


How To Install An Awesome Gorilla Tag Mod Menu
Welcome to this step by step guide on how to install a Gorilla Tag Mod Menu and use it! Gorilla Tag is an extremely fun VR game, and it’s even better with mods. A Gorilla Tag mod menu is great because it lets you easily active and deactivate mods without having to go back to the Gorilla Tag in game PC in your tree house. So keep reading to find out how to install a Gorilla Tag mod menu as easily as possible.
Welcome to this step by step guide on how to install a Gorilla Tag Mod Menu and use it! Gorilla Tag is an extremely fun VR game, and it’s even better with mods. A Gorilla Tag mod menu is great because it lets you easily active and deactivate mods without having to go back to the Gorilla Tag in game PC in your tree house. So keep reading to find out how to install a Gorilla Tag mod menu as easily as possible.
Installing the Gorilla Tag Mod Menu on the Oculus Quest 2
A quick note for all Oculus Quest 2 lovers that are wondering how to get mods directly on your Quest 2. Unfortunately Gorilla Tag mods and Gorilla Tag mod menus can no longer be installed on the Quest 2. There are also currently no plans to bring Quest 2 modding back to Gorilla Tag. Sorry, but if you want to install a Gorilla Tag mod menu then you’ll have to do it on PCVR. Look at this screenshot from the Gorilla Tag modding discord.

You can’t install a Gorilla Tag Mod Menu on an Oculus Quest 2 or 3
If you see a guide that says you can install mods, probably using the QuestPatcher tool, then they won’t tell you that you won’t be able to play Gorilla Tag on your Meta Quest 2 after using QuestPatcher. It just won’t work, and will constantly tell you that you have an outdated version of the game that has to be restored to the newest version.
If you have a Quest 2 and want to play Gorilla Tag on PCVR then you could set up and use Oculus Airlink. The thing about Airlink is that it can drop a ton of frames and be very choppy and look horrible if your internet setup to your PC isn’t very good. If you want to use Oculus Airlink, then make sure your PC is connected to your Router or Modem with an ethernet cable.
If you can’t or don’t want to use Airlink then you’ll need to be able to connect your headset to your PC directly. This is possible with an Oculus Quest 2 using an Oculus Link Cable or comparable USB 3 cable. If you don’t have one there are plenty online that are not as expensive as the official Link Cable, but are possibly not as good.
Monke Mod Manager for PCVR Gorilla Tag Mod Menu
The first step in installing PCVR Gorilla Tag mods is downloading and installing the Monke Mod Manager. It’s a sweet program that you can use on your PC to install Gorilla tag mods. Go to the Monke Mod Manager github page that you can find at this link. Click on the MonkeModManager.exe link under “Assets” to download the installer.

Downloading the Monke Mod Manager to install Gorilla Tag mods
After Monke Mod Manager is downloaded, launch it to start the installer. You might get a prompt like the one you see here if the installer can’t find where your Gorilla Tag launcher is, especially if you’re running it through Oculus.

If you see this error don’t worry
That’s alright. If you run Gorilla Tag through Steam click OK and then find and select GorillaTag.exe at C:\Program Files (x86)\Steam\steamapps\common\Gorilla Tag. If you run Gorilla Tag through the Oculus app then you can find and select GorillaTag.exe at C:\Program Files (x86)\Oculus\Software\Software\another-axiom-gorilla-tag (your filepath might be a little different depending on where you have Steam or Oculus installed, just find the “Steam” or “Oculus” folder and follow the rest of the path from there).
Whether Monke Mod Manager found the path automatically or you had to find it yourself, it will start up and you’ll see a menu with a bunch of check boxes. The box that we’re looking for is the mod menu we’re installing that comes with the Monke Mod Manager, the Haunted Mod Menu. This Gorilla Tag mod menu is great and easy to use. For more information on it you can also check out the Haunted Mod Menu github page.

Installing a Gorilla Tag Mod Menu using the Monke Mod Manager
Scroll up and down the mods available and check whichever other mods you want to install. This Gorilla Tag mod menu is only useful if you have some mods to turn on and off. Then hit “Install/Update” in the bottom right corner, and in a couple of seconds the mods will be installed.

Now installing a ton of Gorilla Tag mods to use with the mod menu
Using Your New Gorilla Tag Mod Menu
So you’ve got some mods installed for Gorilla Tag and the Haunted Mod Menu to activate or deactivate them with. Time to run Gorilla Tag and check them out. Once you start the game you’ll see that the Gorilla Tag mod menu can’t be accessed at first, and if you enter a lobby you’ll find that all of your activated mods won’t be working!
Don’t panic, that’s just because Gorilla Tag will turn off any installed mods by default when entering a standard lobby. If you are joining a normal lobby then you won’t be able to run mods, because if you have a mod like Power Arms then nobody will be able to catch you, and it will basically be like you’re cheating.
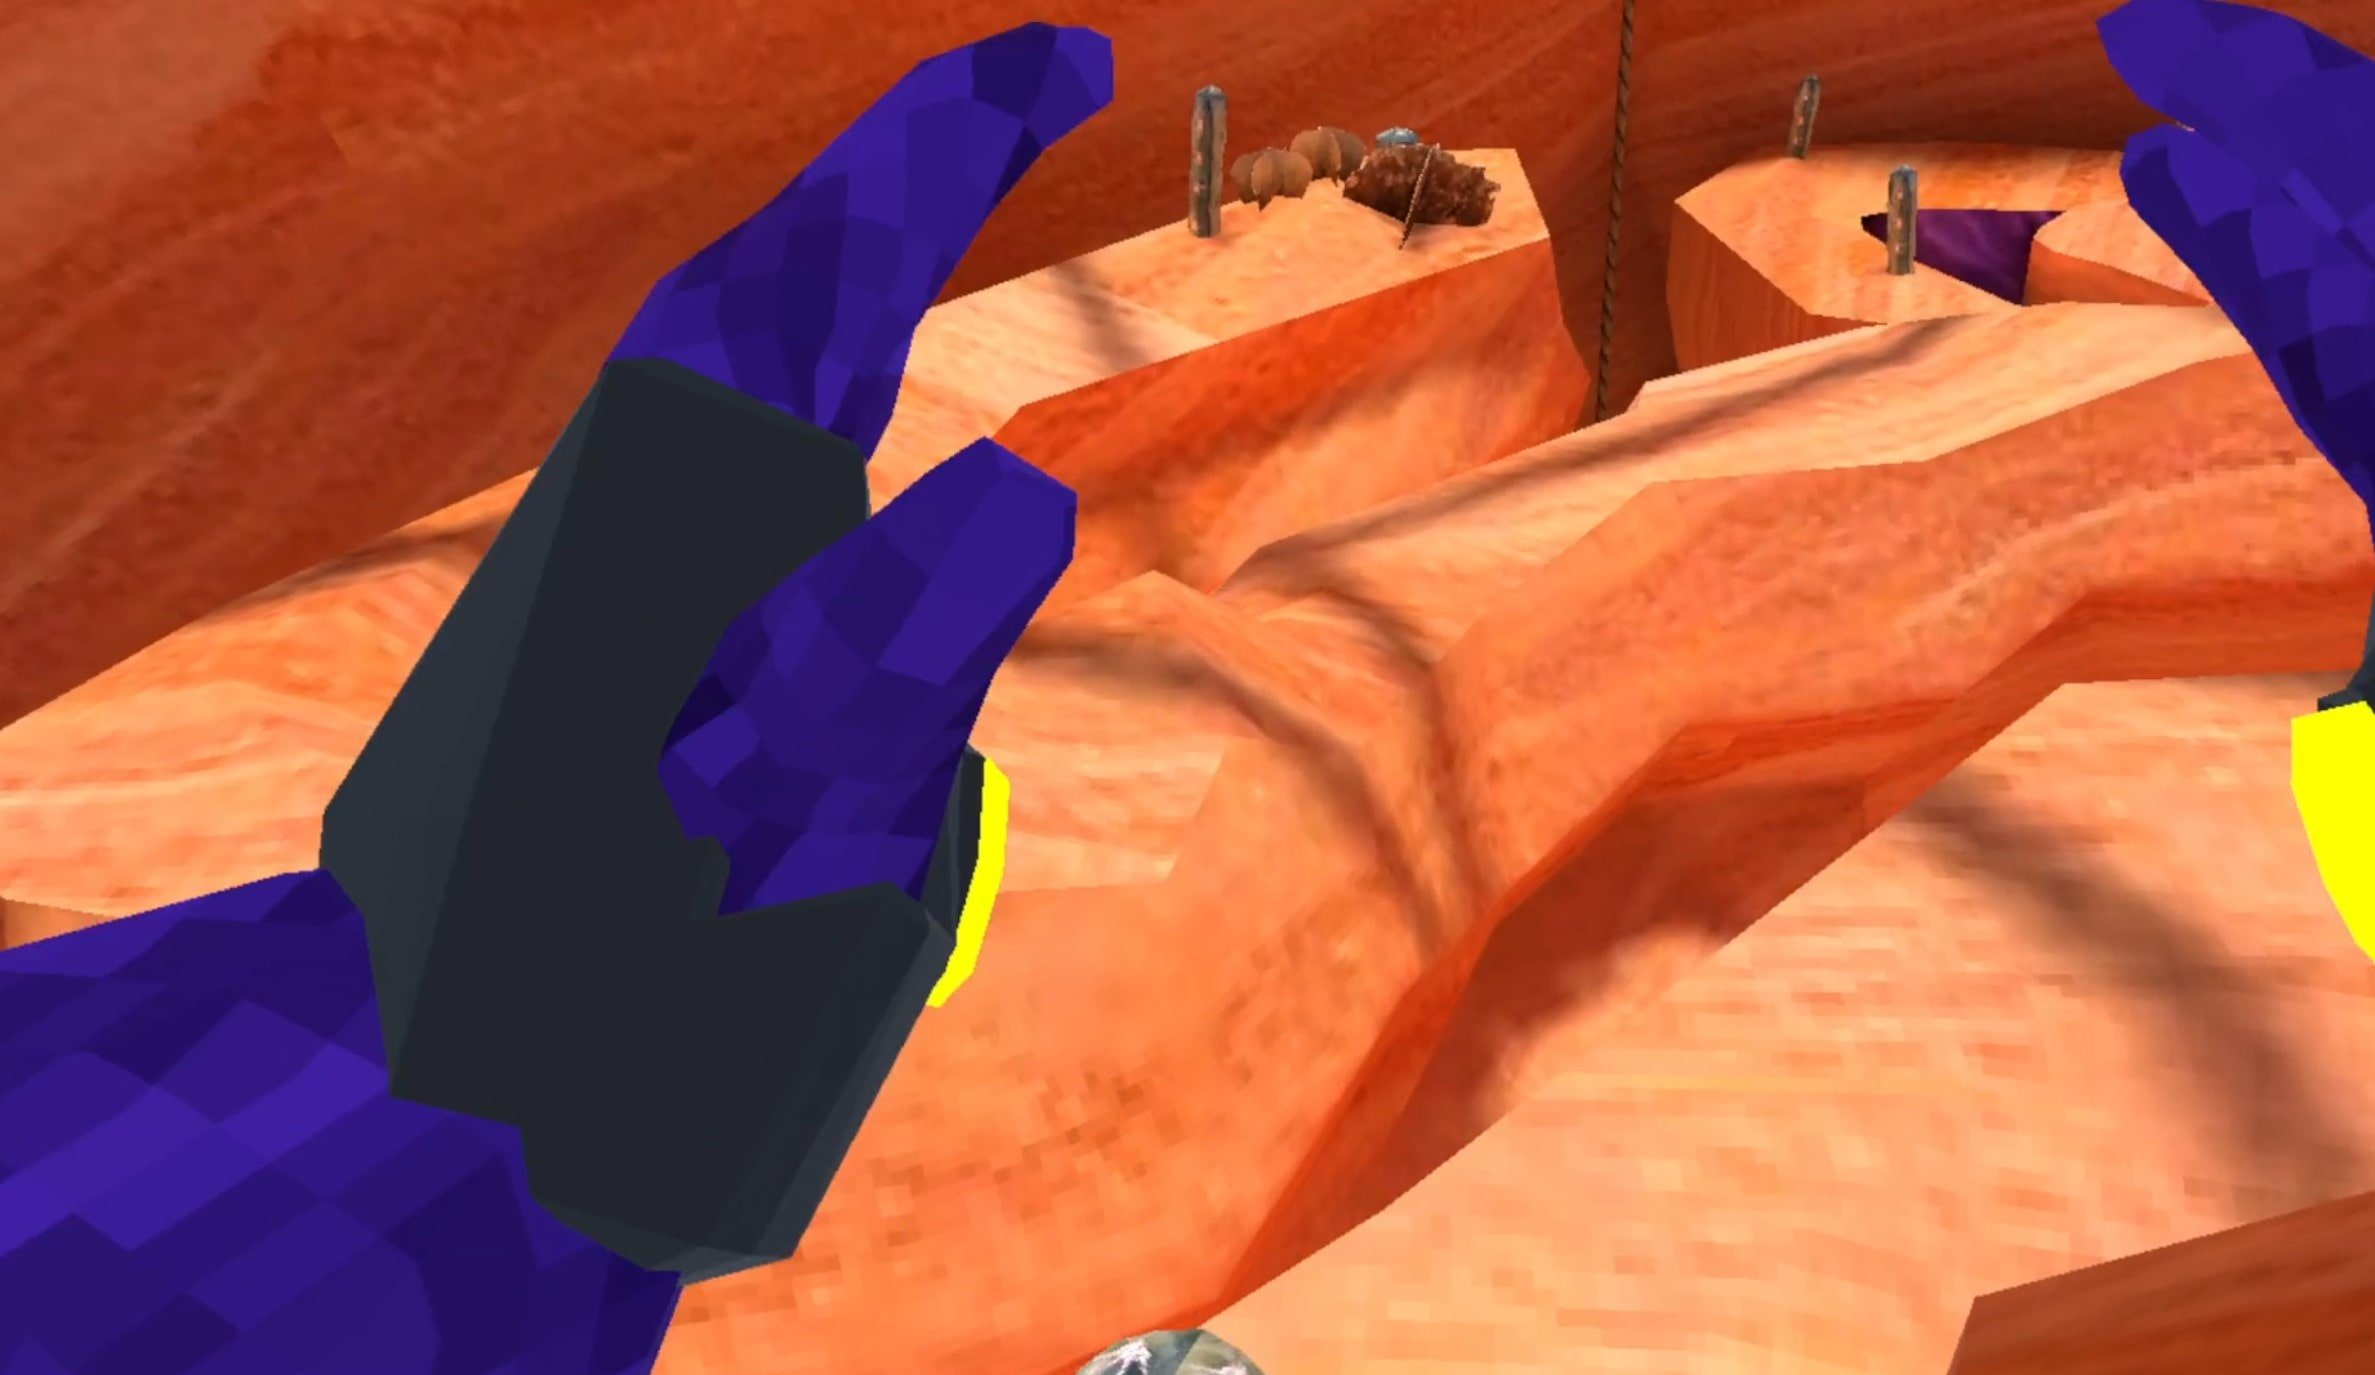
Flying with Gorilla Tag mods
To actually use your new mods you’ll either have to find a custom room that somebody else made, and join it by entering the room ID in the “Room” menu on the Monke Computer in your treehouse, or go over to the “Game Modes” menu in your tree house. When you’re there hit the arrow button on the right and you’ll see that you can select a ton of Modded game modes to find public lobbies that are modded. Select one and then enter a lobby by exiting your treehouse as usual.

Stick to the modded game modes when using Gorilla Tag mods
When you enter the Modded lobby you’ll notice that there’s a yellow button on the inside of your left Monke paw. Press it with your other hand.

Press this button on your palm to open the Gorilla Tag mod menu
Now your Gorilla Tag Mod Menu will appear out of the back of your left hand! All of the mods you installed will be on the mod menu. You can scroll through all of your mods with the arrows on the bottom. To activate a mod press the mod name in the mod menu with your right hand and the button will turn red. That means that the mod is activated.
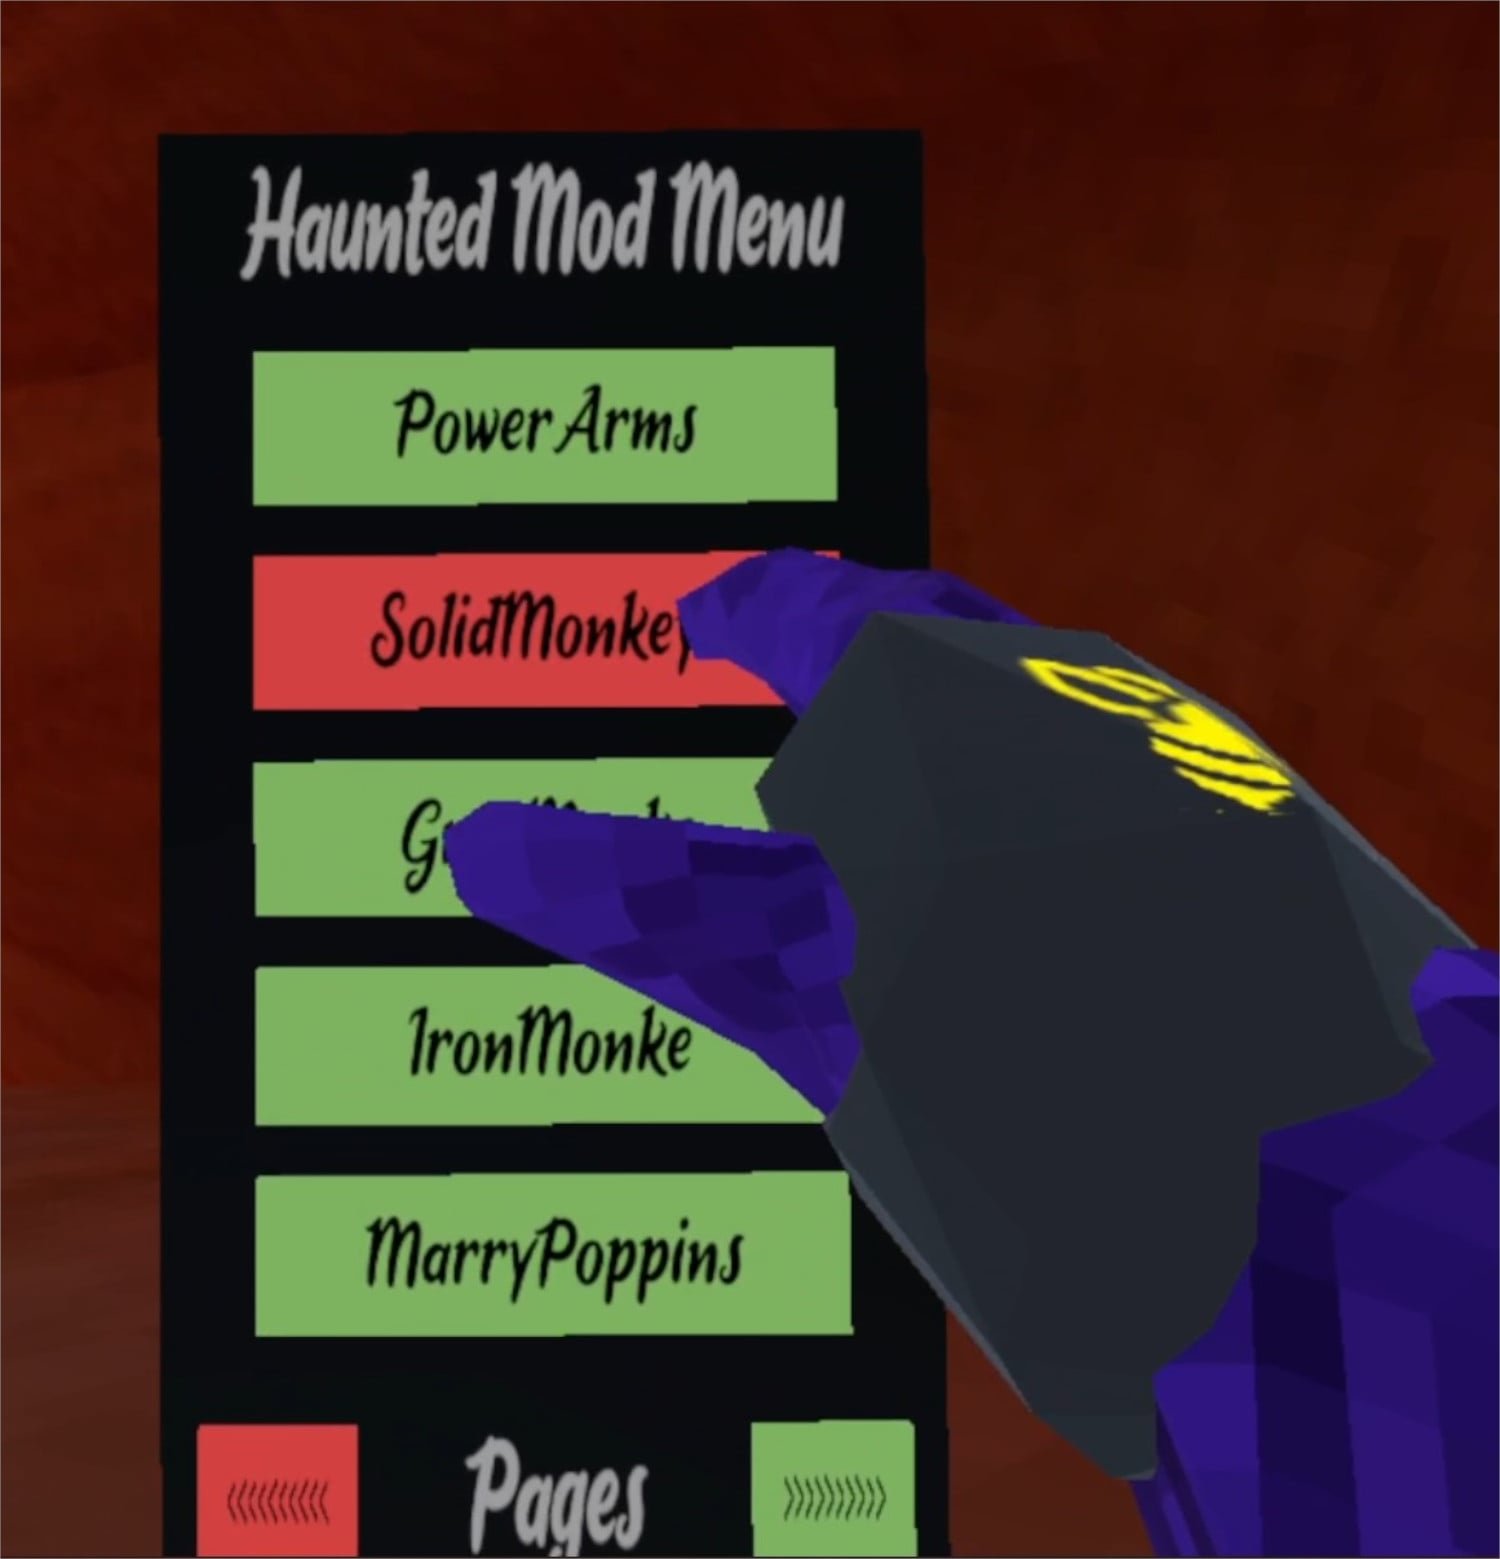
Activating a mod using the mod menu
Now you can easily enjoy all of your Gorilla Tag mods with your new Gorilla Tag mod menu! Activate and Deactivate your mods at will. Enjoy!

All Armor in Blade and Sorcery: Nomad and How to Equip It
If you’ve seen the Blade and Sorcery armor in the spawning book, but are confused as to how to actually use the armor then you’ve come to the right place. If you’re also curious about the different types of Blade and Sorcery: Nomad armor that is available then you’ll find that here too. This is All the Armor in Blade & Sorcery and Blade & Sorcery: Nomad and how to use it.
If you’ve seen the Blade and Sorcery armor in the spawning book, but are confused as to how to actually use the armor then you’ve come to the right place. If you’re also curious about the different types of Blade and Sorcery: Nomad armor that is available then you’ll find that here too. This is All the Armor in Blade & Sorcery and Blade & Sorcery: Nomad and how to use it.
Equipping Armor
The easiest way to equip armor is to go to the spawning book, scroll down to the Armor section, select the armor piece that you want, and hit Equip. If you already have a piece of armor or clothing in the slot that the new piece goes into, the old armor piece will appear in one of your hands.

Of course this isn’t the most immersive way to change your character’s armor, and of course you want to see how cool the Blade and Sorcery armor looks on your character. Well don’t worry, because in your house is a mirror on the other side of the room from the spawning book, behind the wooden wall and beside your bed.

Normally you can’t take off or add on armor pieces to your body by hand, but if you stand in front of the mirror and pull the lever next to it downwards. You can now take off and put on pieces of armor as much as you like until you pull the lever up again. When you are adding or removing a piece just hover your hand over the appropriate bodypart and let go when it glows white and then press the grab button to remove armor, or release it to equip a piece of armor that is in that hand.

You can mix and match armors as much as you like. There’s even mods that add new armor sets, though we won’t go into any specifics on mods here and they can be very finicky. If you want to install some mods later, check out our Blade and Sorcery modding guide.
Some armor pieces are also capable of overlapping. You can, for instance, fit a leather helmet over a gladiator’s headband. Anyway, now that you know how to equip and unequip armor, let’s see all the Blade and Sorcery: Nomad armor sets and how they look.
All Blade and Sorcery Armor Sets
Here are all of the Blade and Sorcery armors. Each comes in a set, but you can mix and match as you please to make some unique combinations.
Civilian Armor
The civilian armor set gives you some respectable looking regular medieval clothing and a pair of boots. Nothing fancy, nothing really armored, but it looks pretty good. Not much in the way of actual armor or protection though.

Ragged Armor
The Ragged armor set basically looks like you just got out of a shipwreck, or are begging on a street corner somewhere. Some very simple garments with a pair of sandals. Try this armor on if you want to look like a first level MMO character. Basically the least armored armor in Blade and Sorcery.

Bandit Armor
Bandit armor is worn by the bandit enemies you can fight in Blade and Sorcery: Nomad. It’s some pretty well rounded leather armor that can turn aside an imprecise sword thrust or a feeble swing.

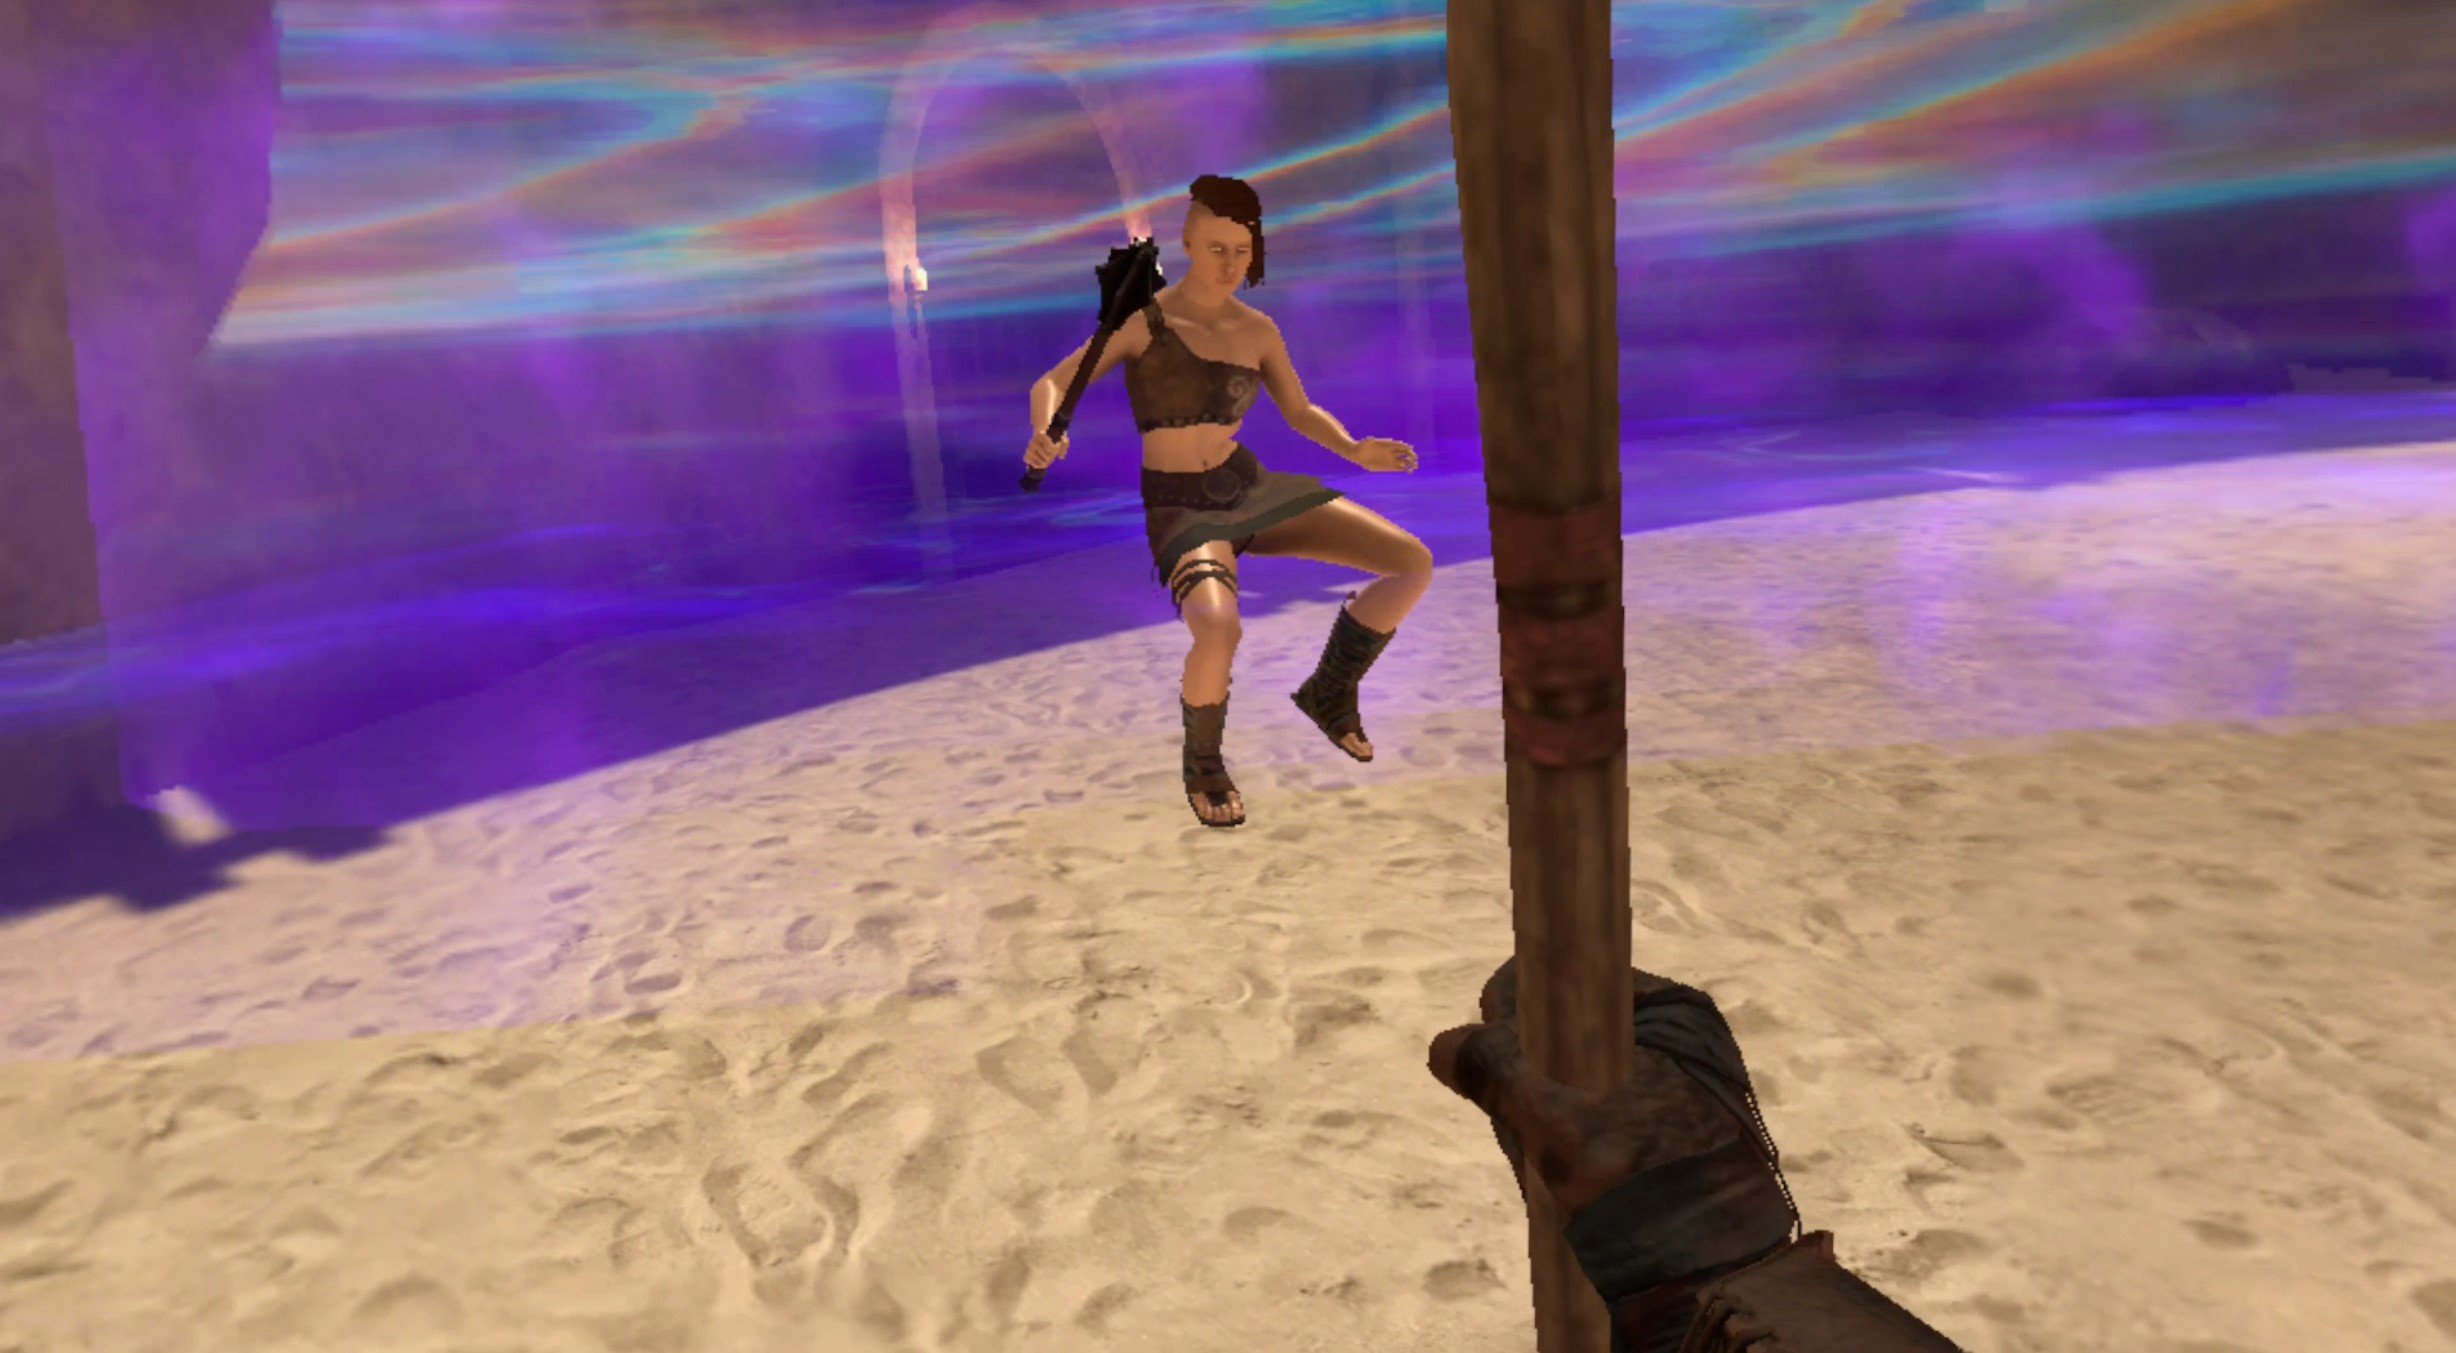
Gladiator Armor
The same armor worn by Gladiator enemies in Blade and Sorcery: Nomad. It’s very simple stuff that doesn’t offer much protection at all, but really gives off that desperate warrior vibe. The Gladiator Blade and Sorcery armor is very apt for what it is named.

Mercenary Armor
Some formidable, and stylish, armor. The Mercenary set has some metal pieces that can protect very well, and has a great patchwork armor look to it. This is definitely capable of saving you from a powerful blow, if that blow lands on the armor that is.

Soldier Armor
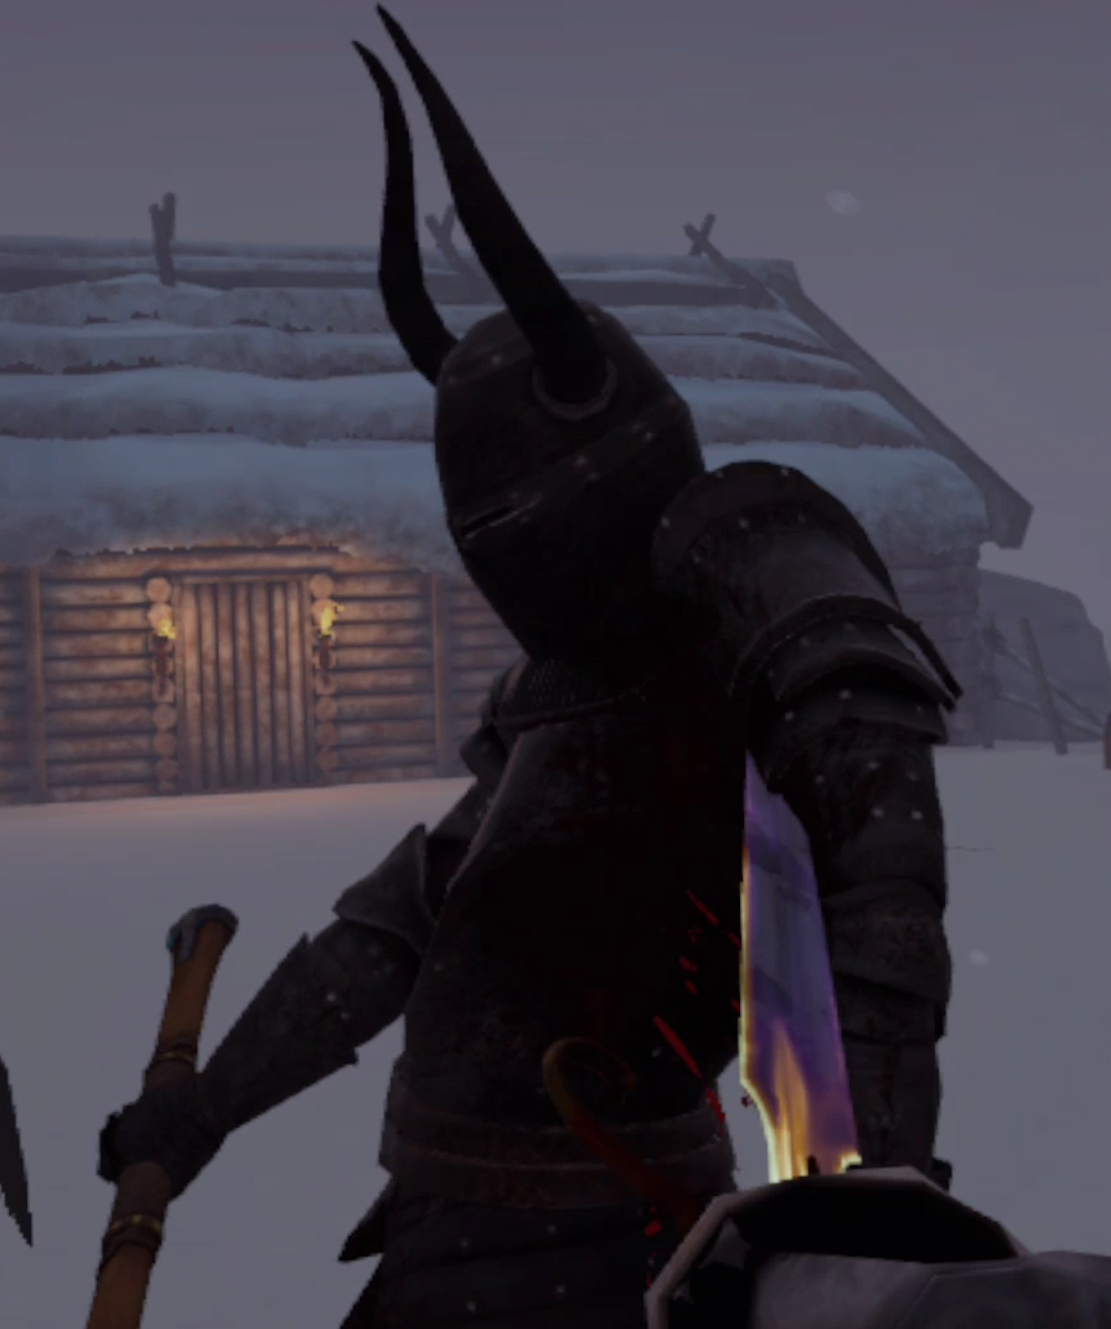
The heaviest armor, but the most well rounded in terms of actual protection. The Soldier Armor covers you head to toe in metal, though metal might not be the best thing to be covered with when fighting lightning magic. Still, it can turn aside swords and heavy blows easily, though your face and arms are still a little exposed. If you want to be a true tank then this is the armor for you. This is the same armor worn by the soldier enemies.

Battlemage Set
The same armor worn by Battlemage enemies. Comes with a cool hood, though it’s light on actual armor. Still, looks pretty cool and definitely gives a flexible arcane feeling. Look at all those belts!

Well there you have it, all the Blade and Sorcery armor there is. Good luck and have fun with your armored character in Blade and Sorcery.
All Spells In Blade and Sorcery: Nomad and How To Use Them
Blade and Sorcery: Nomad wouldn’t be half of the great game that it is without it’s amazing spell casting system. It’s at least half of the name after all. So if you’re wondering what spells and magic is available to you in Blade and Sorcery, read on to find all of the spells in Blade and Sorcery: Nomad, and how to use them.
Oh, and if you’re playing Blade & Sorcery on PCVR don’t worry, the Blade and Sorcery spells are all the same as on the Nomad Quest 2 version.
Blade and Sorcery: Nomad wouldn’t be half of the great game that it is without its amazing spell casting system. It’s at least half of the name after all. So if you’re wondering what spells and magic is available to you in Blade and Sorcery, read on to find all of the spells in Blade and Sorcery: Nomad, and how to use them.
Oh, and if you’re playing Blade & Sorcery on PCVR this guide will be a little out of date, but it will be updated when the Quest version catches up to PCVR version 1.0, which added the Crystal Hunt game mode.
How To Use Spells in Blade & Sorcery
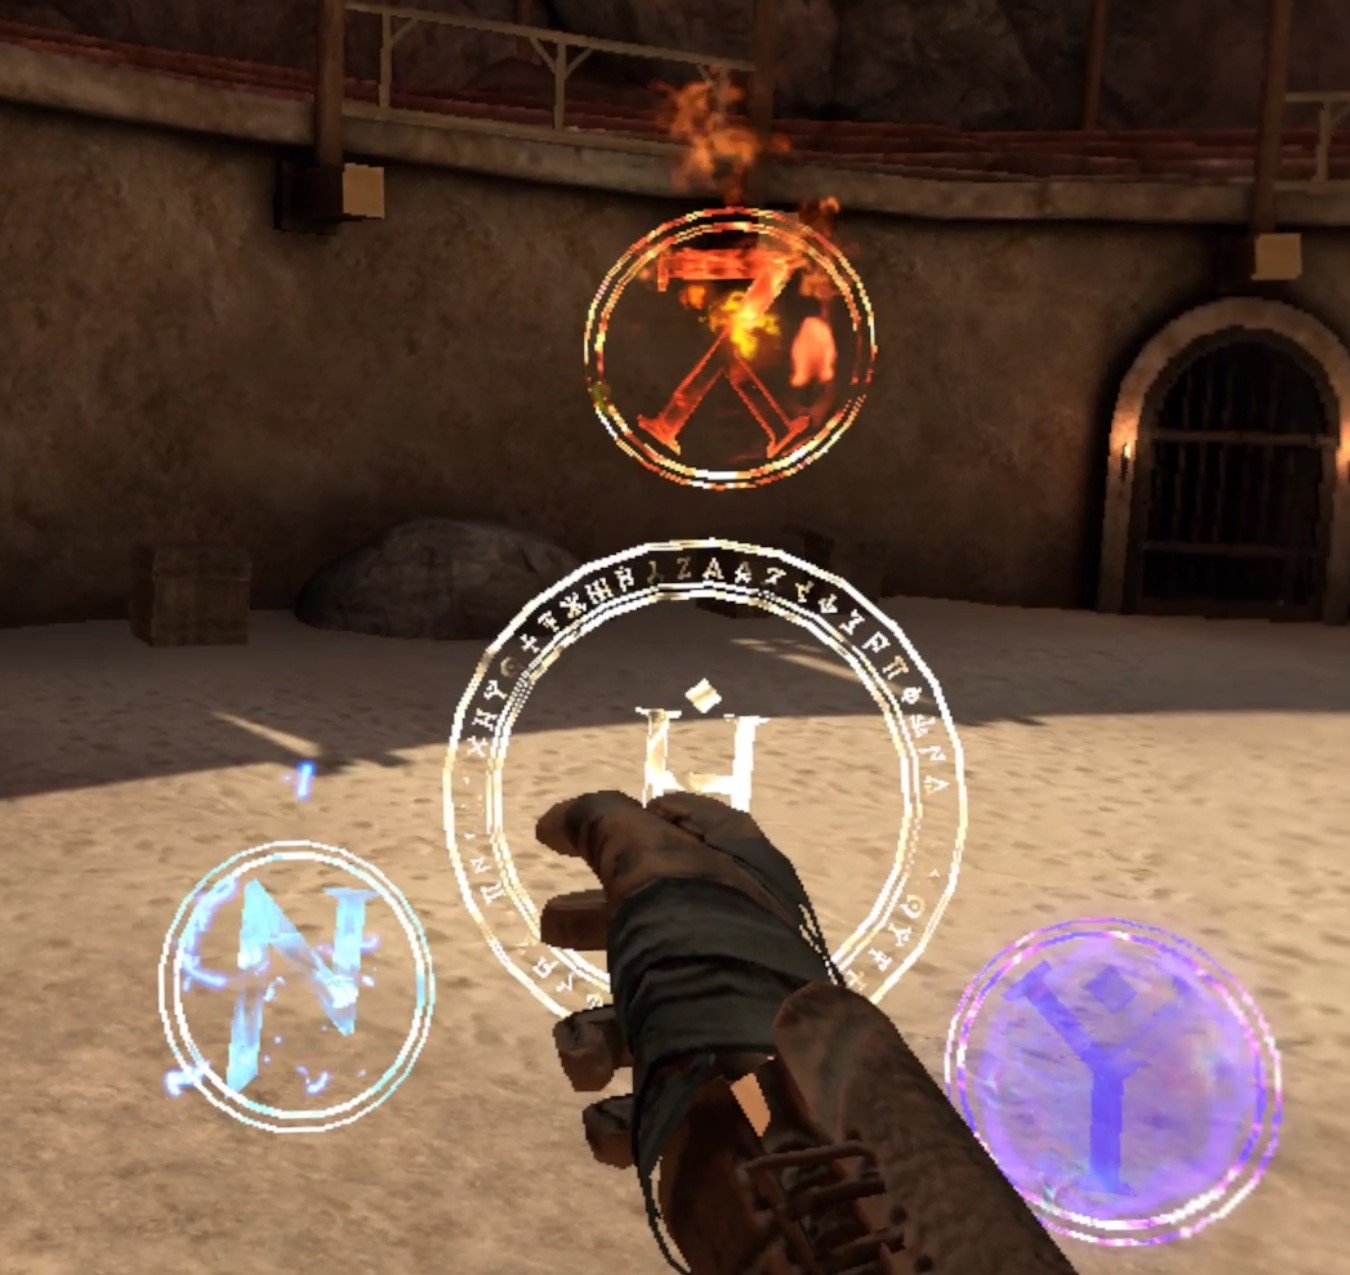
To use Blade & Sorcery: Nomad spells, hold the “A” key on one of your controllers when you aren’t holding anything in that hand. You’ll see a magical looking circle appear around your hand with three smaller circles forming a triangle around it. Move your hand over one of these circles and release the “A” key to select that type of magic.

To now use that magic spell, hit the trigger button on that hand, and a ball with your chosen magic will appear in it. Keep in mind that you can select different types of magic with each hand, or the same with both.
You can do a lot with this ball of magic, depending on what type you selected. You can also combine a spell with both hands by holding a magical ball in either hand together to create an impressive effect. Spells can be combined with weapons to give them magical effects by holding the magic ball over the head of the weapon.. Spells can also be combined with magical staves by holding the ball over the crystal at the top of the staff, and then you can then use that spell by pressing the “A” key with whichever hand is holding that staff.

You can also smash either the head of the staff or the bottom of the staff into the ground to do a really impressive area of effect attack.

Each type of spell does different things with each of these actions, and we’ll go over the three types of spells and what they do here. Also keep in mind that weapons and staves run out of magical energy after you use them, so you’ll have to recharge them with the spell again. You can tell when this happens when the glow of the magic fades from the item.
One last thing though, you can’t use spells as much as you want. You only have a certain amount of mana, which will get used up the more you use magic. Don’t worry though, mana will regenerate on its own pretty quickly. You can check how much mana you have by turning your wrist inwards towards your face. It’s the blue part of the circle, and your health is the red part of the circle.

Gravity
Gravity is definitely the most unique type of magic in Blade and Sorcery: Nomad. Unlike Fire and Lightning gravity magic can be used even without forming a ball of magic with the trigger button. A hand with the Gravity spell selected can be used to pick up an enemy by a limb or the neck from afar. All you need to do is point your hand and wait for the grabbing symbol to appear over the body part, just like you would see when picking up an item in Blade and Sorcery.

Then hold the grip, just like when picking up an item from afar, and you can pick up another person from far away. You can also blast somebody away from you with pure force by holding the gravity ball in your hand and ramming your hand towards an enemy that’s close to you. The force of the gravity spell will push them away.

Gravity also has a fantastic two handed ability. By holding two balls of Gravity magic together, letting it charge for a bit, and then pulling your hands apart you can create a bubble of purple gravity magic that makes every enemy inside of it weightless and float in the air.

Gravity applied to weapons is a little underwhelming though, it just makes them float. Hitting something with the weapon will apply the gravity effect to it as well, making the object or person lighter.
Gravity combines great with a staff though. A staff with gravity on it can grab items extremely quickly from great distances, much faster than you can with your hands, and then you can throw these things at high speeds too.

Finally when you smash a Gravity staff into the ground it will create a wave of force that will push all nearby enemies away from you. Really cool.
Lightning
The lightning spell puts the power of electricity at your fingertips. It’s very good for not only damaging, but stunning and debilitating enemies. If you form a ball of lighting in your hand and point it at an enemy it will damage and make them stand in place while being electrocuted if it touches their skin or conductive armor like plate. Though be careful that the lighting doesn’t just latch on to their weapon, which will cause it to become electrified (more on that later).

Combining two balls of lighting and pulling your hands apart is even more impressive. A ball of lighting will float in front of you for several seconds, and follows you wherever you look. A massive blast of electricity will shoot out of it and demolish anything in its path.

Applying lightning to a weapon is very effective as well, and if it hits an unarmored part of an enemy it will cause them to be stunned for a few moments and deal a little extra damage. Great for crowd control.

Staves also work well with lightning. A lightning staff can shoot a little bit of lightning out of the top of it when you tell it to shoot using “A”, and it is surprisingly effective at limb removal.

Smashing a lightning staff into the ground causes a massive shockwave of electricity all around you, and will damage and electrocute all enemies around you.

Fire
Fire magic makes up the most directly damage dealing Blade and Sorcery spells of them all. Though they don’t offer as much utility or crowd control as the others, fire spells are great damage dealers at range. For instance, using a ball of fire with a single hand will cause a little fireball to jump forward out of your palm. You can even direct it in flight by moving the hand that fired it. Hitting an enemy with this fireball will knock them back and deal significant damage.

Combining two balls of fire with both hands is even more impressive. After the big ball of fire forms in your hands, push both of them forward at the same time to shoot out a massive fireball that explodes to deal a ton of damage. It even causes enemies to fly away with a lot of force in a hilarious way.

Fire is great when applied to weapons too. A weapon heated up with the Blade and Sorcery: Nomad fire spell will pierce armor easily, even the plate armor that soldiers wear, and deal more damage to your target overall.

Combining fire with a staff is great too. A fire staff can fling balls of fire by pressing the “A” key and swinging it.

Weirdly enough the Blade and Sorcery fire spell attack that you cause by smashing the staff into the ground is a little underwhelming. A bit of lava will appear where you smash it. Instead of a wave of fire appearing or something, enemies near it will just be a little hurt and sometimes knocked back.

Well that’s it for fire magic, as well as all of the Blade and Sorcery spells out there. Blade and Sorcery: Nomad spells are a ton of fun and very effective when used properly. So enjoy! Oh, and you can also slow down time by pressing the “B” button, and that seems pretty magical too. Happy fighting!

The Walking Dead Saints and Sinners Walkthrough and Guide - Part 11 - The Reserve and the Ending
Stuck in The Walking Dead Saints and Sinners? Wondering where to go next? Maybe you just like to see what is in store for you before you get there, or want to look back and see if you missed anything in The Walking Dead: Saints & Sinners. Well don’t worry we’ve got you covered with this complete walkthrough. This is the eleventh part, where you uncover The Reserve and the ending of The Walking Dead: Saints and Sinners - Chapter 1.
Stuck in The Walking Dead Saints and Sinners? Wondering where to go next? Maybe you just like to see what is in store for you before you get there, or want to look back and see if you missed anything in The Walking Dead: Saints & Sinners. Well don’t worry we’ve got you covered with this complete walkthrough. This is the eleventh part, where you uncover The Reserve and the ending of The Walking Dead: Saints and Sinners - Chapter 1.
This article will detail how to progress through the main story missions as quickly as possible, with a couple of guiding tips thrown in here and there to make your adventure smoother. Only those recipes that are convenient to get when doing a task for the first time are included. For a full list of all recipes in The Walking Dead: Saints & Sinners, check out our recipe guide article. Spoilers will be as light as possible, but there will be story spoilers by necessity in this walkthrough, but there won’t be any explanation of what is going on in the story beyond what is necessary to make the walkthrough make sense.
All Walkthrough Parts:
The Walking Dead Saints and Sinners Walkthrough and Guide - Part 1 - The Graveyard
The Walking Dead Saints and Sinners Walkthrough and Guide - Part 2 - The Shallows
The Walking Dead Saints and Sinners Walkthrough and Guide - Part 3 - Via Corolla
The Walking Dead Saints and Sinners Walkthrough and Guide - Part 7 - Old Town and Another Stash
The Walking Dead Saints and Sinners Walkthrough and Guide - Part 8 - Rampart
The Walking Dead Saints and Sinners Walkthrough and Guide - Part 9 - The Shallows Again
The Walking Dead Saints and Sinners Walkthrough and Guide - Part 10 - Bastion and The Reserve Key
The Walking Dead Saints and Sinners Walkthrough and Guide - Part 11 - The Reserve and the Ending
Installing the Final Pump Regulator
You’ve got the Reserve Key and the final pump part. All that’s left to do is enter The Reserve and experience the ending of The Walking Dead: Saints and Sinners - Chapter 1. If you just came back from Bastion and haven’t gone to sleep yet then you can immediately start the end of the game by talking to Casey on the radio. There will be a text prompt telling you that you can’t go back after starting, just tell Casey you’re ready to begin.
If you want to spend a few more days scavenging New Orleans before tackling The Reserve, go ahead, but you’ll probably be fine with what you have if you’ve always kept your backpack full when coming back to the Resting Place. Just know that you can’t start the ending of The Walking Dead: Saints and Sinners - Chapter 1 during the day, you have to start it at night after completing a day.

Before you talk to Casey it’s best to be completely ready to begin with. Your choices earlier in Bastion will come up. If you chose to help JB then make sure to be heavily armed. If you chose to help Georgia and The Tower, then you’ll have a much easier time.
Even if you helped JB and snubbed the Tower you should be fine with a single two handed weapon if it’s in good condition. A bandage is also recommended. Either way you’ll want to leave some slots open for what you find in the reserve, so don’t fill up all of your two handed backpack slots with things you aren’t willing to throw away for something better. Stat boosting food may also be helpful, and it’s the finale of the game, why not?
Anyway when you’re ready to go talk to Casey so that you can set up the final pump regulator.

Now that the pump part is ready for installation head over to the catacombs. You’ll see that the door to the church is closed. Keep going and go up the ramp to the area with the jazz men statues and concrete building where you originally got the key for the area with May’s coffin all the way back in the start of the game.
You’ll notice that there’s a blinking red light inside of the building. We’ll get to that in a second, for now let’s unlock the safe with the code you got from the house with the car crashed into it in Bastion. It’s right beside the truck on the other side of the fence from where you enter the area, across from the jazz men statues.

Open it and inside is the exploding arrows recipe.

With a new recipe in hand head back to the concrete building with the flashing light inside. You can now open the door with the “Waterfall Key” you got from May. Inside is the final pump! Stick the part in like before and the light will shine green. Congratulations, all of the Reserve pumps are now fixed! You can head back to the bus now.

Once you’re back, make sure you’re really super ready to start this, it’s your last chance to equip yourself before the action starts. Talk to Casey on the radio. He will be understandably overjoyed. Though when he actually starts the pumps you’ll see something new in the distance. Serious ending spoilers ahead.

The Church is lit up… and this also reveals that The Reserve has been in the church this whole time! The Reclaimed and The Tower will descend upon it in no time flat. Also Casey still can’t get out of the bunker. You’ll have to go over there yourself and get inside. When you’re done talking to Casey go back to the catacombs and take the right to head to the churchyard.
A quick sidenote: If you haven’t played through the final yet then stop reading and play through it once yourself. You owe it to yourself to witness the ending of The Walking Dead: Saints and Sinners - Chapter 1 without knowing what is coming.
Don’t worry if you don’t make all of the right decisions. The game will create a save right here when you emerge from the catacombs to the churchyard. If you play through the ending and want to make different choices you can always reload your save here.
Anyway after you emerge from the catacombs you’ll see a bunch of dead bodies all around you. One in particular has a picture next to her, drawn in a very familiar style.

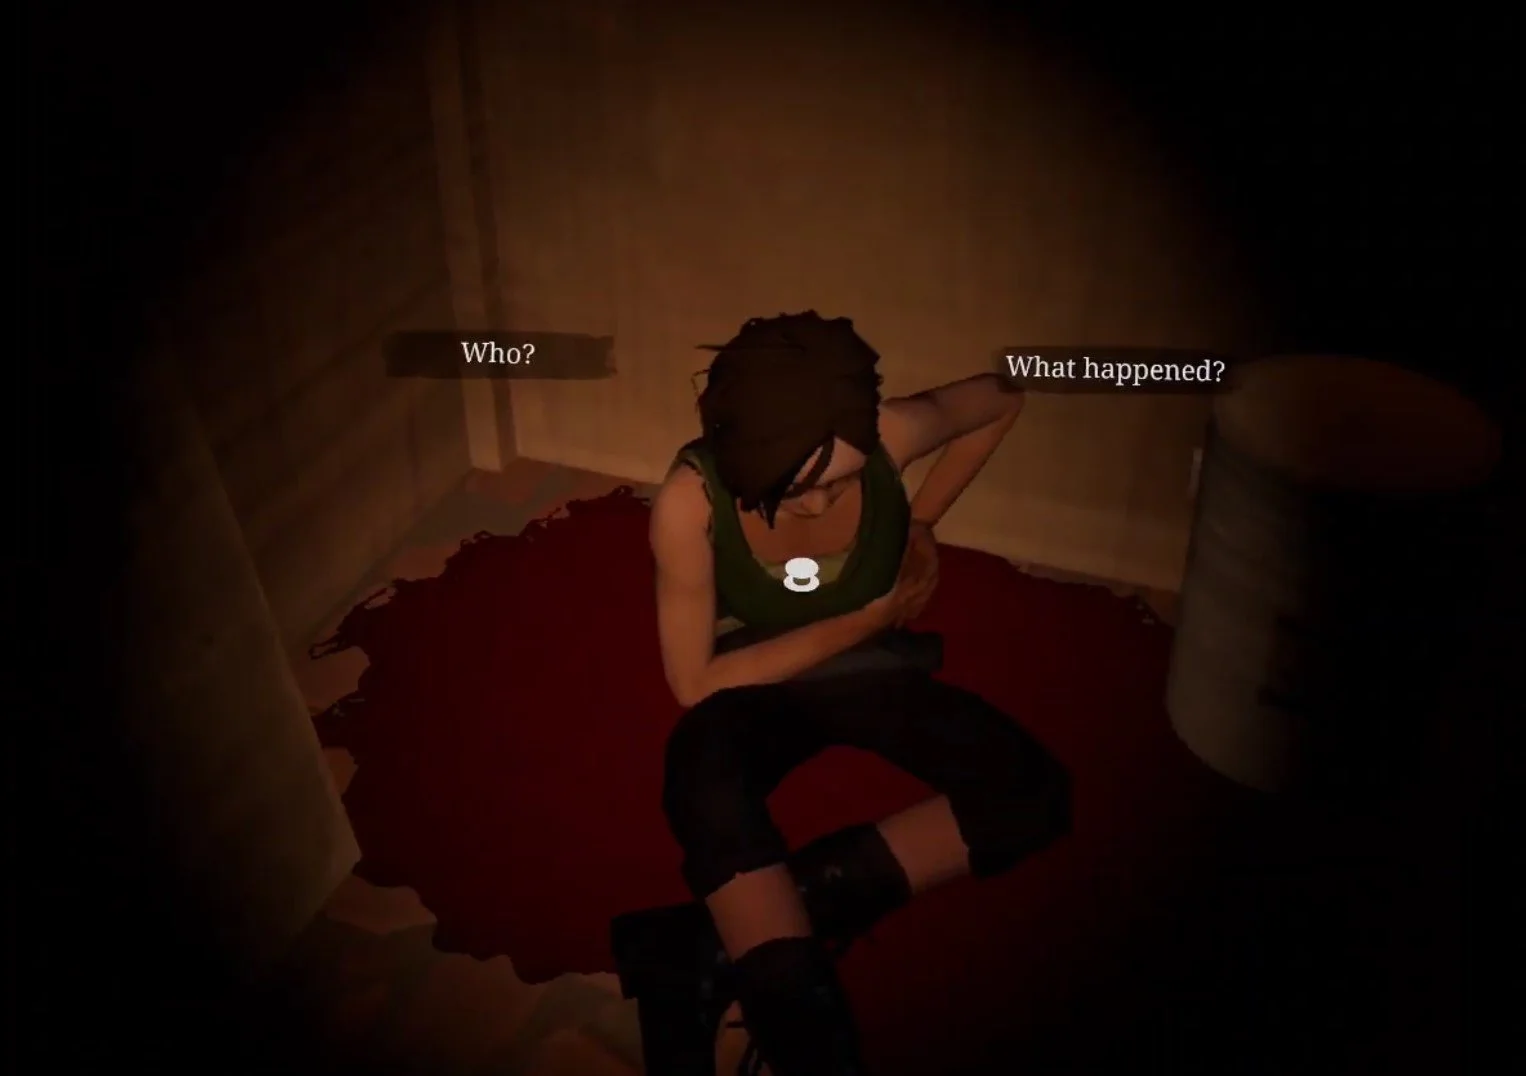
You’ll hear weeping and sniffling coming from the shed right in front of where you come in from the catacombs. Go inside and you’ll find a woman on the floor. Talk to her and find out what happened here.
Kill the woman or leave her, either way doesn’t matter. When you leave the shed one of the corpses will now be alive as a walker. Even if you try to run away they’ll follow you and will likely be killed anyway.

That’s because when you walk over to the street, you’ll see Tower grunts running past you towards the church. Now if you sided with The Tower and killed JB at Bastion, this is no problem at all. You can just walk right past them. They’ll do nothing but throw a few snide remarks your way unless you antagonize them.
If you sided with JB and killed Georgia, or killed both of them, then you’ll have to fight your way through a bunch of Tower grunts as you advance up the street towards the church. Hopefully you’ve got something powerful like the Nova 1014. The Tower soldiers will be armed and armored to the teeth.

Once you get to the churchyard you’ll see a burning car, and some explosions will greet your entrance. Tower soldiers will come from your left and right periodically. They’ll advance towards the church and fight the Reclaimed soldiers that are spread out around the front of the building.

If you sided with JB earlier then the Reclaimed soldiers will let you pass inside. If JB never made it out of Bastion alive then you’ll have to fight your way through them. Still, it’s very easy to sprint past most of them while they fight the Tower soldiers and make a beeline for the open gate on the left side of the church. There might be a Reclaimed soldier or two in front of the gate, but if you make short work of them you can run right through. Don’t try clearing the area, enemies will spawn infinitely.
Just like in Bastion, siding with the Tower is the easier and less combat focused option here. If you can just walk past the Tower soldiers you’ll only need to run past or shoot one or two Reclaimed grunts to make it through the gate. Either way the battle looks and sounds very epic. Once you’re through the gate climb up the ladder propped up on the side of the old police van blocking your way.

When you drop down on the other side of the van the sounds of gunfire will subside and you’ll hear shouts of victory. The battle between the Reclaimed and the Tower has ended. Continue on, there’s a couple of bandages and a Nutri Stew on a picnic table in the center of this area. At the end of it you’ll see an open window on the side of the church and a drain pipe leading up to it. You can climb that drain pipe and get into the church.

Once you’re inside the attic of the church, you’ll hear Casey’s voice below you. Keep heading forward by ducking underneath the ceiling beams, and turn right to see a hole in the floor. Jump down the hole.

There’ll be a brief load when you hit the ground, so don’t worry if your game seems to stutter. You’ll see a door with a red light next to it. You can’t go there yet, instead go the other way down the hallway towards Casey’s voice. You’ll find that the origin of his voice is another piece of pump machinery, the flood control panel.

You can talk to Casey through the control panel like the radio back in your bus. He’ll tell you that the only way to save him is to redirect the flood flow to the armory. After you talk to Casey you can redirect the flow to either the Comms Room, Armory, or both. To do so get the code that JB gave you in bastion from your journal by going to the Notes tab on the far right, then select the Reserve button on the top left and then selecting Reserve Flood Code from the list.

Once you punch the code into the keypad use the lever on the right to make your choice, and then turn the wheel on your left towards the right.
As for your choices, this is a big one. Casey is right, redirecting the flow towards the Armory will destroy the bounty that you’ve hunted The Reserve to collect, but what he doesn’t tell you is that there is still some stuff in the Comm room. Two Custom Nova 1014 Shotguns, a Custom Hunting Rifle, and two FS92M 9MM Pistols all in perfect condition. There’s also some various odds and ends like a little food and some books and junk that you can scrap.

Flooding the Comms Room will indeed kill Casey, and he will scream at you over the radio if you do so. For doing this though, you’ll have access to the Armory. While you won’t get any of the things in the Comms Room, you won’t need them, because the Armory is packed.
Inside are 3 Custom AR-416 Rifles in perfect condition There are also more FS92M pistols, a ton of materials in the form of Boxes of Loot, and even Dragon Bars on the shelves. Even if you brought nothing you won’t have the backpack space to fit it all. Most importantly there is also the recipe for the AR-416 Rifle, and the recipe for the 5.56mm ammunition that it uses.

Before you make your decision, keep in mind that both of the AR-416 recipes can be found later in the Aftershocks DLC or Chapter 2: Retribution. You can find them on the bodies of enemy soldiers. They drop randomly, but you’ll get them eventually when playing through either follow up experience.
You can also flood both of these places as Jean Baptiste suggested, and get nothing. If you really want stuff, you’ll still be getting a lot of it in the Aftershocks DLC, though the massive amount of equipment in the Armory is definitely helpful, most of all the recipes inside.
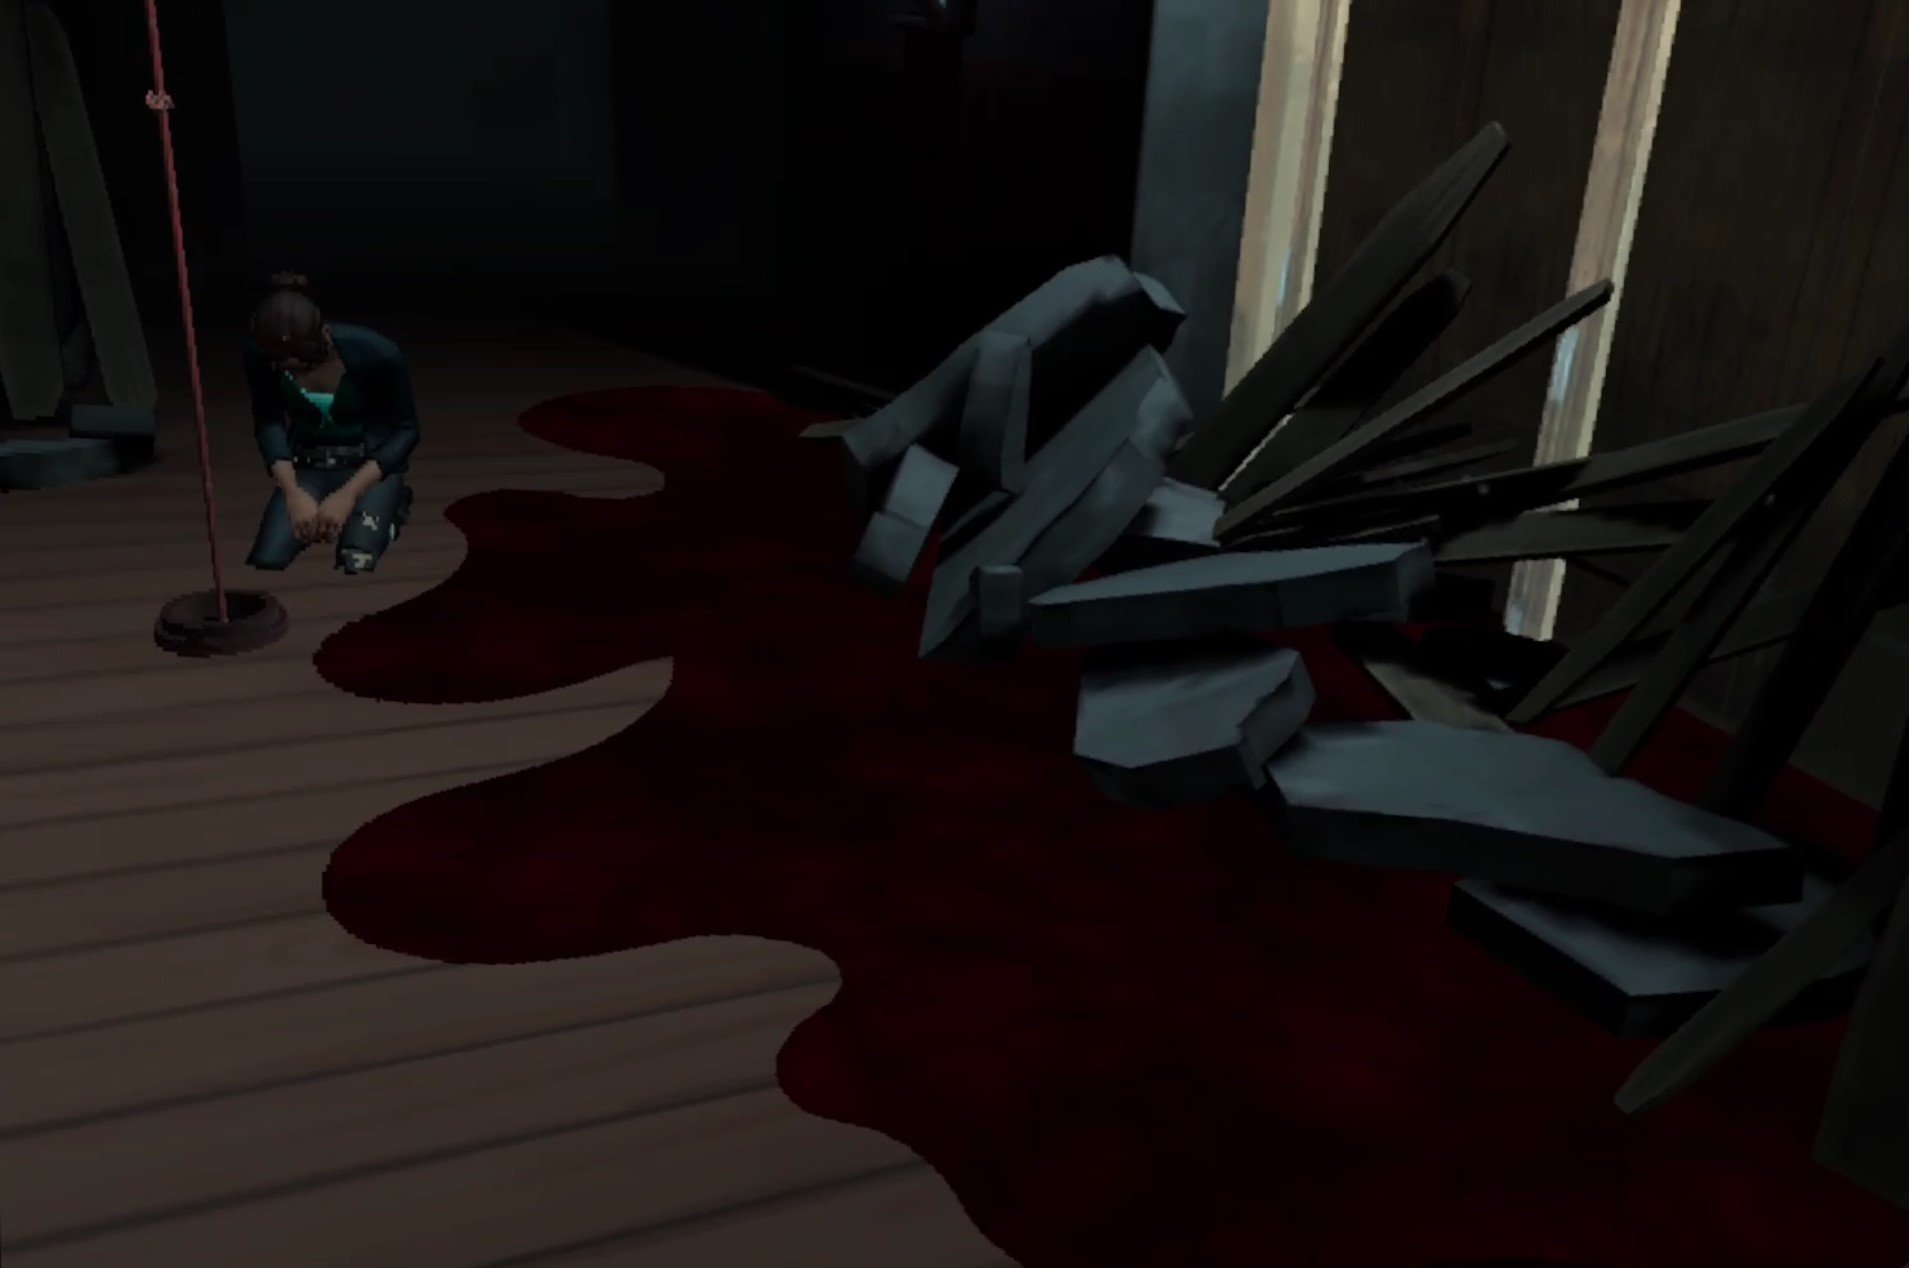
Once you make your decision the door with the red light beside it back where you fell through the ceiling is now open, head on through. You’ll find yourself in a kitchen littered with corpses. Across the table in front of you is a door blocked with boards. If you don’t have a weapon on you can use the axe propped up on the wall to smash the boards down.

While you’re doing this the bell on the top of the church will ring once. You’ll hear the people outside chattering about it. Once you’re past the boards go down the hallway, and emerge in the heart of the church. At the other end of the room is the rope that, if pulled, rings the church bell, and either one or two figures will be standing near it.

Walk across the church towards them. May will yell something about not taking a step closer, but you can stand as close to her as you like and she won’t react differently. She’s got her hands on a rope, and if she pulls that rope the massive bell above you will ring and attract a horde of walkers. If you didn’t flood the Comm Room and spared Casey then he will also be there.
Here is your second choice. Most likely either Casey Or May will end up dead. There is no talking May out of her grief. She will ring the bell no matter what you say. The only way to prevent her from doing this is by shooting her to death. If Casey is alive, then he won’t allow May to commit an atrocity. If you don’t shoot May then he will. Strangely enough, if Casey does shoot May he seems to find it cathartic.

Of course if Casey never made it out of the Reserve then he won’t be there to intervene, and even if he did you can always shoot him before he shoots May, though in that case you might as well have flooded the Comm Room.
If you are alone with May then she will say the same things, and still ring the bell unless you kill her. If this happens she will collapse on the floor and you’ll hear the people outside being slaughtered by the hordes of the undead. Blood will seep through the front door.
You can also ring the bell yourself, even after shooting May. Ringing the bell more than once won’t do anything.
Thanks to commenter Kevin on this article we now also know that there is a somewhat secret ending here where both May and Casey survive. To do this immediately run up to May as you enter the church and get really close to her so she freaks out and starts ringing the bells, or ring the bell yourself while standing between her and Casey.
Both her and Casey will silently drop to the floor, defeated, as the walkers descend on the people outside of the church. Neither will say anything, so this isn’t the most satisfying ending, but neither of them will perish either.

When May and Casey’s fates are decided you can now enter the bunker and take whatever you want from the room that you chose not to flood, or just walk straight through the bunker if you flooded both of them.
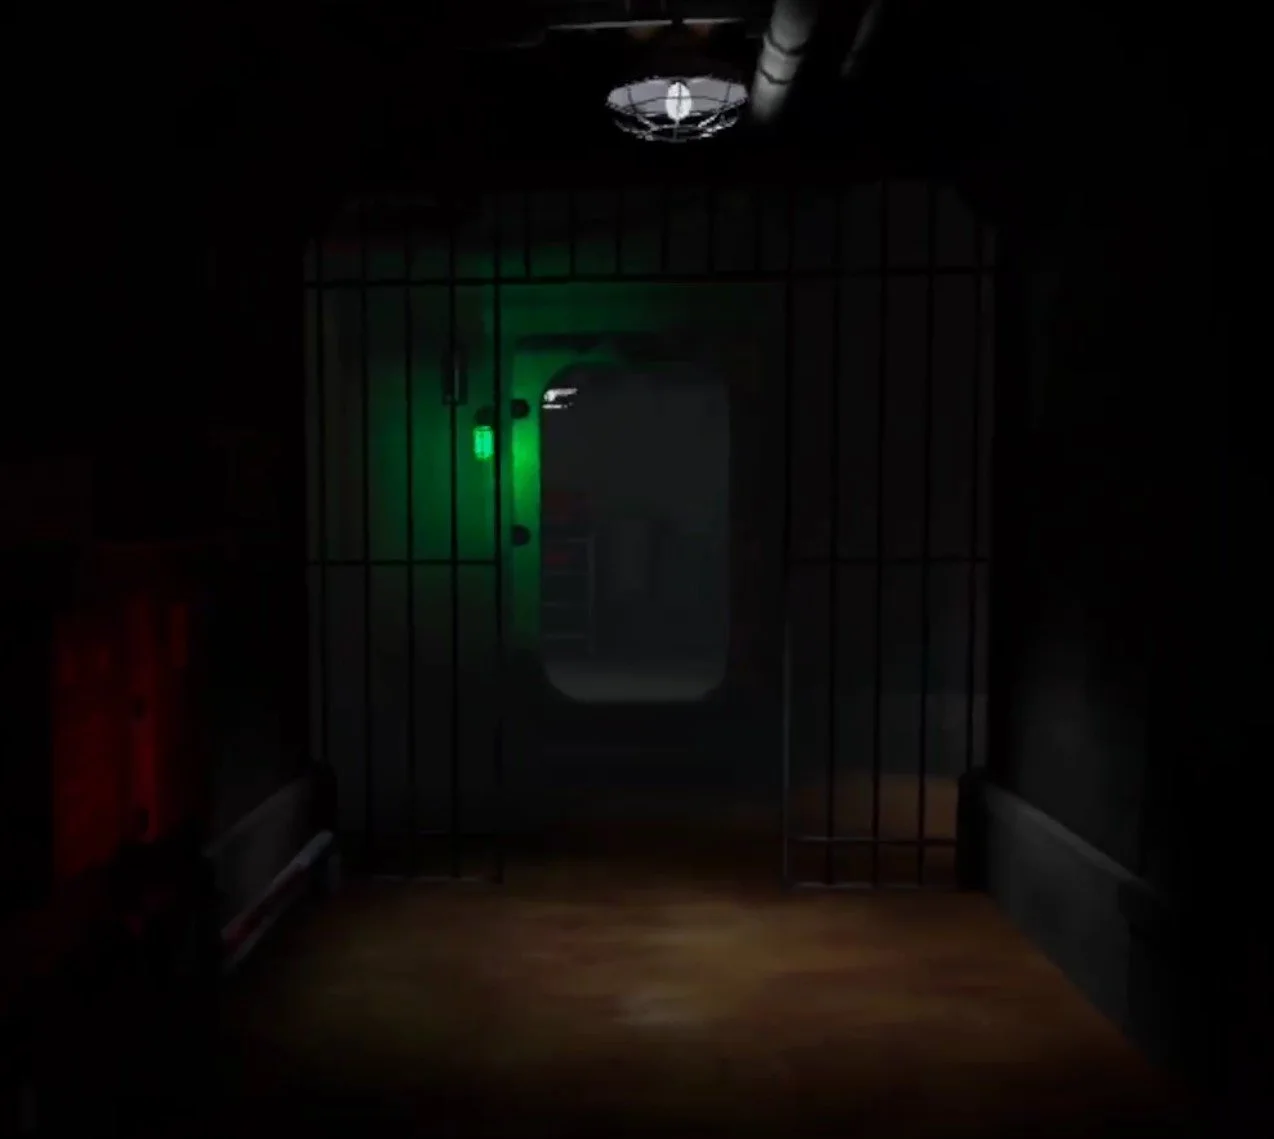
At the end of the straight hallway is this open door, to your right and left will be some walkers on the other side of some bars, they can’t get through and attack you, so don’t worry. Climb up the ladder in the room at the end of the hall and then head through the final door to find yourself back outside. There’s a boat at a little pier in front of you, step on it and sail away.

After you sail away the credits will play. You can hit A to skip them, but please do take a moment to at least think of all the people who worked on this game and all of the effort they put into it. The Walking Dead: Saints and Sinners was an early example of the great potential of Virtual Reality gaming, and we as VR gamers owe these people some gratitude.
When the credits are over, the time will skip to one week in the future. Now that you’ve finally found The Reserve, it’s time for the Aftershocks DLC, which you can find a walkthrough for on this site as well.
For now, congratulations on finishing The Walking Dead: Saints and Sinners - Chapter 1!

5 Best VR Sword Fighting Games on the Oculus Quest 2
Want to get into an epic sword fight in VR? Well we’ve got you covered with the 5 Best VR Sword Fighting Games on the Oculus Quest 2. If you’ve ever dreamed of an intense battle of speed and skill with an awesome sword then here are the 5 best Virtual Reality games to experience that on the Oculus Quest 2.
Want to get into an epic sword fight in VR? Well we’ve got you covered with the 5 Best VR Sword Fighting Games on the Oculus Quest 2. If you’ve ever dreamed of an intense battle of speed and skill with an awesome sword then here are the 5 best Virtual Reality games to experience that on the Oculus Quest 2.
Broken Edge
Broken Edge is definitely a Sword Fighting VR game for the competitively minded. Instead of fighting against AI opponents like you’ll find in most VR Sword Fighting Games, Broken Edge pits you in a One on One PvP Duel against another actual player.

It’s a ton of fun, and kind of feels like fencing in real life. You’ll have a ton of characters with different weapons and secondary items in Broken Edge, like the Knight with a broadsword and shield, or the Duelist with a rapier and dagger, or even the Barbarian with a massive sword. With so many different swords and characters to fight with and against you’ll be able to fight in the way that fits your style.
Broken Edge is a tense PvP VR Sword Fighting experience that will test your patience and reflexes. If you’re interested in having a sword fight against another player, then there is no Sword Fighting VR Game on the Oculus Quest 2 that can be more recommended.
Until You Fall
Until You Fall is an action fantasy roguelike set in an ancient kingdom overcome by a strange crystalline evil that turned your once proud people into monstrous versions of themselves. You, as the kingdom’s last defender, must fight your way through it to defeat the evil that has infested your home. You’ll fight a variety of enemies with different attacks that you must parry or dodge. To do this you’ll also have a bunch of weapons to choose from like Swords, knives, axes, and even fists.

Since Until You Fall is a roguelite, you need to fight your way to the end without falling yourself, and pulling that off is the great hook of the game. Hit certain milestones to get more options for your arsenal, and further upgrade your weapons with better stats using points that you get each time you fail. The progression is very solid for a roguelike, and keeps you coming back for another upgrade to your favorite weapon.
Until You Fall’s greatest strength other than it’s progression is its use of both of your hands in its action combat, and it’s way of encouraging you to move. Some even say that Until You Fall is a workout. Whether it is or not it is very strategic, and requires good reflexes. Mix and match the weapons you take in either hand. Some are slower, some are faster, and see which special abilities combine for the greatest effect. Until You Fall gives you some opportunities to plan and think about your character build, while also having loads of quick action.
Blade and Sorcery: Nomad
Out of every game on this list, you’ve probably heard of Blade and Sorcery: Nomad. It has all the great tiktoks and youtube videos, second in infamy there only maybe to Bonelab. Why? Because Blade and Sorcery (and by extension it’s Quest 2 counterpart, Blade and and Sorcery: Nomad). Is supremely moddable with everything from Halo guns to Star Wars lightsabers. This game is the most well recognized VR Sword Fighting game, but it can also be much more if you want it to be.

It’s also a ton of fun without mods. There is a large variety of medieval weaponry to choose, from bows to massive two handed swords, to glorified hunks of metal on a stick. The opponents you face are very well animated, attack, and respond dynamically. The Sword Fighting in this Virtual Reality game is visceral and varied. It’s consistent fun that will keep you coming back for another bout.
Oh, and as the name also implies, you get magic. Throw fireballs, or send lighting from your hands, or dangle someone upside down off of a cliff with a gravity spell. There’s a ton of sandbox fun to be had, and promises of an RPG mode somewhere down the line.
Swordsman VR
Like the idea of Blade and Sorcery, but like the “Blade” part more than the “Sorcery” part? Well then Swordsman is probably your go to Meta Quest 2 Sword Fighting game.
The goal of Swordsman is to be the best sword fighting game for Virtual Reality, and they’ve done quite a lot to try to earn that reputation. With an RPG progression system and a ton of enemies to face, Swordsman certainly isn’t strained for content, and these enemies are much tougher than you might be accustomed to.
Each is heavily armored, and parries and ripostes your attacks with precise moves and timing, more precise than any other sword fighting game available. If you want an intricate fencing experiences, where every move counts and mistakes are punished immediately, then Swordsman is your game. Master opponents from Vikings to Samurai and everything in between. It’s tough, but it’s so satisfying to land that perfect counter on your enemy’s exposed elbow.
Battle Talent
Battle Talent used to be free, but is now a game you need to pay for, though it is fantastic as we’ve mentioned before. It is also the most High Fantasy, with all sorts of goblins, elves, and skeletons for you to fight with a variety of weapons and spells. There’s a spear that spits lightning and a literal gun. That’s not even counting the tons of weapons that can be modded in. Battle Talent is just as moddable as Blade and Sorcery.

There are a ton of swords and other weapons to choose from, and a ton of different enemies to fight from Skeletons to Goblins to Elves. If you want a VR Sword Fight with strong Fantasy elements and enemies then you’ll get that in Battle Talent VR.
Though besides being free, Battle Talent has a leg up on any other action game with it’s exciting maze mode. There aren’t exactly a lot of RPG elements to go with a lot of these fighting games, and so Battle Talent shines because of the many interesting character building choices you make in its mazes.
You start the maze with a single weapon and average stats, but over the course of the maze as you defeat enemies and bosses you build and enchant your arsenal to make it more powerful. You also get upgrades to your character like extra health or magical damage. Make a powerful mage, or a burly warrior, or anything in between.
There you have it, the 5 Best Sword Fighting VR Games on the Oculus Quest 2. Hope you get the chance to enjoy one of these great titles. They’re all a lot of fun.