

The Walking Dead Saints and Sinners Walkthrough and Guide - Part 9 - The Shallows Again
Stuck in The Walking Dead Saints and Sinners? Wondering where to go next? Maybe you just like to see what is in store for you before you get there, or want to look back and see if you missed anything in The Walking Dead: Saints & Sinners. Well don’t worry we’ve got you covered with this complete walkthrough. This is the ninth part, where you go back to the Shallows to get another package for May.
This article will detail how to progress through the main story missions as quickly as possible, with a couple of guiding tips thrown in here and there to make your adventure smoother. Only those recipes that are convenient to get when doing a task for the first time are included. For a full list of all recipes in The Walking Dead: Saints & Sinners, check out our recipe guide article. Spoilers will be as light as possible, but there will be story spoilers by necessity in this walkthrough, but there won’t be any explanation of what is going on in the story beyond what is necessary to make the walkthrough make sense.
All Walkthrough Parts:
The Walking Dead Saints and Sinners Walkthrough and Guide - Part 1 - The Graveyard
The Walking Dead Saints and Sinners Walkthrough and Guide - Part 2 - The Shallows
The Walking Dead Saints and Sinners Walkthrough and Guide - Part 3 - Via Corolla
The Walking Dead Saints and Sinners Walkthrough and Guide - Part 7 - Old Town and Another Stash
The Walking Dead Saints and Sinners Walkthrough and Guide - Part 8 - Rampart
The Walking Dead Saints and Sinners Walkthrough and Guide - Part 9 - The Shallows Again
The Walking Dead Saints and Sinners Walkthrough and Guide - Part 10 - Bastion and The Reserve Key
The Walking Dead Saints and Sinners Walkthrough and Guide - Part 11 - The Reserve and the Ending
The Resting Place
Welcome to another day in New Orleans. After you wake up you’ll notice that the lantern on the pole overtop the tomb is lit up again. So go over there and get your new task from May out of the coffin. There’s a picture of the location as always, and a letter from May that you should read to get a little more background on her.

You might recognize it from the photo, but that is a window in the Blue Mansion located in the Shallows, the very first place you went to in The Walking Dead: Saints and Sinners for the radio microphone!
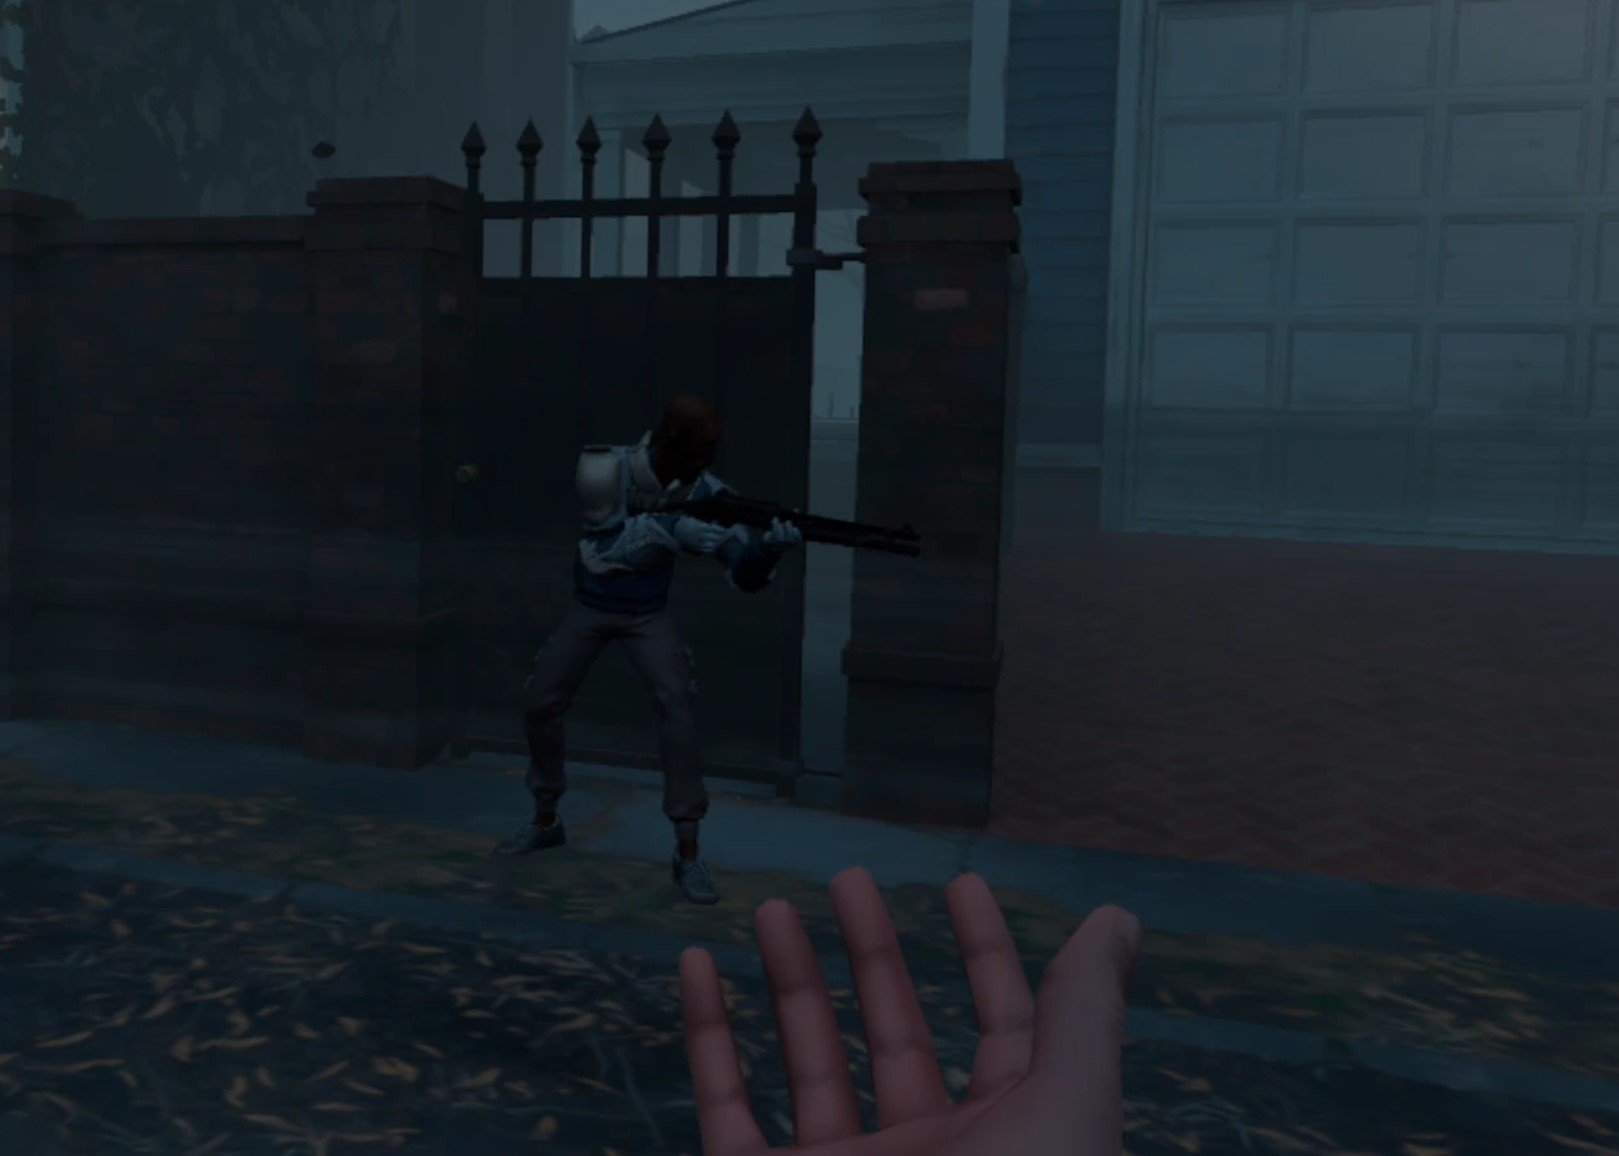
It’s not going to be quite so easy to get into the Blue Mansion this time though. There will be a lot of Tower soldiers guarding the place inside and outside. Be prepared for heavy combat. Grab the best guns that you have. By now hopefully you’ll at least have access to the FS92M 9MM Pistol, or even the Nova 1014 Shotgun. If you do, bring them, but if not that’s okay.

This mission is totally possible with a Double Barreled Shotgun or Hunting Rifle. Just be aware that you’ll have to do some close quarters fighting inside the building no matter how you approach this. So a good pistol is very helpful. Make sure you’ve got plenty of ammo and durability on those guns too, you’ll need to use them a lot.
You may also want to eat some stat boosting food like Gumbo, which gives you 25% more max health. There will still be zombies though, as always, so make sure you’ve got some melee options on hand as well. Whenever you’re geared for some human on human combat and ready to rock, head over to the boat and sail to The Shallows.

The Shallows (Again)
This time when you arrive in The Shallows you will spawn in on the skiff in the upper right corner of the map. Just down the road in front of you and on the right is the Blue Palace. You might hear some shooting after you spawn in, get ready.

Once you start walking down Bordeaux and make it to the truck right in front of where you spawn in, two Reclaimed soldiers with rifles will come running over from a side street. Don’t shoot, they’re actually on your side here, and can make getting into the Blue Palace much easier.

The first Tower soldiers guarding the Blue Palace are on the other side of the truck, and the two Reclaimed will pause for a few moments, and then walk around the front of the truck and start fighting them.

You’ve got a lot of options here. The Tower soldiers won’t actually attack you until you attack them first or get too close to the building, or go into the backyard behind the Blue Palace. So you can always just run past the fighting between the Tower and Reclaimed forces, bypassing most of the external Tower defenders, and take one of several paths inside (more on that later). Though once you’re inside the Blue Palace you will have to fight.
You can also fight alongside The Reclaimed soldiers. They will fight the first group near the skiff, and then go on to attack the Tower soldiers in front of the front door to the Blue Palace. Unfortunately the front door is heavily barricaded now and you can’t go through it. If the Reclaimed soldiers are still alive, they’ll go around the front of the building to the open garage, and fight the Tower defenders there.
If the Reclaimed soldiers somehow survive all of this, they’ll mill around on the street. Once all the Tower defenders are clear you might as well just walk in through the open garage door.

For the fun of a chaotic shootout and the loot that dead enemies will drop (potentially including Worn AR-416 Assault Rifles) fighting through the Tower forces on the street is definitely recommended. There are few moments that are so action packed in the first The Walking Dead: Saints and Sinners game that you’ll be missing out if you ignore it.
Still, if you prefer stealth gameplay or just want to avoid fighting as much as possible, there are several routes you can take to avoid fighting the Tower soldiers outside. They are mostly the same as those from the first time you came to The Shallows, just with a bunch of Tower guards added in.
As mentioned earlier you can run past them and they won’t be immediately hostile. If you’re quick you can duck in through a hole near the front door that leads to the crawlspace beneath the house, and from there pop up through the broken floorboards into several rooms inside.

You can also just not go down Bordeaux street from the very beginning, and instead walk to the little lot that the Reclaimed grunts run in from at the start. Further down is a big gate with a Tower soldier defending it. If you walk through the gate the soldier will attack, but it’s only one. There’s a small courtyard on the other side with a hole in another wall, crawl through it and you’ll be in the backyard behind the Blue Palace.
There are only a couple of Tower guards in the backyard, so take them out and you can climb up a gutter pipe to the second floor, crawl down into another crawlspace hole, or just walk in through the back door.

You can also just walk down the street, past the open garage and into a small side gate with a single guard in front of it. You can quickly shoot the guard and slip inside, or just run through the gate before he notices, and you’re in the backyard.
As you can see there are a ton of ways to get inside. For the least amount of combat though, you’re best off just using the first option presented here and going through the crawlspace hole at the front of the house.
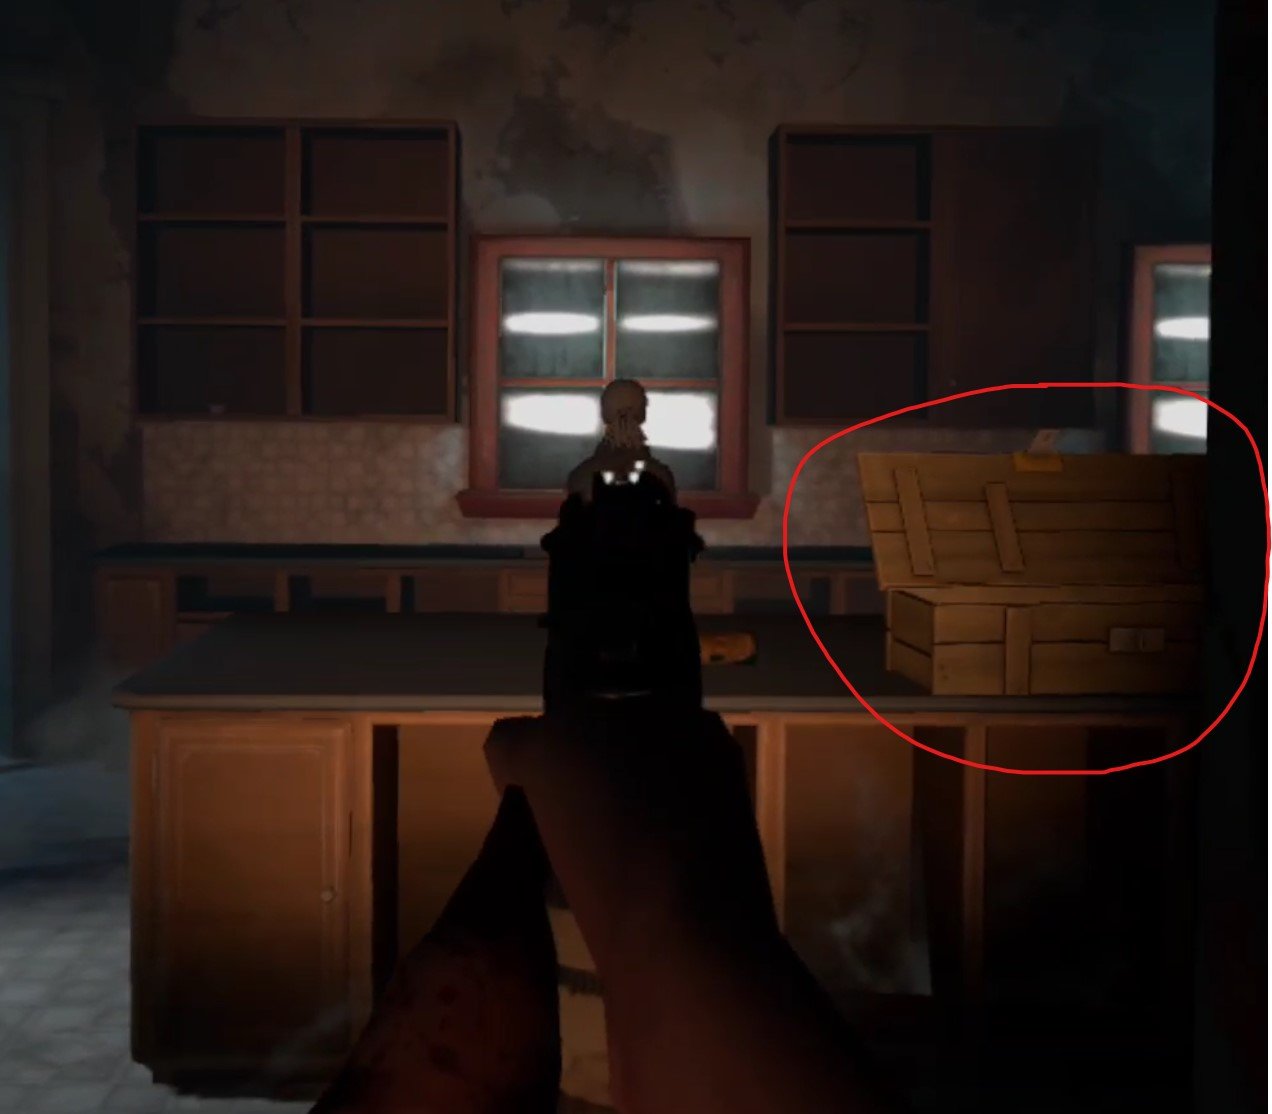
Once you’re inside the layout and loot spawns are mostly the same as the first time you were here. For more information on the loot spawns in the Blue Palace, check out the walkthrough article for the first Shallows mission here. The differences this time are a few crates scattered around, like in the kitchen on the main floor. These open crates contain Boxes of Loot, which are the best loot item in the game.
There are also, of course, Tower soldiers everywhere now. About one for every room, so always have your gun ready when going through a door or rounding a corner. Go through the house and gather loot, or don’t, it’s up to you, there will also be some good stuff by your objective, which is upstairs.
If you wander around the second floor long enough you will inevitably run across it. It’s the small, long room with the pool table in the middle of it. That Pool Table now holds the intel you need, and some goodies. Though there are two Tower soldiers in the intel room, and some in the adjoining room.
If you’re running into those barbed wire traps with cans hanging from them, then you’re going in the right direction. Oh, and in case you’ve forgotten you can easily disarm those by tapping the wire with a gun, melee weapon, or your flashlight.
If you’re having trouble finding the intel room then the fastest way to get there is to climb up the main stairs to the second floor, and go down the long hallway that leads past two doors, one on the left (goes to the attic), and one on the right. At the end of that hallway is another door, and that least directly to the intel room.

Once you’ve got the goods you can just retrace your steps and leave the way you came. As long as any guards that might be remaining outside don’t see you inside the perimeter of the house then they won’t shoot at you.
Oh, and if you never opened the safe to get the .45 Revolver Recipe the first time you came here, the code for that should be on the ground by the carport with the ruined car in it on the road right by the skiff in the top left corner of the map, where the woman was the first time you go to The Shallows.
The Resting Place
Once you’re back do the usual, scrap loot items, store useful items like the timer bombs that you found next to the intel, and put the folder from the stash into the coffin. Congratulations, you’ve survived The Shallows twice! Have a good sleep.

Need a guide on what comes next? Want to find out where the final Pump Part for Casey is? Then head over to Part 10.