

The Walking Dead Saints and Sinners Walkthrough and Guide - Part 3 - Via Corolla
Stuck in The Walking Dead Saints and Sinners? Wondering where to go next? Maybe you just like to see what is in store for you before you get there, or want to look back and see if you missed anything in The Walking Dead: Saints & Sinners. Well don’t worry we’ve got you covered with this complete walkthrough.
This article will detail how to progress through the main story missions as quickly as possible, with a couple of guiding tips thrown in here and there to make your adventure smoother. Only those recipes that are convenient to get when doing a task for the first time are included. For a full list of all recipes in The Walking Dead: Saints & Sinners, check out our recipe guide article. Spoilers will be as light as possible, but there will be story spoilers by necessity in this walkthrough, but there won’t be any explanation of what is going on in the story beyond what is necessary to make the walkthrough make sense.
All Walkthrough Parts:
The Walking Dead Saints and Sinners Walkthrough and Guide - Part 1 - The Graveyard
The Walking Dead Saints and Sinners Walkthrough and Guide - Part 2 - The Shallows
The Walking Dead Saints and Sinners Walkthrough and Guide - Part 3 - Via Corolla
The Walking Dead Saints and Sinners Walkthrough and Guide - Part 7 - Old Town and Another Stash
The Walking Dead Saints and Sinners Walkthrough and Guide - Part 8 - Rampart
The Walking Dead Saints and Sinners Walkthrough and Guide - Part 9 - The Shallows Again
The Walking Dead Saints and Sinners Walkthrough and Guide - Part 10 - Bastion and The Reserve Key
The Walking Dead Saints and Sinners Walkthrough and Guide - Part 11 - The Reserve and the Ending
Day 3: Via Corolla
Welcome to the third day, and to your second foray out into flooded, zombie infested New Orleans. Today you’ll be headed to Via Corolla, and have your first up close and personal encounters with both the Tower and the Reclaimed.

Before you get on the boat though, make sure to get ready with at least one durable melee weapon on your hip, such as a Shiv or Night Shift knife. You can optionally bring the .30 Revolver that you first found in the bus as a little backup firepower, or the damaged 9MM pistol from the Blue Mansion safe.
Provided you followed the previous guide and grabbed the Double-Barreled shotgun from the Blue Mansion in The Shallows you should definitely bring that too. You may have to get into a gunfight or two in Via Corolla, and the shotgun will make them much easier. At this point you should bring a firearm every time you leave your base, at least a pistol.
Make sure you’ve eaten as well to get your stamina bar up, preferably food made from the Survival Crafting table so your stamina doesn’t take damage. Then waltz over to the boat and travel to the new circle on the map, Via Corolla.
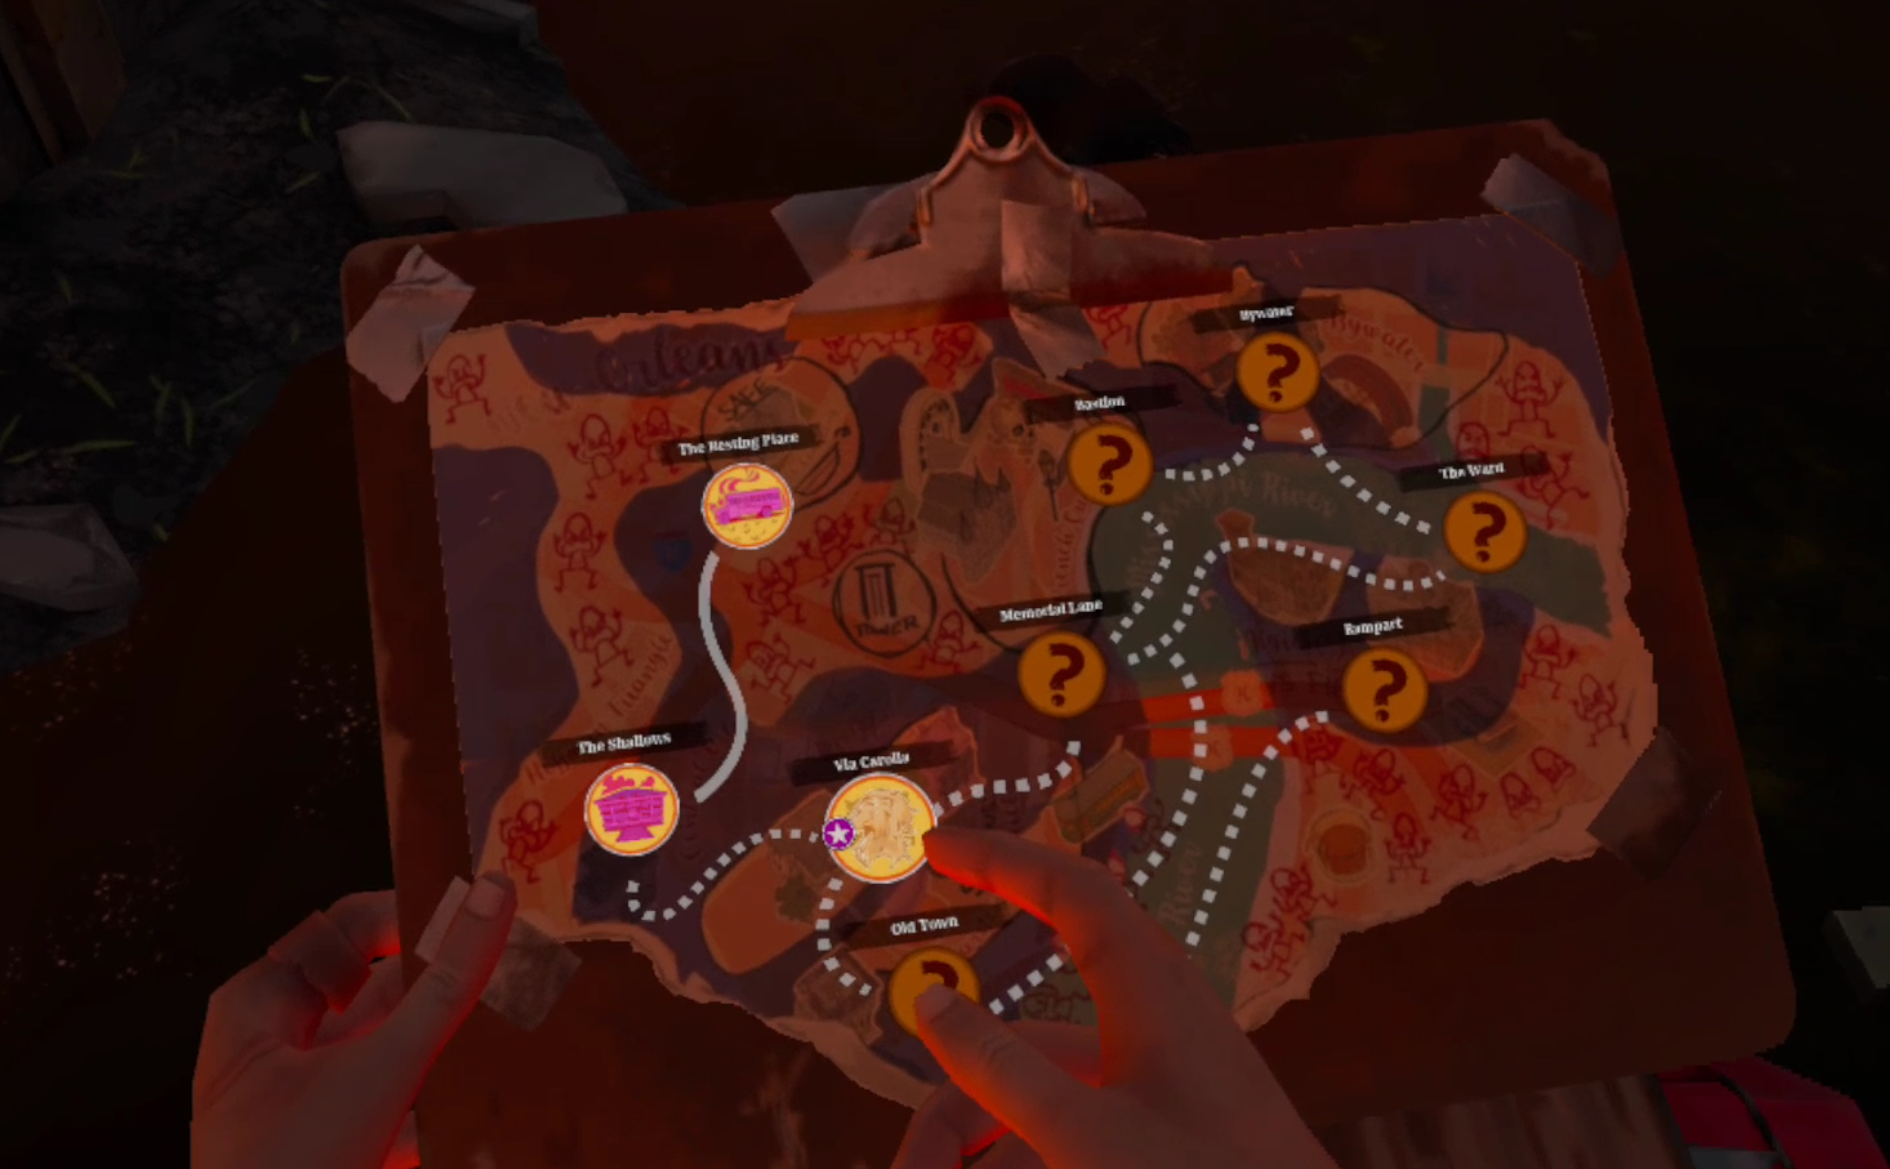
As always, be sure to look at your map when you arrive. You will notice that you have arrived on the upper left side of the map, directly above the yellow house. Your objective, a Tower stash you’re here to steal, is by the Blue House. So stopping by the yellow house is completely optional, but you can find some good stuff inside. The only problem is, it’s guarded.

Like all human guards in the game they’ll heckle you if you get close, but won’t become aggressive unless you hang around them for too long, touch them, or point a weapon at them. Hopefully you have that shotgun, because it’s the easiest way to take them out quickly. Alternatively you could shoot one in the head before quickly stabbing the other. You have the element of surprise in this situation, and should easily be able to take out at least one before they can retaliate, go for whichever is more heavily armed first.
Human enemies will also drop mostly broken, but sometimes still working, firearms. Don’t rely on these as, even if they’re still working, they’ll break quickly. Though the damaged firearms are full of components you will need to make durable guns of your own, namely pistol, shotgun, and rifle frames. Human enemies will, just like in all Walking Dead fiction, come back to life as a flesh eating walker if they die without a significant head wound. You can always stab a dead person in the head before this happens, if needed.

You could also just completely ignore the yellow house, but assuming you do go in there should be a fair quantity of loot to be had within. Remember to always take the little metal boxes of loot no matter what, for more information of what you should and shouldn’t take check out the loot tier list and upgrade guide.
It is highly recommended that you scavenge the Yellow House, as it is the easiest way to get a substantial amount of materials. This is because the blue house is heavily guarded with way more than two Tower grunts.

Once you are done with the Yellow house, continue down Bonaparte street. Should you take a right at the intersection, or head to the blue house through the alleyway behind the yellow house, you will see two people in Red shirts run up to the main gate of the blue house, yell some stuff, and start shooting at the Tower grunts in blue shirts. The red shirted people are some members of the Reclaimed.

The Tower soldiers outnumber these two warriors by a good bit and will easily defeat them.
Alternatively you could continue going down Bonaparte, not taking a right at the intersection, and come to a garage with a slightly ajar door, and a hole in the brick wall that surrounds the blue house. The garage will have at least one walker inside, but will also contain generally at least one metal box of goodies and some ammunition, so make sure to climb in and check it out. You will also notice a ladder in the garage, don’t go up it (yet).

If you look through the hole in the wall you’ll notice a bunch of barbed tripwires with cans hanging from them, and a dry stone fountain just beyond those. That fountain contains your objective, the Tower stash of items and information.

Now that you know which paths you can take, here are your options. They boil down to trying to sneak through the hole in the wall to quickly grab the stash and leave, try to shoot your way to the stash and leave, or destroy the entire Tower garrison and loot the house.
The easiest and most recommended way to do this, especially for newer players, is to sneak through the hole in the wall, grab the stash, and go. Before you do this though, make sure you’ve got at least four empty slots in your backpack, as you won’t want to be fiddling with your inventory when you are pulling items out of the stash.
You’ll also probably see a guard patrolling near the fountain, wait until they walk back towards the front of the house and out of sight before making your move. You will need to quickly disable the trip wires. Running into them will create a noise that will alert nearby enemies and deal some damage to you. Instead of that, use a tool like your shotgun or a knife to cut the tripwire by smacking it with your chosen object. This will save your health and create less noise.

Then walk up to the wall adjacent to the fountain, and make sure to crouch before approaching the fountain itself, try to hide a bit behind it’s centerpiece, and grab the stuff inside as quickly as you can. There will be guards patrolling on the right side of the fountain (relative to the hole in the wall). Since you are in a guarded area enemies will start shooting at you only a second or two after spotting you.
In the fountain you will find a valuable box of crafting materials, and three sticky bombs. These bombs stick to any surface you throw them on, and after a few seconds will explode when an enemy gets near them. Very useful. Not to mention the folder of information that the note in the cemetery requested. You can read the note on the front of it by looking at it for a few seconds, like any other note in the game.

The patrolling guard may come back around and see you before you can grab all of these things. Shooting one or two guards out of sight of the others won’t draw to you immediately, so you can kill them and quickly leave.
Alternatively, trying to shoot your way in will be difficult, but could be manageable provided you brought the Double Barreled Shotgun. There is no aim assist in The Walking Dead: Saints and Sinners, so fighting a large number of Tower grunts, even the pistol armed variety, with only a pistol of your own can be difficult. Comparatively, the Shotgun is easy to aim, but is only very effective at close range.

Fighting through the front gate and then taking a left to head towards the fountain involves fighting more enemies than is strictly necessary if you just go through the hole in the wall, but can be made easier if you attack when the Reclaimed soldiers are also engaging the Tower grunts.
More enemies will emerge from inside the house, and others will still stand sentry inside even if you dispose of all the Tower enemies outside. If you don’t want to use stealth just go through the hole in the wall anyway and shoot the guards at the side of the house, but if you want to clear the whole house to get all the loot inside, attack from the front and utilize the slight advantage of the two Reclaimed soldiers.

The ladder inside the garage can also be used to sneak into the second floor of the Blue House, if you want to avoid fighting your way through the front gate, but the guards on the ground will likely spot you while you are up there. This makes the ladder route not recommended, but if you want to test your stealth skills as much as you can and sneak through the occupied house, that’s the best way in.
The biggest reason to go inside of the house is to get the Jambalaya recipe that is sitting on the stove in the kitchen. This is the best food recipe in the game, because it will make your weapons take less durability damage each day that you eat it. This means when you eat Jambalaya you will have to bring fewer melee weapons, which tend to break quickly, and also have to spend less resources crafting them. Even better, you can always come back the next day after completing the mission and there won’t be any Tower soldiers around, so if you don’t want to shoot your way through and don’t mind spending an extra day, this recipe is ripe for the taking.

Whatever you decide to do, once you have a backpack full of loot and the folder of intelligence from the stash, head to a boat and go back home. As usual heal any wounds and scrap any scavenge, but also make sure to put the folder inside the same stone coffin that contained the note asking for it, underneath the hanging lamp.

Once that’s done go back to sleep, mission accomplished.

Want to find out who the mysterious folder is for? Need a guide on what comes next? Then head over to Part 4.