


The Walking Dead Saints and Sinners Walkthrough and Guide - Part 10 - Bastion and The Reserve Key
Stuck in The Walking Dead Saints and Sinners? Wondering where to go next? Maybe you just like to see what is in store for you before you get there, or want to look back and see if you missed anything in The Walking Dead: Saints & Sinners. Well don’t worry we’ve got you covered with this complete walkthrough. This is the tenth part, where you finally get the Reserve Key and go to Bastion to get the final pump part.
Stuck in The Walking Dead Saints and Sinners? Wondering where to go next? Maybe you just like to see what is in store for you before you get there, or want to look back and see if you missed anything in The Walking Dead: Saints & Sinners. Well don’t worry we’ve got you covered with this complete walkthrough. This is the tenth part, where you finally get the Reserve Key and go to Bastion to get the final pump part.
This article will detail how to progress through the main story missions as quickly as possible, with a couple of guiding tips thrown in here and there to make your adventure smoother. Only those recipes that are convenient to get when doing a task for the first time are included. For a full list of all recipes in The Walking Dead: Saints & Sinners, check out our recipe guide article. Spoilers will be as light as possible, but there will be story spoilers by necessity in this walkthrough, but there won’t be any explanation of what is going on in the story beyond what is necessary to make the walkthrough make sense.
All Walkthrough Parts:
The Walking Dead Saints and Sinners Walkthrough and Guide - Part 1 - The Graveyard
The Walking Dead Saints and Sinners Walkthrough and Guide - Part 2 - The Shallows
The Walking Dead Saints and Sinners Walkthrough and Guide - Part 3 - Via Corolla
The Walking Dead Saints and Sinners Walkthrough and Guide - Part 7 - Old Town and Another Stash
The Walking Dead Saints and Sinners Walkthrough and Guide - Part 8 - Rampart
The Walking Dead Saints and Sinners Walkthrough and Guide - Part 9 - The Shallows Again
The Walking Dead Saints and Sinners Walkthrough and Guide - Part 10 - Bastion and The Reserve Key
The Walking Dead Saints and Sinners Walkthrough and Guide - Part 11 - The Reserve and the Ending
The Resting Place/The Church
Welcome back to New Orleans in The Walking Dead: Saints and Sinner. Wake up and grab a melee weapon. When you walk outside of the bus you’ll see that May’s lantern is lit once again.

As always go over to the coffin, and inside is a note. Read it and you’ll find that May is waiting for you near the church in the same place she was before.

Walk over to the entrance to the old catacombs, deal with the zombie or two that spawn down there, and take the first right to go over to the church yard. After you exit the catacombs and take a right, you’ll see May across the street.

Talk to her and you’ll find out that she will give you the Reserve Key, and that it will show up the next time the lantern is lit. Congratulations! No more intelligence gathering for you. You can also kill May here if you’re angry at her for how many gunfights she put you through for a key, and still get that key off of her body. This isn’t recommended as it will cut out another interesting element of the story later.
Anyway head back to the bus the way you came, and talk to Casey on the radio. He’s heard where you can get the final pump controller. At a fortified apartment building called the Bastion.

Make sure you bring guns. The biggest guns you have, and probably a bandage just in case. Explosives are also great, like the nail bombs that you can craft at the survival bench. If you haven’t used the sticky bombs from the first stash then those will also do just fine. Depending on your choices there is a perfect chance to use those explosives to take out multiple enemies.
You won’t have to worry much about zombies for this mission. If you ever wanted the perfect time to run a pistol on each hip, this is it. Hopefully you’ve unlocked the powerful Nova 1014 shotgun. Or if you have a Worn AR-416 that you got off of a dead tower grunt, that will work too. Just make sure you have some ammunition for whatever you bring. No matter what you can’t go wrong with a double barrel or hunting rifle, whatever you prefer. Just make sure you’re ready to fight other people with guns.
Once you’re ready for a fight head over to Bastion.
Bastion
When you arrive in Bastion you’ll notice that it’s… quiet. Too quiet. There are no gunshots, no walker moans. Just silence. If you check your watch you’ll see that the usual circular timer that ticks down until the bells ring is no longer there. It’s just full green. That’s because there are no bells this time around. You can take as much time as you like.

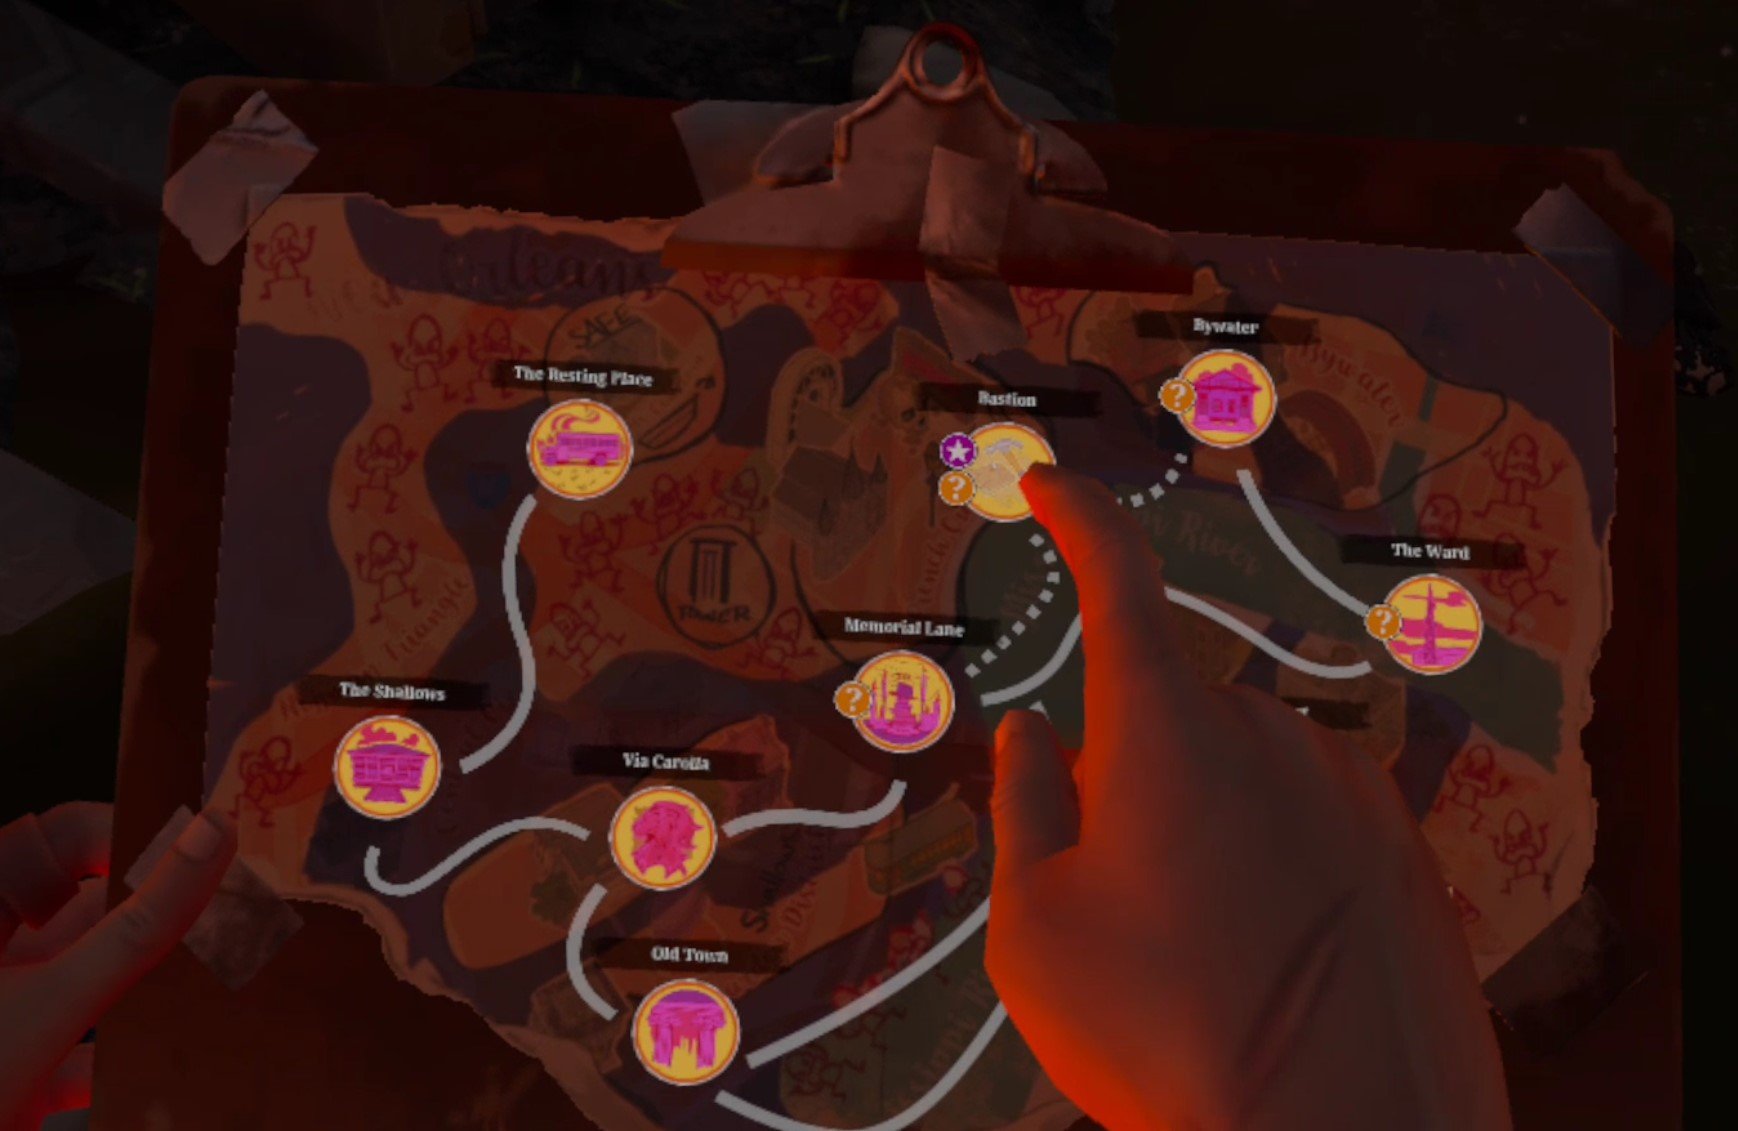
As always take a peek at your map. You’ll see two enterable buildings marked with colors. A blue building and a yellow building.

The yellow building is the fortified apartment complex that is your target, and has the pump regulator inside. If you want to go straight there go ahead, and skip a little further in this walkthrough. Since there are no enemies and all the time in the world though, you might as well take a right out of your spawn and stroll down Walnut street until you see a building with a car crashed into it.

This is the building marked blue on your map. Go up the crashed car and take a right, you’ll see a path that leads around the back of the building, and a hole in the wall blocked by some boards. Use a heavy melee weapon like a cleaver, or a two handed firearm, to bash the boards down and head inside. After you walk out of the first room there will be a little side table on your left, and on it a piece of paper with a safe code.

Take it, you’ll be able to use it in the next walkthrough. Meanwhile feel free to loot the house, loot the streets, and do anything you like until you’re ready to get the pump. When you are, walk over to the yellow building on your map.
It’s large and lit up by a bunch of work lights left in the road. Still, nobody appears to be home. There will also be some good loot inside. Make sure to also check the garages on either side of the building as well. If you want to go straight for the pump then enter one of the doors that are on the lower side of the building relative to the map and walk up the stairs.

Either way if you go upstairs and wander around for a bit you’ll inevitably find an open door, and a figure sitting inside.

Make sure you’ve looted the area as much as you like before talking to him. After your chat with the leader of the Reclaimed, Jean Baptiste aka “JB”, you’ll have more important things on your mind than what junk you’re carrying.
Your chat with JB will be illuminating, and he will give you the codes that will active the Reserve’s flood control system, as well as the final pump controller and the dial for it. You can also, as always, just shoot him and take all of those things off of his body.

Whenever you’re done with JB, walk back down the stairs and you’ll see that the door across the room leading outside is open. Walk over and you’ll run into another of New Orleans’ notorious leaders, and a bunch of her soldiers.

Georgia offers you a deal. Go back inside and kill JB and she’ll forget all of her grunts you killed and stashes you stole. If you refuse this deal you can’t walk away peacefully. It’s either agree to kill JB, or fight Georgia and her soldiers right there.
Here are where the options really open up. If you agree to kill JB you can go back in and tell him you’ll kill him. He will accept this and just wait around for a bullet. He won’t even fire on you first. If you do this then Georgia will promise that her troops will not fight you during the upcoming battle for The Reserve. Then you can just walk past Georgia and her goons and go back to The Resting Place.

You can also warn JB, but instead of running he will charge out to fight Georgia and the Tower soldiers alongside her. Without help JB will certainly lose. If he does survive though he will thank you, and promises that Reclaimed troops will not fight you over The Reserve.
You can also kill both leaders, and neither side will avoid fighting you over The Reserve.
As far as getting that done, shooting JB is the easy way out of the situation. He won’t even fire first on you. Fighting Georgia is harder, especially if you’re trying to keep JB alive. If you warn JB and he starts to run outside, make sure you jump down the stairwell and make it out before he does, or he will quickly perish.
You can always fight her before warning JB, or while she is talking to you. You’ll notice that she has two soldiers standing very close by her. So the optimal way to start the fight is before you say something that causes them to attack. Use the explosives you hopefully brought, and throw it right beside Georgia. That should take out her and at least one of her soldiers.

Use that big gun you brought for the rest. If you take a lot of hits you can always duck back into the building to avoid death, though JB might still foolishly run outside and get killed while you’re bandaging.
A benefit of fighting Georgia is that her soldiers might drop guns, like Worn AR-416es, and the recipe for Sticky Bombs, or any other weapon recipes you might have missed so far. If JB lives he will thank you and run off. If he dies then you’ll have to fight the Reclaimed over The Reserve as well.
However the situation plays out, head back to the Resting Place. You’ve got the final pump regulator. The fight for The Reserve is about to begin.

The Resting Place
Home sweet home. Once you arrive you’ll see that the lantern over the coffin is lit once again. Go there and get a final picture and note from May, and most importantly the Waterfall Key, which you need to access The Reserve.

Once you’re done reading May’s note, go ahead and scrap all that loot you got. When you’re ready for the final battle of The Walking Dead: Saints and Sinners, go over to the radio and talk with Casey. It’s time to enter The Reserve.

Need a guide on what comes next? Want to find out what happens during the thrilling conclusion of The Walking Dead: Saints and Sinners? Then head over to Part 11.
VR Pokemon On The Oculus Quest 2 - PokeQuest VR Review
Want to combine your love of Pokémon with your love of VR? Well now you can experience Pokémon VR through PokeQuest VR, a VR Pokemon game that has been around for a while and somehow still hasn’t been taken down by Nintendo. The best part is that it’s free and fully compatible with the Oculus Quest 2. You can play VR Pokémon standalone by just sideloading PokeQuest VR via SideQuest. Oh, and even better, it’s multiplayer. So you can have Pokémon Battles with your friends or strangers too!
Want to combine your love of Pokémon with your love of VR? Well now you can experience Pokémon VR through PokeQuest VR, a VR Pokemon game that has been around for a while and somehow still hasn’t been taken down by Nintendo. The best part is that it’s free and fully compatible with the Oculus Quest 2. You can play VR Pokémon standalone by just sideloading PokeQuest VR via SideQuest. Oh, and even better, it’s multiplayer. So you can have Pokémon Battles with your friends or strangers too!
VR Pokemon Directly On Your Oculus Quest 2
Once you first load into the game (more on the installation and setup process later in this article if you’re interested) you’ll start the way all classic Pokémon adventures start, in your mom’s house in Pallet Town.

While your room isn’t exactly well furnished, what’s exciting about it is that it shows you what’s most exciting about Pokémon VR in PokeQuest VR, that the top down view of the Pokémon games is now translated to a 3D VR environment. That being said, all of the very low resolution and blocky textures of the old Pokémon games don’t exactly translate into a beautiful VR experience. Also the ceilings and exits are usually represented as just black voids.

After you walk into the stairs that lead into inky blackness, you’ll arrive on the main floor of your house. There’s your mom with a cup of coffee. You’ll see that the NPCs of Pokémon are also translated into VR as 2D sprites. Whether or not you like 2D sprites laid over a 3D environment is a personal preference. Games like Stones of Harlanth and Shock Troops have shown that a lot of people like the sprite look in VR.
Still, just like in Pokémon, here in VR Pokémon you can talk and interact with NPCs and they’ll give you all the usual advice about the game. Here your mom says to get over to Professor Oak’s Lab. You know what that means, it’s time to get your first Pokémon!
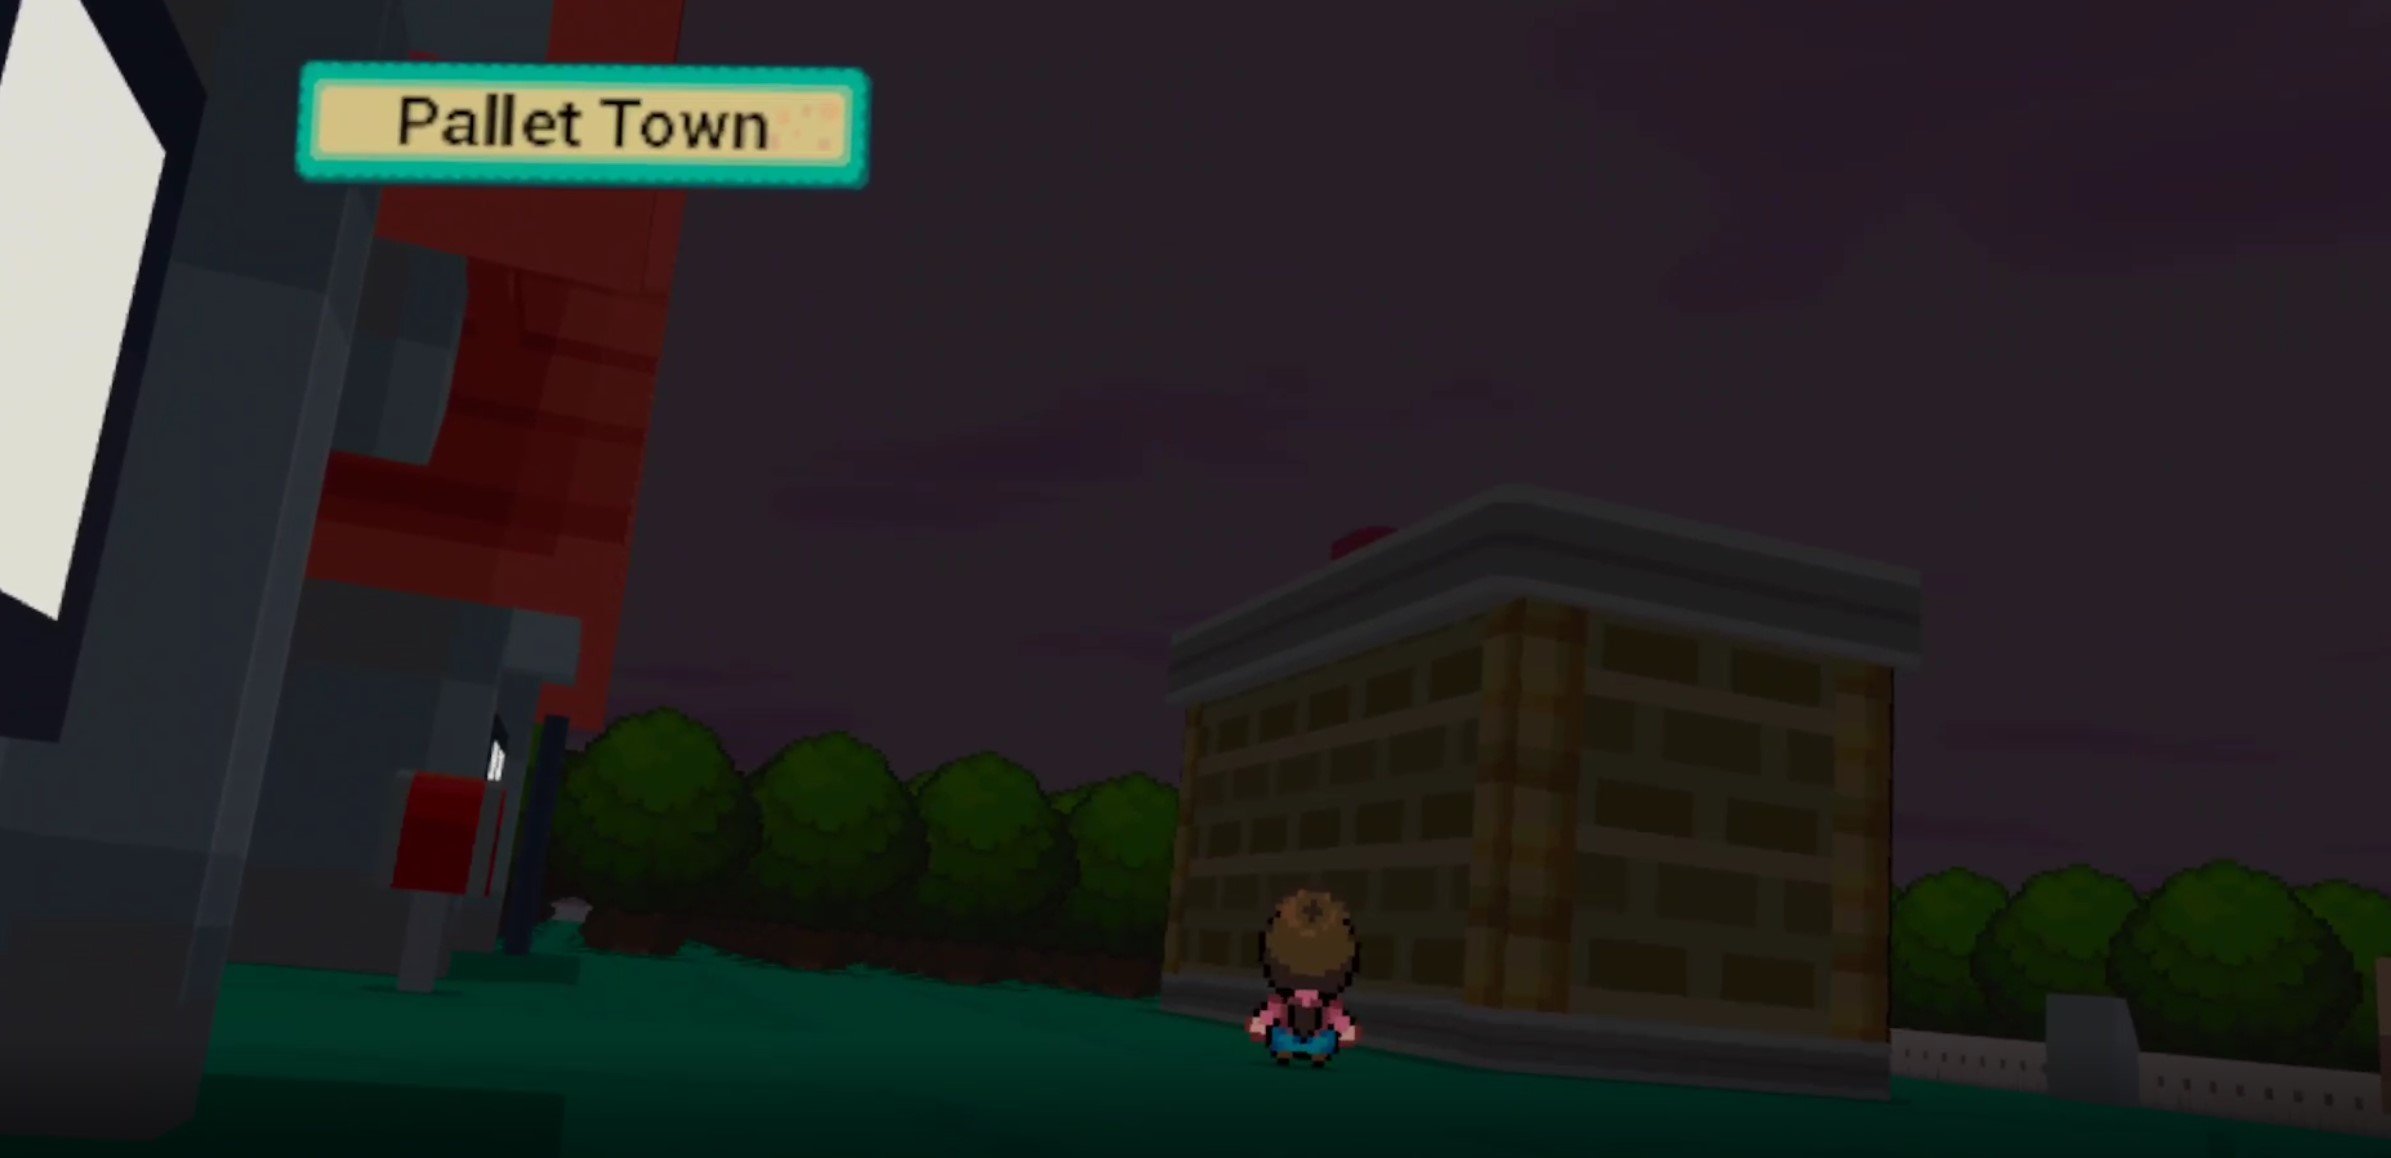
Walking into the black void that takes up a wall of the house brings you outside, and the real majesty of the game is shown once you’re out of a building. Since PokeQuest VR is a VR Pokémon MMO, it has a day night cycle. Here you can see from the expansive sky that it is night time, and even in the low light it is incredible to see the iconic Pallet Town from the original Pokémon games in VR.
Walking around the buildings and talking to people is, even though everything is blocky and lacking detail, incredible. To have the 2D Pokémon buidlings and people laid out in this 3D Virtual Reality world makes it feel so much real, even without realistic graphics. The difference may be mostly cosmetic, but it is still wild to see the difference of viewing the world of Pokémon from the ground in VR.
Anyway, Professor Oak is waiting.

He lets you choose between the original three starting Pokémon, Charmander, Bulbasaur, and Squirtle. Whichever one you pick will even follow you around, and you can interact with them and get their reaction. So classic.

After picking one, there’s no fight with your rival Gary. You’re free to go and explore through the tall grass and experience your first VR Pokémon battles against wild Pokémon.
VR Pokemon Combat and VR Pokemon Battles
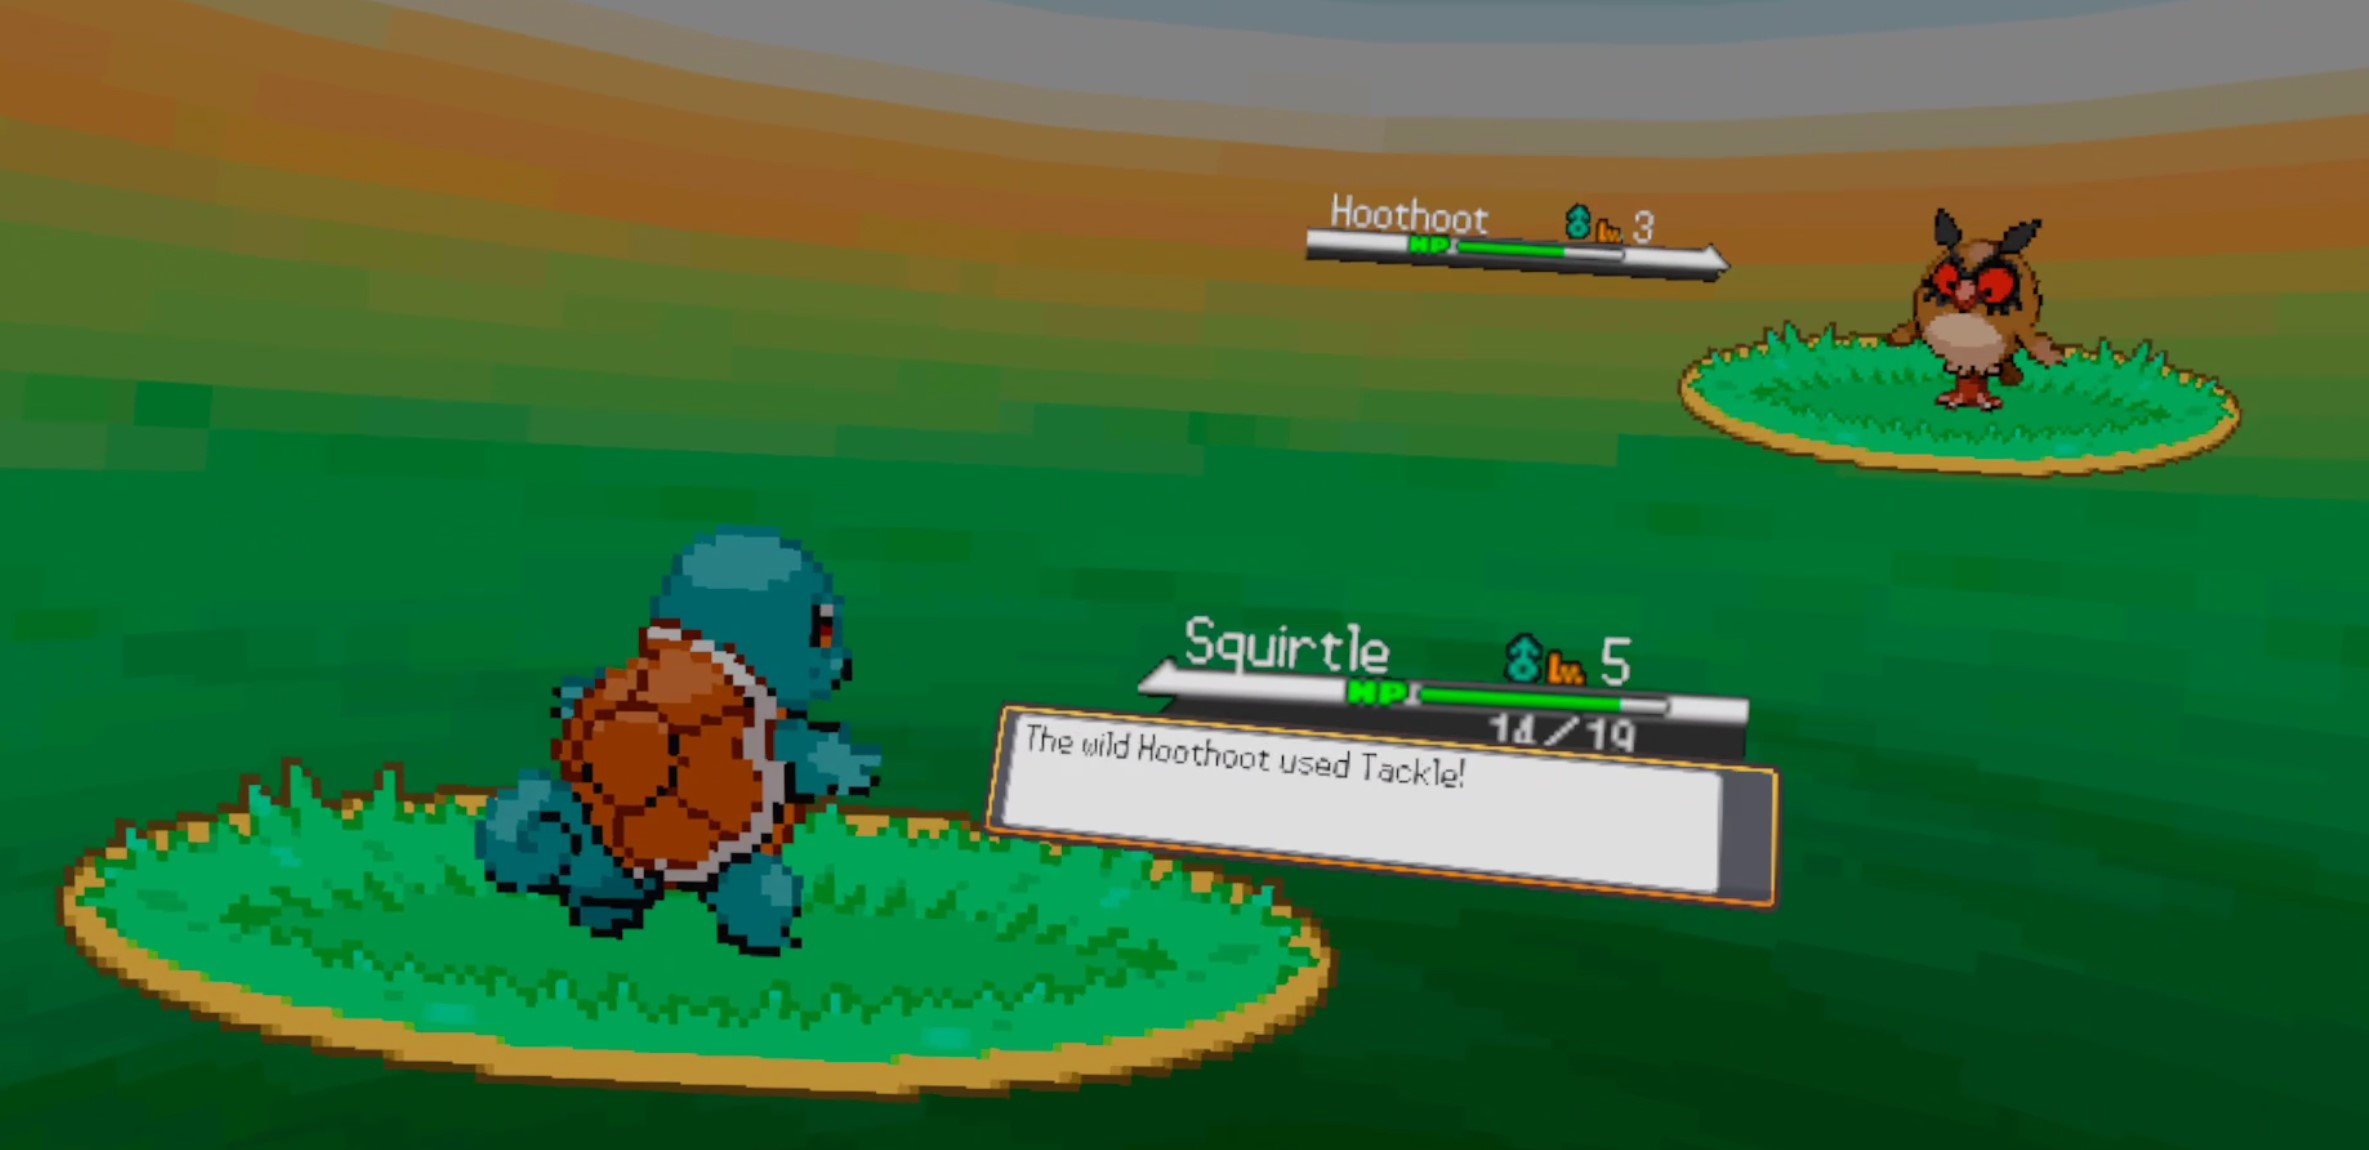
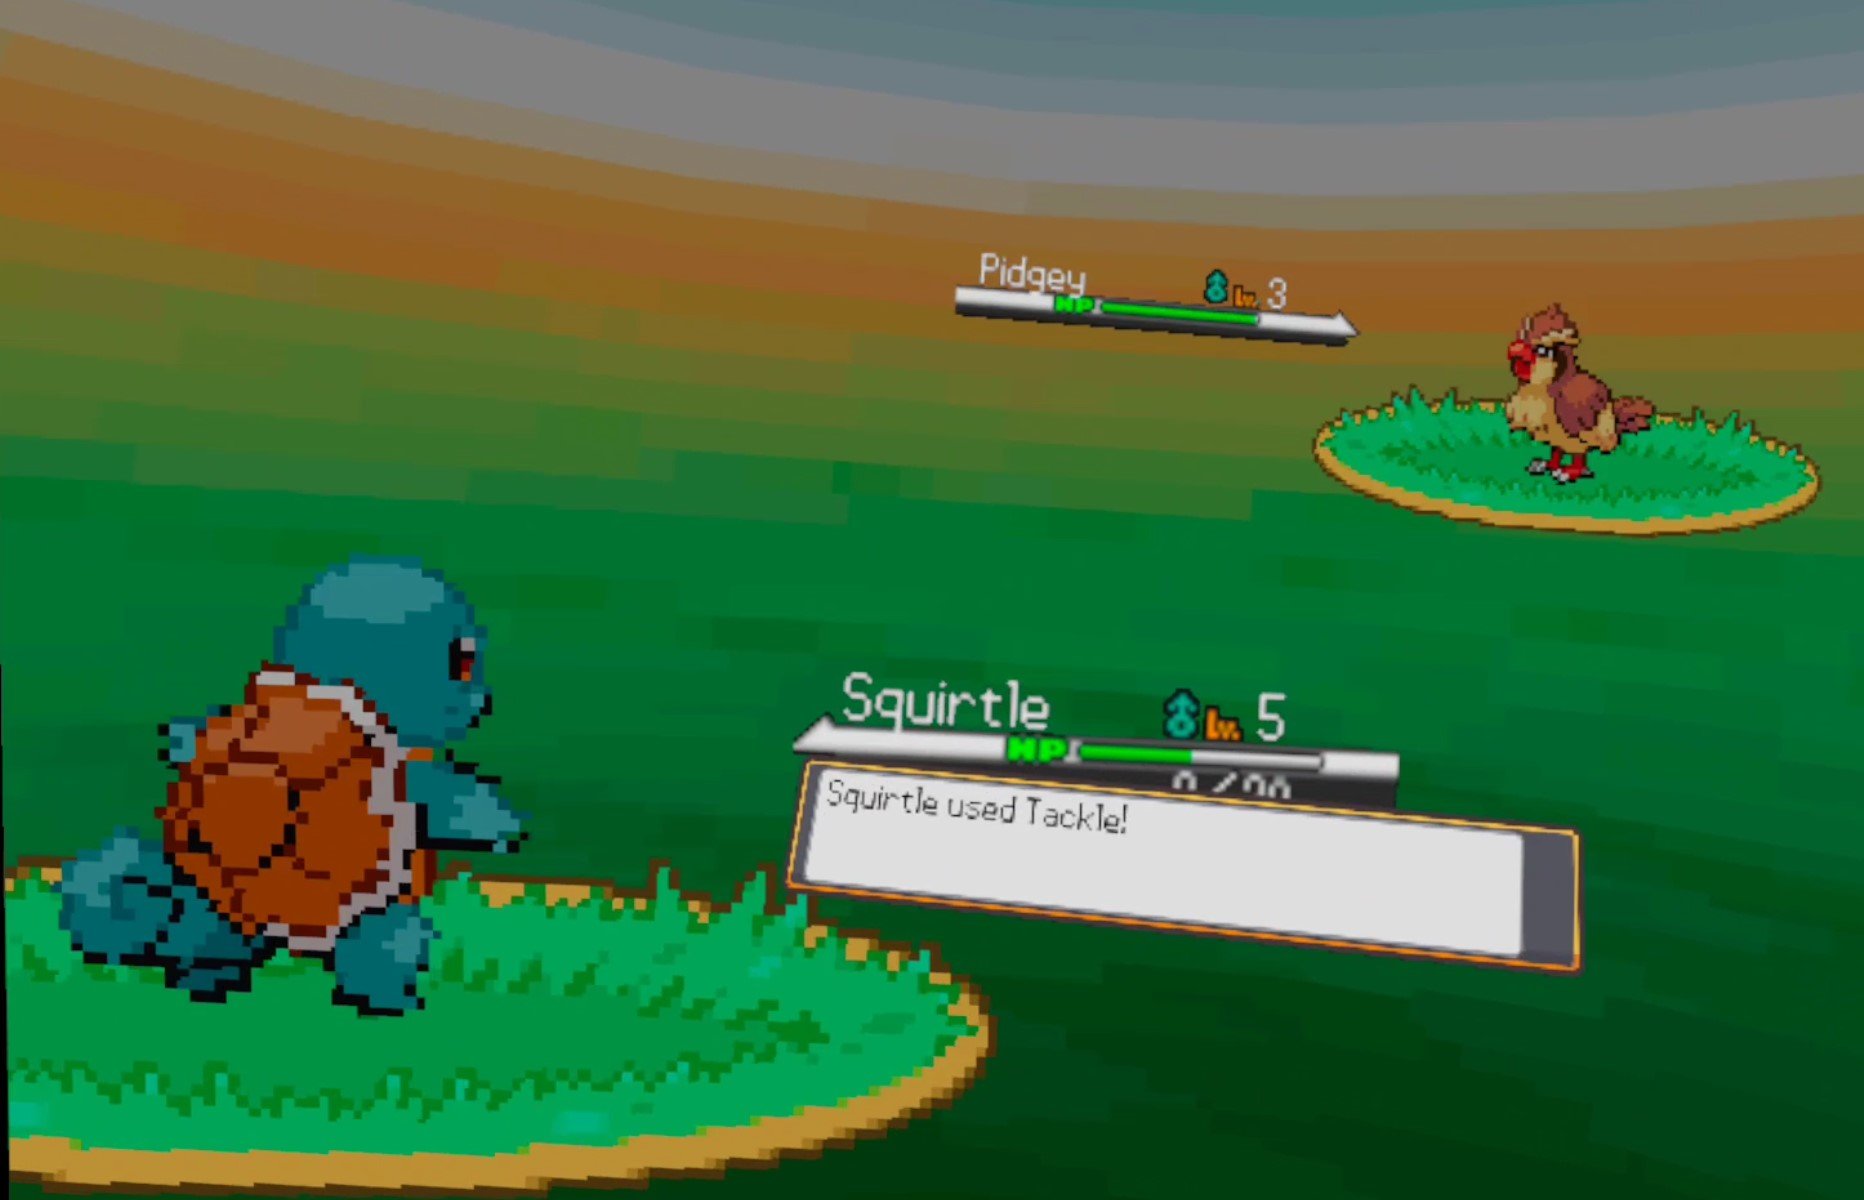
If you’re hoping to see your Pokémon battle as 3D characters or sprites in a VR environment, then you’ll unfortunately be disappointed. The same love that was given to making the exploration of the Pokémon overworld a VR experience was not given to the actual Pokemon VR battles.
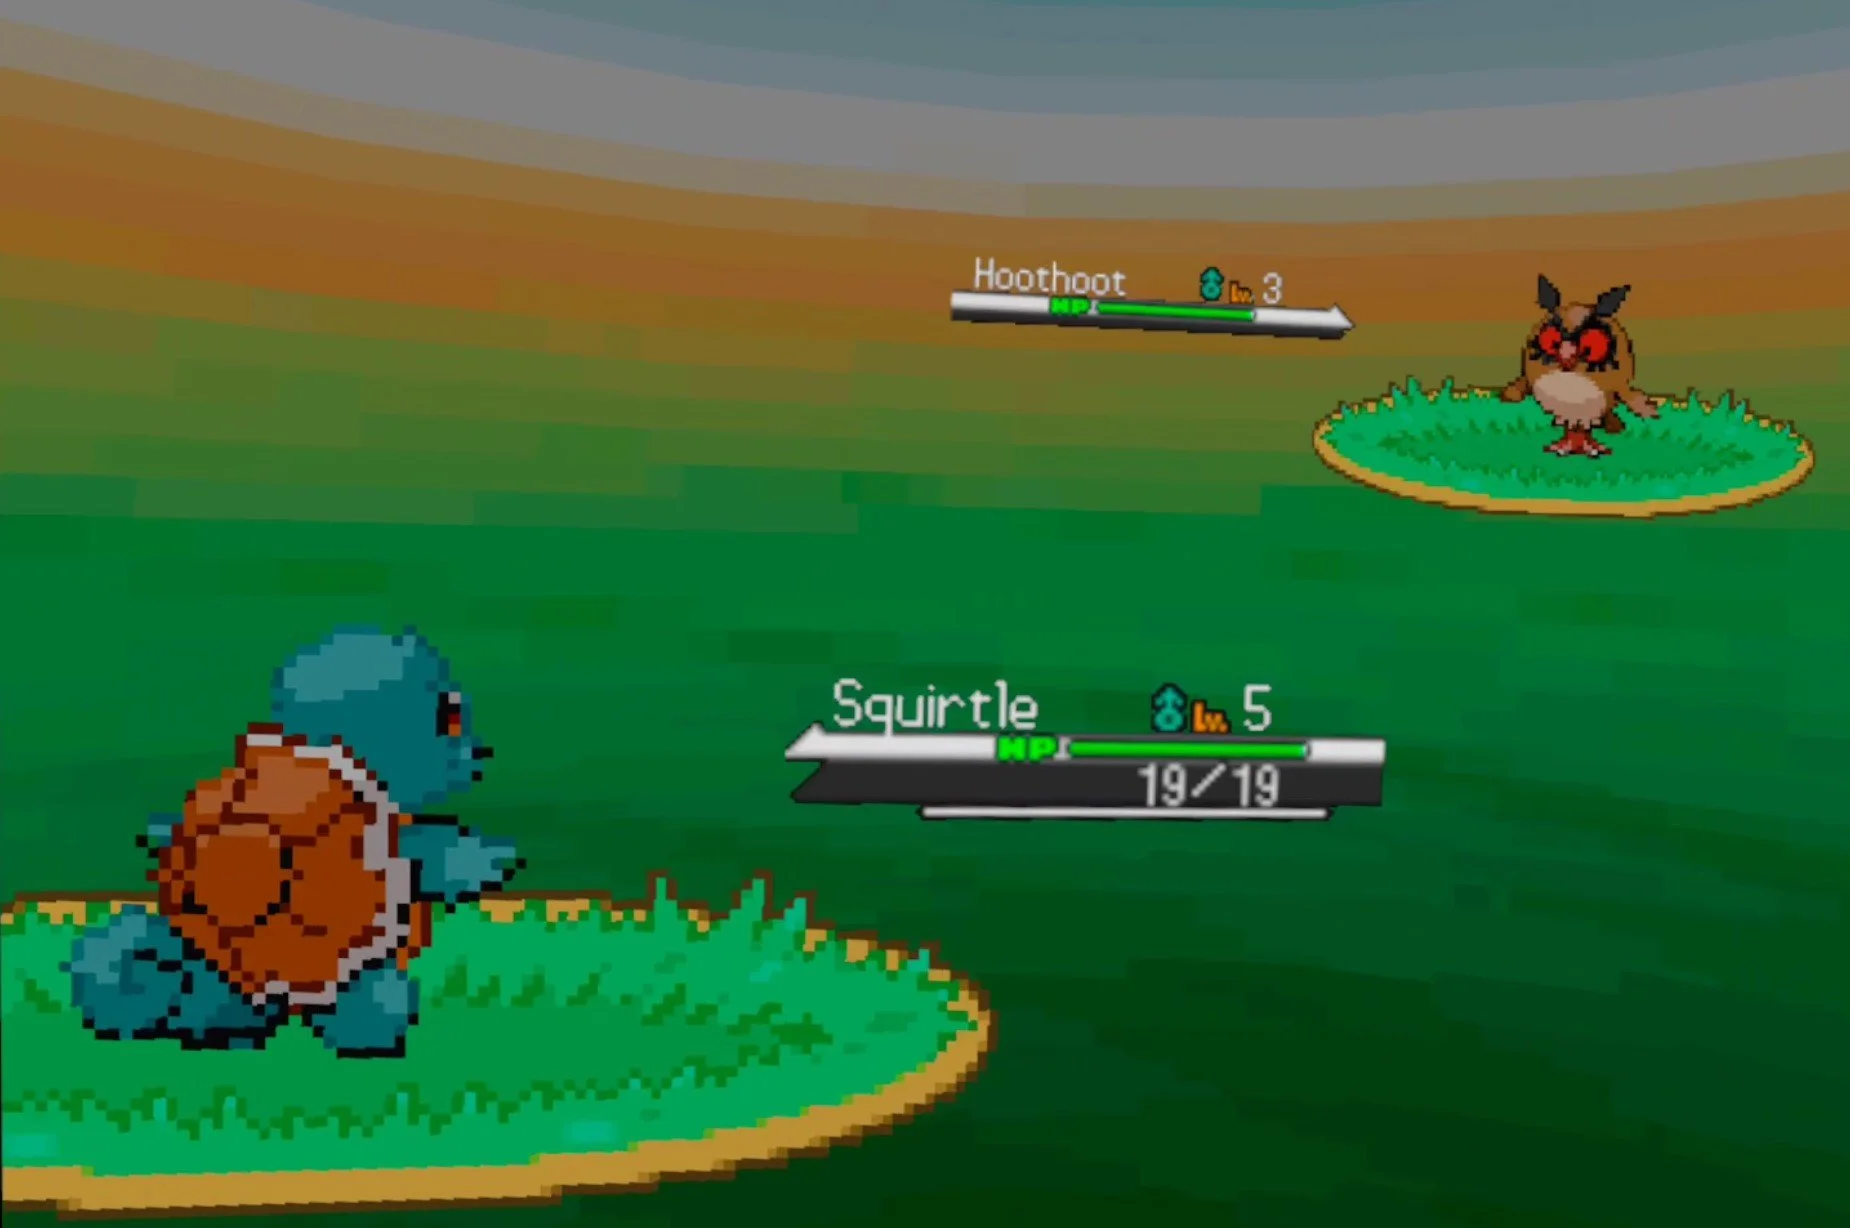
The battles look just the same as they do on a Gameboy except it’s a 2D overlay on your VR headset. You make your battling decisions with a little menu over your left hand. The attacks don’t even have animations, just little text prompts that say which Pokémon is doing what, and then the health bars change. This is what is currently most disappointing about PokeQuest VR.
Walking around the world of Pokémon VR is awesome, but the heart of Pokémon games is in the battles. If the majesty of VR isn’t brought to the Pokémon battles, then most of the game falls flat as a VR experience. The fact that PokeQuest VR is multiplayer is cool, and it does give you a Pokémon battling experience that you could have on a flat screen, but it doesn’t give a full VR Pokemon battle experience.
Still, the game is in Beta and not fully released, so hopefully the devs have plans to make the combat better. If you’re looking for a Multiplayer way to play Pokemon with your friends and explore Pokemon VR together, then maybe this can still be for you. You can still battle others, and all of the Multiplayer elements you might want are there. Seeing the world of Pokemon in VR is still great, but it’s not all there quite yet.
VR Pokemon Setup
Installing PokeQuest VR is pretty straightforward, and is the same as any other game on SideQuest. In case you’re not familiar, you can install the SideQuest app on your PC and connect your Oculus Quest 2 to it with a Link Cable. You don’t have to get an official link cable, there’s plenty of cheaper ones on amazon. When your PC is connected you can install games, a lot of which are free like PokeQuest VR on your PC with the click of a button and a short wait. For more information on using SideQuest check out the how-to on their website here.
Once you’ve installed PokeQuest VR you can find it in the “Unknown Sources” section of your Quest 2 library. A lot of sideloaded games end up there.

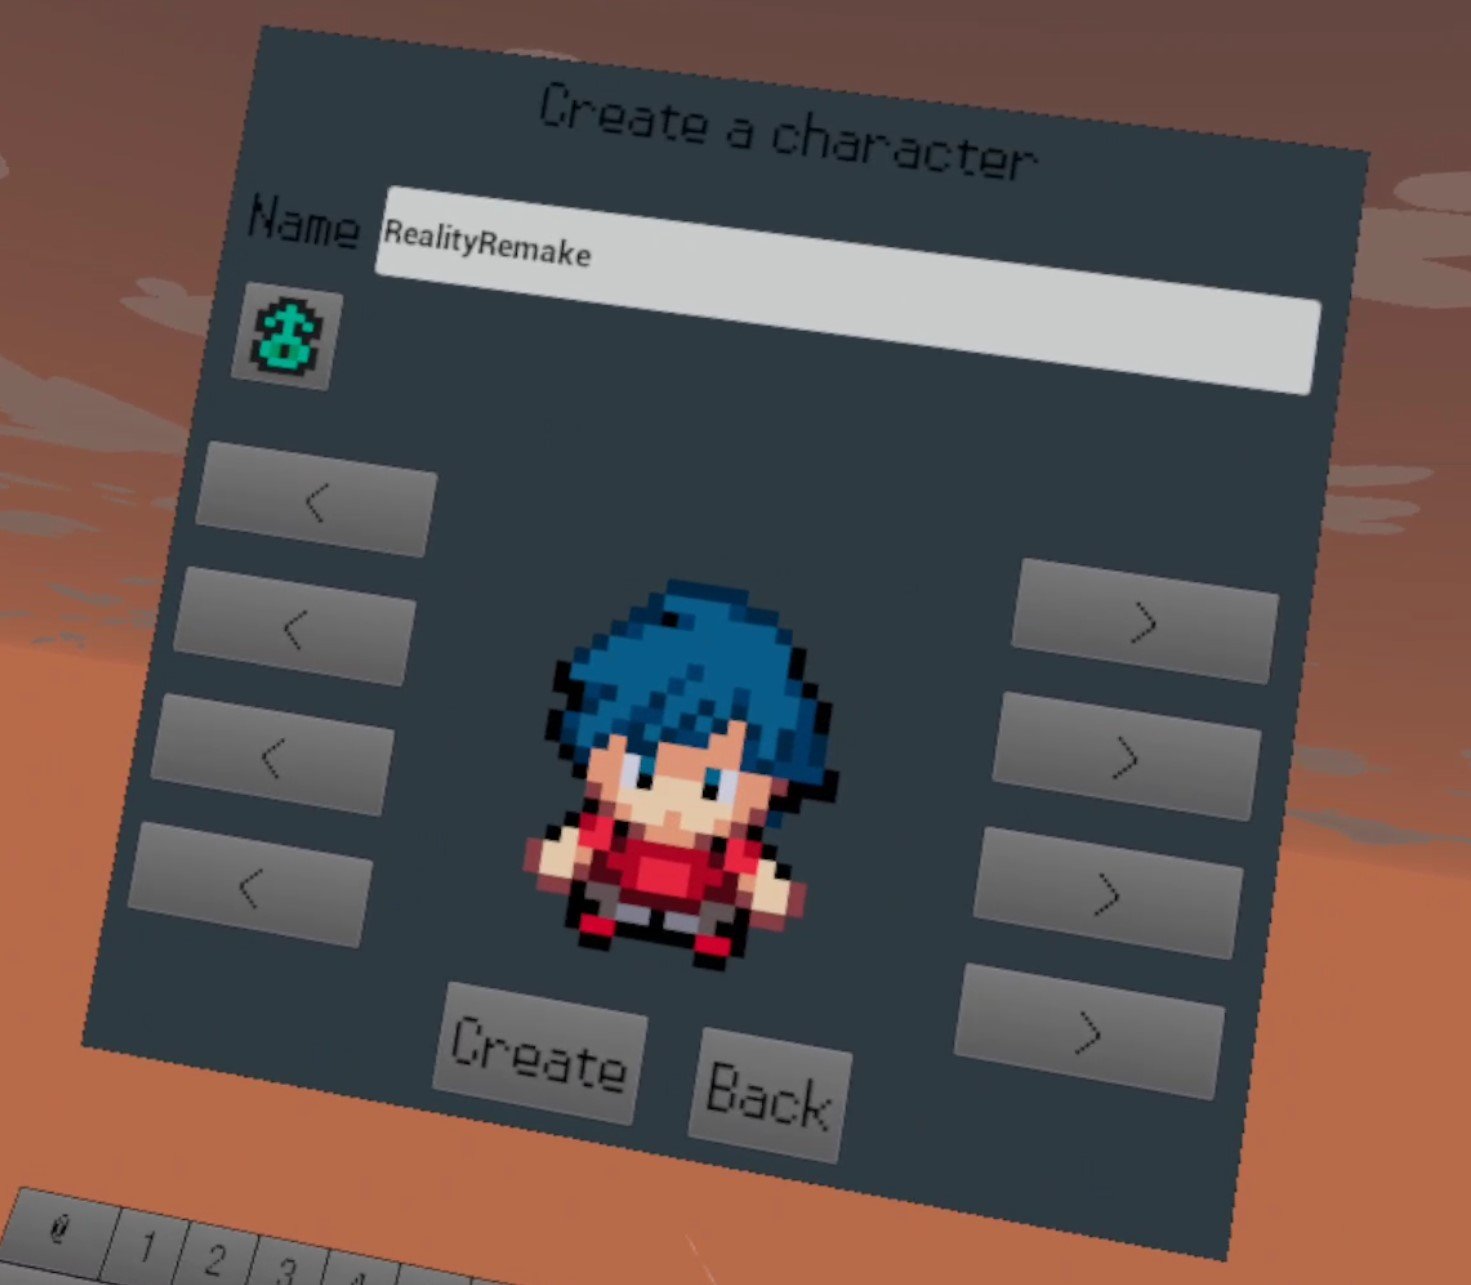
Launch it, and you’ll end up on a login screen. Register an account, it’s free, and make sure to save your password so that you can log in easily the next time. Unless you’ve got an actual bluetooth keyboard to go with your Quest 2, it takes a long type to type with just your touch controllers.

Once you log in you’ll create a character that you can customize however you like, and give them a name. Keep in mind that however this character looks is how other players will see you ingame.
Once you’ve logged in on your new character you’ll start where the original Pokemon games start, Pallet Town! Go to the Lab and talk to Professor Oak to begin your VR Pokemon adventure!
Well that’s the best VR Pokemon game out there, PokeQuest VR. It might not be everything you want in a Pokémon VR game, but it is Pokémon and it is in VR.

5 Ghosts of Tabor Tips and Tricks to Help You Survive and Extract
Want to have huge raids and big loot in Ghosts of Tabor? Well if you’re just starting out in VR’s only extraction shooter you might have a hard time getting in, getting some noteable loot, and getting out alive. It can be intimidating, and you might be concerned with losing your equipment before making any progress. Well don’t worry, we’ve got you covered with 5 Tips and Tricks that will help you get in and get out with the goods.
Want to have huge raids and big loot in Ghosts of Tabor? Well if you’re just starting out in VR’s only extraction shooter you might have a hard time getting in, getting some noteable loot, and getting out alive. It can be intimidating, and you might be concerned with losing your equipment before making any progress. Well don’t worry, we’ve got you covered with 5 Tips and Tricks that will help you get in and get out with the goods.
Always Bring a Backpack
You should always have a backpack whenever you start a raid. The first backpack that you can buy is super cheap and holds a decent amount of stuff. Since backpacks aren’t commonly found in raid you might end up with a bunch of items to extract with but no way to hold them all if you don’t bring one. A backpack is always worth the low price. If you don’t bring one you’re losing out on a lot of potential gains.

You should come in with a gun too, even if it’s just a pistol, and an extra magazine in your backpack. You might decide to try and see if you can find one in raid for the ultimate budget zero to hero sort of run. That’s up to you, though bringing a gun of some kind is a very good idea so you can at least shoot a FENIX scav and take their weapon. You don’t want to bet on finding a slain enemy with their gun lying by them before enemies find you.
You might also be thinking that you just want to go in with nothing so that you risk nothing and can learn the maps. If that’s what you want then keep reading. There’s a much more fun way to learn the maps.
Use Training Mode to Learn Maps and Warm Up
If you’re new to Ghosts of Tabor then the maps and how they are laid out with loot spawns and extraction points might be hard to figure out at first when you’re constantly worried another player is going to get you. While you have a compass that tells you what direction the extracts are in, it’s still hard to find them on some maps like Missile Silo. When you’re ready to leave you’re going to want to get to one as soon as possible.

Well you don’t have to risk your equipment to learn the maps. Each map in Ghosts of Tabor has a training mode that is the exact same as a normal raid, except there will be no other players and any equipment gained and lost is not saved. When you die or extract you’ll have the same gear on you as when you went in.
Training mode is a great way to warm up by fighting some FENIX, and to get your bearings on each map before you risk it all in a raid.
Selling Guns Is Easy Early Money
As far as what you bring out of raid with you, selling guns is the easiest way to make early money. If you get a pistol from a dead FENIX grunt, just pop it in your bag. Each will sell for a few thousand at least, much more than most of the loot items that you will find in boxes and crates (though you should still check those too). You can also complete FENIX kill quests while you’re at it for more money and reputation.

If you’re wondering what sells then guns are always a safe bet. You can carry a long arm on your chest and a pistol at your waist. You also extract with whatever is in your hands, as well as what you have stored on you. So if there’s some guns really close to an extract and you don’t think there are any enemies, you can carry two additional weapons in your hands, and they’ll appear with you in your safe house.

Be careful though, fighting FENIX members means you’ll make a lot of noise and possibly attract other players.
Keep Your Ears and Eyes Open
Especially when you’re sorting out equipment or stuffing items into your backpack, make sure to always listen for gunshots and footsteps. Your ears are your best way to know if enemies, especially other players, are close to you. While looting as quickly as possible is always good, if you hear quick footsteps or gunshots near to you it’s better to not risk being caught by surprise with your backpack in your hands. Either leave if you want to avoid a fight, or have your gun up and be ready for one.

While hearing is great, especially when in close quarters, the sound of footsteps doesn’t go extremely far. So when you’re playing on more open maps like the Island of Tabor, make sure to keep a look out, and check behind you from time to time. Try to stick to areas with foliage and objects that break lines of sight to you. An enemy could be sneaking up behind you with a rifle and shoot you before they’re close enough for you to hear them.
Turn off Full Body for Easier Looting
One of the biggest additions that VR brings to the raid shooter/extraction shooter genre that can’t be found elsewhere in games like Escape From Tarkov, is that you have to physically handle items and loot. Picking items up off of the floor can be especially tricky if you’ve got the Full Body model turned on. While the full body model looks really cool, the legs have an annoying habit of blocking your view to any items on the floor.
Unfortunately you can’t move your legs out of the way like real legs, and so it will be easier to pick up items if you turn the Full Body model off and change it to Hands Only.

There you have it, 5 Tips and Tricks for Ghosts of Tabor. Good luck in your raids and may your stash always grow larger.
Easily Get and Install Into the Radius Mods
Welcome to this step by step guide on how to download and install Into the Radius Mods! Into the Radius is an extremely fun VR game. Even after you’ve played it through a bunch of times, or haven’t even finished it and want a different experience, mods can make this VR Survival Game even better. So keep reading to find out how to install Into the Radius mods as easily as possible.
Welcome to this step by step guide on how to download and install Into the Radius Mods! Into the Radius is an extremely fun VR game. Even after you’ve played it through a bunch of times, or haven’t even finished it and want a different experience, mods can make this VR Survival Game even better. So keep reading to find out how to install Into the Radius mods as easily as possible.
Into the Radius Mods on the Oculus Quest 2
You might be here to find out how to install Into the Radius mods on the Oculus Quest 2, or if you can install mods on the Quest 2. Well I’m afraid to tell you that currently Into the Radius mods are not supported on the Meta Quest 2. Hopefully at some point in the future they will be, but for now there’s no way to install Into the Radius mods on your Quest 2. To play modded Into the Radius you’ll need to play it via PCVR via Steam or the Oculus App on your PC.
If you have a Quest 2 and want to play Into the Radius on PCVR then you could set up and use Oculus Airlink. The thing about Airlink is that it can drop a ton of frames and be very choppy and look horrible if your internet setup to your PC isn’t very good. If you want to use Oculus Airlink, then make sure your PC is connected to your Router or Modem with an ethernet cable.
If you can’t or don’t want to use Airlink then you’ll need to be able to connect your headset to your PC directly. This is possible with an Oculus Quest 2 using an Oculus Link Cable or comparable USB 3 cable. If you don’t have one there are plenty online that are not as expensive as the official Link Cable, but are possibly not as good.
How to Get Into the Radius Mods
To mod Into the Radius on PCVR let’s start with getting the mods that you’ll want to install. In this example we will be downloading the Scavenger Mod. This mod is a great new way to play the game. Make sure you start a new save file after installing this mod, and always be wary of cross compatibility issues when you have multiple mods installed.
To get the scavenger mod get on your PC and go to nexusmods.com and search by game for “Into the Radius” or follow this link to take you straight to the Into the Radius mod page.
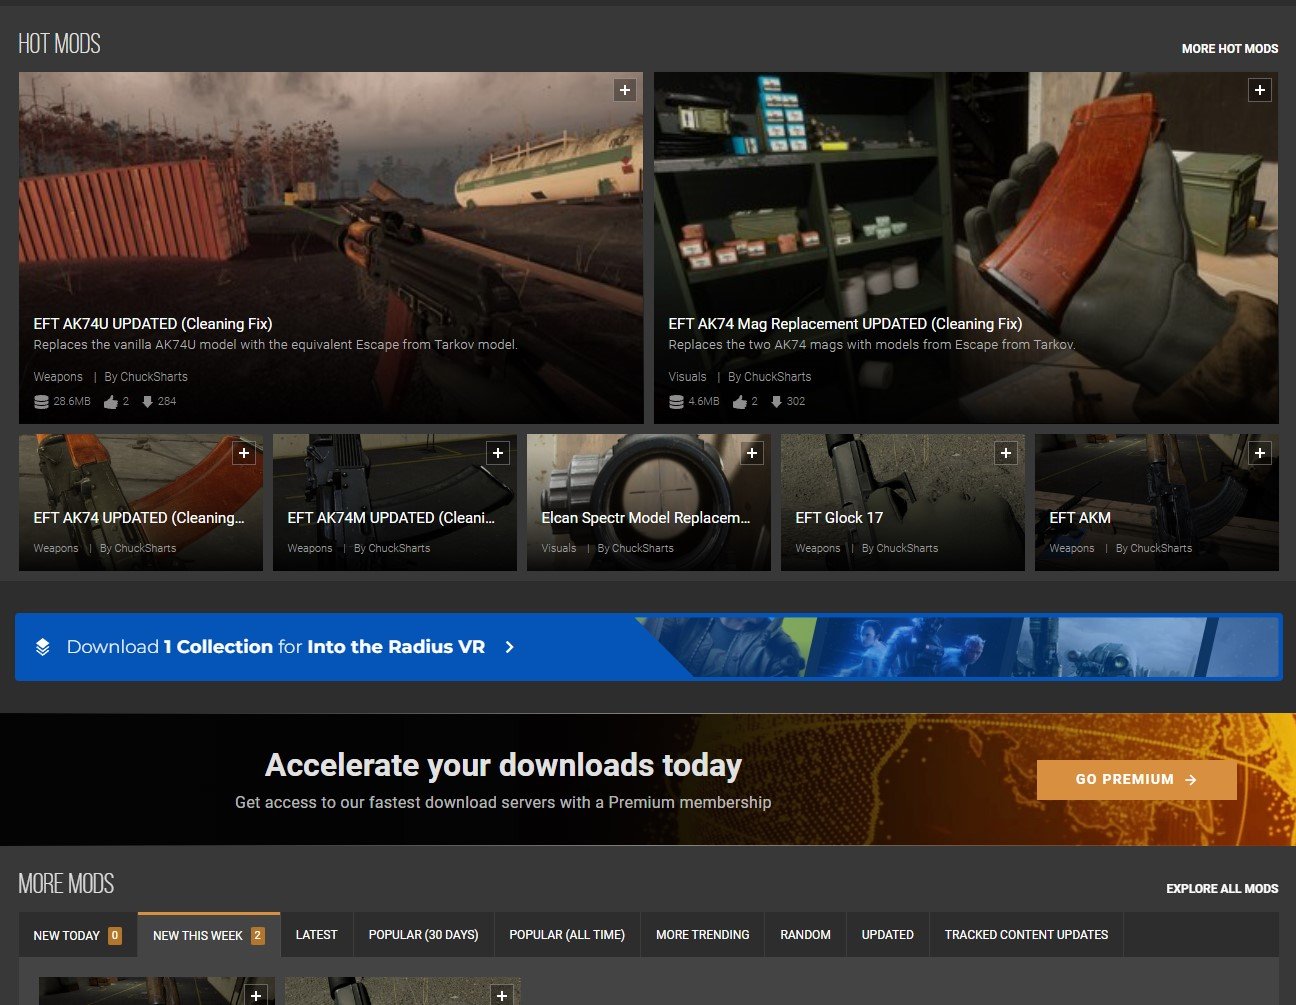
Once you’re here feel free to browse the mods listed on the front page and search through some categories. There’s a bunch of great cosmetic mods that replace objects in the game with different models. There are even other gameplay mods like the STALKER mod that you can install. To find the Scavenger mod search for “Scavenger Mod” in the search bar at the top of the screen, or go to any mod page that you want. When you’re there click on the “Files” tab.

Oh, and make sure that you’re logged into a Nexus Mods account, otherwise you won’t be able to download anything. Don’t worry, you can easily sign up for a free Nexus Mods account. Also you’ll notice that some mods, like the Scavenger Mod, can be installed using Nexus Mod’s Vortex mod manager.
Since not all mods are supported by Vortex, here we’ll be going over how to install these mods manually. Don’t worry, it’s not very hard and takes about just as long as using Vortex anyway.
Now click the “Manual Download” button underneath the latest mod file and you’ll be taken to a downloads page. Select the “Slow Download” button if you’re using a free Nexus Mods account and the file will download to your Downloads folder (or whatever folder you’ve designated files to download to, but Downloads is the default).

Congratulations on your shiny new mod! Time to install it.
How To Install Into the Radius Mods
Head to your PC’s Downloads folder. You can find it in the “Quick Access” panel of the file explorer, or go to C:\Users\<Your PC Username>\Downloads. If the downloaded mod file is a .zip file right click on it and select “Extract All” to get the unzipped contents.
Whichever mod you’ve downloaded should come with one or multiple .pak files. Those .pak files contain the actual mod information and all you need to do is move them to the right folder to install the mod. The Scavenger mod comes with a lot of .pak files in the ScavengerMod/Scavenger/ folder. For this example we’ll be installing the .pak file in the “Abundant” folder for as much loot as possible, and also disabling the shop with the .pak in “Optionnal_files”.
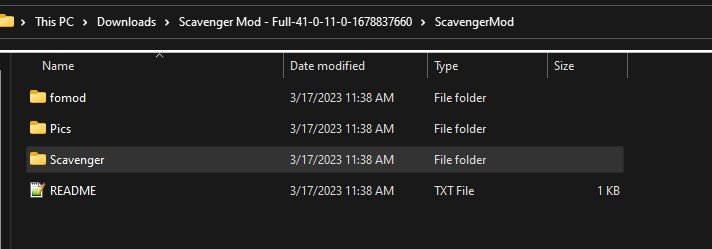
Now that we know what .pak files we want to move, let’s open another File Explorer window to where we want to move them. If you run Into the Radius VR through Steam, then go to where you installed Steam and then \steamapps\common\IntoTheRadius\IntoTheRadius\Content\Paks. The default Steam installation path is: C:\Program FIles\Steam\steamapps\common\IntoTheRadius\IntoTheRadius\Content\Paks.
Oculus App users can find the Into the Radius folder in C:\Program Files\Oculus\Software\Software by default. Then go to \IntoTheRadius\Content\Paks.
This “Paks” folder is where you need to move all of the installed .pak files. Just drag the .paks for the mods you want to install into the “Paks” folder and that’s it! You’ve installed Into the Radius mods. When you start the game next they’ll be installed and ready to go.

Well that’s how you install mods in Into the Radius VR. Make sure to be careful that the mods you install don’t overlap and conflict. Be sure to read the README if one comes with a mod you want to install, or at least read the mod’s page to check if the mod developer shows any conflicts. Most should be obvious, for instance don’t install two mods that reskin the same weapon. It’s also best to start a new game after installing mods, as the mods might mess with a differently modded or vanilla game. Especially overhaul mods like the Scavenger or STALKER mods.,
Oh, and make sure to leave pakchunk0-WindowsNoEditor.pak in the “Paks” folder. This .pak is needed to run Into the Radius properly and is part of a vanilla installation of the game. Moving or deleting it will probably break your game.
Have fun out there in a whole new Zone!

VR Tarkov Is Great - Ghosts of Tabor Review - Tarkov VR
There’s a number of people who are both Escape From Tarkov fans and VR shooter enthusiasts who have always wanted a VR Tarkov. Well you won’t have to wait any more, Tarkov VR is here in Ghosts of Tabor. This game is fantastic, and takes everything that is great about Escape From Tarkov and puts it in VR. Ghosts of Tabor will be available on the Oculus Quest/Meta Quest headsets as well as on PCVR through Steam. There’s also planned releases for the Pico 4 and PSVR2. Here’s a complete review as to why this VR Tarkov game is great and everything we could have asked for.
There’s a number of people who are both Escape From Tarkov fans and VR shooter enthusiasts who have always wanted a VR Tarkov. Well you won’t have to wait any more, Tarkov VR is here in Ghosts of Tabor.
This game is fantastic, and takes everything that is great about Escape From Tarkov and puts it in VR. Ghosts of Tabor is available on the Oculus Quest/Meta Quest headsets as well as on PCVR through Steam.
There’s also planned releases for the Pico 4 and PSVR2. Here’s a complete review as to why this VR Tarkov game is great and everything we could have asked for.
Note that Ghosts of Tabor is currently in Open Beta, and so not all planned features are implemented and there are the sorts of bugs you might expect from a game still in development. When changes are made this article will be updated.
The Premise
This VR Extraction Shooter takes a lot of cues from Escape From Tarkov in its premise.
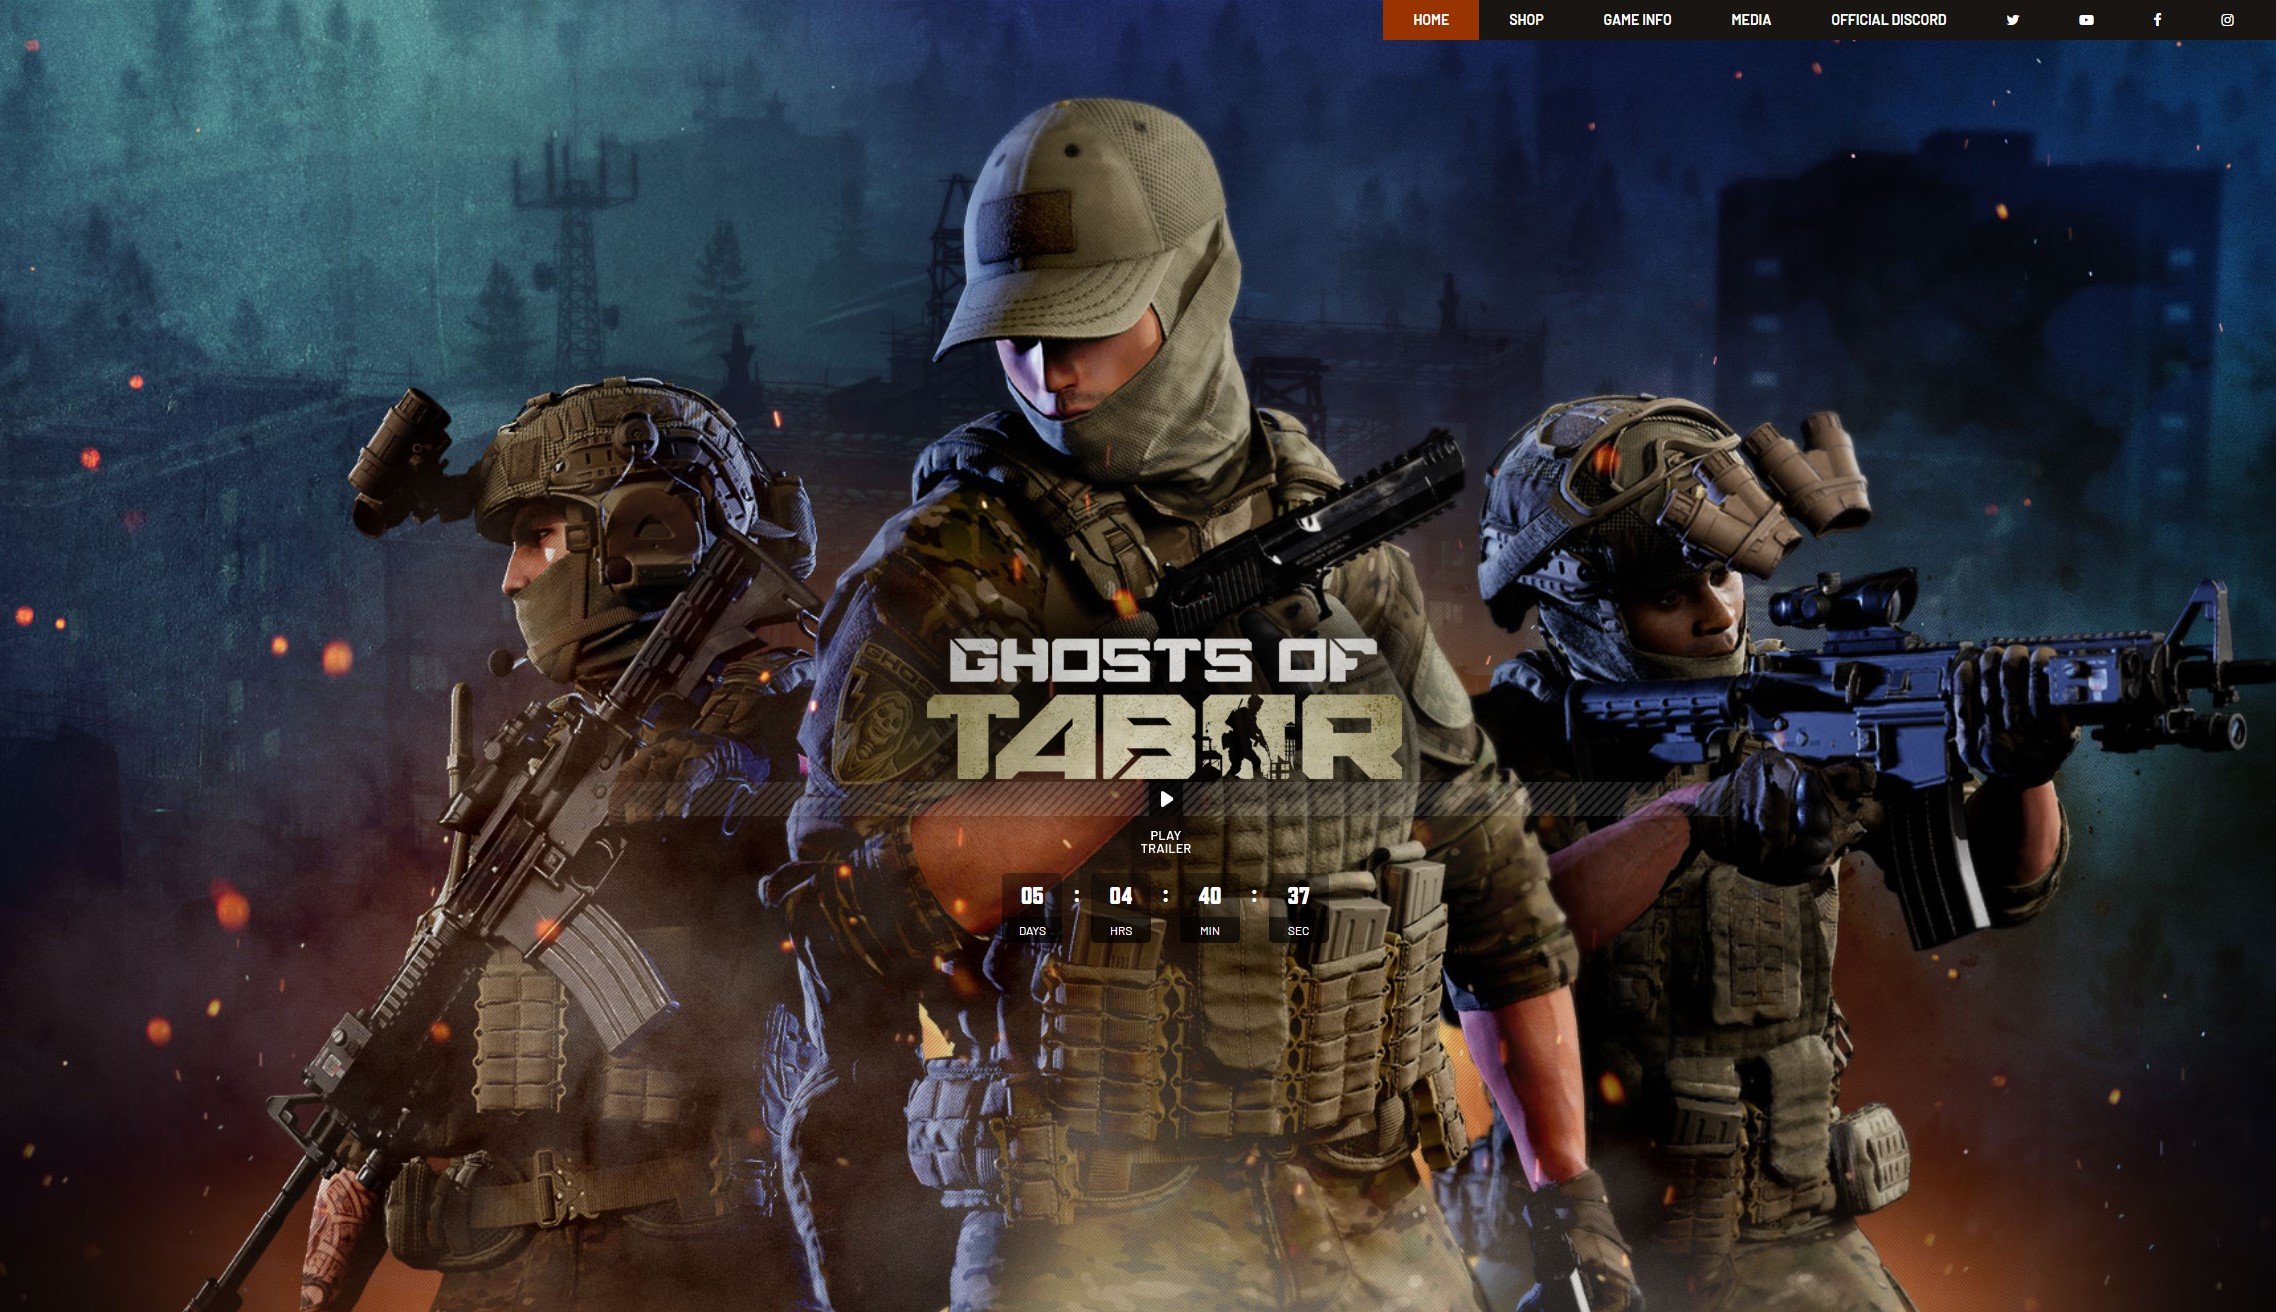
Even their website looks really similar with a bunch of elite looking guys in full combat gear on the front page.
Basically extreme Russian Nationalists (you might call them Ultra-Nationalists) have declared war on the world and nuked a NATO stronghold. You are a special forces member in the area, known as a “Ghost”.
You are completely surrounded. You’ll have to fight the Nationalist Russians (called the Volk) as well as the FENIX rebels, and even fellow Ghosts as you struggle to survive.
Core VR Tarkov Gameplay
Alright so let’s address the question that’s probably the most on your mind. How is Ghosts of Tabor a Tarkov VR game? How similar is it? Does Escape From Tarkov’s gameplay work well in Virtual Reality?
The answer to that last question is yes, it is extremely fun. As for the first ones, the easiest way to answer those is to explain exactly how Ghosts of Tabor plays.
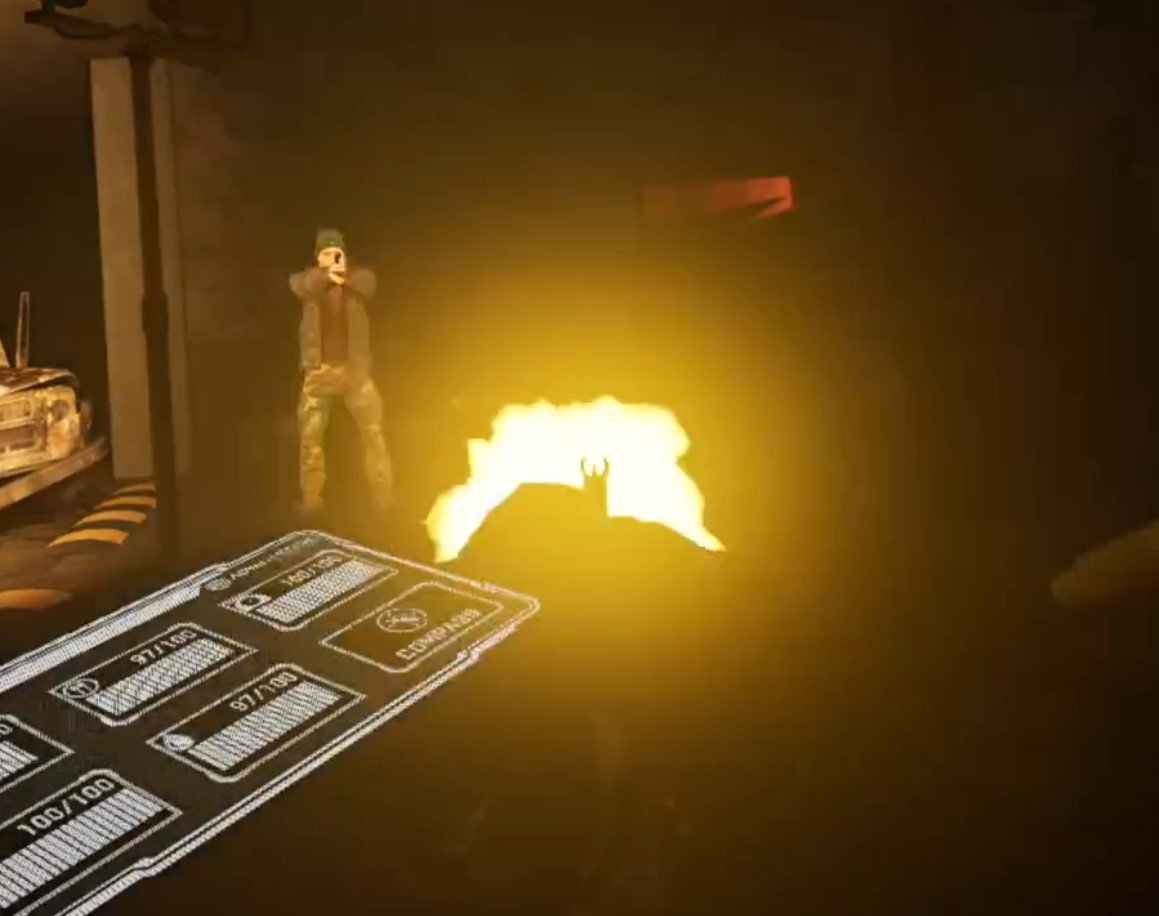
You start the game in your bunker hideout. There’s an Armory where you keep your weapons, and even a storeroom for any loose items and valuables you’re holding on to.
The bunker is huge too, with a lot of areas meant for crafting, performing surgery on yourself, and so on. So anyway you grab your gear (more on that later) and go to the terminal to deploy to a raid.

The loading times are extremely quick, and you’ll be in a raid in thirty seconds at the most. After joining and loading you’ll be standing, equipped in your chosen gear, somewhere in the raid map.
So you start walking around, looking in containers and boxes for anything of value that you can shove in your backpack. You’ll probably hear gunshots pretty soon.
That’s because all around the raid map are these guys, the FENIX.

They’re dressed in basically civilian clothes and are pretty lightly armed with pistols, submachine guns, or rifles. You can even sneak up on the FENIX members if you approach quietly enough and they aren’t looking at you.
Every one you kill will drop their weapon and some magazines for it. So if you want to get another weapon and some ammo, FENIX members are an easy way to get them.
They’re basically Scavs from Escape From Tarkov, and are hostile to everyone that isn’t them.

Of course as you’re scavenging loot from the map and fighting FENIX, you’ll come to realize that they aren’t the main threat.
Other Ghosts, other players, are. You can tell other players from how their body moves, and that they’re wearing military fatigues.

Every player’s mic is always on and other players can hear you talk, so you can freely chat and try to negotiate your way out of a gunfight if you care to try.
Though if you start talking they’ll be able to hear exactly where you are. They might try to shoot you to get your stuff, or just because they think you’ll shoot them. All of the social dynamics in Escape From Tarkov are here in Ghosts of Tabor, except with the added benefit of the greater emotion, body language, and interactivity VR.
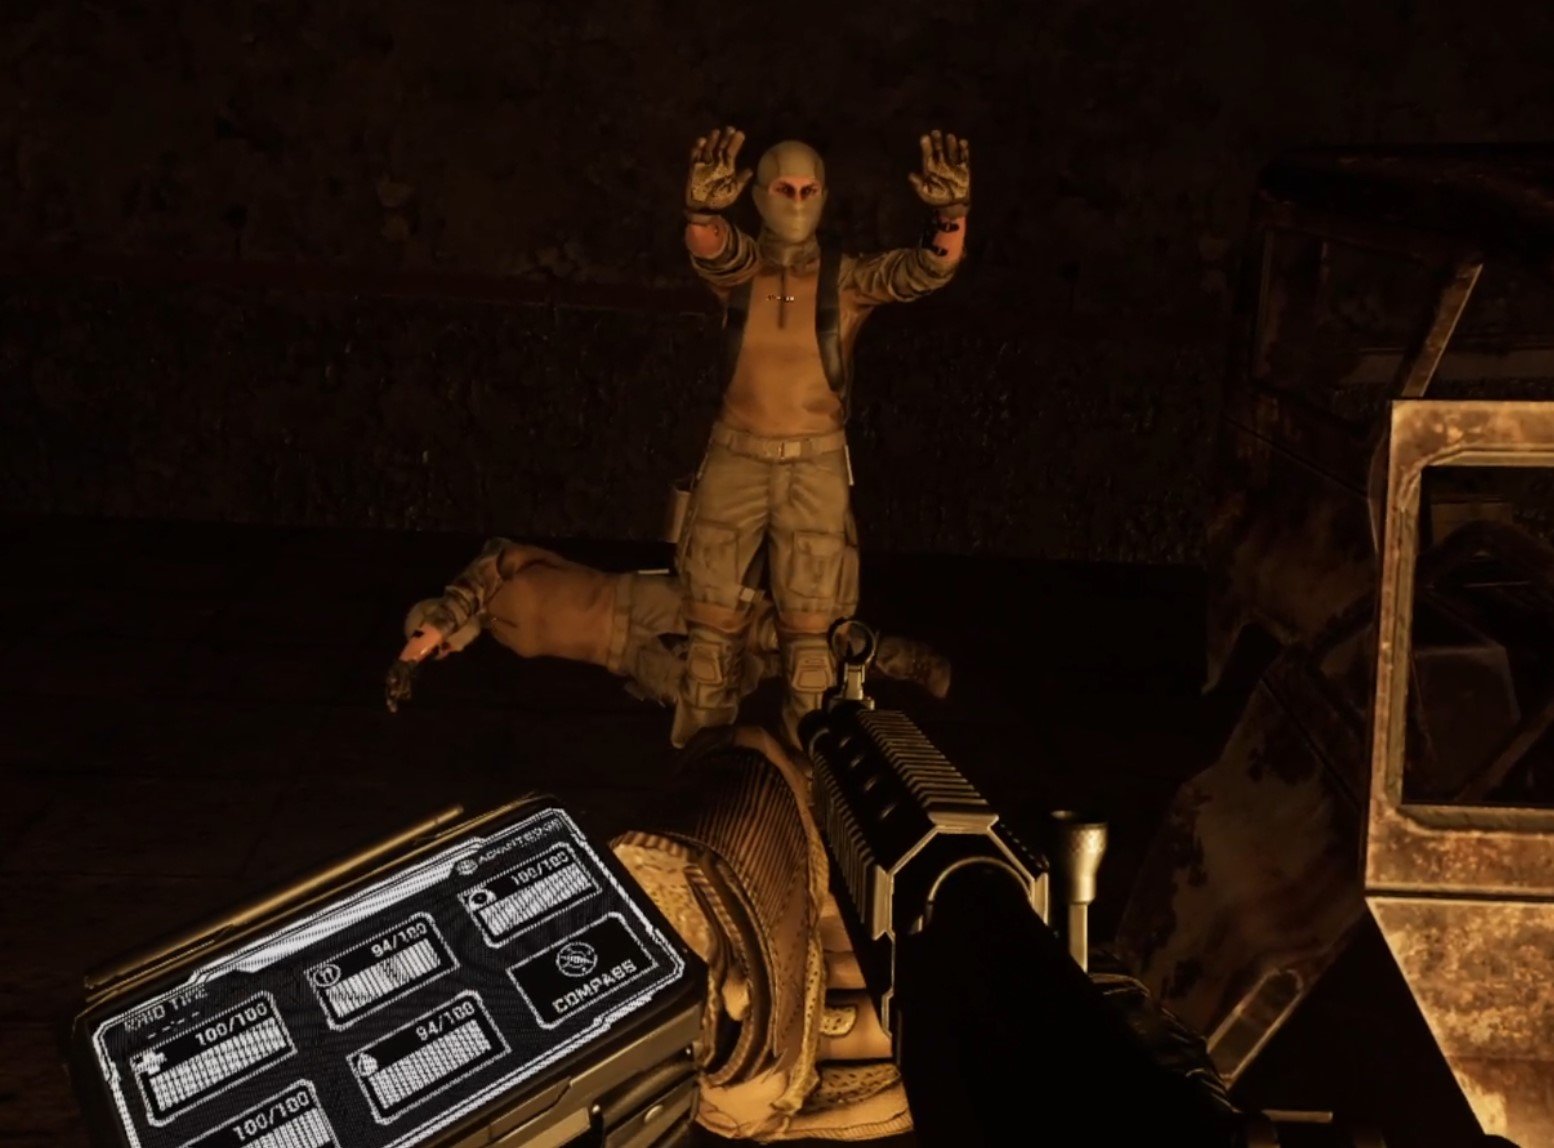
You can even throw down your gun and raise your hands to try to surrender. That’s one of the things that makes Tarkov VR truly amazing.
Each raid is on a generous timer of 30 minutes to an hour.
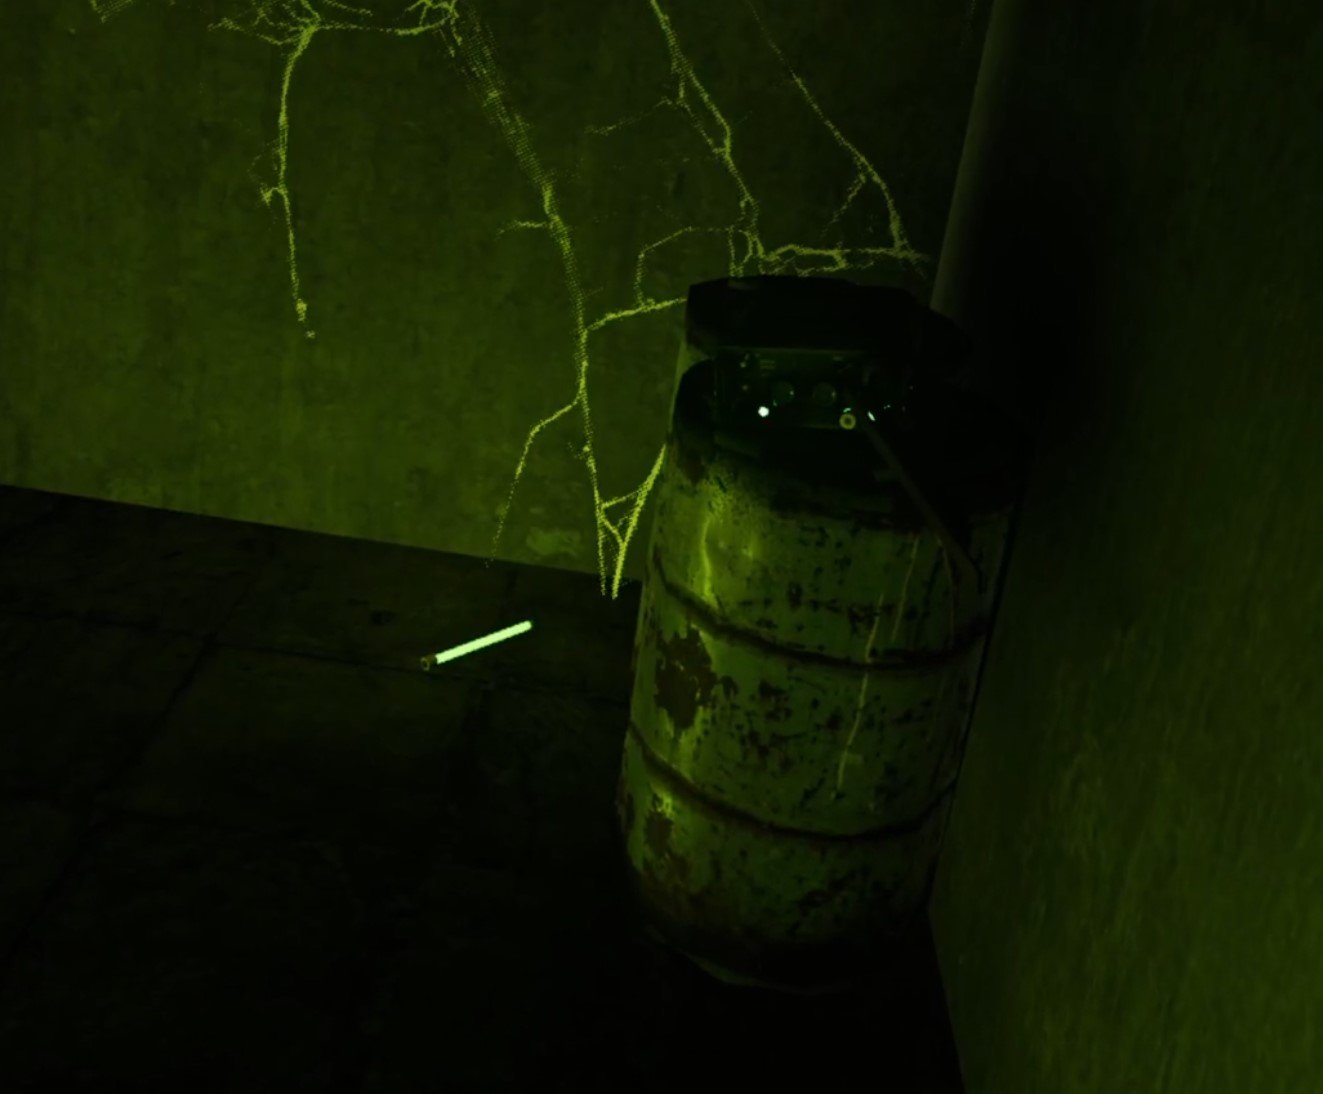
You have to find an extraction radio and leave at some point during that time. Dying is another way to leave a raid, but you probably don’t want to do much of that. Green glowsticks near a radio lit up green show you when you are at an extract that you can use.
Even better, you can now see what direction extracts are in using your compass at the top of your view. So there’s no need to take your headset off and furiously google where the extracts are like you would when you’re new to Tarkov.
You can see that the gameplay is basically VR Tarkov.
The classic extraction shooter formula now in Virtual Reality. With all the same surprising situations and dynamics that constantly keeps the game fresh and fun. While at the same time Ghosts of Tabor always gives you something to care about each raid, and something to lose.
All of this with the immersion and physical presence of Virtual Reality.
With that in mind, let’s talk about some of the key features of an extraction shooter game and how they turn up in Tarkov VR. Like, how do you gear up?
Gear and Progression in Tarkov VR
Ghosts of Tabor brings all of the gearing options and potential of Tarkov to VR, and even enhances it. You don’t just put chest rigs and helmets into a slot on a menu.
No, in VR Tarkov you put it in your actual body by grabbing it and draping it over yourself.

You don’t just control click items to put them into your backpack.
No, in Ghosts of Tabor you pull your backpack off of your back and manually put stuff in there. Oh, and those things in there collide. So you’re no longer concerned with how many slots a backpack has, but how physically big it is.
Get creative enough and you can fit a lot of things into a small space, it’s a skill of its own though.

You can fully customize your chest rig by putting pouches on it so that you can grab magazines and grenades wherever they are.
You have to physically grab them in VR, so personal preference is huge.

You get a holster for a pistol and a holster for a long gun like a rifle or SMG. If you want to hold a knife you’ll need to get a pouch on your chestrig for that.
Guns are heavily moddable just like in Escape From Tarkov too, and you’ll find and buy all sorts of attachments for them that you then physically slot on to the gun.
The entire gearing experience is way more personal and in depth since you’re doing it to your actual body instead of just clicking and dragging things on a screen.
You can even craft bullets with the right materials and your very own workbench (more crafting will come).
There’s insurance too, just like in Escape From Tarkov. You pay a portion of the item’s worth up front, and if you die but nobody takes your insured item out of the raid you get to keep it!

Since loot is all physical objects, any that you want to store you’ll need to put on special loot shelves that will save the item for later, just leaving stuff lying around your bunker will make it disappear.
You can also sell anything from assault rifles to spark plugs by putting them on the conveyor in the Trade Room and selecting which trader you want to sell it to.

Just like in Tarkov the progression isn’t only based off of what items you manage to hoard here in VR. The Traders give missions that give you reputation points when completed, as well as cash.
Selling a trader enough stuff and getting enough reputation with them means that you level them up and can buy even better equipment from them.
There’s a bazar that you go to through a menu option where you can browse each of the trader’s kiosks and buy items at your leasure by scanning them with a scan gun and checking out.
When you go back to your bunker you hit the “Receive” button on the screen in the Trader Room and your items spawn in on a rack.
While a little more time consuming than trading and gearing up in Escape From Tarkov, the very personal nature of doing all of these interactions with your actual hands makes it very satisfying to physically hold what you’ve acquired.
Not to mention looking at it. Guns and equipment all look very true to life and detailed, and even work just like their real life counterparts.
If you’ve ever played Into the Radius, then the looting, stashing, and gearing experience is very similar.

What Ghosts of Tabor VR Lacks
There are still a few things in Ghosts of Tabor that keep it from being the absolutely complete VR Tarkov experience is just a few things, and those are currently being worked on by the developers.
For instance, there are currently no Scav runs, which are raids that you can participate in as one of the mostly NPC FENIX members with a random assortment of equipment. You stand to gain by extracting with gear, and stand to lose nothing in a Scav raid.
Though there is a “rations” system which gives you some gear every 6 hours, day, and week so that you’ll always have a little something to go into raid with if you wait long enough.
Hopefully nobody ends up dead broke in Ghosts of Tabor due to the absence of the Scav mechanic.
Also there’s no base building or stash expansion to sink junk items and money into to improve your character, and no skills to level to get better over time. The only way your character improves is through personal skill and better equipment.
Lastly there are no in depth healing mechanics, only syringes heal your health pool at the moment. These are all things that are being worked on, and this article will be updated when they are added.
Potential Problems with Ghosts of Tabor
A lot of existing issues with Ghosts of Tabor at the time of writing will be resolved in time. There are bugs, like things disappearing through the ground, the magazine loader not working, mags not coming out of mag pouches, and so many more that will be fixed.
The mission system is also rudimentary, but the developers of Ghosts of Tabor do promise a series of missions to discover the secrets of Tabor and ultimately escape.

There will also be new features like more in depth healing mechanics and so much more.
The biggest existing problem is the sound. Sound is extremely important in an extraction shooter, and even while using headphones it can be really hard to hear which direction footsteps and actions are coming from.
Someone will open a backpack two rooms away and it will sound like it’s right next to you sometimes. For anyone well versed in extraction shooters like Escape From Tarkov, sound is an extremely vital part of the game that is currently not well implemented.
Still, it’s early in this game’s life and there are a ton of ways to improve.
It will likely only get better. For now if you jump into Ghosts of Tabor expect some bugs and some jank. That’s really the only downside,
Conclusions on VR Tarkov
Bringing the revolutionary extraction shooter gameplay of Escape From Tarkov to Virtual Reality is what Ghosts of Tabor does and it does it well.
It does this not only with the features and gameplay loop of Tarkov, but by also adding all of the things that makes VR Shooters great.
If you like VR and you like Tarkov then Ghosts of Tabor is a no brainer to get at 25$ for the base package, and it’s coming to every VR platform and HMD out there.