

The Walking Dead Saints and Sinners Walkthrough and Guide - Part 6 - Bywater and the Second Pump Regulator
Stuck in The Walking Dead Saints and Sinners? Wondering where to go next? Maybe you just like to see what is in store for you before you get there, or want to look back and see if you missed anything in The Walking Dead: Saints & Sinners. Well don’t worry we’ve got you covered with this complete walkthrough. This is the sixth part, where you acquire the second pump regulator from Bywater and install it back by the church.
Stuck in The Walking Dead Saints and Sinners? Wondering where to go next? Maybe you just like to see what is in store for you before you get there, or want to look back and see if you missed anything in The Walking Dead: Saints & Sinners. Well don’t worry we’ve got you covered with this complete walkthrough. This is the sixth part, where you acquire the second pump regulator from Bywater and install it back by the church.
This article will detail how to progress through the main story missions as quickly as possible, with a couple of guiding tips thrown in here and there to make your adventure smoother. Only those recipes that are convenient to get when doing a task for the first time are included. For a full list of all recipes in The Walking Dead: Saints & Sinners, check out our recipe guide article. Spoilers will be as light as possible, but there will be story spoilers by necessity in this walkthrough, but there won’t be any explanation of what is going on in the story beyond what is necessary to make the walkthrough make sense.
All Walkthrough Parts:
The Walking Dead Saints and Sinners Walkthrough and Guide - Part 1 - The Graveyard
The Walking Dead Saints and Sinners Walkthrough and Guide - Part 2 - The Shallows
The Walking Dead Saints and Sinners Walkthrough and Guide - Part 3 - Via Corolla
The Walking Dead Saints and Sinners Walkthrough and Guide - Part 6 - Bywater and the Second Pump Regulator
The Walking Dead Saints and Sinners Walkthrough and Guide - Part 7 - Old Town and Another Stash
The Walking Dead Saints and Sinners Walkthrough and Guide - Part 8 - Rampart
The Walking Dead Saints and Sinners Walkthrough and Guide - Part 9 - The Shallows Again
The Walking Dead Saints and Sinners Walkthrough and Guide - Part 10 - Bastion and The Reserve Key
The Walking Dead Saints and Sinners Walkthrough and Guide - Part 11 - The Reserve and the Ending
Bywater
When you wake up change the radio channel to 61 (but do be sure to listen to channel 47 every morning too) and have a chat with Casey. He will tell you that the next pump regulator is in Bywater.

Against the trend you might see forming with the missions here, you actually won’t need to get into a big gunfight with The Tower in Bywater. You could if you wanted to, of course, but you can easily get the Pump Regulator without antagonizing anyone, at least not physically, emotionally maybe.
So you won’t need a big shotgun or anything this time around. You will be fighting walkers though, possibly a big group of them, so an explosive like the Nail Bomb might be a good idea, but that’s up to you. The combat can be very minimal if you’re willing to do a bit of errand running.

As always, take a look at your map when you arrive at Bywater. Your overall goal is the building colored blue with the fish on it. That’s the cannery, and the part is on the second floor. You could just go straight there and enter through the half open loading dock around the back, but there’s a problem with that.

There’s some walkers there. If you brought that nail bomb you could just throw it at the base of the door and take out most of them, then waltz in, climb over the machinery on your left, find your way to the staircase, and climb up to get the pump regulator sitting on the folding table with the tarp over it on the catwalk above. Once you have the regulator you can leave and skip ahead to installing it. Of course that would mean missing the entire story of this area, and it’s a fun and heartwarming bit of drama.
So if it’s your first time you’re better off going to the front of the big orange building on your map. That’s the car repair shop. Out front there’ll be a bald guy in a red Reclaimed jacket calling you over. Talk to him.

He’ll tell you to meet him around the back of the building, so go around the big orange building and meet up with him around back. He’ll be on the street that runs along the top of the Autorepair shop. On your map he will be directly North of the building. You can always restart the level and follow him if you’re having trouble finding him. On your way there you should take a little time to go through the Autorepair shop and loot it. There’s some Reclaimed inside, but they won’t stop you.

Talk to the Bald Guy again and he’ll tell you to deliver a letter (in exchange for help getting the pump parts) to his lover Justin, who happens to be part of the Tower garrison in the nearby Sawmill. The Sawmill is the building marked orange with a drawing of planks on it on your map. Head over there with the letter.
Oh, and be sure to loot the Sawmill while you’re there. The Tower soldiers won’t bother you. There is a spot that is consistently great throughout The Walking Dead: Saints and Sinners and the Chapter 2: Retribution sequel here. In the back of the warehouse, behind some pallets of wood, is a gross looking bed with some pillows on it. You’ll always find at least one box of loot there, so check it every time you visit Bywater.

The guy you’re looking for is in the elevated trailer with the Lumber sign on the side, beside the main warehouse of the sawmill. There’s a woman standing next to a shipping container in front of it as well.
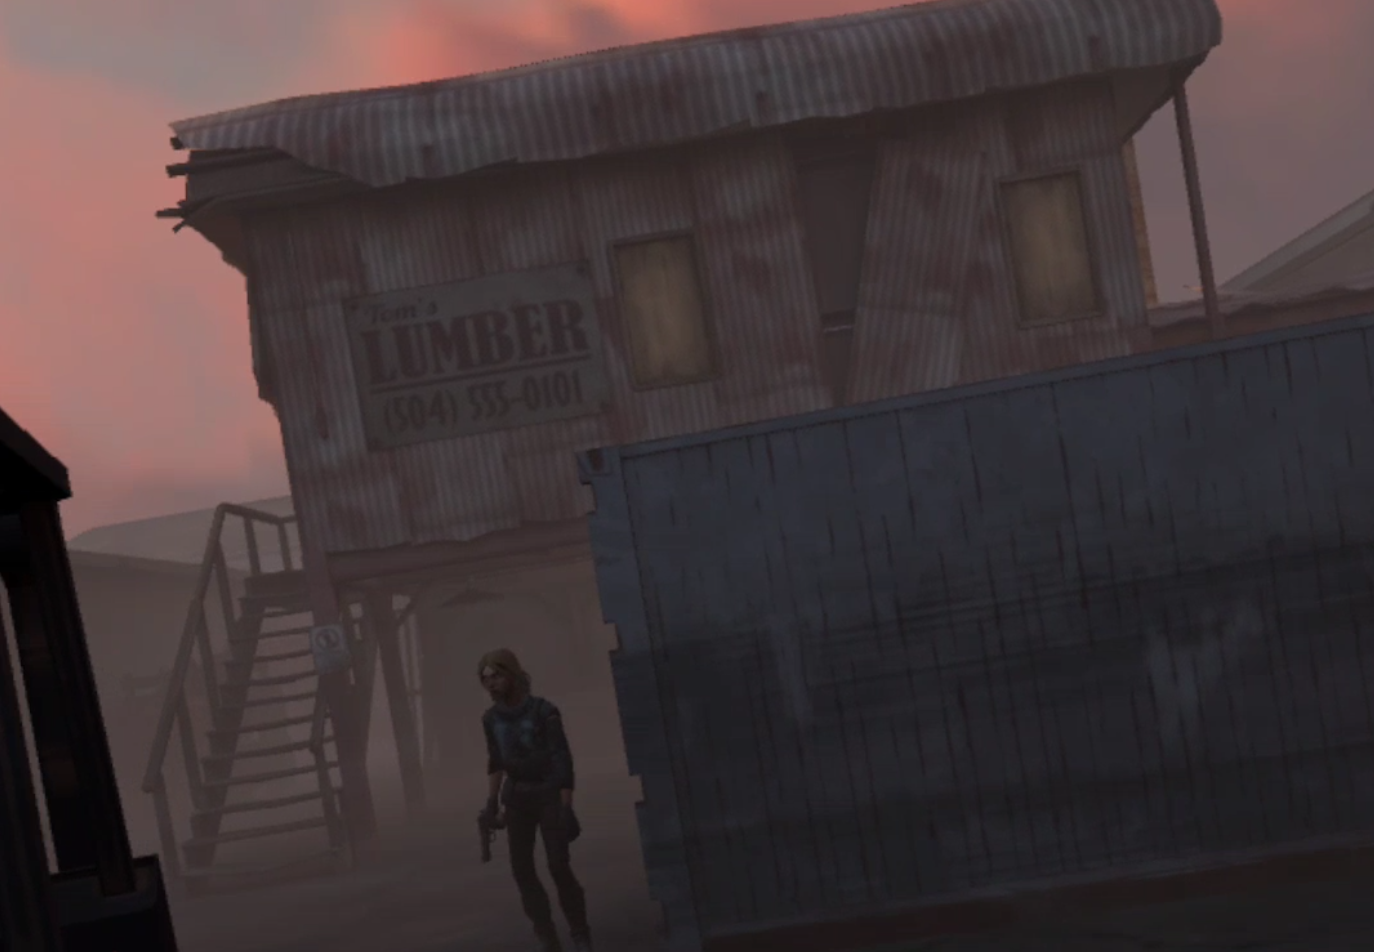
You can extort an item out of Justin by demanding that he hand something over in return for the delivery. Either way when you give him the letter he will be overjoyed. He will give you a letter to deliver back to Davon. Here is where your options expand a little. When you leave the woman outside will stop you and ask you to deliver a fake letter saying that Justin is unwilling to leave the Tower and risk his life. So now you can either deliver the real letter so the two can reunite, or deliver the fake letter so they stay where they are. There’s also a third option. Going to the Reclaimed leader inside the Autorepair Shop.

You can tell the local Reclaimed leader that your bald friend is making contact with the enemy. Just be sure to not demand payment for the information or he will tell you to go away. In response the leader will run over to Davon and immediately shoot him. It’s an interesting option, but it is easier to just give Davon a letter and let him hand the key over to you. Either way, if you talk to Justin and get his reply then killing Davon will cause the Poseidon Cannery Key to drop from his corpse. If you kill Davon before getting Justin’s reply, then he won’t drop the key and you can’t get it.

Giving either letter to Davon will net you one Poseidon Cannery Key, which you can use to go through the door leading directly to the warehouse, bypassing the big group of zombies in front of the loading bay door. Let the lovers unite, or force them apart, the choice is yours. Either way make your way to the cannery and use the key on the double door leading inside.

Make your way through the stacks of boxes, and be sure to keep a lookout for cans of Poseidon Tuna, which contain a good amount of protein that you can use for making food items like the Jambalaya (which you’ll get soon). Find your way to the staircase leading upstairs and take it up. Take a sharp right turn at the top of the stairs to find the Pump Parts and a bunch of other items arrayed on a table.

With the parts in hand, head back to the Resting Place.
Installing the Second Pump
Back at the Resting Place, make sure to scrap your loot and then hop back on the radio to talk with Casey. He’ll run you through how to set up the second pump regulator just like last time. Once all the numbers are green and the button is too, say goodbye to Casey, make sure to grab a big gun like a shotgun or rifle, and head back to the church.

Once you’re there you can see the location of the second pump on your map, it is the pump icon that is closer to the top. Otherwise you can find it by going straight down the central road and take a left as soon as the road gives way to the churchyard. You will see the blinking red light of the pump around the corner, but you will also hear voices.
Crouch and sneak closer around the corner. Three armed people will be crowded around the pump regulator, talking to each other. If they see you they will fire, so take the first shot. Also you can use a nail bomb or sticky bomb to take out several at once.

Once they’re dealt with, pop the pump regulator into the appropriate slot. Once the light is green you’re good to head back to the bus and sleep before taking on another day.

Need a guide on what comes next? Then head over to Part 7.
How To Record Massively Improved Oculus Quest 2 Gameplay Videos With High Quality
Tried recording video gameplay on your Quest 2 and found that the default resolution and recording quality aren’t very good? Well you’ve come to the right place, because here you’ll find two ways to Record High Quality Videos with your Oculus Quest 2. Whether you want 1080p resolution recordings or better, you’ll find what you need here with these two methods for improving gameplay recording quality on your Oculus Quest 2 or Oculus Quest Pro.
Tried recording video gameplay on your Quest 2 and found that the default resolution and recording quality aren’t very good? Well you’ve come to the right place, because here you’ll find two ways to Record High Quality Videos with your Oculus Quest 2. Whether you want 1080p resolution recordings or better, you’ll find what you need here with these two methods for improving gameplay recording quality on your Oculus Quest 2 or Oculus Quest Pro.
There are also some older methods that you might find helpful here.
Method 1: Quest Recording Settings
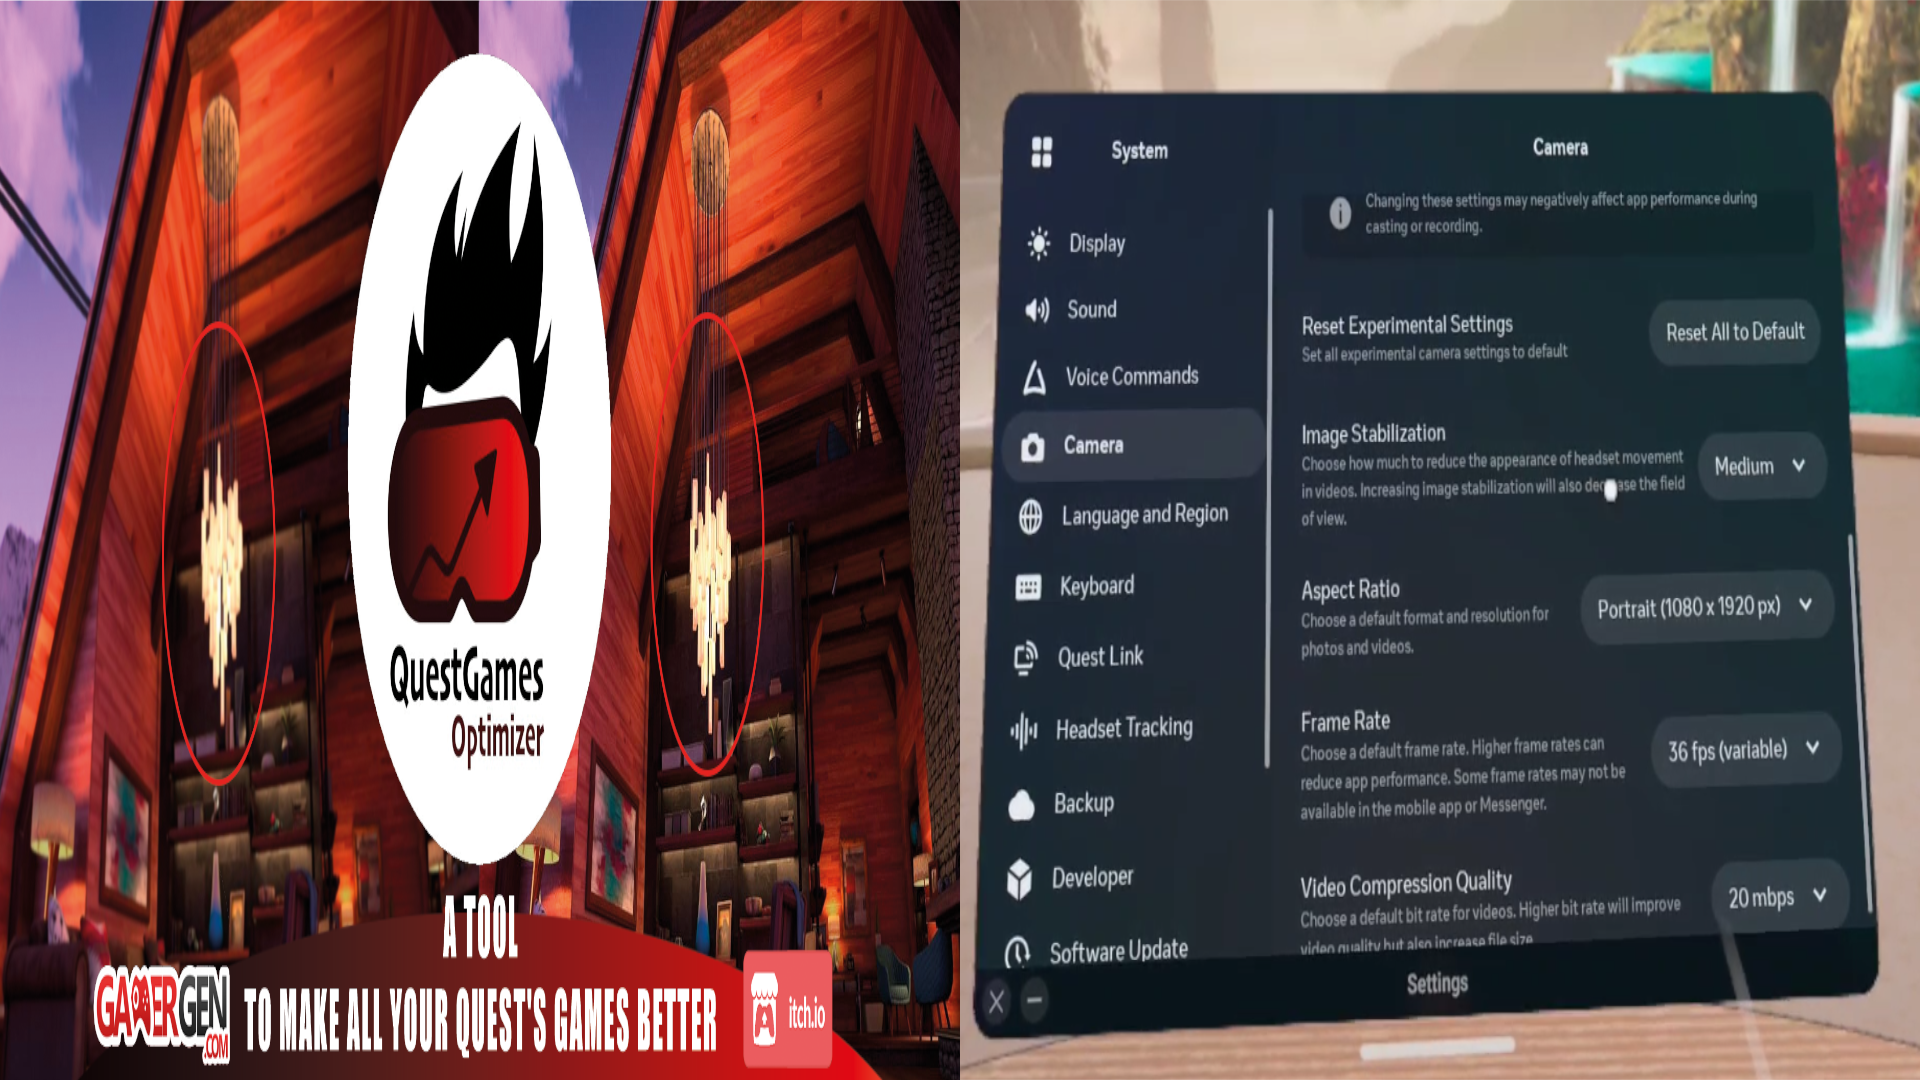
While it won’t get you the best possible recording quality (more on that in the second method) the easiest way to record video gameplay in 1080p and with higher quality is with the experimental recording settings on your Quest 2 or Quest Pro Headset. First, to access these settings you will need to go to your settings menu, and the “Experimental” settings submenu.

When you’re there find the toggle for “Advanced Camera Settings” and select it so that it turns blue. Once you’ve done that you’ve unlocked a ton of new recording settings for the Quest 2. To use them go back to the main settings menu and then to the “Recording” settings section

You can change a lot more settings here now, most importantly the recording resolution, Aspect Ratio, Compression Quality, and Frame Rate. Image Stabilization is also great for games that involve a lot of fast head movements. For the highest possible recording quality using these settings, try a 1920 by 1080 pixel Aspect Ratio, aka 1080p, a 36 fps Frame Rate, and a 20 mbps Video Compression Quality.
Keep in mind that recording over a game that is already processor intensive for the Oculus Quest with these settings may cause stutters and visual lag. Though if you can afford a Quest Pro you’ll have an easier time with it’s enhanced processor.
Method 2: Quest Games Optimizer
While the Quest 2 now offers some decent recording features, if you want the finest looking footage possible it can be kind of a letdown. If you want to record with higher resolutions and bitrates then there is no better way than the Quest Games Optimizer App.
You can install the Quest Games Optimizer App on to your headset directly through an .apk and an app like SideQuest and then find in the “Unknown Sources” menu. After you have Quest Games Optimizer installed you can make your recordings look better at the flick of a switch.

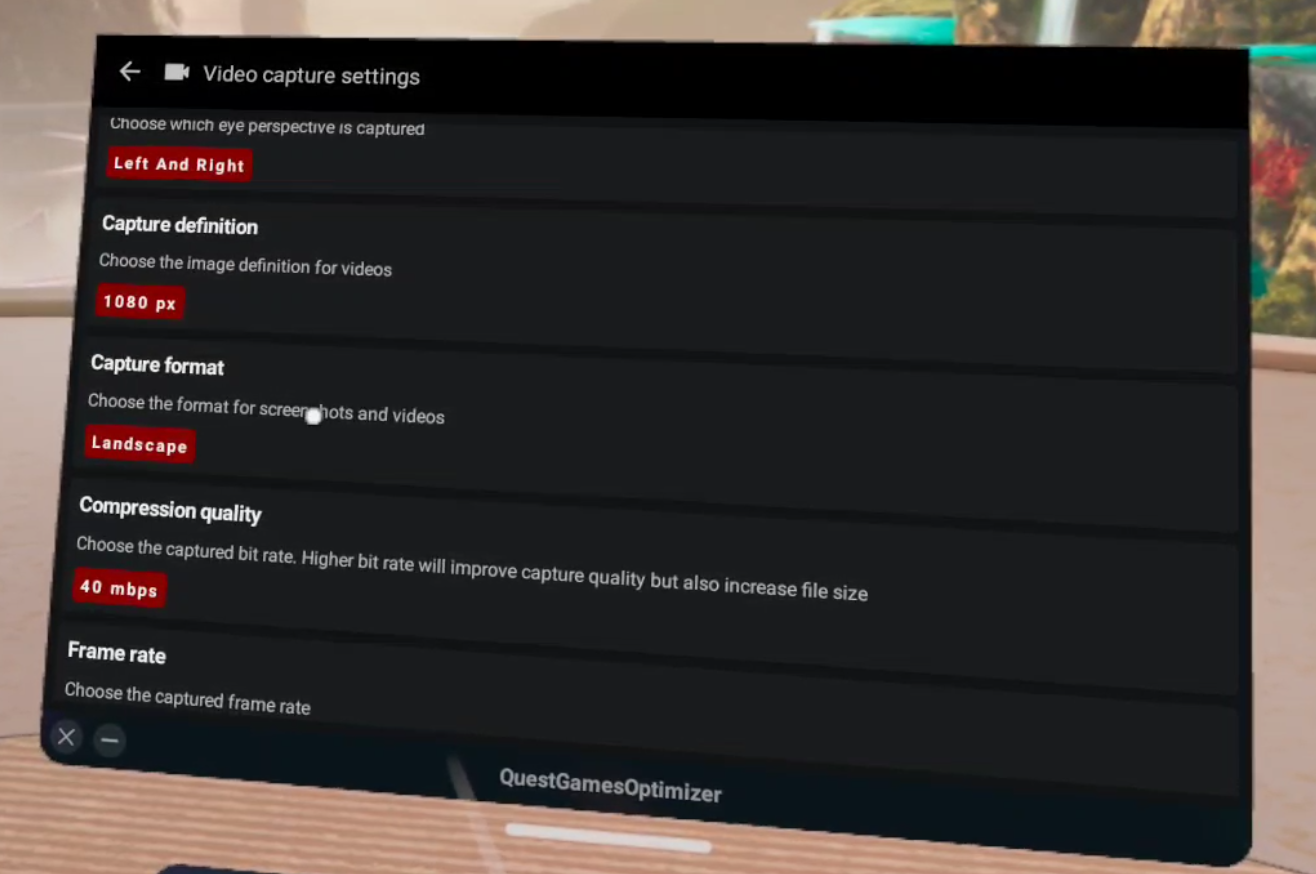
When you open it, Quest Games Optimizer (a.k.a. QGO) will show you every game you have on your Meta Quest 2 that has a profile which can be applied to it to make its graphics look beautiful. More importantly here there is also a recording button in the top right hand corner that you can press to get access to a slew of recording settings.
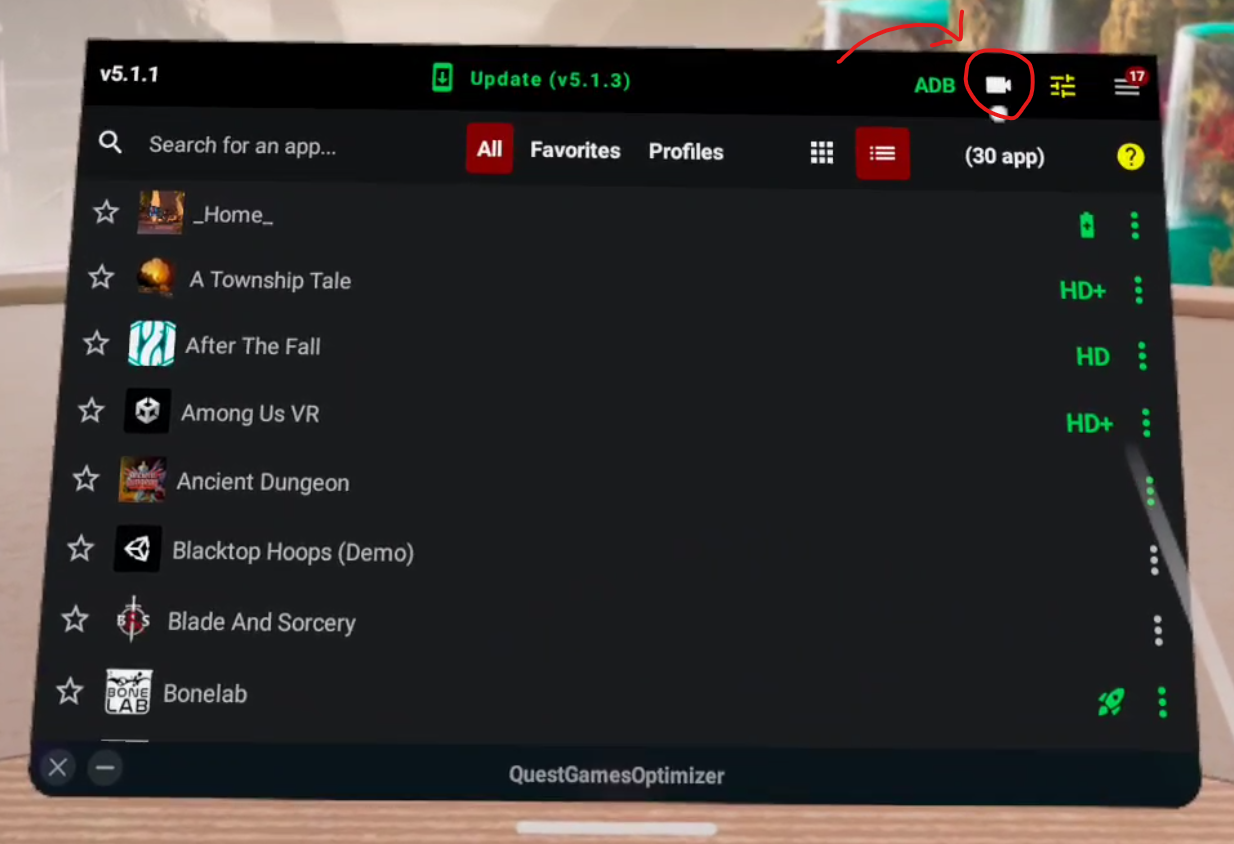
You’ll also notice that each of these settings can go higher than the Oculus Quest 2’s experimental recording settings allow. Meaning that the Quest Games Optimizer allows you to easily set even better recording settings than the Quest 2 does by default. It also allows you to record with not just your left and right eyes, but an amalgamation of both together with the “Left and Right” eyes option. The resolution can go as high as 4K.
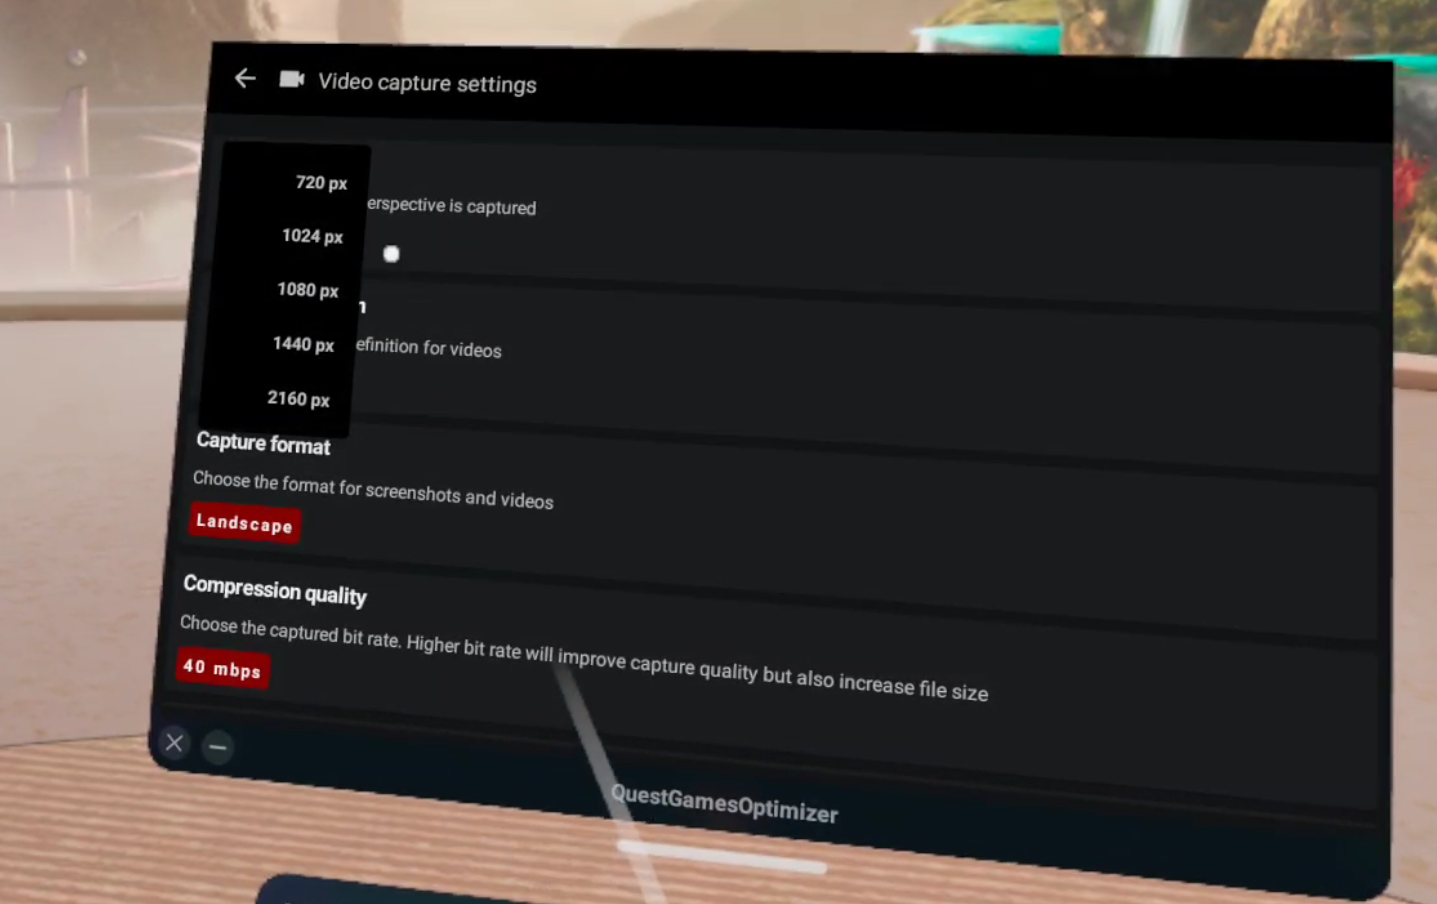
Compression Quality and Framerate can also be set higher here as well. So if you want the best possible recordings, then QGO is your best option.
Just as with the Experimental Quest settings, the higher quality you make your recordings, the higher the chance of impact on your gameplay. Also make sure not to record for too long, because recording for too long (usually more than about twenty to thirty minutes) will suddenly corrupt the entire video file and recording will stop. You’ll have an easier time recording on a Quest Pro due to its enhanced processor, but the Quest 2 can handle very nice recordings on most games. Though some games that are more processor intensive might give you trouble.
Unfortunately the one downside of the Quest Games Optimizer is that it requires more setup than the Quest settings, which will be outlined here. Still, if you’re determined to have high quality videos it is more than worth it.
Setup
Getting QGO running in the first place can be a lot if you’re newer to the Quest and haven’t used Airlink or Quest Link before. As you can see in the “Prerequisites” section of the itch store page here. You need to:
Have your headset and Facebook/Meta account in developer mode so that you can use applications in “Unknown Sources.”
Do no disturb needs to be disactivated so that you can get notifications when a profile is applied or your recording settings are changed.
You need to enable an ADB wireless connection for QGO to work at all.
This can be a lot for some people if they’re not a certified VR lover who has already done all of this to install custom applications or connect their Headset to their PC. Luckily there are plenty of guides out there that explain the setup steps. For this you will need a PC to connect your headset to as well as a cable that can connect your headset to that PC. If you need one here is a link to one on amazon.
Even if you have already done all of this, you will need to reconnect your Headset to your PC once to enable ADB, which Quest Games Optimizer needs to do anything, though this can be done wirelessly. Luckily after you enable ADB debugging wirelessly you won’t need to do it again until you restart the headset.
After you enable ADB you can keep using Quest Games Optimizer without having to worry about connecting it to a PC, just stay on the same wireless network. After the initial hookup it’s still very easy. The easiest way around this limitation is to just avoid restarting your headset, and it’s pretty hassle free after you’ve done it once, so it’s really not that big of a problem. If you do restart your headset you will have to enable the ADB connection by connecting your headset to a computer again.
For more guidance on how to enable an ADB wireless connection the developer of Quest Games Optimizer has a post on their itch page about it here. When it comes to setup their itch page actually has a lot of great advice, and you can find out even more about Quest Games Optimizer on it.
Quest Games Optimizer is currently 4.99$ on itch io. It is worth it if you want to easily make your recordings look better than they can via the Quest 2’s settings alone.

IronWolf VR is the Ultimate World War 2 Submarine VR Experience on PCVR | IronWolf VR Review
If you’ve ever wanted to live the quiet tension of hunting the high seas for vulnerable merchant ships, dodging enemy Destroyers and launching torpedoes from under the ocean waves, then IronWolf VR is the game for you. For a game that fully immerses you in life as a submarine captain hunting merchant ships during World War 2, there is no better experience.
If you’ve ever wanted to live the quiet tension of hunting the high seas for vulnerable merchant ships, dodging enemy Destroyers and launching torpedoes from under the ocean waves, then IronWolf VR is the game for you. For a game that fully immerses you in life as a submarine captain hunting merchant ships during World War 2, there is no better experience.

World War 2 VR Submarine Immersion
The controls are all old timey WW2 dials wheels, switches, and gauges. Each you have to manipulate with your actual hands, as any good VR game would have you do, sometimes in a frantic hurry to dive as quickly as possible after hearing the roar of planes searching for you overhead, and sometimes with cold calculation as you line the crosshairs of your periscope over an unsuspecting vessel.
This game is excellent at what it is trying to achieve, an easy to learn and semi realistic depiction of World War 2 convoy raiding as an Axis submarine. It has a great tutorial, though it could use a little expansion to cover some necessary topics (like how to repair leaks in your hull with the blowtorch). Still, IronWolf VR is easy to pick up and learn, while also being hard to master.
A Fully Realized Submarine
Each room of your cramped submarine is fully and beautifully realized in Virtual Reality. Moving from one to the other always involves turning a wheel on a door or opening a hatch, before you are teleported into the adjoining room. Each has a high level of detail. Everything you need to use or read to run your Submarine is clear to see, while also giving the feeling of being in a dingy steel tube floating beneath the waves.

Even the sound conveys this, with the splashes of depth charges hitting the water and the underwater booms that follow. The roar of your diesel engine is replaced with the quiet humming of your electric propulsion as you sink lower beneath the waves. The creaks of your hull as the pressure of the water around you threatens to crush it while you sink lower and lower under the water. The sound is what elevates IronWolf VR to a fully immersive and sometimes even scary experience.
There are all sorts of things to do inside your Submarine. Navigate in the command room, lock on to targets, fire and guide your torpedoes in the weapons room. Load torpedoes in the torpedo room, and manage the speed and engines in the engine room. You can even go outside when your sub is above the water, where you can shoot the Deck gun and machine gun.
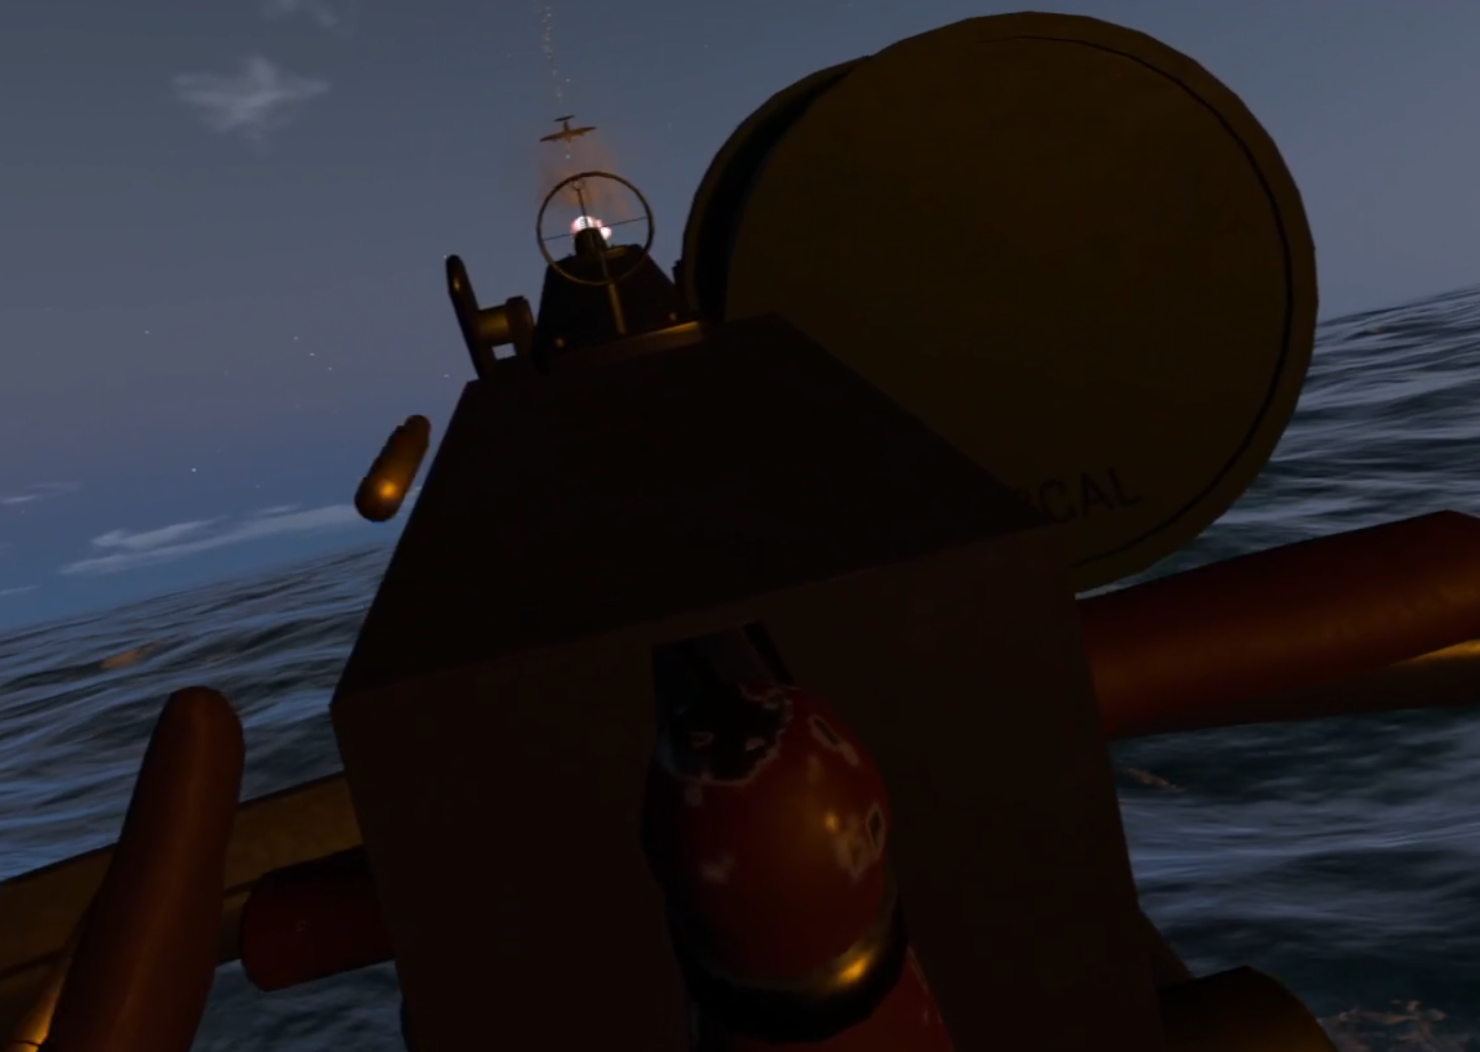
Side note, the deck gun is insanely satisfying to shoot. It has a great report and really satisfyingly slams back when you pull the lever to fire it. You also have to load each shell before you do, and it is a lot of fun. Unfortunately firing your deck gun isn’t often a very smart move in a submarine, but it’s great when you get the chance to pick off a helpless ship, or desperately damaged enemy.

Oh, and if you don’t have a crew of three other friends who want to play this game, and this sounds like too much for one person to manage, you would be right. Luckily there are automation options you can turn on so that you can manage the sub alone, or with fewer than four total people. IronWolf VR is great in multiplayer, and working with a crew is a fun time, but it is just as satisfying as a solo experience.
Patience Required
Though it is very satisfying, the hardest part of IronWolf VR is the waiting for that satisfaction. Sometimes everything just seems to take a little too long once you get the hang of the game. Your Sub moves extremely slowly underwater, which is where you will be spending most of your time. This makes positioning your Submarine a very time consuming experience, and so is running away from pursuit.
Firing some torpedoes to sink a couple of ships before slipping away underwater is great, and so is the quiet tension of listening to depth charges sinking and exploding, and maybe rocking your whole ship and ringing your ears if they are too accurate. Getting away afterwards though, is a real test of patience. Ships in pursuit will constantly ping around with sonar, meaning you need to go up and down and try to slowly, extremely slowly, sail away.

Sometimes this means you will be forced to wait below periscope depth with no power and nothing to do for very long tens of minutes while your hunters lose track of you and wander away. Especially in Virtual Reality, this is extremely tedious. There’s nothing to do but examine deck panels with your flashlight and play with a compass. The one department in which IronWolf VR is extremely lacking is the amount of waiting it can take to successfully pull off the escape from an ambush or battle.
The second department is welding. Playing a solo mission means that leaks in your hull are your biggest adversary, because you have to weld them yourself, and it takes a very long time. You will get a lot of leaks, basically any time your World War 2 era Submarine takes damage.

This means that you’ll be spending a lot of time staring at the bright end of your welding torch while you wait for the leak to stop. Playing IronWolf VR with multiplayers makes this a non issue, but for solo missions it is a huge chore, and means you will end up drowning due to leaks far more often than losing due to your hull being destroyed.

The Quiet Wolf of the High Seas
There are pre defined missions as well as an open world map that you can prowl around in and find unsuspecting convoys to raid. The open world system gives a sense of progression with upgrades that can be applies to your WW2 Submarine, and requires you to manage additional resources like your number of torpedoes and reserves of diesel fuel.

This means that in the open world not only do you not have to destroy every ship you come across before you flee to strike another day, but you also won’t want to put your ship at risk. You will need to go to port when you run low on fuel or torpedoes, and to repair damage to your hull. Each engagement has a greater sense of risk to it, a feeling that what you’ve been working towards is put more at risk. The additional longevity this adds to the experience can be very rewarding if you put the time in.
The predefined missions are just as fun, and are a great way to get acquainted with the game before jumping into the open world. The missions are very fun if you just want to jump into something quickly without all the prerequisite map navigation that the open world requires. Not to mention some of the missions are very hard and offer a great challenge right out of the box.

The Tactics of Submarine Warfare
Simply gunning directly for the nearest enemy ship and launching torpedoes or firing with your deck gun won’t get you very far. You need to master the art of dodging enemy Destroyers, and optimally position your sub so that your torpedoes have a good chance to strike their target. As a submarine you are slow, but have the great advantage of stealth to properly position yourself for a killing blow before scurrying into the depths once again.

Whatever your prey is, there are a lot of ways to approach each situation, and careful scouting of and positioning towards your targets is vital for victory. IronWolf VR is just as much about the tactical considerations of how to attack and retreat than the physical management of the systems of your Submarine in the VR environment.
Do you go for the destroyer at the lead of the convoy first, or do you pick off the merchant ships from behind and try to flee deep underwater before it catches up with you? Do you come around and try to destroy the Destroyer now hunting you, or pull away and come back to strike again when it thinks you are gone? Do you go to the surface and try to finish off a wounded ship with your deck gun, or use another torpedo just to be sure it sinks?
The convoy raiding experience as a World War 2 Submarine has never been more immersive in beautiful Virtual Reality, with all the sunshine of the Ocean and the dingy depths of your Submarine. If you’ve always wanted to be a Wolf out in the water, then try IronWolf VR. Just make sure you don’t mind waiting around a bit.

Unlock All Safe Codes in The Walking Dead Saints and Sinners | Unlock All Safes
Found a Safe in The Walking Dead: Saints & Sinners and wondering how to unlock it? Every safe in the game has a new code generated for it when you begin your playthrough, so there’s no use looking up a safe code that somebody else used. You’ll have to find them for yourself. Don’t worry about how to do that though, because here is the complete list of all safes and how to get their codes here.
Found a Safe in The Walking Dead: Saints & Sinners and wondering how to unlock it? Every safe in the game has a new code generated for it when you begin your playthrough, so there’s no use looking up a safe code that somebody else used. You’ll have to find them for yourself. Don’t worry about how to do that though, because here is the complete list of all safes and how to get their codes here.
This article is an extension of our already existing list of all recipes in The Walking Dead: Saints & Sinners. Wondering where the other recipes are too? Then check out that article here. You can also find all of the recipes in the sequel The Walking Dead: Saints and Sinners - Chapter 2: Retribution here.
Table of Contents:
The Blue Palace Safe - The Shallows
Arguably the most straightforward recipes to get your hands on, the .45 revolver and .45 ammunition schematics are found in a safe in the Blue Palace mansion in The Shallows. The Blue Palace is the only building you can enter on this map, and is also the location containing the item you need for your very first mission in the game, a microphone for your radio.
The first time you enter The Shallows a woman will greet you, saying that her husband took off with their children into the Blue Palace, and that she will reward you for finding him. Your reward will be the code to the safe, which is located in the first room to the left of the main entrance to the Blue Palace. The room also contains a portrait and many books, and the safe itself is set in the wall next to some bookcases. There is also an entrance to this room through the crawlspace beneath the house, through some broken floorboards.

To access the safe and get the schematics you can go to the attic of the Blue Palace, get the dead man’s wedding ring, and return it to her for the code. Or if you prefer to not have to walk between her, the mansion, and back again, you could just kill the woman and take the code off of her corpse.
The Lion House - Via Corolla
Finding some of the recipes is a little more complicated than just knowing where it is located. Samedi’s Hand is a clawed melee weapon that looks extremely cool.

While the safe containing the recipe is in Via Corolla, the code to open the safe is found in The Ward. There is a large shipping office you can explore in The Ward, and you can find the code on top of one of the desks inside, in an office about half way down one of the long hallways on the lower floor. You’ll find it if you just search the top of every desk while you’re inside. Also this is a great opportunity to get some of those juicy keyboards while you’re at it.

Once you have the code the safe is back in Via Corolla. Go to the house that has a front door with lions on either side. Go around the right side of the house and pay attention to the wall. You’ll notice some hand holds in the wall of the house that you can climb up into a little room, which contains the safe with the Samedi’s Hand recipe inside.
Ruined House - Old Town
The Esteemed Mortal is a weird name for what is basically a giant axe made of saw blades. It’s a little cumbersome… but it’s pretty sick.
Before going to the safe you’ll need the code for it, which is located at The Rampart High School. It is on a music stand in the school’s band room. There are a ton of stands and instrument cases in the room, centered around a little podium for the conductor. If you’ve ever seen a band room you will know it when you see it, though it will be pretty dark in there. Make sure to check the music stands thoroughly for the code. (It may be on the ground in the quest version, instead of on a music stand)

Once you have the code the safe containing the recipe is in Old Town in the huge house in the center of the map that is blue on the map. This house is full of Tower soldiers the first time you enter the map, so coming back another time if they are there can be advisable. Once you make your way past any threats the safe itself is on the second floor in the room with a missing wall. There are also good ammunition spawns in the dressers next to it.
By The Jazz Men - The Graveyard/Resting place
You’ll find the safe containing this recipe really early on in the Jazz Park, which you can get to through the catacombs in the Cemetery. Getting the code to the safe requires you to get much further on into the game.
Eventually one of Casey’s missions will take you to The Bastion, a map centered around a fortified apartment block in the middle of the map. There is one other building in next to The Bastion though, a little house with a car crashed into it. Around the back of that house you can break through some boards blocking the back door and get inside. The code will be on a little table against one of the walls of the Living Room with the crashed car in it.
Once you have the code you can go back to the Jazz Man park any time of night. If you don’t remember where that is just go down into the catacombs from the Cemetery with your base in it, and take the route that does not go to the church. The safe will be next to the delivery truck on the road just in front of the hole in the ground you enter from.

There you have it, each safe and safe code in The Walking Dead: Saints & Sinners. Happy surviving in New Orleans!

7 Useful Tips and Tricks for RUMBLE VR to Help You Win
RUMBLE is a fantastic and unique VR game that is like being an Earthbender in the universe of Avatar: The Last Airbender. In this VR Game you can do martial arts moves to create and launch big pieces of stone at your opponent in 1v1 PvP battles. RUMBLE is the sort of experience that can only be made for Virtual Reality, with the hand controls needed to replicate the martial arts moves needed to make a pillar of stone and launch it forward. Still, RUMBLE can be a pretty hard game to get the hang of, partially due to it’s uniqueness. If you’re having trouble and want to dominate the arena of stone, or just want to play more smoothly and skillfully, here are some tips and tricks to help you out.
RUMBLE is a fantastic and unique VR game that is like being an Earthbender in the universe of Avatar: The Last Airbender. In this VR Game you can do martial arts moves to create and launch big pieces of stone at your opponent in 1v1 PvP battles. RUMBLE is the sort of experience that can only be made for Virtual Reality, with the hand controls needed to replicate the martial arts moves needed to make a pillar of stone and launch it forward. Still, RUMBLE can be a pretty hard game to get the hang of, partially due to it’s uniqueness. If you’re having trouble and want to dominate the arena of stone, or just want to play more smoothly and skillfully, here are some tips and tricks to help you out.
Knock Your Opponent Off the Edge

If you’re having trouble landing hits on an opponent, or are low on health and want a way to quickly come back for a victory, then always keep in mind that knocking your opponent off of the edge is an instant win. Even if you have the advantage, quickly pushing your opponent off of the arena can win you the round before they have a chance to come back. You don’t even have to push them all of the way off, just getting them close to the edge of the arena, about where the metal ring is, will cause them to start sliding off.
The best way to start pushing your opponent to the edge is to take control of the middle of the arena, and send your attacks outwards towards them. Once you have control of the middle the only way your opponent can flee from your attacks is backwards towards the edge, or sideways. Once you have this position push them as much as possible by launching pillars or other solid stone pieces at them. If they aren’t paying attention you can trick them into backpedaling off of the edge before they realize what kind of danger they are in.
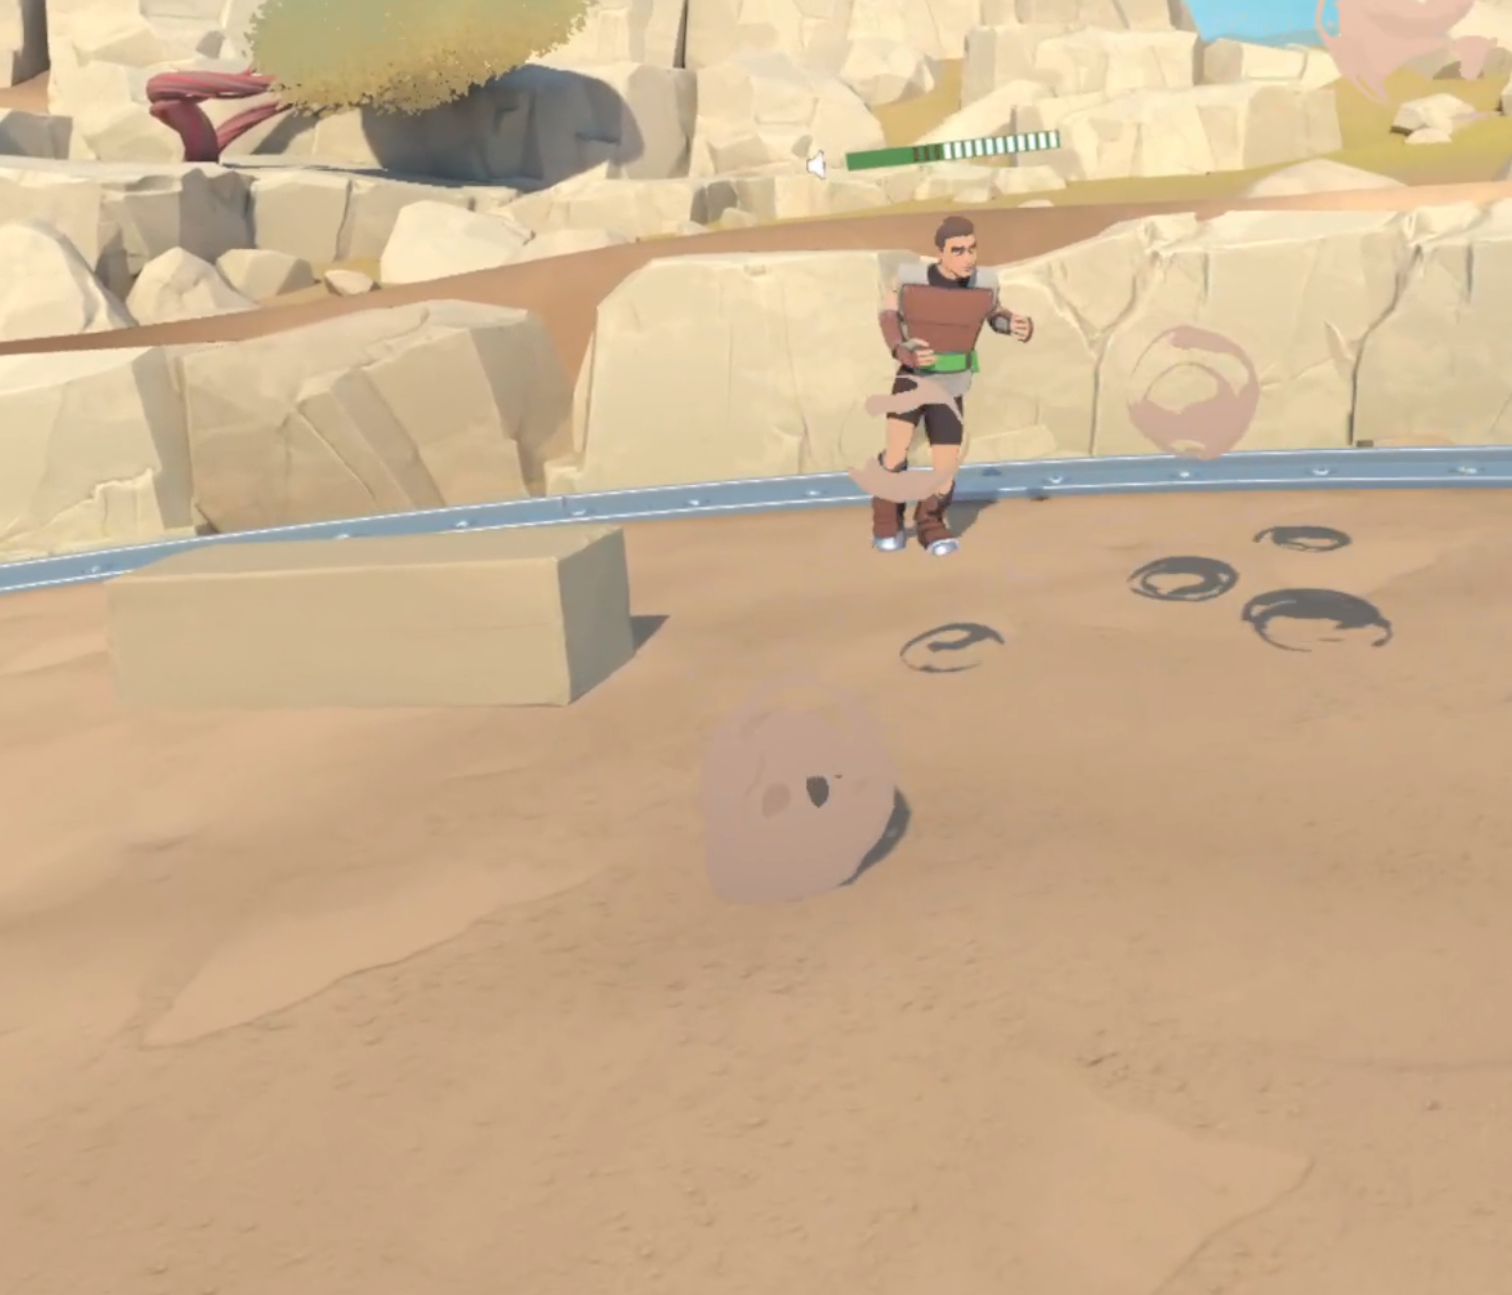
Even if they do realize that they are nearing the edge, that still gives you an advantage. Since falling off is an instant defeat, the other player will do whatever they can to get away from the edge, which gives you opportunities to attack them. For instance, the Disc move is a very reliable way to do damage, and it can be very tempting to spam quickly at an unguarded opponent, but every time you launch a disc it will send you a little bit backwards.
Another player that realizes they are close to the edge will not use the disc, because they don’t want to fall off, giving you an opportunity to hit them as they try to run towards you, away from the edge. At the same time you can bait a player who is close to the edge and doesn’t realize it so that they use the disc move as much as possible. If you have the health to withstand it you can trick them into sending themselves off of the edge by failing to guard yourself, or by acting as though you aren’t doing your moves correctly.
Practice

Okay so speaking of doing your moves correctly, you won’t be able to do much of anything out in the arena if you don’t land them. So make sure you can land moves before you actually start a match. Every time you start the game make sure to take a step into the practice area and try each of your moves out at least once. It can be easy to slightly misremember the way a certain move is done, and it’s much better to realize this when you’re next to the practice terminal that can reteach it to you.

There is nothing more frustrating than trying to use an ability during a match, and it just failing to happen. Not only will this limit the amount of moves you can do, but the time you spend trying over and over to do something and failing to do it just gives the other player more time to do damage and punish you for failing. So make sure you spend a few minutes practicing and warming up each time you start playing RUMBLE, you won’t regret it.
Focus On Defense If You’re Flustered
RUMBLE can be a very intense VR game, and each move that you do needs to be done fairly precisely to actually activate its ability. This means that it’s not uncommon to start messing up your moves when you’re taking a lot of damage or are being pushed around. It’s easy to take a lot of damage while you’re trying to make something happen and failing.

In these cases just back off as much as you can and strafe around your opponent. If you have enough distance then their attacks will miss you. Take a breather and get your bearings. You can even duck and weave around some attacks, like the Disc, if one catches you off guard.
Trying to stay on offence when you’re not succeeding is not the right idea. Use a simple move like the pillar to create a wall between you and the other player to buy yourself some time. If they get close you can always use the Straight, another simple move, to launch a pillar at your opponent and get them to back off for a few more seconds.

Focusing on Defense when you are at a disadvantage can buy you the time to refocus and properly land some of the more complex abilities. If you’re having trouble with even the Pillar and Straight moves, then back off and strafe to the side to buy yourself a little time while you try to put up a pillar. Oh, but make sure you don’t fall off the edge, and practice your moves after the match is over.
Totems Give New Moves
Even though more moves makes the game more complex, and means you have a lot more forms to master and remember, the more moves you have then the more versatility you have in the arena. When you’ve played some matches and gained a rank, make sure to check the mailbox near the matchmaking console. Once you pull the lever on the front a little dumbbell will pop out of the top.

Take this dumbbell over to the Move console and put it into the chute beside it. This will unlock new moves for you to learn and practice at the console. When practicing your new moves, make sure you don’t forget your old ones. Having a few abilities you can use reliably is better than having a ton you will not be able to pull off. Of course more practice makes perfect, and the more abilities you can complete the greater your chances of victory.

Trouble Finding a Match? Set the Match Finder to All Ranks
Sometimes you might be playing at a time when not many others on your server are. You may set the slider to look for opponents of your rank, or close to your rank. Waiting in Virtual Reality kind of sucks though, so if you want to wait as little as possible before finding a match, just set the match finder to All Ranks. Don’t worry about being completely outclassed though, opponents with ranks closer to yours will still be prioritized.

While it will definitely hurt your chances of winning in the short term, the more matches you do the better you will get at RUMBLE. Even if they are against an opponent with more moves and more experience. Either way you can always practice while you’re waiting.
You can also change which server you are playing in with the map, but using a server that is far away from where you are playing can cause a lot of lag. Lag is very hard to compensate for in a fast paced game like RUMBLE. Though if you want to know how many players are on each server, the map will tell you, as well as your ping.
Vary Your Moves
Just as varying between attack and defense is crucial depending on the situation, and the actions of your opponent, varying how you attack and defend is just as important. When you start to unlock more moves than just the Pillar, Disc, and Straight, you will have a lot of tools at your disposal once you master using them. It can be very tempting to just repeat the same move over and over again, especially with something like the Disc.

Avoid this temptation. The other player will realize that you are spamming a single ability, and each ability has another that can counter it. For instance, disc spam can be easily stopped with a pillar, and then that pillar can be punched towards you with the Straight. Then when you are backing away from the pillars your opponent can flank you and hit you with discs of their own. Varying what attacks you use will mean that your opponent will have to use a variety of defensive or counteroffensive techniques.

For instance you could switch to throwing boulders at your opponents when they switch to pillars, since boulders can smash through pillars and damage your opponent, forcing them to change their strategy again. Doing this can fluster your opponent and cause them to fail to do moves, or make them forget that they are close to the edge. So don’t just rely on one attack when facing a skilled enemy, because they will punish you for it.
Give Yourself a Break
This last tip might seem obvious, but sometimes obvious things are the most important to do, and the easiest to ignore. If you are an average person then RUMBLE VR can be very tiring. Some sweat and sore arms are to be expected when a good match has you playing vigorously. The constant arm movements will probably leave you sore and even out of breath.
If you want to keep playing effectively then give yourself a break in between matches. Get a drink of water and give your arms a chance to recover for a few minutes before jumping into another game. Trying to complete moves when it feels like you can barely lift your arms is really tough, and will lead to more mistakes and likely more losses than you should have. Entering each match a little more fresh and rested will mean you can land more abilities and win more games.