

How to Permanently Record Oculus Quest 2 Gameplay at 1080p and 4K with the new Update
You might have heard about the new update that allows native recording on the Quest 2 without having to constantly enter ADP commands every time you start the headset. Here’s how you can do that, but before you start you’ll need three things. A PC to connect your headset to as well as a cable that can connect your headset to that PC. If you need one here is a link to one on amazon.
Finally you’ll need an Oculus Developer account, which anyone can get for free. We won’t go over how to create that account in this guide, just follow the link and the process is straightforward. Also make sure that developer mode is activated on your headset. The reason you need to do all of this is so that you can access the Oculus Developer Hub console (aka ODH). Here you can change your recording settings.
There are also newer methods that have come out to record high resolution videos on the Quest 2. Check them out here as well.
Installing Oculus Developer Hub
First download ODH from the Oculus Developer Hub website and run the installer when it is finished downloading.

Choose a location to install and hit next, the default location will do just fine. A brief loading bar will appear, and when it is done hit finish and run ODH.

Running Oculus Developer Hub
The first time you start ODH you will see this.

Press continue and you will be asked to sign into your Meta account via your default browser. Make sure to use your Oculus Developer Hub account to log in. If you can’t then make sure that your Oculus Developer Hub account and Meta accounts are linked. Then accept the Terms and Conditions and continue.

Changing Recording Settings
Now that you’re logged into the Oculus Developer Hub Console it is time to hook your Oculus Quest 2 up to your PC using an Oculus Link Cable. After you connect the headset to your PC make sure that the headset is turned on, then put it on and press accept on the prompts that will appear, asking you if you trust the computer to access your Oculus Quest 2. Then in the Oculus Developer Hub open the Device Manager tab on the top left part of the window.
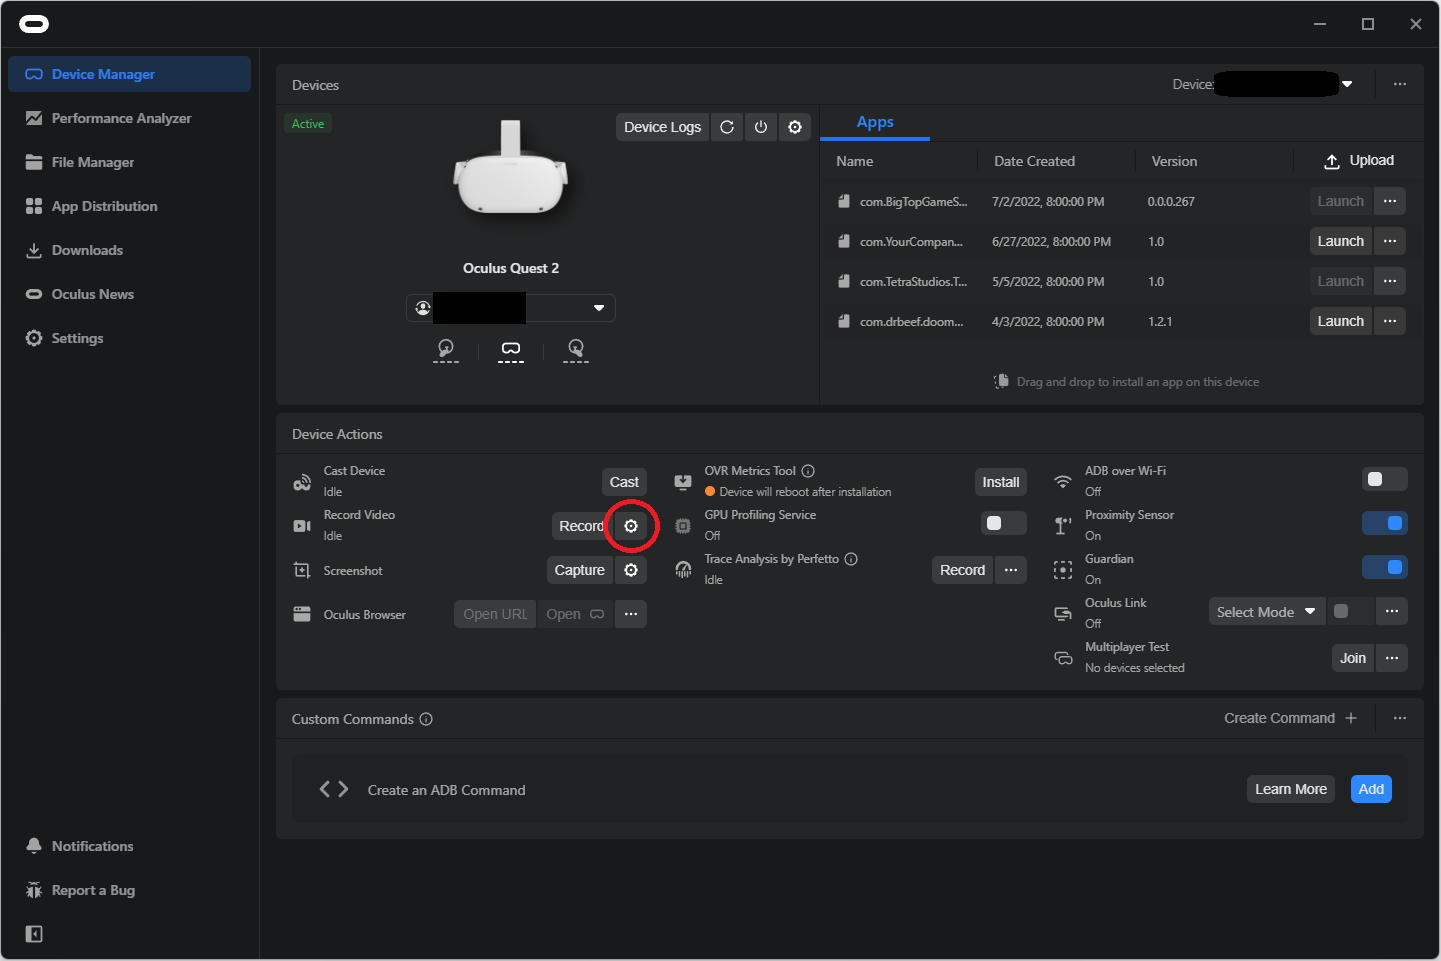
Here you can see a lot of information about your connected Meta Quest 2. what we’re interested in is the Record Video section. You can see it under the Device Actions portion of this menu. Just hit the gear icon to the right of “Record Video”, which is circled in red above. A new menu will open.
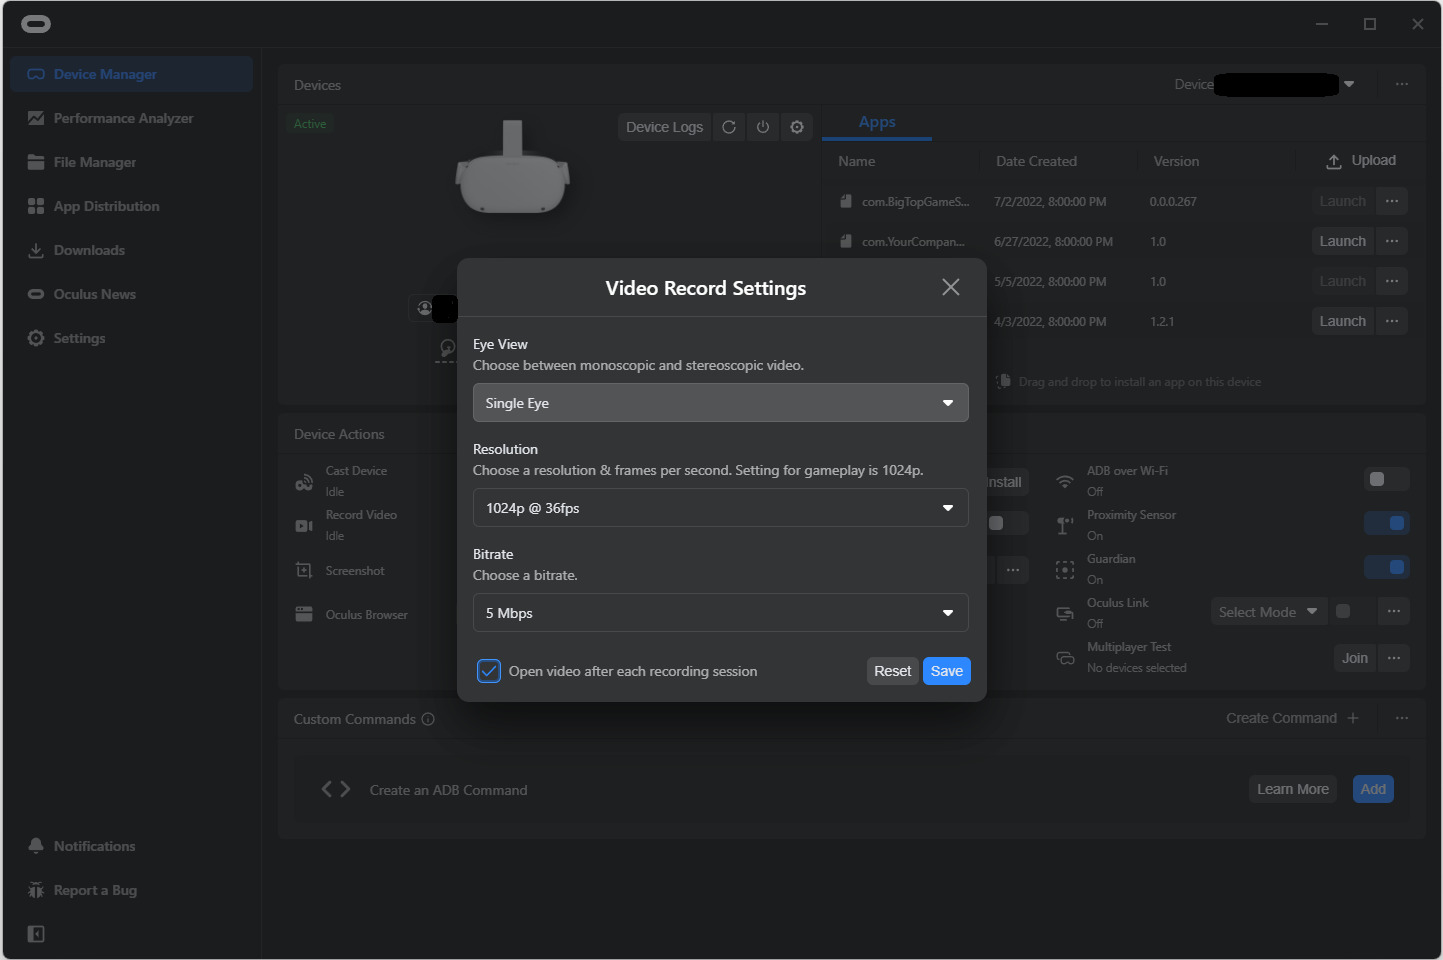
These are the default native recording options on the Oculus Quest 2. Going from top to bottom you can first change the Eye view, though you probably won’t want to. Single Eye will amalgamate the view from both eyes in the recording, creating a single picture. Selecting Both Eyes instead will show the image from each recording side by side (aka Stereoscopic view).

You will probably want to keep this setting at Single Eye. Below that you can change the recording resolution. This will affect the resolution of the video that is recorded, while you can set this to 1080p or 4k or beyond, just be aware that the higher the resolution the bigger the performance hit when you record. The Oculus Quest 2 has a lower default resolution for a reason, so your gameplay experience while recording might not be smooth if you’re recording in 4k.
Below that is the bitrate. Higher bitrates means a higher framerate, to keep it simple. Just as with the recording resolution, a higher bitrate also means a bigger performance hit. Here’s the maximum settings you can have.

Hit save when you’re done, and bam that is your new native recording setting. No ADB commands, and it persists when you shut off your headset. So pop that cable out and get to recording.
Before you go though, there is one more thing, something you will notice pretty quickly. Changing the recording resolution to be anything other than the default will also change your view in the headset. Black bars will appear above and below the picture in each eye, which may impact your VR experience overall. Only the default resolution of 1024p will not affect the view in headset. This is the case even when you aren’t recording.