


Into The Radius Walkthrough And Guide - Repeatable Missions
Stuck in Into The Radius? Wondering where to go and how to get there for your next mission?
Well don’t worry we’ve got you covered with this walkthrough and guide for Into the Radius VR.
Here we’ll be talking about the repeatable missions in Into The Radius. After Total Recall you’ll have to complete two to unlock the next Top Priority mission. These are missions that you can completely infinitely for additional cash, and to unlock some Top Priority missions you’ll have to do a few repeatable ones.
Stuck in Into The Radius? Wondering where to go and how to get there for your next mission?
Maybe you would just like to see what is in store for you before you get there, or you’d like to know if you’re properly prepared for your next mission in the Pechorsk Zone.
Well don’t worry we’ve got you covered with this walkthrough and guide for Into the Radius VR.
Here we’ll detail how to progress through the main story “Top Priority” missions, with a couple of guiding tips thrown in here and there to make your adventure smoother.
The focus of these articles will be the story missions, but we’ll throw in some general gameplay tips and other useful loot locations near your objectives.
These articles will also assume you’re playing the game on the Normal difficulty mode with Tutorials turned on, which is highly recommended for your first playthrough. This walkthrough will still be useful if you’re playing on Realistic difficulty, but some details like vendor prices or enemy placement and numbers will be different.
Here is every article in our complete Into the Radius VR Walkthrough:
Into The Radius Walkthrough And Guide - The First Mission - Equipment Retrieval
Into The Radius Walkthrough And Guide - The Second Mission - Total Recall
Into The Radius Walkthrough And Guide - Repeatable Missions
Into The Radius Walkthrough And Guide - The Third Mission - Fixing A Leak
Into The Radius Walkthrough And Guide - The Fourth Mission - Flash In The Dark
Into The Radius Walkthrough And Guide - The Fifth Mission - A Probing Move
Into The Radius Walkthrough And Guide - The Sixth Mission - The Intrusion
Into The Radius Walkthrough And Guide - The Seventh Mission - A Farewell Feast
Into The Radius Walkthrough And Guide - The Eighth Mission - Kids Playground
Into The Radius Walkthrough And Guide - The Final Mission - Ouroboros
Here we’ll be talking about the repeatable missions in Into The Radius. After Total Recall you’ll have to complete two to unlock the next Top Priority mission. These are missions that you can completely infinitely for additional cash, and to unlock some Top Priority missions you’ll have to do a few repeatable ones.
Into the Radius VR Walkthrough - Repeatable Missions
This walkthrough guide for Into the Radius picks up where our previous guide left off, just after completing the Total Recall Top Priority mission.
Once you go to the mission terminal you’ll notice that there are no missions marked Top Priority, instead you’ll have a few missions of various names listed.

The mission terminal telling you how many more repeatable missions you need to do before unlocking the next Top Priority mission
These sorts of missions will now be available throughout the game, and can be completed an infinite number of times to get you more money, which is awesome.
So you’ll need to do two of these. You can also do all three. Since the only location you have gone to so far is Pervomay Route, they will all be located there, but in the future when you go deeper into the zone they will be located in any of the maps you’ve been to.
So accept just two, or accept them all, it’s up to you, but the more missions you do the more you stand to gain.
As for your loadout, try to pack light to leave room for loot and artifacts, but make sure you’ve got plenty of ammunition in case you run into clusters of enemies, and always have some food and healing items on you as well. The usual Combat Knife, Probes, Detector, and Pocket Lamp are also must haves of course.
You’ll be doing repeatable missions throughout the game, and so your loadout for them will change over time as you acquire better equipment.
If things go wrong you can always just go back home or rest in one of the safehouses marked with a blue house icon on the map. You’ll get a feel for how much to bring depending on where you’re going over time.
Plan accordingly for whatever route you take. If you’ve been following this walkthrough there’s about half of Pervomay you have yet to discover, and the final location that one of these missions will likely bring you to is the Train station in the northwestern section of the map.
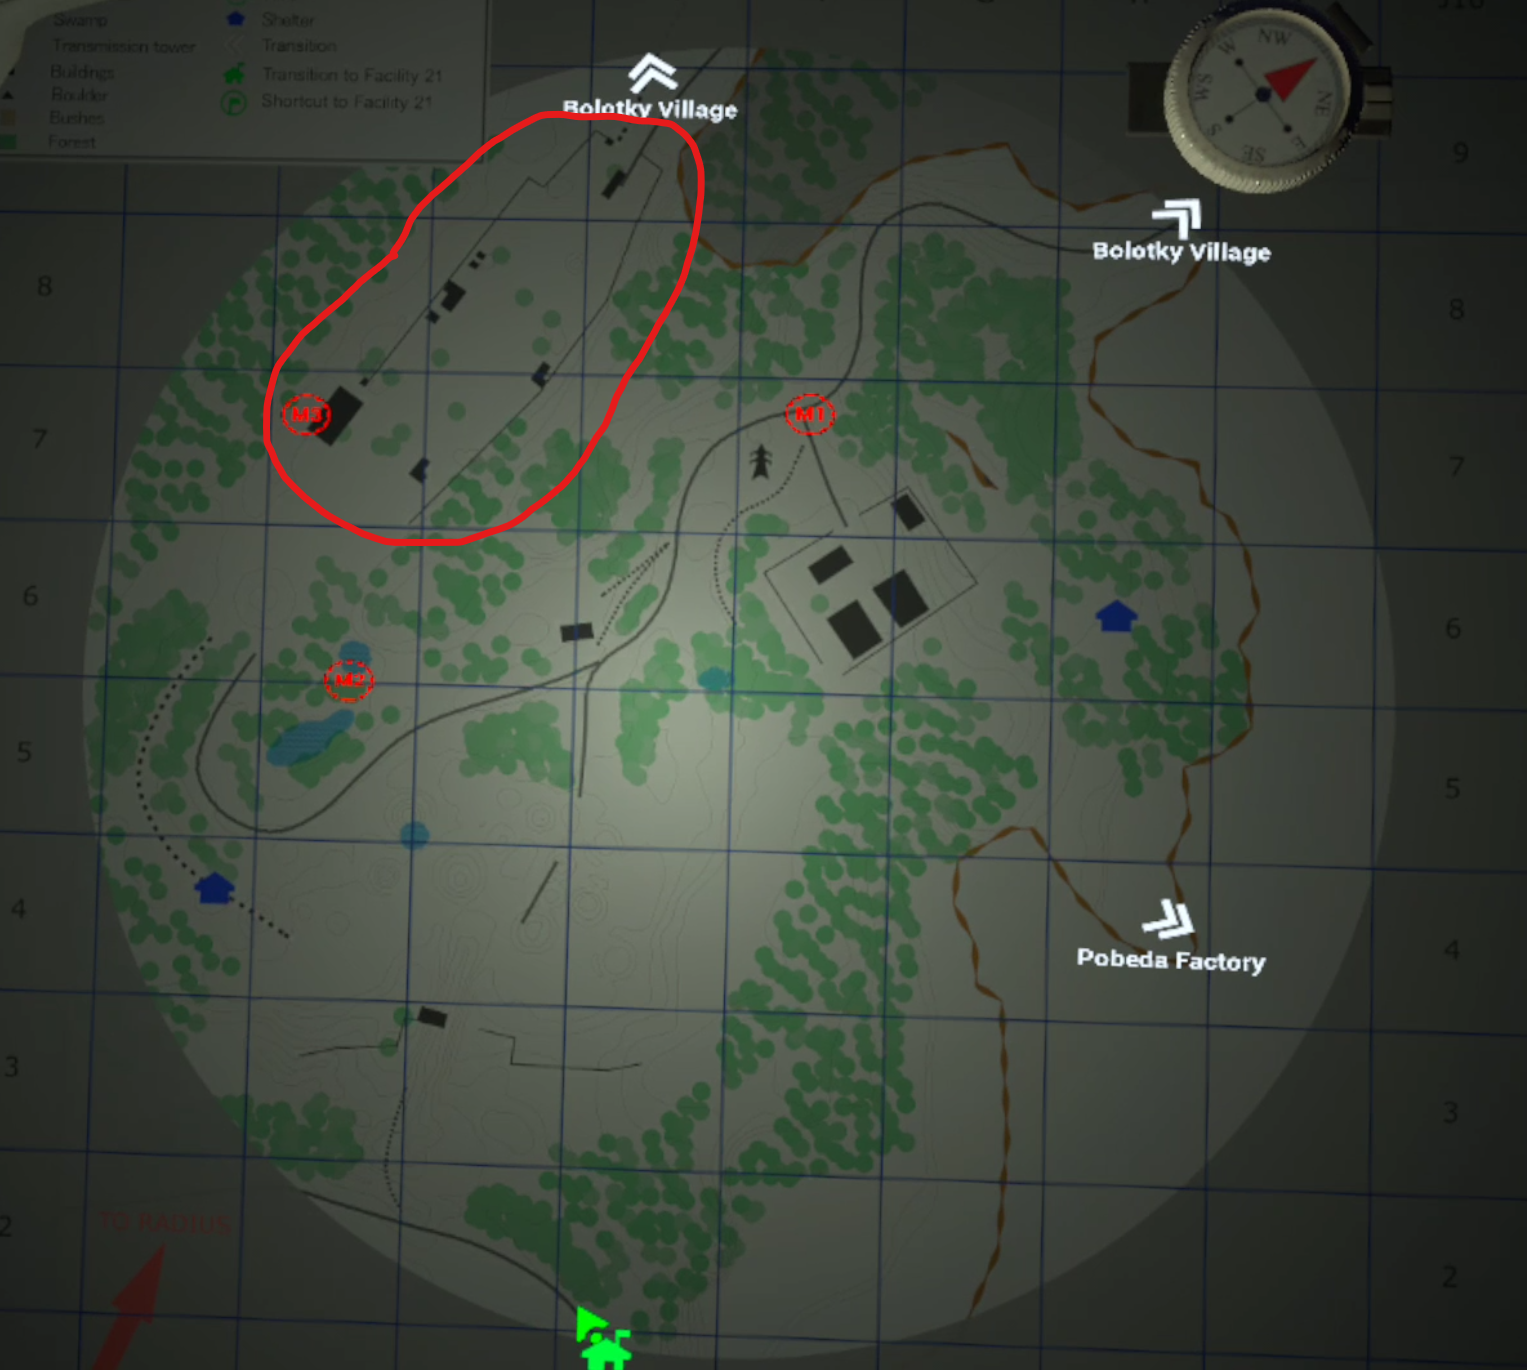
The Train Station marked on the map of Pervomay Route
This train station is the last location in Pervomay Route that you haven’t already been to which is exceptionally dangerous.
In the train station you’ll find multiple Mimic Policemen, and Fragments and Phantoms will be spread all over the map.
You’re also likely to run into Spawn at some point. The secret to beating them is to hold your knife out in front of you when they attack and catch them in mid air. If you’re concerned about getting hit strafe around them and then attack when they jump at you and miss.
Oh, and if you run into the big anomaly with green clouds floating around it, don’t go inside, those clouds will quickly kill you since you don’t have a gas mask yet.
The Train Station - Free Silenced TT-33
Whether you avoid the inside of the Train Station or not, if you want a free TT-33 pistol with magazines, ammunition, and a silencer, there’s a stash near the train station you can pick up while you’re doing these missions.
When you reach the train station head over to the slightly wooded area next to it to the west. If you’re facing the train station from the direction of the floating train car it will be on the left.

The woods leading to the TT-33 stash
Go up into those hills and keep walking until you see a concrete pipe.
Inside the pipe is the TT-33, a pistol silencer, magazines for it, and ammunition for it. The TT-33 is already modified to take a silencer, and is almost in perfect condition.

The location of the TT-33 stash
Though if you want to use the silencer make sure to repair it using the repair box at your base first, since it will be in bad shape when you find it.
This silenced pistol is great if you want to play the game more stealthily.

The pipe holding the TT-33 stash by the train station
Repeatable Missions - Types Of Missions
Since the missions are random we can’t go into detail on how to complete each one specifically.
So instead we’ll go through every type of repeatable mission in Into the Radius and give you a general walkthrough on what is expected to complete them.
You’ll be doing a lot of these missions as you progress through the game and explore the zone further, so come back here if you have any questions on them.
Otherwise you can also find more information on these missions just like with Top Priority missions by looking at your mission log in your Journal.
Sample Courier
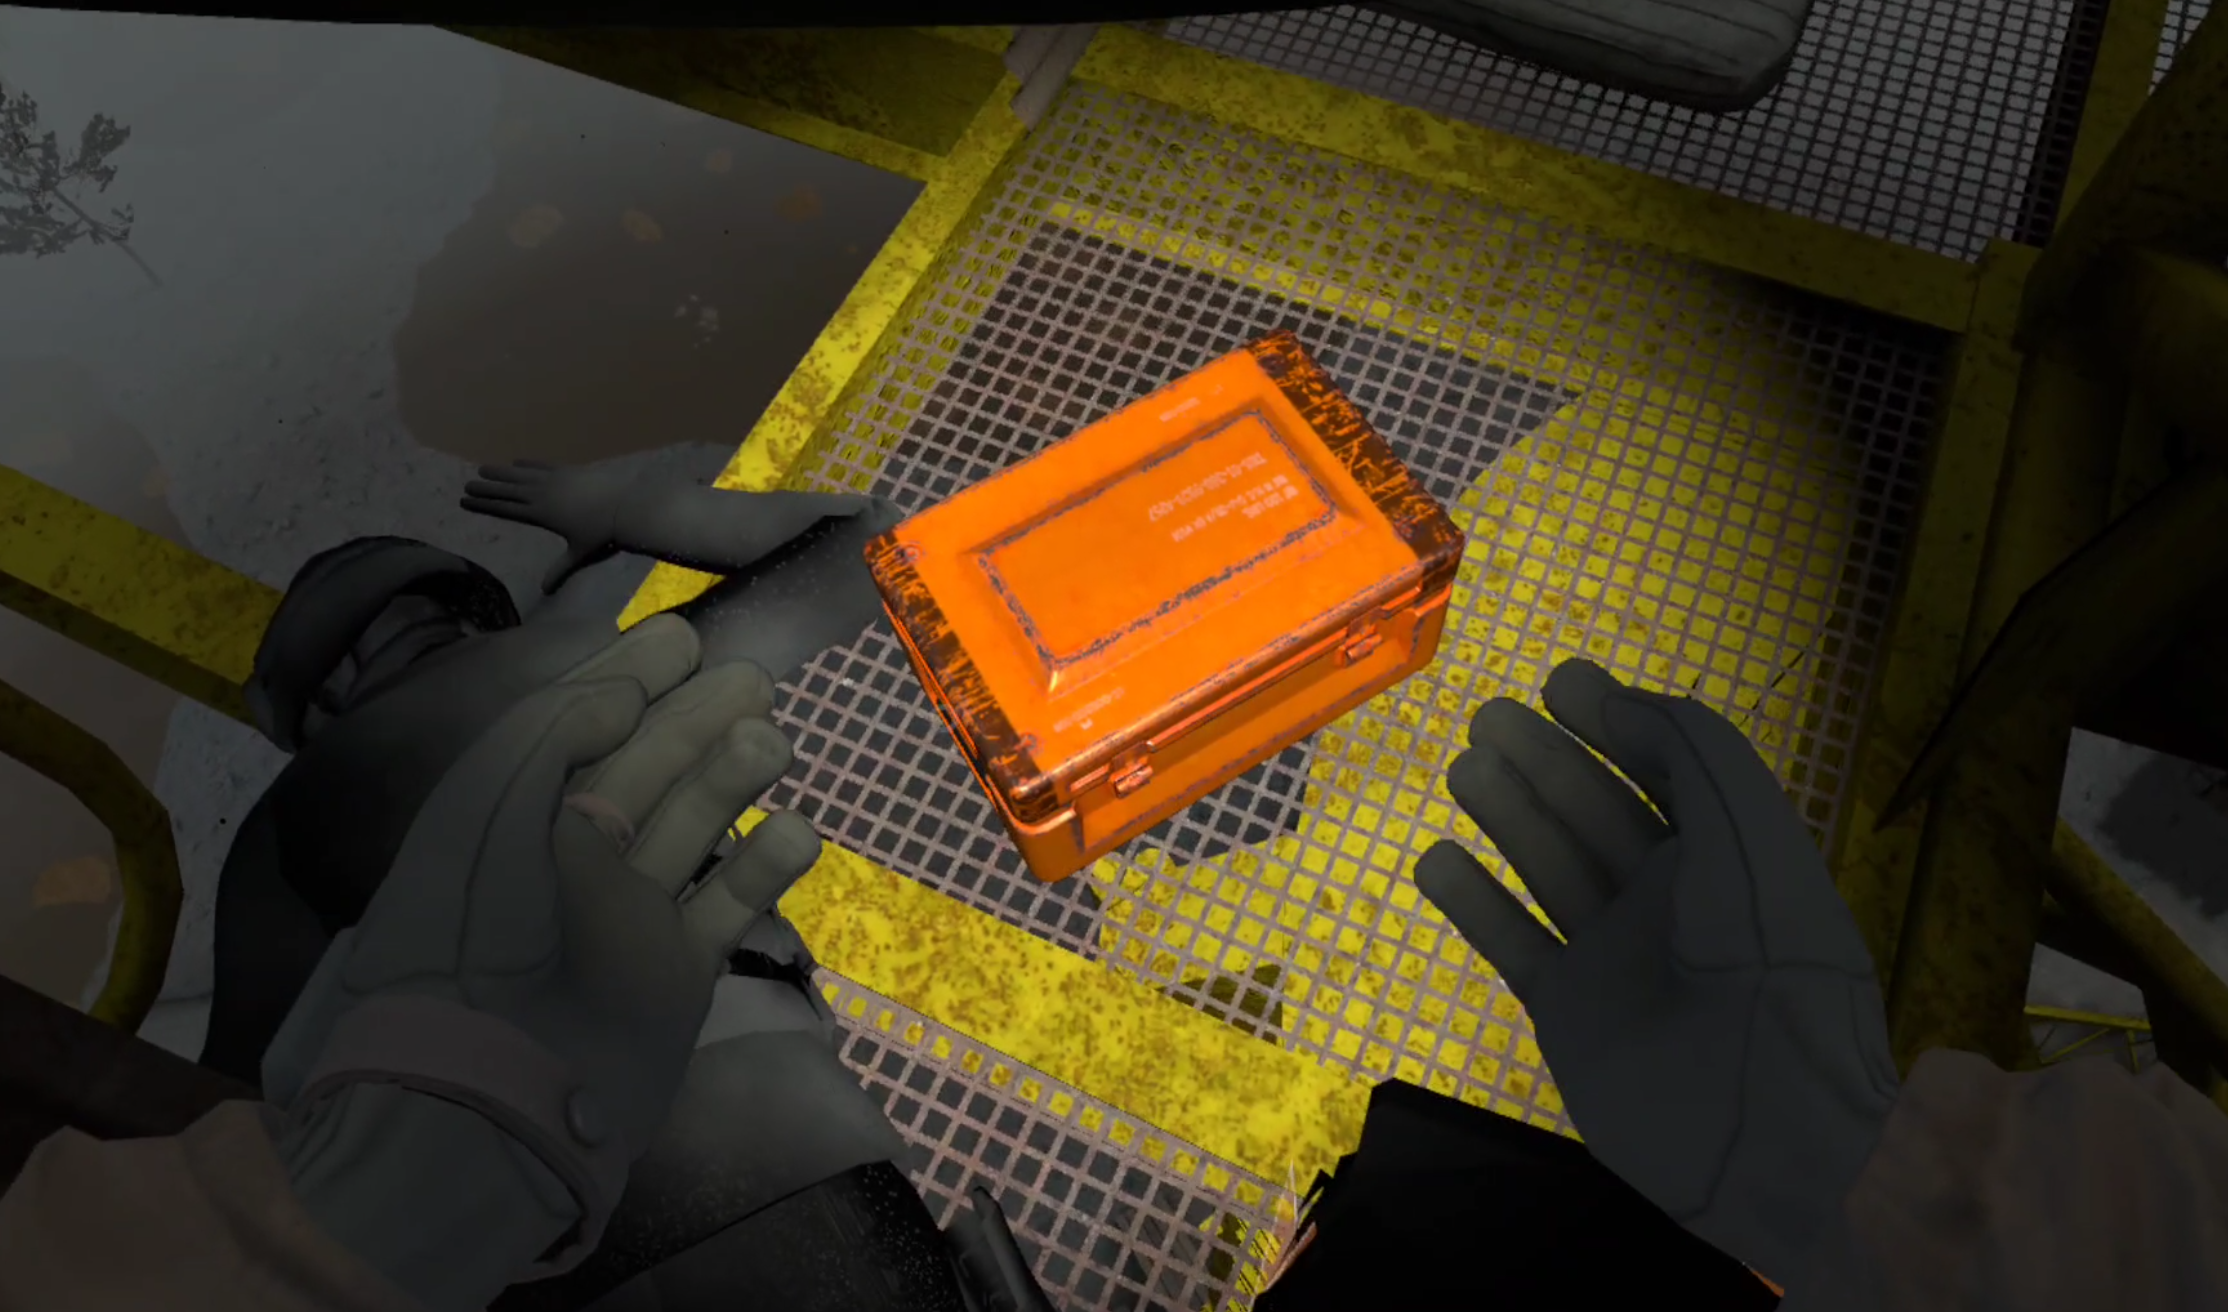
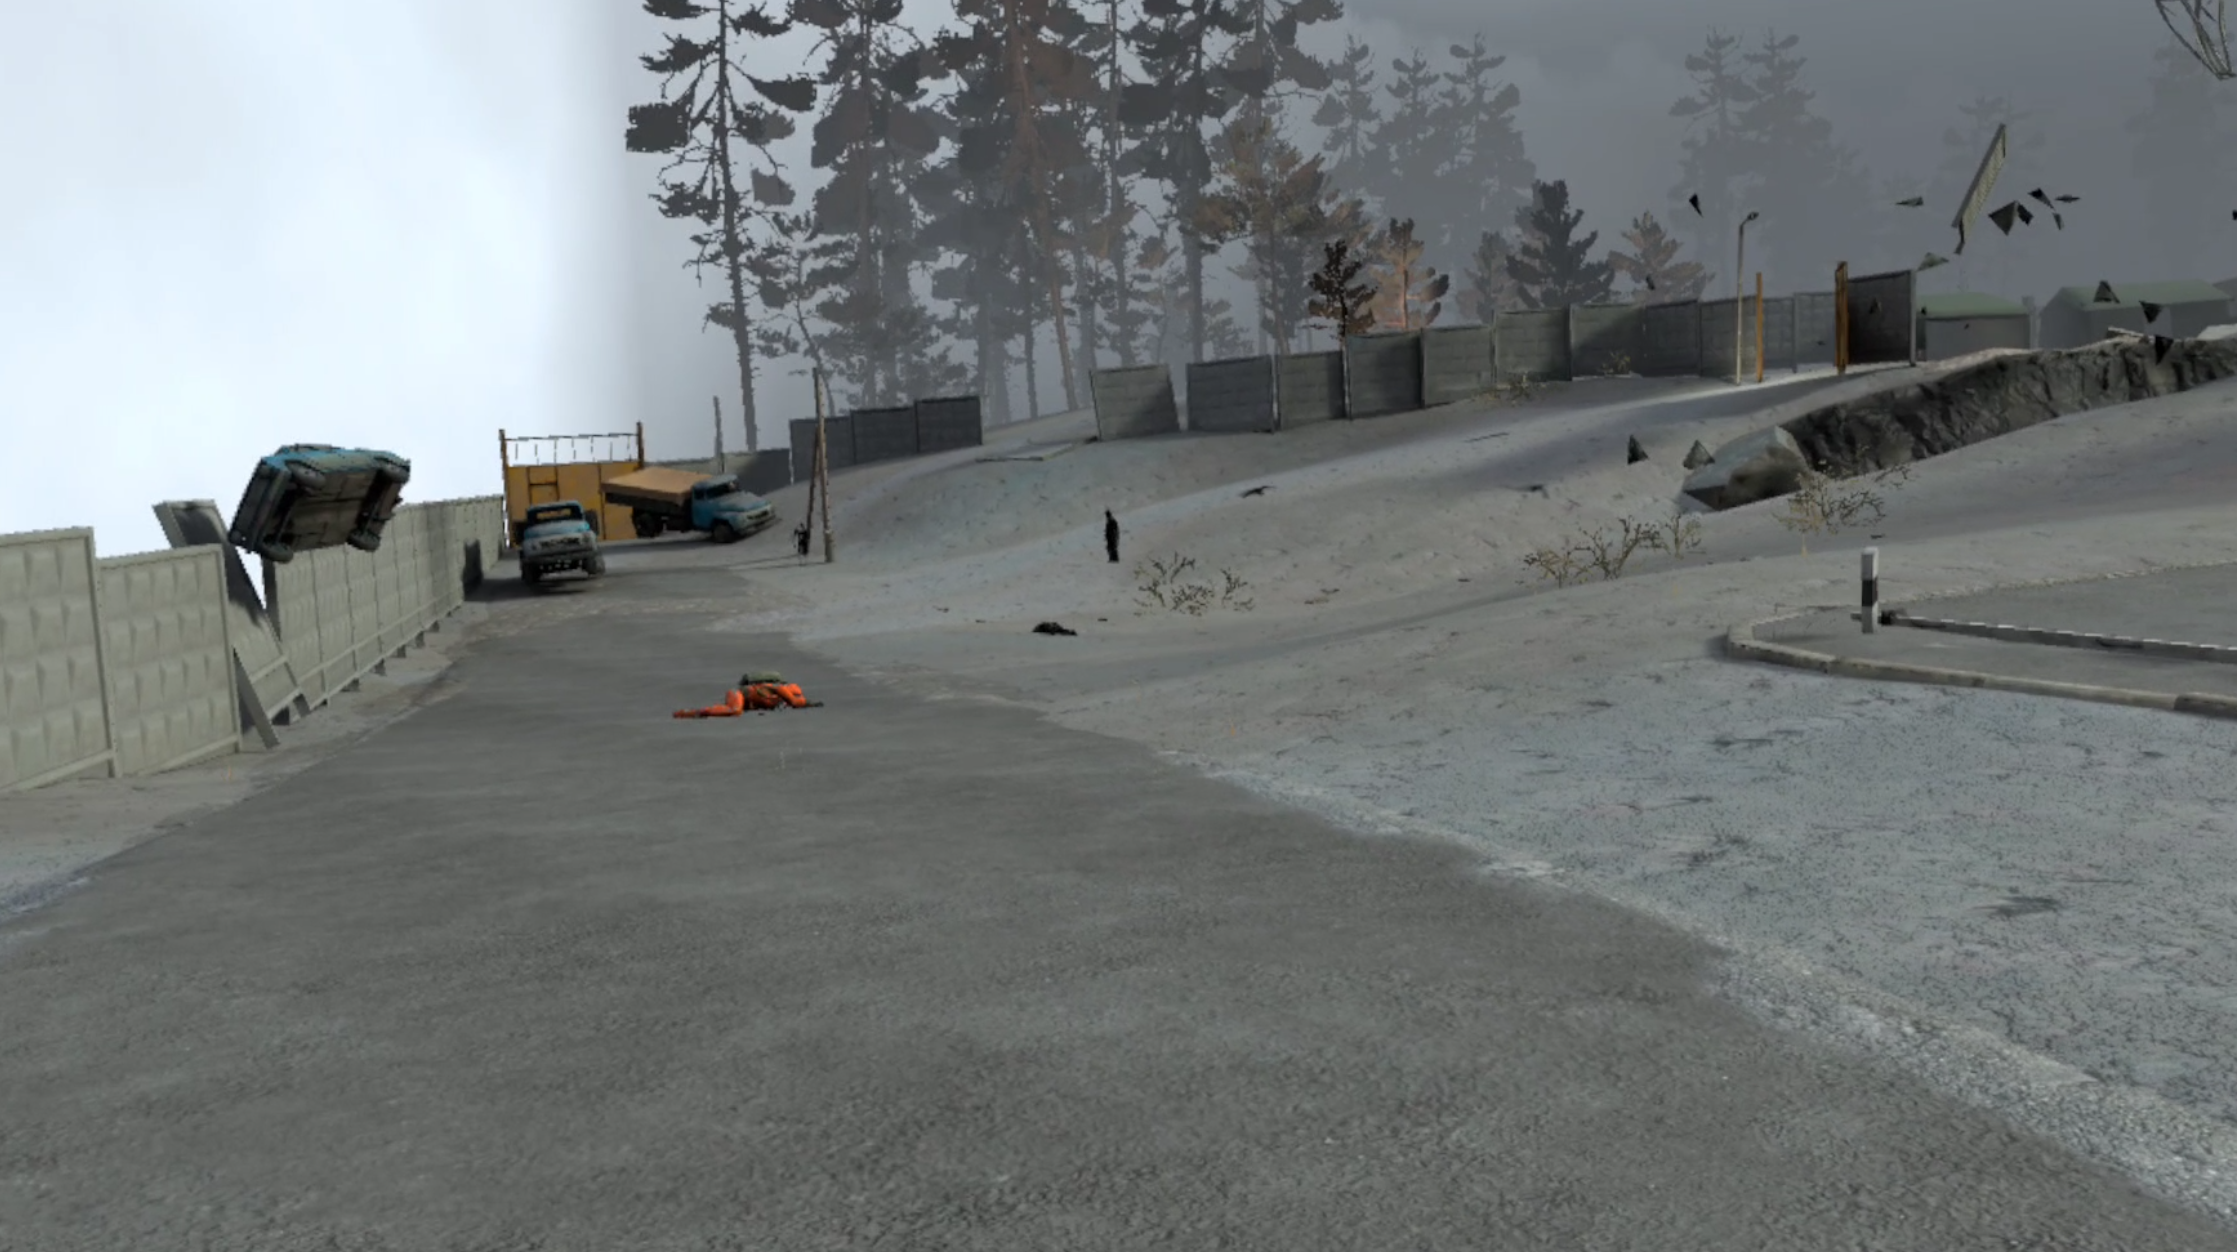
The Sample Courier Mission has you going out into the Pechorsk zone and finding a special sample container.
The sample container will be next to a dead scientist in an orange hazmat suit, or dead soldier in dark tactical gear, and will have some enemies near it.

Enemies guarding a sample container for the Sample Courier mission
You can try to run in and grab the container before running, or dispatch the enemies and take it at your leasure.
Either way once you have the container you turn it in for the reward.

The Sample Container for the Sample Courier mission
Warren’s Legacy
Warren’s Legacy is a mission that you will find later on in the game, and is essentially a harder version of Sample Courier.
This mission has you find a Black Box instead of a Sample Container next to a body surrounded by enemies.
You must retrieve a Black Box to complete the Warren’s Legacy mission
The main difference is that the Black Box will be much heavier, and won’t fit in your backpack. So you’ll have to carry it in one of your hands. It’s easiest to do this mission shortly before returning to Vanno.
Papers Drive Me Crazy
The Papers Drive Me Crazy mission is virtually the same as the Sample Container Mission.
It will also spawn enemies near the objective, though the objective will more often be in an area where loot is normally found rather than next to a body out in a field somewhere. So expect to have to go indoors.

The papers to be retrieved for the Papers Drive Me Crazy mission
Data Recovery
The Data Recovery mission is awfully like the first mission you receive, Equipment Retrieval.

A wristwatch you can retrieve for the Data Recovery quest
You need to retrieve a wristwatch that looks exactly like the one you found in that first mission.
The wristwatch may be next to the body of the unfortunate explorer who lost it, somewhere on the ground near the mission marker, or in a crate.
Usually the watch is found in an area heavy in anomalies or enemies or both.
In And Out/Radius Treasures
This is a very straightforward type of mission. Simply go into the artifact field marked on your map and bring back a unique artifact found inside.

The Neon artifact for the In And Out repeatable mission in Into The Radius
A lot of these missions will bring you to larger artifact fields that can contain multiple artifacts.
So it’s very profitable to not only get the mission artifact, but others as well if your detector keeps beeping. Some anomaly fields are more dangerous than others, but if you take your time they’re all possible to navigate.
Later on you may have to collect multiple artifacts for these missions.
Metastasis
Metastasis also involves hunting for an artifact, but in this case that artifact is inside of a Special Rift instead of a field of anomalies.
These rifts work just like normal rifts, except they look different. They’reort of like several normal Rifts smashed together, and drop a Broken Shard to hand in instead of a normal shard.

The special rift for the Metastasis mission
Later on in the game you will often have to collect several Broken Shards to complete the mission.
You don’t get anything if you don’t have all of the shards, and this mission must be completed before the next Tide.
Paparazzi
The Paparazzi repeatable mission in Into The Radius is arguably one of the more dangerous and annoying.
Not to mention that to complete the mission you will also have to pony up 50 dollars for a camera, found in the “Science Equipment” category.
Despite having two handles you can only hold this camera with one hand at a time, and there is a very small viewport that shows you what you’re taking a picture of.
For the paparazzi mission you’ll need to take photos of multiple enemies out in Pechorsk. What makes this mission dangerous is that pictures generally don’t come out well unless you are very close to your enemy, which can be problematic when those enemies wield automatic weapons.
Though luckily this mission is not tied to a particular zone, you can take the pictures wherever you want. On a successful picture you’ll see the text “That’s a Nice Shot!” appear.
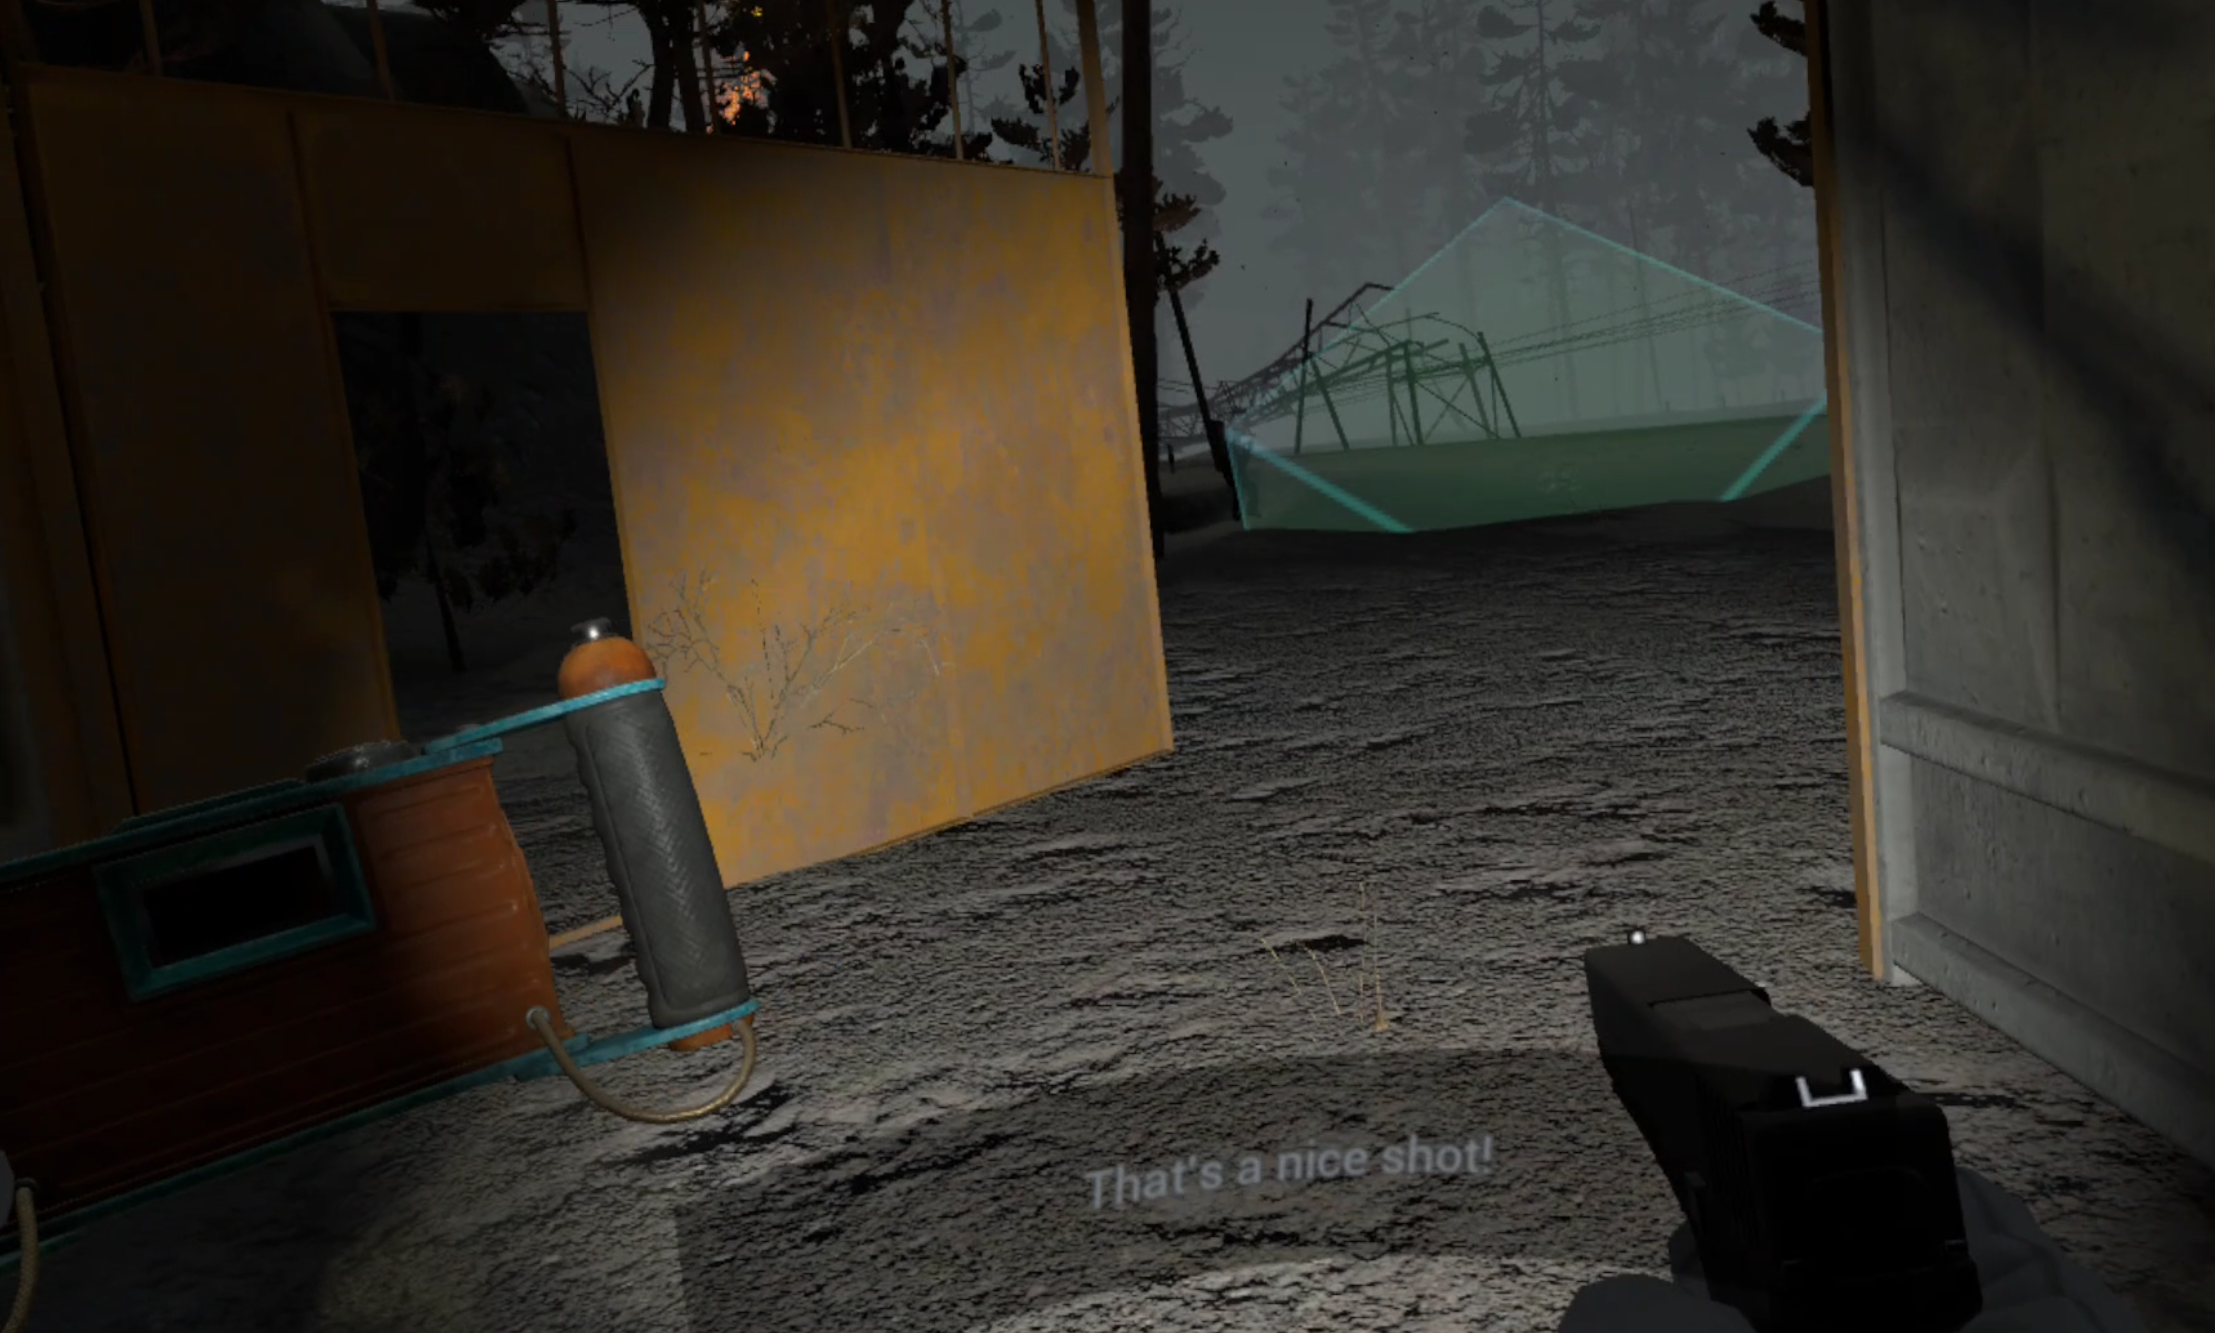
Moments after taking a picture for the Paparazzi mission
Once all of the pictures are taken turning in the camera completes the mission.
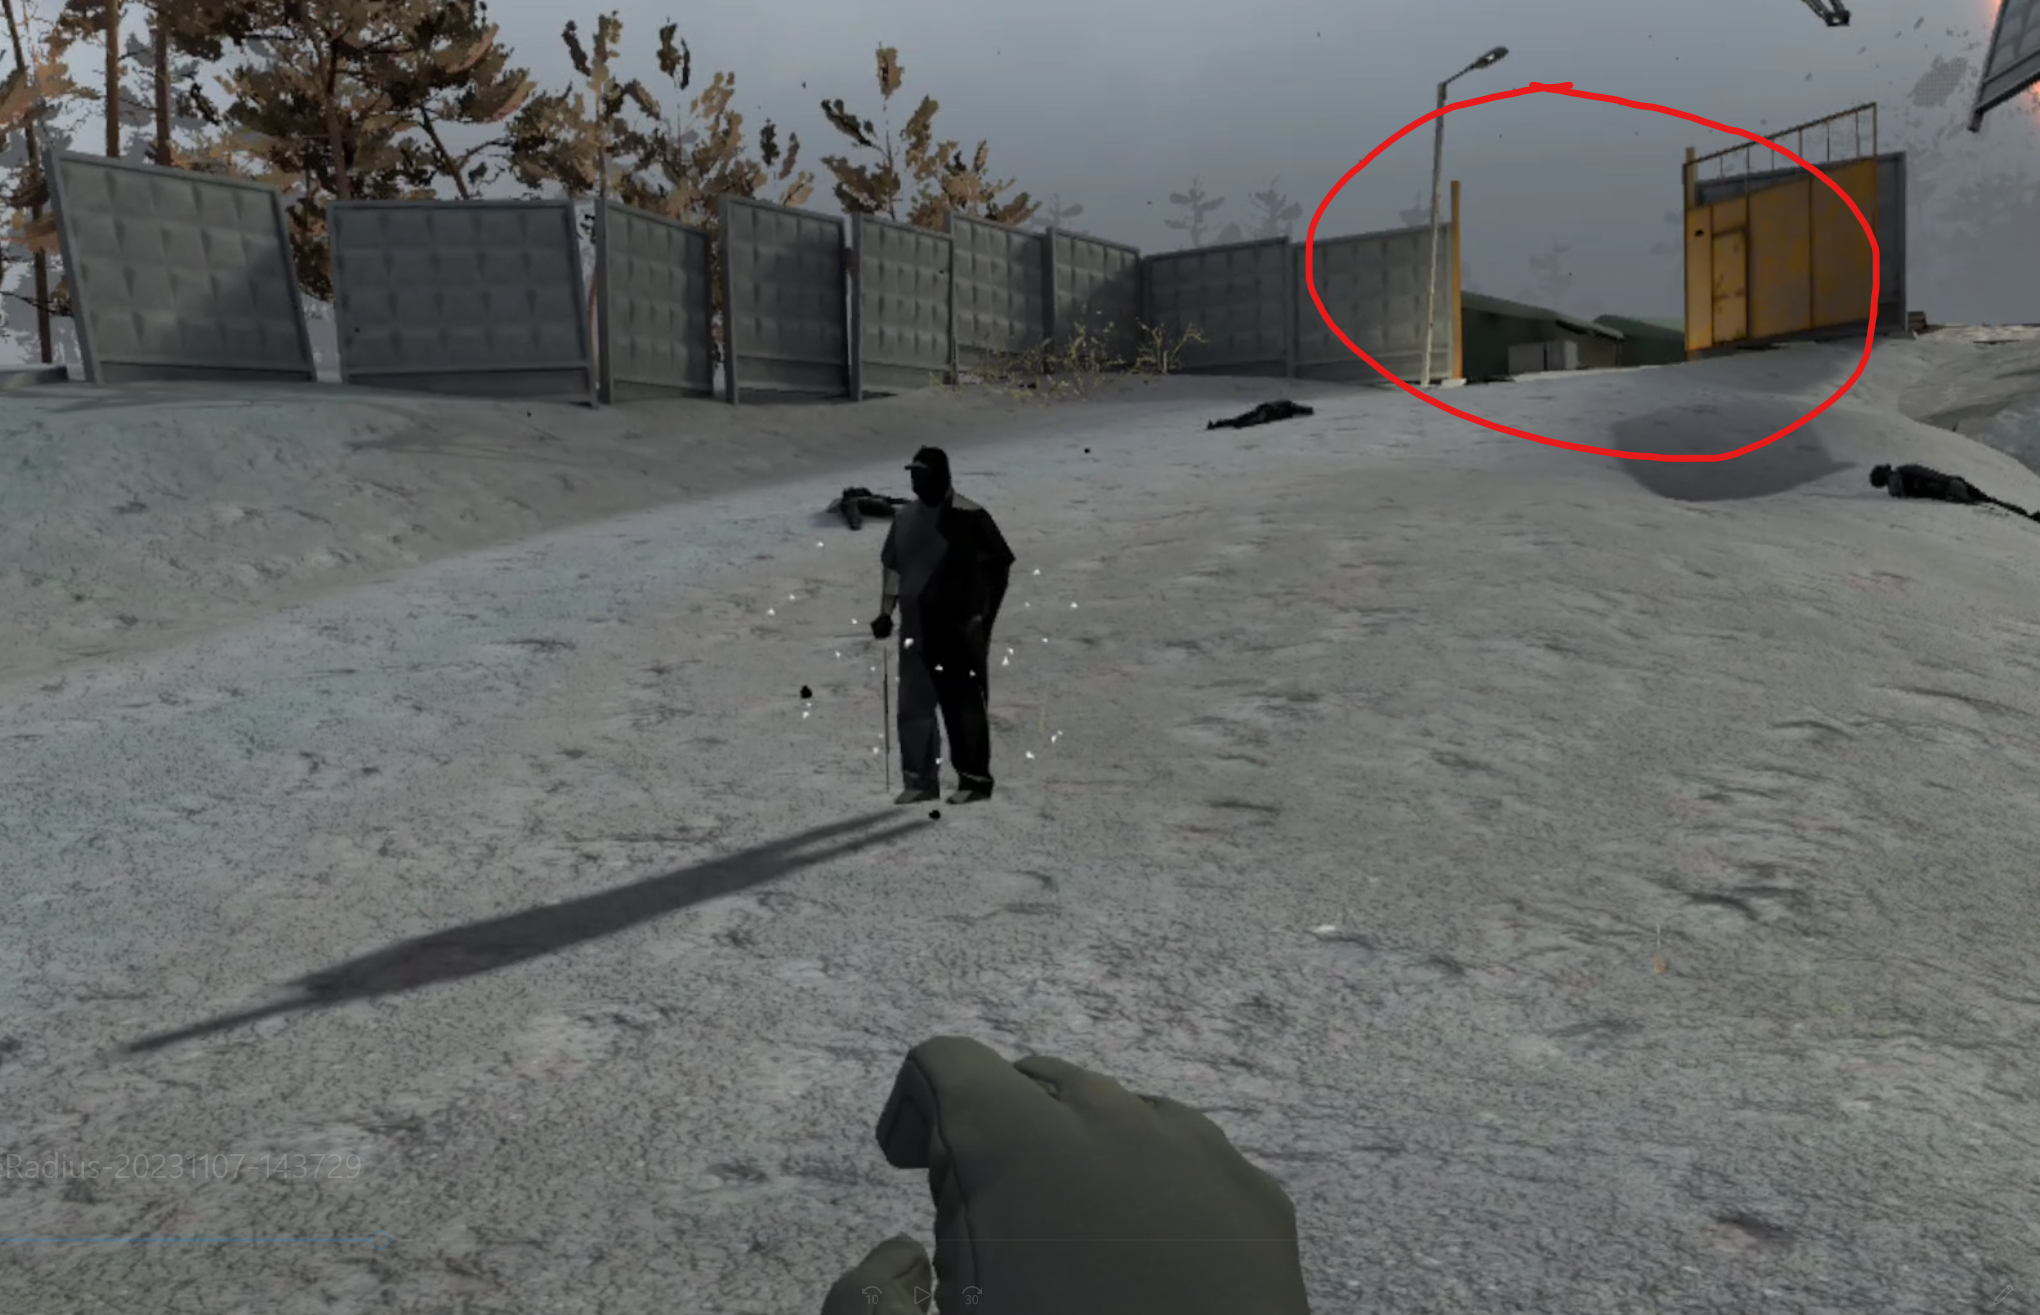
Operation Cleanup
Operation Cleanup is an extremely straightforward mission.
Accepting it will spawn a certain number of enemies where the mission marker is, and the number of those enemies are visible next to the mission in your journal.
Simply destroy all of the enemies spawned by the mission and you complete it.
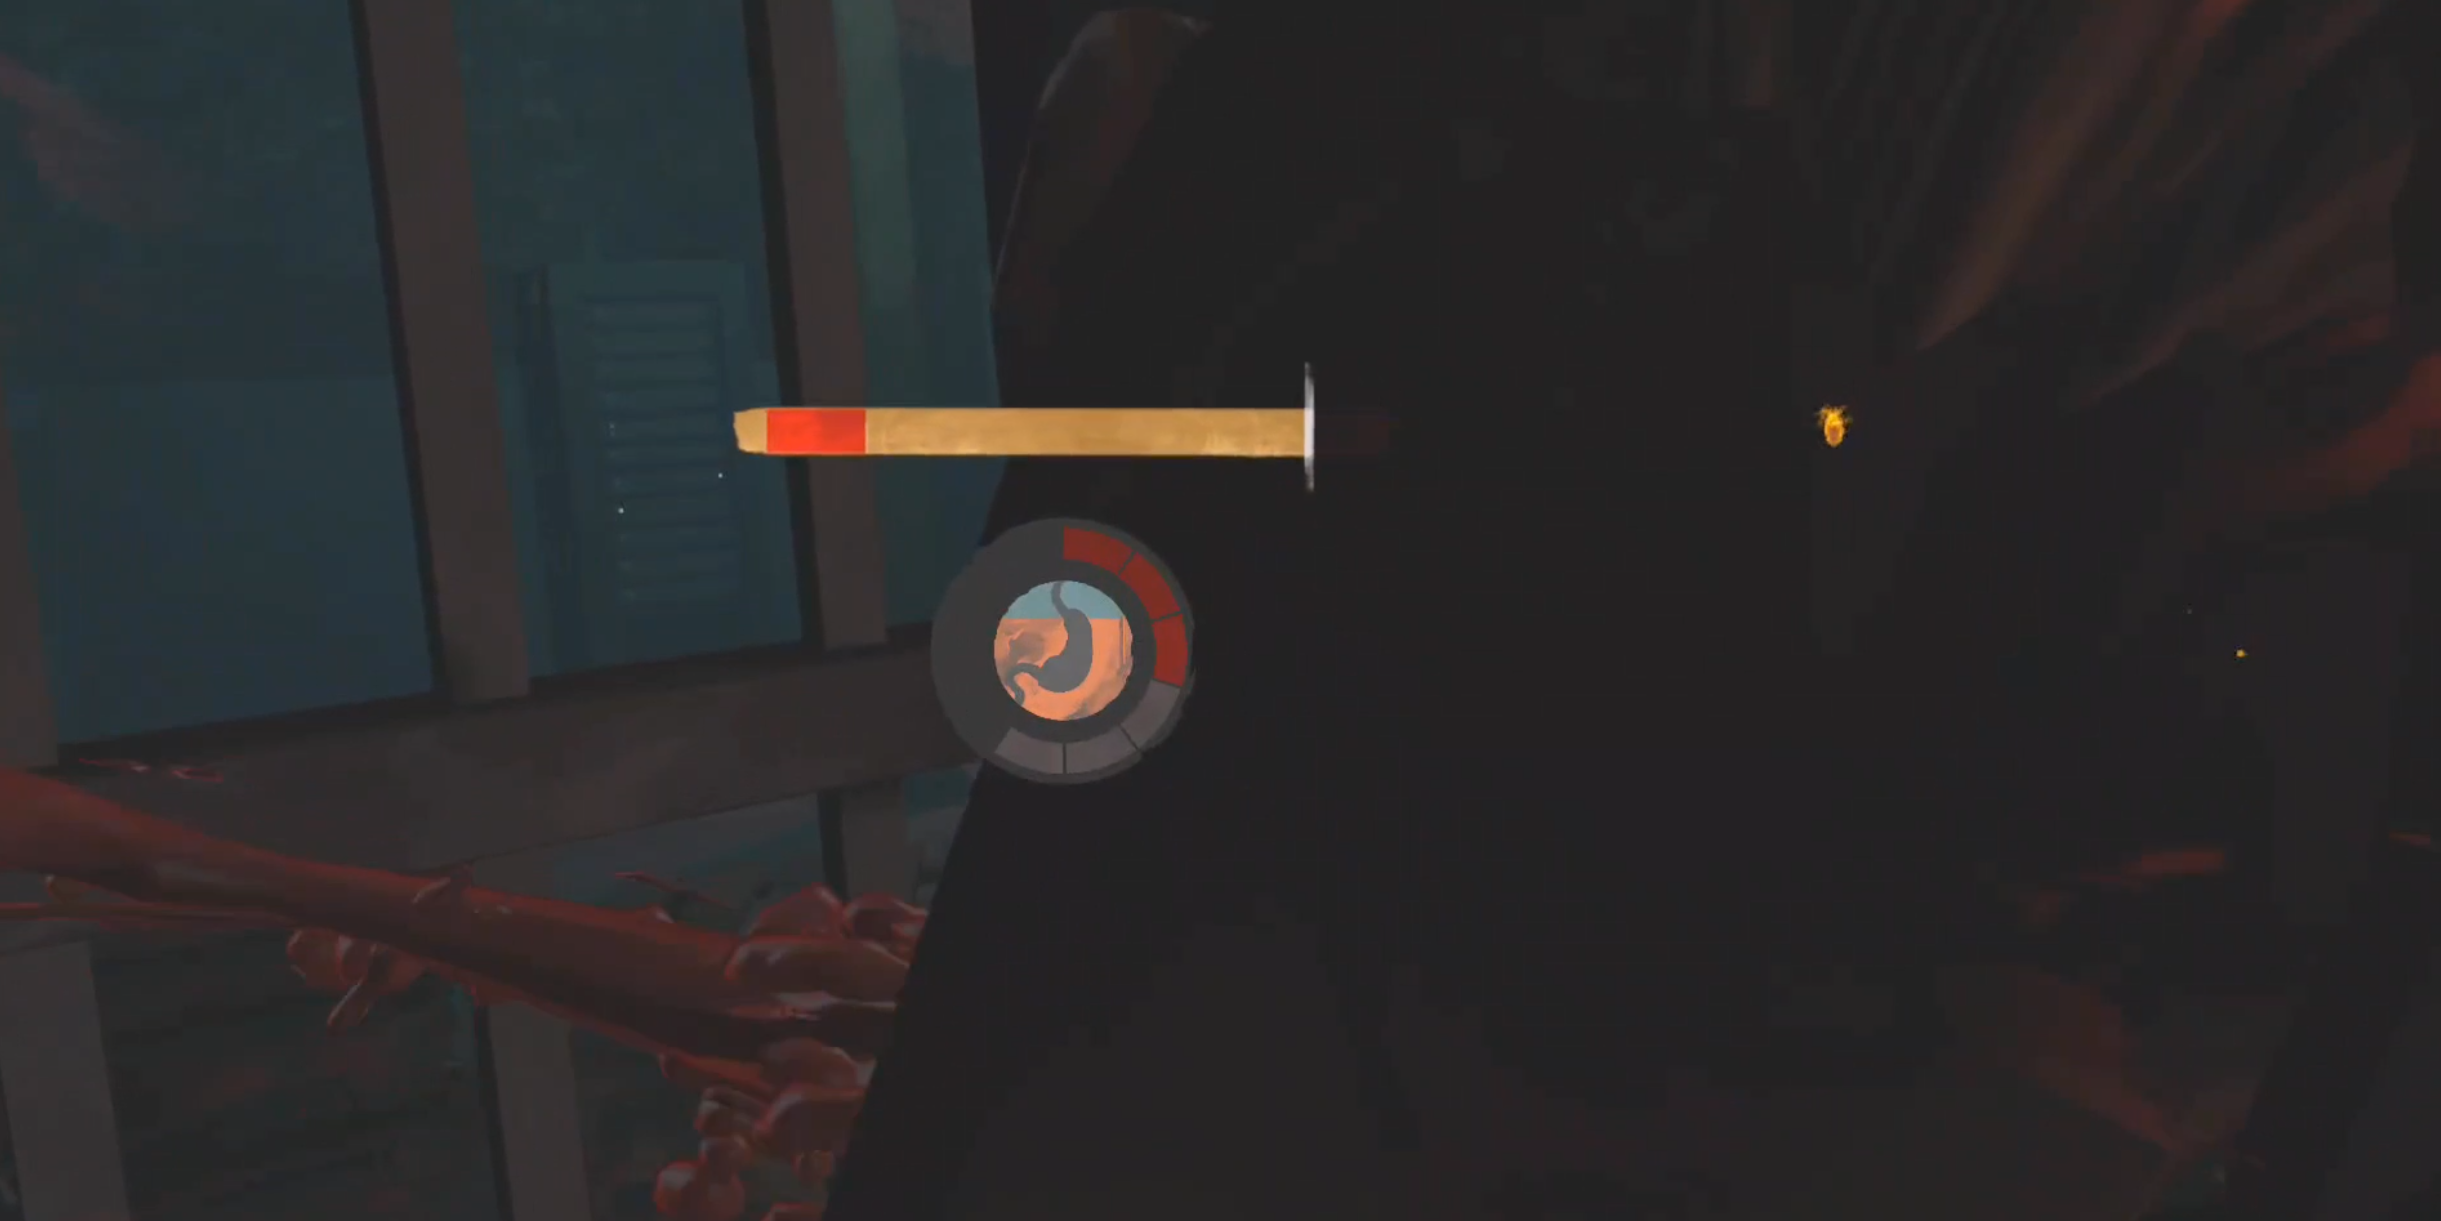
Banshee Hunt
So just like In and Out and Radius Treasures, you’re supposed to find an artifact in an anomaly field for the Banshee Hunt mission.
The catch? The Crier artifact that you find when doing this mission doesn’t just sit inertly in your bag after you take it.
Nope, instead it will make a shrieking noise pretty often, which will give away your position and draw in all nearby enemies. Not only is this noise very annoying, but it could potentially cost you your life.

The Crier artifact that you have to uncover and turn in for the Banshee Hunt mission
So it’s recommended to grab the Crier for the Banshee Hunt mission after the area is clear, or when you’re heading back home through a safeish area.
Those are all of the repeatable missions in Into The Radius, and some tips on how to complete them. After you do two of these you’ll be ready to tackle the third Top Priority mission in the game, Fixing A Leak, which we will cover in part four of this Into The Radius Walkthrough.
Other Guides You Might Find Helpful:

Vampire: The Masquerade - Justice Review After One Playthrough
After completing a full playthrough of Vampire: The Masquerade - Justice, and here's some quick thoughts on the game.
Overall this is a pretty fun vampire assassination and steath VR game. What it does best is the feeling of being a supernatural assassin. Sneaking from spot to spot and taking out your enemies one by one.
After completing a full playthrough of Vampire: The Masquerade - Justice here's some quick thoughts and a review about the game.
Overall this is a pretty fun vampire assassination and stealth VR game. What it does best is the feeling of being a supernatural assassin. Sneaking from spot to spot and taking out your enemies one by one.
Your need for blood will also force you to get up close and personal to borrow some from an enemy, which is always a risk, and keeps you from just using your most powerful abilities over and over.
You suck on a lot of necks in this game
This is the core of Vampire: The Masquerade - Justice and what it does well. Put a lot of enemies between you and where you need to be and let you figure out how to sneak or kill your way past them.
It also gives you the choice between being patient or going a little crazy and seeing if you can quickly fight your way through.
There are sections where I found sneaking to be the best option, and other parts where I just went on a wild killing spree until only I was left standing. Either way I was having a good time.
Though of course going for the aggressive approach comes with a lot of risks as your enemies are capable and if they spot you will take you out pretty quickly.
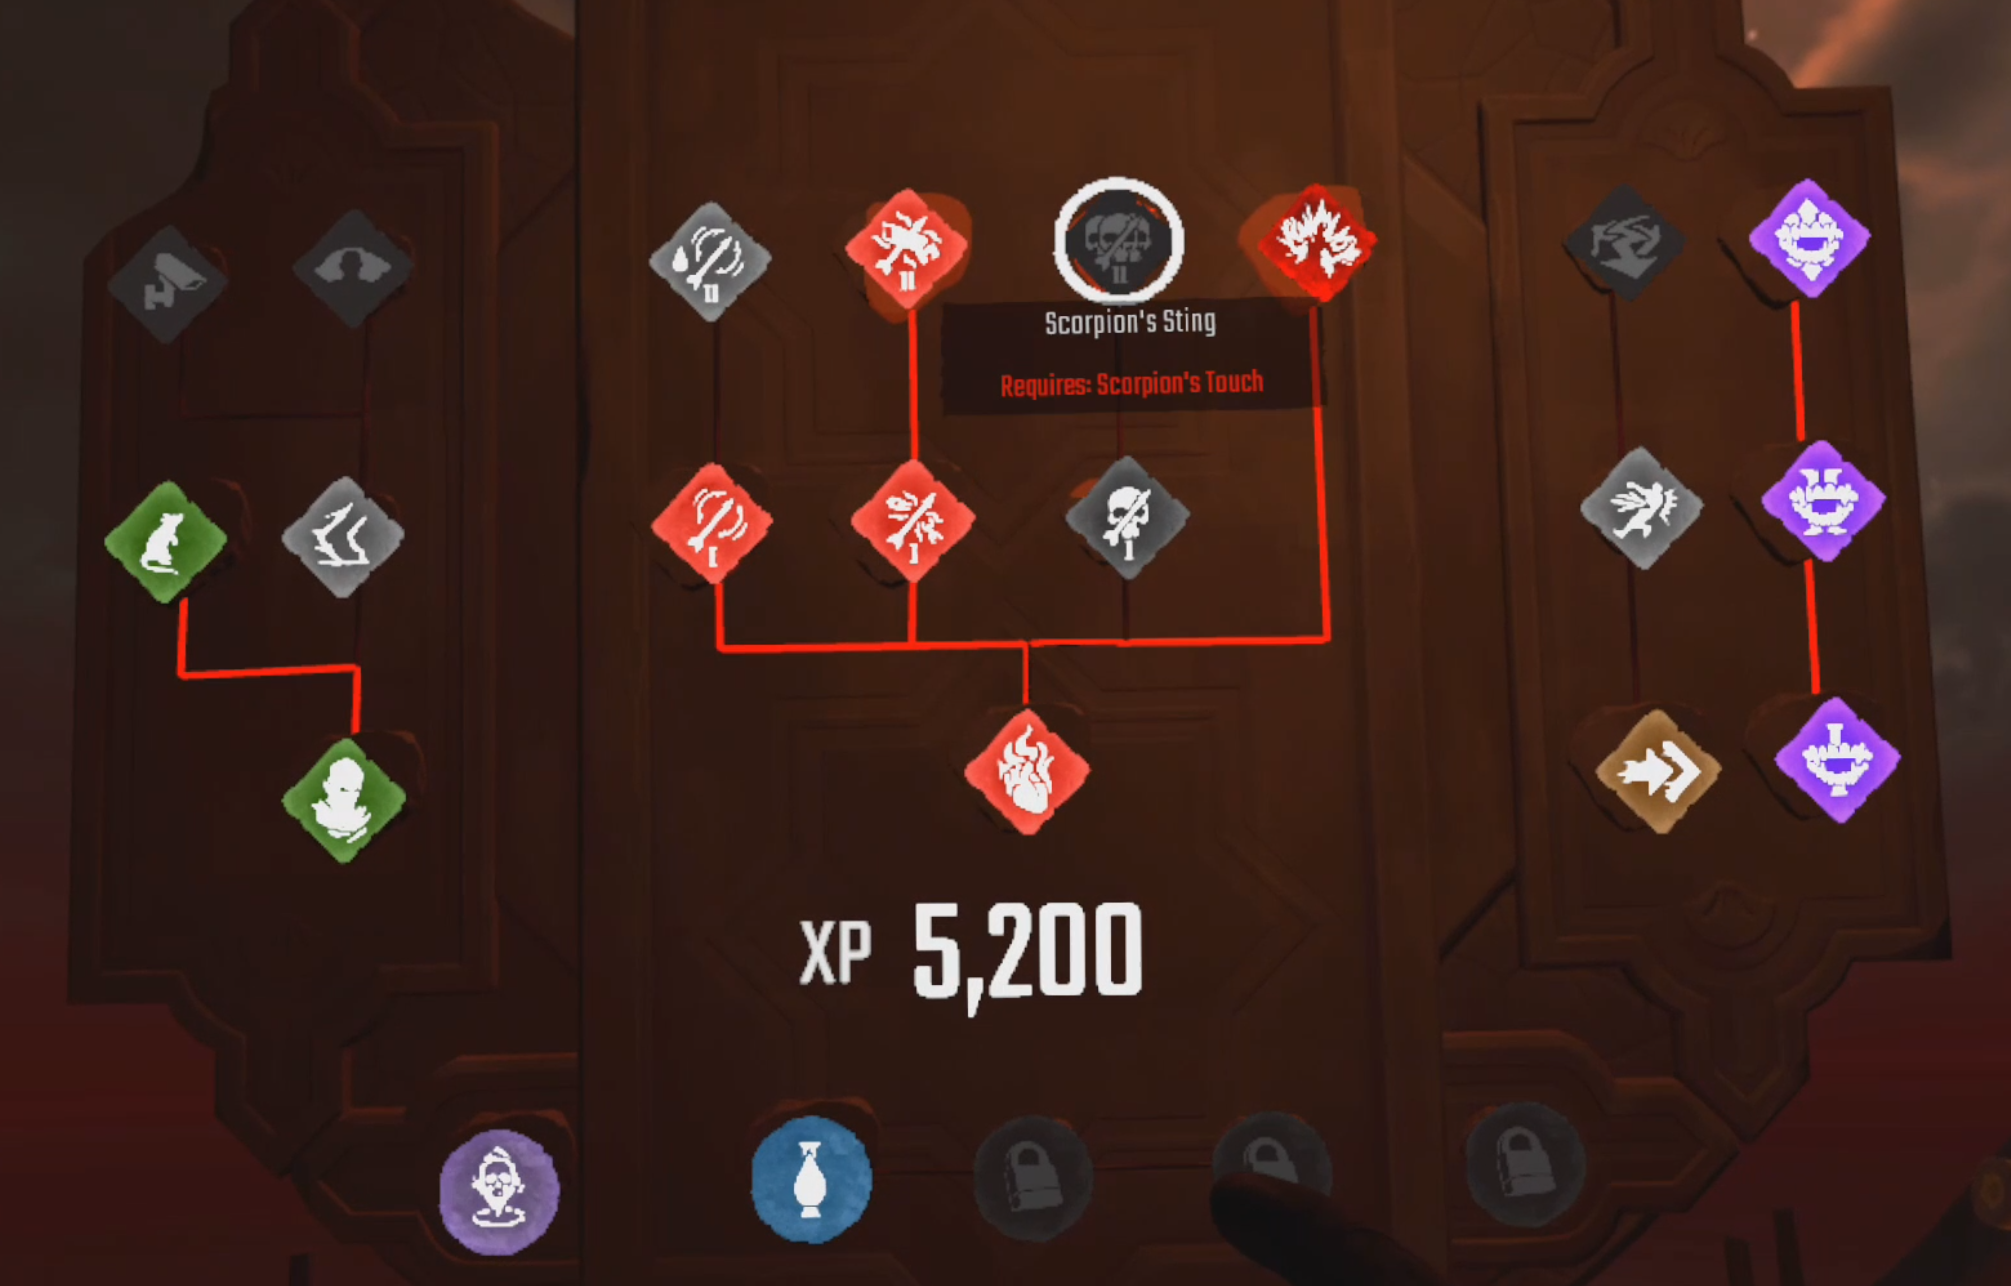
The upgrade tree in Vampire: The Masquerade - Justice
Speaking of options, there's an upgrade tree, and the choices of which upgrade to take were pretty compelling, and you'll always want more upgrade points which really incentivizes you to look for collectibles or complete optional objectives for more.
Even at the end of the game I still want to find out what other abilities and upgrades I could use.
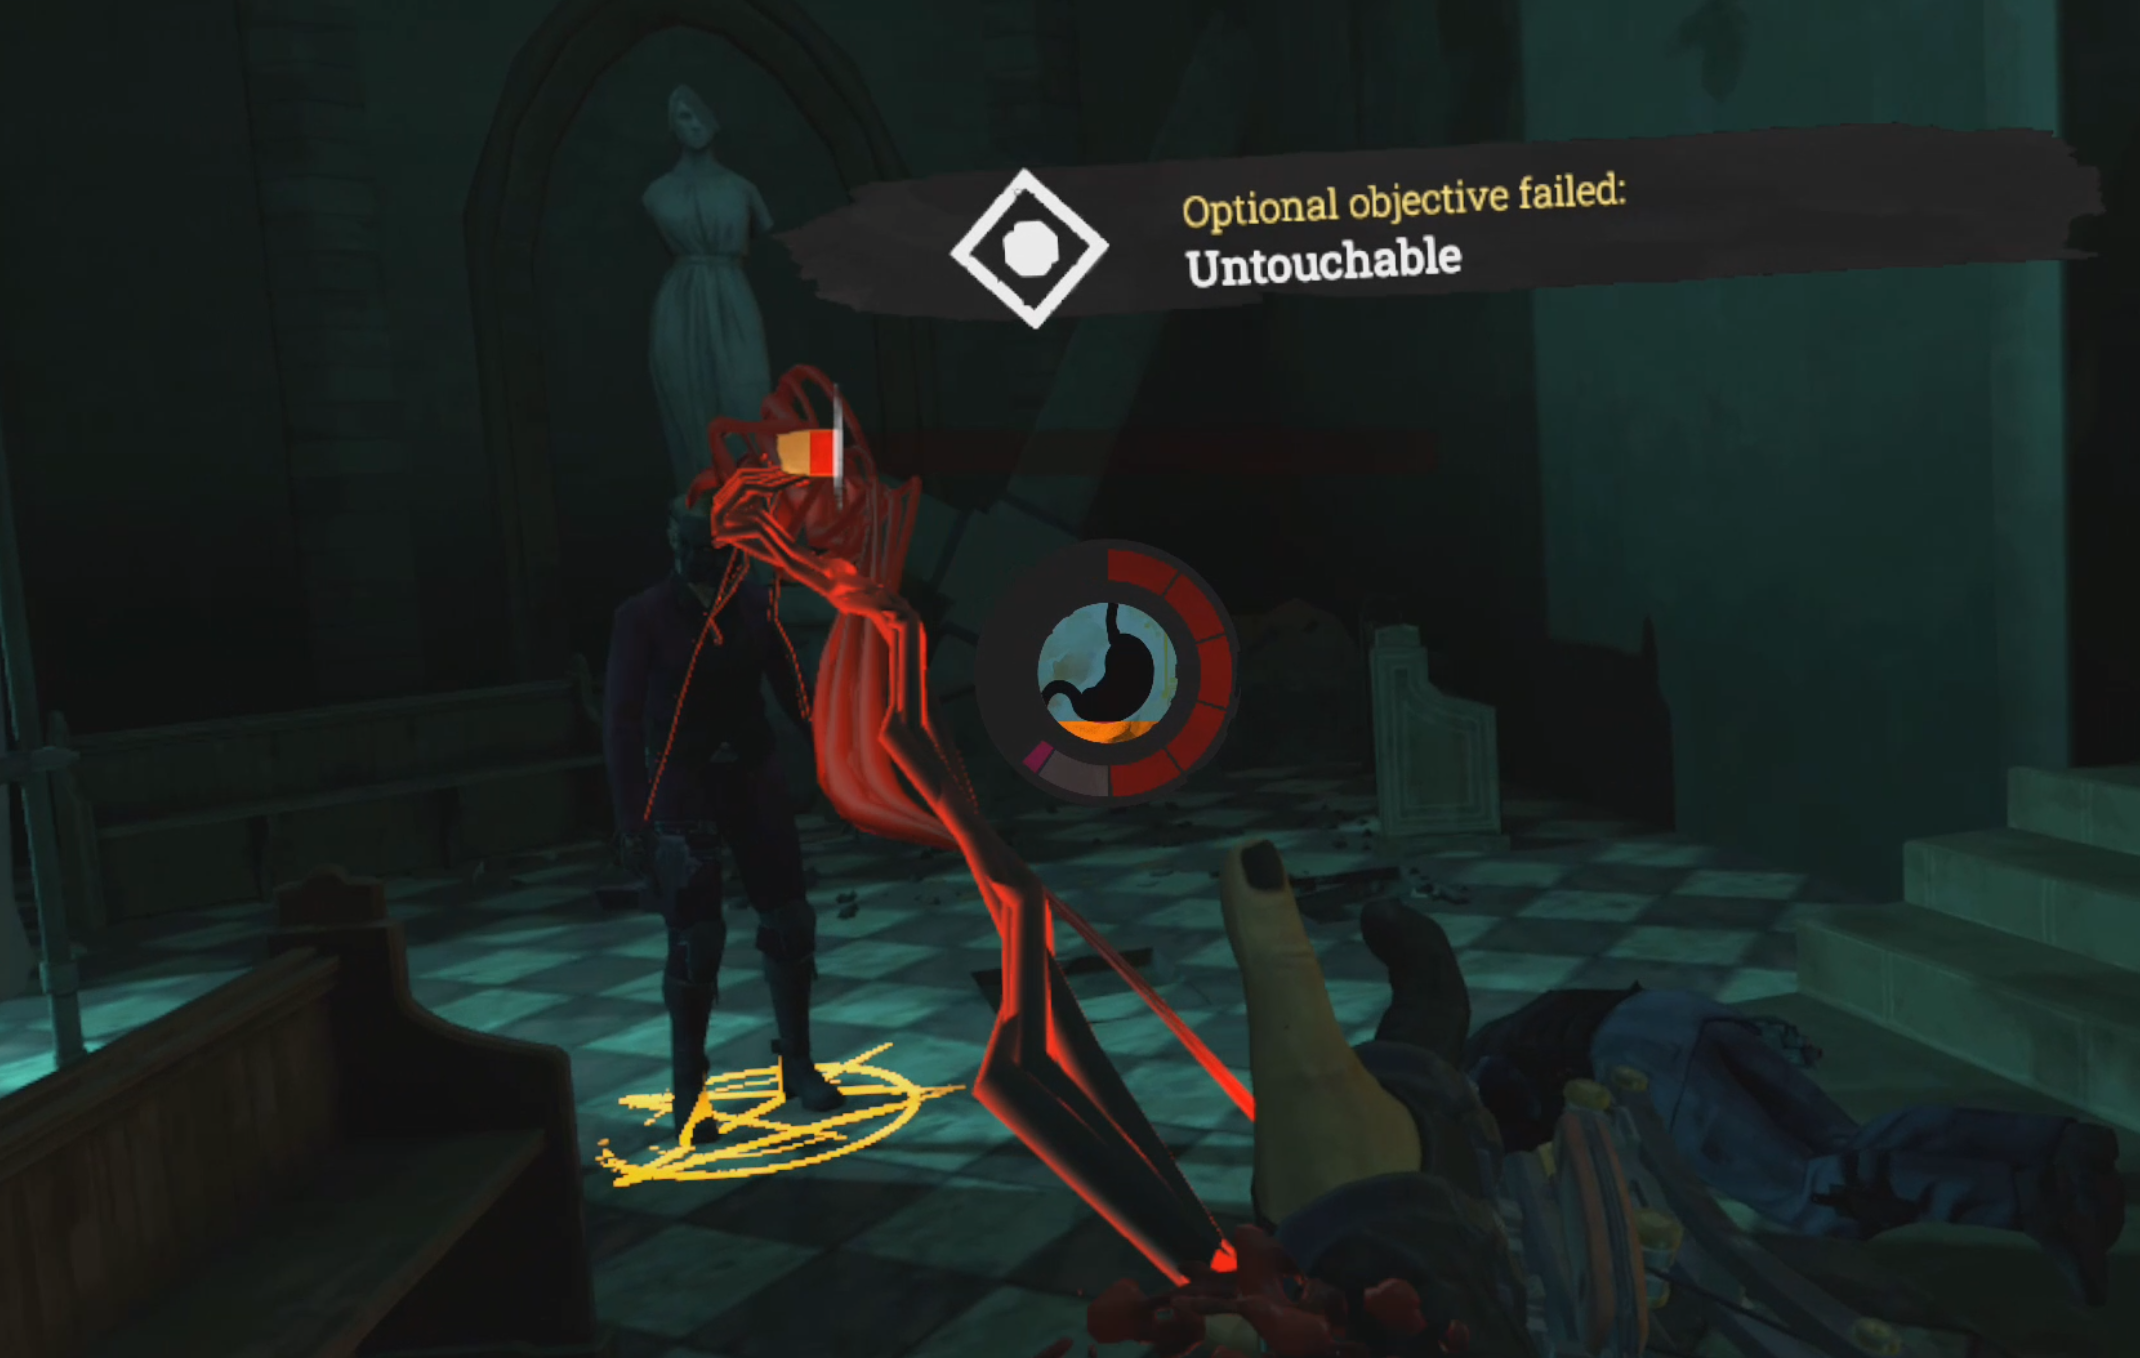
The optional objectives did occasionally make me want to replay a mission later as well, which is a good sign. Though there is sometimes an optional objective to do a mission without killing anyone, and that feels pretty dumb.
Most of your abilities are aimed at murder, you are a vampire assassin after all, and not using those abilities for the pacifist optional objective feels so limiting and takes away most of your options in a given situation.
Using an incredible vampire ability on a poor guard
It feels like a disjointed design choice, and so do other parts of this game as well. For instance the snipers that appear only at the beginning and end of the game, and the boss fights.
There aren't many boss fights, and they all take away most of your abilities and reduce you to your blinking teleport and your punching. Try as I did I couldn't find any other ability that did anything in the boss fights, and that also felt very limiting.
My upgrade choices didn't matter, and neither did my skill at most of what the game had me doing, sneaking and assassinating.

Dodging these is most of what you do in boss fights
Speaking of choices that don't matter, let's talk about the story. Vampire: The Masquerade - Justice bills itself as a story driven game that lets you explore Venice and make choices in the seedy back stabbing World Of Darkness setting.
It doesn't really do that, if you want to come to this game to have fun in the world of vampire power politics, then don't expect much of that. The focus of this game is the fun assassination and sneaking gameplay.
Without spoiling too much, you rarely get choices, and even sinking some ugprade points into Intimidation skills didn't help that much either.
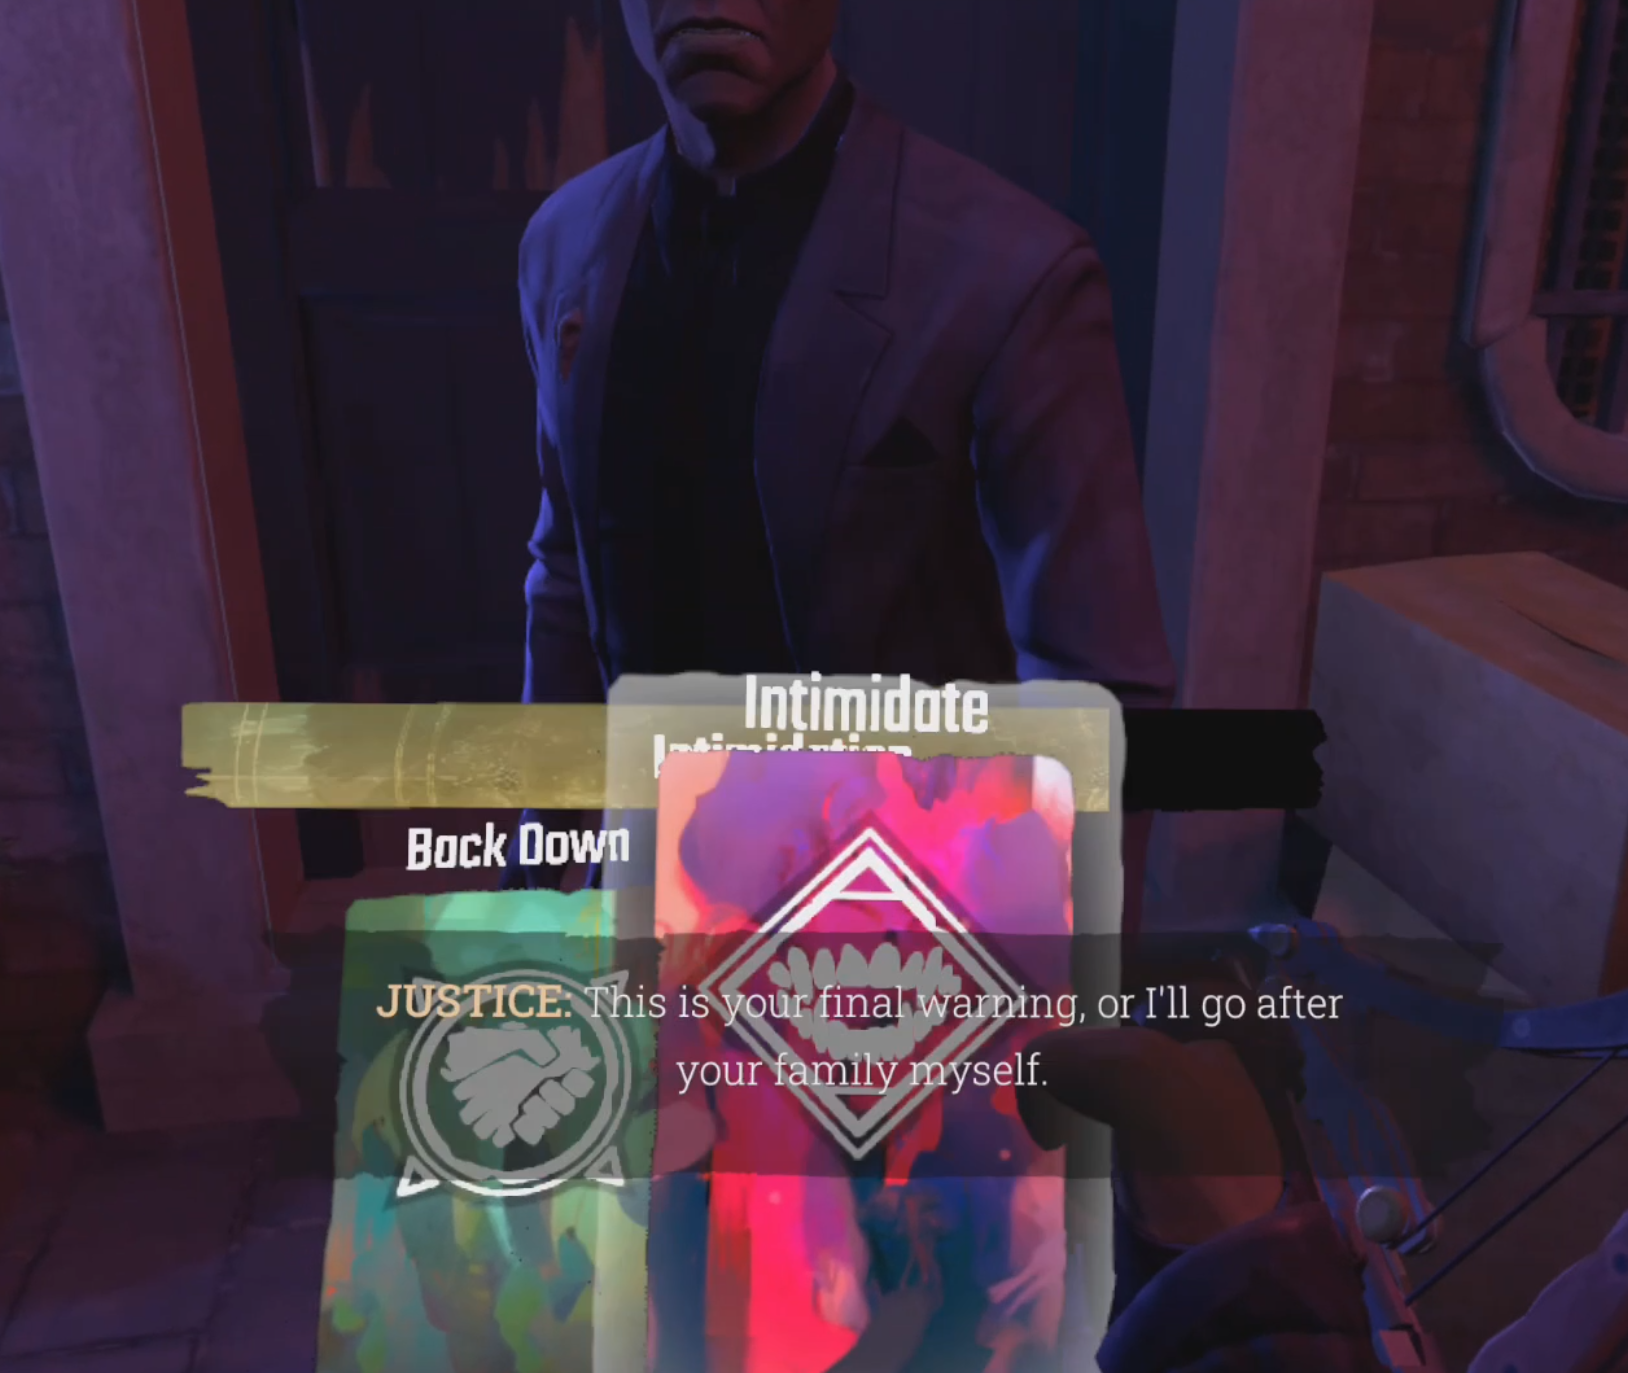
Intimidating for an extremely minor advantage
Your choices really come down to being nice to people or being mean to people, which isn't much choice at all.
Only a couple of times did I notice actions I took in the game changing things later in a throw away line of dialog or a slight difference in a mission.
Maybe my choices were changing things more than I thought, but I didn't really notice that my limited decisions had any effect on anything.
Mostly events just happen to you, and those events are pretty flat.
So are the characters. Your buddy Pietro helps you out, and all the other Vampires are opponents that aren't really sympathetic or deep at all. Except maybe for one, but I never had the chance to take their side.

Despite not being very interesting Pietro is pretty great
This ties into the big twist that clearly meant to feel like a twist, but didn't.
Overall the most disappointing thing in the entire game was at the end where what should have been a big choice on how to treat all the main characters, but that didn't happen.
Their fates were already decided. Maybe my actions earlier had predestined that, but it would have been good to have some indication if that was the case.
The gameplay was pretty awesome though, and the feeling of sneaking through an area and picking off the hapless opponents one by one, or the scary thrill of running away or trying to not be destroyed in a tense fight was fantastic.
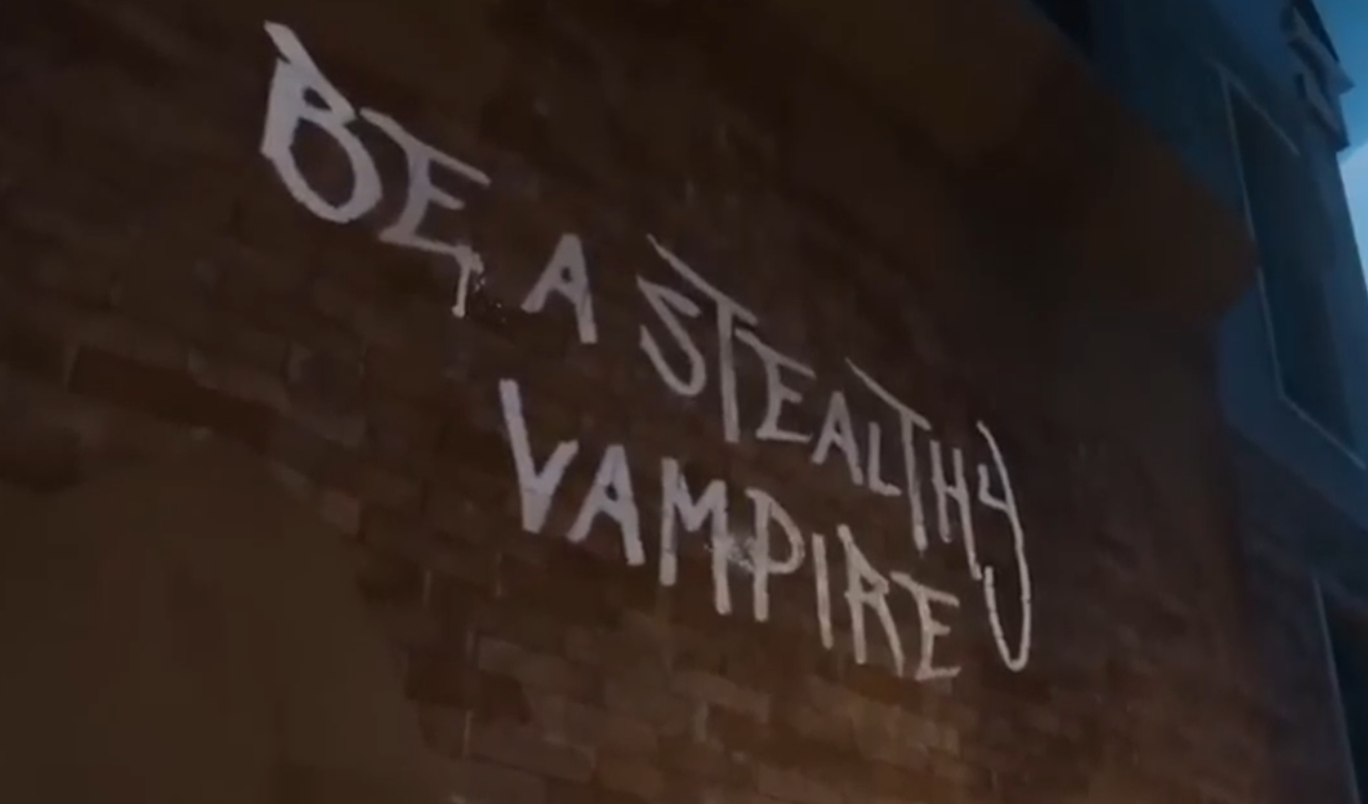
This screenshot from the Vampire: The Masquerade - Justice summarizes this entire review
Vampire: The Masquerade - Justice delivers in its gameplay promises, though it does stumble from time to time when it loses focus of what makes it a fun game.
All in all I'd give it a B. If you really love the World Of Darkness or want to do some sneaky assassination as a vampire, then this game is an easy recommendation.
If you're looking for a deep story where your decisions have consequences or you're looking for a more head to head combat focused experience then look elsewhere.
If you've got some thoughts on this game yourself feel free to leave a comment.

Into The Radius Walkthrough And Guide - The Second Mission - Total Recall
Stuck in Into The Radius? Wondering where to go and how to get there for your next mission?
Well don’t worry we’ve got you covered with this walkthrough and guide for Into the Radius VR.
Here we’ll be talking about the second mission that you get in Into The Radius, Total Recall, which has you delving further into Pervomay Route, fighting new enemies, and dealing with new anomalies.
Stuck in Into The Radius? Wondering where to go and how to get there for your next mission?
Maybe you would just like to see what is in store for you before you get there, or you’d like to know if you’re properly prepared for your next mission in the Pechorsk Zone.
Well don’t worry we’ve got you covered with this walkthrough and guide for Into the Radius VR.
In this Into the Radius walkthrough we’ll detail how to progress through the main story “Top Priority” missions, with a couple of guiding tips thrown in here and there to make your adventure smoother.
The focus of these walkthroughs will be the story missions, but we’ll throw in some general gameplay tips and other useful loot locations near your objectives.
These articles will also assume you’re playing the game on the Normal difficulty mode with Tutorials turned on, which is highly recommended for your first playthrough. This walkthrough will still be useful if you’re playing on Realistic difficulty, but some details like vendor prices or enemy placement and numbers will be different.
Here is every article in our complete Into the Radius VR Walkthrough:
Into The Radius Walkthrough And Guide - The First Mission - Equipment Retrieval
Into The Radius Walkthrough And Guide - The Second Mission - Total Recall
Into The Radius Walkthrough And Guide - The Third Mission - Fixing A Leak
Into The Radius Walkthrough And Guide - The Fourth Mission - Flash In The Dark
Into The Radius Walkthrough And Guide - The Fifth Mission - A Probing Move
Into The Radius Walkthrough And Guide - The Sixth Mission - The Intrusion
Into The Radius Walkthrough And Guide - The Seventh Mission - A Farewell Feast
Into The Radius Walkthrough And Guide - The Eighth Mission - Kids Playground
Into The Radius Walkthrough And Guide - The Final Mission - Ouroboros
Here we’ll be talking about the second mission that you get in Into The Radius, Total Recall, which has you delving further into Pervomay Route, fighting new enemies, and dealing with new anomalies.
The Second Mission - Loadout
This walkthrough picks up where our previous one left off.
You’ve completed the first mission, gotten security level 1, and done the training in the shooting range.
What you may have already noticed is that your bedroom has some new and very useful items in it which you’ll want to take.
First on the bedside table is a detector and a Regen artifact.

The free Detector and Regen artifact on your beside table
As you were taught in the shooting range tutorial, you’ll need the detector to find and reveal artifacts.
You will always want to bring a Detector with you into the zone, so make sure to pick it up and preferably put it on one of your body slots like one of your shoulders.
This way you can hear it ticking when you’re close to an artifact and can quickly whip it out and put it back away.
The Regen artifact is a more rare tool, and while the one on the table isn’t in the best of shape, it’s still a great source of healing that can top off your health when you’re not hurt enough to justify using a healing syringe.
Even better you can now find a free double barreled sawn off shotgun on top of your mission terminal.

The free sawn off shotgun on top of your mission terminal
It also comes with a box of shells, and hopefully you found some other shells while off on the first mission to supplement them.
While buckshot isn’t very effective at longer ranges, it is great for taking out fragments and phantoms.
You can store the shotgun behind your right shoulder, where you can quickly take it out for use in combat. It can also hold reserve shells in the shell holders on its side.
While you’re at your base it’s also highly recommended that you get some cleaning supplies and clean out your Makarov, the cleaning rod and paper can be found in the “Weapon Cleaning” category and are very cheap.
More importantly if you haven’t found a Pocket Lamp then you should buy one. While you’ll be replacing it later on it’s also cheap, and is an easy way to mount a light on your body so that your hands are free.
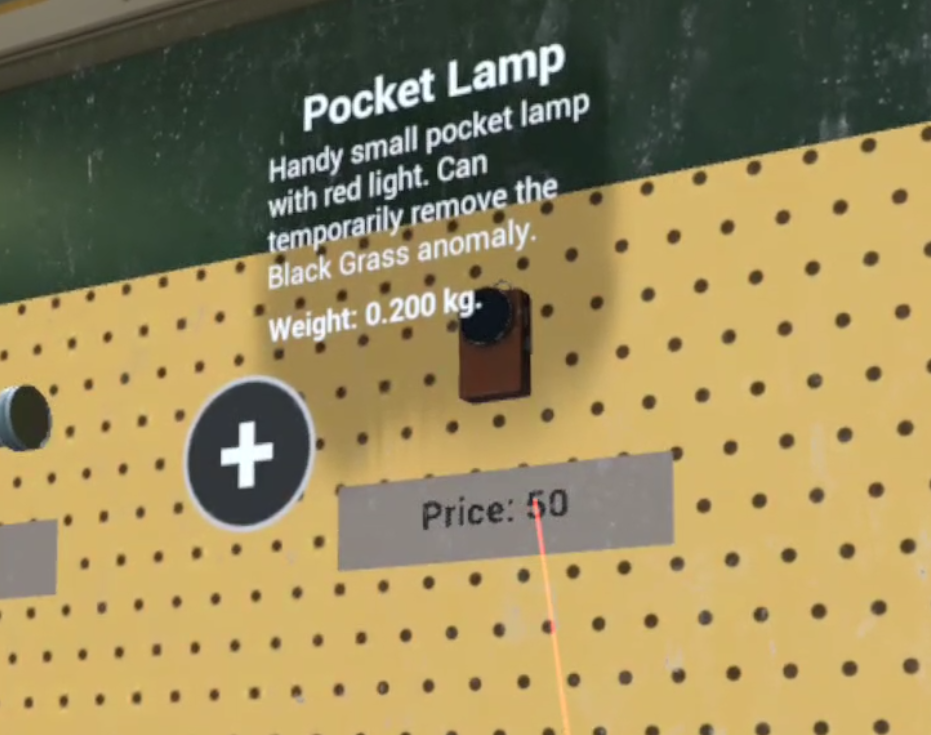
The Pocket Lamp in the store in Into The Radius
It can be found in the “Survival Equipment” category and can be turned on and then placed in a shoulder slot.
It will then shine a light directly in front of you, so it will light in front of you wherever your body is turned and doesn’t need to be held in your hand to do so. Very useful.
As for your loadout you still don’t have many options. You can spend what money you got from your first mission, and from selling anything you don’t want or need, on a limited selection of new weapons.
The Glock 17 pistol, the GSH-18 pistol, and the short barrelled PPSh are the most noteable options. If you’re truly struggling then they’re all solid upgrades to your Makarov and sawn off shotgun.
Though at least for your first try I’d recommend that you try to do this mission with just your Makarov and shotgun that you already have. You’ll need the money that you’ve got later for other upgrades, and when you get your security level to 2 in the mission after this one you’ll have even better options.
Also I’ll be showing you how to get a Glock 17 easily in this article, and at some point how to find an upgraded TT-33 pistol in practically mint condition.
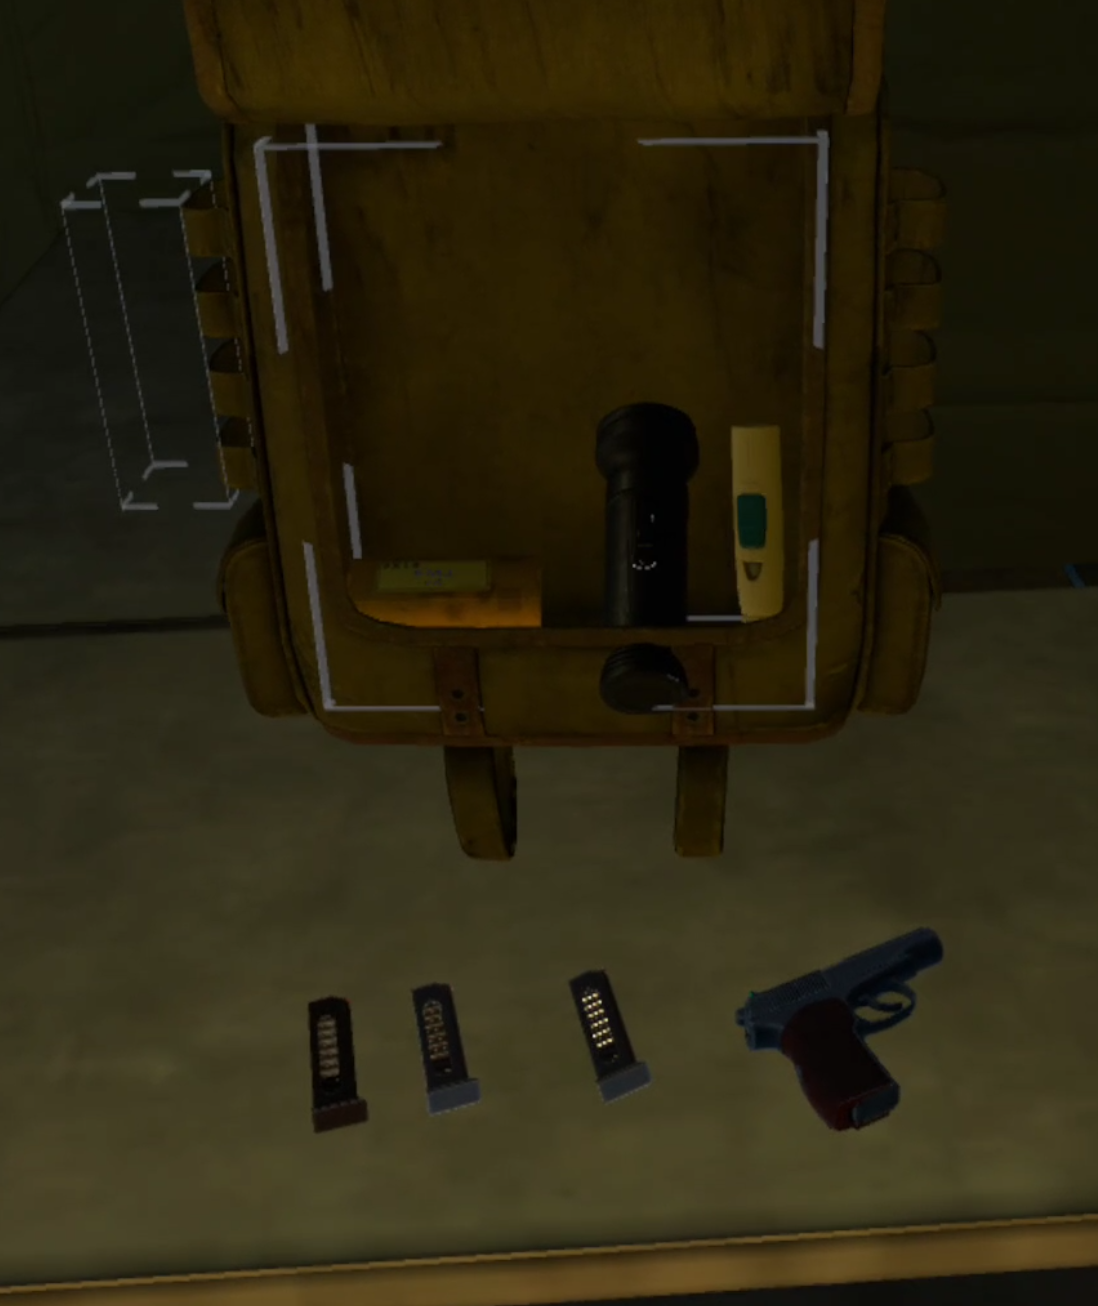
So this loadout is maybe a little frugal, but you can certainly complete the second mission with it. Bring some spare shells for your shotgun and spare ammunition, as well as three spare magazines for your Makarov.
You’ll also want to bring at least one healing syringe and the regen artifact. If you’ve still got two syringes you might as well bring both just in case. You can also buy more if you need them.
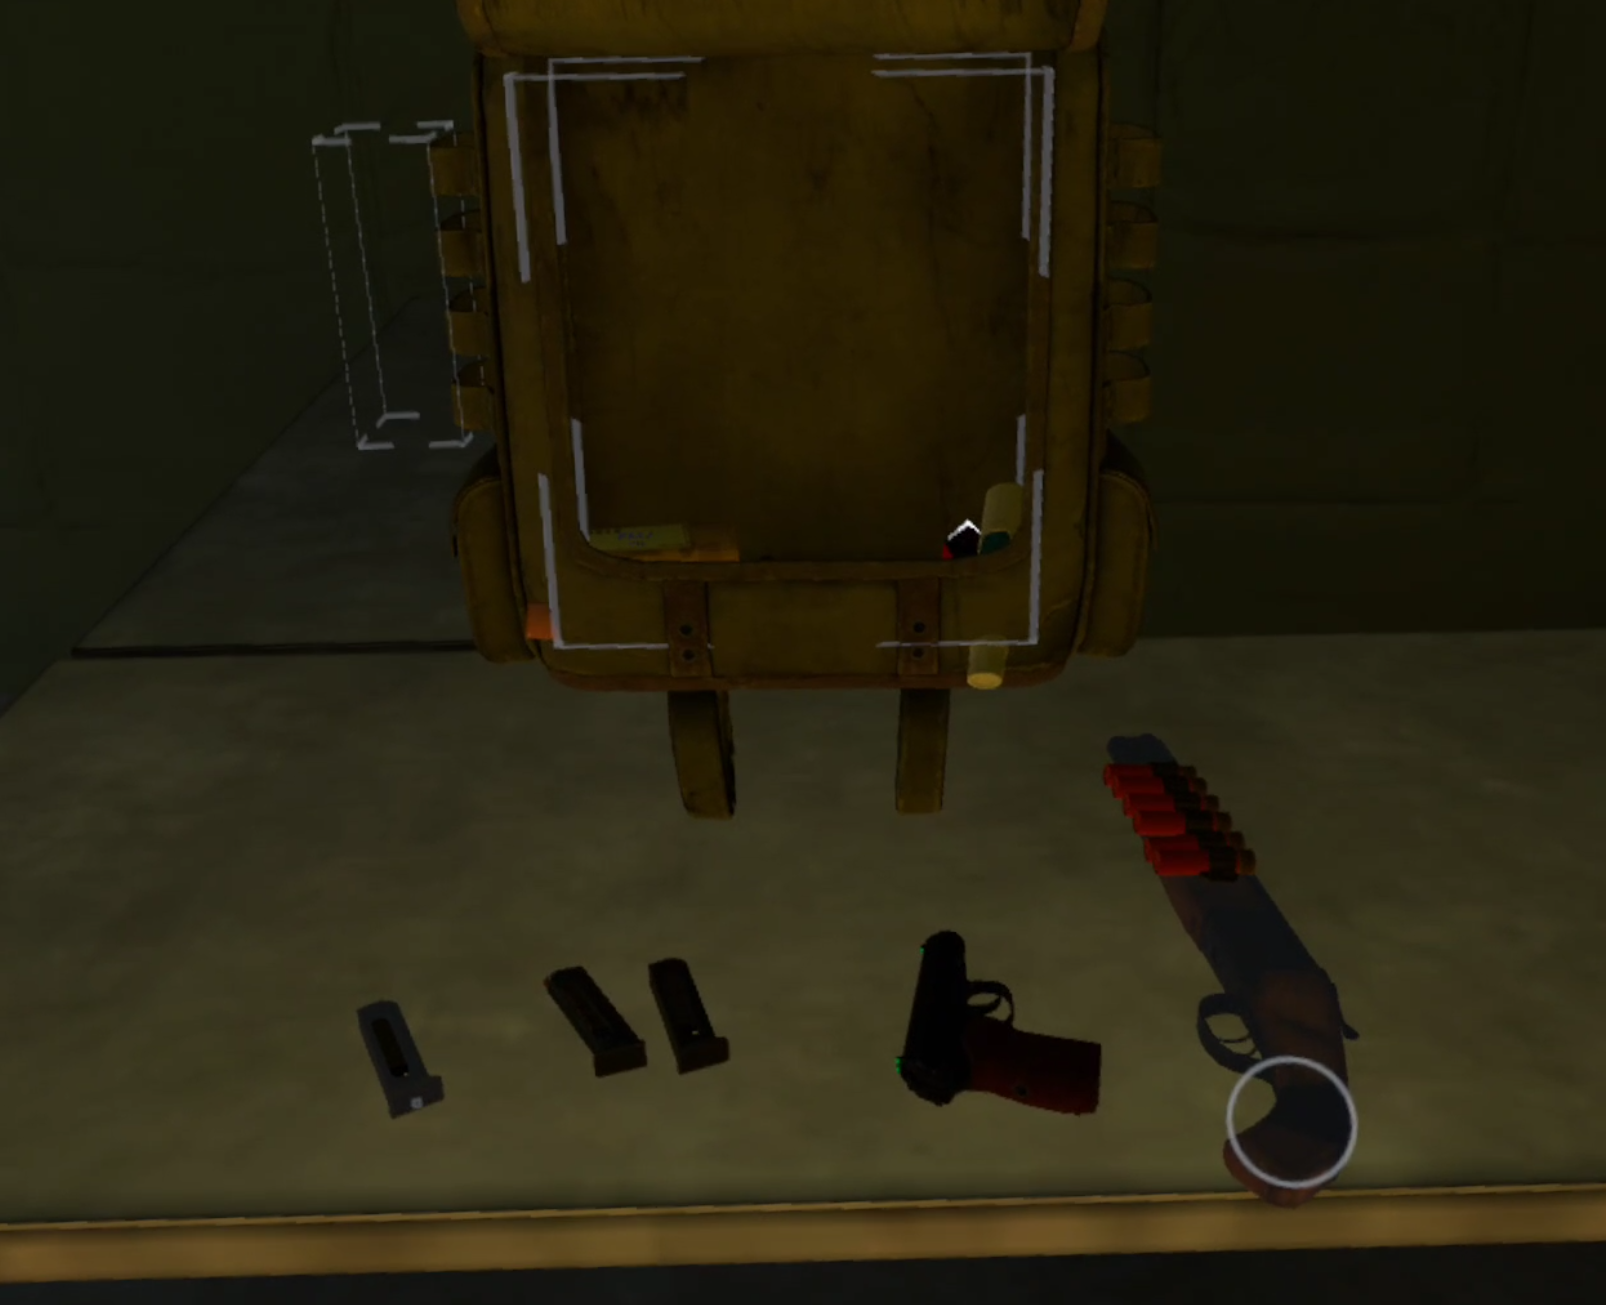
An example loadout for the second mission - Total Recall
Not pictured is the equipment on your body. Make sure you’ve got the probes you started the game with, a combat knife, a detector, and a pocket lamp.
The probes and knife are good to have easily accessible on your arm slots, while the Detector and Pocket Lamp can go on your shoulder slots. If you prefer a different way of storing and using your items then go for it. Part of the fun of Into The Radius is customizing your equipment as you like.
The Second Mission - Total Recall
When you’re ready accept the mission from your terminal and make your way out to Pervomay Route just like before.

The mission briefing for Total Recall
Check your watch and keep in mind that, depending how long you took on the last mission, it might get dark soon.
You can always go back and sleep until morning (7 AM) if it is late and you don’t want to be out at night. you’ll probably have plenty of time though.
Once you’re out there take a look at your map and get your bearings.
You’ll see that the mission marker is inside a walled compound near the center of the area.

The route we will take to the mission objective
We’re going to be roughly following the route on the map above. Just like in most Into The Radius missions there are multiple ways to get to a given area.
You could also go north east through the woods and enter the rear of the compound from there to get to the objective more quickly. The route we’ll be taking in this guide is meant to optimize the amount of loot that you’ll bring back home with you.
Every one of these Into The Radius walkthroughs for the main missions will take you along a prescribed path. Usually this path will be the most direct and conflict free one possible, but for the Second Mission you’re really going to want some extra cash and loot to help you with your start to the game.
Anyway now to really begin, start off down the road towards the first mission, but this time when you take a right go through the big rift in the ground that split the blockhouse in half.

The rift that tore the blockhouse in half
You won’t have to worry about anomalies until you reach the end of the rift, but once you do, get your probes out.
There’s a ton of anomalies in the crater covered field beyond the blockhouse, but as usual when there are a ton of anomalies, there are artifacts.

Entering the anomaly field and throwing probes
As mentioned earlier, there are definitely easier routes to the objective for the second mission, but this is a very good chance to get some experience with parts of the game that you’ll need to know how to overcome later on… oh and get some money too.
So use your probes, take your time, and work your way through the anomalies. Be especially careful of the white orbs. They’re called Reflector anomalies and will shoot out some sort of energy back in whatever direction a probe hits them.
Your detector should start beeping near the hump in the ground in the middle of the anomaly field. Use it like you did in the tutorial.
The Detector beeps faster when you’re close to an artifact, and when it’s pointed in the direction of an artifact the light will turn more green.
There’s also a guide on how to hunt for artifacts if you’re having some trouble.

Anomalies surrounding the artifact in the crater field
Find the artifact in the field or don’t, it’s up to you, but artifacts do sell for a good deal of cash you’ll be needing later, and learning how to find them now is easier than learning later.
When you’re past the anomaly field you’ll want to head towards the trees on the other end of the craters. The next place you’re headed is the building just past them.

The building past the trees that we’ll head to next
This building will have another new enemy type that you haven’t encountered before, the Mimic Policeman.
They will be your first encounter with firearm equipped enemies, though luckily they only have a Makarov pistol.
Still, that makes them pretty dangerous when you’re just starting out, you’ll most likely see this mimic policeman on the roof of the building.
If you’re a good shot you can take them out from the trees with your Makarov. If you’re not a good shot then your best bet is to either run towards the wall surrounding the building before they notice you and take your shots from there.
You could also go up the stairs leading to the roof, climb the ladder, and take them out from close range by hanging on to the ladder with one hand and using your Makarov with the other.
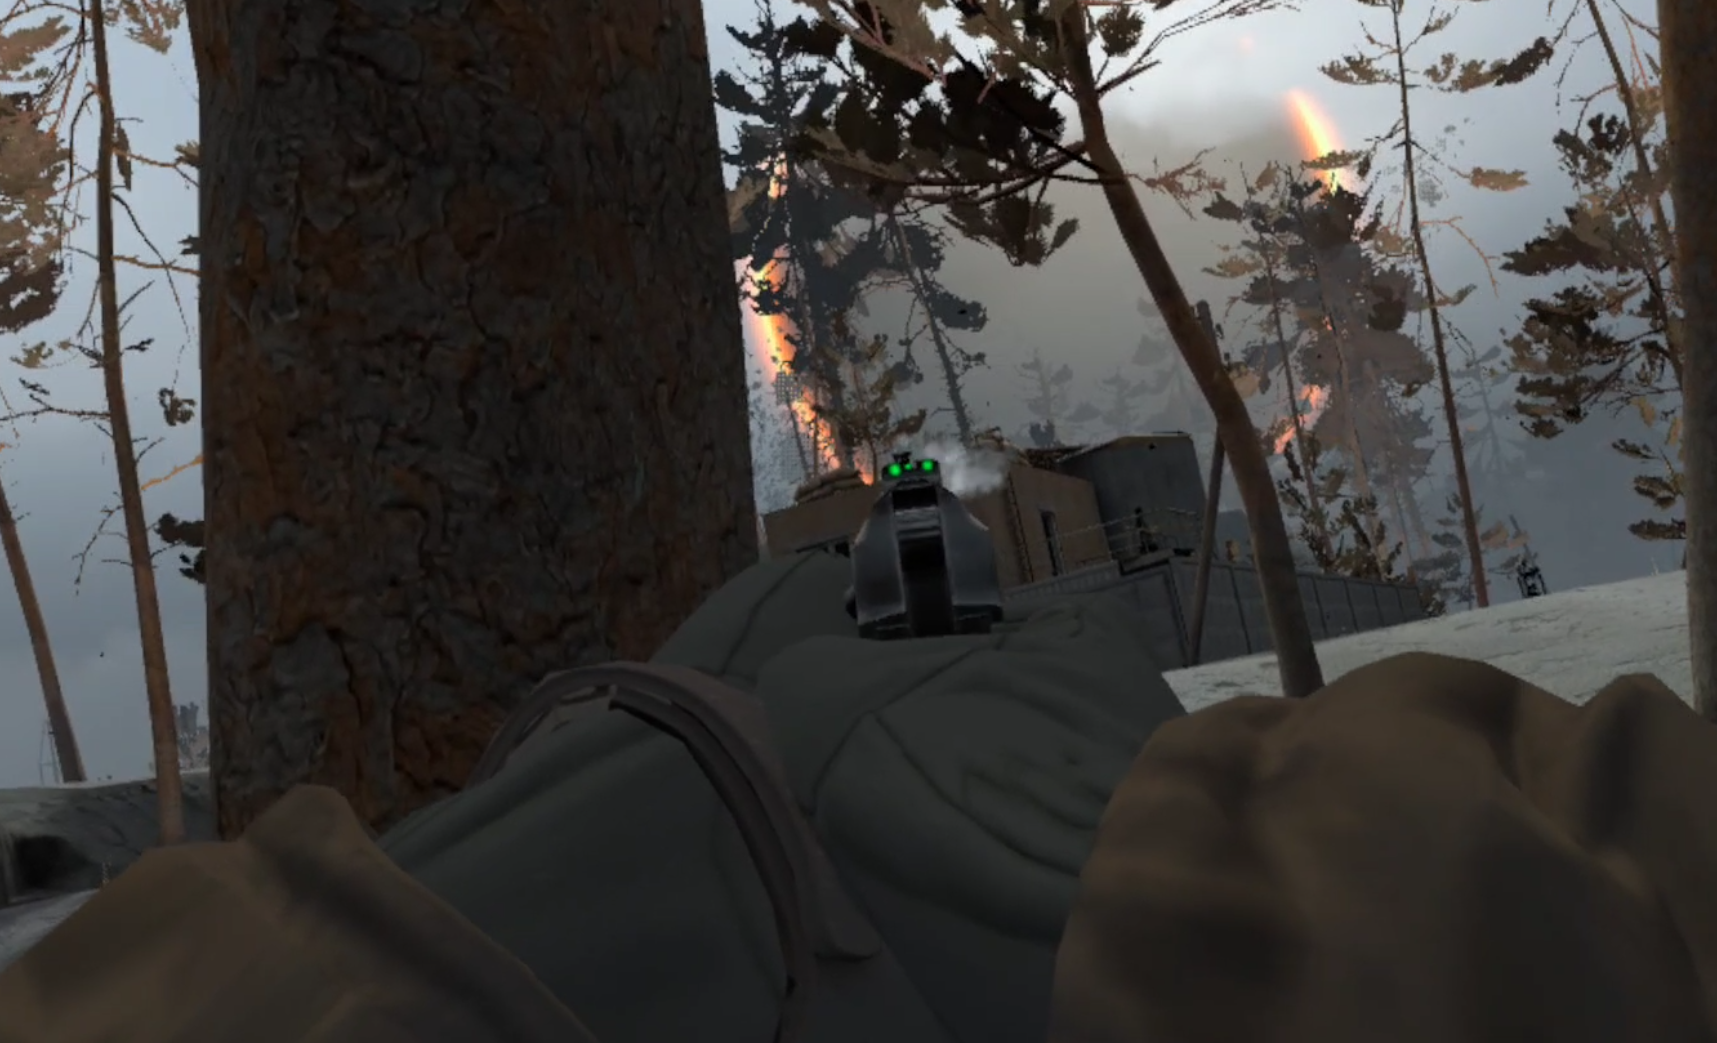
Sniping the Mimic Policeman with a Makarov
What makes these other options dangerous is that there are also Fragments and Phantoms hanging around the building, and the sound of gunshots will attract more from nearby.
If the firefight doesn’t go your way you can always pull back to the edge of the crater field and take cover behind the boulders there. The Fragments and Phantoms will follow you and you can take them down without worrying about the policeman on the roof.
However you get rid of the policeman and clear the building, once it’s clear you’ll probably find at least one crate around it on top of the dumpster at ground level, or on top of the roof.

A randomized loot crate that may or may not be there
The inside has some potential loot as well inside the cabinets and drawers. There is also a chance that your detector will start beeping due to a Rift Anomaly.
The shooting range tutorial told you about them, they will respawn enemies if left for too long, so if your detector beeps find the Rift and hit it with your knife to destroy it and get a Shard artifact to sell.
You also might hear more Fragments and Phantoms approach while you’re looting, take them down as they come. If you’ve arrived prepared you should have plenty of ammunition.

A rift inside the second story of the building
When the area is clear take a chance to get your bearings. Make sure your weapons and spare magazines are fully loaded. Check your health and hunger.
Check the time, if it’s getting late and the sky is getting darker you may want to retrace your steps and head back if you don’t want to explore at night.
Night time does have the plus of making you harder to see, but it also has the downside of making it harder for you to see. Your pocket lamp on your shoulder does making lighting more convenient, but it also makes you a shiny target in the middle of a dark night.
If you want to wait until morning or get more ammunition or other supplies then head back to Vanno the way you came. None of the enemies will respawn until the Tide comes in (assuming you destroyed any rifts in the area).
When you’re ready to keep pushing head out of the building and head out to the road running beside it. Turn back towards the crater field and you’ll see a broken down car at the intersection there.

The crashed car with the stash of ammunition
This car is a stash, and you may or may not have found the note hinting at it earlier on.
Inside of it underneath the seats are a ton of ammunition boxes of various types. Take all of them. The more ammo the better.
If you’re having a hard time finding the car here’s where it is on the map.

The location of the car on the map
You can also skip it if you like and just head straight to the compound that you can see to the northeast of it where the “M1” symbol is.
That’s where you’re headed next. There are some anomalies scattered about, and a pretty thick field of them at the road intersection in front of the main entrance.
You can go in through the gate or one of the broken sections of the wall surrounding the place.

A back way into the compound through the broken wall
However you enter the base make sure you’re ready for a fight.
There is another Mimic Policeman hanging out in the area. Though they might even have been drawn outside of the walls by noise earlier, and there’s also the possibility of Fragments and Phantoms as well.
This policeman will be much easier to deal with than the last, because he’ll be on ground level with you and won’t have such an easy time seeing you coming.
However you deal with the enemies and get inside the base you’ll hear your detector ticking. That’s because inside one of the hangars is another Rift Anomaly.
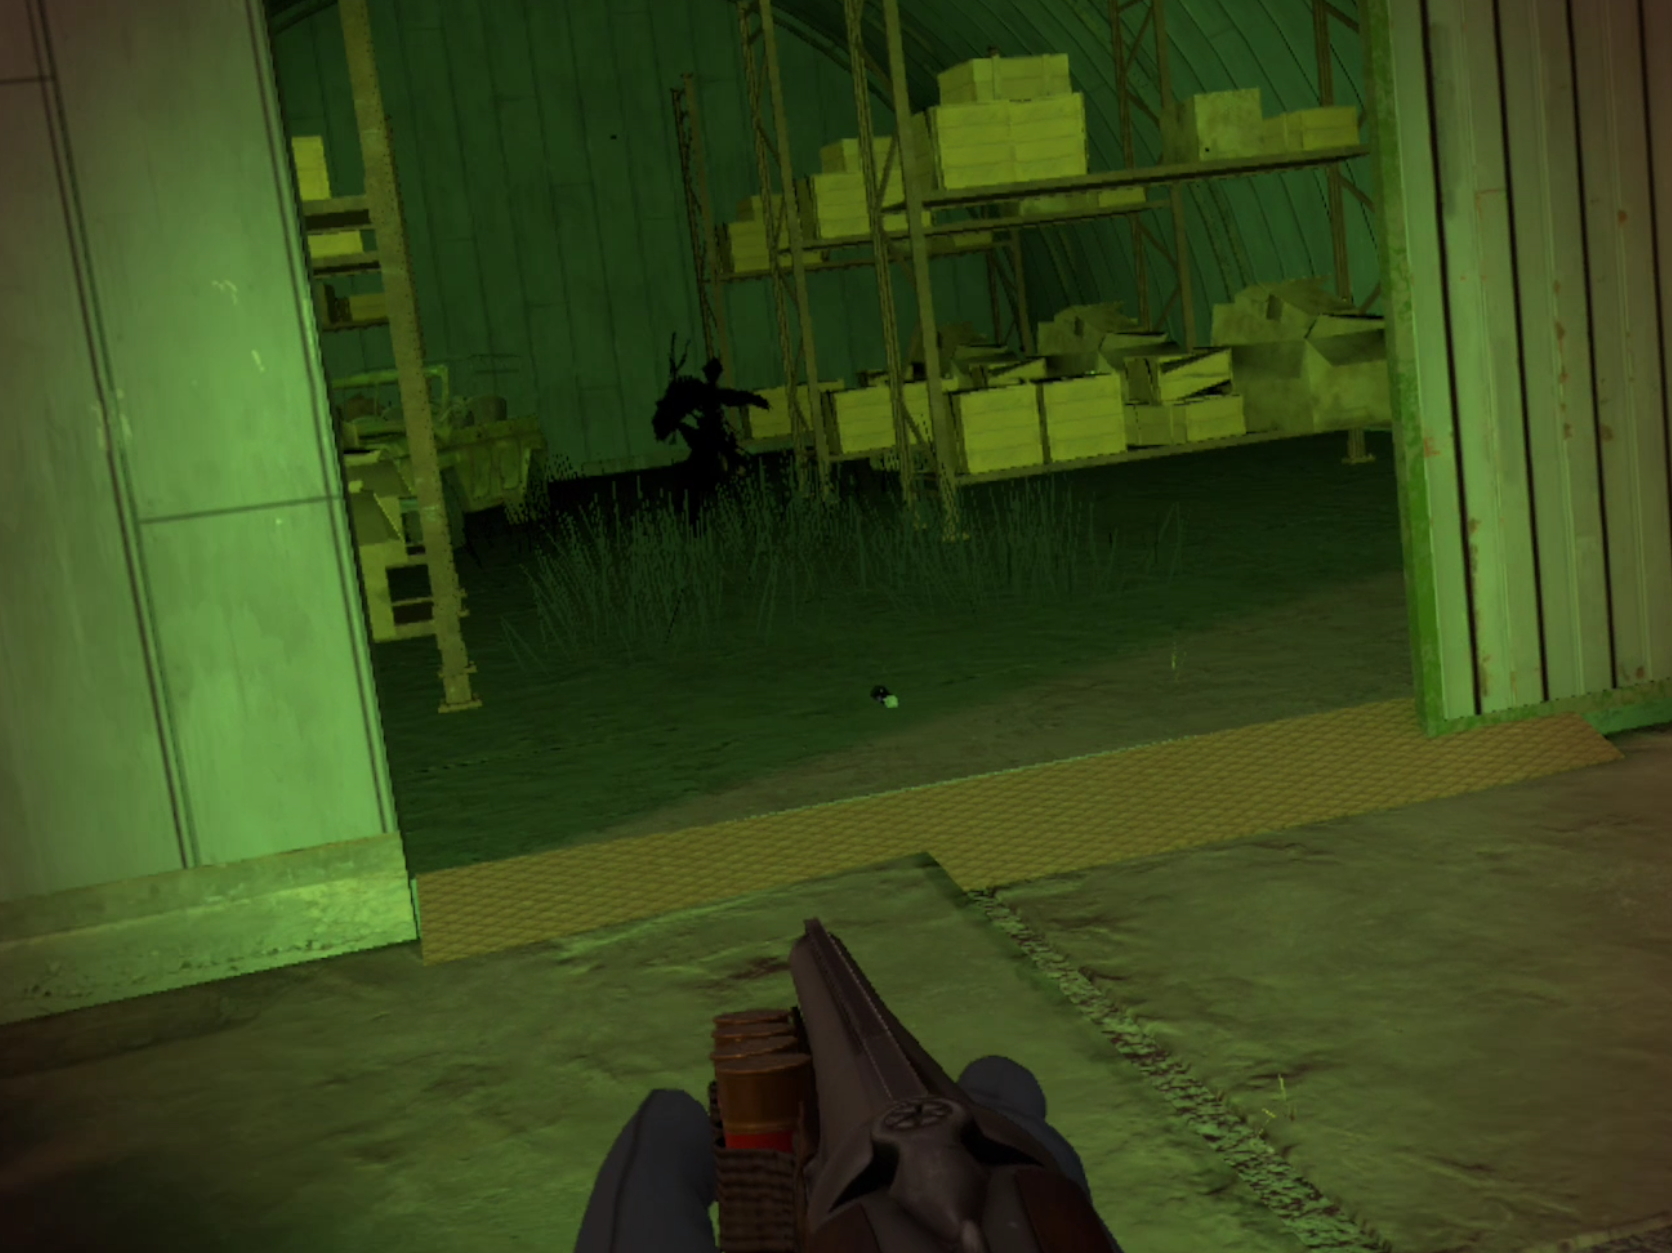
The rift in one of the hangars. There is a handheld flashlight on the ground if you need it
See that grass spread out around it? Well that’s no regular grass. That’s the Black Grass anomaly.
It will hurt you if you touch it, but will temporarily shrink if light is shone on it. See that flashlight? Well take it for now as it will be really helpful here.
You can always shoot the Rift and try to distance grab the Shard artifact that it drops. Either way it’s a good time to familiarize yourself with how Black Grass works. You’ll have to deal with more soon.
Oh, you’ll also see your friend near the entrance of the base if you haven’t already.

Your friend hanging out at the base
Touch her to get some more background dialog. There’s also a note and some loot in the basement of the ruined brick building behind her.
That’s not your mission objective though, the film you came here for is inside of the long building opposite the two hangars. The entrance to this building is right beside the front gate.
Once you’re in there’s a black statue that gives you some dialog, and in the main hallway is your last obstacle to the film.
More Black Grass.

Black Grass is your final obstacle in the mission
The hallway is chocked full of the stuff, so hopefully you got that flashlight from the hangar.
While you can make your way through with just a pocket lamp it will be much easier with an extra source of light.
If you’re playing Into The Radius on PCVR you can always turn the flashlight on and leave it on the ground, which will keep shining on the Black Grass and leave a clear path.
Unfortunately standalone Meta Quest versions of the game will turn off the flashlight once you drop it.
Focus on the grass on the right. You’ll want to disable it and then quickly dash past it into the first doorway on your right.
If you’re fast you won’t take much damage even if the Grass does regrow too quickly. Though it is very possible to get through without being hurt at all.
Once you make it through the doorway the film is on top of one of the desks.

The film that you came here for sitting on a desk
Grab it, and if you like loot the rest of the building. There’s usually some decent stuff lying around.
Though you’ll have to make your way back through the Black Grass to exit the way you came in.
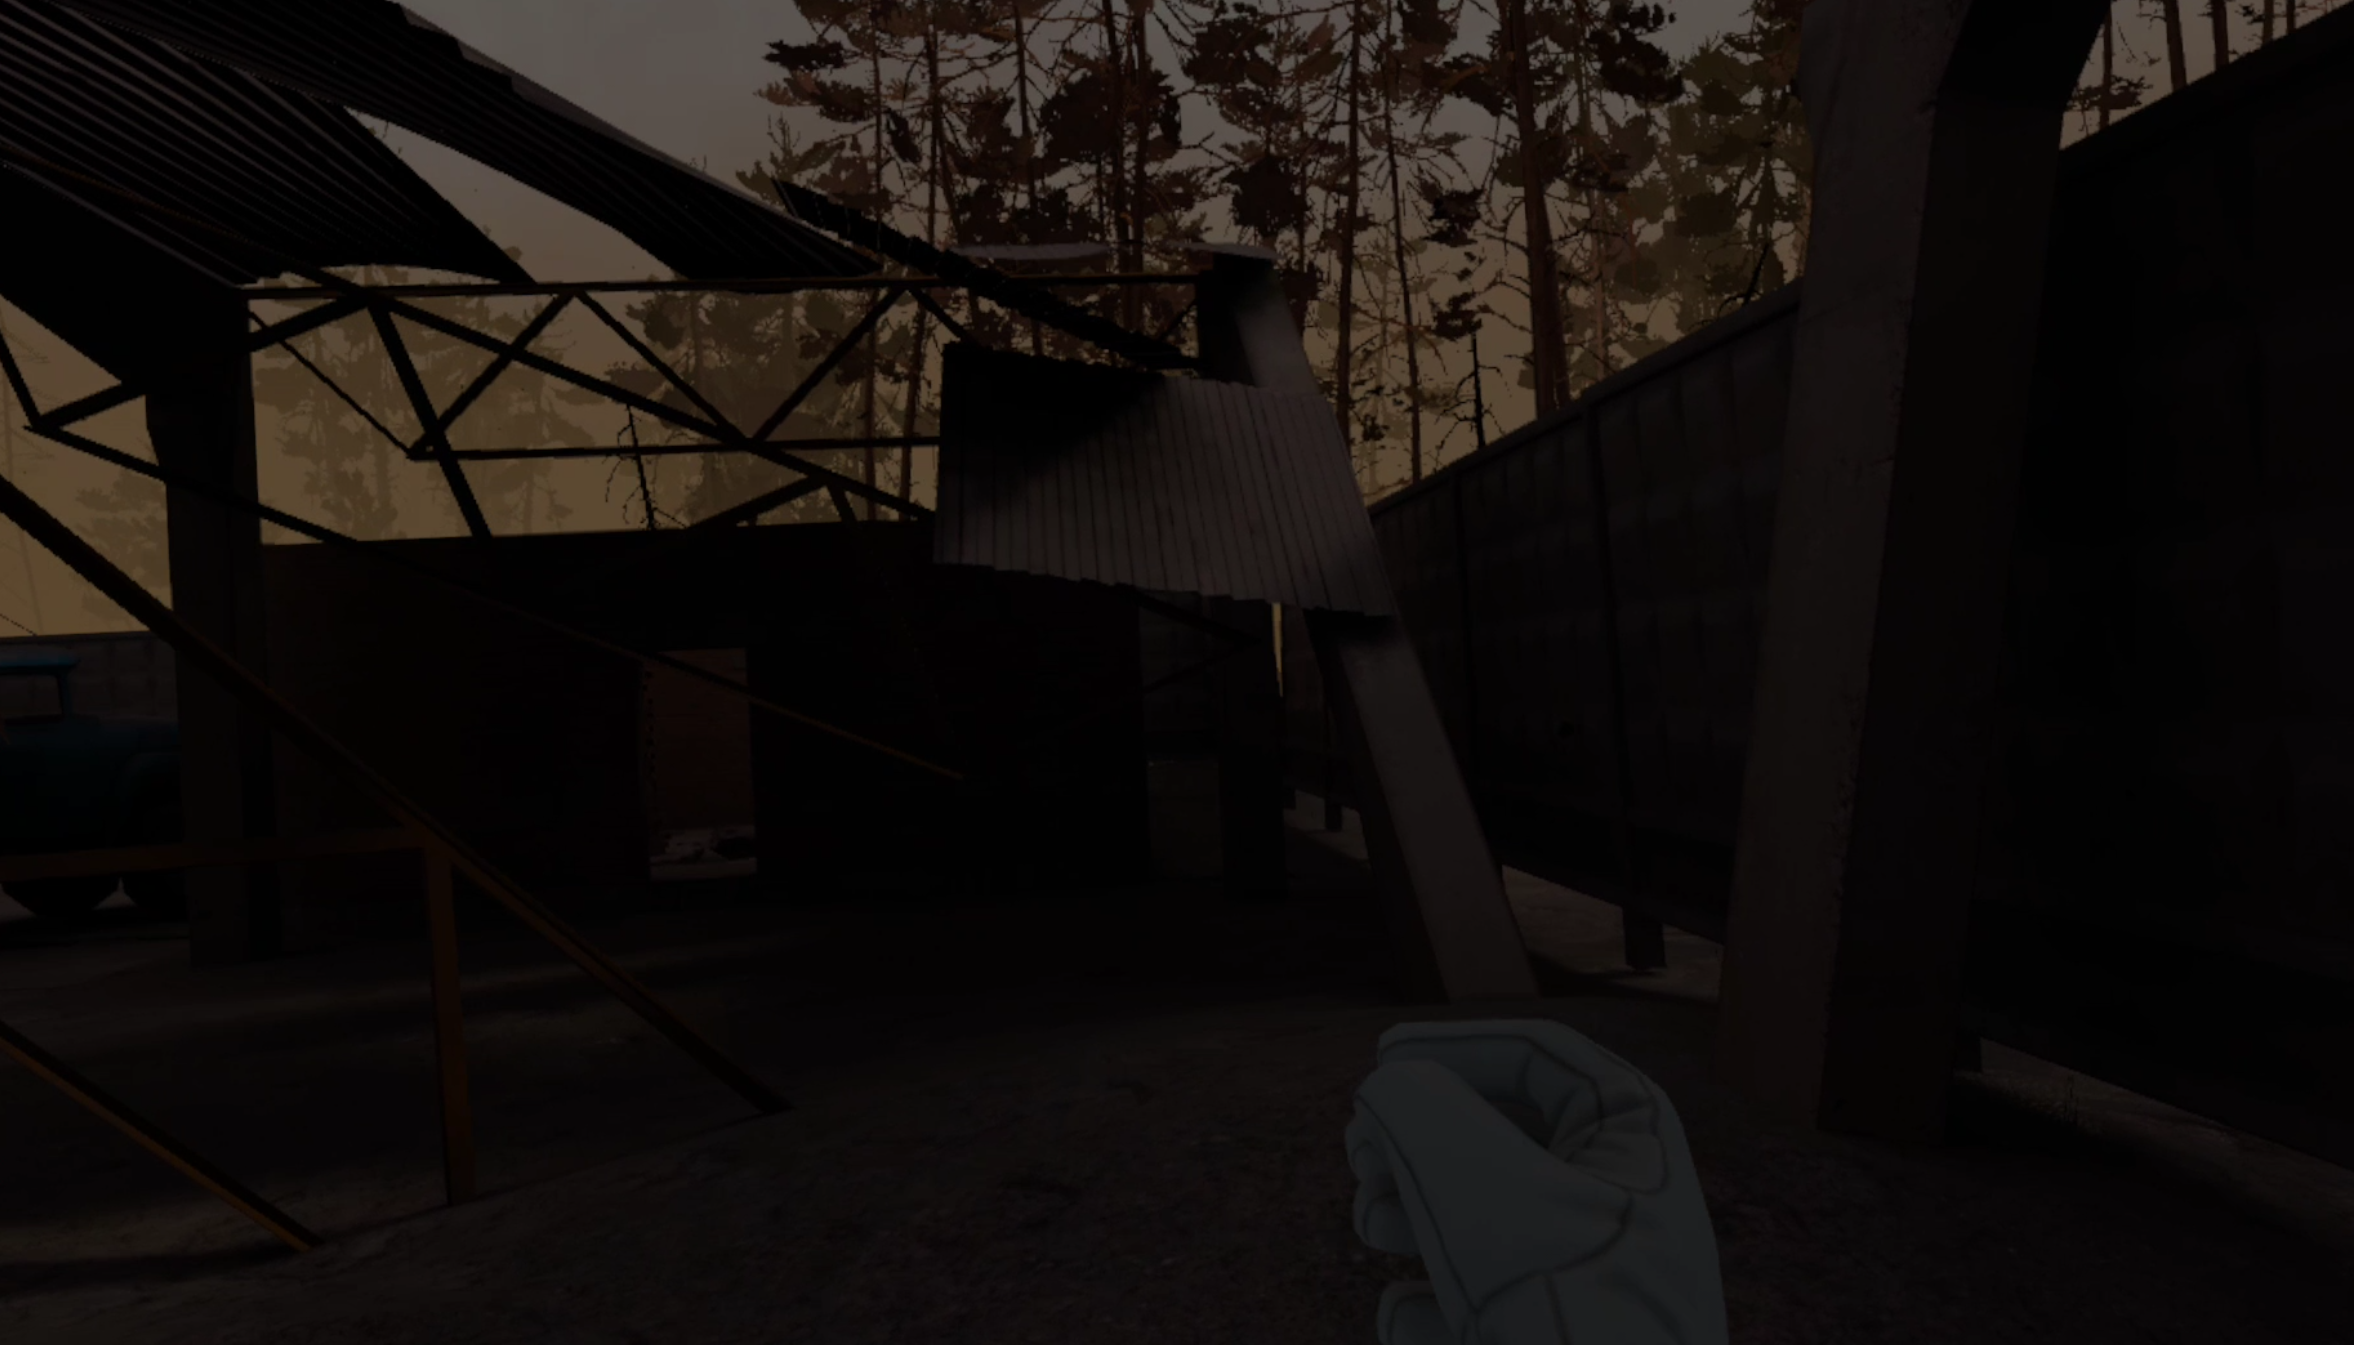
You can go back to Vanno to turn in the Film and complete the mission, though if you’re willing to stay for a little longer there’s a free Glock 17 stash inside of the base.
It’s on top of one of the Red fuel tanks at the northeast end of the base, beside one of the hangars.
You can’t jump in Into The Radius VR, but there is a convenient ramp going up to the top of the beat up awning that is right beside the tanks.
The way up to the awning over the G17 stash
Once you’re up there go to the edge that hangs over the fuel tanks and look down. You’ll see the G17, a magazine for it, and a box of ammunition sitting on top.
To get to them run off of the edge of the awning towards the fuel tank. If you miss and hit the ground just try again. Be careful of fall damage if you’re low on health though.
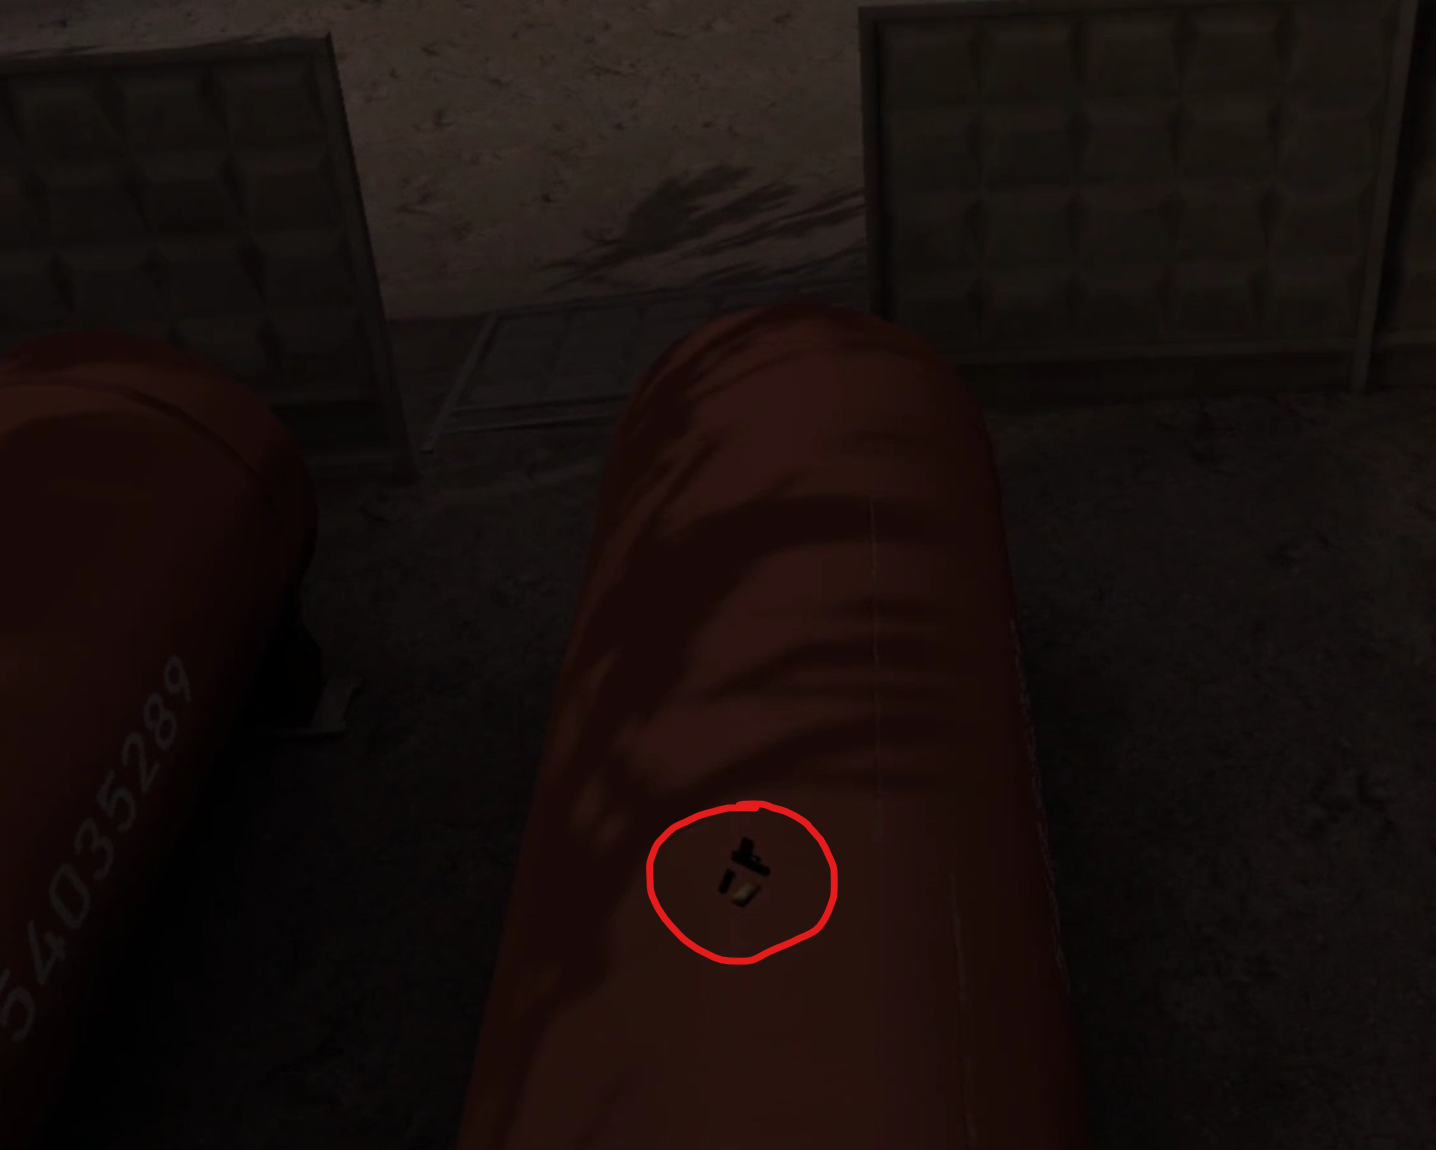
The G17 stash on top of the red fuel tank
The Glock and magazine are in very rough condition, but you can always repair them using the terminal that you do deliveries with back at base.
Loot and Film in hand, head back to Vanno the way you came to sell your loot, repair your weapons, and complete the mission by turning the film in just like the watch from the first mission.
Congratulations on completing the second mission! We’ll talk about what you’re going to need to do next, repeatable missions, and some more great places to explore and stashes to find in Pervomay Route in Part 3 of our Into The Radius VR Walkthrough.
Into The Radius Walkthrough And Guide - The First Mission - Equipment Retrieval
Stuck in Into The Radius? Wondering where to go and how to get there for your next mission?
Well don’t worry we’ve got you covered with this walkthrough and guide for Into the Radius VR.
In this article we’ll be starting at the beginning of the game with your first mission, Equipment Retrieval, and cover some general tips for your first foray into the zone.
Stuck in Into The Radius? Wondering where to go and how to get there for your next mission?
Maybe you would just like to see what is in store for you before you get there, or you’d like to know if you’re properly prepared for your next mission in the Pechorsk Zone.
Well don’t worry we’ve got you covered with this walkthrough and guide for Into the Radius VR.
In this Into the Radius walkthrough we’ll detail how to progress through the main story “Top Priority” missions, with a couple of guiding tips thrown in here and there to make your adventure smoother.
The focus of these walkthroughs will be the story missions, but we’ll throw in some general gameplay tips and other useful loot locations near your objectives.
These articles will also assume you’re playing the game on the Normal difficulty mode with Tutorials turned on, which is highly recommended for your first playthrough. This walkthrough will still be useful if you’re playing on Realistic difficulty, but some details like vendor prices or enemy placement and numbers will be different.
Here is every article in our complete Into the Radius VR Walkthrough:
Into The Radius Walkthrough And Guide - The First Mission - Equipment Retrieval
Into The Radius Walkthrough And Guide - The Second Mission - Total Recall
Into The Radius Walkthrough And Guide - The Third Mission - Fixing A Leak
Into The Radius Walkthrough And Guide - The Fourth Mission - Flash In The Dark
Into The Radius Walkthrough And Guide - The Fifth Mission - A Probing Move
Into The Radius Walkthrough And Guide - The Sixth Mission - The Intrusion
Into The Radius Walkthrough And Guide - The Seventh Mission - A Farewell Feast
Into The Radius Walkthrough And Guide - The Eighth Mission - Kids Playground
Into The Radius Walkthrough And Guide - The Final Mission - Ouroboros
Here we’ll be starting at the beginning of the game with your first mission, Equipment Retrieval, and cover some general tips for your first foray into the zone.
Entering Vanno
We won’t be covering the Tutorial here, so our Into the Radius walkthrough will start where the game proper begins, with you as the Explorer standing before the gates of the UNPSC base of Vanno.

The entrance to the UNPSC base and your home - Vanno
Follow the footsteps and stop when directed to by the automated turret.
Raise your hands and do not move. If you fail to comply it really will shoot you.
In a moment you’ll be cleared for entry and the gate will open. Follow the footsteps towards your bedroom. Make sure to pick up the healing syringe on the barrel next to the door.

Make sure to get the healing syringe next to your bedroom
Healing Syringes are fairly expensive so having a free one to add to the one that you start the game with in your pack is a great find.
Hold your watch up to the door panel when prompted to open the door, and walk into your new home.
Follow the ghostly outline to the mission terminal and accept your first mission in the missions menu, Equipment Retrieval.

The briefing for Into The Radius’s first mission - Equipment Retrieval
As the briefing states you will need a firearm, in fact you’ll always need a firearm when entering the Pechorsk zone.
So before we get into tackling the first mission let’s talk about your loadout, and since this will be your first mission in the radius also cover some general loadout tips.
The First Mission - Loadout
You’ll start the game with some items in your pack and a Makarov pistol in the holster on your hip.
This pistol is in mint condition, but is also arguably the worst gun in the entire game. Don’t worry though, it will be more than adequate for now.
You’ll also have some food, some spare ammunition, a healing syringe, two spare magazines, a combat knife, and a flashlight in your backpack.

The gear that you start the game with. Not pictured is the Makarov in your hip holster
If this is your first foray in Into The Radius then you can find some useful information spread around Vanno in the form of notes that you can read, though the Tutorial will have covered all of the basics.
Looking around your room you’ll find a few items scattered around, most noteably on the green shelves in the corner. There’s a rusty Makarov there that you can sell later on, and some more ammunition and magazines for it.
Fill one of those magazines up with bullets and put it and the two in your backpack in the magazine pouches on your chest rig. While you’re at it also make sure to turn the safety off on your Makarov so that it’s ready to go when you need it.

The Makarov pistol with the safety switched off
It’s also advisable to take the combat knife out of your backpack and put it on one of your body slots. You have one on each of your arms and one on each of your shoulders.
Being able to quickly access your knife will be very useful against the enemies you will face in this mission. There will also be a packet of Advanced Probes on your left arm, you might as well keep them there. You won’t need them for the first mission, but you soon will.
You can leave the food behind as you won’t be out of your base for very long, but do make sure to bring your flashlight as you’ll want it to see clearly later on.
It’s advisable to always take spare ammunition to reload magazines in the field, though here you won’t need it. There are very few enemies in Into the Radius’s first mission, and it’s not very far away from your home.
Here is an example loadout for the first mission. If yours varies a little don’t worry about it. As long as you have your pistol, a few full magazines, your knife, a healing syringe, and a flashlight, you’ll be fine.
A sample loadout for your first mission. The box contains 25 rounds of 9x18mm bullets
Equipment Retrieval - Leaving Vanno For The First Time
Before you head out you can always explore the rest of Vanno. There are some other free items scattered about, and you can collect them whenever you like.
When you’re ready go back out of the gate you came in, following the ghostly footsteps, and walk into the rope line that heads into the fog.

The rope line leading out into the Pechorsk Zone
Welcome to the Zone. Have a look around. It’s pretty creepy, right? Well don’t worry, you can handle this.
Once you feel comfortable take a look at your map.
You’ll see your location at the bottom as a green arrow, and the location of your mission objective as a circle with “M1” inside of it.

The map of Pervomay Route showing the objective of the first mission
As you can see it’s very close.
First though, take a little detour. If you look off to your right you’ll see a little wooden watchtower amid the trees.

The wooden watchtower next to the path to Vanno
Climb up it and open the red container inside. You’ll get some more bullets for your Makarov and some other goodies.
If you don’t see the tower you don’t have to bother with it, but it’s good to get a little extra when you’re just starting out.
Anyway to start heading to the objective just walk down the paved road.
The road leading to the blockhouse
You’ll probably see some randomly generated corpses strewn about with loot next to them.
We’ll talk more about looting in a moment, because you’ll probably have a bigger problem to deal with as you near the end of the road.
See that path that goes up the hill? Well there’s going to be a strange dark figure at the bottom of it, and it will start walking towards you while making strange squelching sounds.
Don’t let it get close, while it’s only dangerous right in front of you, if you let it get within clawing range it will do a lot of damage to you.

Fighting the first enemy in Into The Radius
This is a fragment, the first type of enemy that you will encounter in Into The Radius VR.
Don’t panic, you’ll easily be able to deal with them by using your Makarov Pistol.
Before they get close aim carefully and shoot them a few times until they turn into a floating orb, then either shoot the orb or stab it with your combat knife. If you run out of bullets or panic you can turn around and run away. When sprinting you are faster than the Fragments, and that will give you time to reload and compose yourself.
Make sure to load in a fresh magazine afterwards, the Makarov doesn’t hold many bullets in each magazine.
If you want to know more about the fragment or other enemies in Into The Radius VR then check out our guide on all of the enemies in the game.
Anyway once that fragment is dealt with walk up the path leading into the little compound to your right, past the black statue of a man. You can touch the statue to get a little dialog.
All statues that you see which have little floating white particles around them can be touched to get some dialog.
The entrance to the blockhouse compound, and the man statue in front of it
Inside the walls of the little compound you’ll find another fragment.
Take them out just like you did the first one.

Taking down the second Fragment
The First Mission - Looting
The “compound” is really just two tents and the concrete blockhouse. Look around and scrounge what you can.
Structures in the radius will commonly hold useful items. Boxes of ammunition, more magazines, food, and other various bits and pieces.
Since you’re just starting out it’s wise to take a little food, especially the canned stuff, and if you find any more magazines it’s also a good idea to take them, even if you don’t have the gun that goes with them yet.
Ammunition for your Makarov (9x18mm) is very common, but it’s still a good idea to take whatever you can find, and also any shotgun shells you find. Really it’s not a bad idea to hoard any kind of ammunition you find in the early game.
If you’re unsure what something is then hold it in your hand and hold down the B button, a little text box will appear over the item telling you what it’s use is and how it works. If you’re unsure how an item is useful make sure to use this feature. It will answer a lot of your questions when first starting the game.
You’ll also find a note in each of the tents. These notes are rare glimpses into what exactly is going on in Pechorsk, and it’s recommended that you read them to enhance your appreciation for the mystery and story of Into The Radius.

A note found in one of the tents
Equipment Retrieval - Getting The Goods
Whenever you’re finished looting head into the concrete blockhouse.
Here’s where you will need your flashlight. While there’s some lighting inside it can be a little dark. Into The Radius can be a pretty scary game and you’ll always want to make sure you can properly see in poorly lit areas so you aren’t surprised by enemies or anomalies.
Immediately on your left you’ll see a crate on a table. Take whatever is inside.
There’s a crate in the blockhouse, make sure to loot it
Once you’re finished with that head the other way further into the blockhouse.
Right next to some sandbags you’ll see a watch in an open crate.

The objective of the first mission
That’s what you came here for! Pick it up and put it into your backpack. When you’re finished looking for whatever other valuables might be around, head back outside the way you came in.
You’ll get a visit from your friend. To hear what she has to say, touch her and her dialog will play.

Your friend will appear once you get the objective item
You’ve got the mission objective and hopefully some other good stuff too.
Head back the way you came, down the path leading up the hill and up the road. Just walk into the rope line heading into the fog and you’ll find yourself back at Vanno.
Completing Your First Mission in Into The Radius
Now that you’re back in Vanno the built in Tutorials will be your guide.
Follow the ghostly footsteps into the train car and over to the mission terminal.
Go here to deliver the watch
Some popups will tell you how to make the delivery. When the tray opens, throw the watch inside and complete the mission on the terminal.
You’ll also find a strange bright white note in your backpack. Weird huh?
Once the delivery is complete you are now security level 1. Congratulations!
The terminal will also tell you to go to the shooting range for more training. It’s an easy 300$ and you’ll learn some important stuff while you’re there. So you might as well go for it.

Go here to access the shooting range and training
Follow the ghostly footsteps over there and do the training.
The game will teach you about anomalies, the tide, artifacts, and how to get them. Though if you want a more in depth guide we’ve got one as well.
Once you are finished feel free to sell whatever you don’t need in the Train car, and use the shower to regain any health you might have lost to Fragments.
Congratulations on hitting Security Level 1! We’ll talk more about what you can do with your new security status, and how to tackle your next mission in Part 2 of our Into The Radius VR Walkthrough.
Other Guides You Might Find Helpful:

The Thrill Of The Fight 2 Will Have Multiplayer and Improved Realism
We’ve talked a lot here about the fantastic VR Boxing Game Thrill Of The Fight, and if you’re as big of a fan of this game as we are then you’ll be excited to hear that a sequel is coming.
Unfortunately one of the biggest things that has been missing in the first iteration of this fantastic VR fighting game is a lack of a Multiplayer mode. That’s why it is so fantastic to know that Thrill Of The Fight 2 will have Multiplayer.
This and a whole suite of other improvements have been announced by the new developers of Thrill Of The Fight 2, Halfbrick, who will be working with the original creator of Thrill Of The Fight, Ian Fitz, on the sequel.
So let’s talk about what we currently know about Thrill Of the Fight 2 and the fantastic new features that are coming to this VR game.
Thrill Of The Fight 2 - Multiplayer And What We Know So Far
So, as far as we know, what’s the vision for Thrill Of the Fight 2?
In their announcement about the new game Halfbrick hasn’t given many concrete details, but what they have said sounds very good for long time fans of the original Thrill Of The Fight.
A lot of their wording seems meant to placate longtime fans and assure us that Thrill Of The Fight 2 is not only made in close concert with the creator of the original game, Ian Fitz, but will also continue the spirit of that original game.
Halfbrick state their intentions here to continue the focus on boxing simulation and realism that the first game had, while also including what they’ve heard “players want most” a Multiplayer mode.

Realistic boxing is what makes Thrill Of The Fight such a great game, and is the focus of the sequel Thrill Of The Fight 2
While unfortunately details on what this Multiplayer mode might look like are scarce so far, it is clear that it is a big focus of the developers over at Halfbrick.
Thrill Of The Fight is an old game that is so much fun and such a great workout that it continues to be one of the best games on the Oculus Quest 3 and VR in general.
So an update is definitely sorely needed. Being able to box another person would make Thrill Of The Fight 2 hands down the best VR Boxing game on the market, given that the feeling and use of actual boxing skill of the game isn’t altered.
From what we’ve heard we can at least definitely say that Halfbrick hasn’t announced any intentions to turn Thrill Of The Fight into a more arcadey experience like those in Creed: Rise To Glory or Knockout League.

Making Ugly Joe even uglier, a hallmark of the Thrill Of The Fight experience
Though there is potential for concern in how Singleplayer might look in this new game, as there hasn’t been any word on new fighters, new difficulty modes, or possibly even a more campaign style fighting bracket to progress through.
While Thrill Of The Fight Multiplayer is a lot to get excited about, let’s hope that the Singleplayer experience also gets some love when Thrill Of The Fight 2 releases.
The addition of Multiplayer alone will bring a lot of challenges to this studio that is relatively untested in the VR market. Even a small amount of lag would make a boxing match a nightmare to play, and there’s also balancing, collision, and a ton of other factors that become much harder with the addition of Multiplayer to a fighting game.
So can we have faith in Halfbrick to deliver on these promises? Are they a studio that can make a fantastic Thrill Of The Fight 2?
Thrill Of The Fight 2 - Who’s Halfbrick?
Now let’s address something that might worry long time fans of Thrill Of the Fight. You might be skeptical of this studio and how they might handle the game, or whether they can handle it at all.
As you may know the original game was the passion project of a solo developer, Ian Fitz, and now we know that the sequel will be in the hands of a game studio that you’ve probably not heard of, Halfbrick.
You might be concerned that despite their promises Halfbrick might skew the original vision of Thrill Of The Fight or fail to deliver a good upgrade to the original, and that’s a legitimate worry to have.
There have been game sequels in the past that have changed hands to a new developer and ended up worse off for it.

The Halfbrick Studios Logo
Fortunately Halfbrick have announced officially that they wish not only to continue Ian’s original focus on realism, but to expand on it and make the game feel like an even more immersive boxing experience.
Should Halfbrick deliver on this promise in Thrill Of The Fight 2 then it’s also certainly good news for those that use Thrill Of The Fight as a workout game as well as a boxing simulator.
Of course you may also be wondering if Halfbrick has the expertise to deliver on this promise. While they certainly have more resources than one person alone, what have they done in the past?
Judging from their website they’ve released a lot of games, but most seem to be 2D flatscreen games. They’re clearly very prolific mobile game developers, but not so much in the Virtual Reality gaming space.
Though they do have some acclaim as the studio behind the infamous Fruit Ninja games, their only experience in Virtual Reality game development is Fruit Ninja VR 1 and 2.
So it’s not like this is a studio completely inexperienced in VR game development.

Halfbrick’s Fruit Ninja series are currently their only forays into VR game development
Fruit Ninja VR 1 and 2 are good VR games that definitely deliver on the promise of slicing fruits in VR, and the controls and physics of them run smoothly. As far as VR game development experience goes, it’s not bad for a small studio.
Speaking of small, how big is Halfbrick? According to Google Studio’s case study on the company: “Halfbrick Studios employs about 35 people at its headquarters in Brisbane, Australia, plus another 11 in Spain and a small team in Bulgaria, while its licensing and entertainment business operates out of the United States.”
Pretty big as far as VR game studios go, though their resources will likely not all be on Thrill Of The Fight 2. Still, this is very hopeful news, and it seems that Thrill Of The Fight 2 will definitely have the expertise and manpower to be all that it can be.
Either way it’s good to see more game studios turn their attention towards Virtual Reality games.
Well that’s all we’ve got so far about Thrill Of The Fight 2 and the promised Thrill Of The Fight Multiplayer in this sequel. If you’ve got thoughts or hopes for the future of this fantastic VR boxing game feel free to leave a comment. Hopefully we’ll be able to get our hands on it soon.