

Into The Radius Walkthrough And Guide - Repeatable Missions
Stuck in Into The Radius? Wondering where to go and how to get there for your next mission?
Maybe you would just like to see what is in store for you before you get there, or you’d like to know if you’re properly prepared for your next mission in the Pechorsk Zone.
Well don’t worry we’ve got you covered with this walkthrough and guide for Into the Radius VR.
Here we’ll detail how to progress through the main story “Top Priority” missions, with a couple of guiding tips thrown in here and there to make your adventure smoother.
The focus of these articles will be the story missions, but we’ll throw in some general gameplay tips and other useful loot locations near your objectives.
These articles will also assume you’re playing the game on the Normal difficulty mode with Tutorials turned on, which is highly recommended for your first playthrough. This walkthrough will still be useful if you’re playing on Realistic difficulty, but some details like vendor prices or enemy placement and numbers will be different.
Here is every article in our complete Into the Radius VR Walkthrough:
Into The Radius Walkthrough And Guide - The First Mission - Equipment Retrieval
Into The Radius Walkthrough And Guide - The Second Mission - Total Recall
Into The Radius Walkthrough And Guide - Repeatable Missions
Into The Radius Walkthrough And Guide - The Third Mission - Fixing A Leak
Into The Radius Walkthrough And Guide - The Fourth Mission - Flash In The Dark
Into The Radius Walkthrough And Guide - The Fifth Mission - A Probing Move
Into The Radius Walkthrough And Guide - The Sixth Mission - The Intrusion
Into The Radius Walkthrough And Guide - The Seventh Mission - A Farewell Feast
Into The Radius Walkthrough And Guide - The Eighth Mission - Kids Playground
Into The Radius Walkthrough And Guide - The Final Mission - Ouroboros
Here we’ll be talking about the repeatable missions in Into The Radius. After Total Recall you’ll have to complete two to unlock the next Top Priority mission. These are missions that you can completely infinitely for additional cash, and to unlock some Top Priority missions you’ll have to do a few repeatable ones.
Into the Radius VR Walkthrough - Repeatable Missions
This walkthrough guide for Into the Radius picks up where our previous guide left off, just after completing the Total Recall Top Priority mission.
Once you go to the mission terminal you’ll notice that there are no missions marked Top Priority, instead you’ll have a few missions of various names listed.

The mission terminal telling you how many more repeatable missions you need to do before unlocking the next Top Priority mission
These sorts of missions will now be available throughout the game, and can be completed an infinite number of times to get you more money, which is awesome.
So you’ll need to do two of these. You can also do all three. Since the only location you have gone to so far is Pervomay Route, they will all be located there, but in the future when you go deeper into the zone they will be located in any of the maps you’ve been to.
So accept just two, or accept them all, it’s up to you, but the more missions you do the more you stand to gain.
As for your loadout, try to pack light to leave room for loot and artifacts, but make sure you’ve got plenty of ammunition in case you run into clusters of enemies, and always have some food and healing items on you as well. The usual Combat Knife, Probes, Detector, and Pocket Lamp are also must haves of course.
You’ll be doing repeatable missions throughout the game, and so your loadout for them will change over time as you acquire better equipment.
If things go wrong you can always just go back home or rest in one of the safehouses marked with a blue house icon on the map. You’ll get a feel for how much to bring depending on where you’re going over time.
Plan accordingly for whatever route you take. If you’ve been following this walkthrough there’s about half of Pervomay you have yet to discover, and the final location that one of these missions will likely bring you to is the Train station in the northwestern section of the map.
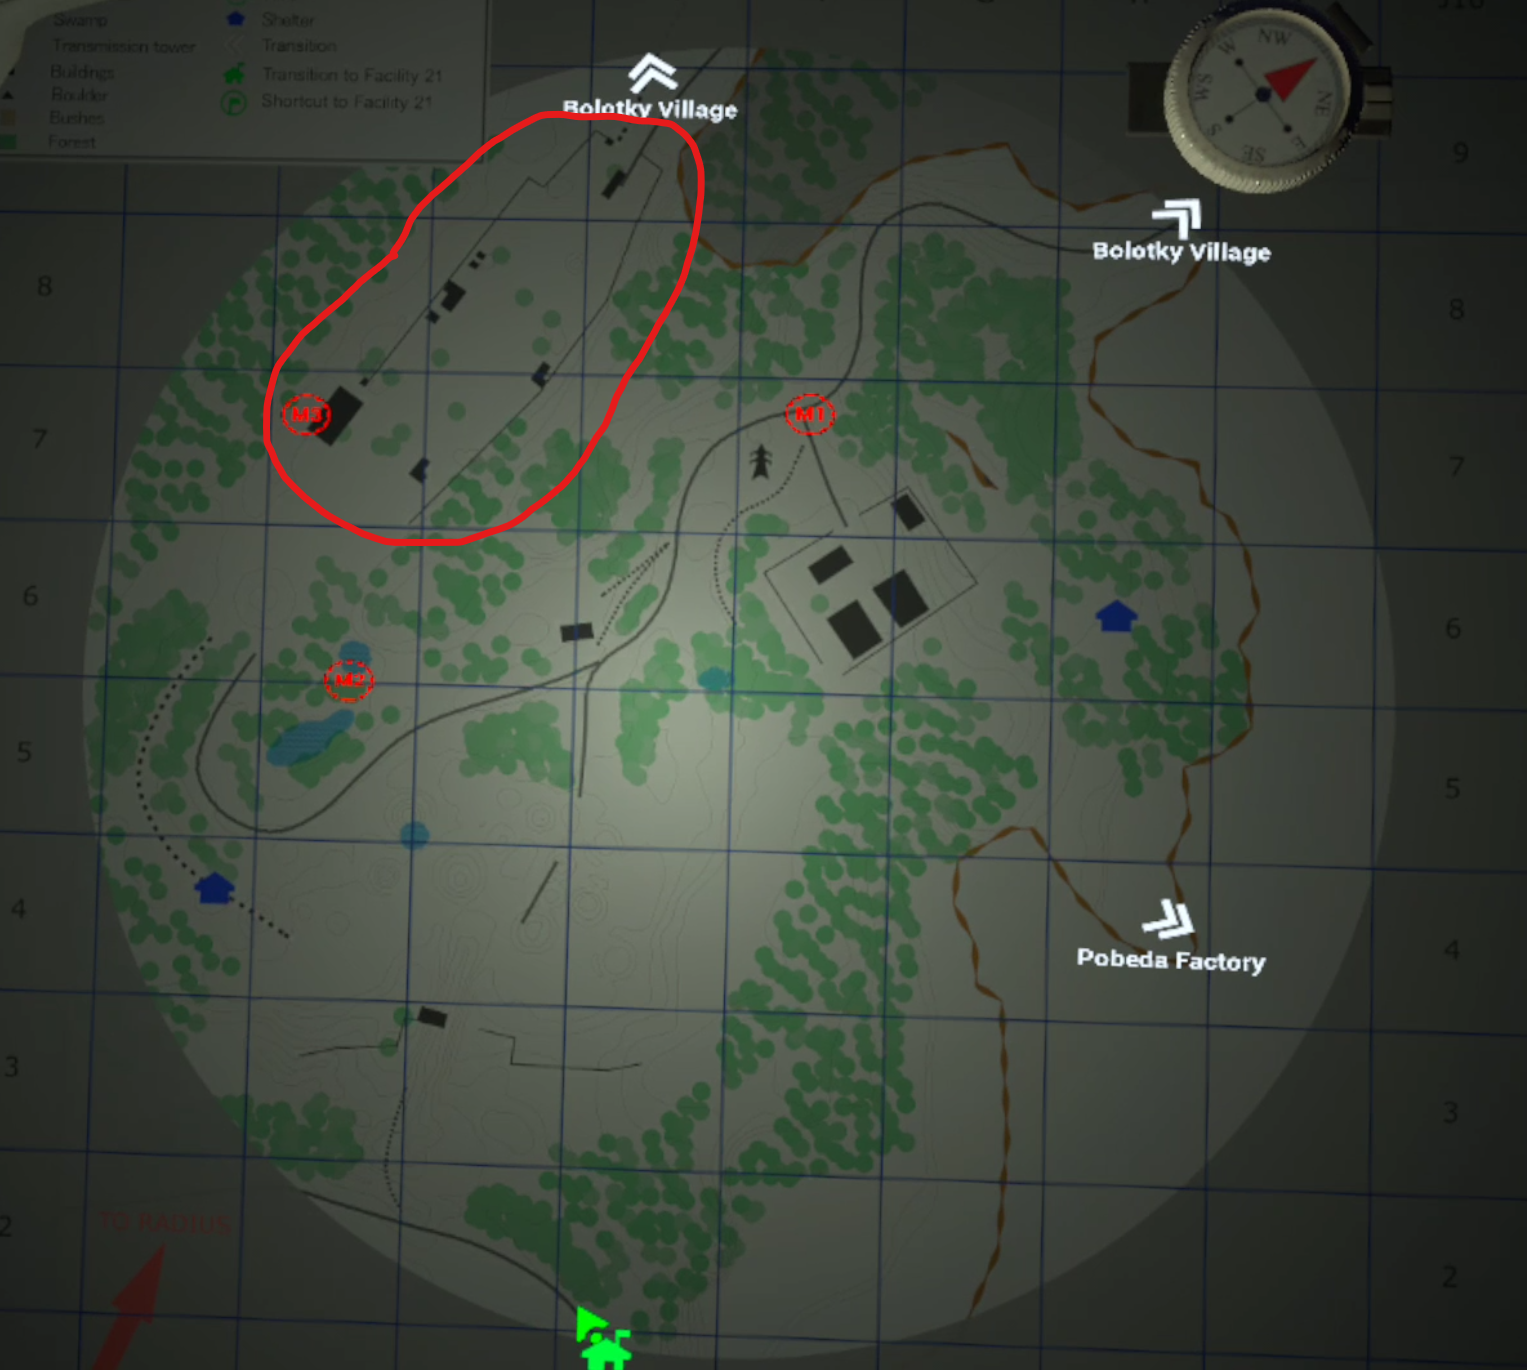
The Train Station marked on the map of Pervomay Route
This train station is the last location in Pervomay Route that you haven’t already been to which is exceptionally dangerous.
In the train station you’ll find multiple Mimic Policemen, and Fragments and Phantoms will be spread all over the map.
You’re also likely to run into Spawn at some point. The secret to beating them is to hold your knife out in front of you when they attack and catch them in mid air. If you’re concerned about getting hit strafe around them and then attack when they jump at you and miss.
Oh, and if you run into the big anomaly with green clouds floating around it, don’t go inside, those clouds will quickly kill you since you don’t have a gas mask yet.
The Train Station - Free Silenced TT-33
Whether you avoid the inside of the Train Station or not, if you want a free TT-33 pistol with magazines, ammunition, and a silencer, there’s a stash near the train station you can pick up while you’re doing these missions.
When you reach the train station head over to the slightly wooded area next to it to the west. If you’re facing the train station from the direction of the floating train car it will be on the left.

The woods leading to the TT-33 stash
Go up into those hills and keep walking until you see a concrete pipe.
Inside the pipe is the TT-33, a pistol silencer, magazines for it, and ammunition for it. The TT-33 is already modified to take a silencer, and is almost in perfect condition.

The location of the TT-33 stash
Though if you want to use the silencer make sure to repair it using the repair box at your base first, since it will be in bad shape when you find it.
This silenced pistol is great if you want to play the game more stealthily.

The pipe holding the TT-33 stash by the train station
Repeatable Missions - Types Of Missions
Since the missions are random we can’t go into detail on how to complete each one specifically.
So instead we’ll go through every type of repeatable mission in Into the Radius and give you a general walkthrough on what is expected to complete them.
You’ll be doing a lot of these missions as you progress through the game and explore the zone further, so come back here if you have any questions on them.
Otherwise you can also find more information on these missions just like with Top Priority missions by looking at your mission log in your Journal.
Sample Courier
The Sample Courier Mission has you going out into the Pechorsk zone and finding a special sample container.
The sample container will be next to a dead scientist in an orange hazmat suit, or dead soldier in dark tactical gear, and will have some enemies near it.

Enemies guarding a sample container for the Sample Courier mission
You can try to run in and grab the container before running, or dispatch the enemies and take it at your leasure.
Either way once you have the container you turn it in for the reward.

The Sample Container for the Sample Courier mission
Warren’s Legacy
Warren’s Legacy is a mission that you will find later on in the game, and is essentially a harder version of Sample Courier.
This mission has you find a Black Box instead of a Sample Container next to a body surrounded by enemies.
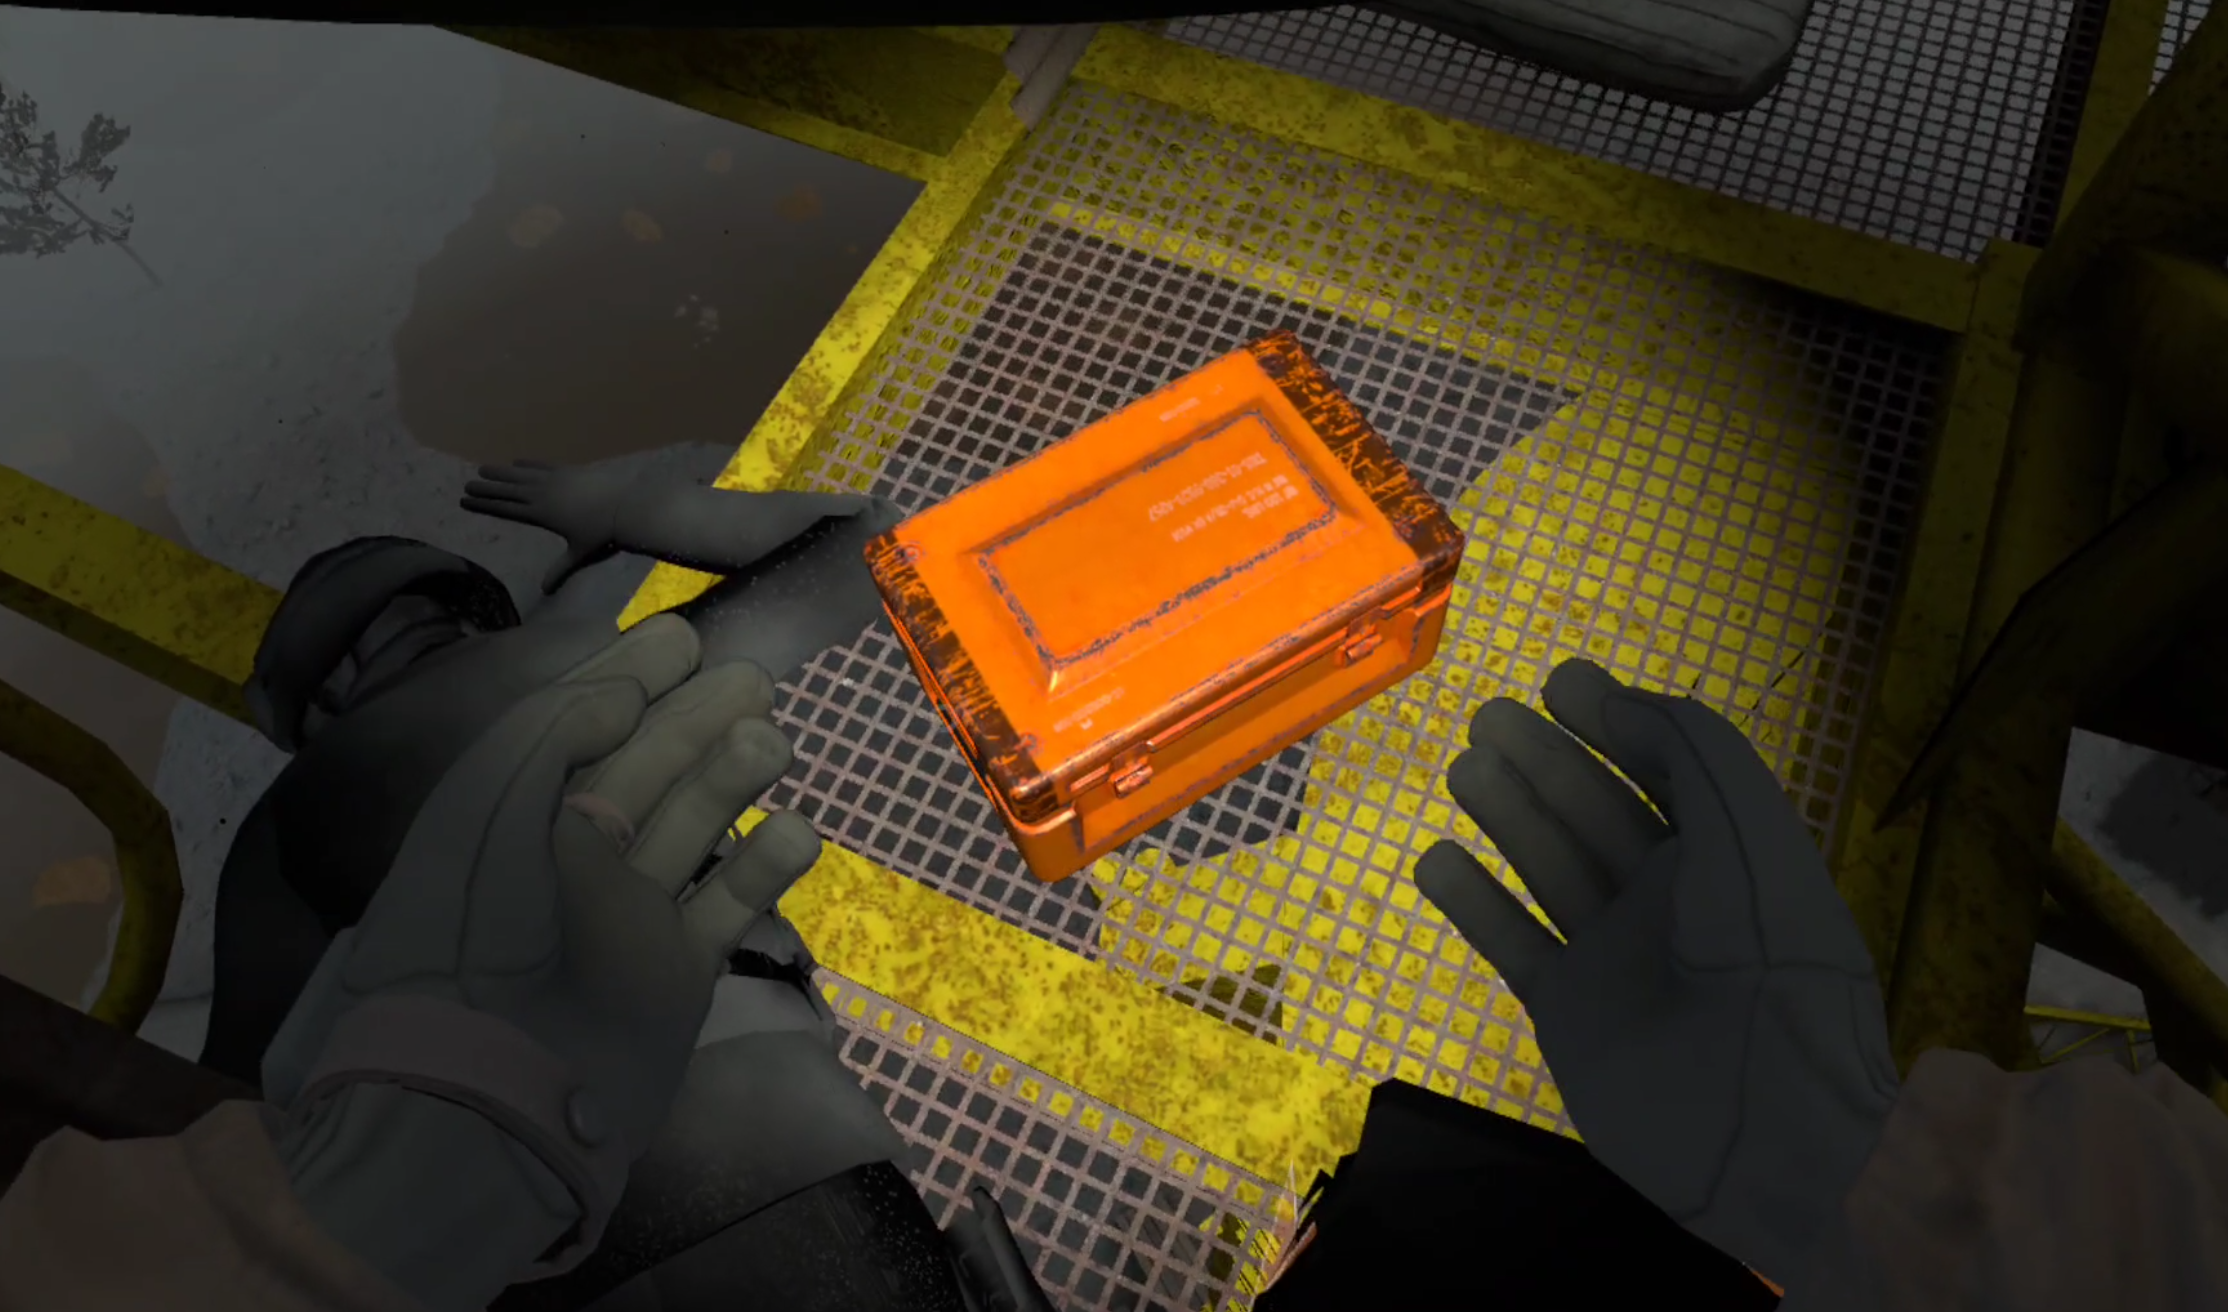
You must retrieve a Black Box to complete the Warren’s Legacy mission
The main difference is that the Black Box will be much heavier, and won’t fit in your backpack. So you’ll have to carry it in one of your hands. It’s easiest to do this mission shortly before returning to Vanno.
Papers Drive Me Crazy
The Papers Drive Me Crazy mission is virtually the same as the Sample Container Mission.
It will also spawn enemies near the objective, though the objective will more often be in an area where loot is normally found rather than next to a body out in a field somewhere. So expect to have to go indoors.

The papers to be retrieved for the Papers Drive Me Crazy mission
Data Recovery
The Data Recovery mission is awfully like the first mission you receive, Equipment Retrieval.

A wristwatch you can retrieve for the Data Recovery quest
You need to retrieve a wristwatch that looks exactly like the one you found in that first mission.
The wristwatch may be next to the body of the unfortunate explorer who lost it, somewhere on the ground near the mission marker, or in a crate.
Usually the watch is found in an area heavy in anomalies or enemies or both.
In And Out/Radius Treasures
This is a very straightforward type of mission. Simply go into the artifact field marked on your map and bring back a unique artifact found inside.

The Neon artifact for the In And Out repeatable mission in Into The Radius
A lot of these missions will bring you to larger artifact fields that can contain multiple artifacts.
So it’s very profitable to not only get the mission artifact, but others as well if your detector keeps beeping. Some anomaly fields are more dangerous than others, but if you take your time they’re all possible to navigate.
Later on you may have to collect multiple artifacts for these missions.
Metastasis
Metastasis also involves hunting for an artifact, but in this case that artifact is inside of a Special Rift instead of a field of anomalies.
These rifts work just like normal rifts, except they look different. They’reort of like several normal Rifts smashed together, and drop a Broken Shard to hand in instead of a normal shard.

The special rift for the Metastasis mission
Later on in the game you will often have to collect several Broken Shards to complete the mission.
You don’t get anything if you don’t have all of the shards, and this mission must be completed before the next Tide.
Paparazzi
The Paparazzi repeatable mission in Into The Radius is arguably one of the more dangerous and annoying.
Not to mention that to complete the mission you will also have to pony up 50 dollars for a camera, found in the “Science Equipment” category.
Despite having two handles you can only hold this camera with one hand at a time, and there is a very small viewport that shows you what you’re taking a picture of.
For the paparazzi mission you’ll need to take photos of multiple enemies out in Pechorsk. What makes this mission dangerous is that pictures generally don’t come out well unless you are very close to your enemy, which can be problematic when those enemies wield automatic weapons.
Though luckily this mission is not tied to a particular zone, you can take the pictures wherever you want. On a successful picture you’ll see the text “That’s a Nice Shot!” appear.
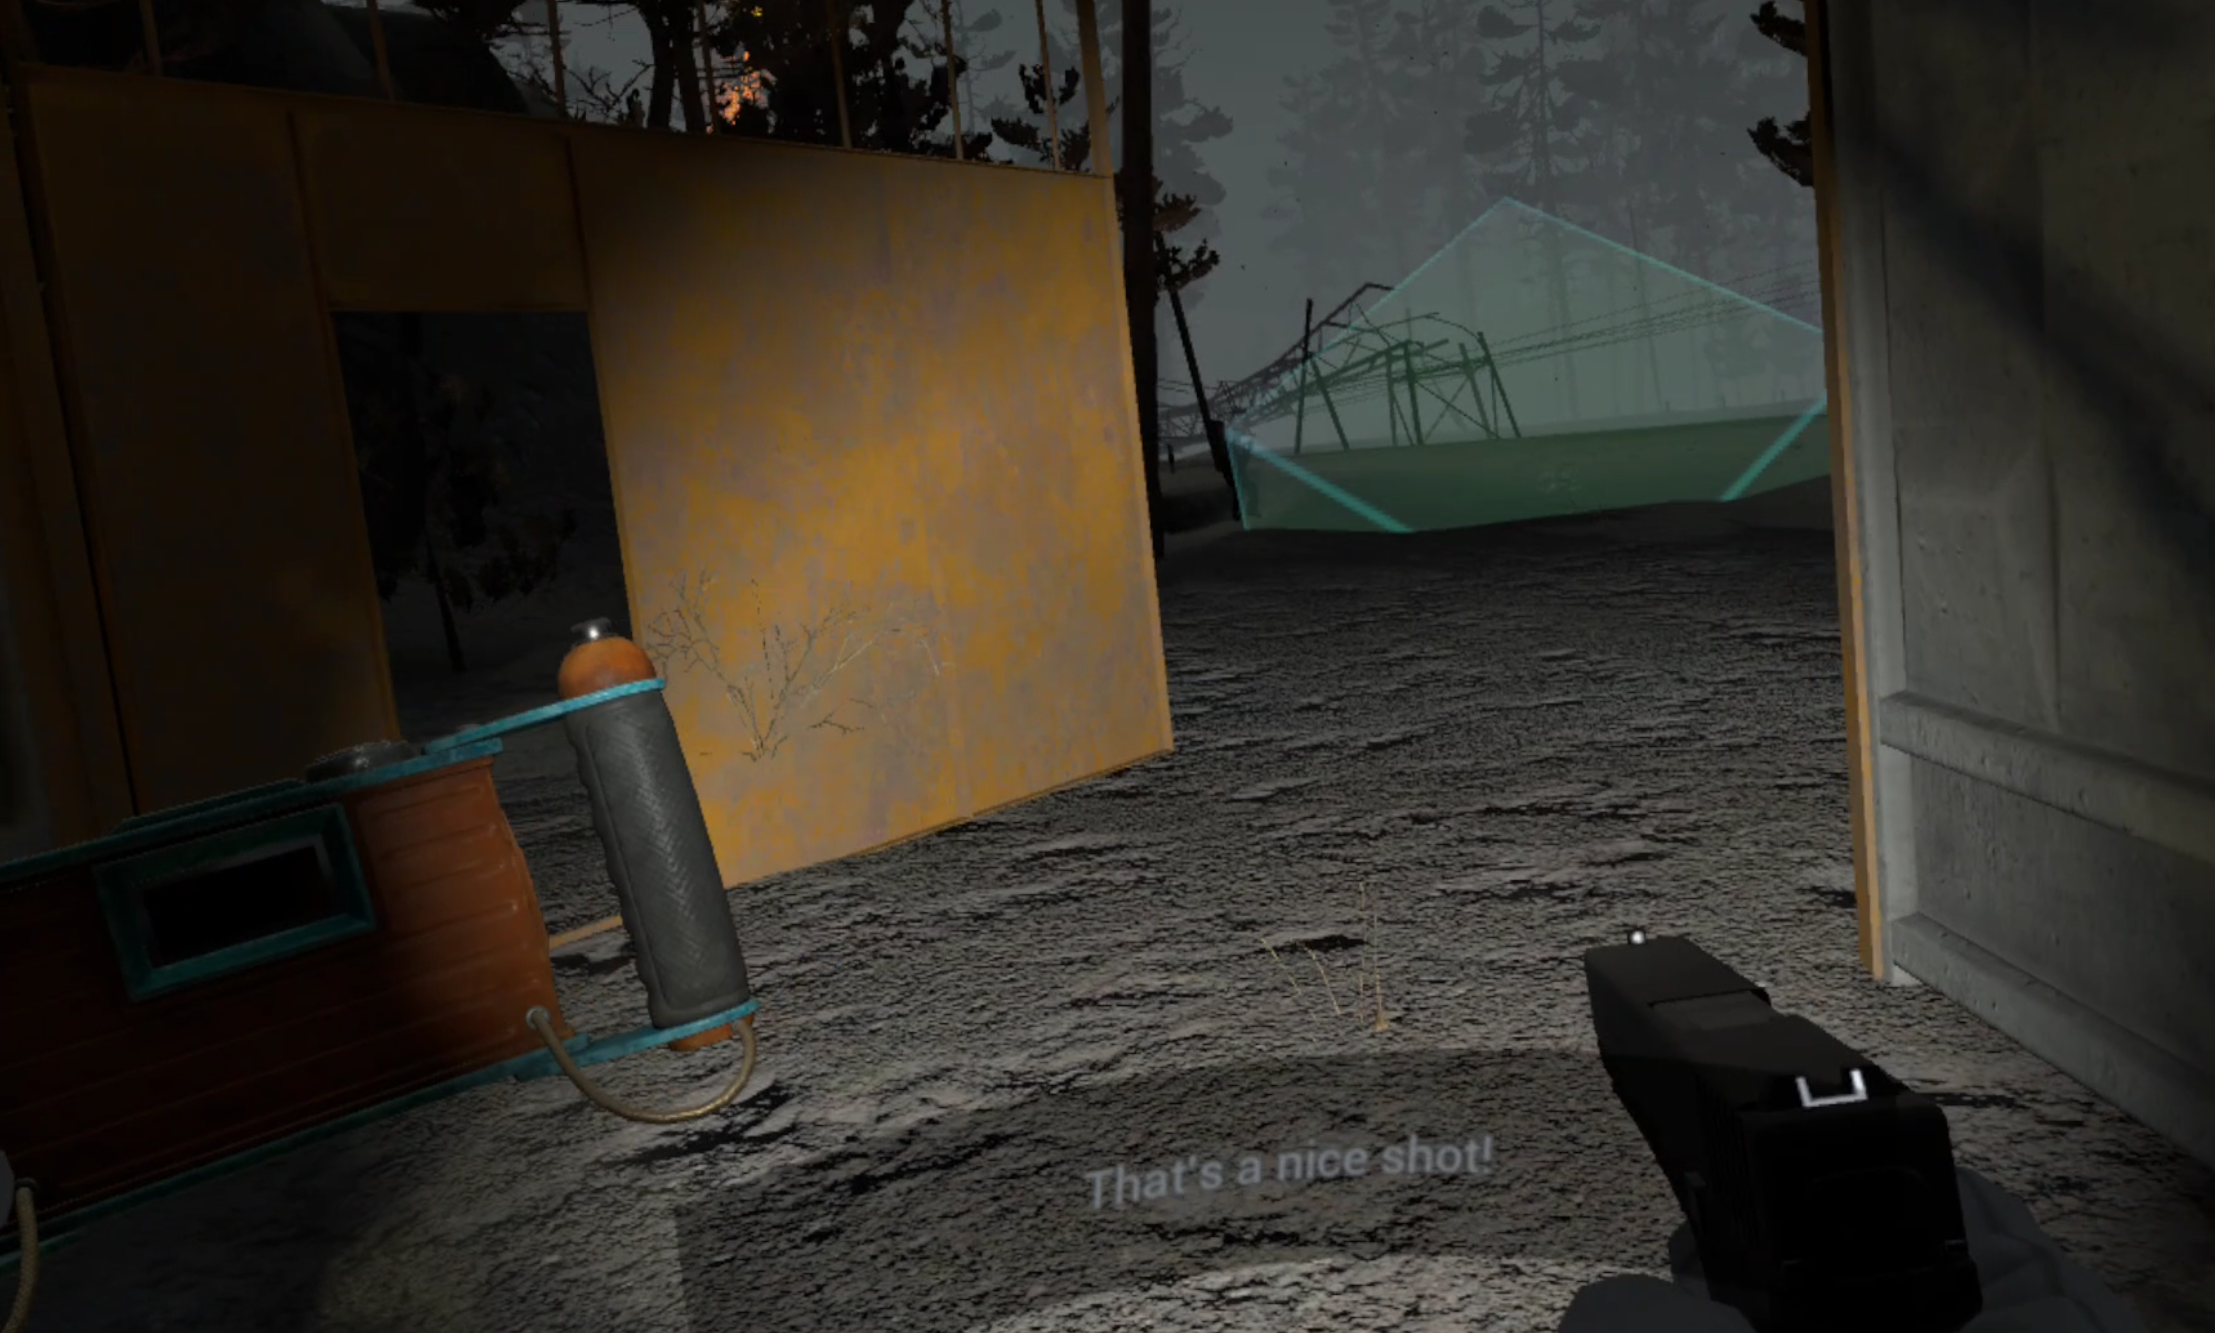
Moments after taking a picture for the Paparazzi mission
Once all of the pictures are taken turning in the camera completes the mission.
Operation Cleanup
Operation Cleanup is an extremely straightforward mission.
Accepting it will spawn a certain number of enemies where the mission marker is, and the number of those enemies are visible next to the mission in your journal.
Simply destroy all of the enemies spawned by the mission and you complete it.
Banshee Hunt
So just like In and Out and Radius Treasures, you’re supposed to find an artifact in an anomaly field for the Banshee Hunt mission.
The catch? The Crier artifact that you find when doing this mission doesn’t just sit inertly in your bag after you take it.
Nope, instead it will make a shrieking noise pretty often, which will give away your position and draw in all nearby enemies. Not only is this noise very annoying, but it could potentially cost you your life.

The Crier artifact that you have to uncover and turn in for the Banshee Hunt mission
So it’s recommended to grab the Crier for the Banshee Hunt mission after the area is clear, or when you’re heading back home through a safeish area.
Those are all of the repeatable missions in Into The Radius, and some tips on how to complete them. After you do two of these you’ll be ready to tackle the third Top Priority mission in the game, Fixing A Leak, which we will cover in part four of this Into The Radius Walkthrough.
Other Guides You Might Find Helpful: