

Into The Radius Walkthrough And Guide - The Final Mission - Ouroboros
Stuck in Into The Radius? Wondering where to go and how to get there for your next mission?
Maybe you would just like to see what is in store for you before you get there, or you’d like to know if you’re properly prepared for your next mission in the Pechorsk Zone.
Well don’t worry we’ve got you covered with this walkthrough and guide for Into the Radius VR.
In this Into the Radius walkthrough we’ll detail how to progress through the main story “Top Priority” missions, with a couple of guiding tips thrown in here and there to make your adventure smoother.
The focus of these walkthrough articles will be the story missions, but we’ll throw in some general gameplay tips and other useful loot locations near your objectives.
These articles will also assume you’re playing the game on the Normal difficulty mode with Tutorials turned on, which is highly recommended for your first playthrough. This walkthrough will still be useful if you’re playing on Realistic difficulty, but some details like vendor prices or enemy placement and numbers will be different.
Here is every article in our complete Into the Radius VR Walkthrough:
Into The Radius Walkthrough And Guide - The First Mission - Equipment Retrieval
Into The Radius Walkthrough And Guide - The Second Mission - Total Recall
Into The Radius Walkthrough And Guide - The Third Mission - Fixing A Leak
Into The Radius Walkthrough And Guide - The Fourth Mission - Flash In The Dark
Into The Radius Walkthrough And Guide - The Fifth Mission - A Probing Move
Into The Radius Walkthrough And Guide - The Sixth Mission - The Intrusion
Into The Radius Walkthrough And Guide - The Seventh Mission - A Farewell Feast
Into The Radius Walkthrough And Guide - The Eighth Mission - Kids Playground
Into The Radius Walkthrough And Guide - The Final Mission - Ouroboros
Here we’ll be talking about the final mission of Into The Radius, Ouroboros, which brings you to Pechorsk Castle to get some answers, and more mysteries, at the center of the Radius. Ouroboros is the final Top Priority mission of this game, and the most illuminating and difficult of all of them.
Ouroboros - Loadout
Congratulations, you’ve made it to the final mission of Into the Radius! Get ready for the hardest fighting in the most difficult map of the game. More than ever being properly prepared is important and will help you win.
This mission brings you to Pechorsk Castle, which has a variety of indoor and outdoor areas. As you make your way through the inside and outside of Pechorsk Castle, you’ll be fighting a lot of enemies in both very close quarters, and once or twice from far away. So it’s best to be prepared for a lot of close range, and some long range combat.
There will be a smattering of all of the enemies you have encountered so far like Fragments, Spawn, Seekers, and Sliders. Though most dangerously of all you’ll be coming up against a lot of heavily armed and armored Mimics like Mimic Soldiers, Mimic SWAT, and Mimic Snipers.
The automatic weapons they’ll be using are very effective and if you aren’t careful can take you down in a few short bursts at close range, so it’s best to arm yourself with weapons that are capable of taking down Mimics very quickly.
So more than anything rifles that hit heavily and have a decent rate of fire are recommended like the FN 17 “SCAR” that you can see in this example loadout. They can hit enemies at medium and long ranges with some skill and patience, and also offer more than enough firepower for close ranged fighting.
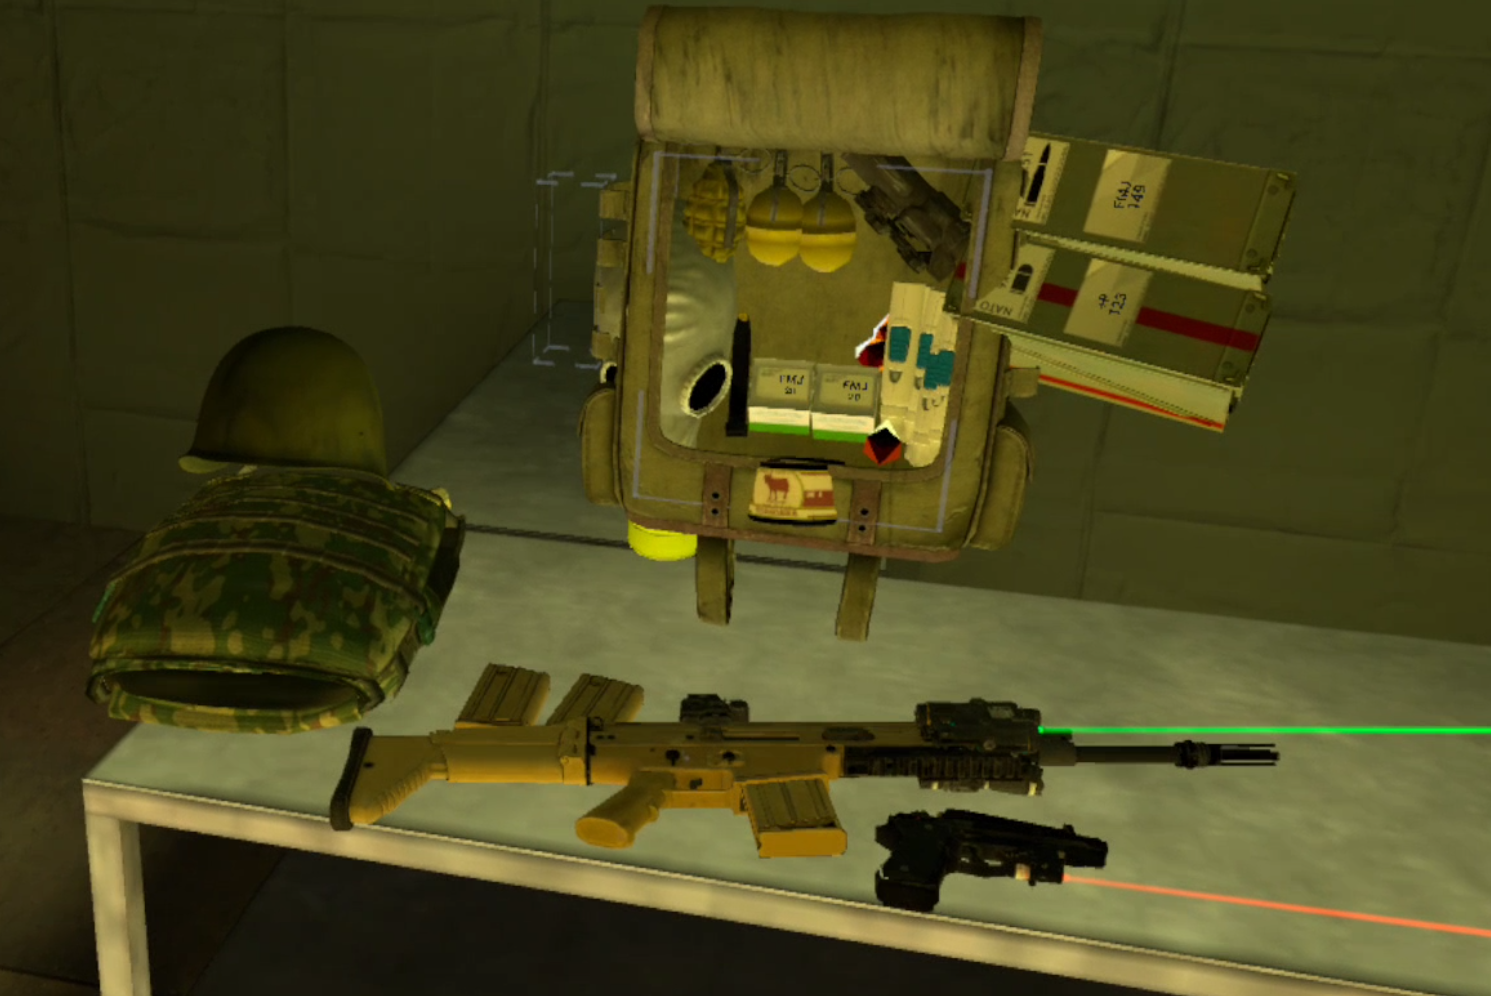
A sample loadout for the last Into the Radius mission
This is the final mission and so there’s no need to spare any expense on your equipment. A good sidearm is also very useful in the close quarters fighting you’ll be doing inside of the castle, preferably with a laser pointer for easy aiming as well.
Having a good pistol to quickly switch to if your main gun runs dry is more helpful in the final mission than anywhere else, and more likely to happen and save your life. While I used the M9 in this sample loadout, which is an all around very reliable and hard hitting pistol, you may want to use the extremely heavy hitting Desert Eagle, or something that can fire automatically like the OC-33.
It’s also not a bad idea to bring two long arms, one for up close and medium ranges, and another for longer ranged shooting. Though you don’t necessarily have to have a sniper rifle with you it can be helpful, and you can always keep a longer ranged optic in your pack to swap on to your rifle, as you can see in the top right hand corner of the backpack in the example loadout.

Upgrading an M9 before heading out on the final mission
You also might want to upgrade what weapons you do bring with you if you can afford it, and adding attachments like optics or lasers if you haven’t already can be extremely helpful.
More than anything else make sure you have a lot of healing items like Healing Injectors and Regen artifacts. Bring more than you think you’ll need. In this mission one wrong step can drain most if not all of your health pool.
Also invest in the best possible ammunition for whatever weapons you are bringing, and bring at least a whole crate of it. As always healing items and ammunition are the number one thing that might force you to quit and turn back. So go ahead and get the best, and have a lot of it.
A little food is a good idea to have, though you’ll find more in various loot areas inside the Castle, and you will definitely want to bring your Gas Mask. While not strictly necessary it will make some of the anomaly fields in the exterior of the castle a lot simpler to navigate and survive.
You’ll also notice that I brought a few grenades. While not necessary they can be useful in flushing out Mimics that are waiting to ambush you in the next room, and so they’re worth having a few of just in case.
You’ll also notice in this loadout that there aren’t any silencers or subsonic ammunition. Unlike in other missions stealth isn’t very useful in Ouroboros, as your enemies will generally be right in your path and impossible to avoid, so don’t bother, this will be a loud mission.
Of course the usual Head Lamp, Detector, Probes, and melee weapon of some sort are necessary as well. Make sure all of your equipment is fully repaired and loaded before you head out. Don’t spare any expense, you’re about to finally enter the center of the radius and master it.
The Last Mission - Entering Pechorsk Castle
As always accept the mission at the terminal before heading out. You’ll see that you’re in for a challenge as the briefing ominously indicates. Don’t worry, you’ll be alright.

The briefing for the last mission of Into the Radius. Combat Training will definitely be required.
Once you do head out of the gate, double check your gear, and take the left most rope line out, which leads to Kolkhoz Zarya.
Once you find yourself in Kolkhoz Zarya take a look at your map and get your bearings.

The path from Kolkhoz Zarya to Pechorsk Castle
Luckily you won’t have to go far to get to Pechorsk Castle, though there will be some enemies and anomalies in your way.
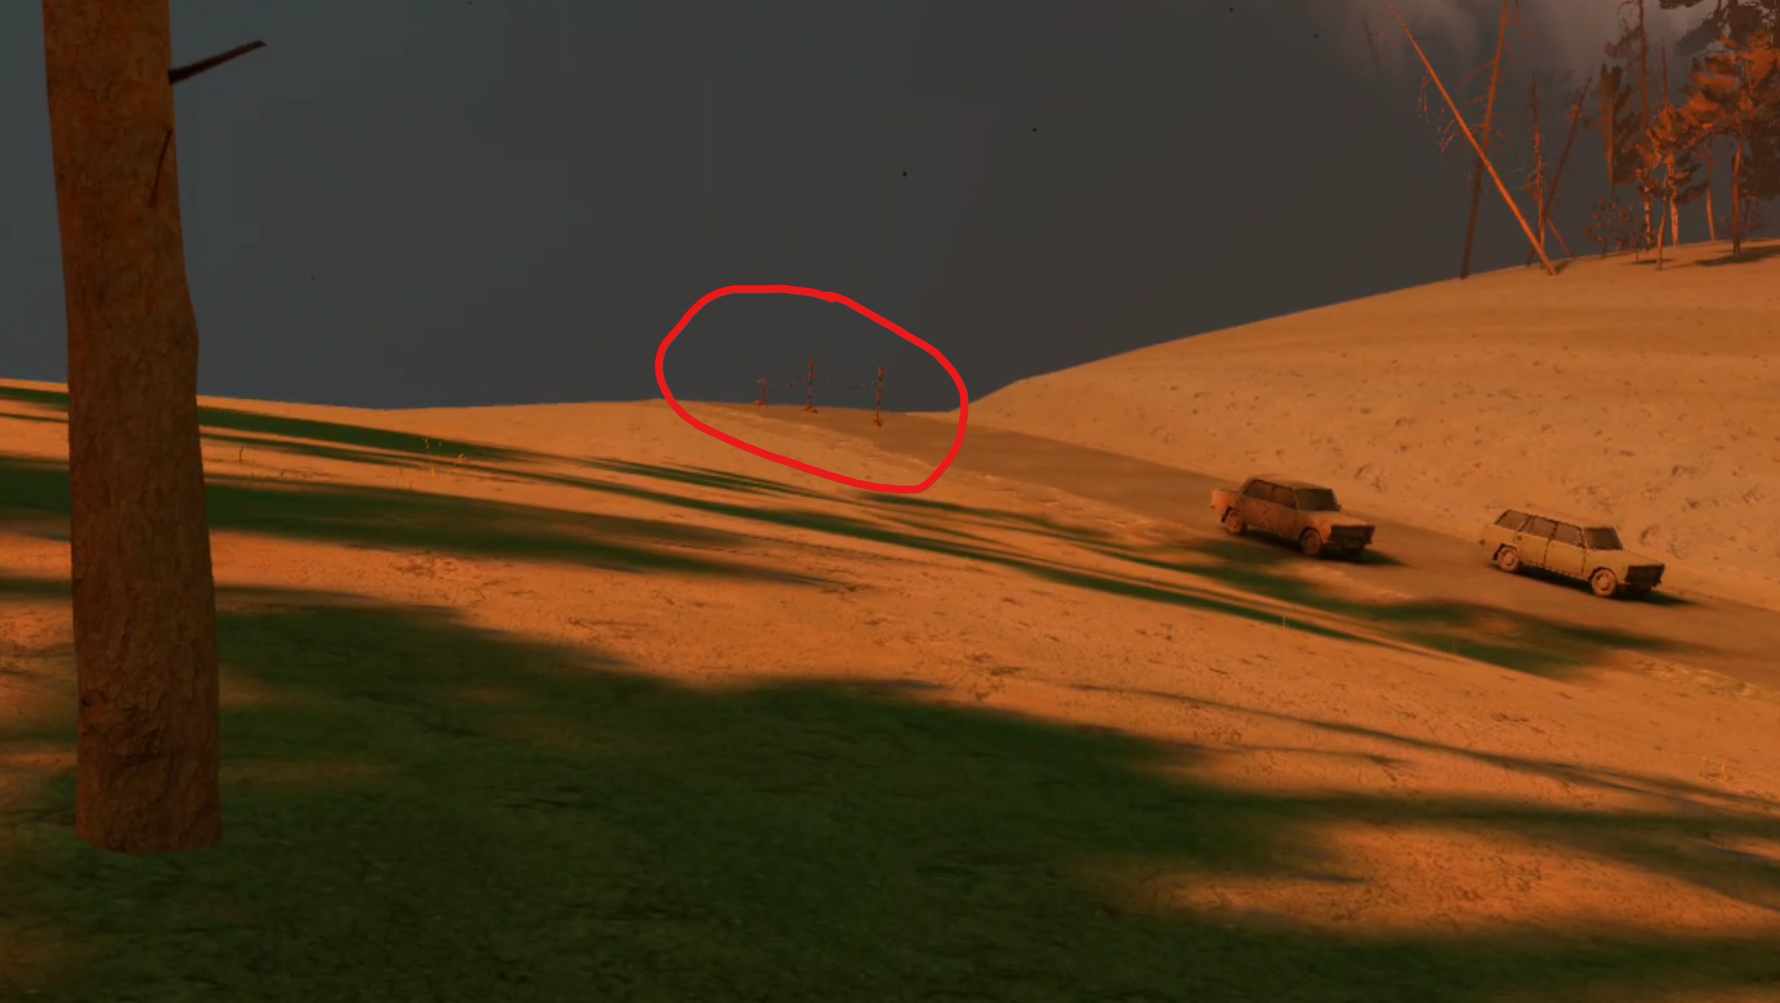
You can head straight down the railway in front of you towards the bridge and fight your way through the Mimics that patrol by the bridge before taking a left down the road.

The Mimics guarding the bridge. You can sneak past them by going through the woods.
You can also go left off of the railway down the embankment, swim through the water, and skirt around the anomaly field in the trees to avoid those mimics if you like. Either way you should be very prepared for a fight if there is one, and these few enemies will be the least of your worries.
However you get there, enter the rope line heading to Pechorsk Castle.
The rope line leading to Pechorsk Castle, the final map of the game
Once you’re through to Pechorsk Castle you’ll see a large house ahead of you, and hear a lot of Stomper Anomalies around. Just head towards the house, eliminating the few Fragments and Spawn that might see you on your way towards the castle.
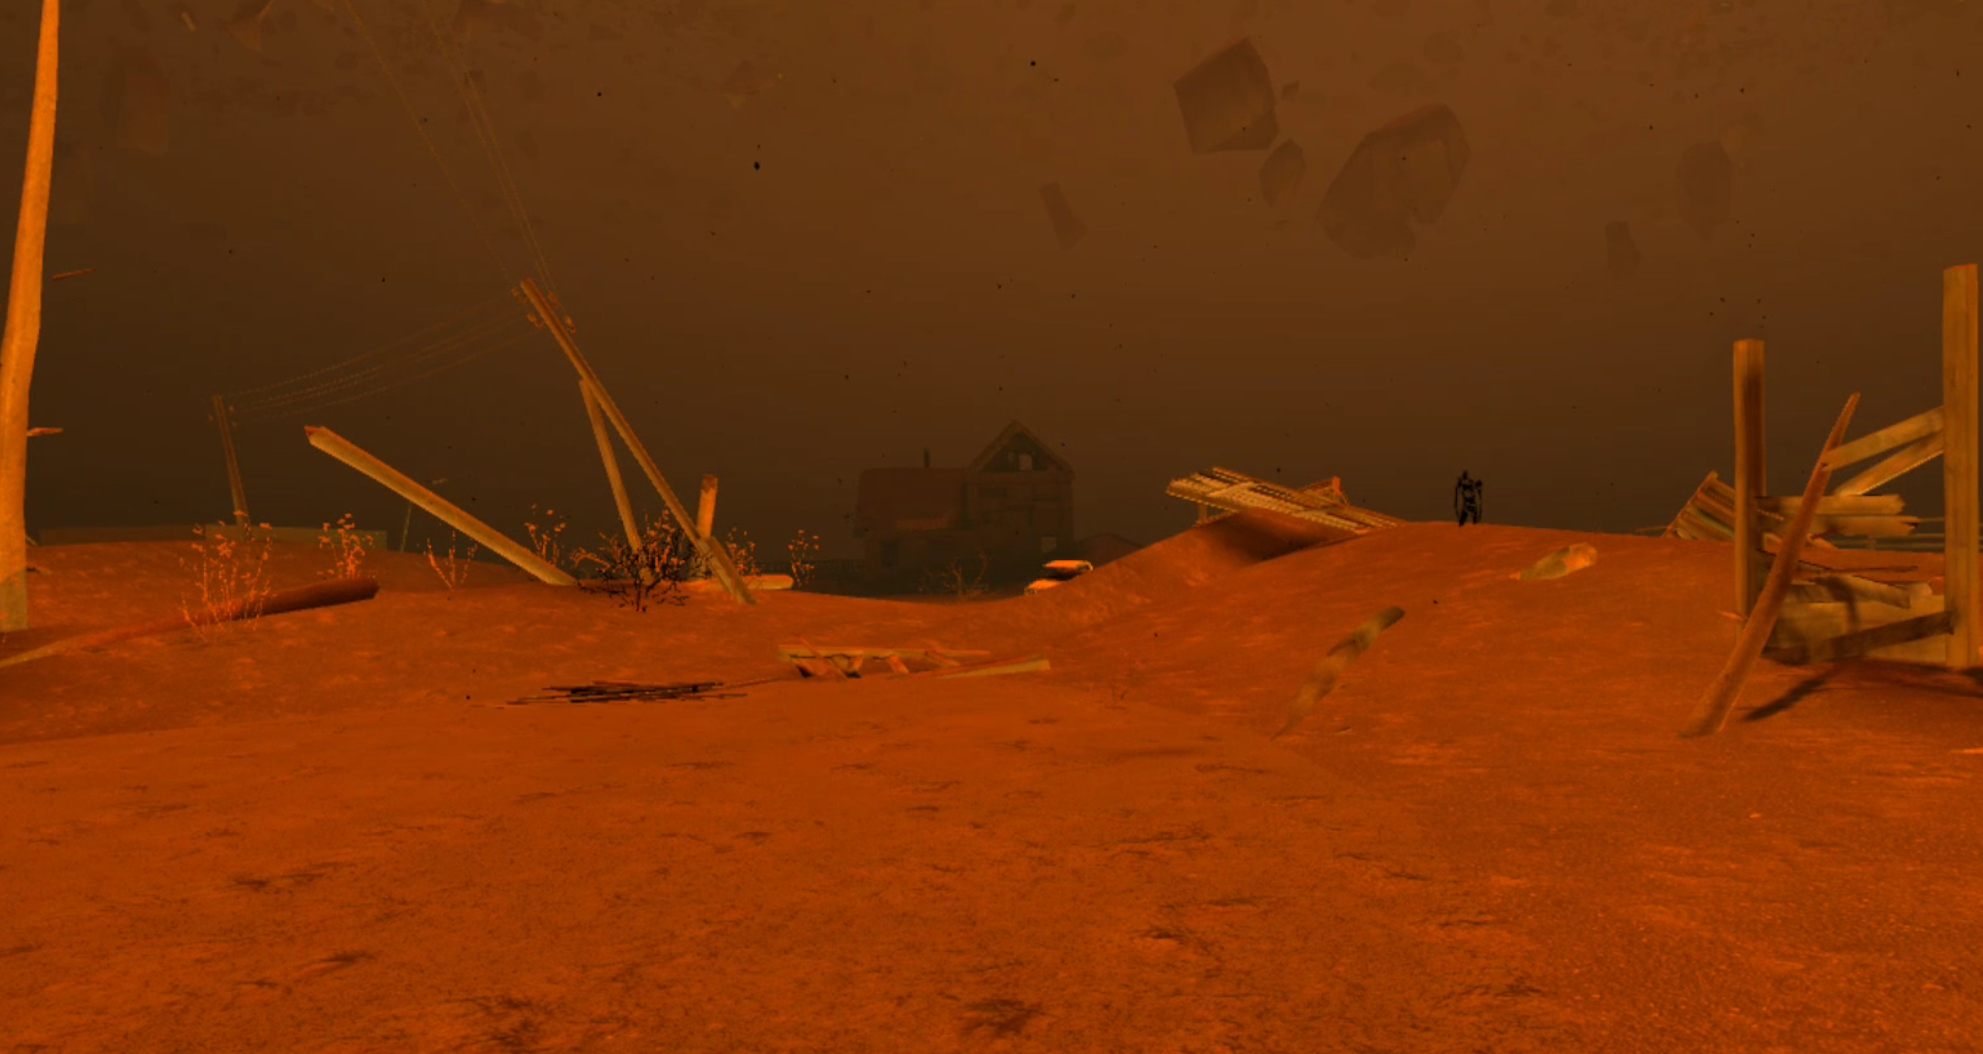
Head towards the house, and you’ll see the bridge heading into the castle right past it
You’ll soon see the castle ahead with a bridge leading to it.
As usual during a Top Priority mission you’ll also see the white form of friend Katya standing near the bridge. Touch her to get some more story details before you head inside.

Katya once again waits for you
Then double check and make sure you’re completely ready. Load your magazines, and make a save if you’re not playing in Ironman mode.
When you look from the end of the bridge towards the castle entrance you’ll see that the gate is open and the way in. The orb that has always stood in the center of the radius is just above you.
It’s time to complete the final mission of the game and discover what is at the center of the zone. Here’s where things get heavy.

Fighting Through The Castle
Take a glance at your map, while it won’t be as useful here as in other missions, this is the approximate route we’ll be taking through the castle.
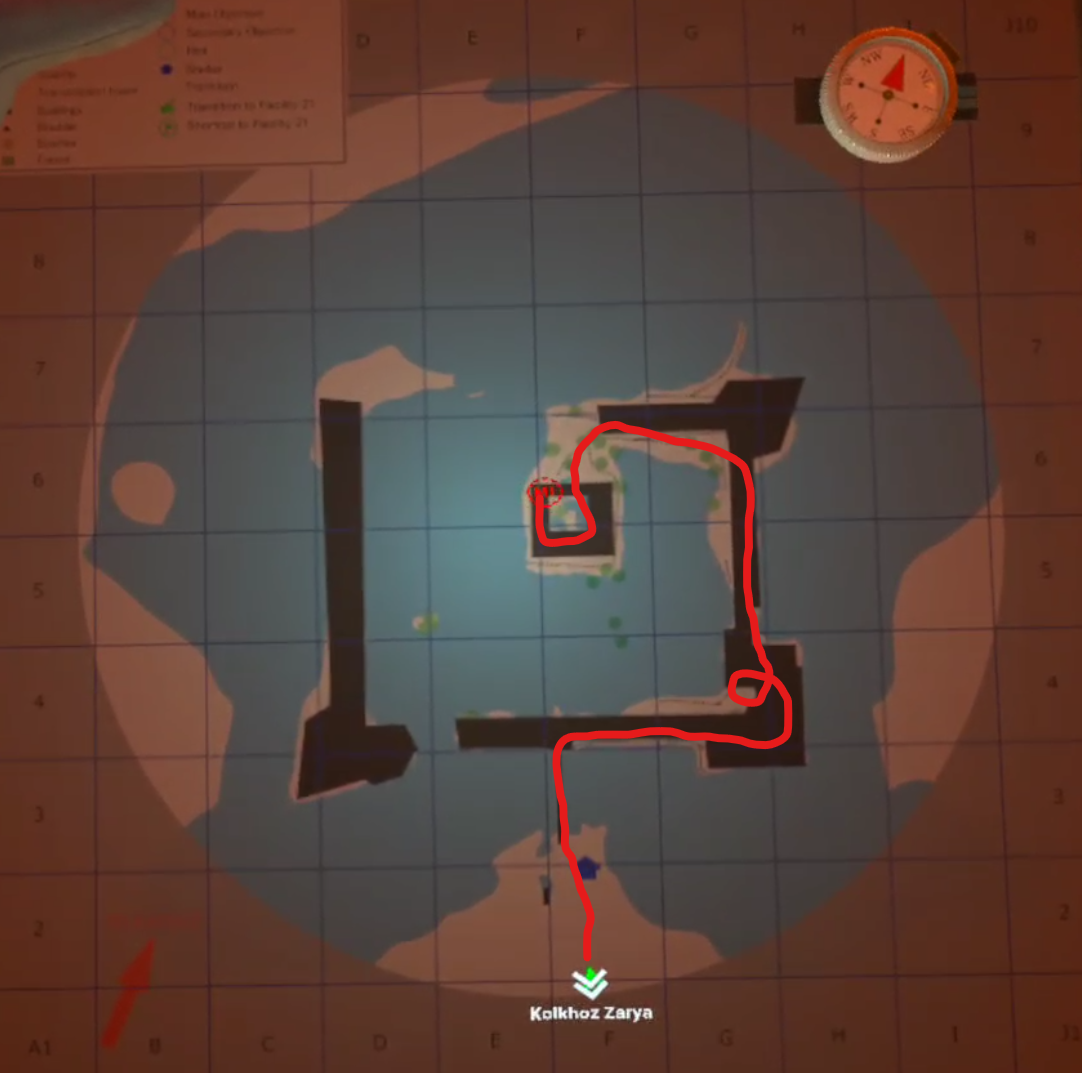
The route through the Castle for the Ouroboros mission
It’s pretty linear, so you’ll have a hard time getting lost even if you tried.
Steel yourself and walk across the bridge. You’ll hear a lot of enemies inside, and a stray Mimic or Spawn might greet you by coming through the gate and attacking, so keep an eye on it and your weapon drawn as you approach.
Though if you decide to go down the dirt path directly to the right of the gate you can follow it past the walls and find a grate with a dead soldier in front of it and a small stash of Saiga 12 magazines and shotgun slugs.
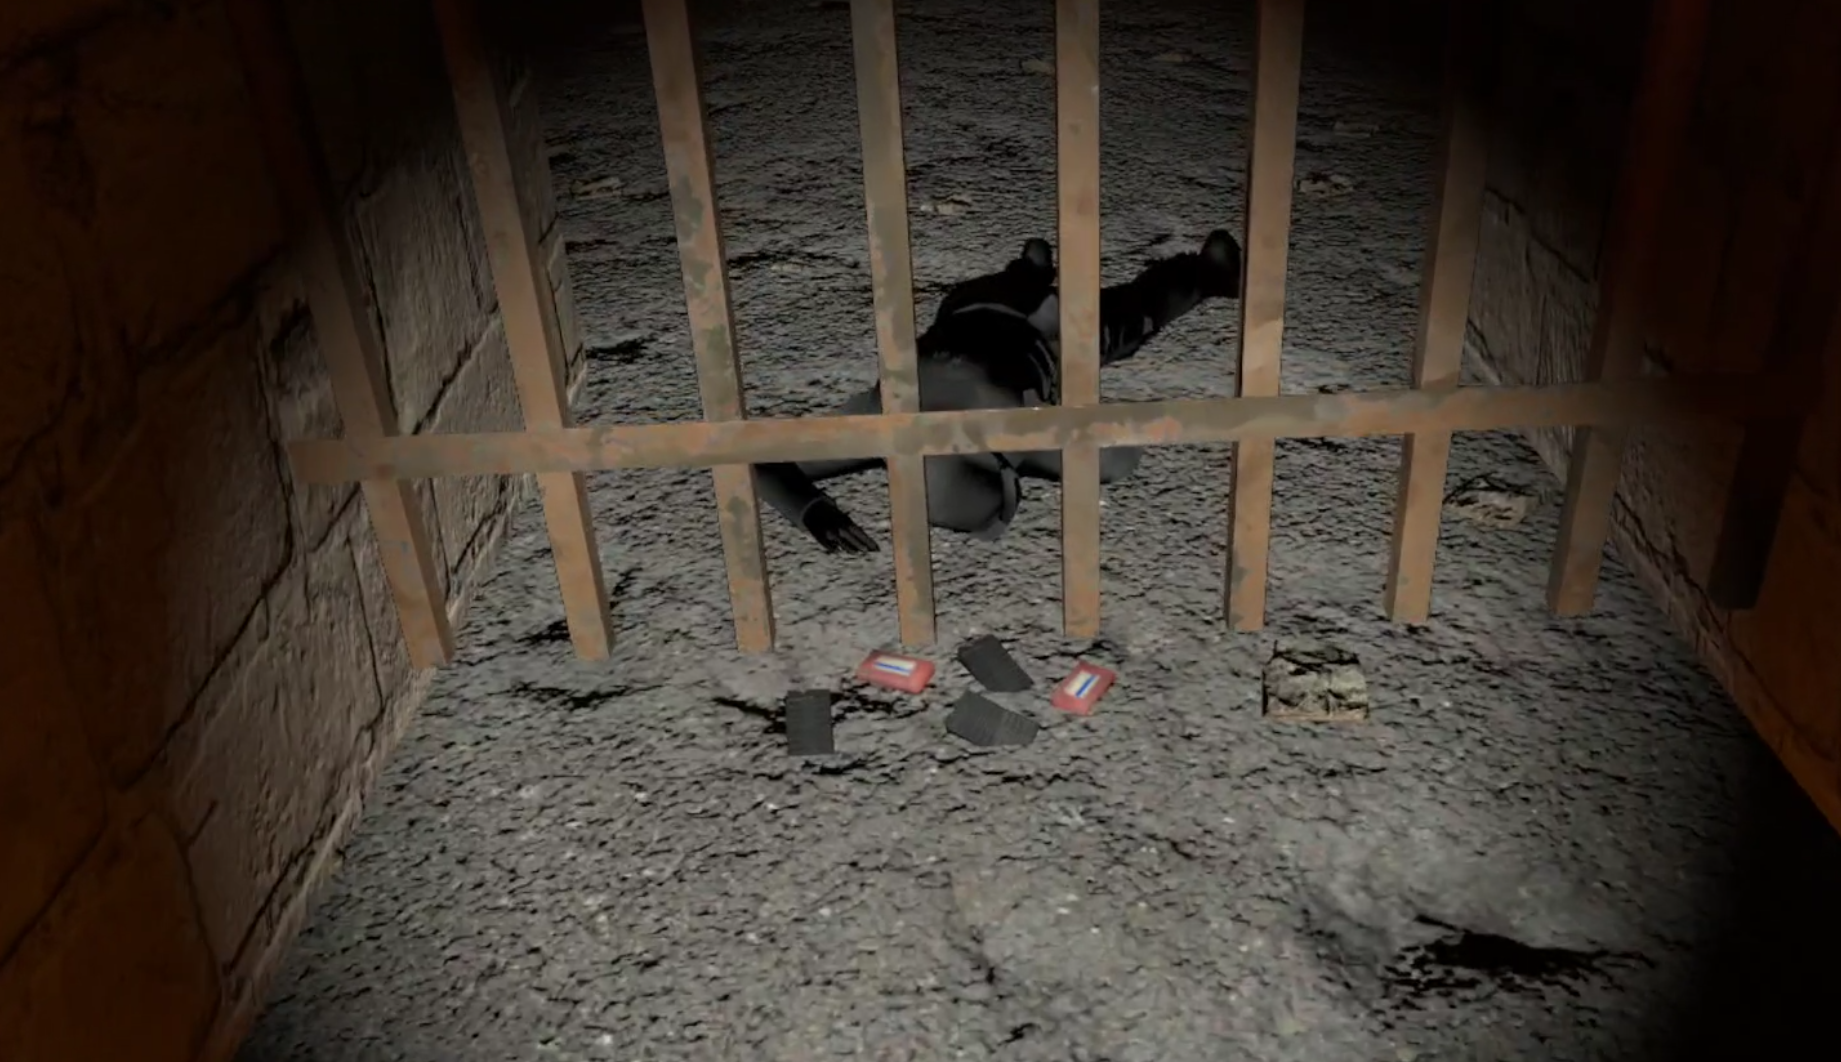
A small stash of Saiga 12 magazines and shotgun slugs
Go out of your way to pick them up or don’t, it’s up to you, and you can always get them later inside the castle. Either way there’s no way through around the side, you have to go through the front gate.
From here on out be ready for enemies around every corner.
Through the gate you’ll see a dark version of Katya, who you can touch for some more story dialog. You’ll be seeing her periodically throughout the Castle, and there will also be other black statues that you can touch for some extra lore.
I won’t be pointing all of them out here, from now on we’ll focus on fighting your way through to the end. There are also numerous crates and small side areas throughout the castle that you’ll find with a ton of loot. Since this is the final mission of the game we won’t be focusing much on looting in this walkthrough guide either, and will be focusing on getting you into the central keep and completing the game.
Directly to the right as you enter the gate is a doorway, and that’s where your enemies will be coming from. Expect Seekers, Fragments, and Spawn to come rushing out.
Gunning down a Seeker as it rushes out of the castle
When you see one shoot them down and push forwards to destroy the Rift Anomaly on the other side before it spawns any more enemies.
A Rift Anomaly right inside the castle entrance
It’s a good idea to wait for at least a few seconds after you’ve made a bunch of noise with gunfire to see if any more enemies run around the corner to attack you.
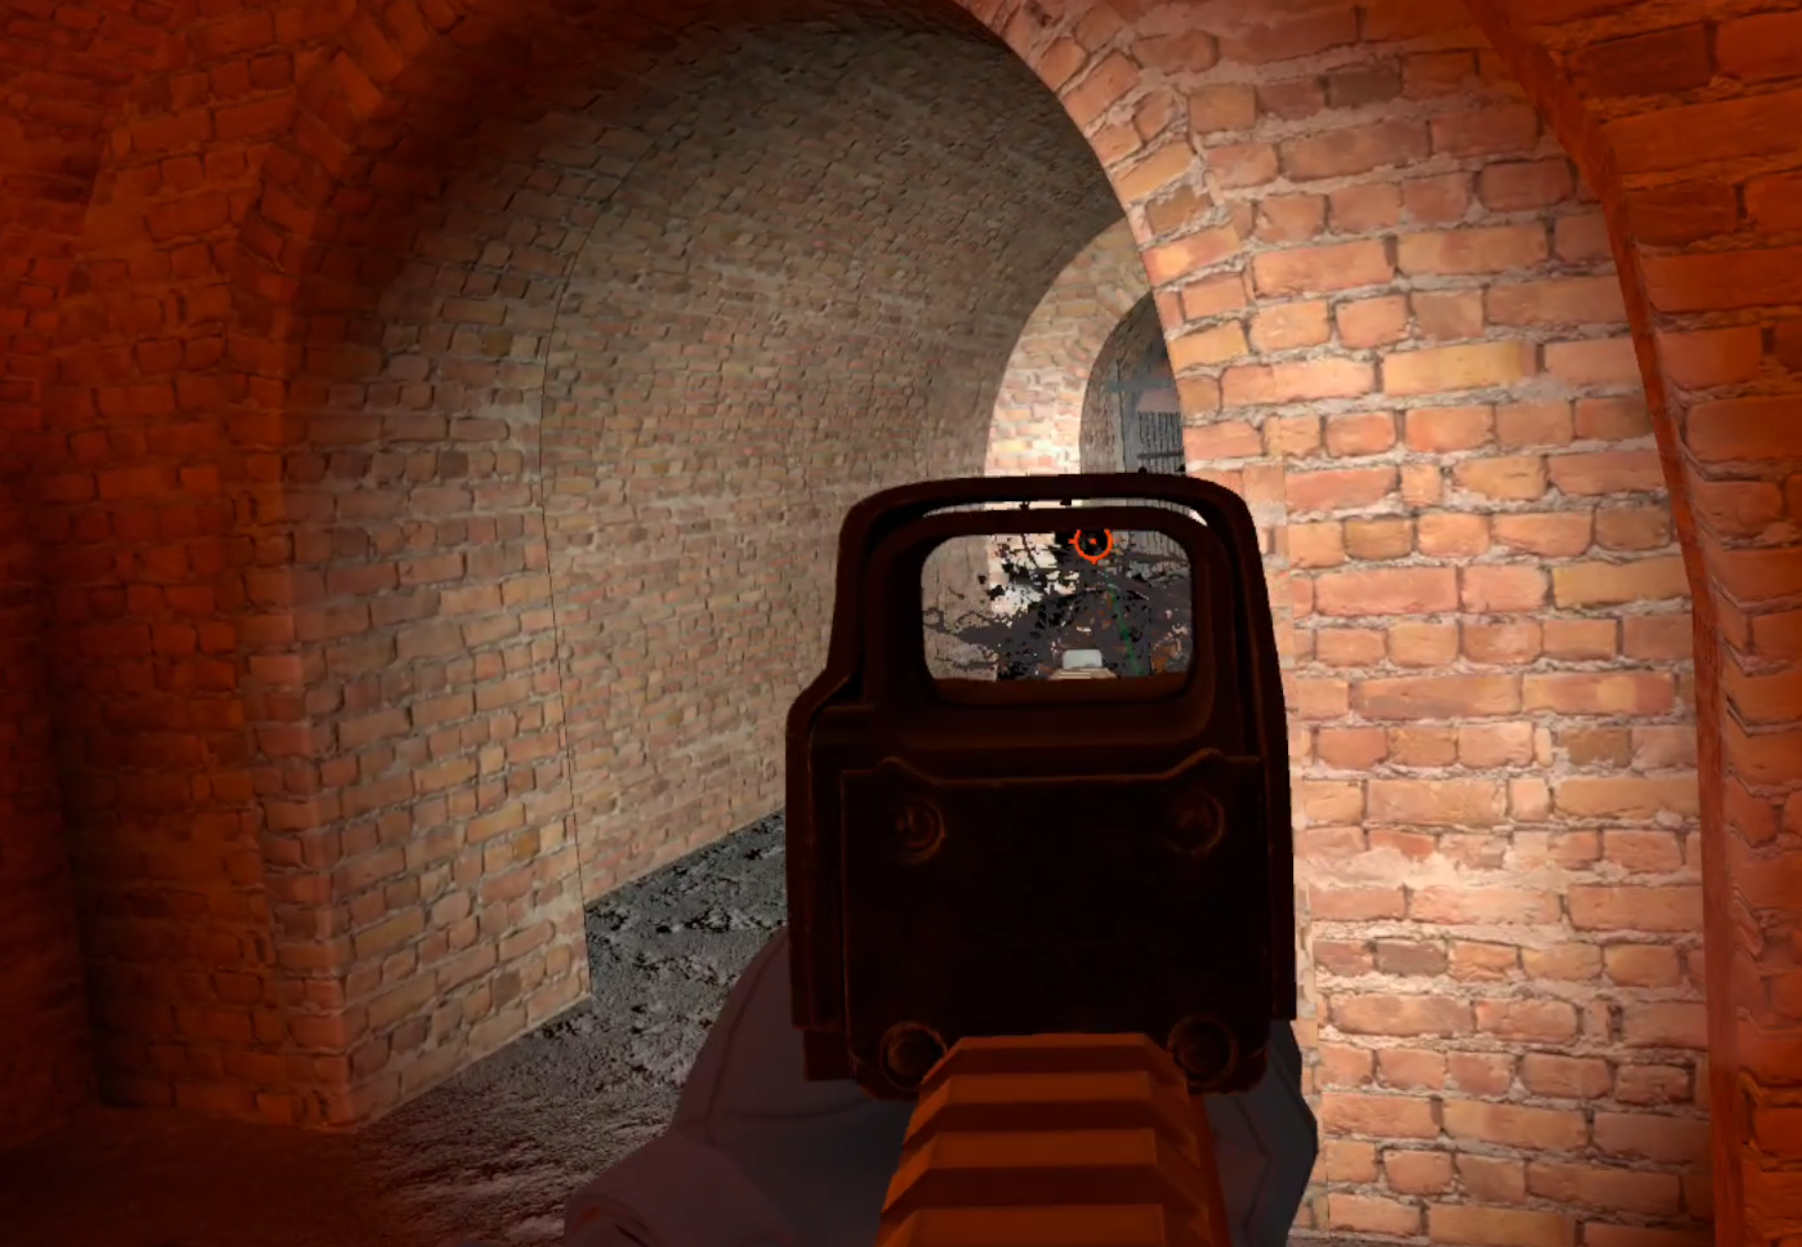
Once the coast is clear head forwards and take a right. Past the room containing the Rift you’ll take a quick left down a very short hallway pictured below into another. Be careful here. It doesn’t look like it but this room expands to your left and right, and there will be a squad of mimics in the next room waiting to ambush you.
If you wait for a moment or two you can hear them talking. If you’re lucky one or two might walk out to meet you, but most likely they’ll wait for you to walk further inside.

Mimic Soldiers wait in ambush around each corner here
You can flush them out by throwing some grenades around each corner, or try blind firing around the corners when you hear them, or quickly peak, take a shot, and fall back. You can also push a little bit into the room and hide behind the pillars inside to block the lines of sight of the other Mimics inside.
This many mimics can take you down very quickly if they fire together, so don’t expose yourself for too long. Once you’ve made some noise and have their attention fall back, heal, and then peeking back in to take one or two down quickly, or try to bait them into coming towards you.
This is definitely the section of the castle where grenades are the most useful, so don’t spare them if you’ve got them. You’ll probably have to take a few shots, but this room is very clearable if you’re careful and quick about it.

The bed inside the castle, just ahead and to the right is a doorway leading forwards
Past this room you can take a left and see a long corridor with a bed in it. This bed is actually useable, though right now isn’t a very good time to use it. As you walk towards it there will undoubtably be more enemies through the doorway on your right, which is also guarded by a patch of Black Grass.
There will also be some arches that you can’t walk through because they have grates on them, don’t be lulled into a false sense of security by these grates. Mimics can still shoot through them, and so can you, so always watch them as you go by.
Once you’ve cleared the first group of Mimics, and whatever Fragments lied beyond them near the bed, your path continues past the Reflector anomaly after the doorway covered in Black Grass.

A Mimic lying in wait past the indoor Reflector Anomaly. Always stay alert while you go forwards
As always constantly be on the lookout for enemies ahead of you, and squeeze past the anomaly on the left to go to the store room beyond it.
This room will have some shelves with various pieces of loot on them, so feel free to grab a snack. This is also not a bad place to reload some magazines and heal.
There is a short period of relative calm here after the huge firefight you just had. Keep going forwards through the corridors. You’ll pass some metal beams and large pieces of concrete, and a room that’s dominated by natural rocks.

A caved in room inside the castle
There may be some sparse enemies here, but most if not all will have been drawn by your huge firefight earlier.
After the caved in hallways you’ll find yourself in a large room, the room on the other side of the grate with the dead soldier near the entrance. If you didn’t grab those Saiga 12 magazines you can grab them here as well.

The other side of the grate with the saiga magazines
Going to the other side of the huge room you’ll see another manifestation of dark Katya facing another doorway.
Head through it, and be wary that more enemies might come at you as you make your way through the next hallways, which are all full of Black Grass.
Use your Head Lamp to deactivate the anomalies and run through them. Though you’ll start to hear the telltale sounds of Lightning anomalies as you head into this room.

Be careful in this room, it is full of lighting anomalies
This room is filled with Bolt Anomalies, though luckily they are all very small and it is complete possible to make your way through without being hit by a single one of them.
Throw a probe very gently, and just a little bit in front of you. If the probe doesn’t trigger the anomaly then follow its path directly, just a little deviation can get you a serious shock and a lot of damage.
First hug the left hand wall and then head between the shelf and the cable reel to the left of it. Then go straight towards the shelf next to the doorway leading out and hug that shelf as you go through the doorway.

The doorway leading out of the Lightning Anomaly room
Take your time and you’ll be alright, you can make it through the Lightning Anomaly Room. Once you’re through there will be another room with some Black Grass in your way.
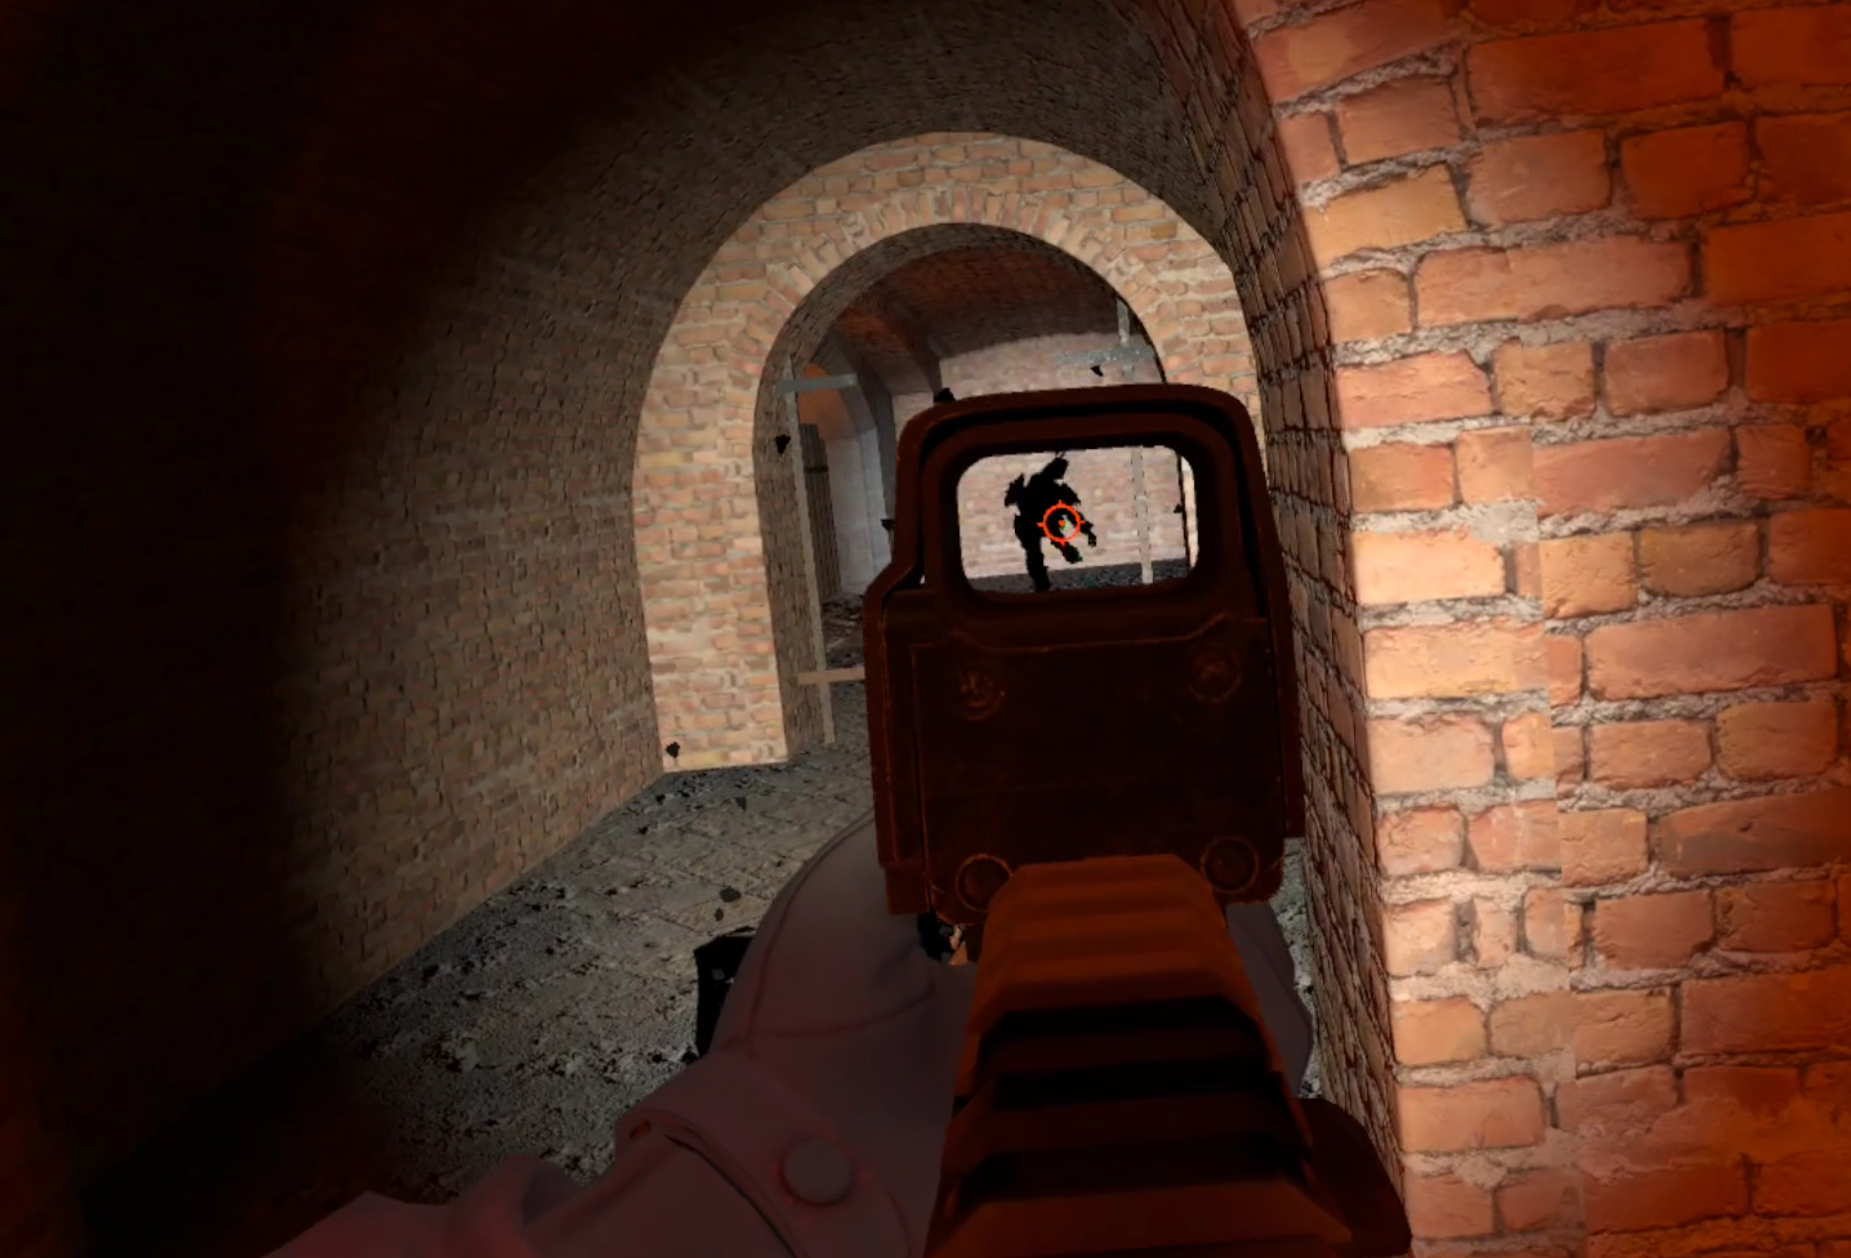
Though once you find yourself at some wooden planks leading across some water be careful, as there’s very likely going to be a Mimic waiting to ambush you on the other side.

Ambushed by a Mimic. Always stay on your toes in the Castle
After dealing with this ambush keep going onwards past a ton more Black Grass.
Making your way past this anomaly should be easy by now, and after shining your way through some more patches of it you will find yourself finally free from the confines of the inside of the castle, with the light of day greeting you.

The ladder up to the walls
Past a blue wall you’ll see a ladder leading upwards to the walls of the castle. Head towards it and climb up.
Once you’re at the top take a left instead of going straight forward from the ladder, so that you’re facing this tower and the huge anomaly field surrounding it.
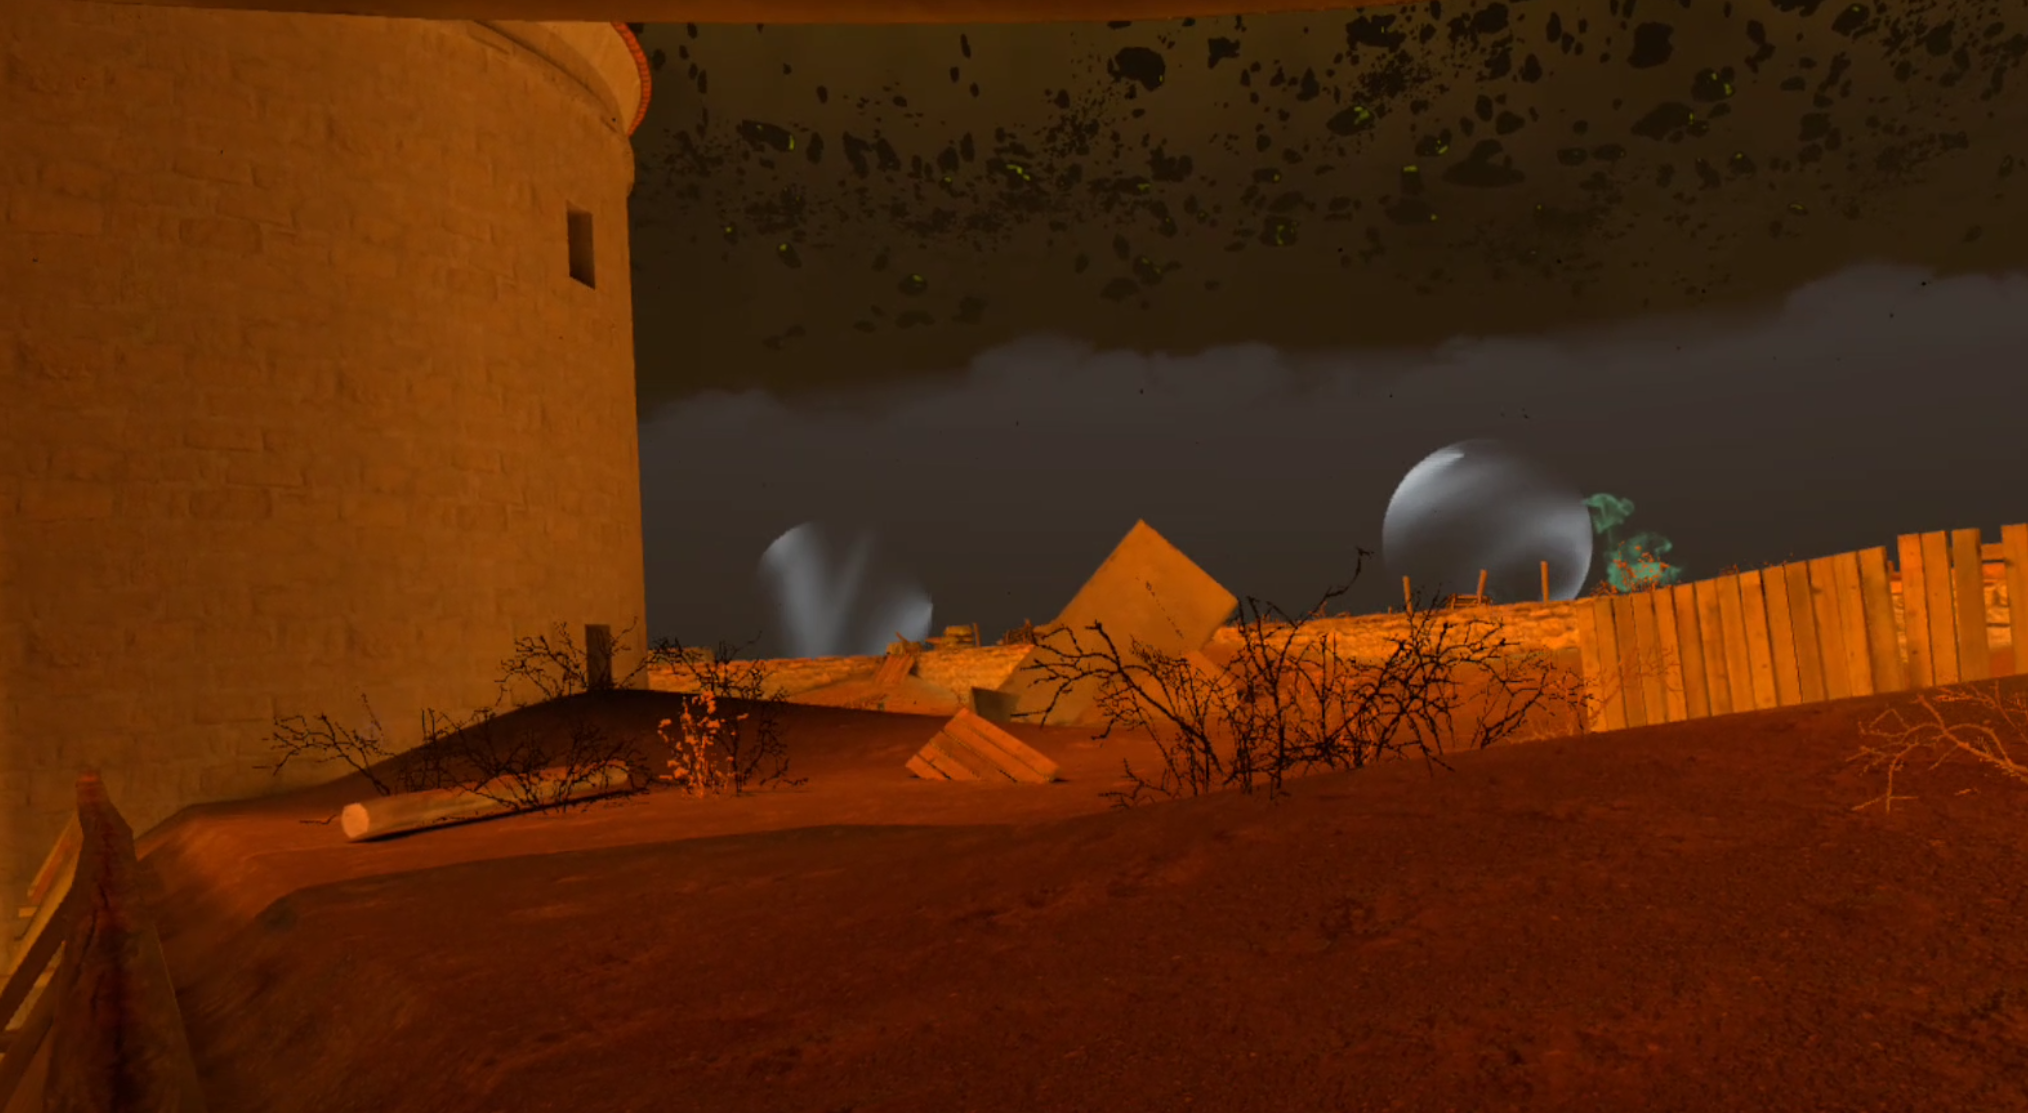
A huge anomaly field you’ll have to find your way through
Now is a good time to take off your helmet and put on your gas mask. You’ll have to head straight through this anomaly field.
It should be pretty easy if you use your probes, you should have a lot of practice by now. At first the anomalies will be mostly Reflector and Distortion Anomalies that you’ve been avoiding ever since the very first map of the game.
Weave your way through the anomalies until you’re on the other side of the tower, and take a little wooden ramp leading up to the top of the wall.

This ramp leads between the anomalies and up to the next level of the wall
You’ll start to see some more gas anomalies once you’re on the upper level, just keep making your way to the north.
You’ll see more gas anomalies once you’re on the other side of the tower, that’s why it’s so important to have brought a gas mask. Once you’ve made your way through the worse of the field you’ll see a long stretch of open wall in front of you.
Now is a good time to get your long ranged weapon ready. If there was ever a time for a little sniping in Into the Radius, it’s coming up now.

A long ranged scope is very useful here
Make sure your magazines are loaded. Once you go further down the wall you’ll see the central keep of Pechorsk Castle on your left.
In front of the gate leading in on the north end of the keep, and ahead of you on the wall, there will be another group of mimics spread out. There will also be at least one sniper among them.
As you make your way up the wall through the gas anomalies it’s important to stick to cover as much as possible. The Sniper Mimic will inevitably see you and open fire, though at such a long range they’ll probably miss at least the first few times.

The keep is on the left, keep going up the wall to your right and stick to cover
Where the two walls meet and become a corner you’ll also see some rocks floating in the air.

The floating rock formation at the corner of the walls
The Sniper will be perched on the wall to the left of these rocks, and other Mimics of various types will be near the sniper, near the rocks, or near the front of the castle to your left.
There are a number of ways to approach this situation. Sniping is the easiest, start by taking out the Mimic Sniper and then pick off the others as they try to sneak closer to you.
You can also get closer to them by moving a little down the wall to your right and advancing forwards towards the rock anomaly. There’s a lot of cover near it that you can work your way through to get closer to the enemy Mimics. Though this comes with the risk of being surprised and gunned down.
Also keep in mind that you’re also very likely to be attacked by Sliders, and possibly Spawn and other melee enemies. If you hear the telltale sound of Sliders teleporting closer to you then immediately break off fighting the Mimics and wait for the Sliders to appear, gun them down immediately. It can be easy to be clawed to death by the sliders while you’re busy with a firefight.
As always take your time when you can, and if you take a hit take cover and heal up.
Once you’ve cleared a path through the Mimics the entrance to the Keep is on the north side of it. Get ready for the final leg of your assault. Load your magazines before heading to the gate.

The entrance to the inner keep of the castle
Ouroboros - Finishing The Mission
Be careful going through the gateway to the inner keep. Immediately inside of it is a large courtyard, and just running out into it is very dangerous.
Instead keep your eyes upward and look to the top of the wall surrounding the inner courtyard. There will be mimics all around it waiting to shoot you.

The courtyard is a death trap if you don’t snipe the Mimics before they all see you
Slowly walk into the gateway, and when you see a Mimic stop and take them down. Rinse and repeat until you slowly reveal the entire wall.
If multiple Mimics see you at once it can be an easy recipe for disaster, but taking them out one by one makes this ambush very easy to fight through.

Carefully clear these walls before walking out into the open
Once the courtyard is clear of Mimics walk up the wooden stairway to the second level, and continue around the wall.
You’ll see a doorway leading to some stairs headed upwards, and another Rift Anomaly inside as well.

Be careful going up these stairways
Go up the stairway and through the small maze of rooms and stairways leading upwards. Be very careful turning each corner.
There can be Spawn, Mimics, and other enemies waiting inside, though hopefully at least some of them have been drawn out by your previous battle through the courtyard.
Be very careful when you see the light of day again. The last stairway leading to the top will have a Mimic waiting to ambush you on it.

This Mimic can take you down by himself if you let him
Once you’ve fought your way through them you’ll find yourself in the room at the very top of the keep, and your Detector beeping like crazy.
Next to you is another black Katya, and a pedestal.
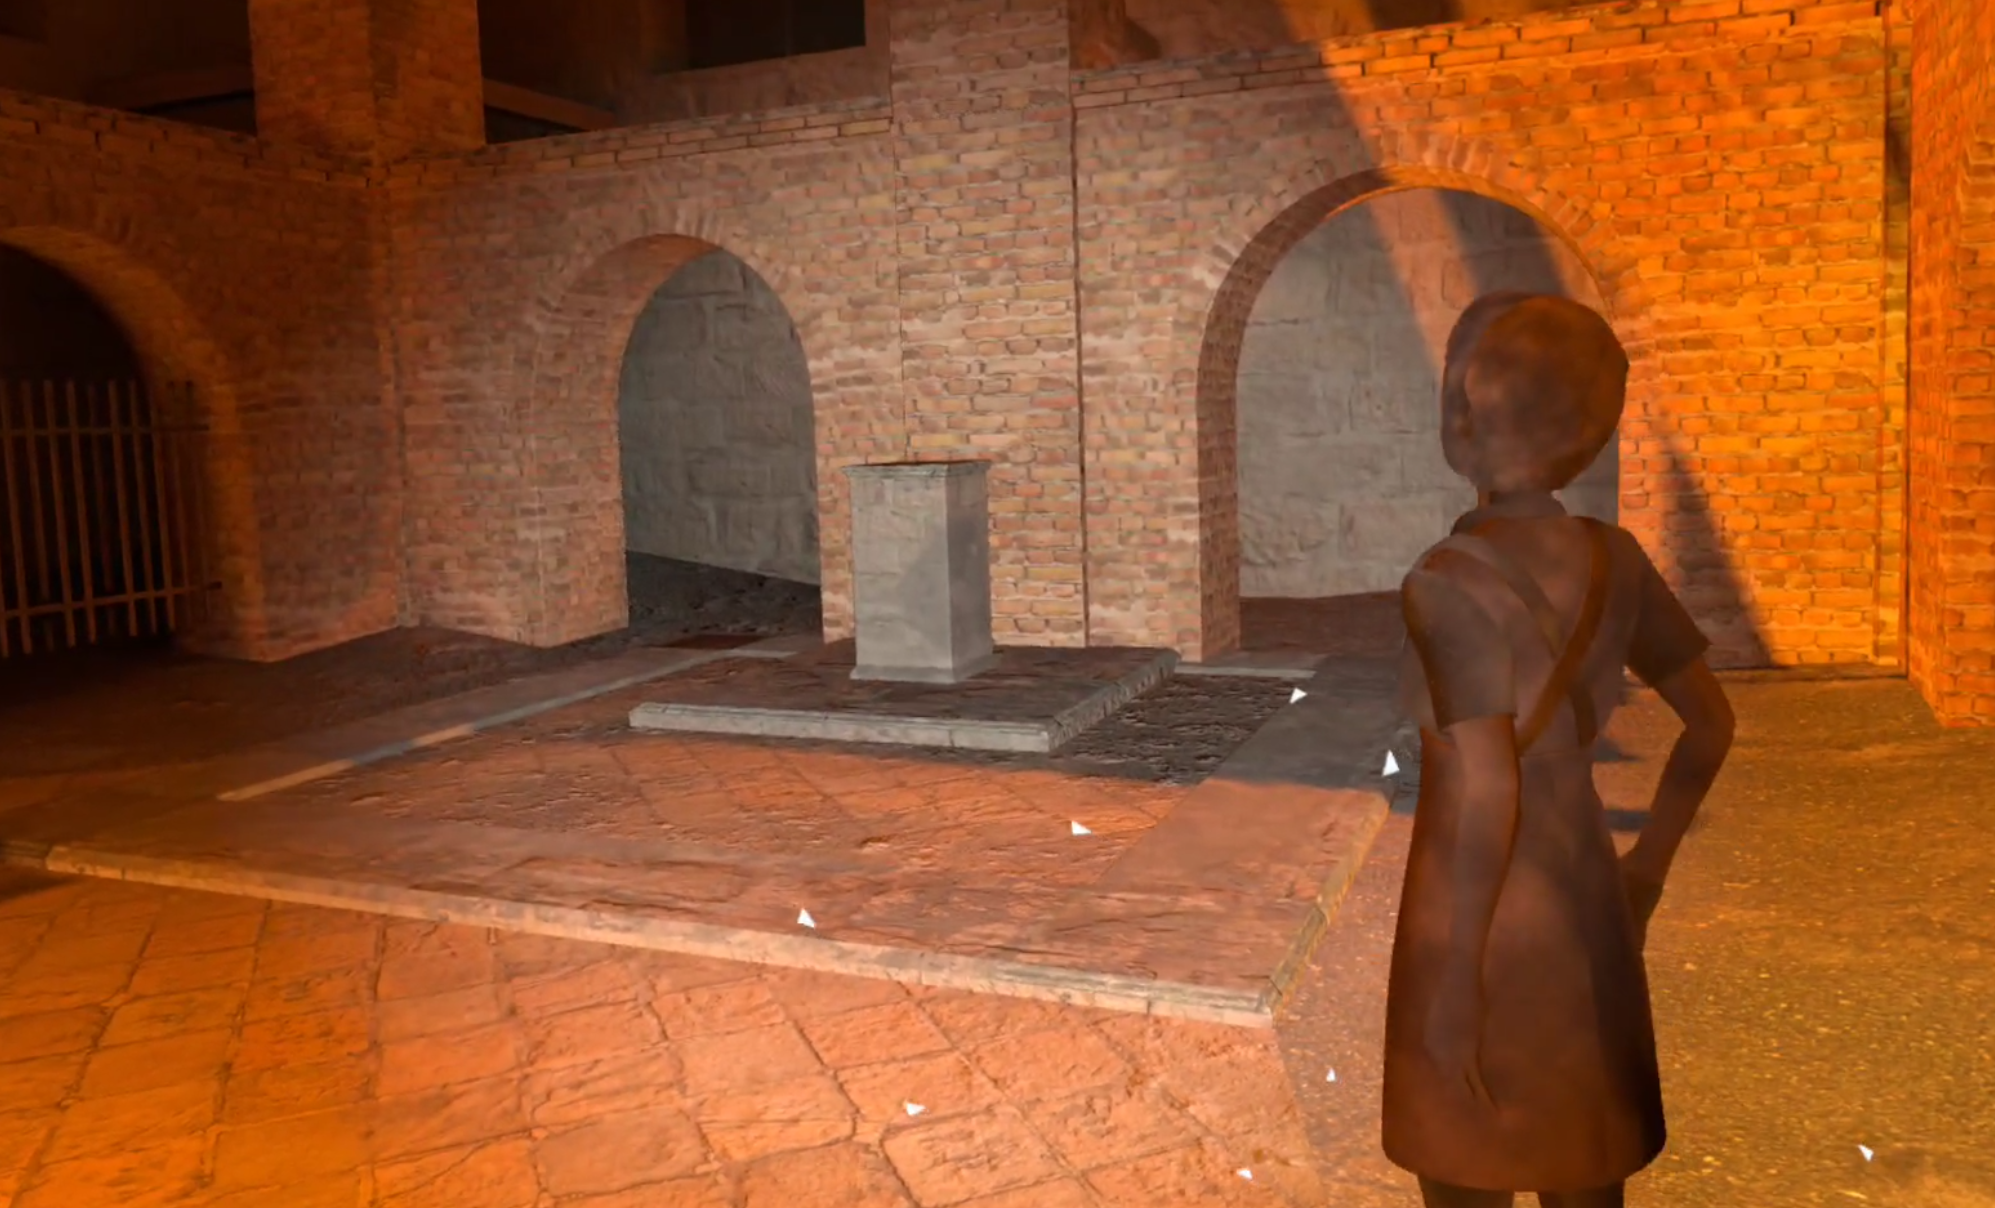
The final room of the game with the final Katya of the game
That pedestal contains the goal of this final mission, and the game. This is the end of Into the Radius. Once you’ve made it here you’ve made it to the end.
Take out your detector and use it to reveal the final artifact, the Grail, on the pedestal.

The Grail artifact revealed
Pick up the grail to reveal the ending to the game, though to avoid spoilers we won’t be talking about that here.
I highly recommend that you play through this level, experience it, and experience the ending of Into the Radius before reading about it here. This game is fantastic, and it deserves to be experienced first hand if you can do so.
For now this is everything you need to know to complete the final mission of Into the Radius Ouroboros. Whether you’ve already completed it or not, or when you do, take a moment before picking up the Grail to be satisfied with your accomplishment.
Getting this far is really hard, and Into the Radius is a very challenging game. So congratulations! Once you pick up the Grail you’ve accomplished a truly difficult victory in the world of VR gaming.
Also take a moment to think about the wonderful people over at CM Games who made this fantastic VR experience. Into the Radius took years of hard work from them to create, and they deserve some gratitude for crafting such a wonderful game.
If you want to see what happens at the end of the game after you’ve completed this last mission, then head over to our endings guide.