


The Walking Dead Saints and Sinners Walkthrough and Guide - Part 5 - The Ward and the First Pump Regulator
Stuck in The Walking Dead Saints and Sinners? Wondering where to go next? Maybe you just like to see what is in store for you before you get there, or want to look back and see if you missed anything in The Walking Dead: Saints & Sinners. Well don’t worry we’ve got you covered with this complete walkthrough. This is the fifth part, where you install the first pump regulator and then get another stash for May from The Ward.
Stuck in The Walking Dead Saints and Sinners? Wondering where to go next? Maybe you just like to see what is in store for you before you get there, or want to look back and see if you missed anything in The Walking Dead: Saints & Sinners. Well don’t worry we’ve got you covered with this complete walkthrough. This is the fifth part, where you install the first pump regulator and then get another stash for May from The Ward.
This article will detail how to progress through the main story missions as quickly as possible, with a couple of guiding tips thrown in here and there to make your adventure smoother. Only those recipes that are convenient to get when doing a task for the first time are included. For a full list of all recipes in The Walking Dead: Saints & Sinners, check out our recipe guide article. Spoilers will be as light as possible, but there will be story spoilers by necessity in this walkthrough, but there won’t be any explanation of what is going on in the story beyond what is necessary to make the walkthrough make sense.
All Walkthrough Parts:
The Walking Dead Saints and Sinners Walkthrough and Guide - Part 1 - The Graveyard
The Walking Dead Saints and Sinners Walkthrough and Guide - Part 2 - The Shallows
The Walking Dead Saints and Sinners Walkthrough and Guide - Part 3 - Via Corolla
The Walking Dead Saints and Sinners Walkthrough and Guide - Part 5 - The Ward and the First Pump Regulator
The Walking Dead Saints and Sinners Walkthrough and Guide - Part 7 - Old Town and Another Stash
The Walking Dead Saints and Sinners Walkthrough and Guide - Part 8 - Rampart
The Walking Dead Saints and Sinners Walkthrough and Guide - Part 9 - The Shallows Again
The Walking Dead Saints and Sinners Walkthrough and Guide - Part 10 - Bastion and The Reserve Key
The Walking Dead Saints and Sinners Walkthrough and Guide - Part 11 - The Reserve and the Ending
Installing the First Pump Regulator
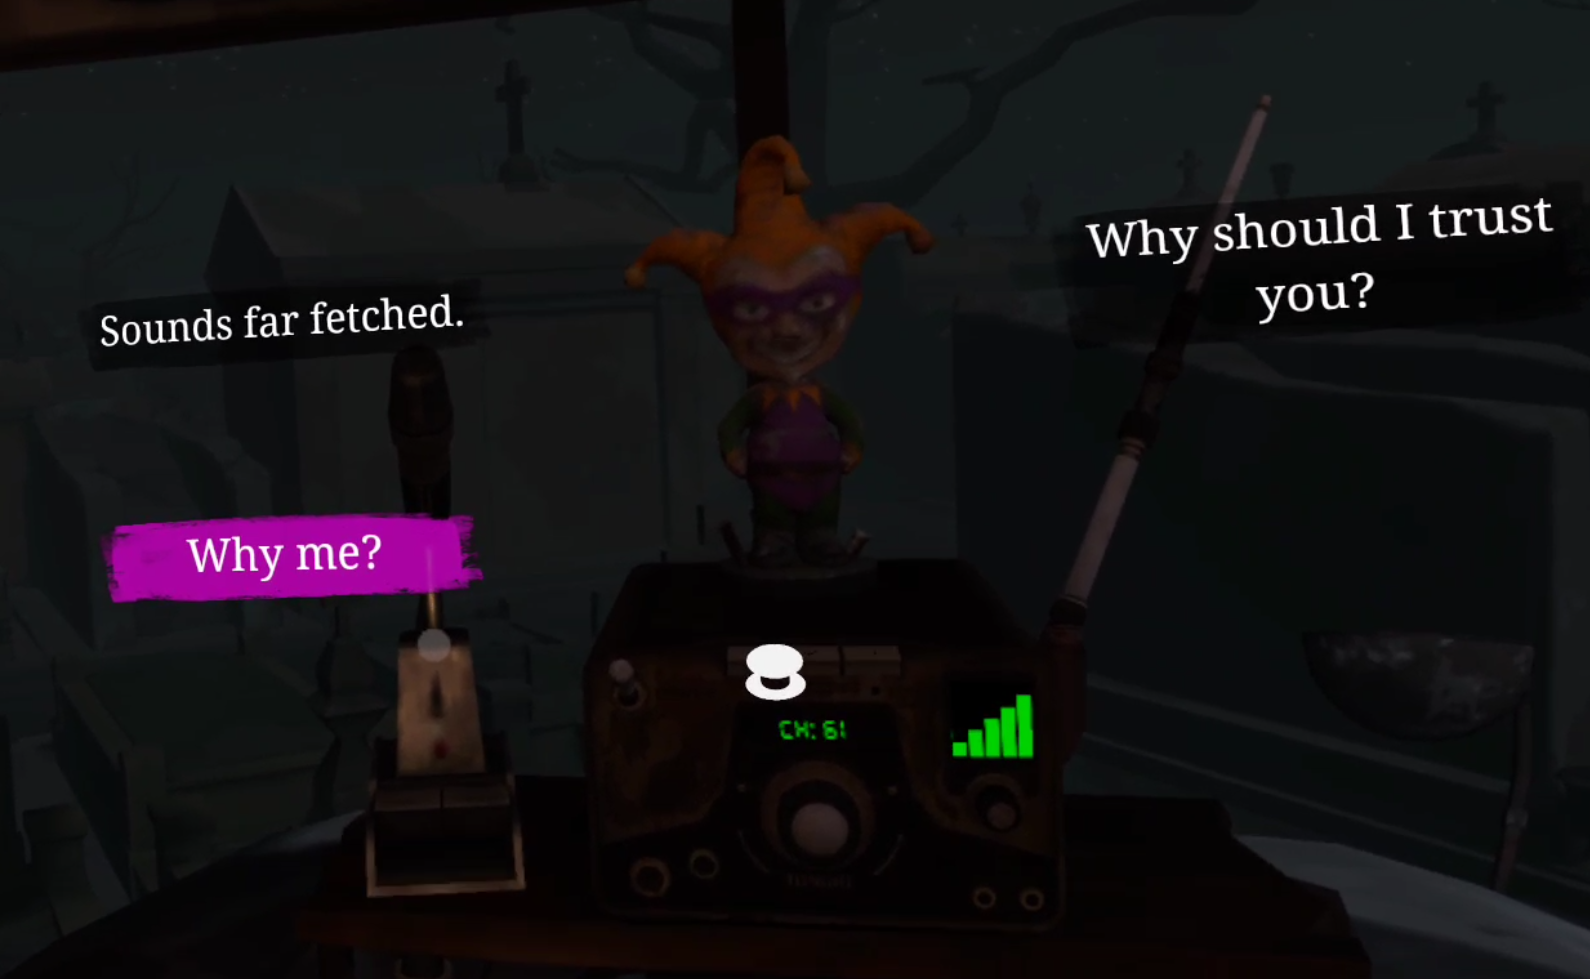
Hope you’re ready for a little amateur plumbing, because it’s time to install the first pump regulator. After you wake up walk over to the radio and talk to Casey again.

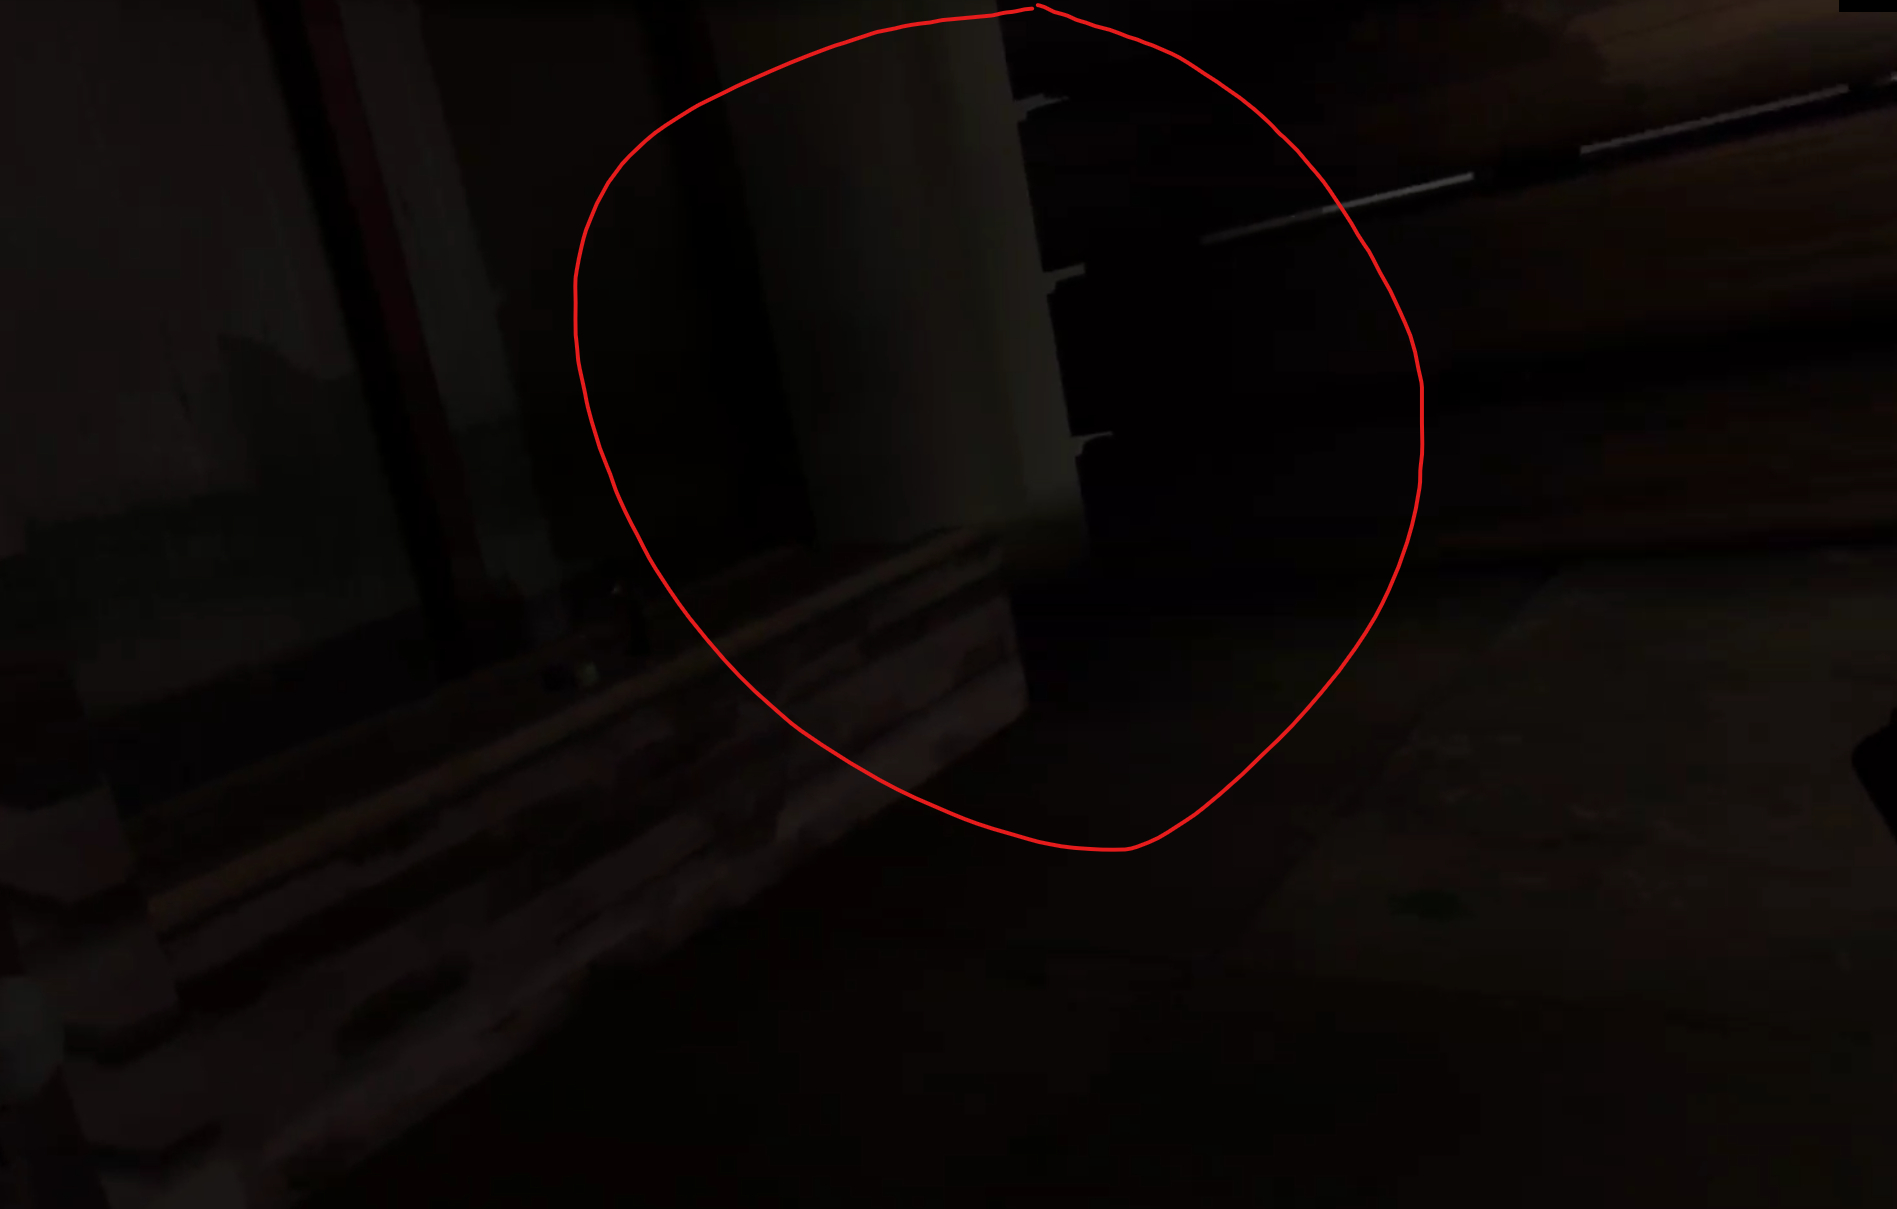
He will walk you through how to set up the first pump regulator. His instructions are pretty straightforward, but for this first regulator here’s a quick rundown: First you turn it around and look at the serial number on the back to read it off (the circle that grows around it indicates your reading progress). Then you flip the A switch on the front and turn the dial right to make the number go up or left to make the number go down.
Wait for Casey to tell you the right number and dial to it, when the number is green you’ve got it. Then flip the B switch and repeat with the next number Casey tells you, same for C. Finally press the red button on the bottom right corner of the front of the device and you’re good to go.
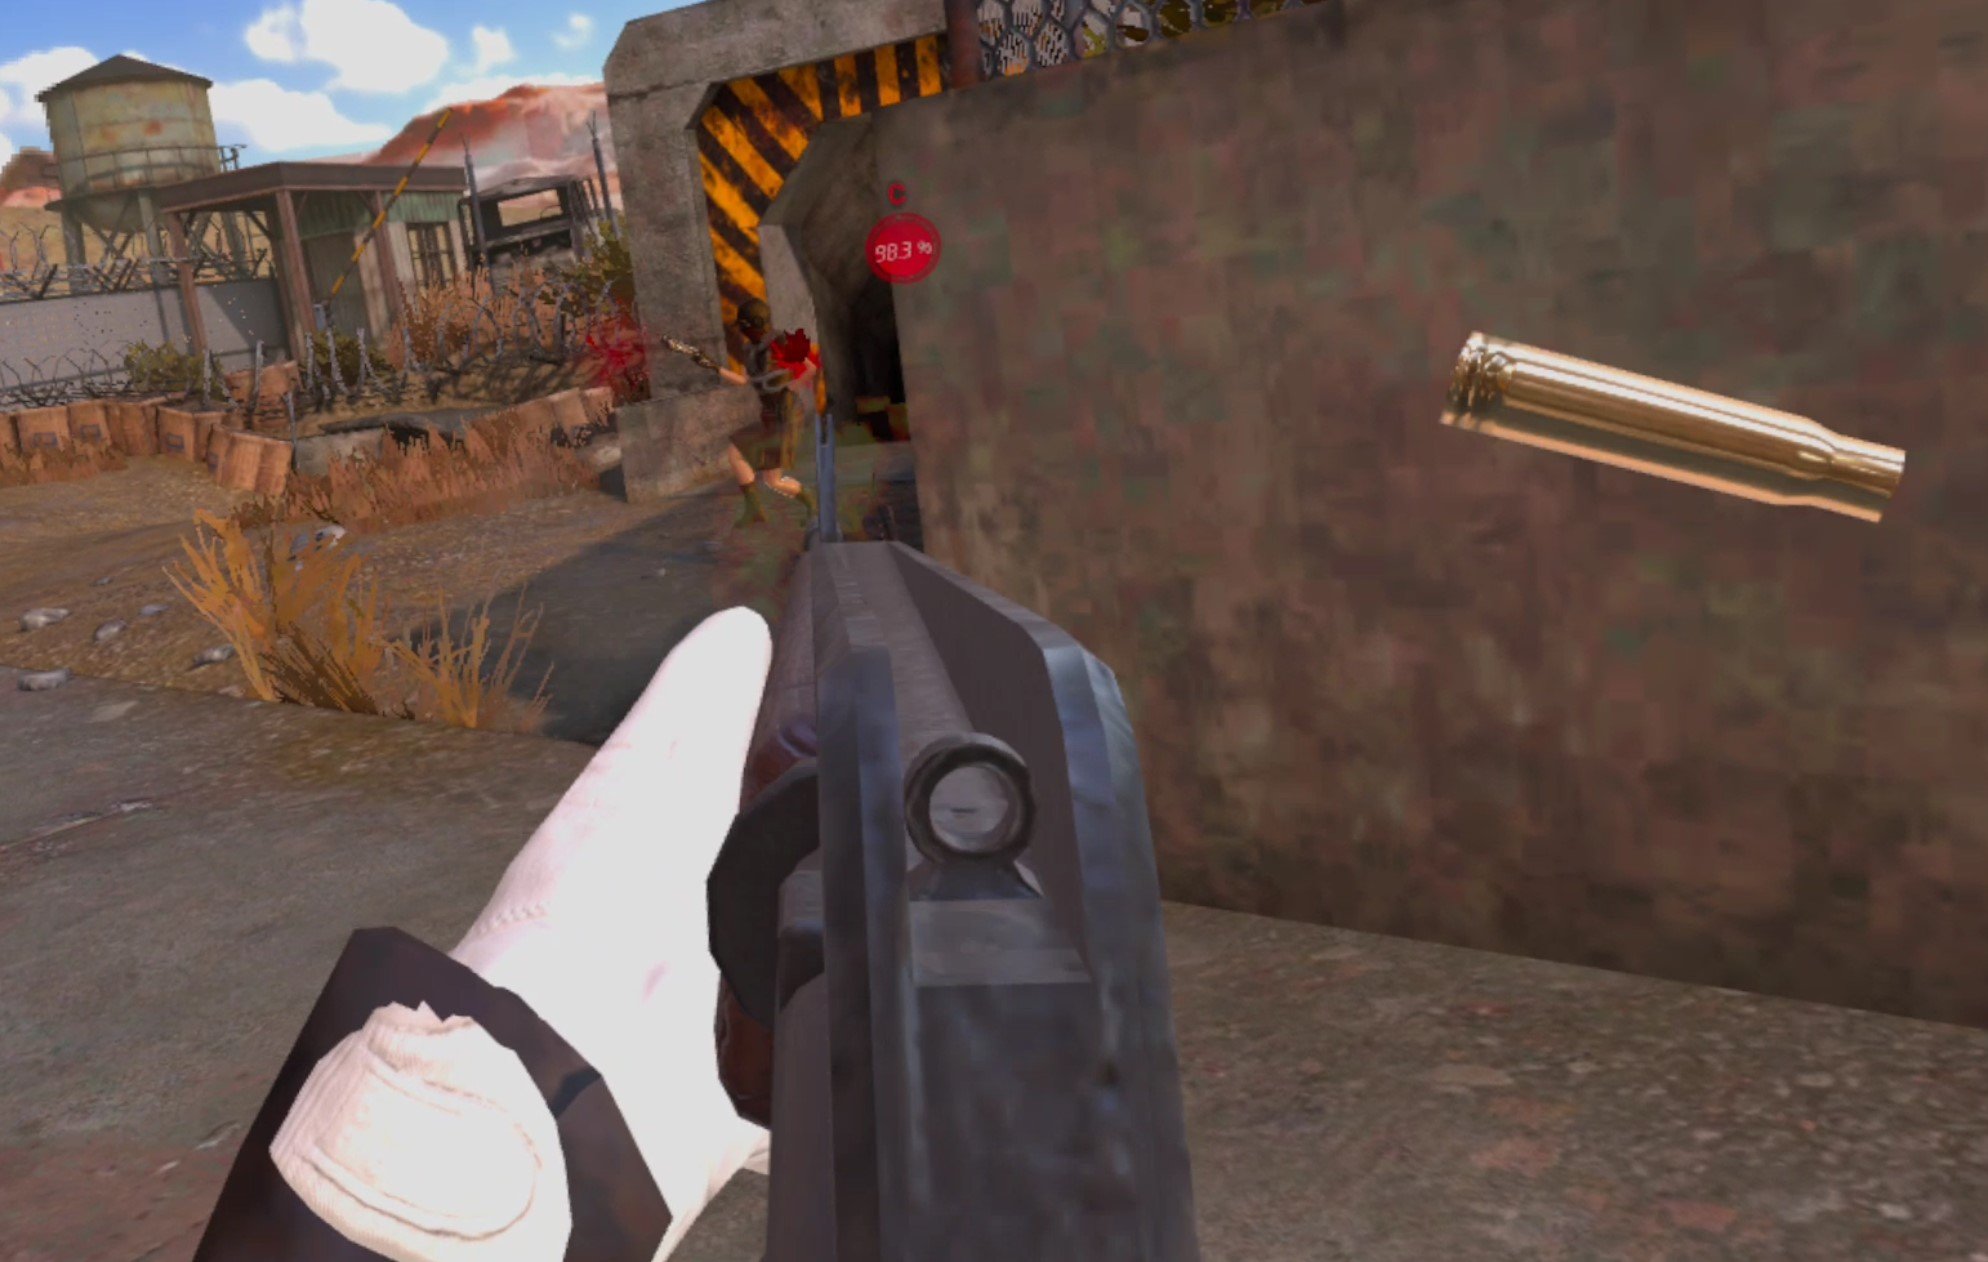
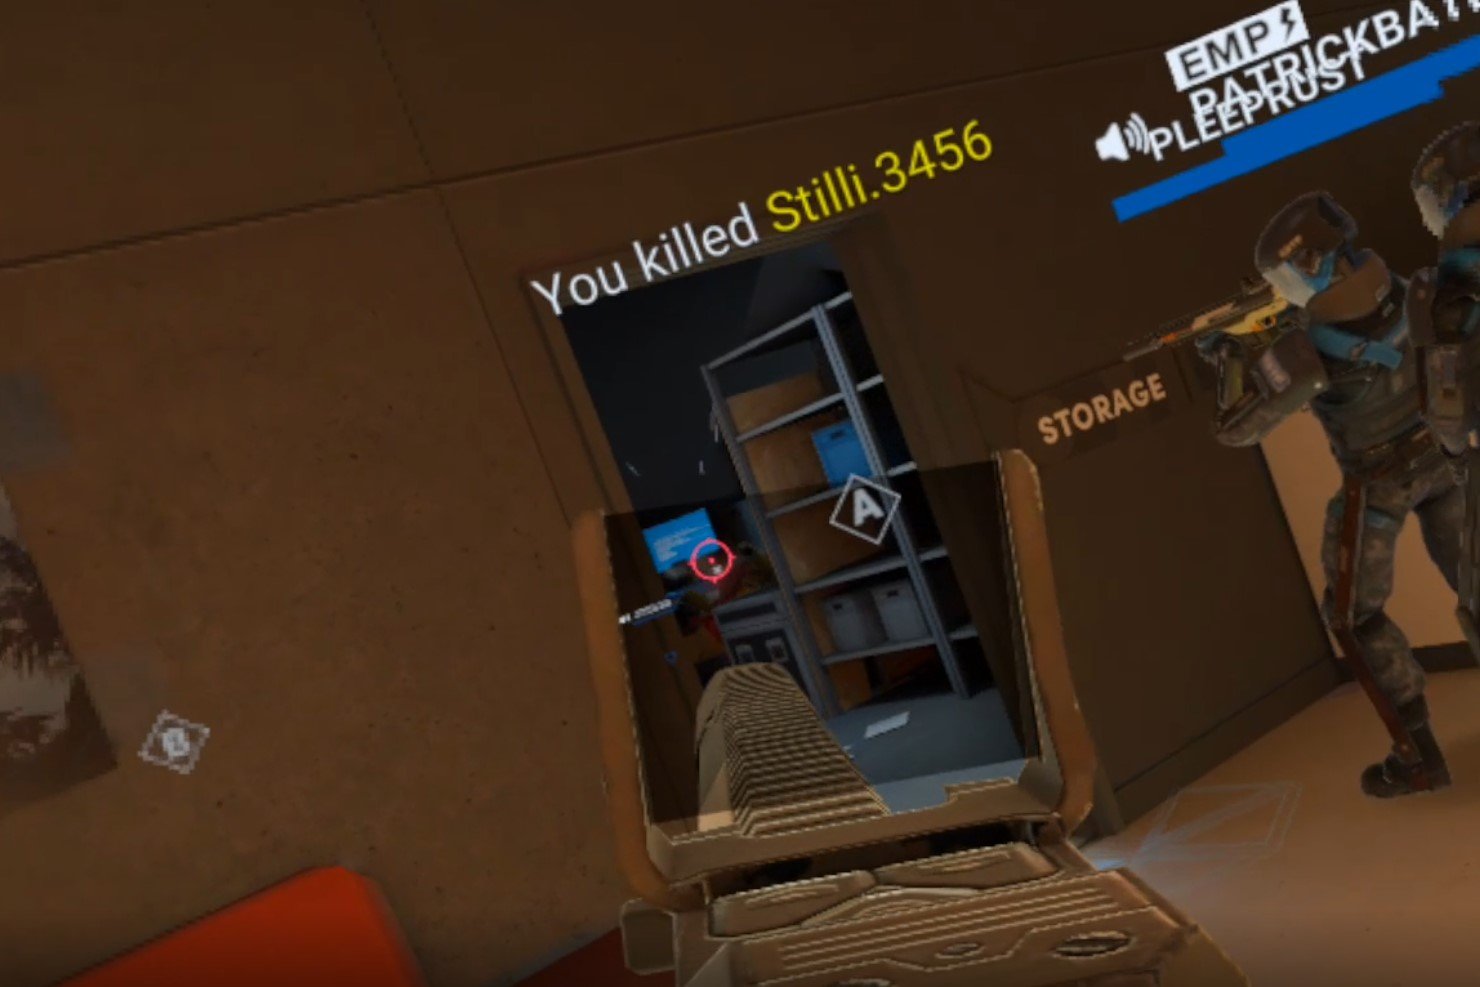
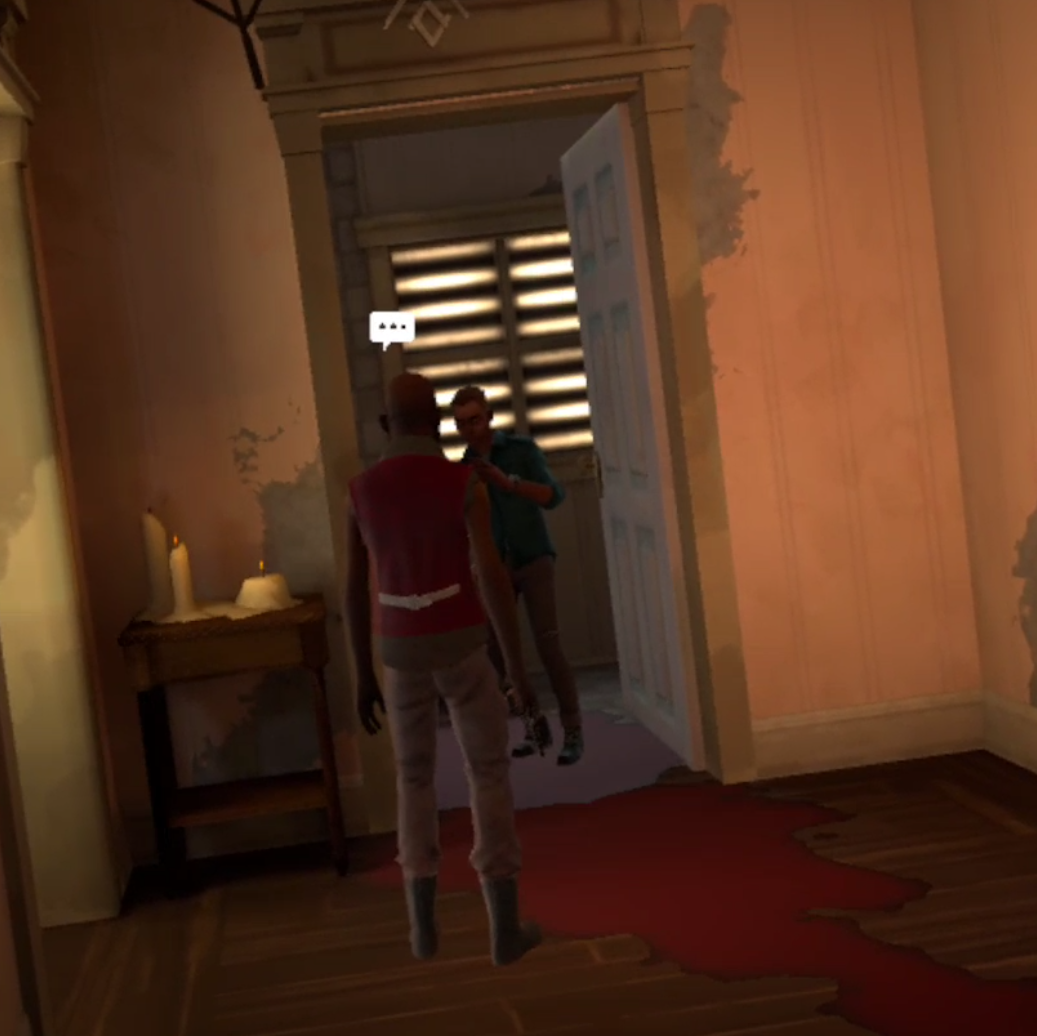
With the regulator good to go, time to install it. Go back to the catacombs and up to the churchyard. Once you’re there walk down the center street, you should come across a lone walker with a ripped up looking belly.

This is a special walker. Kill it and then cut through it’s belly with a sharp weapon. Inside you can pluck out an item called “Walker Innards.” You can save some extra for later, but right now take one and rub it all over yourself. You should see a circle fill up on your screens. Once it fills your screens will look redder, this means that you smell like a Walker and can walk among them undetected.
Which is good because your goal is surrounded by walkers. Make sure you don’t run or kill any walkers, because then your camoflage will disappear. Go further up the main street until you see the crowd of walkers and blinking red light on the right side of the street. That machine blinking red is the machine you need to install the regulator in. If you don’t feel like messing with Walker Innards you could always just make a couple of nail bombs and blow up the crowd.
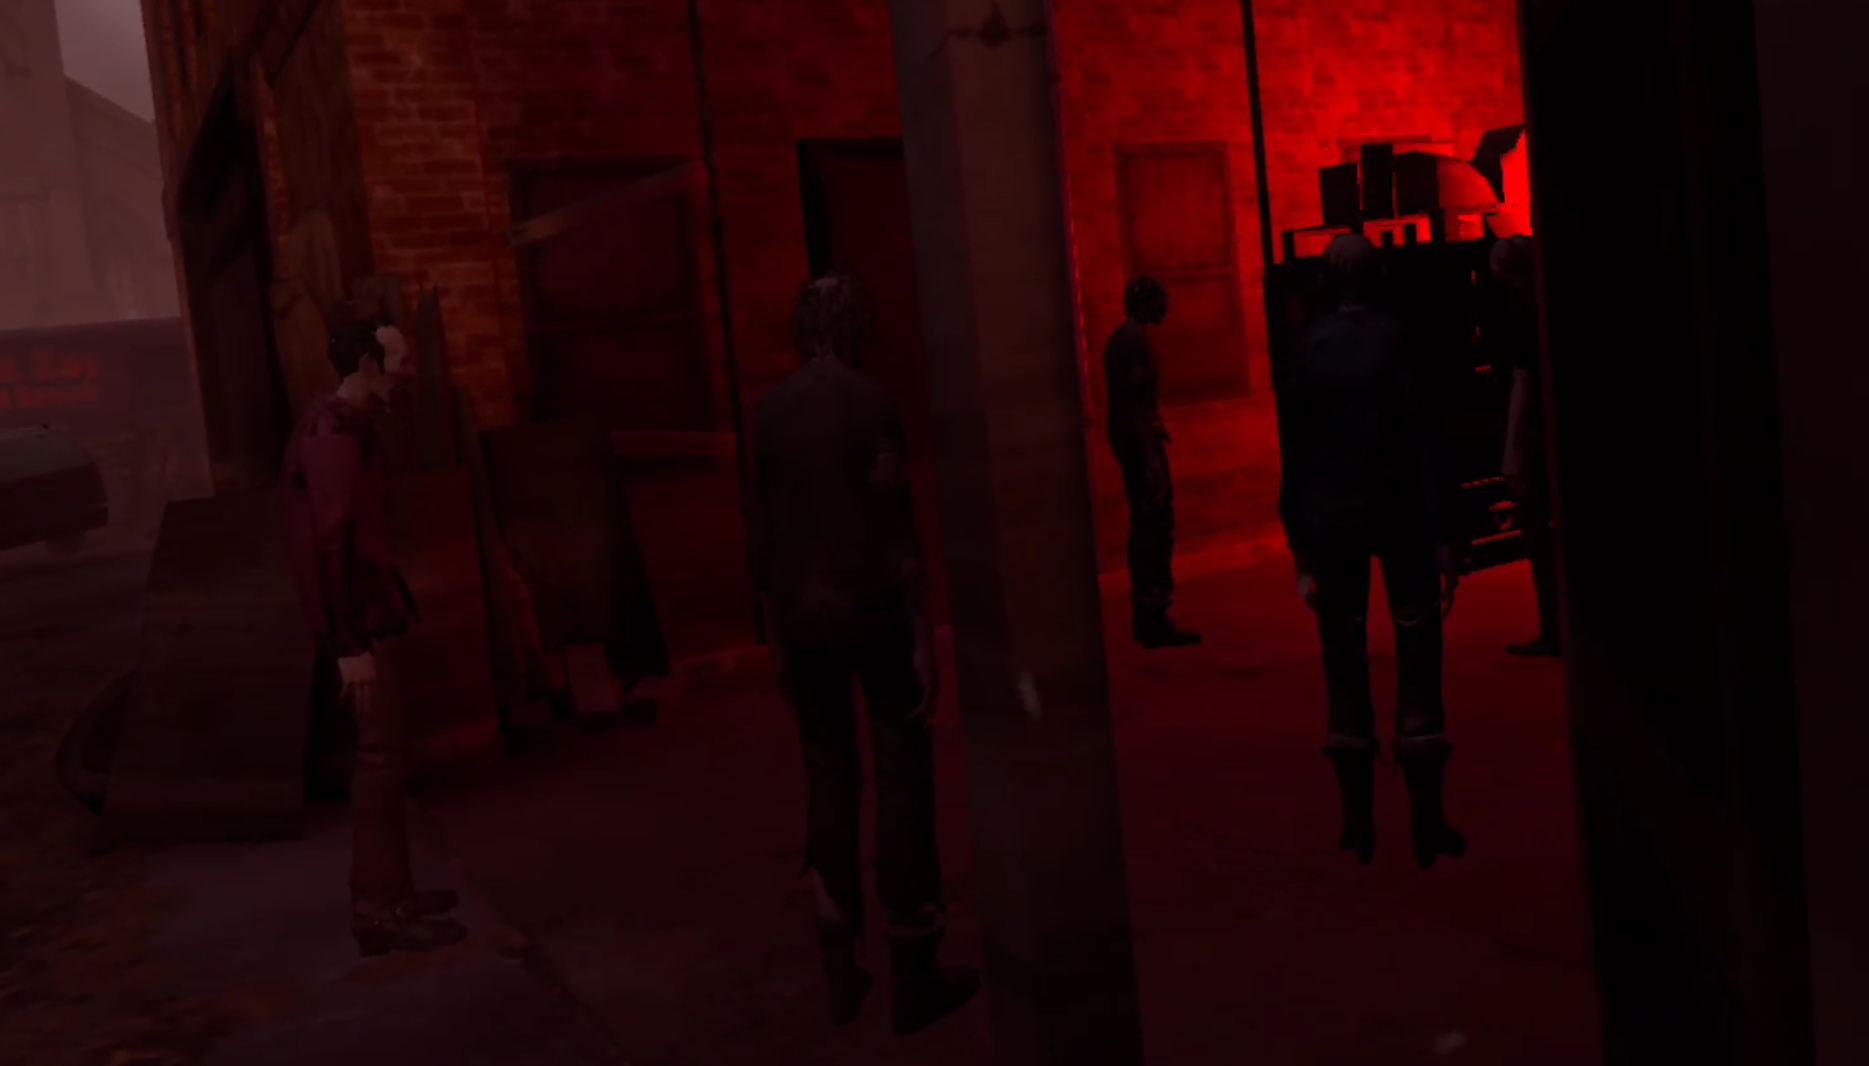
Walking slowly and not making any quick movements, make your way through the crowd of walkers. Be careful not to bump into them too much. Then take the regulator out of your bag and just put it into the open slot on the machine. When the light goes steady green it is installed successfully and you can walk back to the Bus.
Back in the bus tell Casey about your success and chat with him for a while. Once you’re done with that make sure you grab some guns. In this next location a firefight is tough to avoid. If it’s your first try, best to assume that you’ll get into one. The double barreled shotgun, if you still have it, is also a good addition to your arsenal in The Ward.
At this point you hopefully have the backpack upgrade, and are possibly capable of crafting new Double Barreled Shotguns. If not you may have a tough time, but don’t worry, if you follow this guide you can mostly stealth your way to the objective. You won’t have to fight every Tower soldier if you’re careful and quick. Still, a spare bandage wouldn’t hurt either, oh and make sure you bring something that can break through boards like a Cleaver or two handed weapon. Once you’re ready hop in the boat and go to The Ward to get May’s next cache.

The Ward
As always open your map after loading in. Your goal is a little reddish area next to the open yard of storage containers. This is the Tower’s main storeroom in the area. The problem with getting to it is that it is surrounded by Tower soldiers. If you have the guns and the guts you can just go straight down Pious Street and blast your way through the guards. There are quite a few guards who will fight you all at once, so this isn’t very recommended, and either way taking the long way around offers a lot of opportunities for great loot, so that’s what we’ll be doing.

Go down Pious and take a left to go up Madrid. You’ll pass by a lot of tower guards overlooking the street, ignore their catcalls and keep going until you reach the building colored teal on your map at the top of Madrid street, it’s a radio station with a tower still jutting out of the top. In the side of it you should see a hole in the wall covered with some boards. Bash your way through those boards with whatever big object you have on hand (a cleaver or two handed weapon of any kind will do, even a shotgun) and then climb your way in.

There’s some good loot inside the radio station, at least one loot box if you’re not too many days in, so go through it thoroughly before heading out the door that’s past the kitchenette and bathroom, it leads back outside and into Tower turf.

Ignore the guards by the flatbed in front of you, instead crouch down and go to the left of the red sedan. There is a brick wall with a huge hole in the middle. At the end of the left side of that wall is a single tower soldier looking outwards and making sure no Walkers get in. Another Tower soldier will patrol that strip of alley leading past the wall and further to the right. There is also another patroller to the right, who walks between the flatbed and the shelves in the back.
This part is tricky, but as long as you get the drop on the patrollers you shouldn’t have a problem. Either wait until they get close to you and chop through their head, or line up a headshot with a pistol and take them down with a single bullet. Be careful not to shoot the second patroller while they are near the two grunts by the flatbed because that might aggro them. If stealth doesn’t work out you can always just shoot your way through, there’s only five tower soldiers total in this area.
However you make it past the soldiers make sure you loot the shelves in the back, there’s usually good stuff there. Once you’re done go through the double doors near those shelves, at the end of the ramp behind the flatbed.

Here is where things get difficult and where avoiding a gunfight is even harder. Past these double doors is a very dark hallway and another set of doors. through those is a dark storage room filled with stacks of wood and a few tower patrollers. Instead of Walking towards them immediately take a left and hide in the stacks of wood. Keep your weapons ready and don’t get spotted by any patrollers. If you do, shoot them until they stop coming for you.
There is a single wire trap back there, but don’t walk into it and don’t trigger it with an item, just go around it by taking the other path through the stacks of wood. You should find yourself next to a flatbed truck piled with wood, with two to three tower grunts on the other side of a stack, talking and unaware of you.

Stick around here too long and they’ll hear or see you through the stacks. Take your chance and chop the soldier nearest to you in the head and shoot the other. There will be a patroller on your right or left as well. If they are nearby when you spring your ambush, great, if not no big deal, shoot them.

With those three out of the way your path to the objective is pretty clear, and you should have some decent loot already from the first storage area and radio station. Just outside you should see a storage shed with a blue wall, inside is the cache.

If you’re fast and there are no patrollers nearby you can run right in, get the folder and leave (make sure to loot the nearby shelves) or you can fight the other tower soldiers patrolling outside. There are quite a few, but the other loot that you will find on the folding tables and around the container yard might make it all worth it. Luckily to help you there is a Lever Action Rifle with the folder you came to The Ward to get, which is a great weapon at range. Also make sure you pick up the Lever Action Rifle blueprint which is next to the rifle itself.
Sneak back the way you came or shoot your way out, either way you have your objective, just get back to the Resting Place alive. When you get there put the new folder inside of the coffin, just like you did with the first one, then as usual clean out your backpack, do whatever crafting you need to do, and go to sleep.

Casey is going to need more of your help with the pumps. Need a guide on what comes next in Bywater? Then head over to Part 6.
5 Helpful Tips and Tricks for The Walking Dead: Saints and Sinners - Chapter 2: Retribution
The Walking Dead Saints and Sinners - Chapter 2: Retribution is a fantastic follow-up to one of the greatest Virtual Reality games out there, but if you’re having a tough time maybe you’re not enjoying it as much as you could. Well if you’re struggling or just want to dominate the flooded streets of The Walking Dead’s New Orleans even harder, here are some premium Tips and Tricks for The Walking Dead Saints & Sinners - Chapter 2: Retribution.
The Walking Dead Saints and Sinners - Chapter 2: Retribution is a fantastic follow-up to one of the greatest Virtual Reality games out there, but if you’re having a tough time maybe you’re not enjoying it as much as you could. Well if you’re struggling or just want to dominate the flooded streets of The Walking Dead’s New Orleans even harder, here are some premium Tips and Tricks for The Walking Dead Saints & Sinners - Chapter 2: Retribution.
A video version of this review can be found here on our Youtube Channel.
For our previous article with tips from the first game (which are still very useful here in Chapter 2) go here.
Some Materials Are Easier to Find at Night
With this new Chapter of The Walking Dead: Saints & Sinners comes new crafting materials like Casings and Biomass, along with new crafting tables to use them on, and the ability to explore New Orleans at night. To explore at night you can either sleep through the day by using the flask in the Resting Place, or travel somewhere like you usually would, but go to another location instead of heading back to the Resting Place. That means you can go to two places in one day!
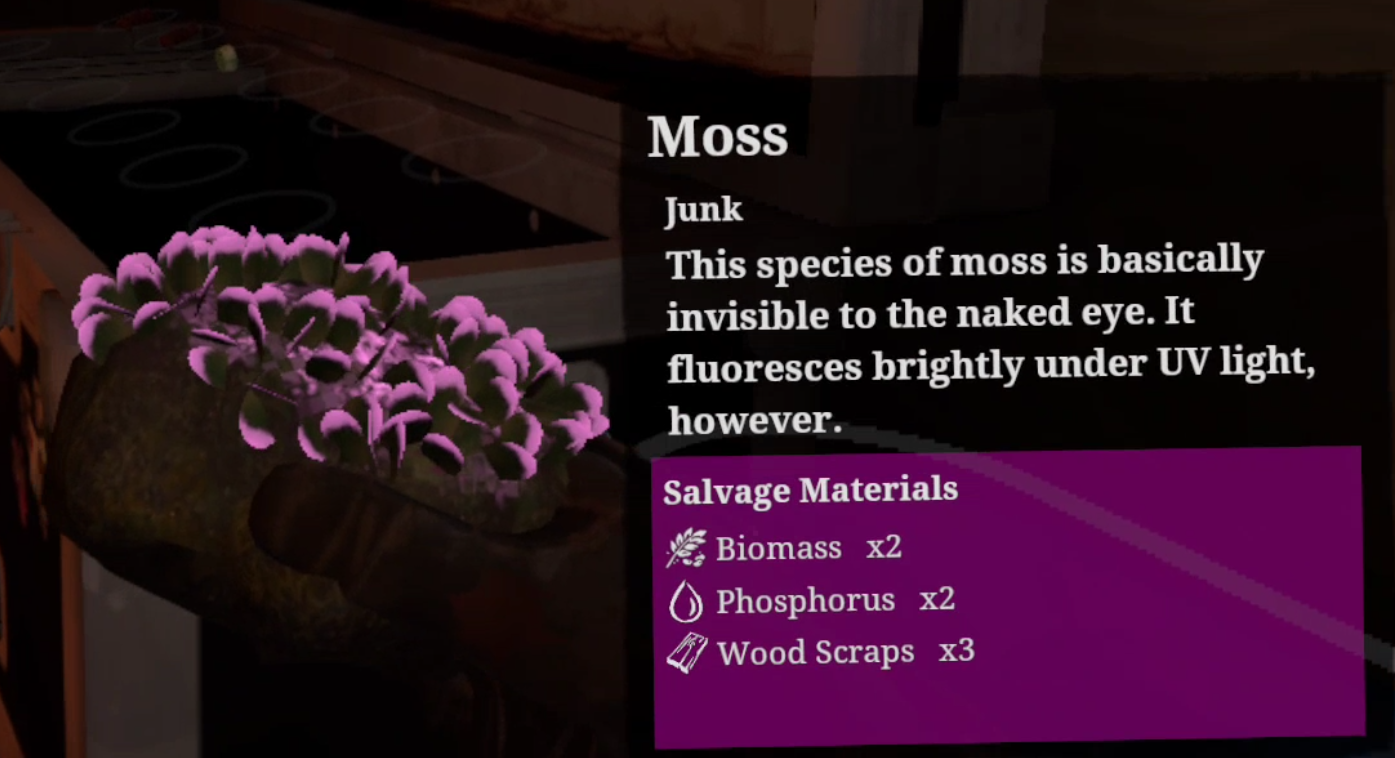
The Tactical Flashlight you got in the Aftershocks DLC for the first game is very useful here. Switching it to UV not only reveals useful graffiti on the walls that will lead you towards the local exile trader (more on that later), but it will also illuminate items to loot that you can only find at night. Items like Bird Skulls, Oyster Mushrooms, and Moss. While you can still find these new materials in other places, to get them in big quantities you’ll want to go out at night and pick up these glowing items. You definitely won’t regret it. The new crafting tables make some great stuff.

Oh, and you’ll find a lot of dead Exiles at night with their discarded backpacks right beside them. You can find a lot of great things in these like boxes of materials, the best healing item in the game, other useful loot, and guns. Going out at night is very profitable.

Stealth is More Useful at Night… But Not Required
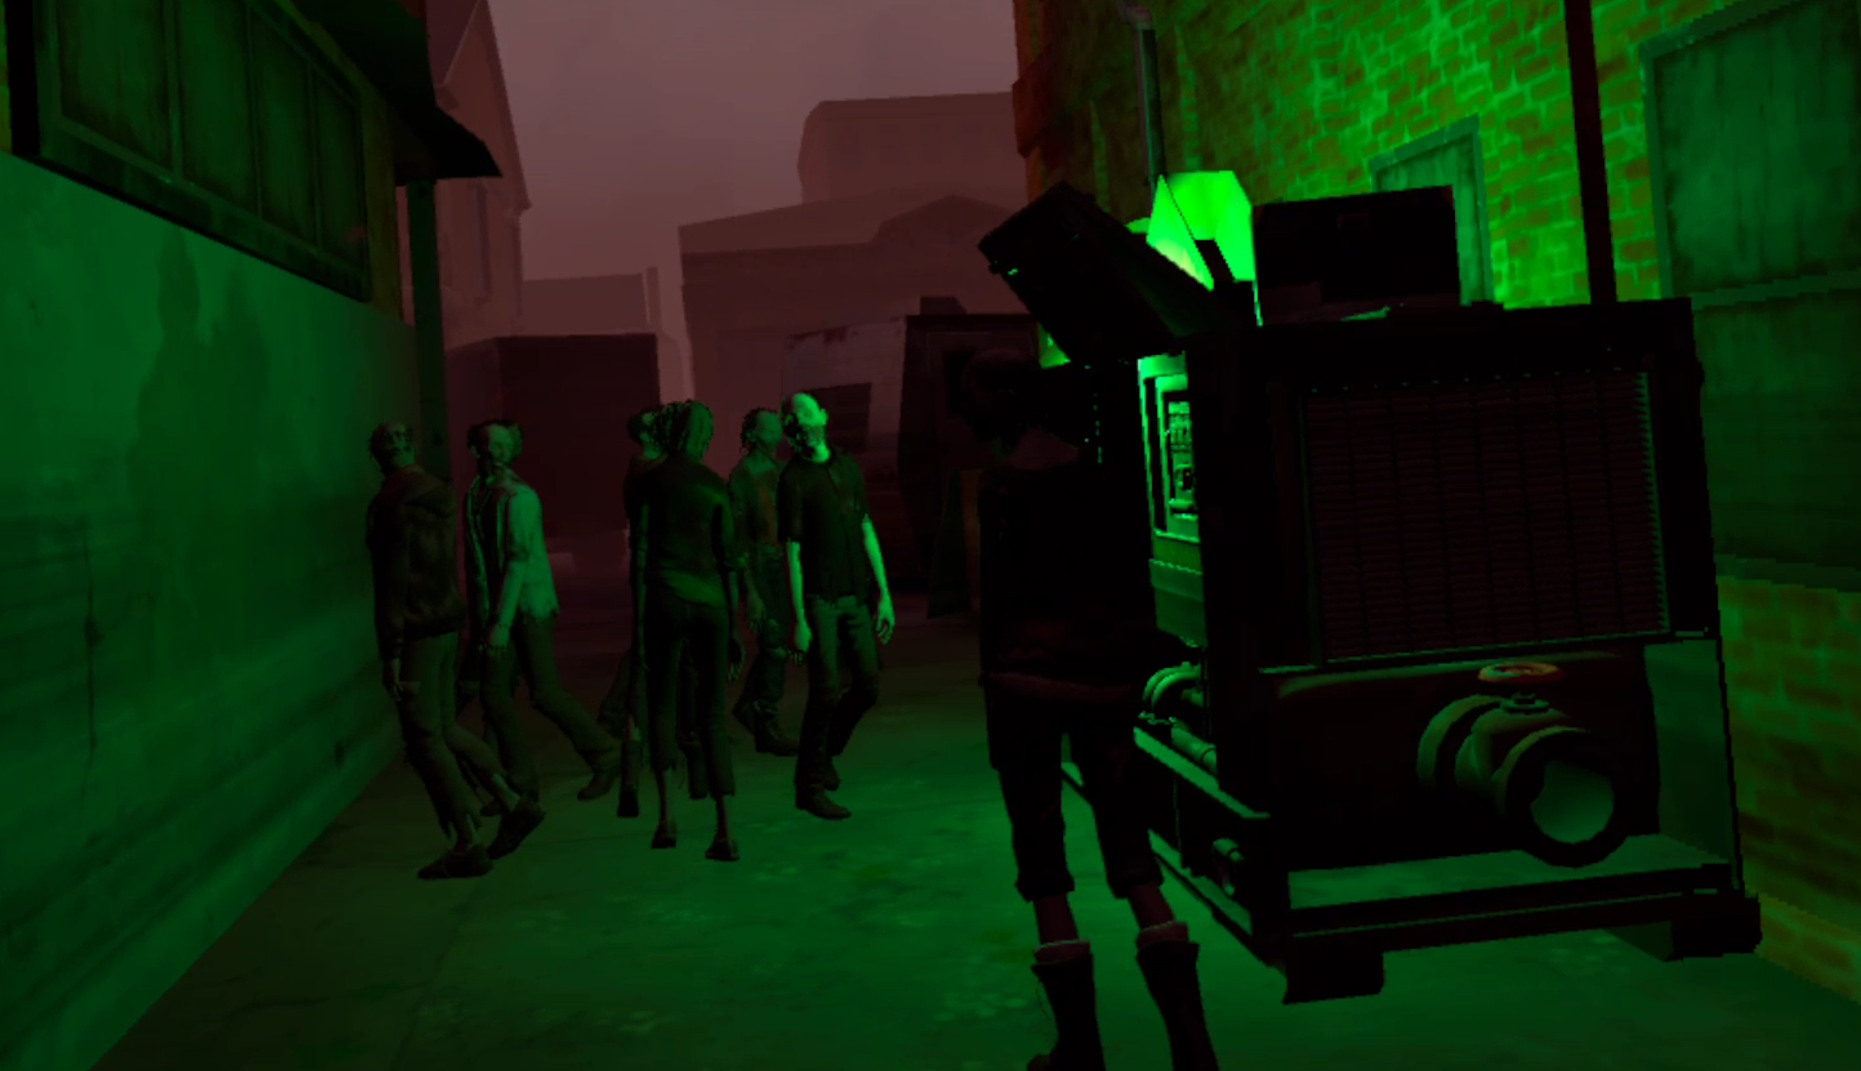
The downside of scavenging at night is that it’s dark and hard to see. Oh, and there’s a LOT more walkers than there usually are. Not only will you run across them more frequently, but they come in larger groups than during the day. This makes travelling at night significantly more dangerous than during the day, but the upside is that all that darkness also makes it harder for walkers to see you.

The streets and open areas are lined with trashcan fires, though who keeps those lit is anybody’s guess. Walking or crouch walking and avoiding their light means that walkers will not notice you and try to eat you unless you get very close. This also naturally means that you should keep your flashlight off if you don’t want to be seen, though you’ll still be able to see things that are right in front of you. So you aren’t completely blind, just mostly.
Listening to the soft moaning of nearby walkers helps to avoid stumbling into them in the darkness. Attracting even a single walker can easily create enough noise from their hungry screeching for a large group to take notice and start chasing after you as well. Though if you find an area that is chocked full of walkers you can always use useful items like the Frankenflare or Noisemaker arrows to draw them away so that you can pass through.

Of course you can always just fight all of the walkers instead. If you’re good at combat in The Walking Dead: Saints and Sinners - Chapter 2: Retribution and you play it smart you can chop or shoot your way through, though you’ll definitely expend more resources in the process, so bring lots of melee weapons and bullets if you plan to do this.
Always Wear Bolted Up Gloves
Speaking of melee weapons, some of the new weapons added in Chapter 2 of The Walking Dead: Saints & Sinners are especially useful. These would be the Sap Gloves and Bolted Up Gloves. These weapons won’t take up a slot on your body or your backpack, because you wear them on your hands, and they make punching walkers a viable tactic in combat.
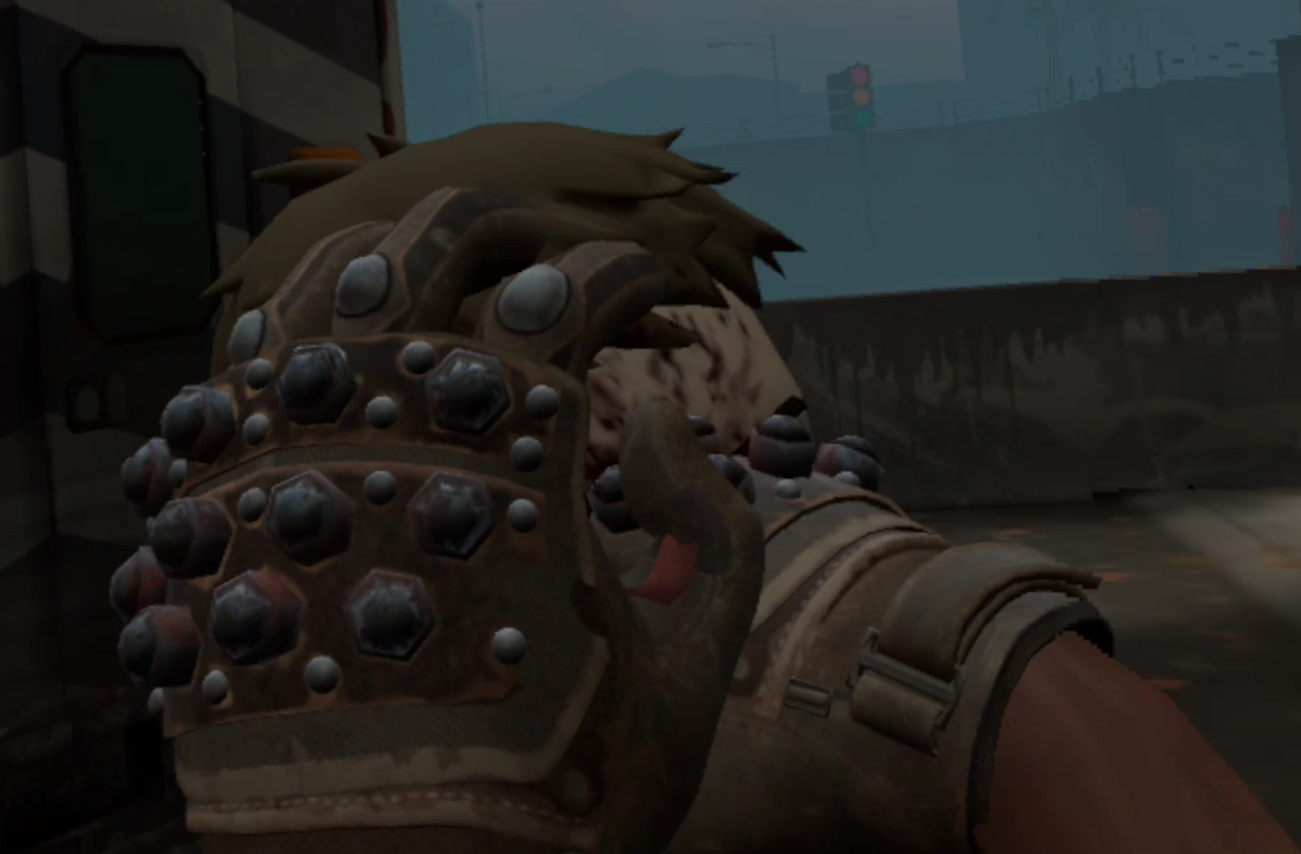
With some of these on you can punch walkers in the head until they keel over, or grab them and drive a fist straight through their skull. These gloves are lifesavers in situations where you panic and drop your weapons, and serve as a reliable backup if you run out of more traditional melee weapons.

The Bolted Gloves are a better version of the Sap Gloves, and you can get them very early on your first trip to Bourboun Street in the building marked Brown on the map. Check out our article on the locations of new recipes for more specific directions.
Pool Balls are Great Loot - Always Pick Them Up
In terms of new loot, the things you find at night aren’t the only great new opportunities to be had. There are a number of new items that you can find lying around. Loot boxes from the first game are still around, but now they come in varying sizes, with Mediums and Larges containing a lot of great stuff.

An equally good find that you might not suspect is so chocked full of resources are Pool Balls. Somehow this tiny and unassuming item has an absolute ton of resources inside of it, making it far better than most junk that you would find and is certainly worth a spot in your backpack. So don’t assume Pool Balls are junk, they’re actually great. There are some other good items around too, like Guitars and Saxophones, that have a lot of materials inside them for a single inventory slot.
Fulfil Exile Trade Network Orders
You’ll be hearing a lot about the new Exile Trade network through the story missions of The Walking Dead: Saints and Sinners - Chapter 2: Retribution, and you should take part in it. There is an exile trader that comes out at night in a specific location on each map. To find where they are use your UV Tactical Flashlight to follow the cats painted on the walls.

At the end of the trail of cats is a trader who has an order for you to fulfil, usually for items that you would normally scrap or replace with something crafted yourself. You can view the orders in the green tab with the box on it in your journal. If you bring the items back to the trader they give you the reward listed in the order. This also means you should be careful when scrapping a haul of loot, you might need some more obscure items later.

It can also be tempting to ignore the trades because the rewards, at first, aren’t very good. Each trader has three different orders, and the first usually gives mediocre rewards at best, but the third trade usually grants you fantastic items, so stick with it and you won’t regret it.
Bonus Tip: Recipes From the First Game Are Still There
For our final tip you should know that the recipes from the first game are still in their original locations. So if you want to go back and get any of the recipes from the first game, go ahead. Some, like Jambalaya or the 4th and Pain, come especially recommended to get your hands on. Note that some recipes for firearms, explosives, and bullets will sometimes drop off of dead Reclaimed and Tower soldiers.
You might have trouble with the recipes in Old Town though.
If you want to find the new recipes that are specific to Chapter 2: Retribution then check out our guide on them here.

11 Best VR Shooting Games for the Oculus Quest 2 | VR Shooter Games for the Quest 2
If you’re a fan of Shooters or Shooting Games and have an Oculus/Meta Quest, you’re probably thinking that shooting games would be pretty awesome in Virtual Reality. Well they are! Shooters are one of the most consistently fun genres that takes full advantage of what VR has to offer. Actually handling a gun and its parts directly to reload and aim makes VR Shooting Games instantly more tactile and immersive. The feeling of crouching physically while listening for an enemy coming around the corner with your gun trembling in your hands isn’t quite the same outside of Virtual Reality Shooters.
If you’re a fan of shooters or shooting games and have an Oculus/Meta Quest, you’re probably thinking that shooting games would be pretty awesome in Virtual Reality. Well they are! VR shooting games are one of the most consistently fun genres that takes full advantage of what VR has to offer.
Actually handling a gun and its parts directly to reload and aim makes VR shooting games instantly more tactile and immersive. The feeling of crouching physically while listening for an enemy coming around the corner with your gun trembling in your hands isn’t quite the same outside of Virtual Reality Shooters.
Many of the varieties of VR shooters which can be found in flat screen games are making their way over to VR, and this list includes many different genres of shooting games. There’s multiplayer as well as singleplayer VR shooting games for the Quest in here. These are the best VR shooting games on the Oculus Quest 2.
Oh, and honorable mention to The Walking Dead: Saints and Sinners Chapters 1 and 2. While absolutely fantastic survival games, they didn’t have enough of an emphasis on VR shooting to be considered as VR shooter games, but they are fantastic games.
You Might Also Enjoy:
Onward - VR Shooting Games and VR Shooter Games
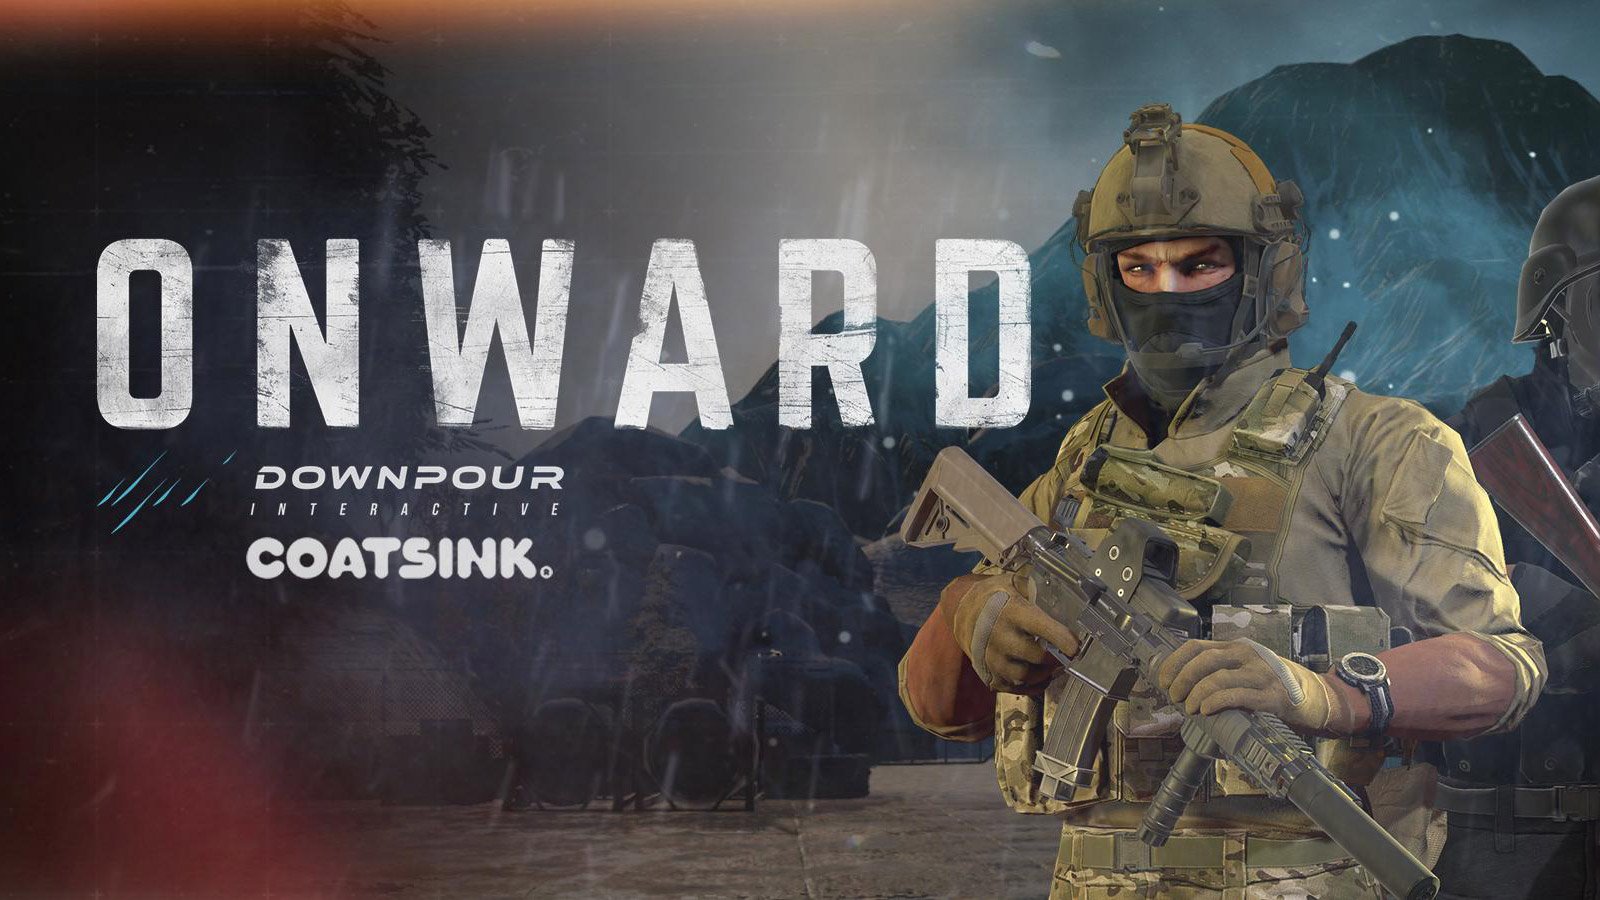
The Onward Logo
Chances are you’ve probably heard about Onward. It’s a well known VR shooter because it has been around for a very long time, and was originally released for PCVR years ago. Since then it has seen many improvements and additions, while also being ported to the Quest 2.
In case you aren’t familiar, Onward is a Multiplayer focused VR shooter (though it does have some Singleplayer features) that takes place during a fictional worldwide conflict in the modern day. Whichever team you are on determines what weapons you can choose for your loadouts, and teams are limited to five players each, similar to the Counter Strike franchise. Movement speeds are low and so is the time to kill. One or two shots can easily down a player. Even being wounded means you need to use a medical syringe on yourself.

An intense shootout in Onward
If you want a slow and tactical multiplayer VR shooting experience, then Onward is a game you should definitely try. For more about Onward check out our article comparing it to Contractors.
Lies Beneath - VR Shooting Games and VR Shooter Games

The Lies Beneath Logo
Now for a game you probably haven’t heard about. Lies Beneath is not a Multiplayer game, instead it is a linear, story based horror VR shooter. You are one woman with nothing but a magical lighter and a few old guns and blades against hordes of horrifying, otherworldly monsters.
Lies Beneath has a story that is genuinely thrilling and a number of disquieting and beautiful settings to match it. It remains consistently creepy where it isn’t outright scary, and varies the gameplay constantly so that you never know what you’ll find or shoot at next. Whether you’re defending a cabin against a horde of zombies with a shotgun or blasting your way through a village of possessed fishermen with a revolver, Lies Beneath is a VR shooting game that never gets dull.
Ghosts of Tabor - VR Shooting Games and VR Shooter Games
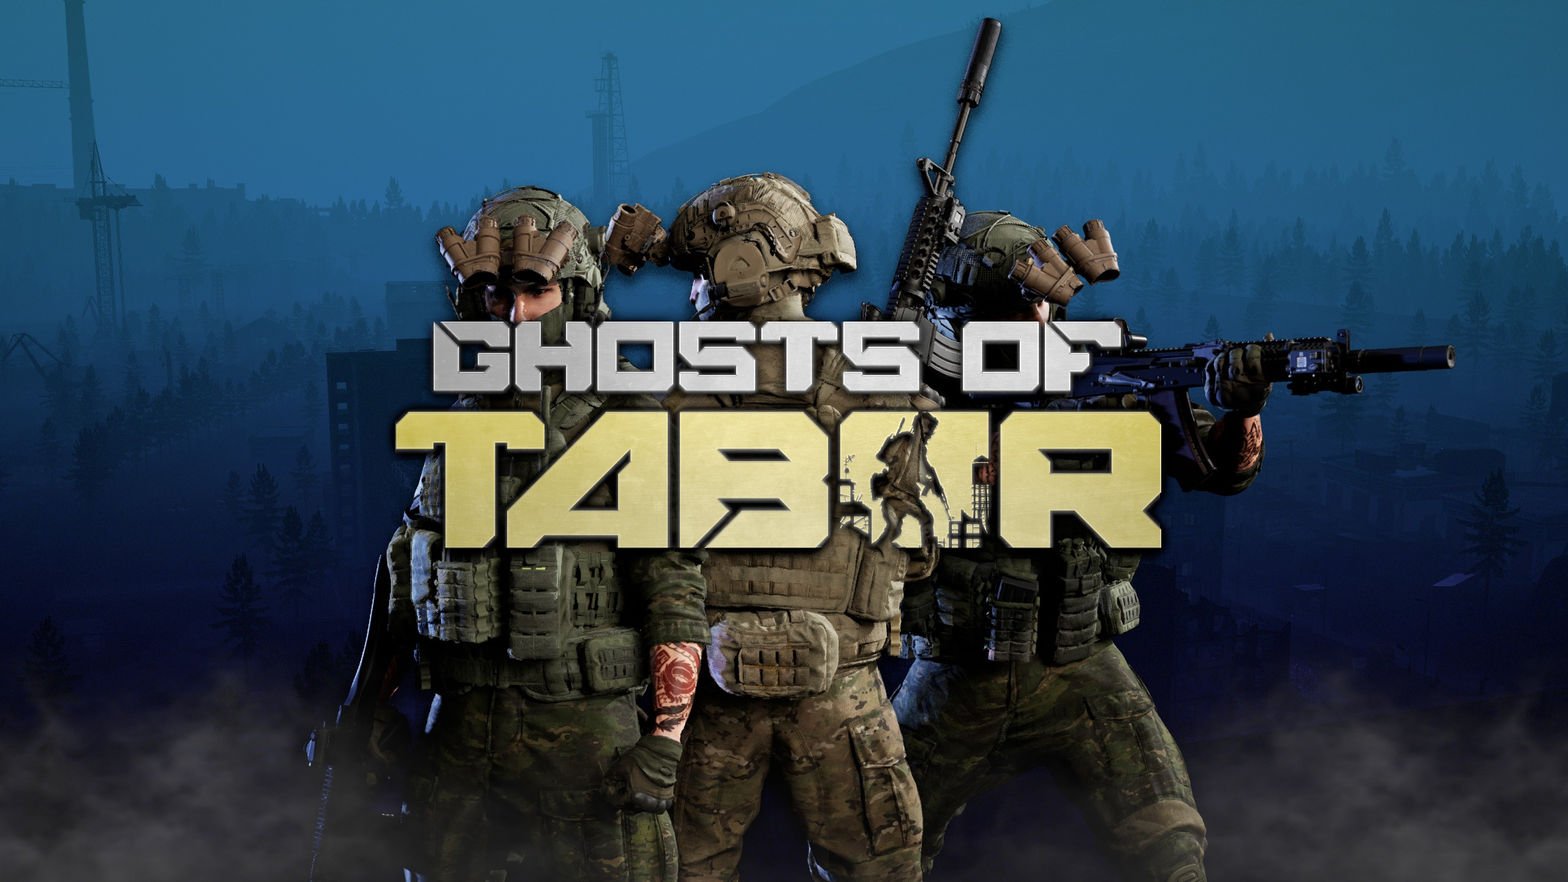
The Ghosts Of Tabor Logo
Every wanted to play VR Tarkov? Want to have the tension of an extraction/raid VR shooter in VR? Well Ghosts of Tabor finally delivers on that. Set in a future where Russia has collapsed to Extreme Nationalists, you are a Special Forces soldier on Tabor, which has been hit by a nuclear missile.
Gather your gear in your bunker Safe House and venture out into the many locations of Tabor to acquire loot and bring it home, while also completing missions given by the many traders. Watch out though, the NPC FENIX rebels (basically Scavs from Tarkov) will shoot you on sight. Other players also might, but they might also end up being your friends. Still… you can never really trust anyone in Tabor.
Ghosts of Tabor is shaping up to be the premier multiplayer VR shooter game on the Quest 2 and PCVR. For more on Ghosts of Tabor and how it compares to Escape From Tarkov check out our article on it here.
Into The Radius - VR Shooting Games and VR Shooter Games
The Into The Radius Logo
Into the Radius is hands down the best survival VR shooter available on any platform, not just the Quest 2. It is often compared to the S.T.A.L.K.E.R. series of games, but takes much more inspiration from the book that inspired S.T.A.L.K.E.R., Roadside Picnic.

An anomaly in Into The Radius
In Into the Radius you explore the Pechorsk Radius, fighting strange creatures made of dark matter and avoiding deadly anomalies while completing missions and gathering artifacts to sell. There are a huge number of weapons and pieces of equipment to buy to keep you alive in the Zone, which has dangers that only become greater the further in you go. Though the further in you go, the closer you get to revealing the mysteries of what exactly happened to Pechorsk.

Firing a PPSH in Into The Radius. This is one of the greatest VR shooting games
If you want a tense singleplayer VR survival shooter, then Into the Radius is a must play. As far as Virtual Reality Shooting Games in general, it is one of the best out there and should be at the top of your list if you want a great singleplayer VR shooter on the Quest 2.
Warhammer 40,000: Battle Sister - VR Shooting Games and VR Shooter Games

The Warhammer 40,000: Battle Sister Logo
Finally, a Warhammer 40K VR shooting game in Virtual Reality. If you don’t know what Warhammer 40K is, basically it’s a far future galaxy in which the Imperium, which has incorporated most of humanity, is fighting basically everyone who isn’t them. In Warhammer 40,000: Battle Sister you are a Sister of Battle, an elite woman supersoldier armed and armored to the teeth.
You fight (mostly) the forces of chaos, who represent the entropic forces of the galaxy that want to destroy the Imperium. From cultists to huge Chaos Space Marines to demons of several kinds, there is great enemy variety in Warhammer 40,000: Battle Sister, as well as weapon variety. Though the combat can feel a little repetitive after a while, many encounters play out in very similar fashion, which can make you lose interest over time in this VR shooting game.
Warhammer 40000: Battle Sister is mostly a linear Singleplayer experience, though there is some Multiplayer available in it’s endless horde survival mode. The one downside is that sometimes this VR shooter forces you into long and boring talking sequences that you can’t skip, and the dialog isn’t the most well written. Occasionally it is somewhat cringy, with a little overcommitment to character.
If you want to have some shootouts with large industrial weapons in an interesting grimdark sci-fi setting, or are already a Warhammer 40K fan, give Warhammer 40,000: Battle Sister a look.
Contractors - VR Shooting Games and VR Shooter Games
The Contractors Logo
Contractors is another Multiplayer online VR shooter for the Quest 2 that is often called the “Call of Duty of VR.” This is because the gameplay of Contractors, despite being in VR, shares many similarities with the Call of Duty franchise. Movement is fast and so is the gunplay.
If you want fast paced action, then Contractors is probably going to be your go to game. While there are a variety of game modes, most of them play out similarly. Spawn, run for a few seconds, see an enemy, fight, see another enemy, fight, die, rinse and repeat. It’s a great game to get some fast VR shooting action in.
There is constant action and very little waiting. You will die and be in another gunfight in less than thirty seconds. The action never stops. As for the gunplay, it plays out quickly, but gives you a chance to react. Jumping while shooting and sliding towards your enemy while shooting are totally viable tactics here.
Contractors is the most moddable of all multiplayer VR shooting games
Though the pace of gameplay can vary when playing any of Contractor’s many mods. That is the greatest strength of this game, how moddable it is. As far as multiplayer VR shooters on the Quest 2, there are none with anywhere near the amount of moddability and available mods as Contractors. There’s a Halo mod, Star Wars mod, and even some attempts at recreating Call of Duty’s zombies mode, and DayZ.
For more on Contractors check out our article comparing it to Onward.
Oh, and if you want an excellent VR Battle Royale, one of the best out there, based on the gameplay of Contractors, then check out Contractors: Showdown.
Sniper Elite VR - VR Shooting Games and VR Shooter Games
The Sniper Elite VR Logo
Sniper Elite VR is currently the best World War 2 VR shooter available on the Quest 2. You might think that Medal of Honor: Above and Beyond would hold that title, but a badly paced single player campaign combined with poorly thought out Multiplayer means that Sniper Elite VR gets the title.
Sniper Elite VR takes place in Italy during World War 2. You are a partisan fighting the Nazi occupiers, and Nazi shooting never gets old, especially in this game. There are many different and varied combat encounters to fight through, though as the name implies sniping is the core focus of the game. The Virtual Reality shooting is very fun, and all weapons have impressive kickback, with slow motion x-ray vision sometimes turning on and showing you just how devastating your bullet is as it goes through an enemy soldier’s body.

Firing an STG in a graveyard
If you want the World War 2 VR shooter experience in VR then Sniper Elite VR is the place to look. There are a ton of weapons and missions to enjoy. The downside is that Sniper Elite VR is an entirely Singleplayer experience, though it’s recent cousin on the flat screen has shown that it would make an excellent Multiplayer game.
For more on Sniper Elite: VR check out our review.
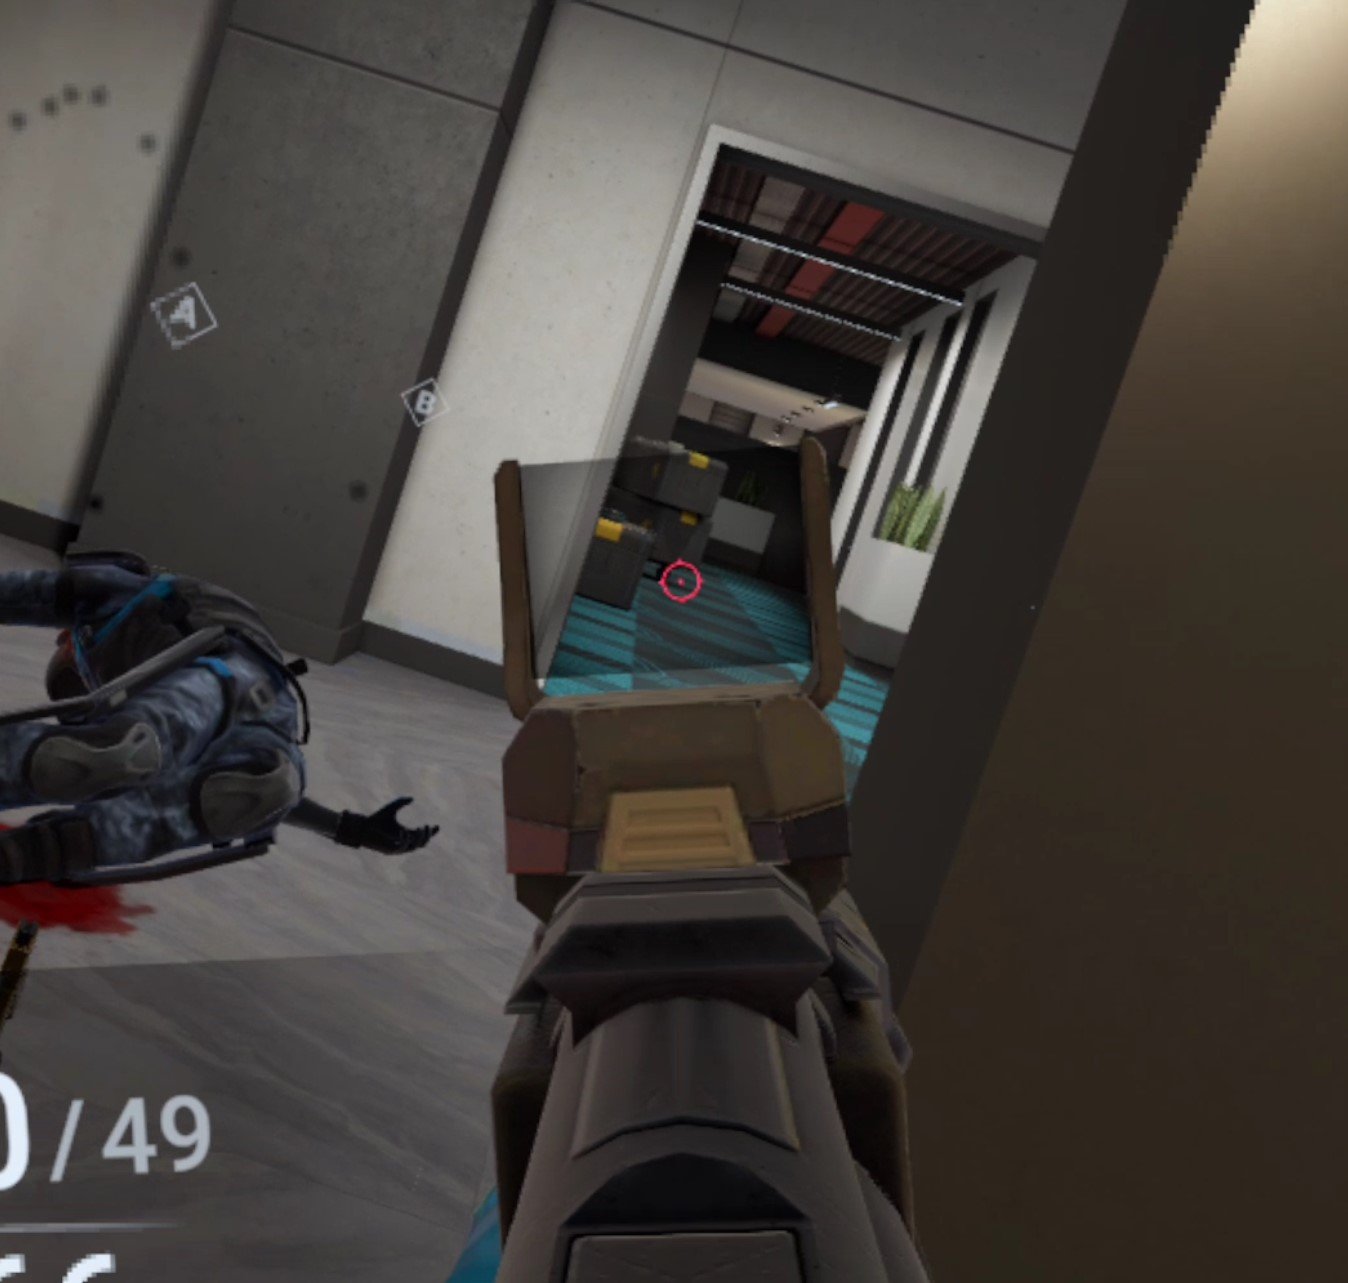
Resident Evil 4 VR - VR Shooting Games and VR Shooter Games

Leon Kennedy from Resident Evil 4 VR - A fantastic single player VR shooter
Here’s another Singleplayer game, but it is a legendary one. The original Resident Evil 4 was a huge hit that created a whole new genre of shooters, and now it’s a VR shooter. Resident Evil 4 VR is a very faithful and very well made adaptation of the original to the Virtual Reality format, and it is just as much of a hit.

Shooting in Resident Evil 4 VR
Fill the shoes of Leon Kennedy as you fight the Ganados Cult in rural Spain to save the President’s daughter. There’ll be plenty of homicidal villagers and mutants on the way, as Resident Evil 4 VR brings the immersive manual reloading and aiming that can only be done in Virtual Reality to the story and gameplay of Resident Evil 4. This is a phenomenal combination that will leave you starved for more and happy to strap on your headset one more time to play this VR shooting game.
A quick time event in Resident Evil 4 VR
If you have ever played and enjoyed a Resident Evil game, or games from similar franchises like Uncharted or the newer Tomb Raider games… Actually if you’ve ever enjoyed a singleplayer VR shooter in your life, then get Resident Evil 4 VR. Oh, and if you ever get stuck check out our article with tips and tricks (or the video).
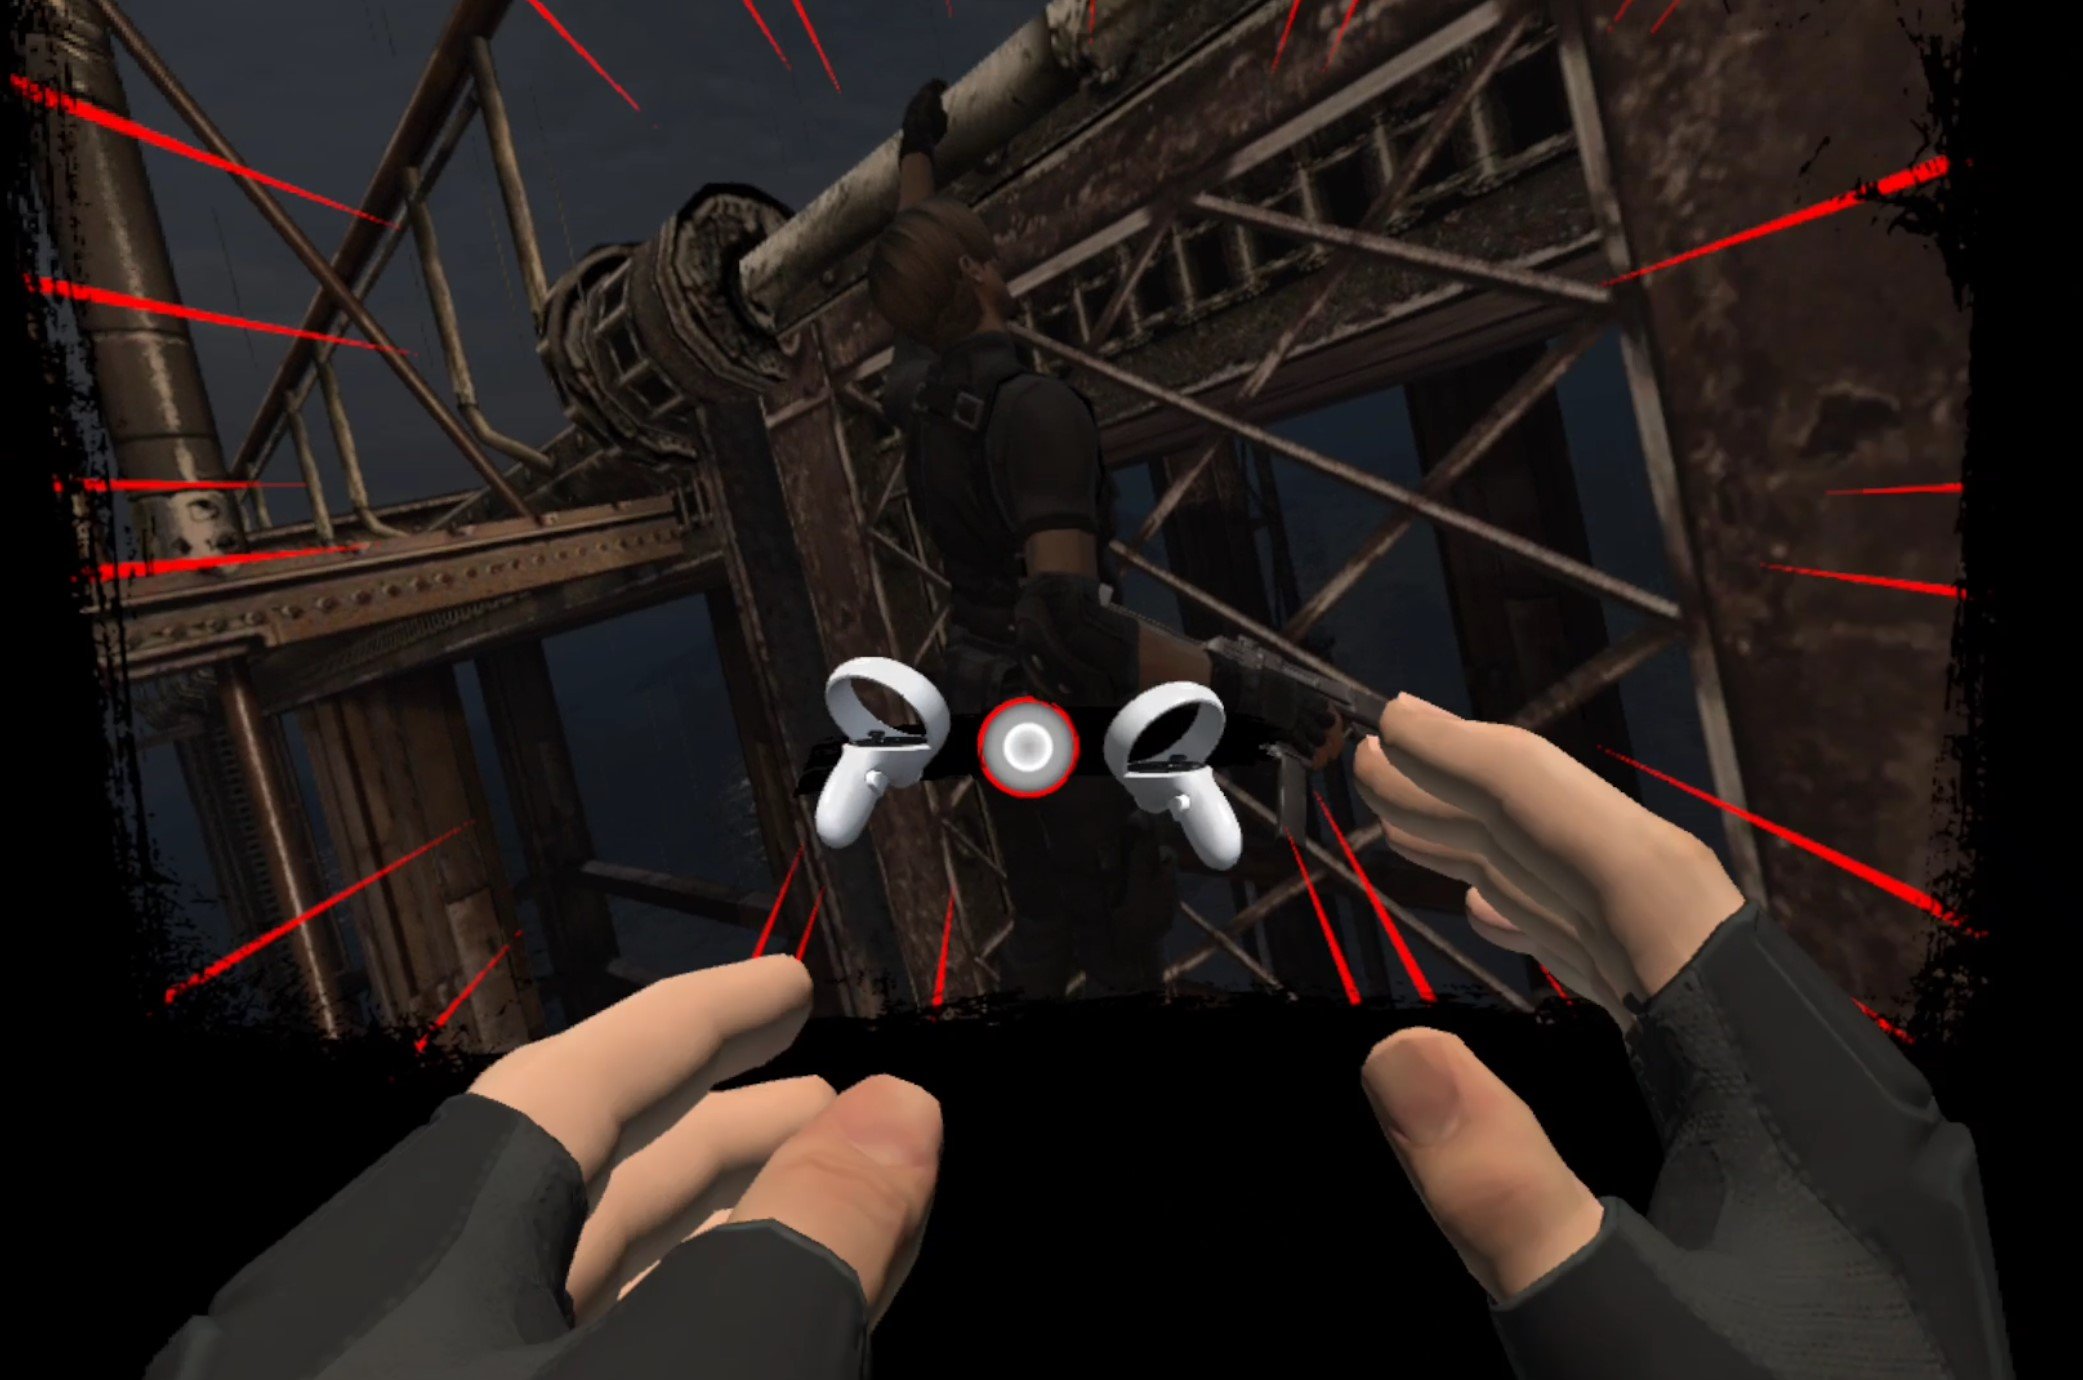
Breachers - VR Shooting Games and VR Shooter Games
The Breachers Logo
Often called the Rainbow Six: Siege of VR, Breachers definitely contains a lot of elements from Rainbow Six: Siege, but also pulls inspiration from other well known shooter titles like Counter Strike: Global Offensive.
In the VR shooter Breachers you are either on the attacking or defending team, with access to all of the same weapons, but different items and tools depending which side you are on. The defending team has traps and defensive items, while the attacking team gets flashbangs, cloaks, drones, and breaching equipment. The attacking team needs to plant an EMP to disable bombs on one of two adjacent bomb sites, and the defending team needs to prevent this.
Oh, and if all team members on one of the teams dies, then the other team wins. The stakes always feel high in this VR shooter.
Leaning to cover a hallway in Breachers - A great tactical VR shooter game
Breachers combines quick gameplay with short rounds lasting three minutes so you will rarely be idle for a long time. It’s a ton of fun, and is quickly becoming one of, if not the, best multiplayer competitive VR shooter on the Oculus Quest 2. Maybe even the best competitive VR shooter in all of Virtual Reality.
The gunplay is satisfying and the time to kill with all weapons is very finely tuned for an enjoyable experience. The attackers vs defenders gameplay loop means that how the game plays varies greatly depending on what team you’re playing on. This keeps the gameplay fresh and entertaining. The wide variety of gadgets, guns, and tools also means that you have a ton of options to change your playstyle and strategize depending on what the enemy team is doing.
Scoring a headshot in Breachers
Breachers combines smooth design with great gunplay into a complete VR PvP shooter experience that takes inspiration from the flat screen, but is a fantastic game all on its own. If you love competitive team vs team shooters that require communication and strategy in a tight package, then Breachers is definitely for you.
POPULATION: ONE - VR Shooting Games and VR Shooter Games
The Population: One Logo
Do you like Battle Royales? Want to see what a VR Battle Royale might look like? Well then you’ll like Population: One, as it’s the only VR Battle Royale available on the Quest 2. It’s a pretty great one though, and also is a good VR shooter in general. While each match doesn’t support as many people as a flat screen Battle Royale, there are still a lot of players for a VR game. More than enough to make the game tense, and Population: One keeps the repositioning and equipment gathering between firefights fast paced.
Movement is quick and fun, with the ability to glide by stretching your arms out or climb up buildings with your bare hands. You have health as well as shields, meaning combat can be a protracted and very fun affair. There’s also building, but it’s not as widespread or as quick to do as in other games like Fortnite.
Population: One does have a bot mode for Singleplayer, but the heart of the game is playing with a squad of other people and trying to be the last ones to survive. If you love Battle Royales and want to see what one would be like in Virtual Reality then get your hands on Population: One. Oh, and now it’s free!
Bonelab - VR Shooting Games and VR Shooter Games
The Bonelab Logo
Bonelab is another VR shooter you’ve probably heard about, and for very good reason. Where Contractors is the king of Multiplayer modding in Virtual Reality, Bonelab is the king of Singleplayer modding in Virtual Reality (except maybe for Blade and Sorcery, but we’re talking about VR shooters here).
Bonelab is a Singleplayer only game that has a satisfyingly long campaign that has you fight all sorts of strange enemies with a multitude of guns and even melee weapons (though the guns are clearly the best part). If you like puzzles then Bonelab offers just about as many physics puzzles as it does VR shooting.
The real gem of Bonelab is what is outside of the campaign, and that is the multitude of mods for weapons, enemies, maps, and so much more. Bonelab also has a unique feature that now allows you to download different skins for your character and switch between them, and each skin has a variety of stats. So you can be a strong and slow guy, or a tiny gremlin that can fit into tight spaces, or anything in between. There’s modded skins for popular characters like Batman, Deadpool, and so much more.
If you want a more sandbox like experience, or want to get into making your own mods for a VR shooter, then Bonelab is a great game to play. Oh, and if you want to install mods for Bonelab without a computer, check out this article on how to install Bonelab mods without a PC.
VAIL VR - VR Shooting Games and VR Shooter Games - BONUS

The VAIL VR Logo.
VAIL VR is another Multiplayer Shooter now available on the Meta Quest platform. It has recently, since it’s release on PCVR, gotten huge updates adding new maps, game modes, and a progression system that has you unlocking weapons and skins as you level up in the game and complete other various challenges like getting headshots.
VAIL VR is fast paced and has small teams going head to head to complete classic objectives like wiping out the enemy team, or planing a bomb objective. You know, like Counter Strike.
VAIL VR also has an extremely polished feel to it, and generally looks and feel fantastic. While it might not have the most sophisticated game modes or team play, this VR Shooter is absolutely fantastic for the responsiveness of its shooting and smoothness to its controls and movements. There’s even a system in the game that dynamically estimates where your legs should be, making it a much better idea to take cover.
While VAIL isn’t the most tactical of shooters, there is a fair bit of running and gunning involved. It’s low time to kill makes it very reaction based and fast paced. It’s a fantastic new player in the VR Shooting Game scene that has been the favorite of many.
You Might Also Enjoy:

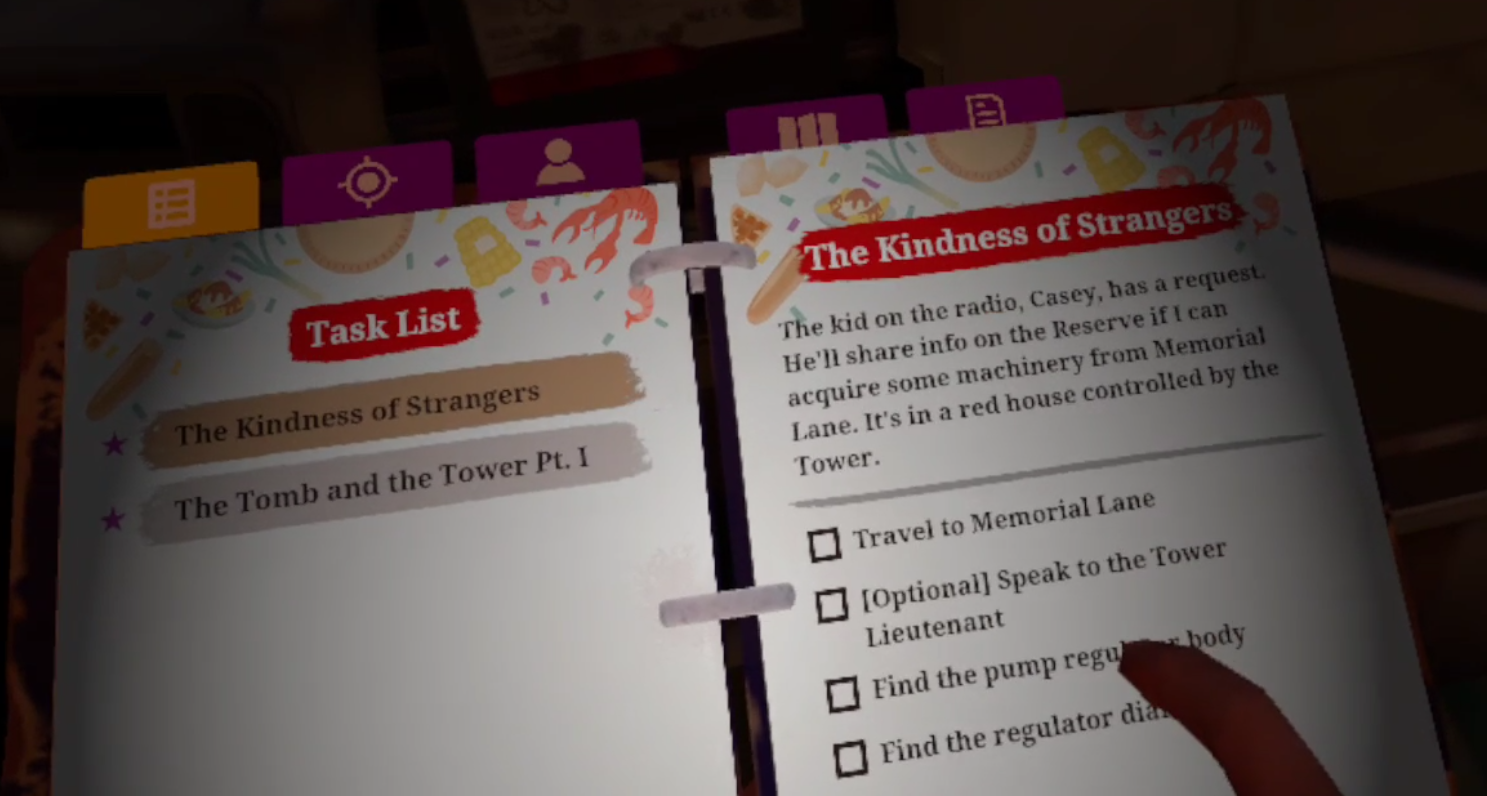
Unlock the New Hidden Recipes in The Walking Dead: Saints and Sinners - Chapter 2: Retribution
In The Walking Dead: Saints and Sinners - Chapter 2: Retribution you unlock most recipes and schematics by upgrading your crafting tables. Except for the green recipes at the bottom of each table. These have to be found out in New Orleans before you can craft them. Wondering where to find them? Well then look no further, because we’ve got them here.
In The Walking Dead: Saints and Sinners - Chapter 2: Retribution you unlock most recipes and schematics by upgrading your crafting tables. Except for the green recipes at the bottom of each table. These have to be found out in New Orleans before you can craft them. Wondering where to find them? Well then look no further, because we’ve got them here.
All recipes from Chapter 1 of The Walking Dead: Saints & Sinners can be found in the same locations here in the second game. For those recipes check out the article covering all of them. (Human enemies also drop some firearm, explosive, and ammunition recipes occasionally)
This list is only missing a single recipe to avoid spoilers, don’t worry though you will easily get it when doing the main story missions of the game. If you get every recipe on this list (and the main mission recipe just mentioned) and still notice you have some recipe slots unfilled and without hints on the page, that is because those are only available by purchasing the Payback Edition addon to the game.
Table of Contents:
Heavy Armor Plating
The Heavy Armor Plating recipe is by far the easiest of the new recipes in The Walking Dead: Saints & Sinners Chapter 2: Retribution to acquire. It is located in the resting place in the new catacombs area in the room just across the hallway from the bedroom you sleep in. It is sitting on the large wooden table in the center of the room.

Bolted Up Gloves
The Bolted up gloves recipe comes highly recommended to find, and can be acquired during one of the very early missions that you do for the main story. It is located in Bourbon Street in the cocktail lounge on the right end of St. Peter street when looking at your map. It also appears on your map as the brown building with a bottle of bourbon on it.

When entering the house find the stairs that lead to the second floor and go up them. You will come across a room with a shrine or altar of some kind covered in bones and candles. Go through the double doors on the other side of the shrine and find the recipe on the desk in front of you.

Hand Grenade
The Hand Grenade recipe is a pretty straightforward find, and a fun addition to your arsenal. Go to the Hotel E’Claire and enter it from the left side of the building, where there is a fountain and bushes in front of the entrance. On your map this is the entrance on the left side of the building. Once you are inside you’ll notice a coat check on one side of the room, and a set of stairs leading downwards on the other side. These lead down to the wine bar.

Go down the stairs, but once you are at the bottom look underneath the staircase. Hugging the inside of the final flight of stairs is the recipe sitting on the floor.

Undersleeve Plating
The Undersleeve Plating recipe is a little more difficult to find, but you will come across it during the main story missions, either way you can grab it early if you like. Go to Via Corolla and get to Bonaparte street. Once you are on the street walk all the way down it towards the right side of the map. Once you are at the end of the street you will see a crashed police van blocking your way further.

Just to the right of the van is a hole in the fence that borders the street. Duck through the hole and enter the building beyond it. This building is the house marked as green on the map. Take a right as soon as you enter the building. The recipe is on a piece of furniture at about head height.

Double Barrled Sawed Off Shotgun (Improved)
The High End Sawed Off Shotgun recipe can be found by going to The Tower, and is a useful upgrade to the original craftable Sawed Off Shotgun. On the top right most side of your map is a grey, uncolored building that was once a parking garage. Go inside the garage past the collection booth at the front, your goal is to get to the top right section of the garage on your map. Keep to the first floor and don’t go up any ramps.

You should see two semi-trucks at the furthest right corner of the garage, just past a ramp that would lead to the second level. Squeeze between the trucks and find the recipe on the floor in the little nook behind them.

Custom SMG (Improved)
The High End SMG is a direct upgrade to the craftable SMG, and is a must have if you like the weapon. To find it go to The Tower. In front of the Teal Tower building on the map is a small collection of tents, which are past various tower barricades and checkpoints. Fight your way through the Tower soldiers. When you find yourself going down the road that has big concrete walls on either side with traffic cones at their corners, you are going the right way.

Just past those walls is a collection of tents. Head past the military vehicles towards where there is a row of small tents. The first tent you come across, which is closest to the entrance of the left side of the compound will have the recipe sitting on a table.

The Orphan Bow
The Orphan Bow is a must have blueprint for bow lovers in The Walking Dead: Saints and Sinners - Chapter 2: Retribution. It’s an even more improved bow than the improved bow from the first game, and even features a laser sight for improved accuracy. To get the recipe go back through the catacombs in the Resting Place to the Churchyard where The Reserve is. Instead of walking through the front door of the church, take the small open gate to the left of it where there will be a ladder leading up a bus.

Walk past the junk scattered around and the picnic table, to where you climb up the pipe to get inside the church at the end of the first game. To the left in the corner is a large green tent. Inside of that tent on the right is a cot that has the Orphan Bow recipe sitting on top of it. Note that this recipe might be bugged and not be visible on top of the cot. If that’s the case just hover your hand over it and wait for the grab marker to appear inside the cot and press the grab button to make it zoom into your hand.


The Walking Dead Saints and Sinners Walkthrough and Guide - Part 4 - Memorial Lane and Meeting May and Casey
Stuck in The Walking Dead Saints and Sinners? Wondering where to go next? Maybe you just like to see what is in store for you before you get there, or want to look back and see if you missed anything in The Walking Dead: Saints & Sinners. Well don’t worry we’ve got you covered with this complete walkthrough. In this part we meet May and Casey and go to Memorial Lane for some important parts.
Stuck in The Walking Dead Saints and Sinners? Wondering where to go next? Maybe you just like to see what is in store for you before you get there, or want to look back and see if you missed anything in The Walking Dead: Saints & Sinners. Well don’t worry we’ve got you covered with this complete walkthrough.
This article will detail how to progress through the main story missions as quickly as possible, with a couple of guiding tips thrown in here and there to make your adventure smoother. Only those recipes that are convenient to get when doing a task for the first time are included. For a full list of all recipes in The Walking Dead: Saints & Sinners, check out our recipe guide article. Spoilers will be as light as possible, but there will be story spoilers by necessity in this walkthrough, but there won’t be any explanation of what is going on in the story beyond what is necessary to make the walkthrough make sense.
All Walkthrough Parts:
The Walking Dead Saints and Sinners Walkthrough and Guide - Part 1 - The Graveyard
The Walking Dead Saints and Sinners Walkthrough and Guide - Part 2 - The Shallows
The Walking Dead Saints and Sinners Walkthrough and Guide - Part 3 - Via Corolla
The Walking Dead Saints and Sinners Walkthrough and Guide - Part 4 - Memorial Lane and Meeting May and Casey
The Walking Dead Saints and Sinners Walkthrough and Guide - Part 7 - Old Town and Another Stash
The Walking Dead Saints and Sinners Walkthrough and Guide - Part 8 - Rampart
The Walking Dead Saints and Sinners Walkthrough and Guide - Part 9 - The Shallows Again
The Walking Dead Saints and Sinners Walkthrough and Guide - Part 10 - Bastion and The Reserve Key
The Walking Dead Saints and Sinners Walkthrough and Guide - Part 11 - The Reserve and the Ending
Meeting Casey
When you wake up, tune your radio to channel 61 if it isn’t already. Casey, the man you previously met over the radio, now wants to talk. He’s got a lot to say, and he also wants you to get a Pump Regulator for him from Memorial Lane.
Meeting May
You will also notice that the lantern above the coffin is now lit. So head back to the coffin, and find a note inside. Seems whoever was leaving notes figured out you’re not Henri, and wants to talk in the Churchyard.
Make sure you’ve got a melee weapon or two on you and go back down to the catacombs near the coffin. It may be daytime but there are plenty of zombies around. Though this time you’ll see that the big gate which was blocking off access to one of the corridors in the catacombs is now open. Head through it.

You will find another ramp leading you outside again, once you are back aboveground head to your right and across the street, a woman will be waiting for you.

She agrees to assist you in finding the Reserve in exchange for finding more Tower caches. The next cache is in The Ward. You can also just kill May here, and pick up an item off of her body to help you get to the Reserve. While this means you can avoid her tasks and still complete the game, killing May would take a lot of flavor out of the story and remove a lot of fun missions. This guide will assume you leave her alive, and it is highly recommended that you do leave her breathing.
Once you’ve spoken with May you don’t have to stick around, but there is a ton of free stuff sitting around. Take whatever you can get your hands on, since none of this loot will cost you a day, it’s all basically free. The house that shows as orange on your map has the beignet recipe in the kitchen. The streets, alleys, and churchyard have various junk on the ground, and at least one bundle of arrows. There’s also a worn out 9MM pistol in the warehouse that shows as blue on the map. The church itself is inaccessible, so don’t bother trying to get in.

Once you’re done picking the place clean go back to your bus base and get ready. Bring some melee weapons and some guns, preferably the Double Barreled shotgun if you still have it in one piece. Maybe even a sticky bomb or two, which you got from the tower stash in Via Corolla. You will have to fight at least one group of human enemies to get the pump regulator from Memorial Lane. So be ready.
Then head to the boat and go to Memorial Lane.

Day 4: Memorial Lane
Once you arrive in Memorial Lane take a look at your map. You’ll see two colored houses, Red and Blue. The Red House is full of Tower grunts, who have the pump parts you need inside, and the Blue House holds a group of Reclaimed.

Move down the street and take a left off of Bordeaux down the driveway at the side of the red house, you’ll find a couple of Tower soldiers standing around, willing to talk.

Talk to them and listen to what they have to say. Long story short they want you to save a hostage from the Reclaimed warriors in the Blue House. They agree to give you whatever you want from their stash in return (this includes the pump regulator.)
If you go over to the Blue House, past the courtyard with the huge tree, you’ll see a lot of upside down walkers hung up from the ceiling, and upstairs the Reclaimed and their hostage.
The Reclaimed leader is very angry. There is no way to talk him down or get him to release the hostage. The only two possible outcomes are you killing the hostage or you killing all of the Reclaimed.
So this sounds like a choice between the Tower and the Reclaimed, and you can go based on whichever faction you like more if you so desire. Though the outcome of your choices, in terms of gameplay, ends up being either a gunfight between you and all of the Reclaimed there (about 4 or 5 enemies) or a gunfight between you, plus the Reclaimed on your side, versus the 8 to 10 or so Tower grunts in the Red House.
If you kill the hostage the Reclaimed leader will state his desire to fight the rest of the Tower in the area. You can accept or not, but with the hostage dead the only way to get to the pump regulator is to fight through the Tower, and the Reclaimed warriors are a huge help in doing so.
If the Reclaimed attack without your help they will definitely lose, but they make a great distraction while you line up headshots with your pistol or blast away with your shotgun. Once you say you’re ready the Reclaimed will pile out of the Blue House and make a beeline for the back door of the Red House by going through the big courtyard with the tree. The Reclaimed and Tower will shoot each other on sight.
Fighting the Reclaimed alone is a little difficult if you begin the fight while they surround you. Going back to the stairway and shooting them from there is far easier, though make sure the hostage doesn’t die in the process. If you manage to save him, go back over to the Red House. The Tower leader will walk you to the master bedroom of the house, which has a big stash of goodies and the pump parts you need.

A big gunfight between the Reclaimed and the Tower is the most fun way to get to the stash, and also arguably the easier way. Though a couple well placed sticky bombs could make eliminating the Reclaimed in one swoop the more cost efficient, and safer, option. Whichever way sounds like the better choice is up to you. Whichever way you choose, make sure you have the pump body and dial (and of course a full backpack) before finding a boat and setting sail back to your bus.
When you arrive back home attach the dial to the pump and then talk to Casey again on the radio. He’ll be really excited you didn’t die out there.
Once more, head off to sleep.
Want to find out what you will need to do with the pump regulator, or what awaits you in The Ward? Need a guide on what comes next? Then head over to Part 5.