

![A Township Tale Update: How to Reach the Climbing Tower on the Quest 2 [Guide]](https://images.squarespace-cdn.com/content/v1/60ee2eaaafee646b28e6aa42/1668364449029-NFKI1JC4OJ0PV552AI9D/ATownshipTaleClimbingLogo.jpg)
A Township Tale Update: How to Reach the Climbing Tower on the Quest 2 [Guide]
The Climbing Tower was finally added in the newest Update of A Township Tale for the Quest 2. A lot of players have been looking forward to this addition for a while, because mastering the Climbing Tower is not only fun on its own, but also allows you to climb all over the world of A Township Tale while you are exploring. Read on to find out how you can find the Climbing Tower in this newest update.
The Climbing Tower was finally added in the newest Update of A Township Tale for the Quest 2. A lot of players have been looking forward to this addition for a while, because mastering the Climbing Tower is not only fun on its own, but also allows you to climb all over the world of A Township Tale while you are exploring. Read on to find out how you can find the Climbing Tower in this newest update.
The Journey Begins
First you’re going to need some supplies to make sure you’ll make it. A Township Tale is a survival game after all, and you will definitely face some challenges on your way from your town to the Climbing Tower. Here is the recommended list for what you should bring.
A Leather Backpack (the more backpack space the better, there are a few chests you can loot on the way there.
A weapon of some kind, an axe would be best
A teleport potion in case you need to go back (Not super necessary but it’s a long journey. Teleport Potions can be found in chests)
Food (Not necessary as you can find enough mushrooms on the way, but it’s easier to not have to stop and forage)
Dynamite (One is all you strictly need but bringing a spare wouldn’t hurt. Dynamite can be found in chests)
Something to light a fire with (a flint and a rock works just fine)
Once your pack is all sorted make your way to the mines to start out.

Instead of going down into the pit, take the path on the right hand side that leads up and over the mine entrance, that leads to the teleporter. Even further past the teleporter and empty chests above the mines is another path leading to the Rocklands.
The Rocklands
The Rocklands are where the journey starts to get rough. You will see Turabadas (the enemies make out of rocks) all over the place, stray to close and they will attack you. Fortunately they’re not so dangerous in the open because they cant run nearly as fast as you can, and they won’t follow you for very long.
Otherwise the Rocklands are a big series of small hills and mining nodes, just keep going past all of the Turabadas and past the tallest hill, until you come to a section of wall that looks much darker and different than the other walls.

This wall can be destroyed, so here is where your dynamite comes in. Grab some dried grass nearby and put it on the ground, then light it with a flint and rock. Then light the fuse on your dynamite with the burning grass and leave it in front of the breakable rocks before running away as fast as you can. When the dynamite blows up the rocks will be gone and you can continue on.

Next is a small rocky valley full of enemies such as Turabadas and Goteras (The armless tree people). Just continue through the valley and run past them. There’s some pots and crates to break if you like, but they won’t contain anything particularly special. There will be a few paths and ramps for you to walk up, just keep moving on and don’t get caught by the hostile creatures. Eventually you will climb up a path and crest a hill to see this.

The Tarn
This new area is called the Tarn, and wow is it huge. If you’ve never been there before then it might be the biggest wild area you’ve ever seen in A Township Tale! Once you’re done taking it all in go down the path leading off of the mountain you’re standing on. At the bottom are some trees and more Goteras. If you haven’t got an axe with you then take one of the rusty axes laying near them, you’ll need it soon. There is also a cluster of mushrooms, pots and boxes nearby in case you are hungry.
Explore around and soon you’ll find two pathways. One leads into a rocky area and a stone arch covered in vines. There is a chest and some iron nodes behind those vines. The other pathway leads up to the wooden bridge that you can just faintly see in the image above, on the right side between those spires. Guarding that bridge will be one pissed off Turabada.
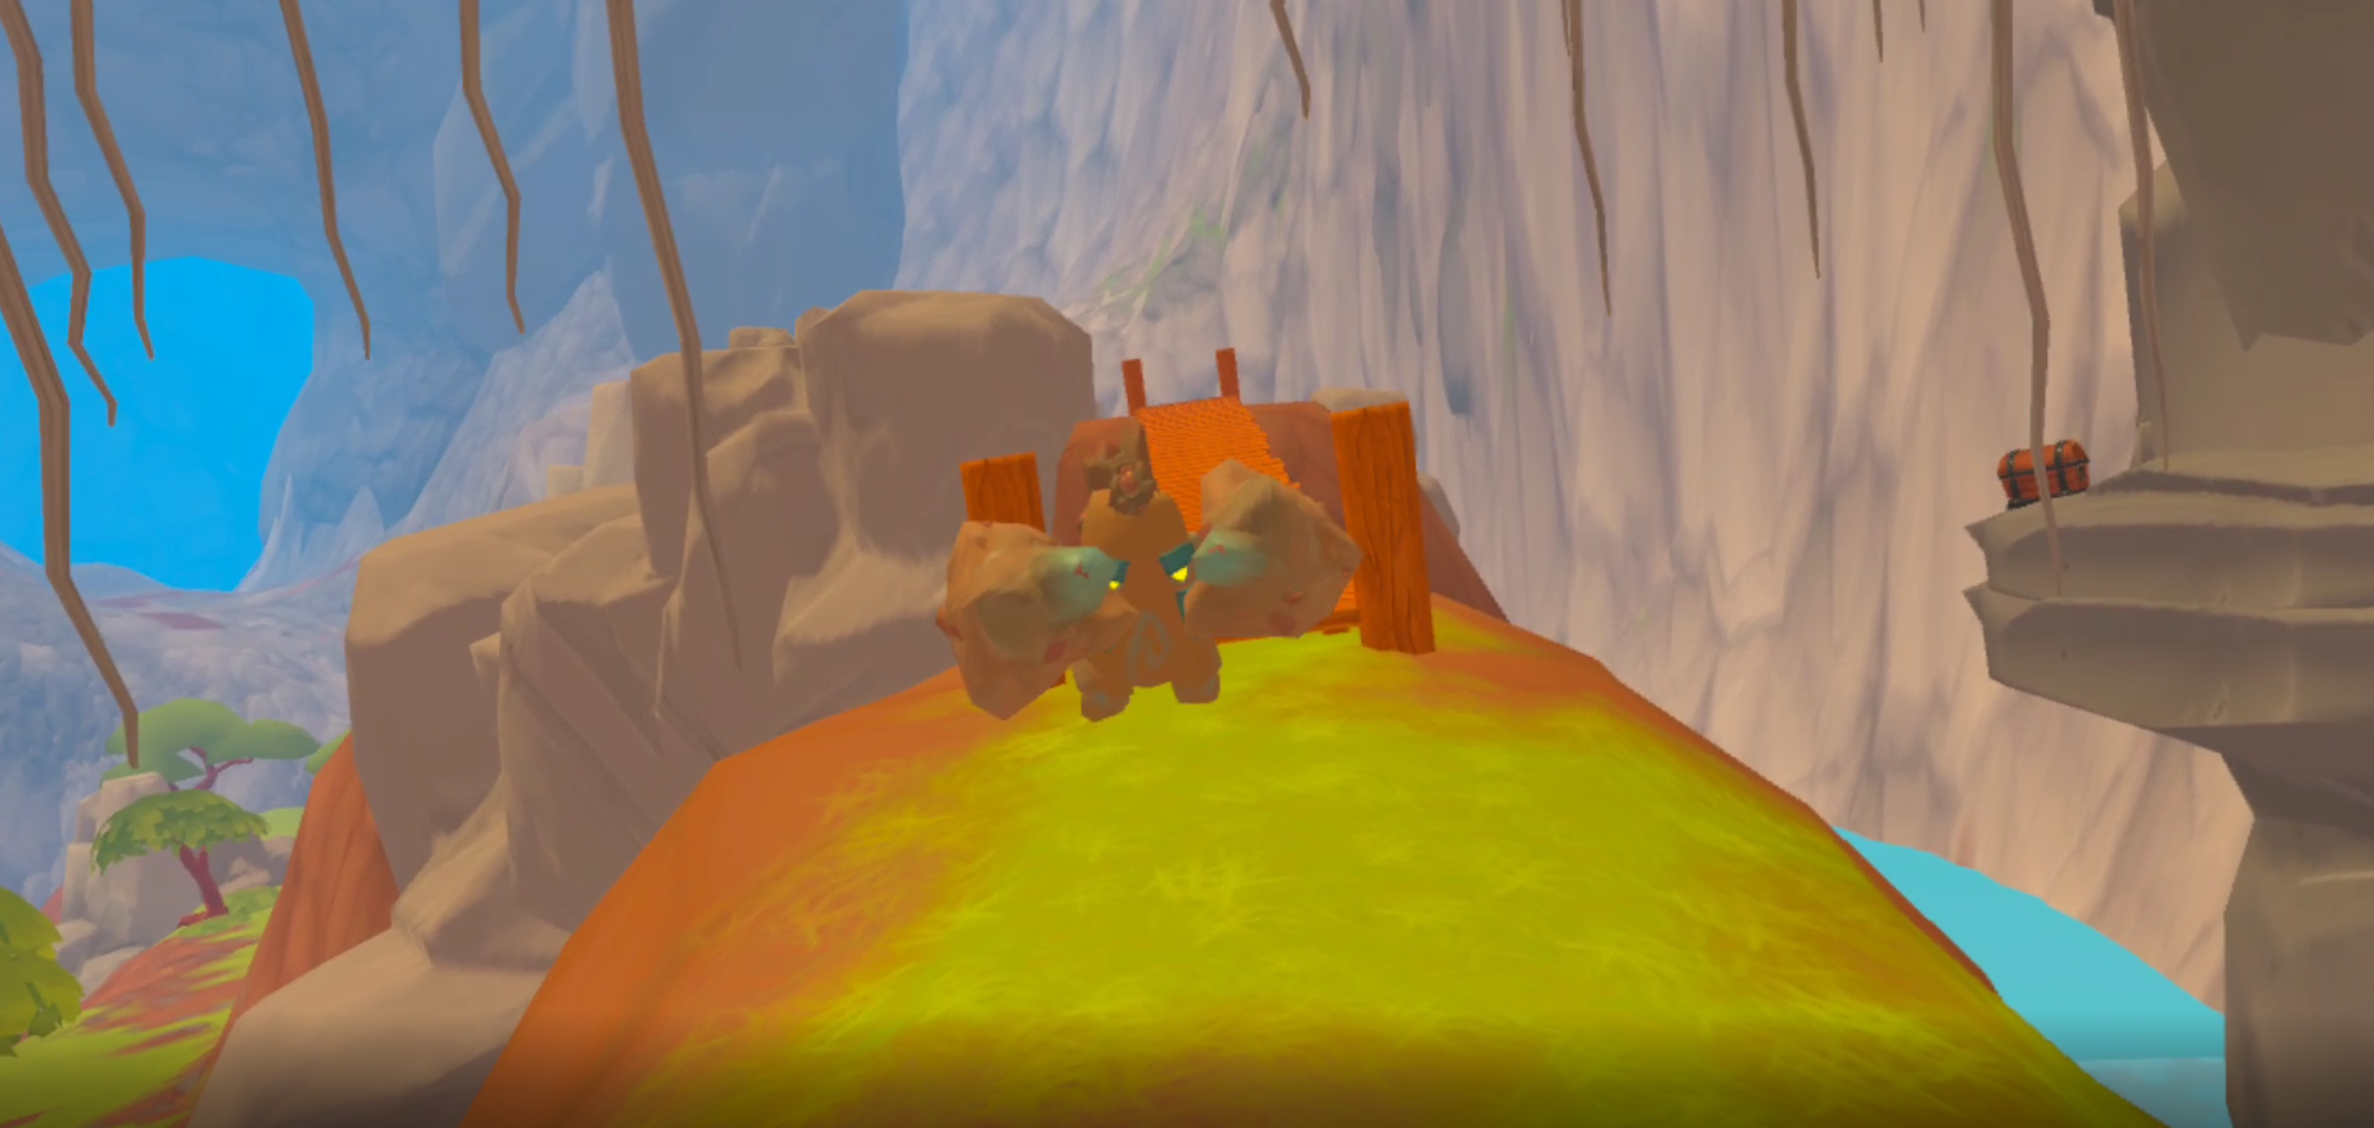
Since there’s not much space to run around this guy, you’ll have to either draw him out and then run around him, or try and squeeze past before he hits you. Now if he does hit you you’ll be slowed down since you’ll count as being in combat, and won’t be able to outrun the Turabada. Don’t panic, you can just beat him in a fight if you want to, or just keep blocking his fists and backing away until he gives up. Since he’s a little guy and it’s a 1 on 1 fight, you won’t have much trouble just defeating him.
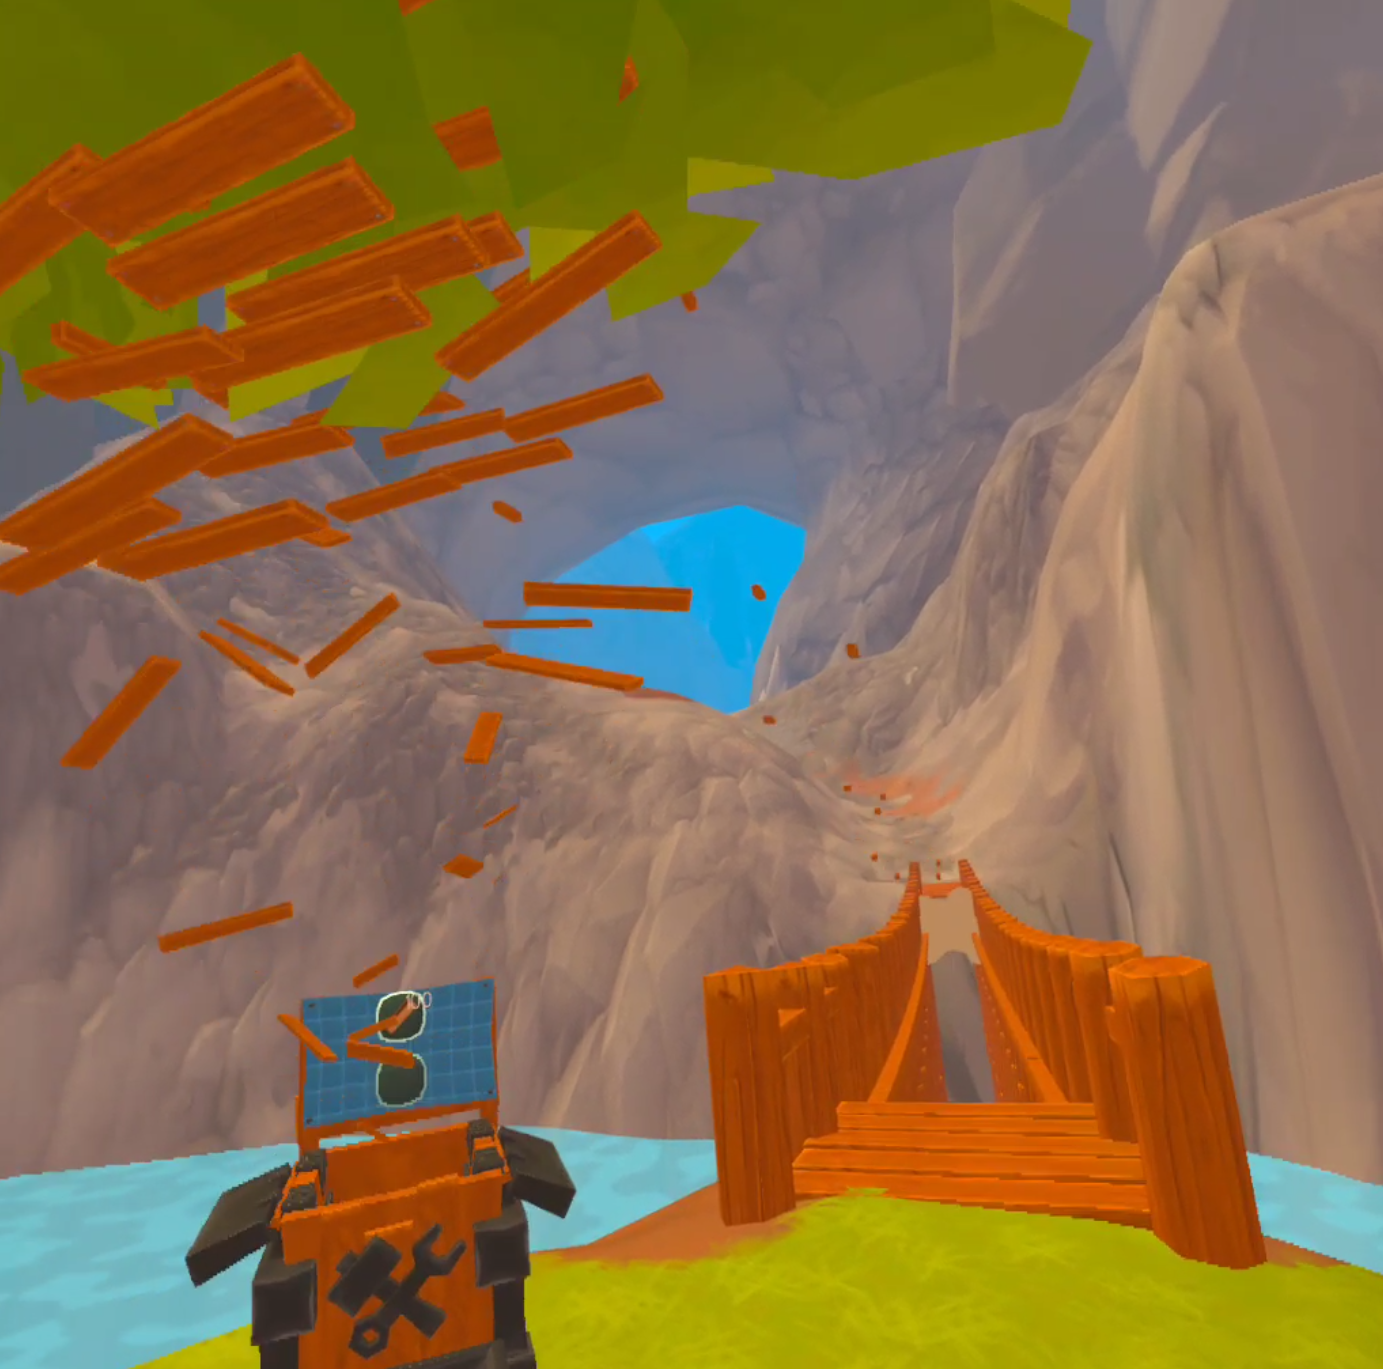
Once you get past that bridge keep going towards the giant rock arch that you can see in the mountainside behind it. You’ll see that there is a gap between the hill you’re on and the path leading to the arch. Fortunately a bridge can be built there with 100 pieces of wood.

Here is where your axe comes in. There are some choppable trees near the unbuilt bridge along with some Goteras. Defeat the Goteras and then chop one or two trees down. You will have plenty of wood to build the bridge. The Goteras also drop wood when defeated, by some combination of tree cutting and Gotera fighting you will easily get 100 pieces of wood and build the bridge.
Climbing Canyon
Cross the bridge to enter the last leg of your journey through the mountains, though that doesn’t mean there won’t be any more danger to overcome. Follow the new path until you come to a big basin or rock, and in the center a bridge leading to and from a wooded grove suspended above the canyon.
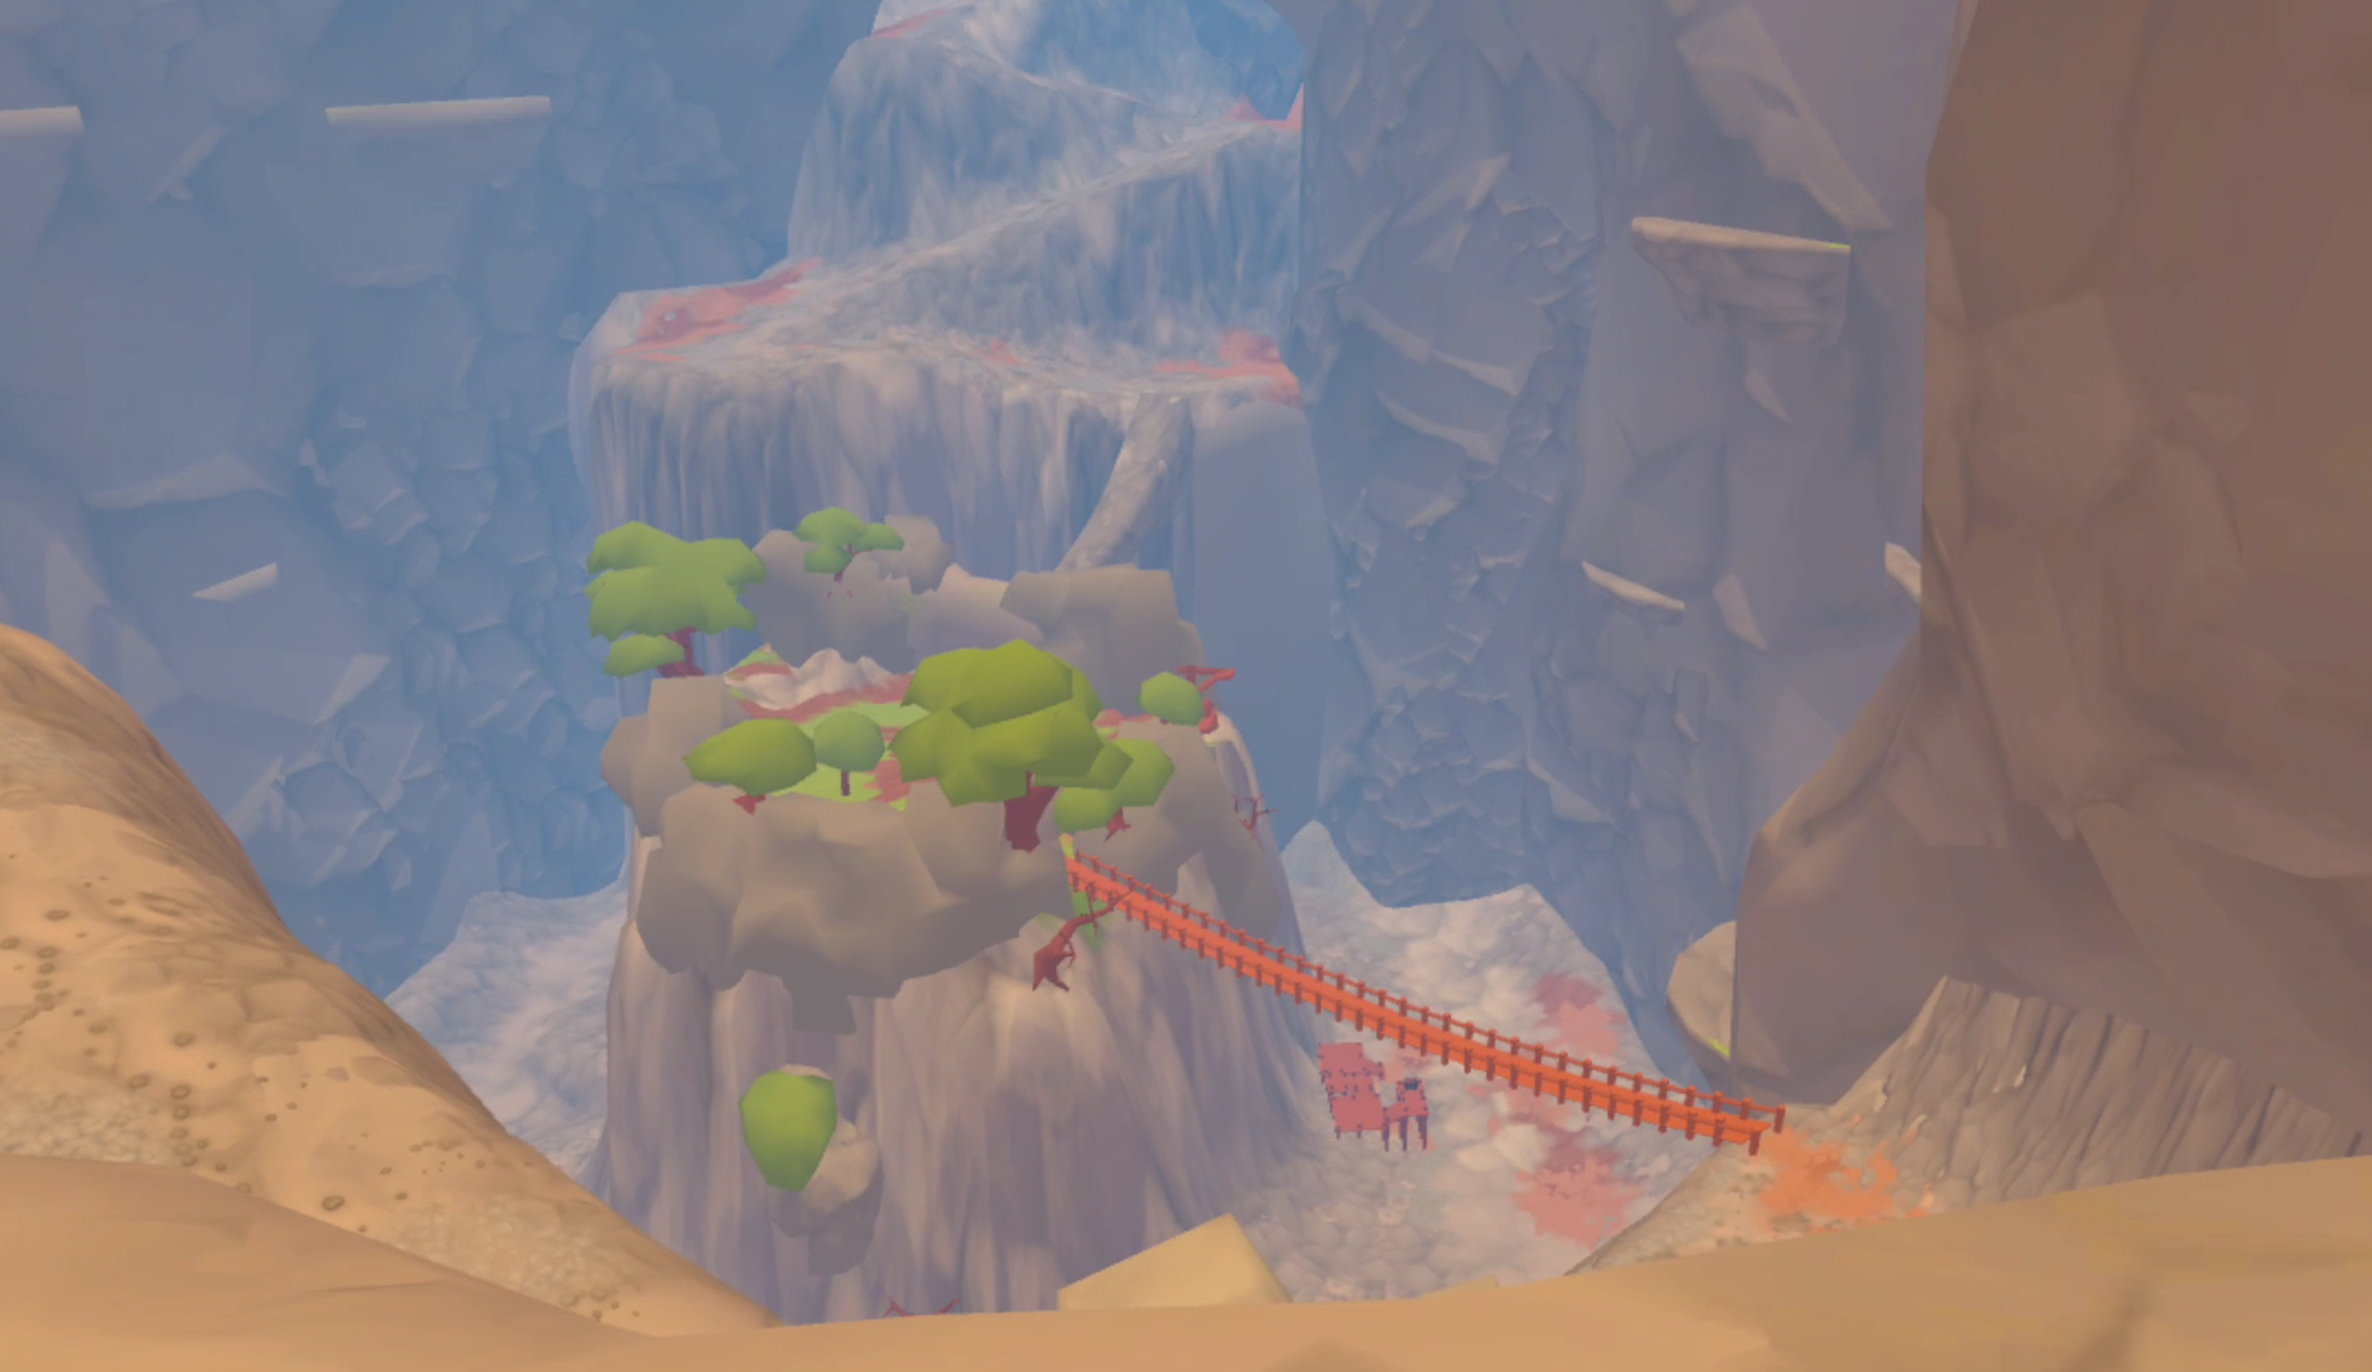
Once you make it down to the bridge you can keep going further down, where there are some chests. There are also more iron nodes to be had around here, though a lot can’t be reached until you complete the climbing tower. To get to the tower you will need to go through the island grove and out via the bridge on the other side. This is the last big obstacle before the Climbing Tower.
Both the bridge into and out of the grove are covered in vines. Normally vines don’t pose much of a problem, the issue here is that once you cut your way into the island, there are a ton of Turabadas inside. They will almost immediately start to chase you.
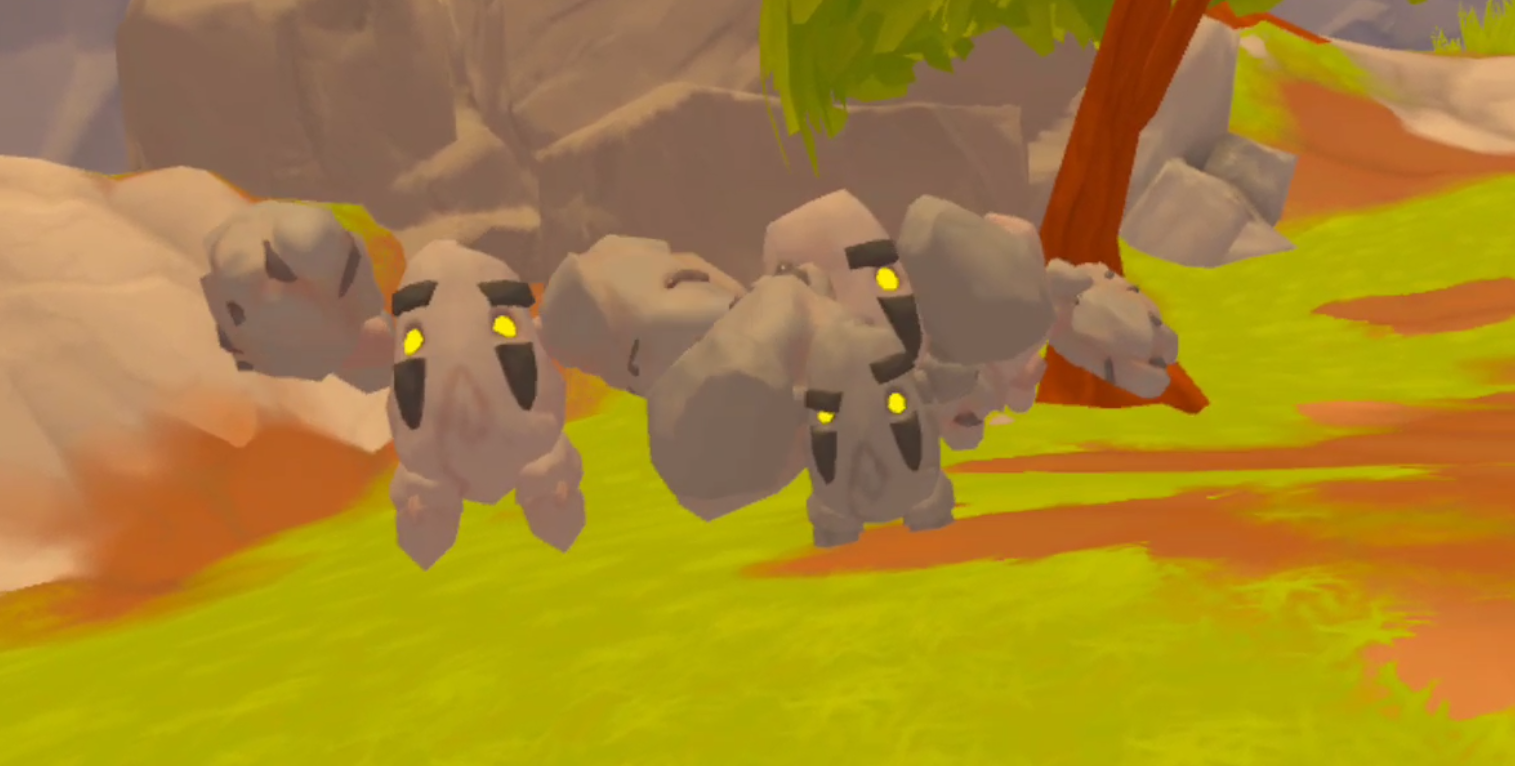
You can’t just outrun them like you normally can, because if you run to the exit from the island, you’ll be blocked by the vines. So you have to try and cut your way through the vines before they catch up with you. Be careful for vines that are overhead, because just a single vine dangling by your head can still block you from running forward. Of course you could also try fighting the Turbadas, but there are several big and tough ones. It would be a very hard fight to win.
Once you are past the island keep going forwards past the other clusters of enemies, pots and crates. You’ll probably start running into Wyrms as well, which pop out of the ground and spit acid at you. They’re even easier to avoid than the other enemies you’ve seen on this journey.
The Climbing Tower
A little further upwards up the path past the island, and you will finally see it. The Climbing Tower.

Once it is in view you can easily tell the way forward. The winding rocky switchbacks of the mountains will give way to a gentle grassy slope leading towards the tower. Just follow it to the entrance in the side of the mountain it is perched on.

Once you’re inside, follow the stairs downward to the beginning of the climbing challenge! Simply place your hand on the button at the central pedestal to activate the climbing tower challenge. Your items will disappear, and you won’t have to worry about food while you are climbing. Then go ahead and get to it, follow the paintings on the walls for hints.
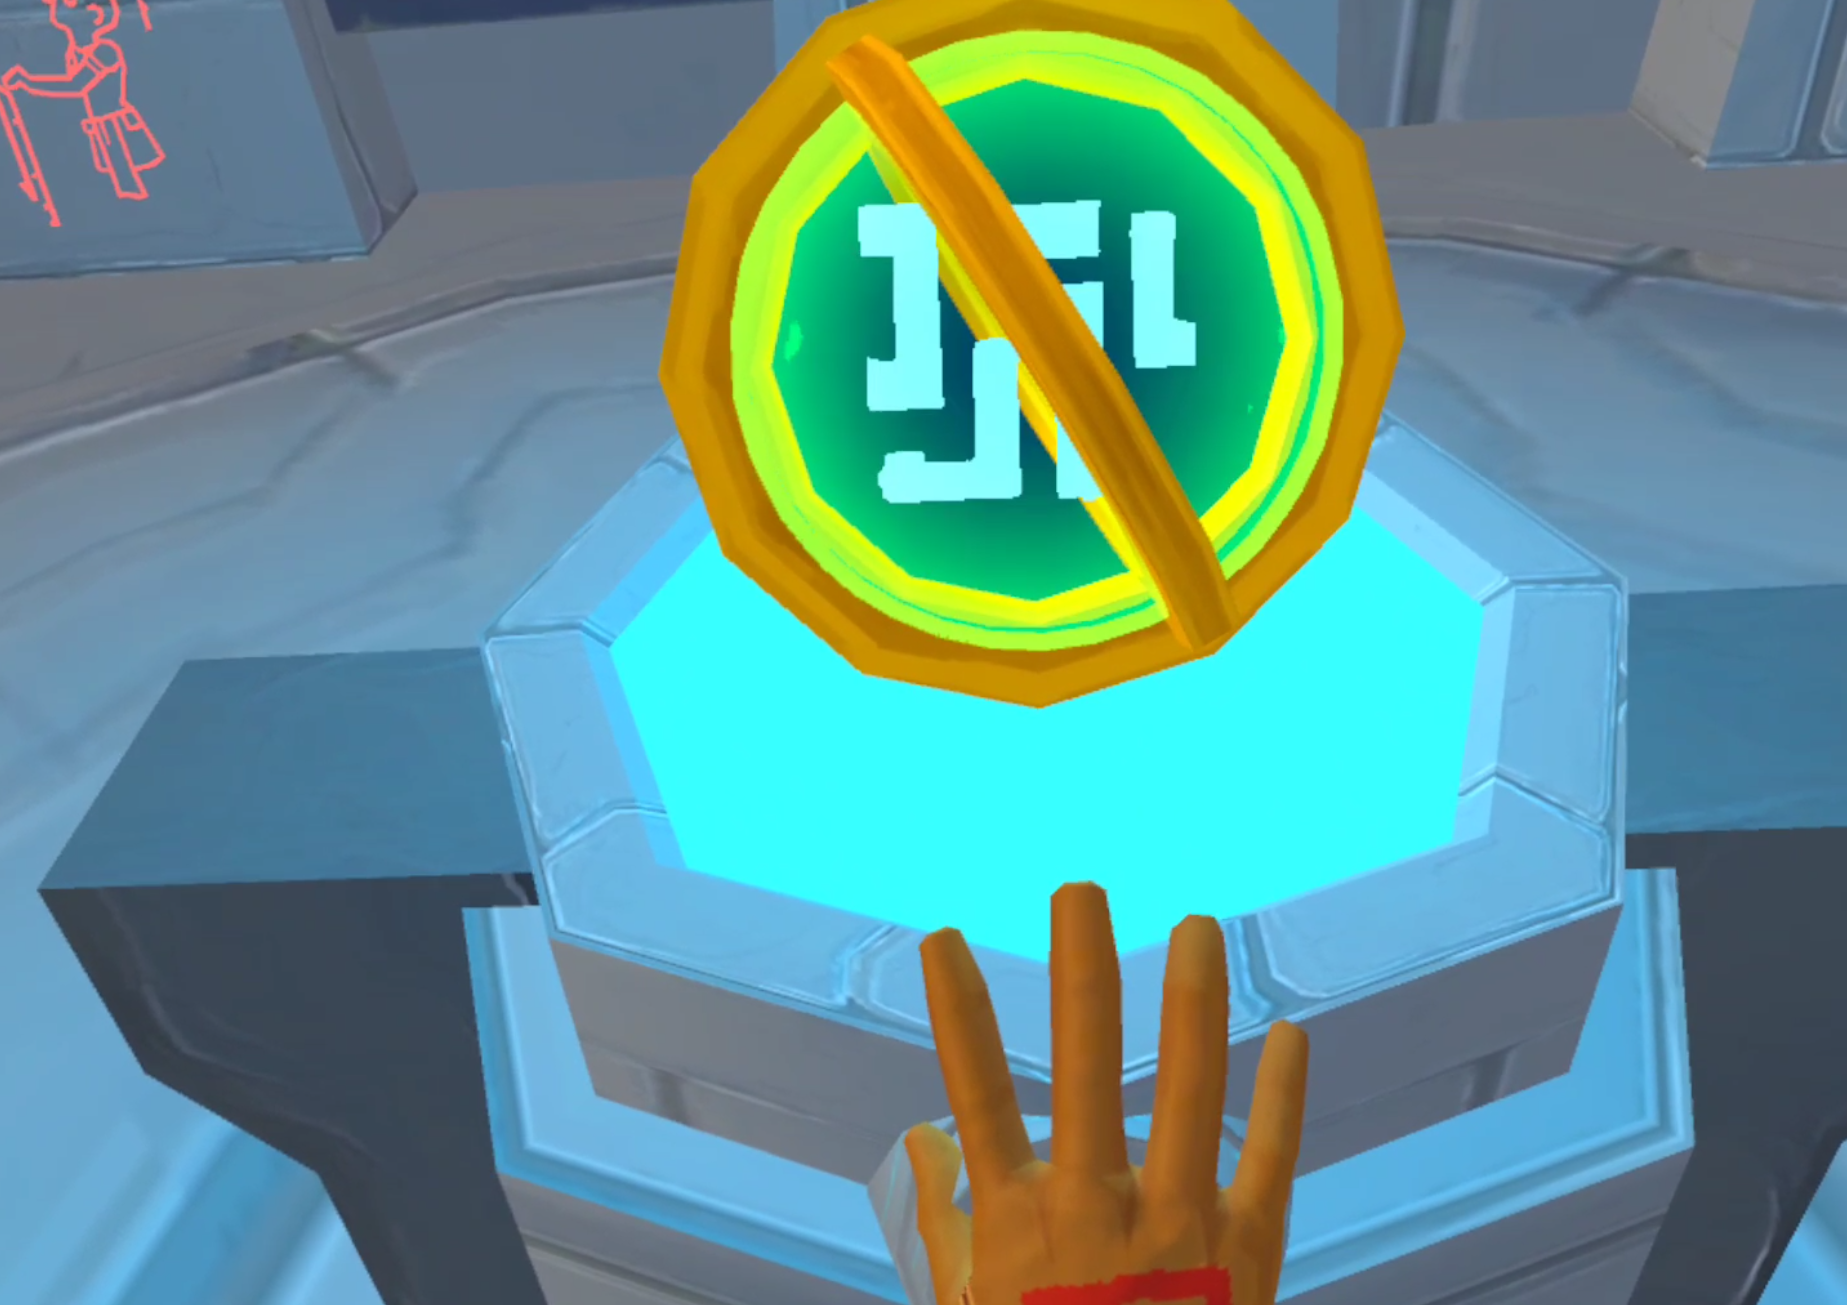
That’s how you get to the Climbing Tower in A Township Tale’s newest Update. Happy climbing!

7 Awesome Battle Talent Weapons Mods on the Quest 2
The Battle Talent mod scene is really taking off, and it’s easier to access mods in this game than ever. More are being added all of the time, and one of the best mod categories in Battle Talent are custom weapons. After seeing what there is on offer for now, we’ve found 5 of the best Battle Talent weapons mods for you to try out. These have that important combination of both being really cool to look at, while also being very fun for you to use.
The Battle Talent mod scene is really taking off, and it’s easier to access mods in this game than ever. More are being added all of the time, and one of the best mod categories in Battle Talent are custom weapons. After seeing what there is on offer for now, we’ve found 7 of the best Battle Talent weapons mods for you to try out. These have that important combination of both being really cool to look at, while also being very fun for you to use.
Halo BR80 (aka Battle Rifle)

Let’s start this list off strong with a true classic from the Halo franchise. The BR80 or Battle Rifle is just as powerful here as a Battle Talent mod as it ever was in any Halo game. While it doesn’t fire in three round bursts anymore, it does have a fully functional scope and a ton of power. While the scope can be a little dark and there’s not many long range engagements in Battle Talent it is still really cool to blow goblins and skeletons away in Virtual Reality with such an iconic video game weapon.

Gum Gun
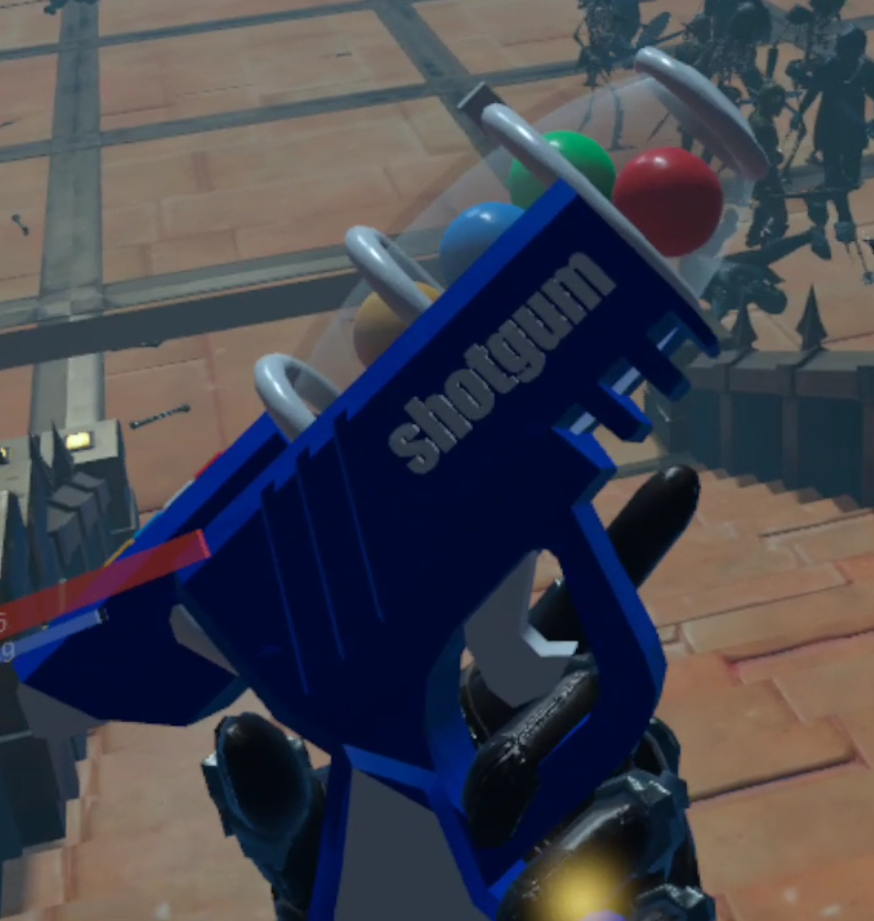
Okay, the Gum Gun may not look the coolest, or even look good in your hand, but it is the funniest weapon Mod out right now for Battle Talent. Instead of bullets it just shoots gum balls that bounce off of your enemies. It is hilarious to see them bob around while getting pelted with balls of gum coming out of this colorful pistol. It’s even funnier to hold down your trigger and charge up the Gum Gun and then releasing the trigger to let loose a powerful stream of gumballs. Knocking Battle Talent’s fearsome looking fantasy enemies off of their feet with this thing is hilarious.

Stormbreaker

Stormbreaker is a very cool weapon that basically amounts to ‘Lighting Axe’. Yep, you don’t have to think much more about it to realize how sweet this mod is. Want to feel like some kind of Viking God? Then this is the weapon for you. The lightning effect follows the blade of Stormbreaker wherever it goes, and it is effective at bashing enemies with the axe blade and the hammer on the back. Not to mention a ton of fun.

The Golden Duke

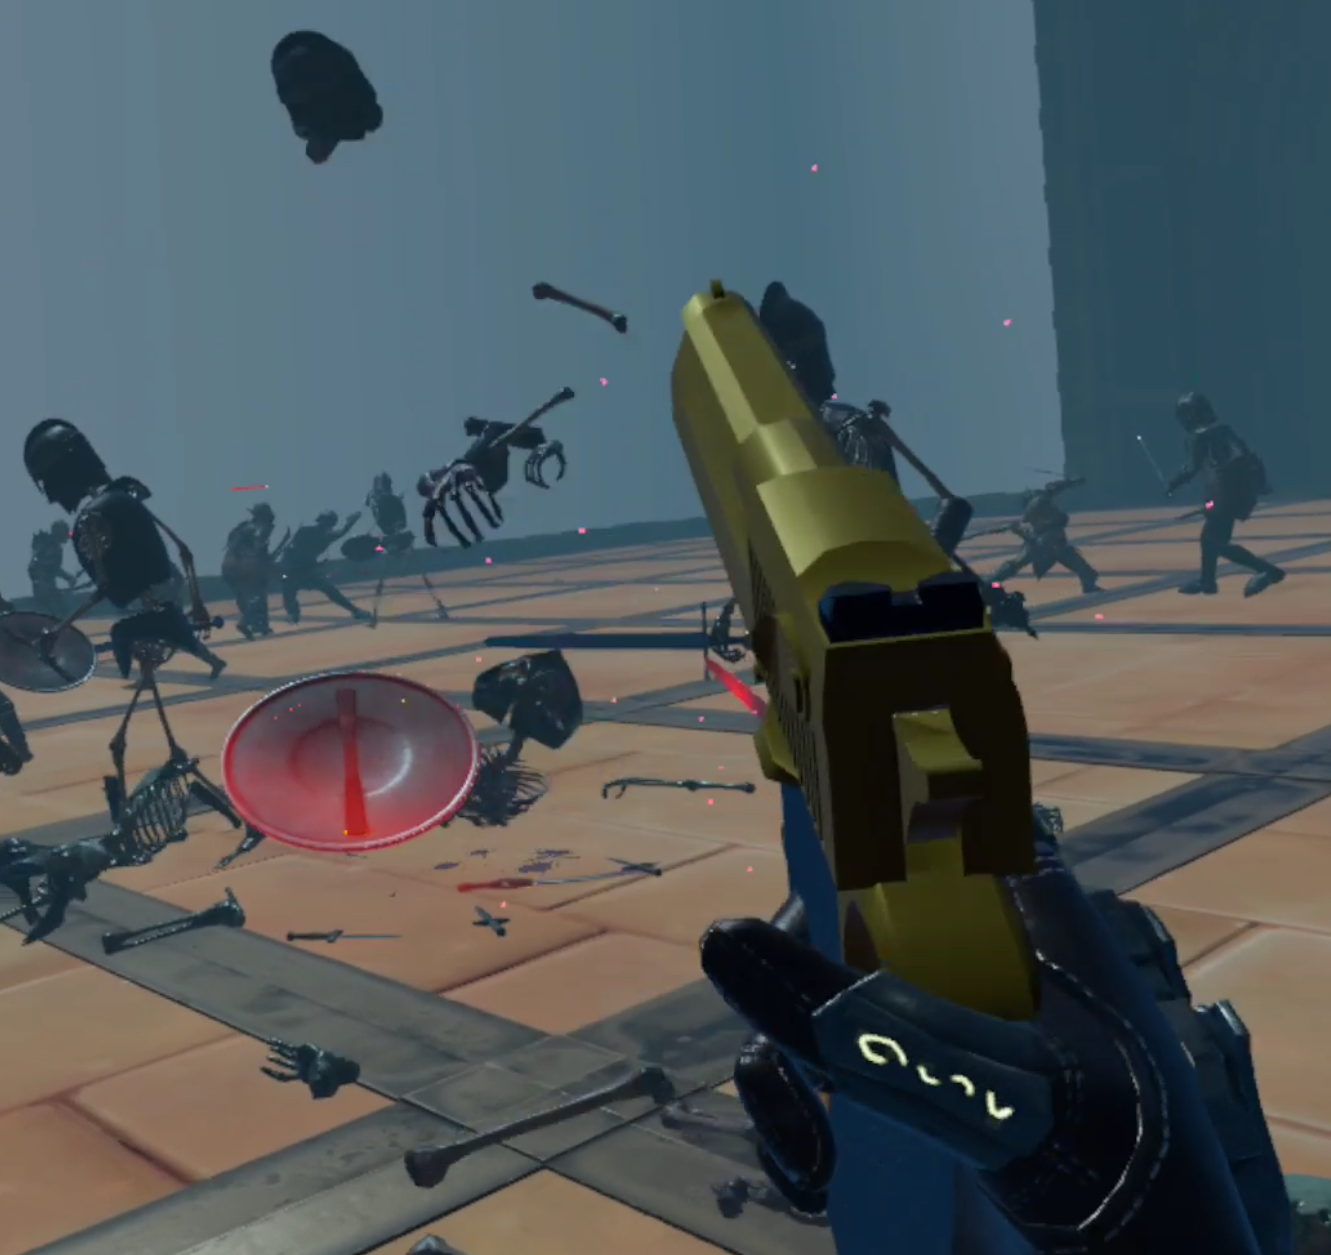
Remember Duke Nukem? Well now you don’t have to just remember, instead you can use his Golden Desert Eagle (aka Deagle) pistols to blow the ribcages off of skeletons. This gold plated puppy is super powerful and super satisfying to use. Even the noise it makes might make you jump the first time you pull the trigger. Whether you’re using just one, or dual wielding them for maximum cool factor, out of all pistols featured in Battle Talent weapon mods, the Golden Duke takes the cake as the most fun.
Energy Sword

Halo has so many iconic weapons that it would be very hard not to include more than one on this list, that’s why we’ve also got the Energy Sword here. What melee weapon from the Halo series would be more fun to use in VR? Honorable mention here to the Gravity Hammer mod, unfortunately that one just didn’t feel very good to use, but the Energy Sword does. That’s because it feels just like you’d imagine it would from using it in any Halo game. It can cut off enemy armor with a shower of sparks and also cut them into pieces so hard that they fly across the arena. Sci-Fi weapons don’t get much better than that.

Witchblade
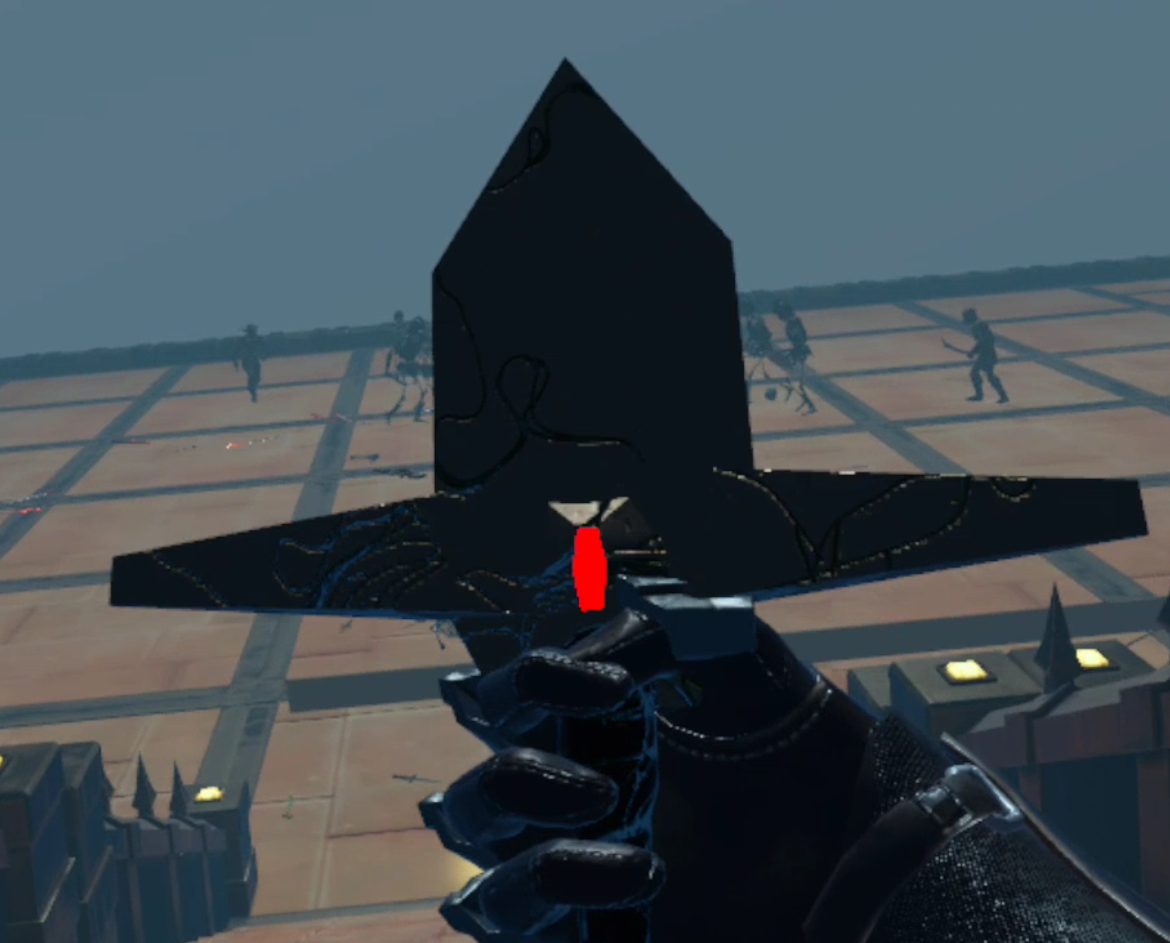
As cool as the Energy Sword from Halo is, it still isn’t as great as this, the most satisfying Battle Talent weapon mod of all, the Witchblade. The Witchblade is basically a lightsaber with a hilt that looks like an ancient sword. Not only does it look like a lightsaber, it feels like one. The Witchblade’s blue energy blade cuts through enemies and armor alike, making it the most effective melee weapon mod on this list, and definitely the coolest. If you want something that feels like a lightsaber in Battle Talent then download this mod. It’s also just the best melee weapon mod of all.

M60 ‘Pig’ LMG
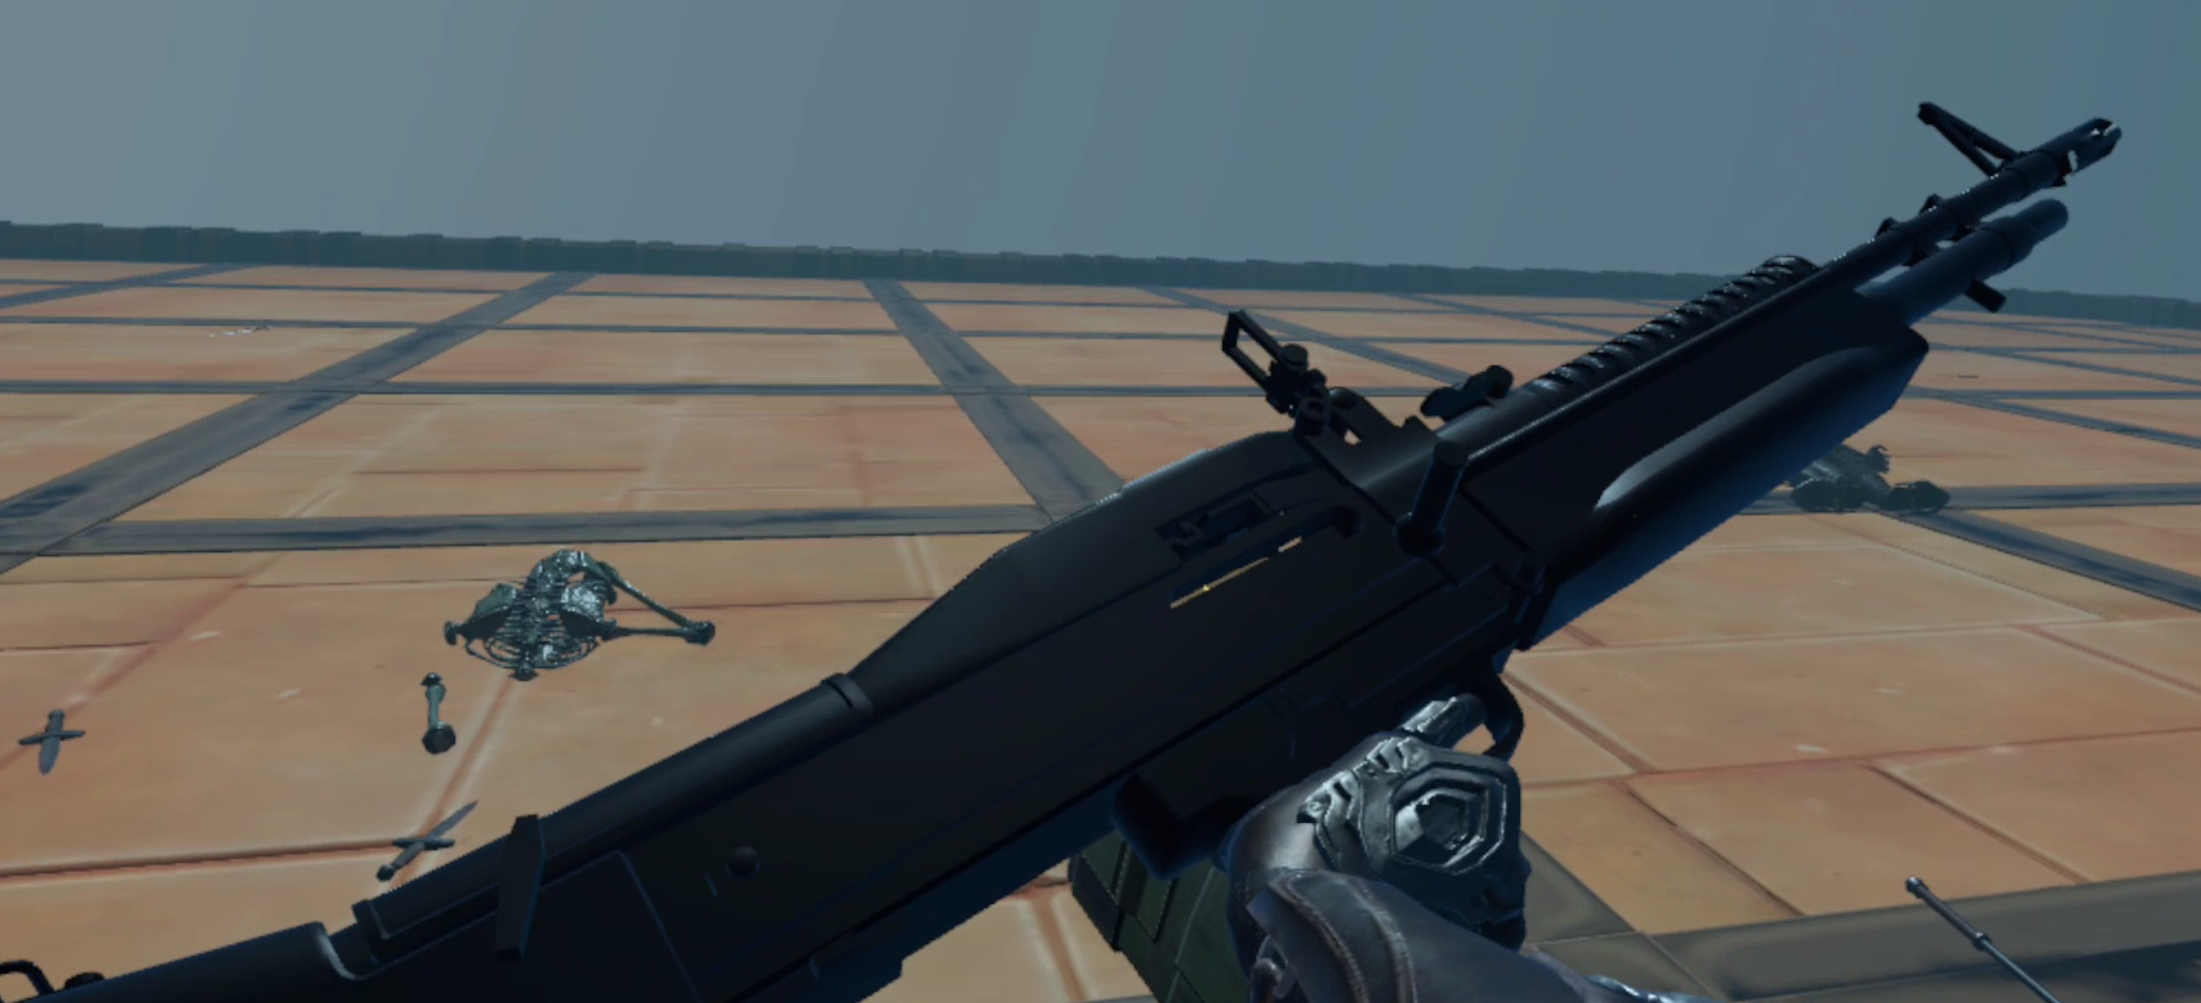
Well if the Witchblae is the coolest and most deadly sword, then what about guns? Well it’s really hard to beat the combination of cool and power that the M60 LMG mod gives you. This big iconic American machinegun feels and shoots just like you’d imagine it would. Hard to control without both hands, and super powerful. Each round from it does incredible damage to enemies, and it has a steady rate of fire that feels good to control as you swing your stream of bullets over your opponents. So basically you can blow through whole crowds of fantasy monsters with this thing without even having to move. If you want ranged destruction than get the M60 ‘Pig’ LMG.

That’s it for the best Battle Talent weapons mods out there right now. Got any recommendations for us to try here at Reality Remake? Leave a comment with your favorite mod and maybe it’ll get a spot on this list!

All Into the Radius VR Armors and Wearable Equipment
Wondering what equipment and armor you can obtain in Into the Radius VR to protect yourself? Well wonder no more, here is the complete list of all armors and wearable equipment in Into the Radius.
Wondering what equipment and armor you can obtain in Into the Radius VR to protect yourself? Well wonder no more, here is the complete list of all armors and wearable equipment in Into the Radius.
You Might Also Enjoy:
The GP-5 Gas Mask

Obtainable at Security Level 2, the GP-5 Gas Mask is a vital piece of equipment due to the protection it grants from the Haze Anomaly (also known as the Gas Anomaly) as well as its general anomalous protection. In fact wearing the Gas Mask is the only way to decrease the damage that anomalies do to you.
While this is useful, some anomaly clusters are completely covered with Haze Anomalies, the big green clouds of gas. Stepping into one of those clouds without a Gas Mask on will quickly cause you to suffocate to death on the toxic gasses. This makes buying and carrying a Gas Mask basically mandatory if you want to get those sweet artifacts, and also makes the Gas Mask the most useful Armor in the game.
The only downside to the GP-5 Gas Mask is that wearing it obstructs your vision to a little hole on each eye, just like you were wearing an actual gas mask and had your whole face covered except for the eyeholes. Wearing it also makes your breathing sound a lot louder, to the point that it is distracting and can conceal the sound of nearby enemies. This means that the Gas Mask is best saved in your backpack until you need it.

The Gas Mask and helmet cannot be worn at the same time. The Gas Mask can only be repaired via the repair bay in the trailer at your base.
The SSH-40 Helmet

Obtainable at Security Level 3, the SSH-40 is a Steel Combat Helmet that gives you some protection from physical damage, aka the bullets and strikes of enemies you find out in the Radius. While not as universally useful and required as The Gas Mask, the SSH-40 Helmet is a great piece of armor that can easily save your life with its damage reduction.
Especially areas full of firearm armed Mimics like Pobeda Factory and Kolkhoz Zarya become significantly easier to traverse when you have a Helmet equipped. Even on Normal difficulty its armor alone can keep you alive when you otherwise wouldn’t make it.

While the helmet does slightly obstruct your vision by its brim taking up a little bit of the top of your screens, there is no other downside to wearing it constantly. The Helmet and Gas Mask cannot be worn at the same time. The Helmet can only be repaired via the repair bay in the trailer at your base.
The Head Lamp

Obtainable at Security Level 2, the Head Lamp is a piece of armor that is worn on the head, but does not prevent you from wearing other headgear like the Gas Mask and Helmet do. In fact you wouldn’t ever need to take it off. The Head Lamp doesn’t need to be repaired or removed to put on armor like the Helmet and Gas Mask. Still, you can remove it from your head if you like.
To turn the headlamp on after putting it on your head just put your hand up by your head and pull the trigger. The Light from the Head Lamp is white like the flashlight, and has about the same level of illumination. The biggest strength of the Head Lamp is that the light it gives off follows where you turn your head to look. This coupled with the fact that you no longer need to use a body slot to carry a light makes it an extremely useful purchase.

There is really no reason not to buy a Head Lamp to free up your hands and body slots in dark areas.
The Army Bulletproof Vest
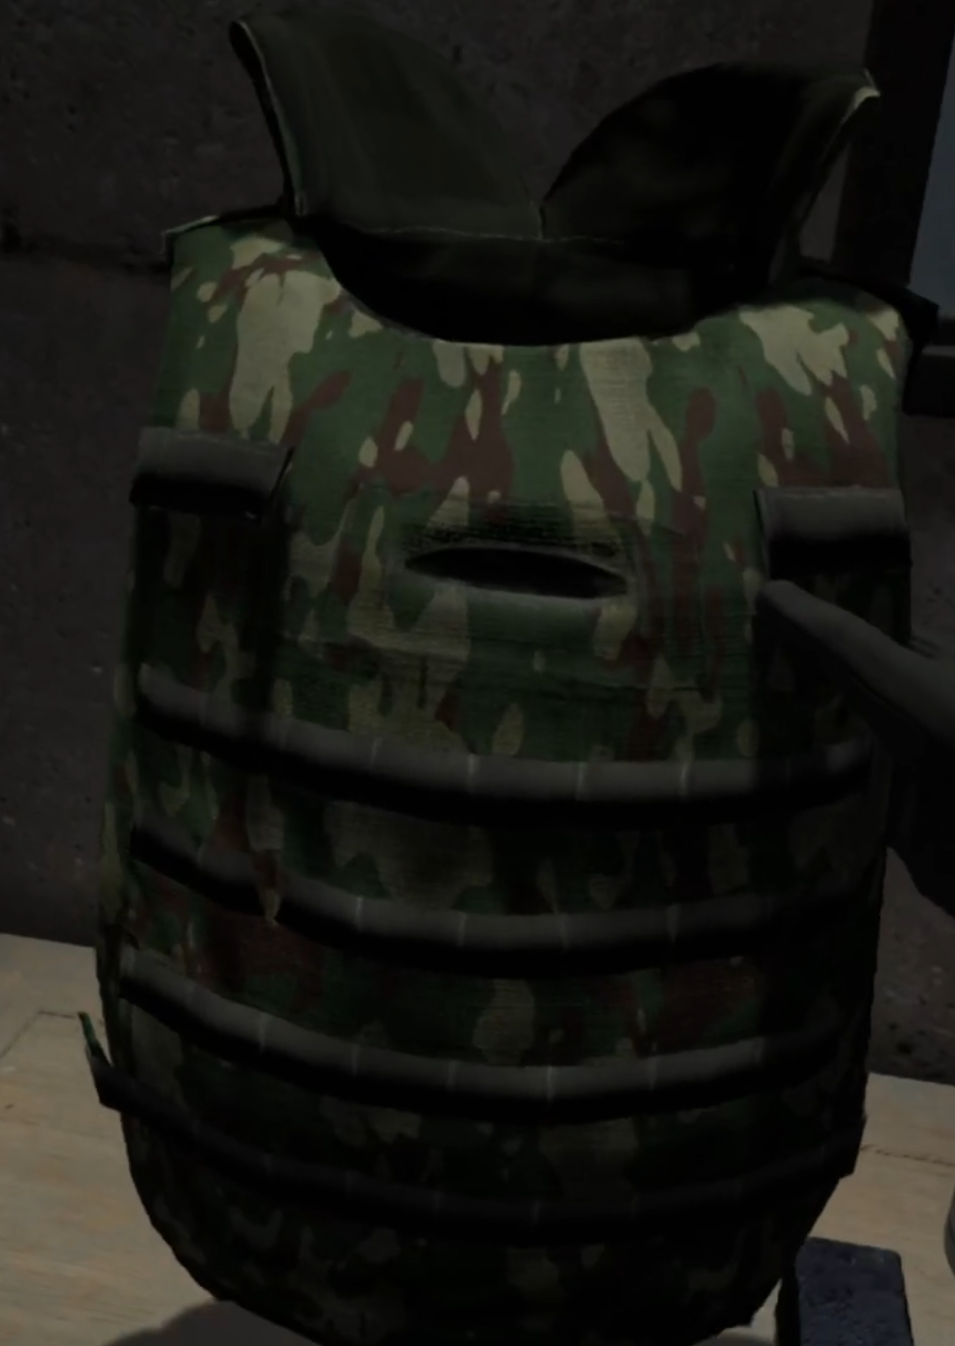
Obtainable at Security Level 3, the Army Bulletproof Vest is the only armor that can be worn on your body, and is the cousin of the SSH-40 Helmet. While it is heavy this vest will reduce incoming damage from enemy entities even more than the Helmet does.
Just as with the helmet the Bulletproof Vest can be a lifesaver in areas later in the game that are littered with heavily armed and armored mimics. Even better the Army Bulletproof Vest does not obstruct your vision in any way or take up space that can be used by other armors. You can see it on yourself while wearing it, but that isn’t really a downside.

This vest does weigh a bit, but its ability to keep you from dying in a gunfight more than outweighs this drawback. Wearing a Vest and Helmet together is highly advisable once you can do so. The Vest can only be repaired via the repair bay in the trailer at your base.
You Might Also Enjoy:

The Walking Dead Saints and Sinners Walkthrough and Guide - Part 1 - The Graveyard
Stuck in The Walking Dead Saints and Sinners? Wondering where to go next? Maybe you just like to see what is in store for you before you get there, or want to look back and see if you missed anything in The Walking Dead: Saints & Sinners. Well don’t worry we’ve got you covered with this complete walkthrough.
Stuck in The Walking Dead Saints and Sinners? Wondering where to go next? Maybe you just like to see what is in store for you before you get there, or want to look back and see if you missed anything in The Walking Dead: Saints & Sinners. Well don’t worry we’ve got you covered with this complete walkthrough.
This article will detail how to progress through the main story missions as quickly as possible, with a couple of guiding tips thrown in here and there to make your adventure smoother. Only those recipes that are convenient to get when doing a task for the first time are included. For a full list of all recipes in The Walking Dead: Saints & Sinners, check out our recipe guide article. Spoilers will be as light as possible, but there will be story spoilers by necessity in this walkthrough, but there won’t be any explanation of what is going on in the story beyond what is necessary to make the walkthrough make sense.
All Walkthrough Parts:
The Walking Dead Saints and Sinners Walkthrough and Guide - Part 1 - The Graveyard
The Walking Dead Saints and Sinners Walkthrough and Guide - Part 2 - The Shallows
The Walking Dead Saints and Sinners Walkthrough and Guide - Part 3 - Via Corolla
The Walking Dead Saints and Sinners Walkthrough and Guide - Part 7 - Old Town and Another Stash
The Walking Dead Saints and Sinners Walkthrough and Guide - Part 8 - Rampart
The Walking Dead Saints and Sinners Walkthrough and Guide - Part 9 - The Shallows Again
The Walking Dead Saints and Sinners Walkthrough and Guide - Part 10 - Bastion and The Reserve Key
The Walking Dead Saints and Sinners Walkthrough and Guide - Part 11 - The Reserve and the Ending
Tutorial and Introduction
The tutorial is well… a tutorial. Everything you need to do will be explained as you do it. In case you are wondering, items from the tutorial will not carry over to the main game, so go nuts. Oh, and make sure to use the tutorial guy as target practice at the end, it is a long standing Saints and Sinners tradition.

Now Henri the old man tells you all about New Orleans, the Reserve, The Tower, and The Reclaimed while you have a nice relaxing boat ride. At the end walkers will grab your boat and start pulling it, and you, into the water. A 9mm handgun will slip out of the backpack in front of you when this happens. Feel free to pick it up and shoot a couple of walkers. It doesn’t have many bullets in it, and it doesn’t matter if you hit the walkers or not. Either way you will wake up in front of the Cemetery Gates.

Welcome to NOLA
Now the game begins in earnest. You will start facing the gates of a cemetery, with nothing but flooded streets behind you. Go ahead through the gates, and pick up your very first weapon next to a dead walker.

Ahead you will see a windowsill with a corpse draped over it. Don’t climb through just yet. Search the area to the left of the windowsill. There should be some junk on the ground. When you are in the graveyard grab as much junk as possible. It’s all basically free crafting materials that won’t cost you a day of exploration to acquire. You won’t be coming back this way any time soon, so get them now.
Now climb over the windowsill so that you can be greeted by your very first walker!
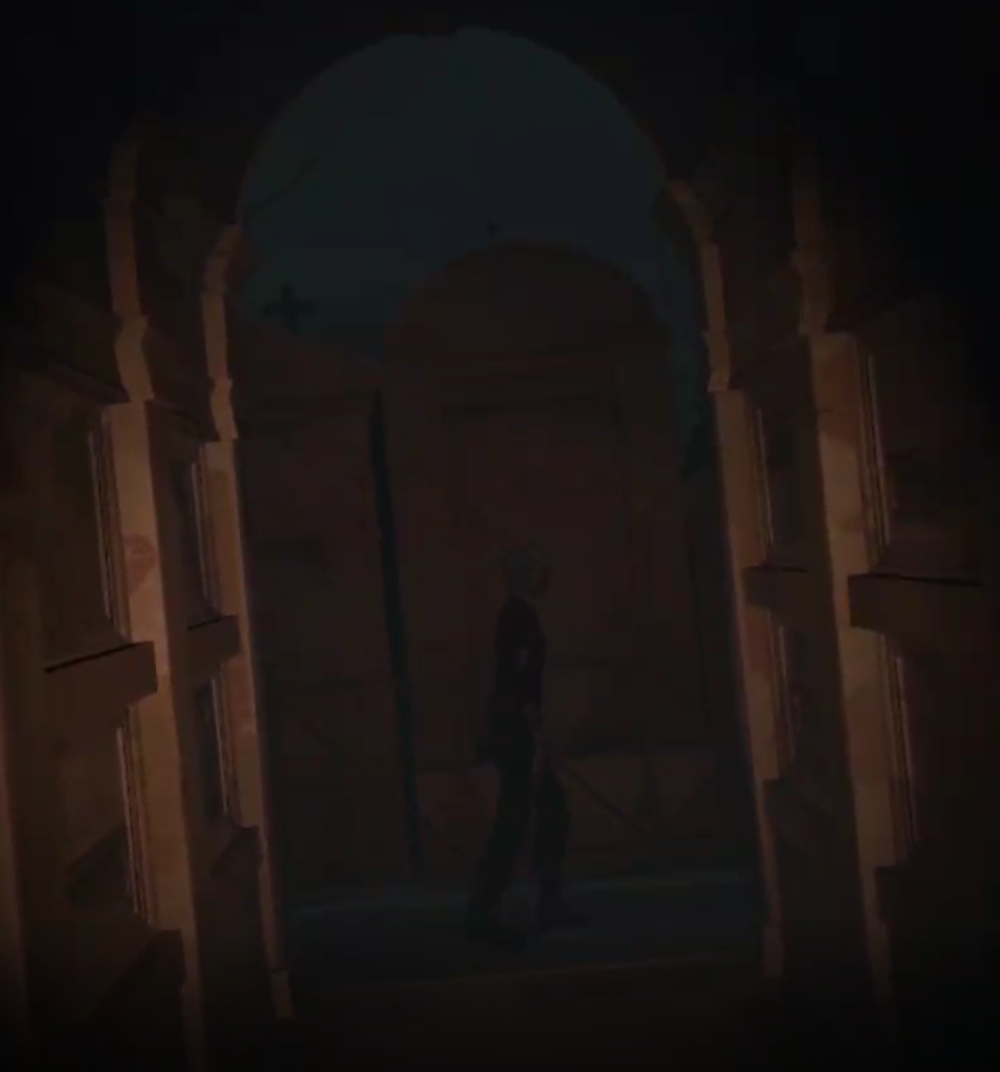
You can stab this one with your new screwdriver easily, if you give it a moment to pass by it’s back will be to you. If you’re having trouble cutting through the skull then try starting the stabbing motion with your arm further away, and moving your hand through the skull. The wider the range of motion the better. You will get the hang of it in time. You can also make connecting your strikes easier by grabbing the walker by the head with your free hand and holding it still to stab it with your other hand. Be careful though, this will drain your stamina more quickly.
Once the walker is dead check the area it was walking away from. You’ll see a door. Inside you will find another walker, but also a fire ax, as well as some other goodies lying on the floor. Scour the area and collect them all before moving back to where you killed the first walker and look ahead and to your right. You will see a gate.

Go through the gate to find another walker and some more free loot. Collect it all and then exit straight out of the gate where there are some fresh bodies and a letter on the ground. Then take a right through some sarcophagi. Kill another singular walker in your way, and go through another gate to find a battlefield full of bodies.

Past the bodies you will find Henri. Talk to him, shoot him, do whatever you want. It doesn’t matter. There’s another letter on the ground near him if you are interested. Once you are done with the old man keep going past him to find your new home in a sweet bus.

Scour the surrounding area for supplies. You will find some arrows on a table in front of the bus, and the three crafting tables will also have some free things, like bullets on the gun crafting table. Around the corner you will find a candle lit archery range with a bow and another free arrow. Don’t go past the archery range on this side of the graveyard yet, there will be plenty of opportunities to go there soon enough.

If you go to the left of the bus towards the dock there is a box of stuff on the dock, and inside the bus you will find a .30 revolver in perfect condition, as well as a shiv in perfect condition. There are some notes from Henri on the same table. Read through them and you will get your first task, to get a microphone for the radio. For now you can hook the battery up to it.
Scrap all of the things you found in the graveyard and go to bed. Your screwdriver is probably about to break by now, so you may as well scrap that. The bow in the archery is also in very bad condition. You may as well scrap that too, it only has a couple of shots in it. Once your inventory is clear go to sleep.

Day 2: The Shallows
Every day in New Orleans will be slightly harder than the last one. The loot will get worse and worse, and the walkers will become more plentiful. Since your trip to the shallows will be on Day 2, there won’t be many walkers, and the loot will be top notch. You won’t really need to bring your revolver, as there won’t be any human enemies, though a firearm can be useful if you get cornered by too many walkers, or run out of stamina.

You will definitely need to at least bring your new Shiv. You will be able to find other melee weapons in the Shallows, and some medical supplies. While generally you don’t want to rely on what you find during the day, Day 2 will be pretty easy, just a few walkers here and there.
Also make sure to check your stamina gauge before leaving. If your maximum stamina is low then you need to eat. Make sure to only eat food you make yourself at the survival workbench unless it’s an emergency, all other food will damage your maximum health. You can also make some Nutri Stew at the survival bench and bring it with you to the Shallows to eat during your time there. You could also bring a bandage if you want to play it a little carefully, but you will find some in the Shallows, and every item you bring and don’t use is one less inventory slot for loot.
Once you’re ready to go, head on over to the boat, pick up the map in one hand, point to the Shallows with the other and press trigger.

Want to find out what happens in the shallows? Need a guide on how to complete your first mission and retrieve the microphone? Then head over to Part 2.

The Scavenger Mod Makes Into the Radius a Whole New Game
Chances are if you've already played Into the Radius you've picked some favorites. Bet you're used to running an M9 on your hip, maybe an OC-33, or even a Desert Eagle just for style. Maybe you want to try out some different long arms, but you'd never use a double barrelled shotgun once you hit security three. You know what you like and you know what works for you. Well what if, just what if, you had to throw all of that out the window? What if instead of being able to just get whatever you want, you have to take whatever you can get?

Chances are if you've already played Into the Radius you've picked some favorites. Bet you're used to running an M9 on your hip, maybe an OC-33, or even a Desert Eagle just for style. Maybe you want to try out some different long arms, but you'd never use a double barrelled shotgun once you hit security three. You know what you like and you know what works for you. Well what if, just what if, you had to throw all of that out the window? What if instead of being able to just get whatever you want, you have to take whatever you can get?
So Many Guns
Imagine all the weapons you never tried because you didn't have the money for them or because another one just looked better. Now imagine having to use that weapon because it's literally the only one you still have ammo for. That's the experience of this mod, the experience of desperation, of the scavenger life. Get ready to throw out half of what you knew about surviving in the Zone, because the Scavenger mod is the best way to replay Into the Radius VR.
In this Mod the shop is disabled so you can't buy anything with your cash. So as you complete the main missions and explore the Pechorsk Zone you'll have to rely completely on what you find. Forget hunting for artifacts, it's all about hunting for those sweet sweet silver crates now. Money isn't totally useless though, you can still buy repairs and upgrades at REALLY inflated prices.

So Much Loot To Find
But wait! This isn't just some masochistic mod meant to make the game super hard. I mean just start a Realistic Ironman playthrough if you want that. Nope, scavenger mod gives you what you need to survive. You just have to find it. Compared to the stuff you can scavenge in unmoded Into the Radius, you find some crazy things in the Scavenger Mod. Gas Masks, Ammo Cases, sick guns with mods already on them, way more than vanilla Into the Radius. The thing is, the loot is random, so you might get a really nice pistol... but no magazines to load it with. Still, you'll find guns in crates that you never would without the mod, and you can build as varied an arsenal as you could with the store. You just have to go out and find it. As always, the harder the map you're on, the better the loot.

Use What You Can to Survive
So now the name of the game is adaptability. You won't get your favorite thing immediately. You may or may not even find armor or cleaning supplies for a while. The flip side is the thrill of the find. The scavenger experience. You'll know what I mean when you practically jump up and down with joy because you found a cleaning rod. Having to adapt to what weapons and ammo you find is a great way to freshen up the Into the Radius experience. You might find yourself relying on weapons you would never use if you had access to the shop. While the TT-33 pistol isn’t a big upgrade from the Makarov, you might find yourself using it because you’ve got nothing better, or nothing else you have ammo for.
This goes for all sorts of equipment. Without easy access to a headlamp, the humble flashlight becomes much more important. Of course the guaranteed weapons in stashes from vanilla are still around, but repair fees are pretty big now and they might not be in the best of shape when you get them.

So if you're a Radius hoarder, you'll love the Scavenger mod for a replay of Into the Radius. Give it a shot, you won't regret it. Tried the Scavenger mod already? Then leave a comment with what you thought about it.