


7 Best VR Survival Games for Meta Quest (And PCVR)
Something about Virtual Reality just makes for great Survival Games, especially on standalone platforms like the Quest 2. Maybe it’s the feeling of actually being inside of the world you’re playing in, or using your actual hands to use the tools you need to keep yourself alive. Whatever it is you’d be crazy not to try VR Survival Games on the Quest 2, it is one of the best genres to experience in Virtual Reality. Here are some of the best VR Survival Games on the Quest 2 to consider getting.
Something about Virtual Reality just makes for great Survival Games, especially on standalone platforms like the Oculus Quest 2. Oh, and if you’re here for PCVR games then you’ll find that most of these are also available on Steam.
Maybe it’s the feeling of actually being inside of the world you’re playing in, or using your actual hands to use the tools you need to keep yourself alive. Whatever it is you’d be crazy not to try VR Survival Games on the Quest 2, it is one of the best genres to experience in Virtual Reality.
The Survival Game genre has seen a massive boost in recent years with many great flatscreen games coming out like Valheim and Sons Of The Forest, and luckily some studios have also been focusing on this genre in Virtual Reality. More and more VR Survival Games have been coming out over the years, and as more are added to the Quest platform we’ll also be adding them to this list here.
So here are the best VR Survival Games on the Oculus Quest 3 and Quest 2.
You May Also Enjoy:
The Walking Dead: Saints and Sinners Chapters 1 and 2 - VR Zombie Survival Games
The Walking Dead: Saints and Sinners Logo
Well known as one of the greatest VR game series out there, The Walking Dead: Saints and Sinners and its newest iteration The Walking Dead: Saints and Sinners - Chapter 2: Retribution are knockout Zombie Survival Games on the Quest 2 based in the universe of The Walking Dead.
If you are even neutral on the concept of a zombie apocalypse you should play these games. Not only are there a ton of zombies (or rather walkers) to dispatch with one of the most straightforward yet elegant melee combat systems in VR survival gaming, but there are also human NPCs to get into firefights with and advance a very compelling story.

In this VR Survival Game there are a ton of zombies and people to fight with a variety of melee weapons and firearms
Most importantly to fans of VR Survival Games, not only will you have to fight to survive, but you will have to scavenge the ruins of New Orleans for materials to craft weapons, medical supplies, and food. Each day you will find less and less as supplies and materials from before the outbreak become scarcer and scarcer.
You’ve probably already heard of The Walking Dead: Saints and Sinners, and that’s for good reason. It is one of the few VR games to combine a dangerous open world with a variety of secrets and systems to draw you into the gameplay, as well as a great story.
So if you’ve ever wanted to see how well you would do surviving in a zombie apocalypse, there’s really no better VR Survival Game I can recommend to you than The Walking Dead: Saints and Sinners and it’s sequel. It’s got fantastic combat, heart pounding moments, and compelling characters.
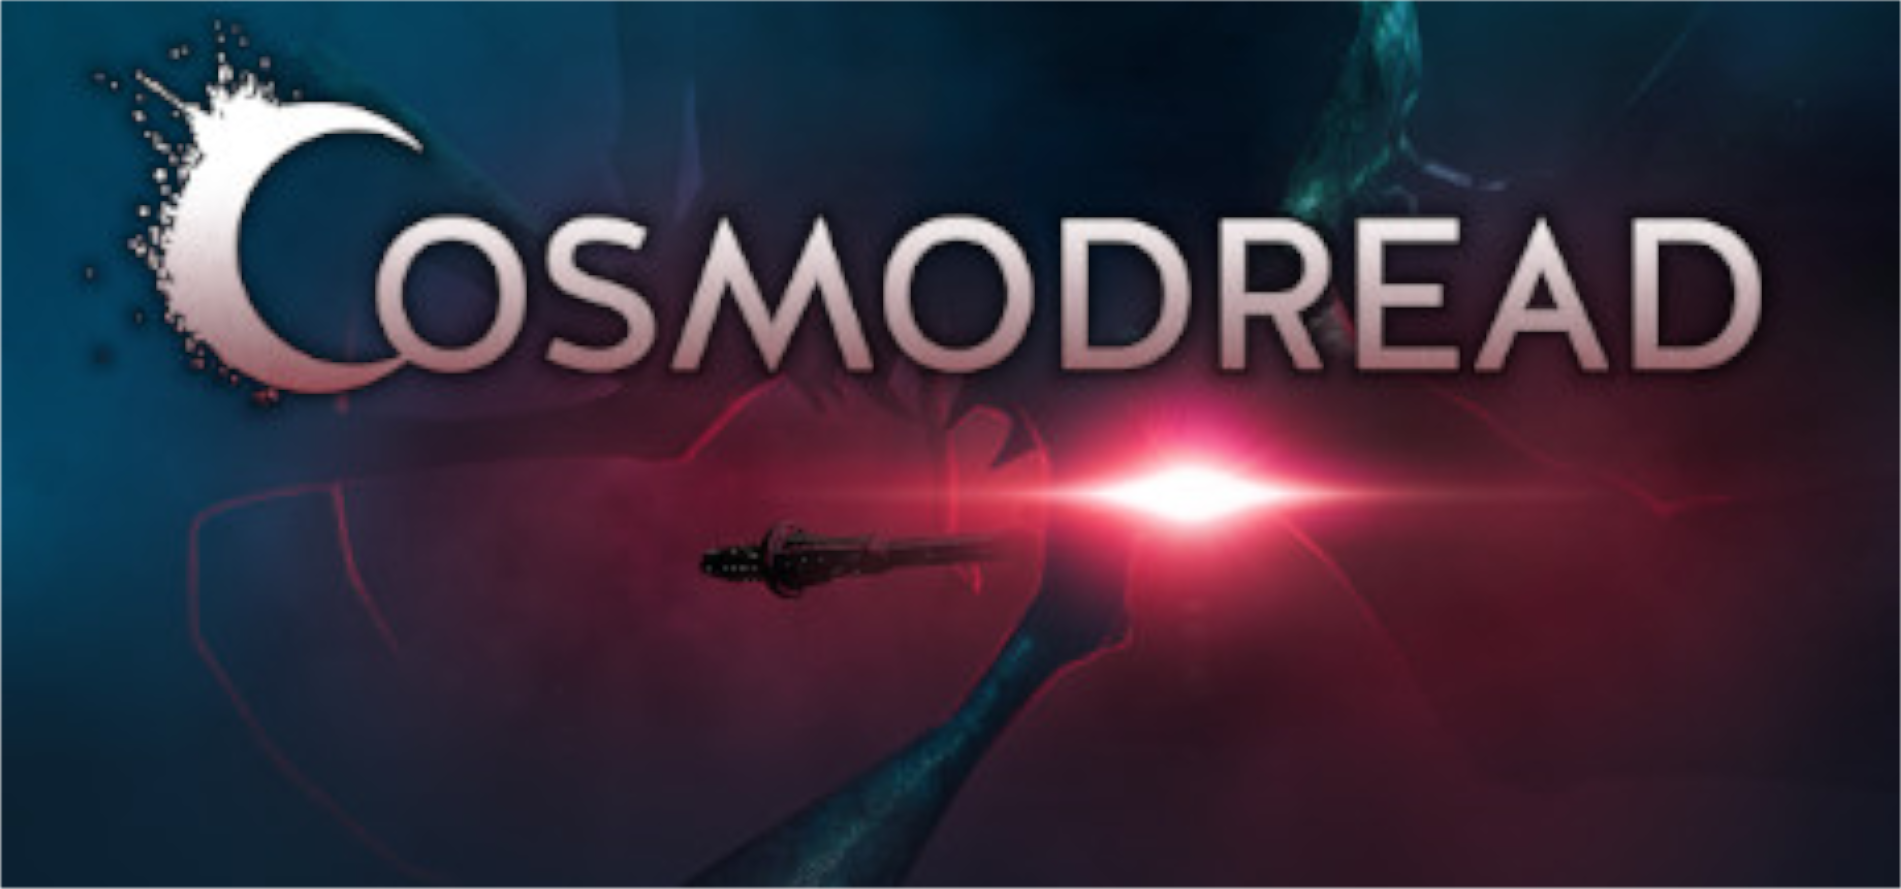
Cosmodread - VR Sci Fi Horror Survival Game
The Cosmodread Logo
Zombies are scary, sure, but what if they don’t scratch that scare itch for you like they used to?
Well if horror is what you want in your Virtual Reality survival game then Cosmodread is the scariest survival game on the Quest 2. In it you attempt to repair and fly a half destroyed and alien infested ship back to Earth. Along the way you collect crafting recipes to create more weapons and items to help you survive in this VR roguelike horror survival game.

Cosmodread combines resource scarcity and terrifying enemies to make for a fantastic VR Roguelike Survival experience
Cosmodread is not only one of the best survival games on the Quest 2, but one of the best horror games. It’s terrifying looking enemies and creepy sound design will have you sweating to open a door and jumping at dark corners. The creaks of the decaying ship combined with the disgusting fleshy sounds of the alien growth means you never feel truly safe.
You shouldn’t feel safe, either, as the aliens only grow stronger as time goes on, and they can find you anywhere.
Cosmodread uses resource scarcity and an interesting crafting system to make you think on your feet and use every resource available to you to make your way from one end of the ship to the other through all of the dangerous aliens and malfunctioning robots so that you can make it back to earth and survive.
There’s really no other VR Survival Game like it, and when you’re low on ammo and hear the roar of an alien on your trail there’s nothing scarier in Virtual Reality.
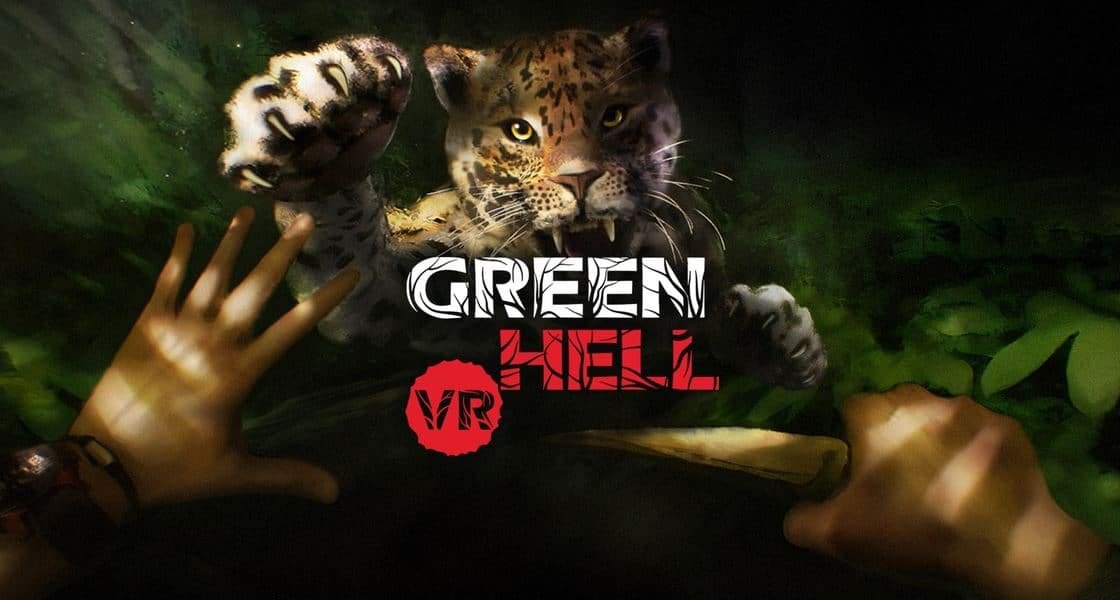
Green Hell VR - VR Jungle Survival Game

The Green Hell VR Logo
If you want a survival experience that takes you far away from civilization and deep into the bowls of the Amazon rainforest, then Green Hell VR is the game for you. The jungle is an unforgiving place in this VR Survival Game, and so are its inhabitants.
When you are not hunting for food or figuring out which plants will make you vomit up all your nutrients, you’ll be fighting for your life against predators like pumas and leopards, and the native tribespeople who are very unhappy with your presence.
Green Hell VR combines a fantastic crafting system which involves combining items in your hands with intuitive actions like wrapping vines around a simple stone axe to make it stronger, or running a sharpened stone across a long piece of wood to make a sharp spear.

Even the leeches in the water make surviving in Green Hell VR’s jungles difficult
Gathering resources from the jungle and then building your tools and campsites out of the natural resources of the Amazon makes the most basic necessities of survival feel difficult to achieve and very earned when you do.
For a more rugged and true to life survival experience, there is no better game than Green Hell VR. It’s less combat focused than other survival games here, though there is plenty of combat to be had, and you’ll find that in Green Hell VR you’re far more challenged by more true to life challenges of survival like building your camp, finding the right food to eat, and staying hydrated.
Also just like its flatscreen counterpart Green Hell VR has seen and will continue to see updates like it has with the addition of the free Spirits of Amazonia DLC that was recently added. Now there’s new environments, new objectives, and new ways to survive in this fantastic VR Survival Game. It just keeps getting better.
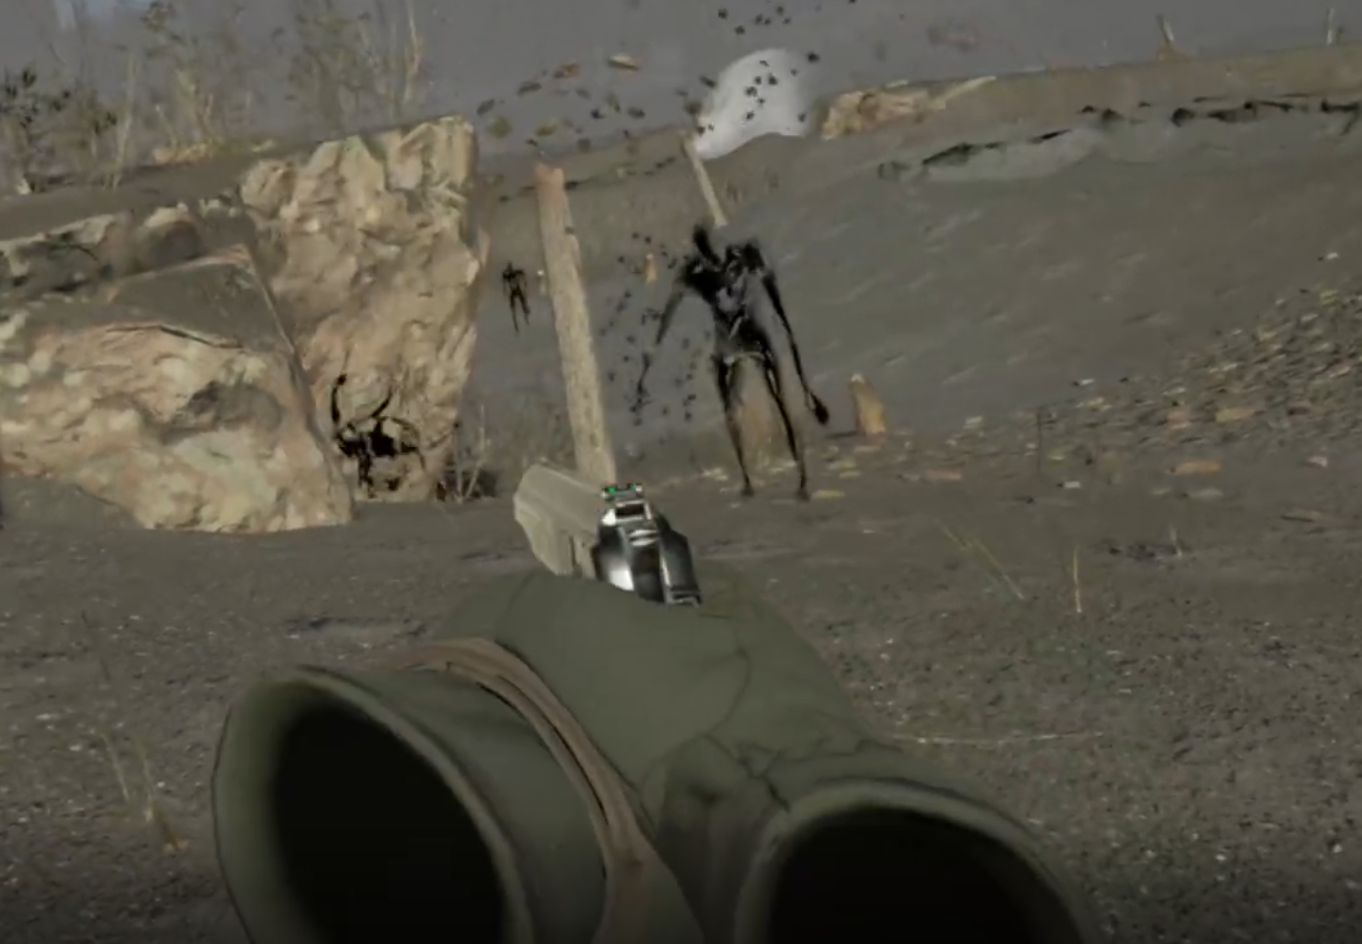
Into the Radius - Surreal VR Survival Shooter Game
The Into the Radius Logo
What is a list of VR Survival Games for the Quest 2 without Into the Radius? Inspired by Roadside Picnic, the book which also inspired the S.T.A.L.K.E.R. movie and games, Into the Radius combines fantastic gunplay with a surreal and dangerous setting.
In it you are an explorer navigating the Pechorsk Radius, a wide section of land in Russia dominated by a massive black sphere hanging in the sky where the usual laws of reality do not apply.
While completing missions for the mysterious Committee you have to fight off hostile entities, which look a lot like humans (in most cases) but made of a strange black material, while also navigating fields of deadly anomalies that hold valuable and otherworldly artifacts inside.

Into the Radius has very intense and scary fighting
Into the Radius gives you a wide variety of weapons to choose from, which all handle incredibly well in Virtual Reality, and it’s gunplay is definitely a huge draw for this VR Survival Game. What enhances it beyond a normal shooter is not only the need to scavenge and hunt for artifacts to survive, but the mystery of the Pechorsk Zone.
Delving deeper and deeper into the Radius towards greater danger, while discovering bizarre sights and uncovering more about this strange place, is what makes Into the Radius a Virtual Reality Survival Game like no other.
Into the Radius is a classic of the VR Shooter and VR Survival genre, and it’s even got a sequel on the way, Into the Radius 2.
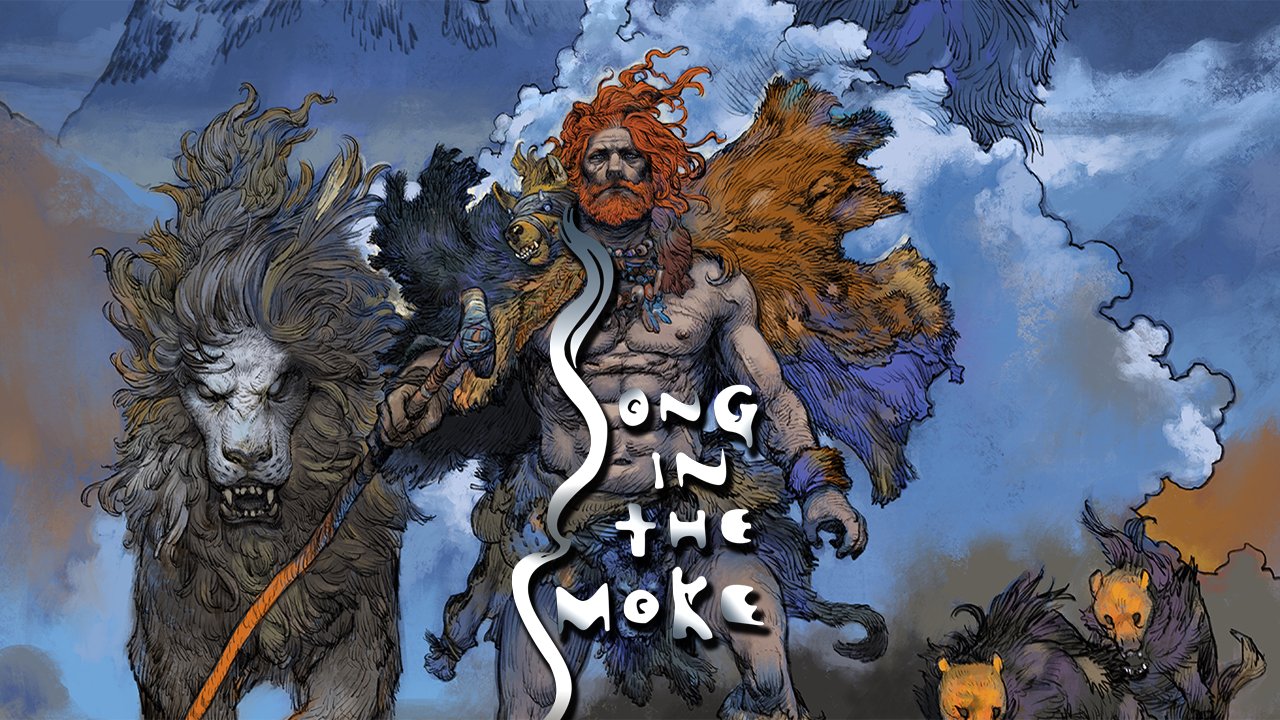
Song in the Smoke - Prehistoric Caveman VR Survival Game
The Song In The Smoke Logo
Want a survival experience that not only takes you far from civilization, but back in time before civilization even existed? Then Song in The Smoke might be what you’re looking for. In this VR Survival Game you are a caveperson discovering the secrets of the land as you craft a number of tools and weapons to hunt and fight prehistoric creatures.
Surviving the vicious predators of a wilderness before time is the hard part, but there is also a lot of fun to be had in the exploration of Song in the Smoke’s untouched wilderness. Not only do you find the sticks and stones needed to create your weapons, but mystical herbs and fruits to craft powerful elixirs.
Song in the Smoke immerses you in its mysticism from the very beginning, and through its many areas you can find secrets that not only reveal more of the forest around you, but your own potential.
Medieval Dynasty VR - A VR Medieval Life Simulator and VR Survival Game

The Medieval Dynasty New Settlement Logo
Medieval Dynasty New Settlement, or rather Medieval Dynasty VR, is a VR remake for the Meta Quest 3 and Meta Quest 2 of the 2021 flatscreen medieval life simulator Medieval Dynasty. Unlike other Virtual Reality survival games on this list, Medieval Dynasty VR focuses more on being a life simulator than a purely survival focused experience.
This means you'll be spending a lot of time talking to the locals, completing tasks for them, and most importantly building a thriving settlement of your own on any of a few available plots of free land. It's very satisfying to go from nothing to putting up your first house to sleep and cook in, to erecting a huge variety of crafting and storage buildings to harvest all kinds of resources and make all kinds of tools.
What is most satisfying about Medieval Dynasty VR is engaging with its huge variety of crafting systems to make all sorts of things from tools to planks to pottery and beyond, and most importantly gathering and constructing buildings. You can even hire workers to work on your land for you and find a wife to marry and have children to continue your dynasty in future generations.

Stirring up some soup in Medieval Dynasty VR
While Medieval Dynasty New Settlement might not have the most satisfying end game at the moment, because those quests and tasks do eventually dry up and become repetitive, it does have a huge map to explore and secret treasures to find as well.
Uncovering the mysteries of Green Valley, the place where you are building your new home, offers some survival challenges of its own, though it is not hard to keep yourself hydrated and fed in this game, and the combat could use some more work.
Still, it is so satisfying to build yourself and your new home up from nothing, and there are many hours of fun to be had going from a nobody to a well respected local landowner in Medieval Dynasty VR.
If you want to know more about this fantastic VR game then check out our review of Medieval Dynasty: New Settlement.
Survivorman VR: The Descent - A VR Survival Game For Teaching You Real Survival Tactics

The Survivorman VR: The Descent Logo
Survivorman VR: The Descent is, of all of the VR Survival Games on this list of Virtual Reality Survival games, the most aimed at realism and teaching you actual survival tactics for the real world.
In this Virtual Reality game, you play as a survivor of a helicopter crash on a cold and desolate mountain. From the start you have very little to work with, and the cold and darkness of the arctic wastes that you have to survive in closing in around you. Luckily survival expert Les Stroud will tell you exactly what you need to do in order to stay alive, stay dry, stay warm, and stay fed.
Survivorman VR: The Descent is more of a survival learning tool than a real game, but is very interesting nonetheless. If you're interested in VR games for the purpose of learning actual things about the real world, then I highly suggest you take a look at this one.
The downside of Survivorman is that it's less a game and more a way to introduce you to these methods of real world survival for this potential real world situation. There is very little replayability, and it functions more as an interactive lecture than a game in the traditional sense of the word. It's also a very short VR survival experience at just a couple of hours.
Still, if you're really interested in survival in the real world instead of just the virtual world, give Survivorman VR: The Descent a look and see if you've got what it takes to listen to Les Stroud's advice and stay alive on the mountain.
You May Also Enjoy:

The Best Open World VR Games
So you want to experience a fantastic open world in VR. You want huge vistas, interesting landmarks to explore, and all sorts of fantastic things to find in a huge landscape brought to you in Virtual Reality.
Well good thing you found your way here, because you’re about to discover the best Open World VR games in existence. While these VR games have a variety of different mechanics and VR interactions, each is guaranteed to give you a massive place to explore and discover intriguing things.
These are the Best Open World VR Games.
Into The Radius
The Into The Radius Logo
If you’re looking for a truly weird place to explore then Into The Radius will certainly deliver. In all of the VR games I’ve played none gives as much of an experience of the surreal and scary quite like Into The Radius does.
In this game you’re an explorer doing your best to survive the Pechorsk Zone, which is a huge open world area comprised of 5 areas where the laws of the natural world no longer apply.
Fighting the dark figures in Into The Radius
As you hunt for artifacts, scavenge for supplies, and try to complete missions you’ll have to fight your way through the hostile dark figures that stalk the radius, and dodge the deadly anomalies that dot the landscape.
Into The Radius is a great open world game not only for its numerous combat and survival challenges, but for the imagination behind its world.
Pechorsk was once a normal place, but now there are all sorts of insane gravity defying ruins and odd structures scattered about. You really never know what you’ll see and discover next while exploring in this VR open world game.

A massive anomaly in Into The Radius
Into The Radius has made its way on a lot of our lists here at Reality Remake for good reasons. Not only is it a blast to play with tons of horror and action packed gameplay, but it also gives you a mysterious and strange world to explore.
That’s why Into The Radius is among the best open world VR games out there.
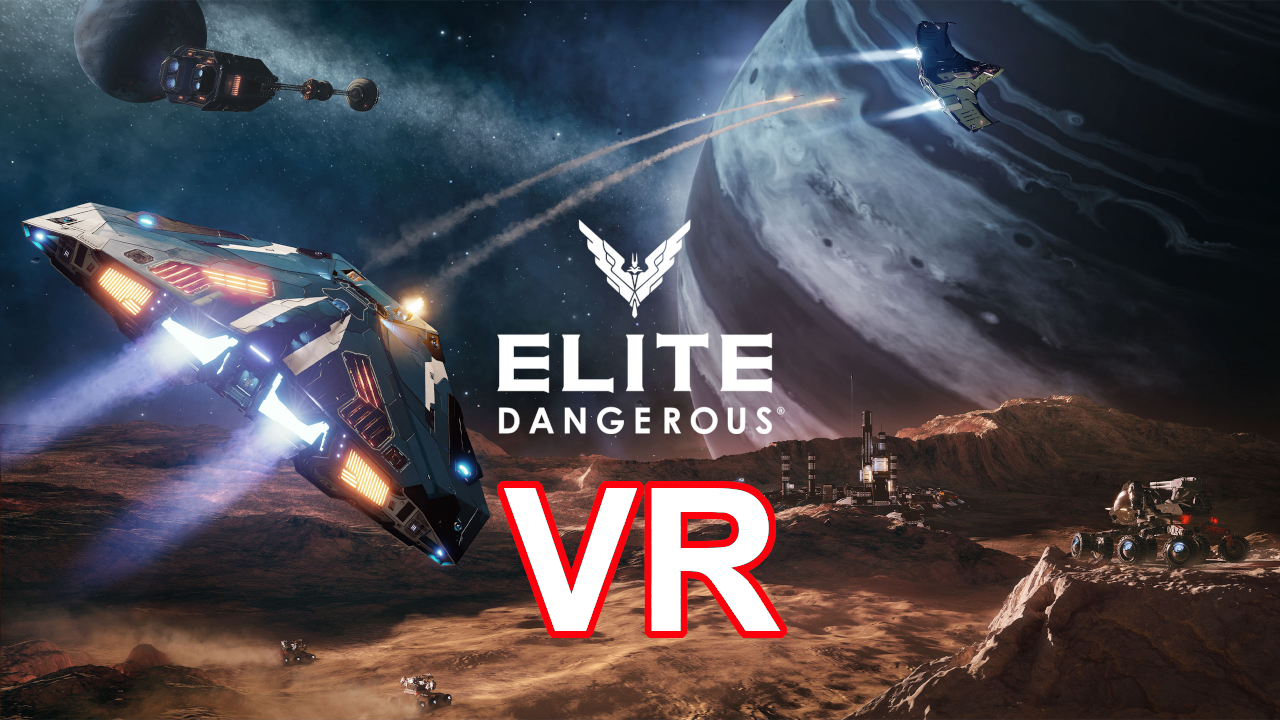
Elite Dangerous VR
The Elite Dangerous Logo with “VR” slapped on it
So you want an open world to explore in Virtual Reality, well what if we told you that more than one world was available? Well there are many worlds to explore in the depths of space, and that’s why Elite Dangerous VR is such a fantastic choice as an Open World VR game.
There is so much to explore in Elite Dangerous VR that nobody has seen all of it. Even all of the players of this game put together haven’t explored a small percentage of the worlds in store, because Elite Dangerous VR models our actual Universe.
If you want to not only see the incredible sights of space, but also have an effectively infinite number of worlds to discover, then Elite Dangerous VR will satisfy your craving for deep space exploration.
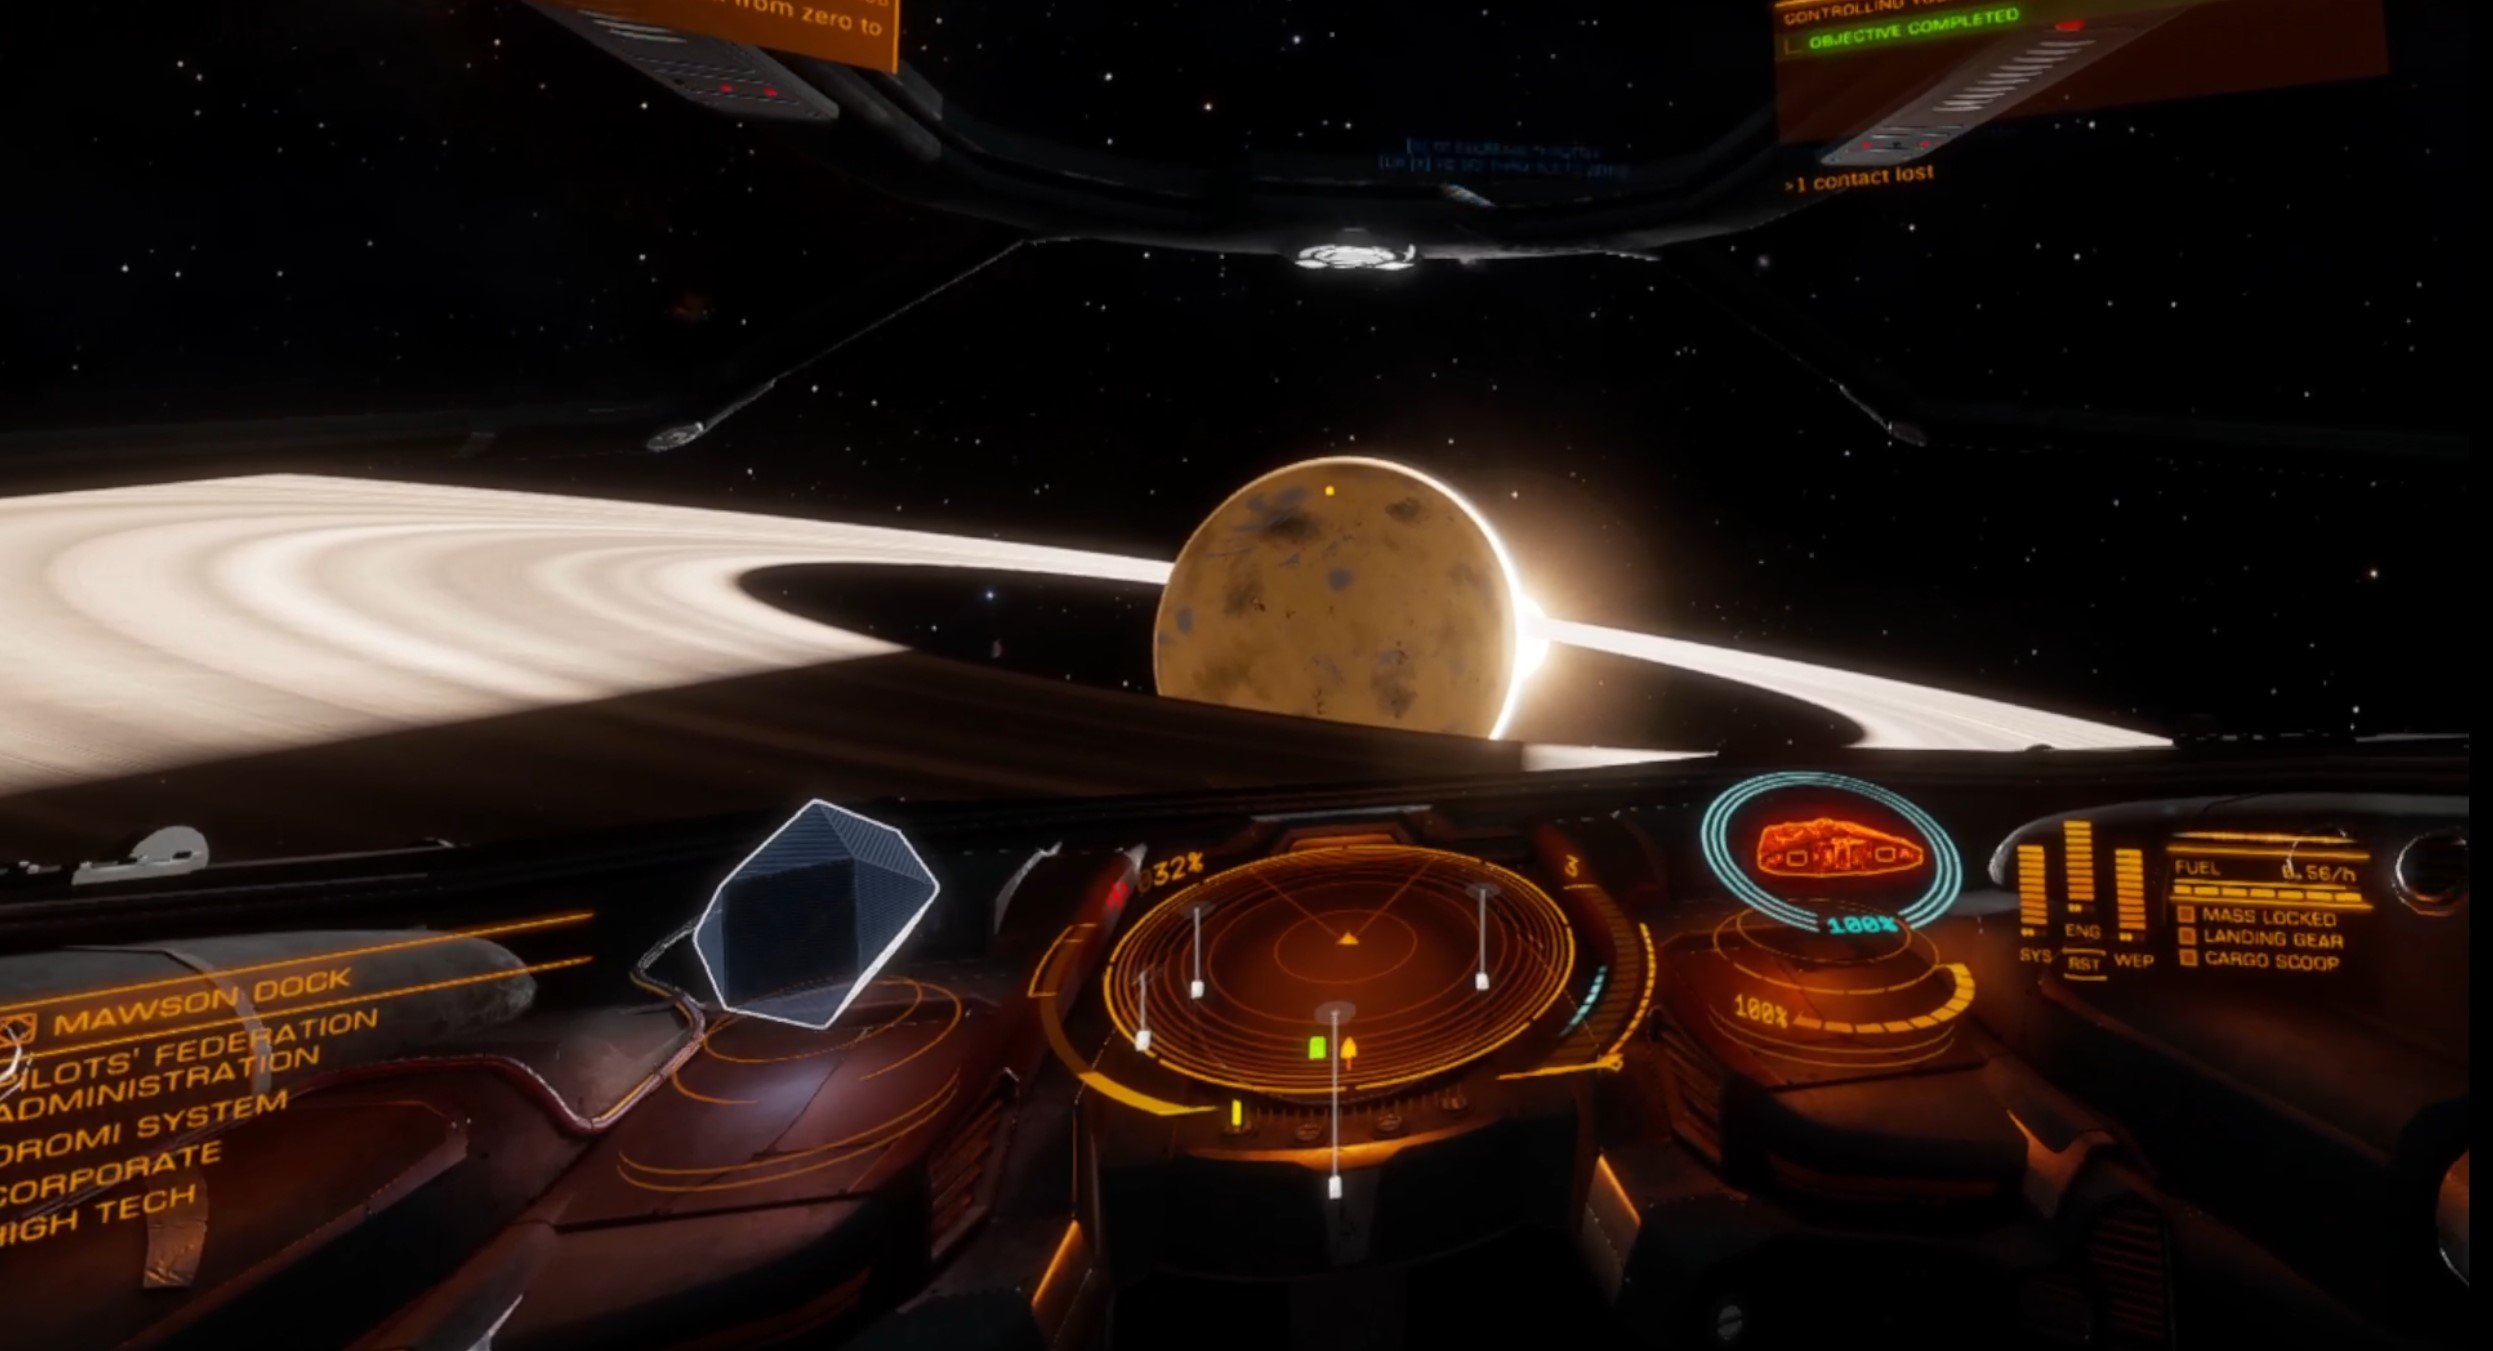
The views of space in Elite Dangerous VR are unmatched
There’s also more to do in this VR open world game. There’s combat, space trucking, space piracy, all sorts of things. No matter what you choose to do your chosen profession will take you all over this gorgeous game in the cockpit of your ship.
As far as open worlds go they don’t get much more open than the depths of space, so if you want to explore the cosmos Elite Dangerous VR is a great choice of open world VR game.
Want to know more? Check out our review and setup guide for Elite Dangerous VR.
No Man’s Sky VR
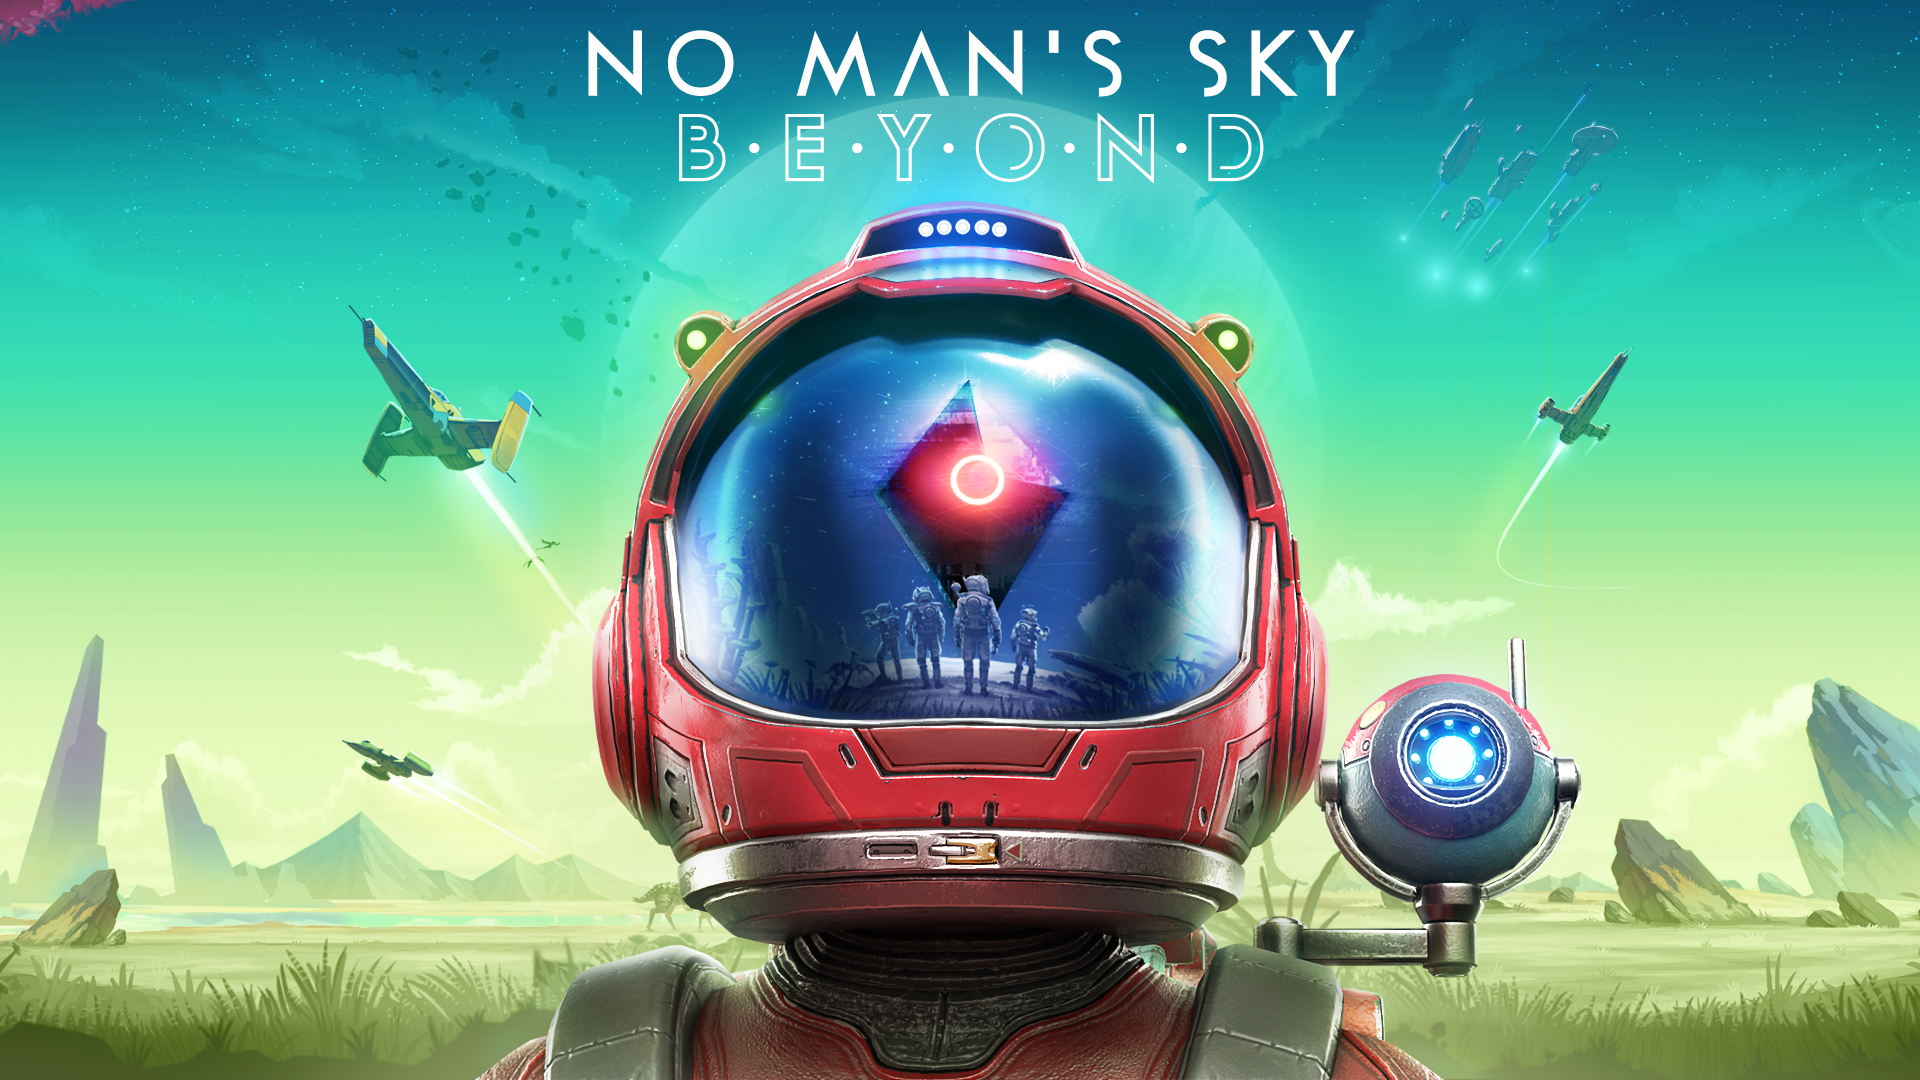
The No Man’s Sky Logo for their expansion “Beyond”
Since we’re talking about VR open world space games we’ve got to mention No Man’s Sky VR.
This game has a lot of the same open world strengths that Elite Dangerous VR has, but with very different gameplay mechanics.
The universe is just as infinite in No Man’s Sky VR, but instead of always being confined to your ship you also have much more to do by walking around on the surfaces of planets like harvesting resources, fighting robots, and a ton more. All in immersive Virtual Reality.
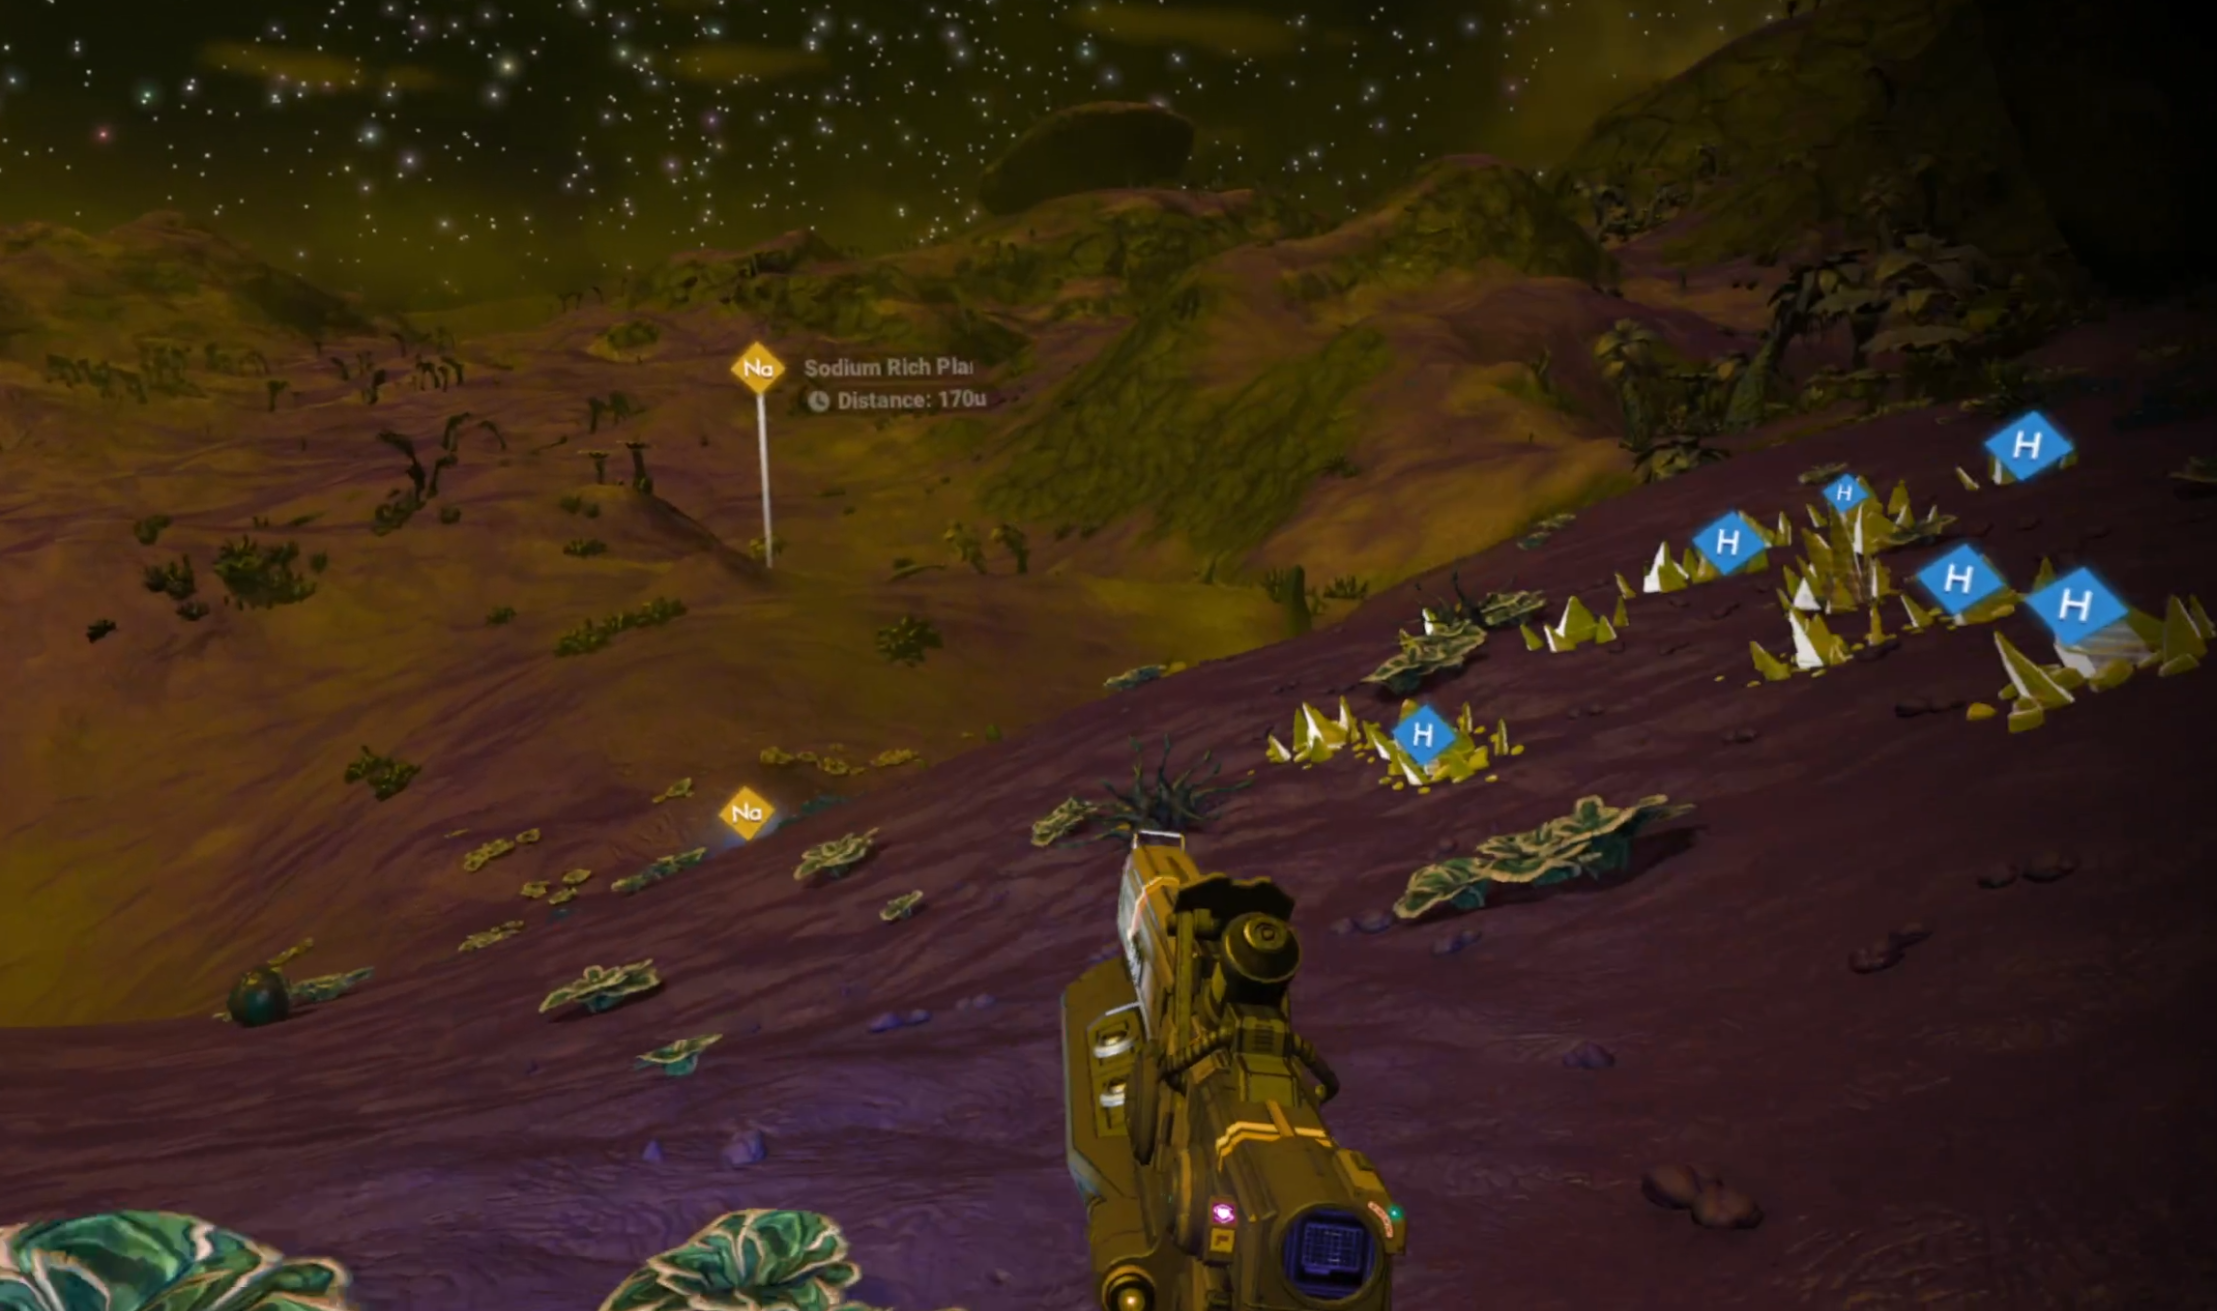
Exploring a massive open world planet in No Man’s Sky VR
Learn alien languages, upgrade your ship, get a massive freighter, start a space colony, and so much more is available in No Man’s Sky VR. Of course, this game also has more worlds to explore than you can possibly imagine.
Despite getting a lot of bad press at its release, No Man’s Sky has delivered on so much since then, including this VR port, though on PCVR it leaves some to be desired. It’s easy to walk outside of your body, and the VR controls are a little janky at times.
So while not as smooth of a VR open world sci fi experience as Elite Dangerous VR, No Man’s Sky VR brings a ton of different gameplay options that Elite Dangerous’ purely spaceship and space rover based experience just can’t deliver on.
So while it’s not the best VR port around and can run pretty choppily, No Man’s Sky VR is still a fantastic open world VR game, especially on the PSVR2, where it runs much more smoothly.
The Walking Dead: Saints and Sinners
The Walking Dead: Saints and Sinners Logo
The Walking Dead: Saints and Sinners is another fantastic example of a VR open world game done well.
In this game you are the Tourist, an infamous survivor of the zombie apocalypse in the universe of The Walking Dead and you’ve recently arrived in the flooded city of New Orleans.
This game has an interesting story with compelling characters that centers around your quest to find The Reserve, a bunker which is rumored to contain tons of weapons and supplies that everyone in the city wants.
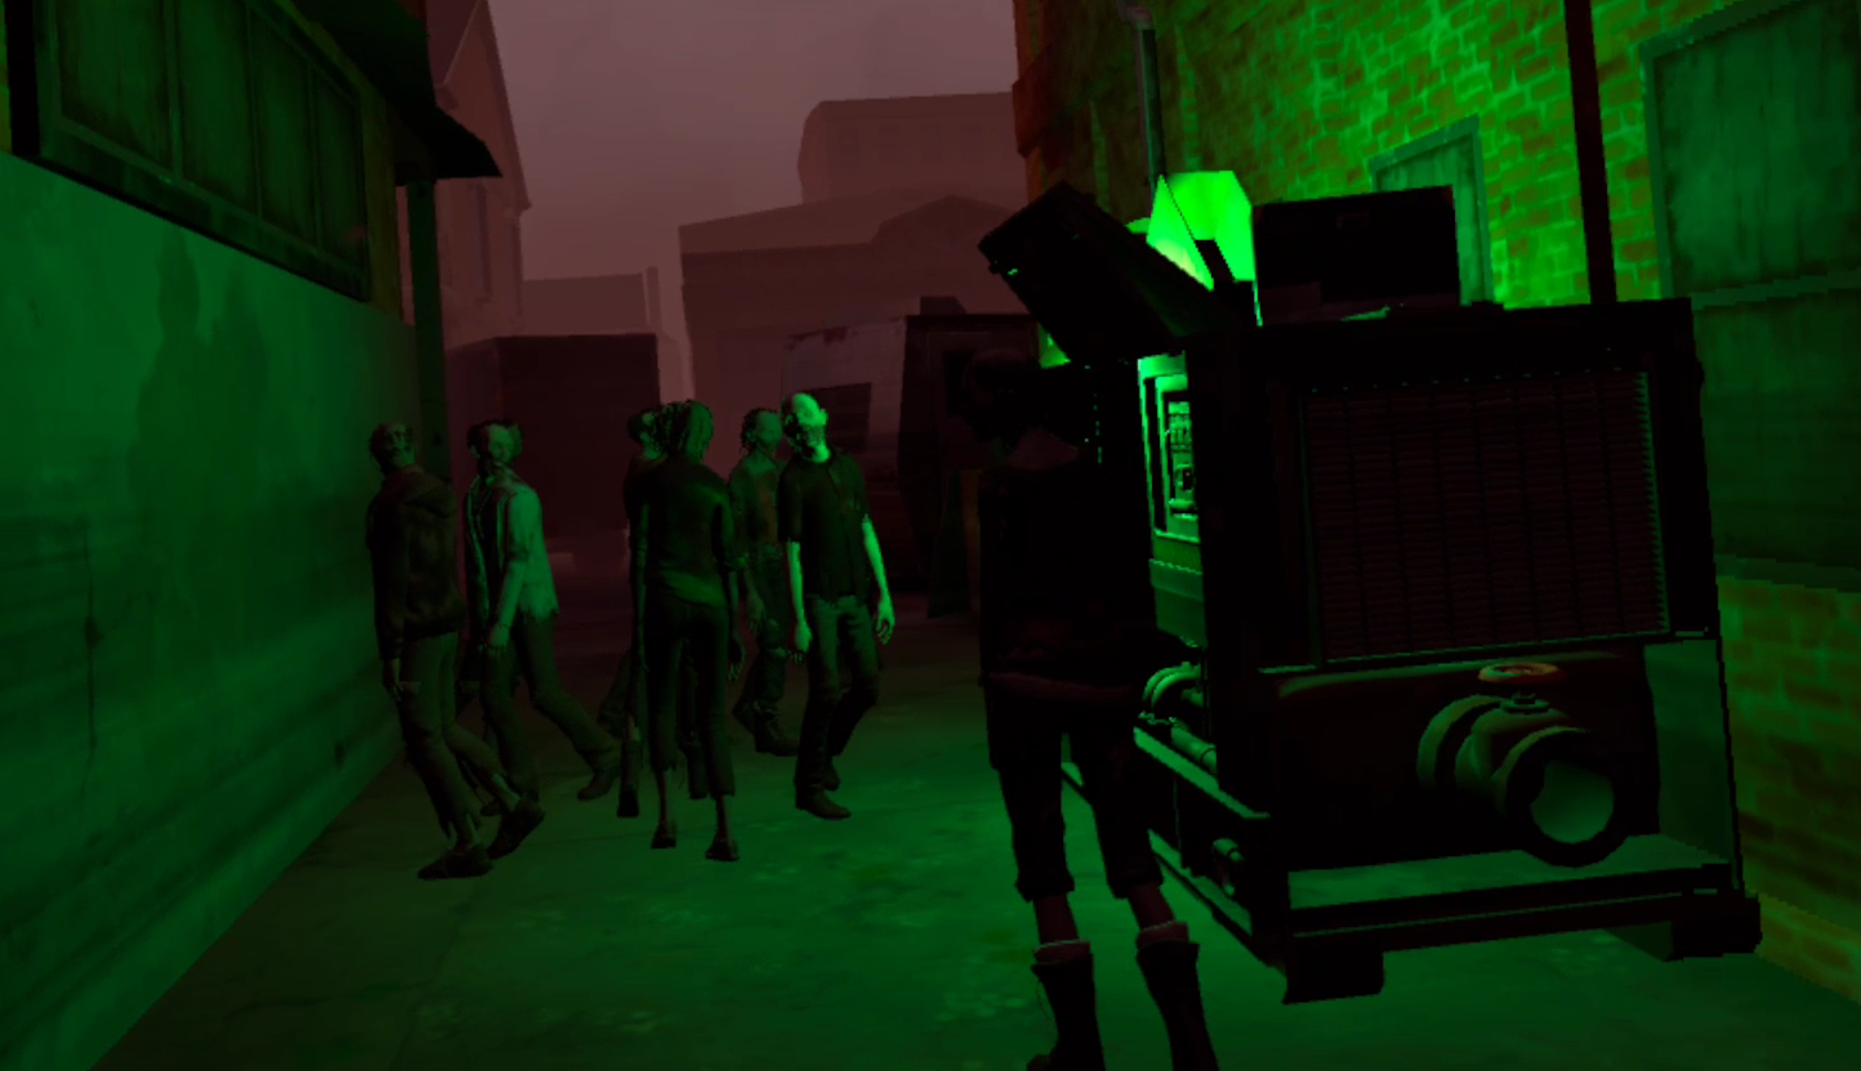
A small horde of zombies in The Walking Dead: Saints and Sinners
Your mission to find The Reserve will take you all over the ruined and zombie filled streets of The Walking Dead’s New Orleans. You’ll need to scavenge, craft, and fight through not only zombies but also the human factions that all want a piece of The Reserve, and you.
The Walking Dead: Saints and Sinners is a fantastic game not only for its story, missions, and events, but also the world that you enter every time you go out into the city.
There are all sorts of ruins to explore and sights to see in the zombie filled streets of New Orleans. The world is massive, though it is cut up into separate maps with tons of nooks and crannies to explore and things to find.
If you want a zombie themed open world VR game then there is no better one to scratch that itch than The Walking Dead: Saints and Sinners. It’s also available on the Meta/Oculus Quest as well as PCVR.
Green Hell VR
The Green Hell VR Logo
Both on PCVR and the Meta Quest platforms Green Hell VR is a fantastic game that lets you explore the Amazon rainforest in all of its green and dangerous glory.
From hunting animals to discovering which plants will make you sick or nourish you, Green Hell VR combines an intricate crafting, survival, and building system with a huge rainforest to explore.
You’ll even discover that you’re not quite alone in the green hell, there are some local peoples that aren’t too fond of you interloping in their territory.

Being attacked by a Jaguar in Green Hell VR
Green Hell VR is a fantastic VR survival game that constantly forces you to deal with the very real perils of your environment from leeches in the water to pumas stalking you between the trees.
There are very few games that combine survival elements with the thrill of exploration and discovery in a natural space quite like Green Hell does, and even fewer that do so in Virtual Reality.
Green Hell VR is a great open world VR game, and also a great story for you to discover. Why are you trapped in the rainforest? Why can’t you leave?

Hanging out and cooking food in Green Hell VR
If you want to discover the rainforest in all its dangerous beauty and master it then there’s no better VR open world game than Green Hell VR.
The Forest VR
The Forest VR Logo
While we’re on the topic of VR open world games that give you a big natural environment to explore, then there’s no way we won’t mention The Forest VR.
A PCVR port of the hit game The Forest, The Forest VR is essentially the same game but with a VR view and controls. While it’s not the smoothest VR port in terms of performance, quality, or VR interactions, it is still a great open world VR game to enjoy.
In this game you are a passenger on a crashed plane that must survive in a dangerous forest inhabited with cannibal tribes that only grow more aggressive as time passes.
Meanwhile you’re looking for your kidnapped son, and try to discover what exactly is happening in the remote stretch of wilderness you find yourself in.

Walking through the titular Forest
I’m not going to sugar coat this though, The Forest VR has a lot of jankiness to it.
From the third person animations to the annoyances of trying to crouch without being teleported into the air, and the input lag that can give you a headache or just make the game frustrating to play.
Still, The Forest is such fun as a Virtual Reality open world game if you can get over those things. It gives you a huge world to explore filled with dangerous cannibals, vistas and caves to explore.
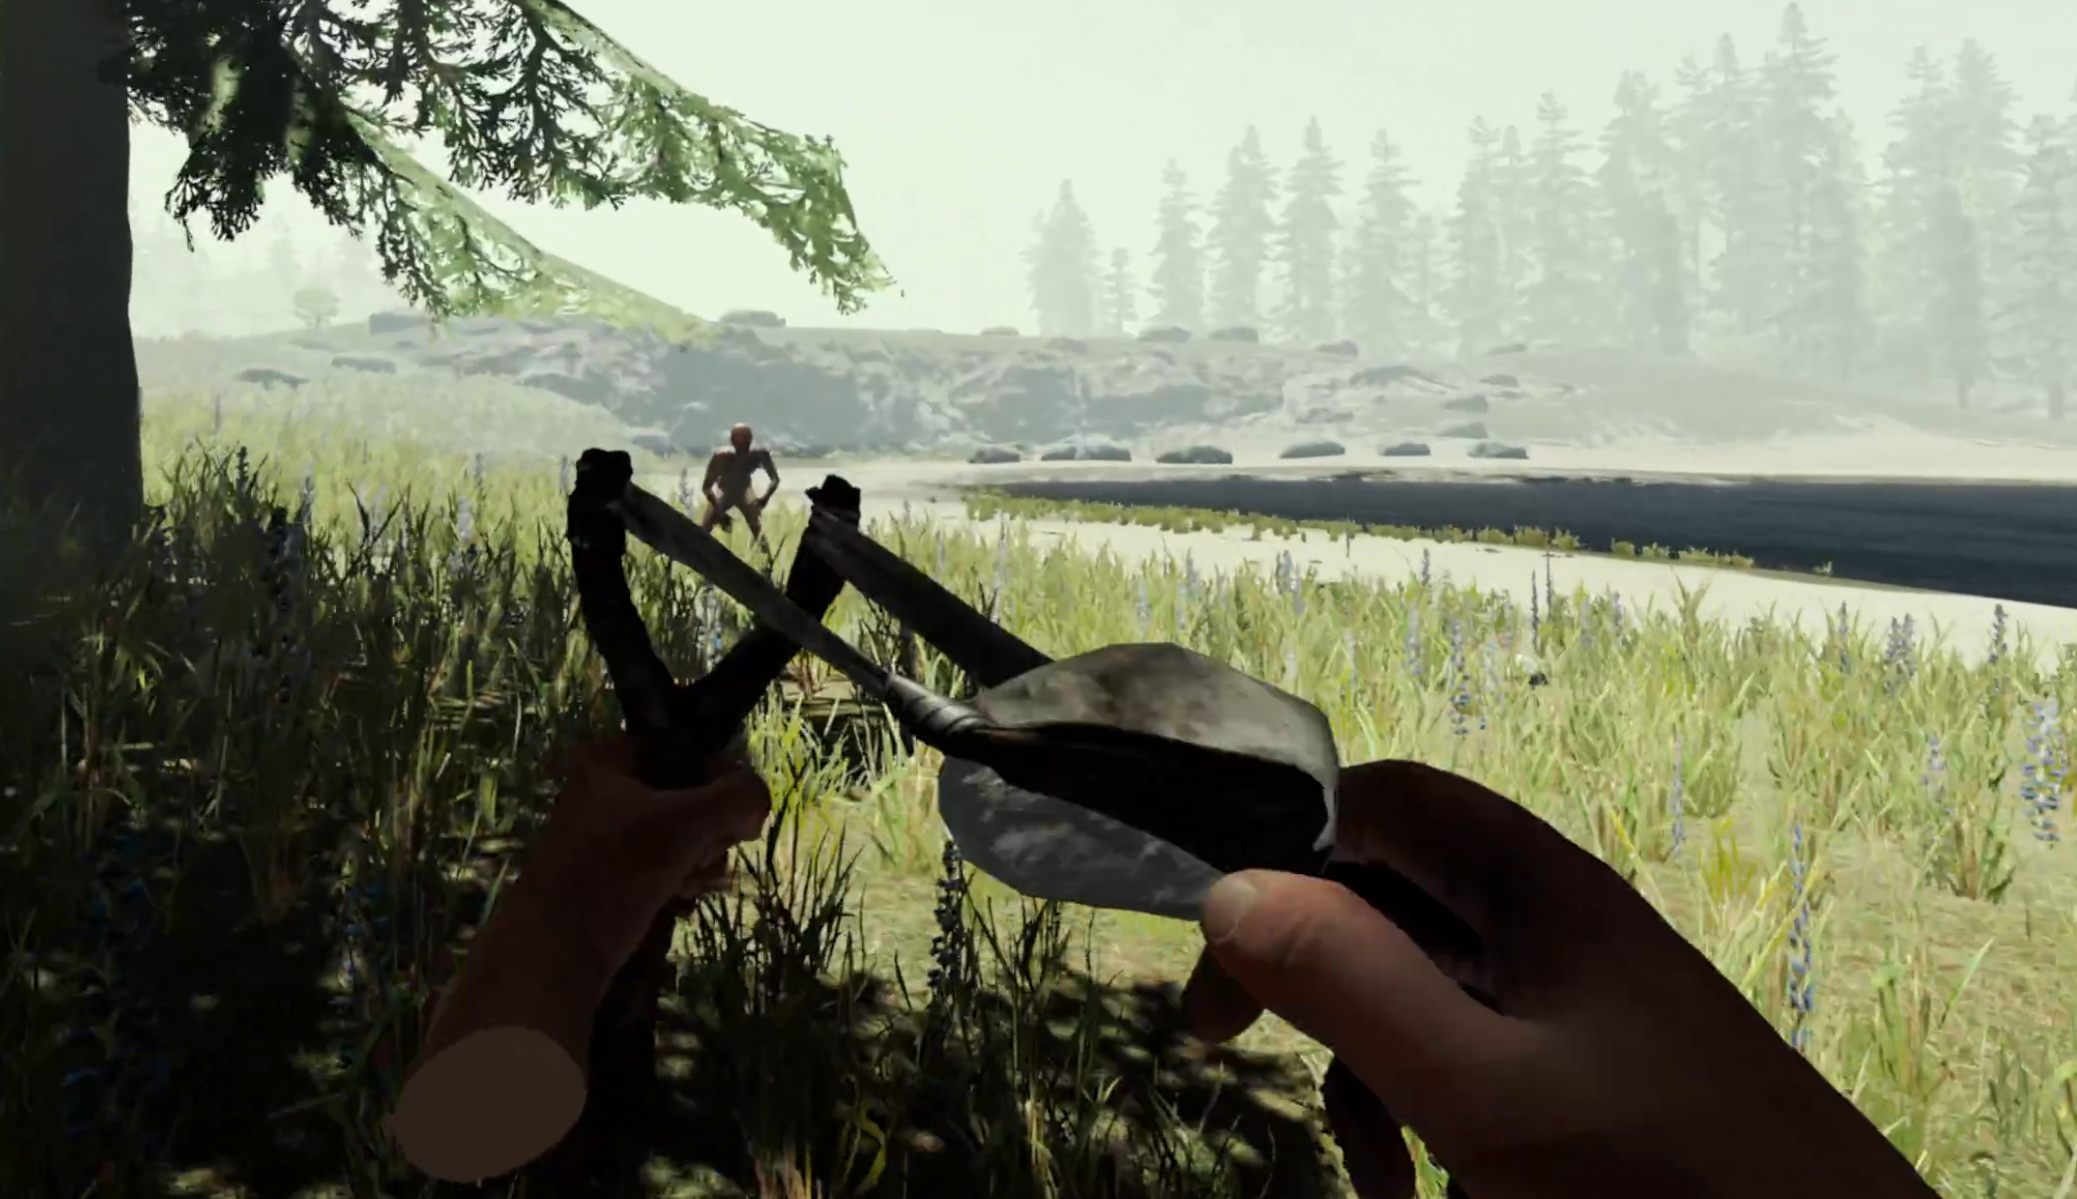
Slingshotting a cannibal
There is a lot of VR game for you to have fun with if you’re able to, and exploring the forest and its mysteries while you gather resources and uncover mysteries is too much fun to not include it on this list.
Gorilla Tag

The Gorilla Tag Logo
If you’re into VR games then you’ve probably heard of Gorilla Tag. So we won’t talk too much about it here, but you might not have realized that Gorilla Tag is basically an open world game as well.
Each area in Gorilla Tag is connected, and whether you’re playing it on PCVR or the Oculus Quest it is completely free. Your first time exploring each area with this game’s fantastic movement system is still a ton of fun, because each of the levels is connected.
A fantastic piece of Gorilla Tag’s open world
There are a lot of nooks and crannies and things to discover and explore in Gorilla Tag, from a sunny beach to floating platforms high up in the sky.
So if you want to discover what is so special about Gorilla Tag’s VR oriented movement while also exploring an interesting world, then give it a shot. It’s free, and surprisingly satisfying as a VR open world to explore.
Ghosts of Tabor
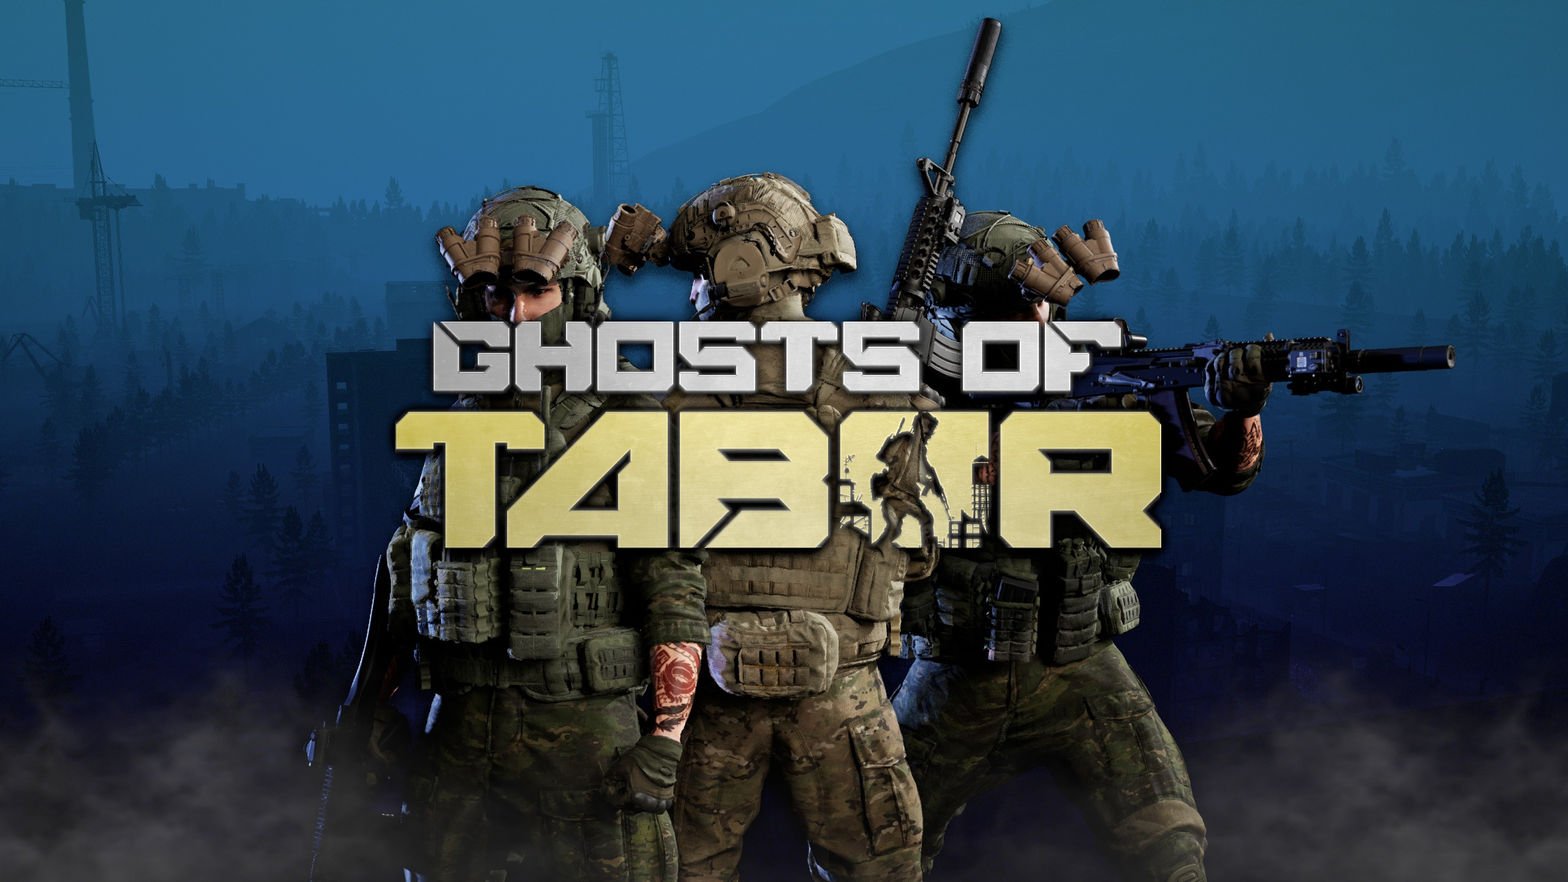
The Ghosts Of Tabor Logo
If you want player vs player shooting action while you scavenge and explore a world ravaged island, then Ghosts of Tabor is a game that delivers just that. It is a fantastic VR shooting game and a fantastic VR open world game.
We’ve called it a VR Escape From Tarkov game before, and if you’ve heard of Tarkov then you know exactly what that means.
In Ghosts of Tabor you enter the world from your secret bunker by starting a raid, and in that raid you have a certain amount of time, at least 30 minutes, to find an extraction point and exit.

A massive building to explore in Ghosts Of Tabor
While you look for one you explore the map and try to find loot to take out with you and either sell for money to buy more equipment, or store in your bunker for later use.
Meanwhile other players might be your friend or foe out in Tabor, and the local FENIX rebels will certainly be unhappy to see you.
Oh, and just like in Escape From Tarkov if you die you lose everything you have on you. So staying alive is always your number one priority.

Fighting another player in Ghosts Of Tabor
So if you want an open world to explore while combined with fantastic player versus player shooting and the extraction shooter mechanics pioneered by Escape From Tarkov, then give Ghosts of Tabor a look.
For such an action focused game it also gives you a ton of explore and discover, making it a great open world VR game as well.
If you want to know more then check out our article on Ghosts of Tabor.
Stormland
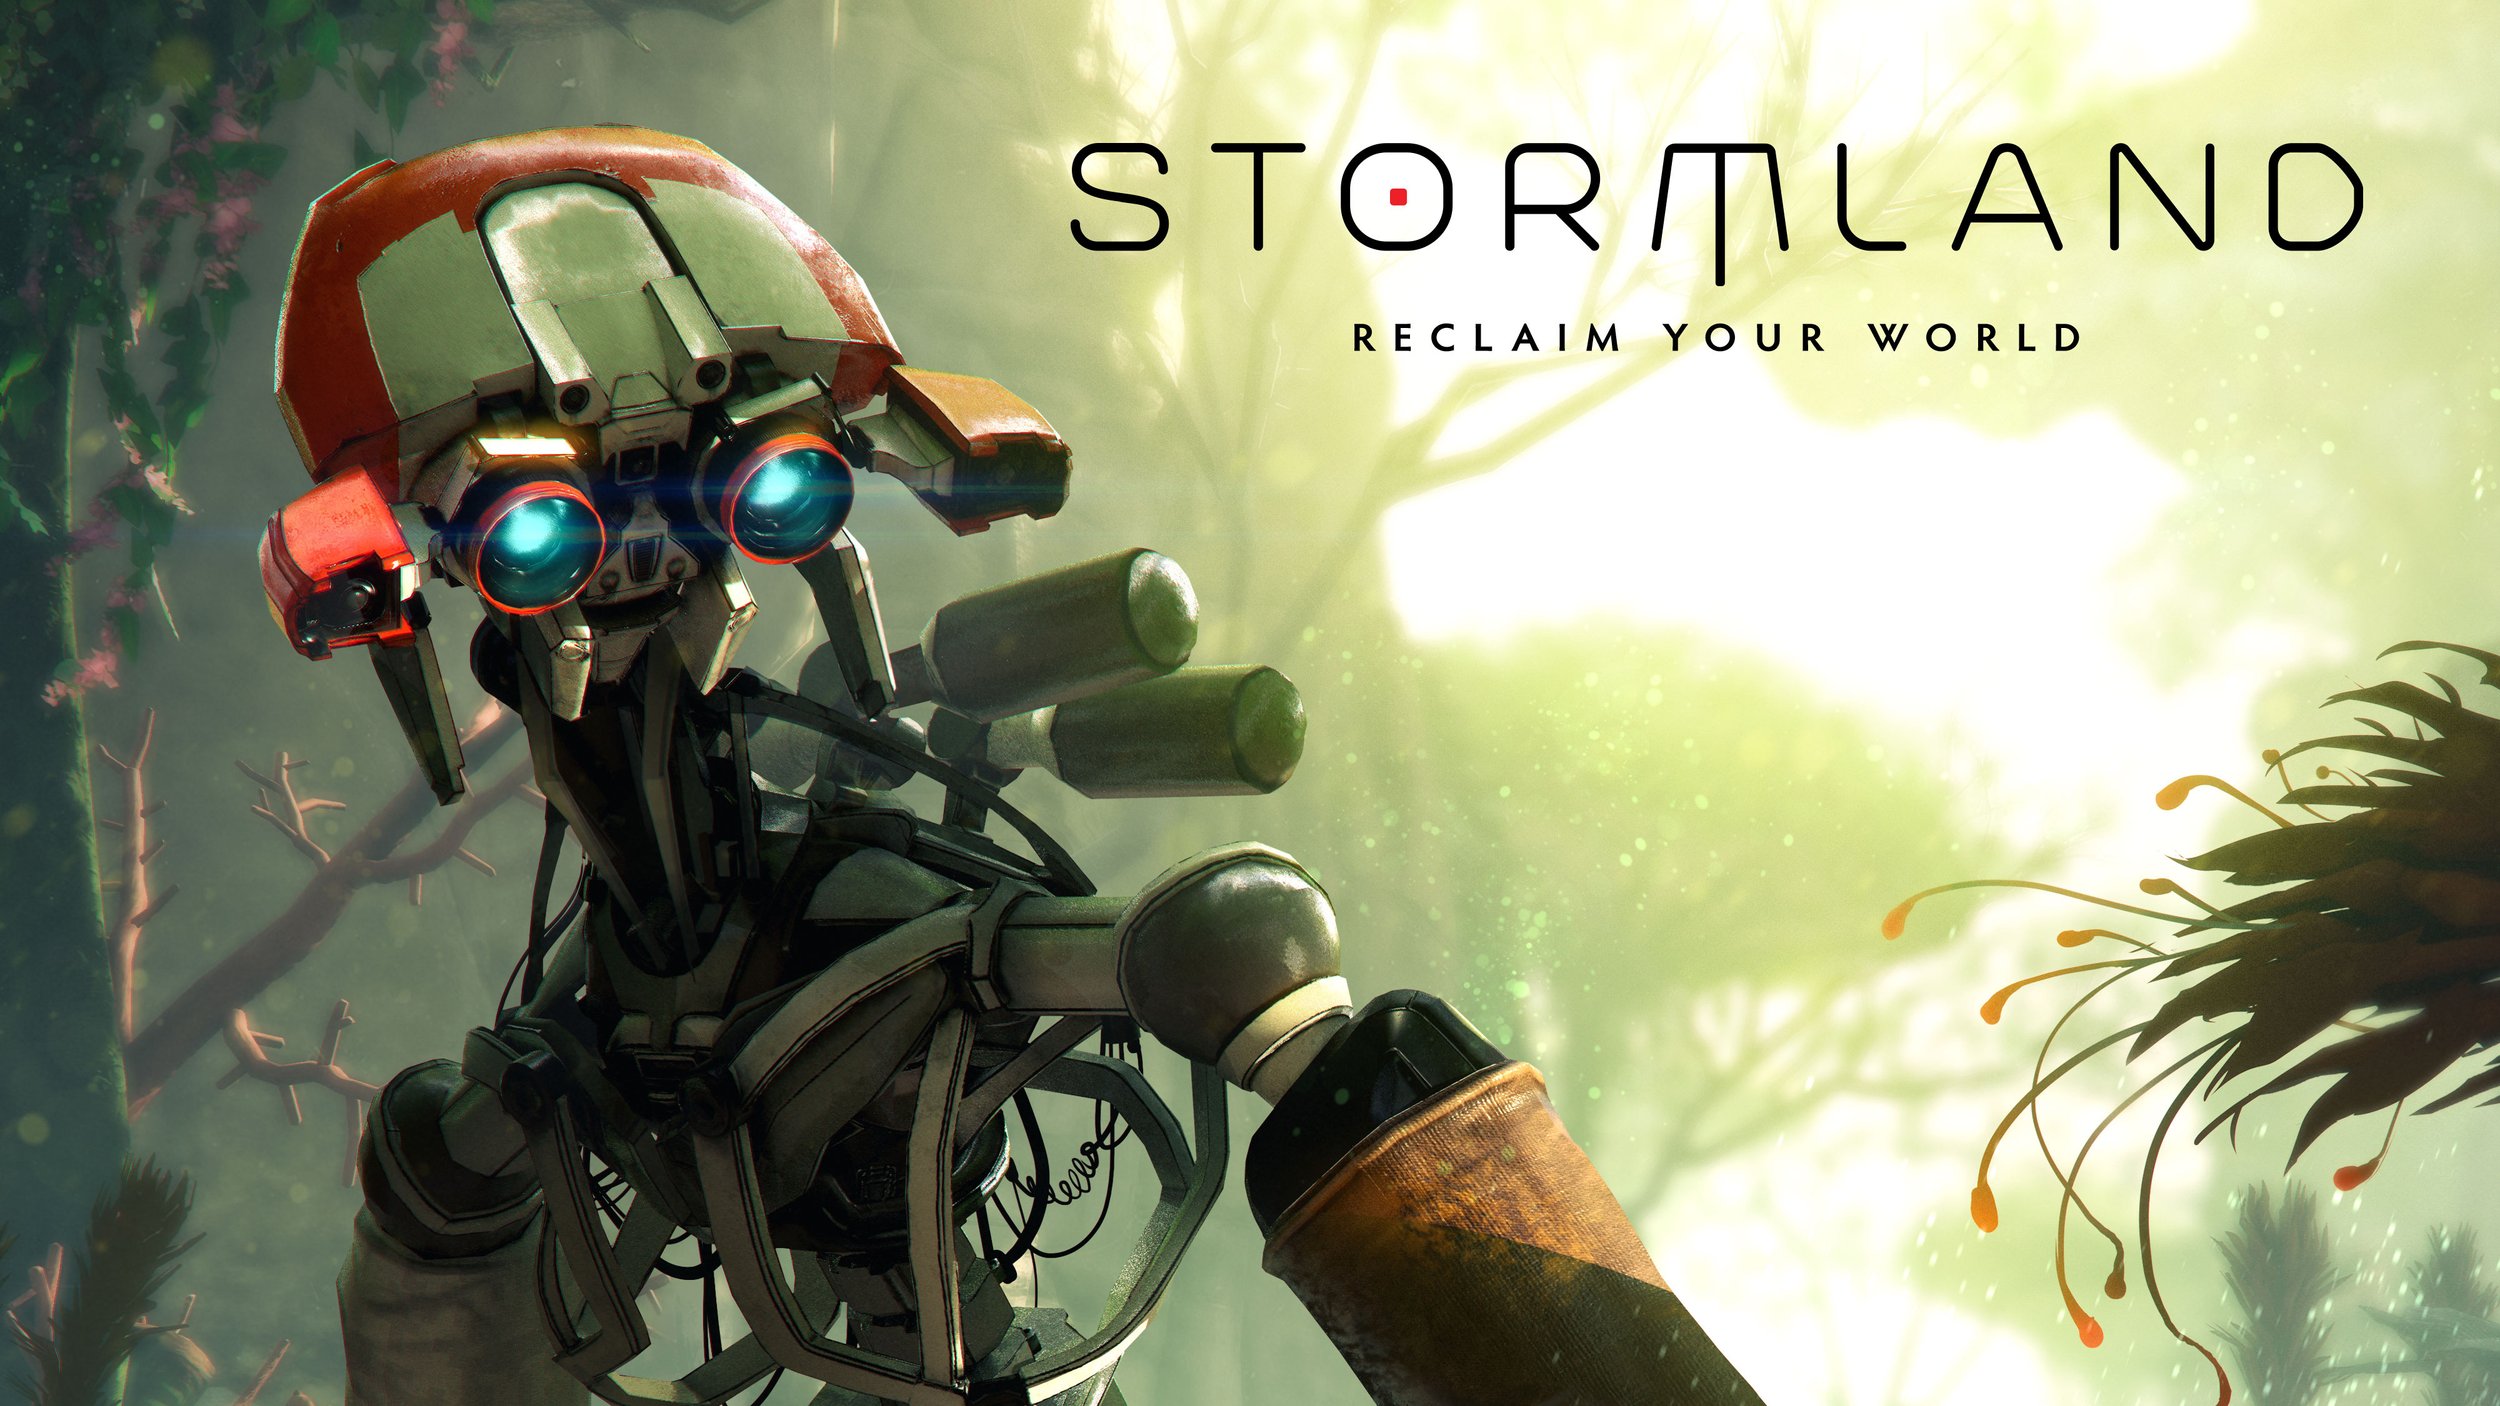
The Stormland Logo
Stormland is a VR game so old that you might not have heard of it. This was an early Oculus title from the days when standalone VR headsets like the Meta Quest weren’t even available yet.
So Stormland is PCVR exclusive, but wow is it a hidden gem.
In this game you’re a robot with human consciousness on an alien world, and it takes a lot of inspiration from flatscreen open world games.

Flying in Stormland
You explore around finding camps of enemies and clearing them to make the world a little bit safer, and there’s a shooting combat system that by today’s standards is a little unsophisticated. Oh, and the game is awfully short at about five to six hours.
Though where Stormland really shines is when it lets you loose to explore its open world. I’ve never had such a good time flying around in a VR game than I did when coasting through the alien world of Stormland.
The towering columns packed with vegetation and science fiction structures scattered around the place make Stormland a very pleasing game to look at and a great VR open world game to explore.
Despite how short of an experience it is compared to more modern VR open world titles, and a somewhat lackluster combat system, Stormland is a ton of fun to explore at least once if you don’t mind paying the price for it.
Grimlord
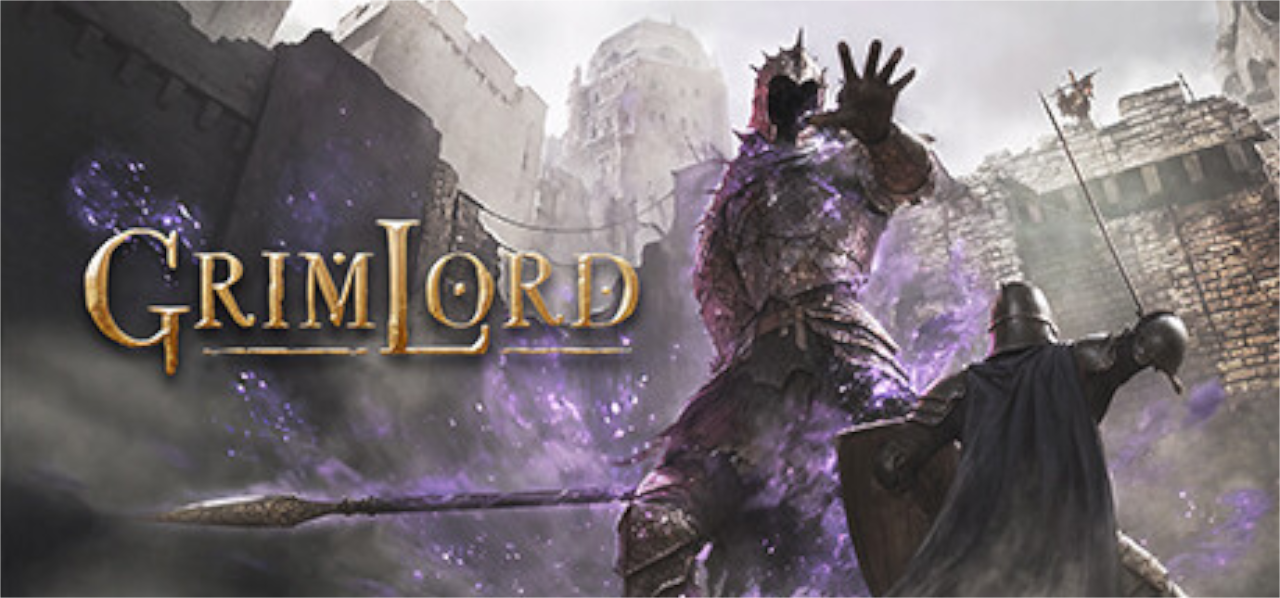
The Grimlord Logo
Remember Dark Souls? Or maybe Elden Ring. You’ve probably heard of at least one of them and are familiar with the concept of a “souls-like”.
These games are very well known for their excellent melee combat systems as well as their harsh punishments for repeated failure. Well Grimlord takes both of those things, and puts them into a fantastic open world just like any of the flatscreen soulslike games.
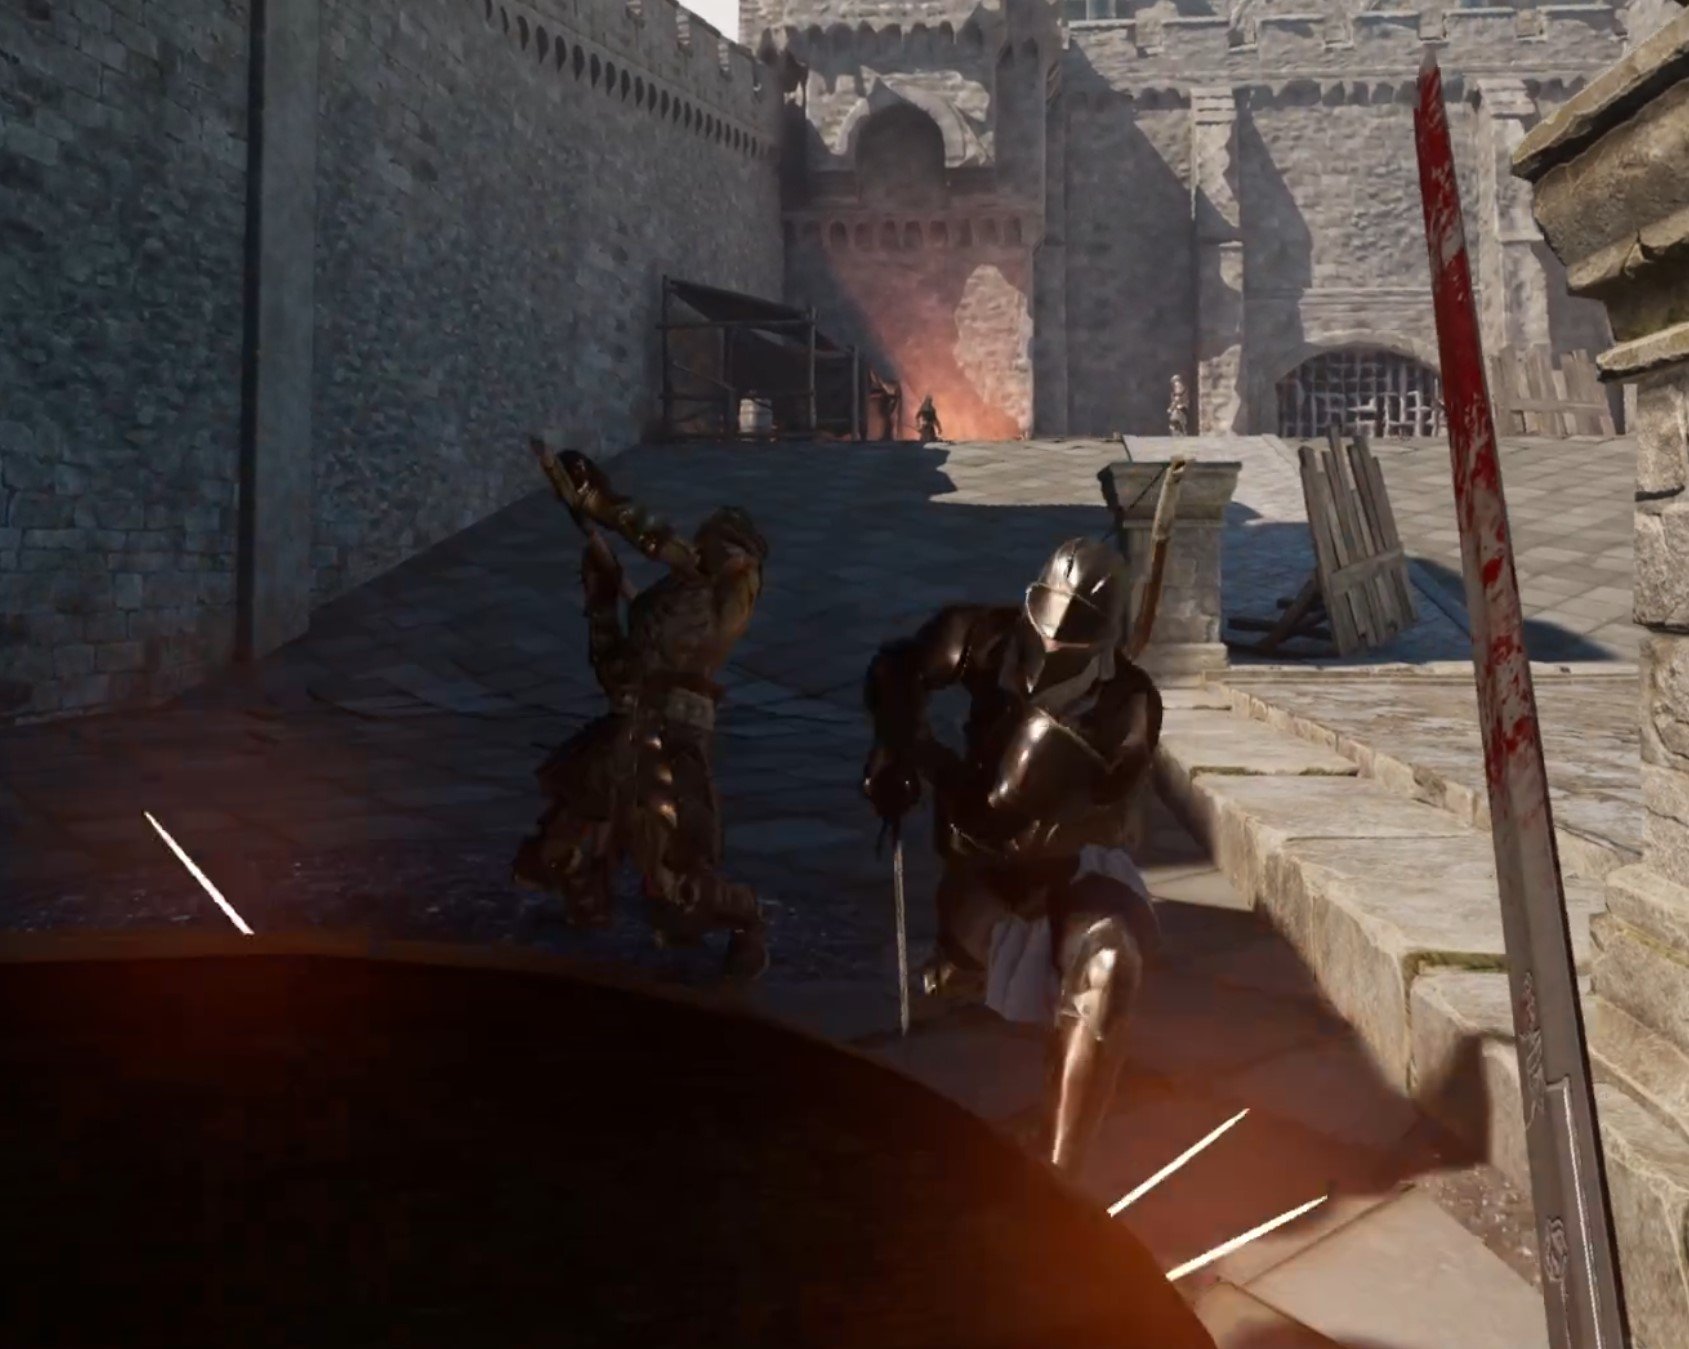
Fighting multiple enemies in Grimlord
The biggest difference is, of course, the addition of VR controls and a VR view.
Instead of hitting a button to attack in a set pattern, depending on your weapon, you’re now swinging your weapon any way that you want with your actual arm!
If a VR fighting game that includes a massive open world and soulslike progression sounds interesting in the slightest then you should really check out Grimlord, it’s a ton of fun.
Skyrim VR (With Mods)
The Skyrim VR Logo
It’s no secret that Skyrim VR was not a very good VR port. From the poor optimization to the lack of very basic VR interactions, it was considered a flop and a cash grab by its publisher, Bethesda Softworks.
Luckily as with all Bethesda games, Skyrim VR has had a lot of work put into it independently by the modding community.
If you want to do fairly basic VR things like grab stuff, have a physical body in the world, or enjoy melee combat that amounts to more than just flicking your wrist near an enemy, Skyrim VR with mods will give you all of that in the beautiful and immersive open world of Skyrim.
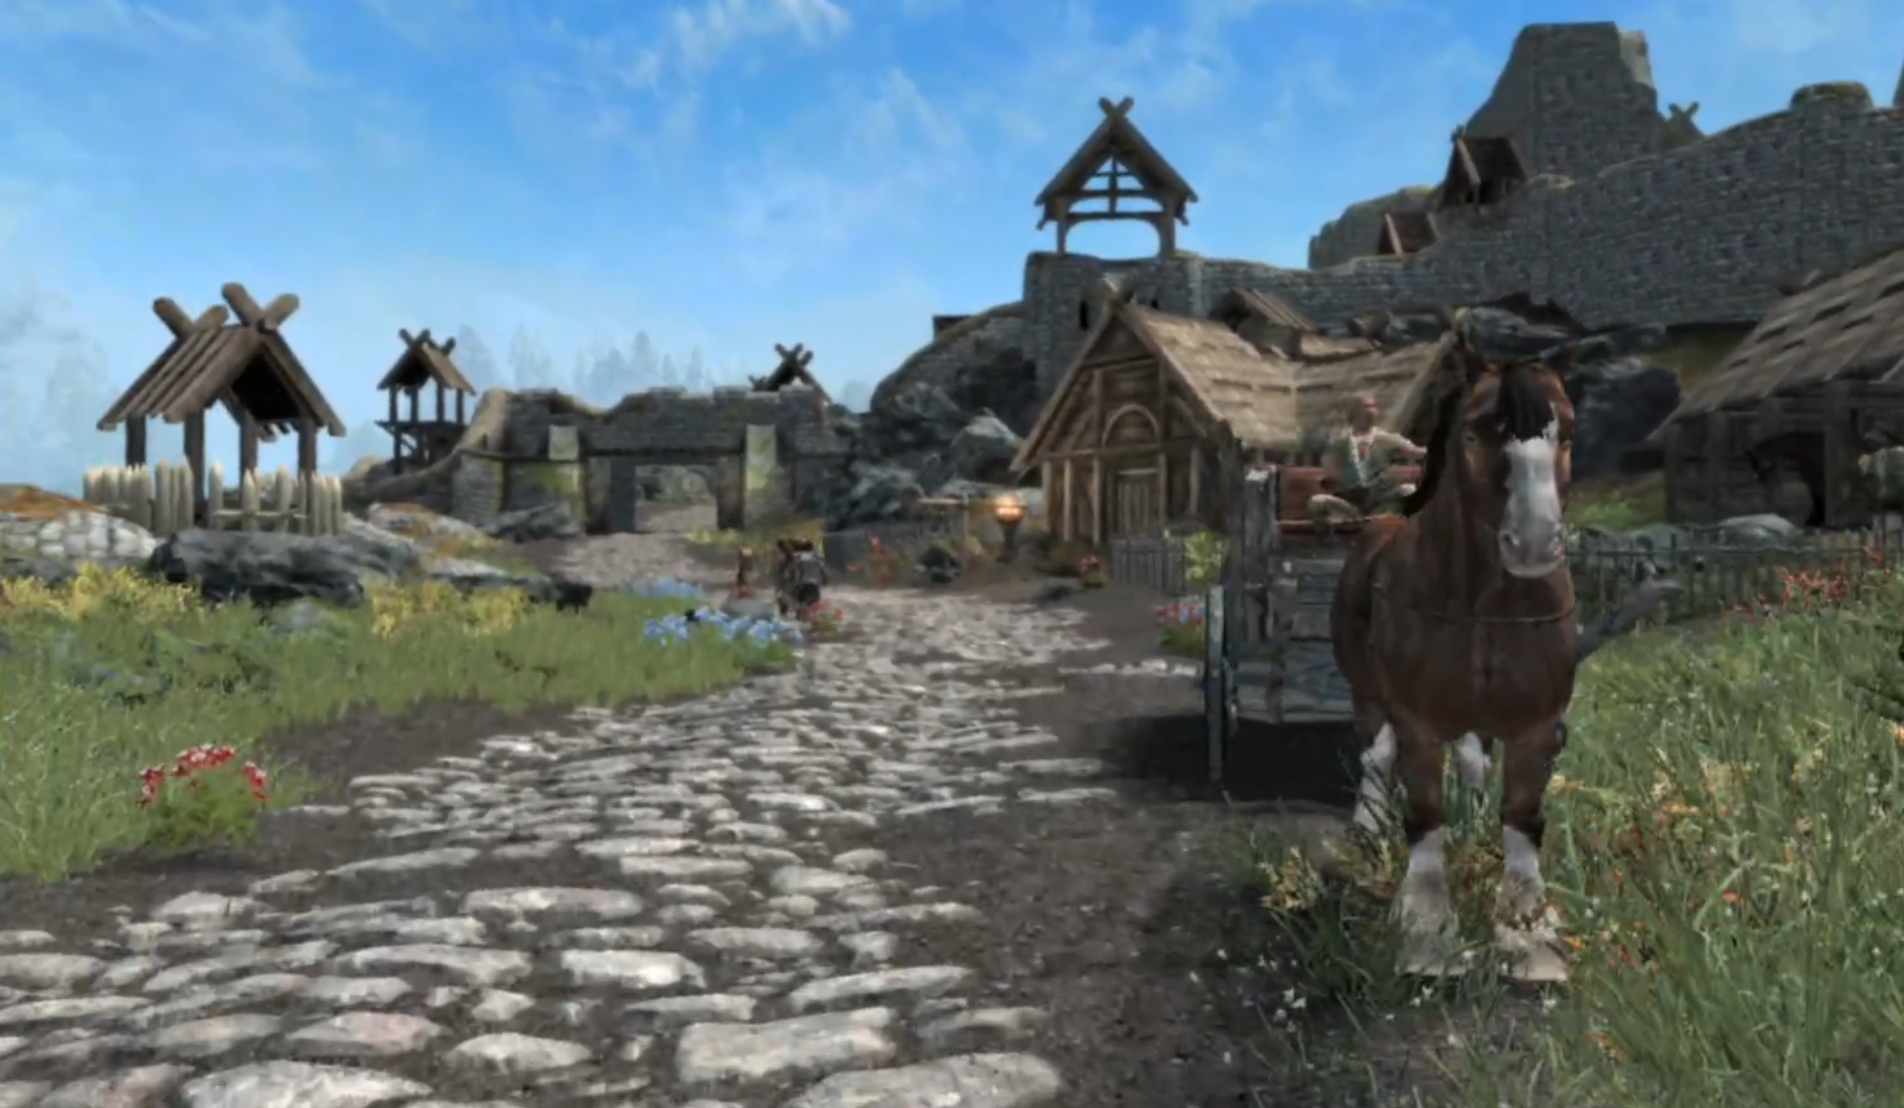
The entrance to Whiterun in Skyrim VR
Now you can experience Skyrim VR like you should have been able to from the start. While there are still some performance issues on certain graphics cards, Skyrim VR with mods really delivers on a VR Elder Scrolls experience.
Now you can explore Skyrim’s vast open world with truly immersive VR controls, and wow is it a ton of fun. If you’ve always wanted to explore Skyrim in VR, but the reputation of the VR port kept you away, it’s time to install mods and give it a go.
If you want the easiest way to install a large suite of Skyrim VR mods without having to worry about cross compatability issues, then check out our guide on the easiest way to install Skyrim VR mods so that you can enjoy this VR open world.
Minecraft VR
A Minecraft Logo
To cap off this list of the Best Open World VR Games, none needs as little introduction as Minecraft VR.
We don’t need to tell you anything about this game and what it entails, just that it’s possible to enjoy it in Virtual Reality and experience the most open of open worlds.
The satisfaction of creating a fantastic building is better than ever in Virtual Reality, and if you want a limitless open world to explore in VR then Minecraft VR will always deliver.
Well that’s it for our list of the best VR Open World games. If you want a big world to explore then you’ll certainly have found something on this list that you’ll enjoy. I’ve personally played every single one and found something to enjoy in exploring each of them, and you certainly will too. Have fun!

The Walking Dead Saints and Sinners Walkthrough and Guide - Part 11 - The Reserve and the Ending
Stuck in The Walking Dead Saints and Sinners? Wondering where to go next? Maybe you just like to see what is in store for you before you get there, or want to look back and see if you missed anything in The Walking Dead: Saints & Sinners. Well don’t worry we’ve got you covered with this complete walkthrough. This is the eleventh part, where you uncover The Reserve and the ending of The Walking Dead: Saints and Sinners - Chapter 1.
Stuck in The Walking Dead Saints and Sinners? Wondering where to go next? Maybe you just like to see what is in store for you before you get there, or want to look back and see if you missed anything in The Walking Dead: Saints & Sinners. Well don’t worry we’ve got you covered with this complete walkthrough. This is the eleventh part, where you uncover The Reserve and the ending of The Walking Dead: Saints and Sinners - Chapter 1.
This article will detail how to progress through the main story missions as quickly as possible, with a couple of guiding tips thrown in here and there to make your adventure smoother. Only those recipes that are convenient to get when doing a task for the first time are included. For a full list of all recipes in The Walking Dead: Saints & Sinners, check out our recipe guide article. Spoilers will be as light as possible, but there will be story spoilers by necessity in this walkthrough, but there won’t be any explanation of what is going on in the story beyond what is necessary to make the walkthrough make sense.
All Walkthrough Parts:
The Walking Dead Saints and Sinners Walkthrough and Guide - Part 1 - The Graveyard
The Walking Dead Saints and Sinners Walkthrough and Guide - Part 2 - The Shallows
The Walking Dead Saints and Sinners Walkthrough and Guide - Part 3 - Via Corolla
The Walking Dead Saints and Sinners Walkthrough and Guide - Part 7 - Old Town and Another Stash
The Walking Dead Saints and Sinners Walkthrough and Guide - Part 8 - Rampart
The Walking Dead Saints and Sinners Walkthrough and Guide - Part 9 - The Shallows Again
The Walking Dead Saints and Sinners Walkthrough and Guide - Part 10 - Bastion and The Reserve Key
The Walking Dead Saints and Sinners Walkthrough and Guide - Part 11 - The Reserve and the Ending
Installing the Final Pump Regulator
You’ve got the Reserve Key and the final pump part. All that’s left to do is enter The Reserve and experience the ending of The Walking Dead: Saints and Sinners - Chapter 1. If you just came back from Bastion and haven’t gone to sleep yet then you can immediately start the end of the game by talking to Casey on the radio. There will be a text prompt telling you that you can’t go back after starting, just tell Casey you’re ready to begin.
If you want to spend a few more days scavenging New Orleans before tackling The Reserve, go ahead, but you’ll probably be fine with what you have if you’ve always kept your backpack full when coming back to the Resting Place. Just know that you can’t start the ending of The Walking Dead: Saints and Sinners - Chapter 1 during the day, you have to start it at night after completing a day.

Before you talk to Casey it’s best to be completely ready to begin with. Your choices earlier in Bastion will come up. If you chose to help JB then make sure to be heavily armed. If you chose to help Georgia and The Tower, then you’ll have a much easier time.
Even if you helped JB and snubbed the Tower you should be fine with a single two handed weapon if it’s in good condition. A bandage is also recommended. Either way you’ll want to leave some slots open for what you find in the reserve, so don’t fill up all of your two handed backpack slots with things you aren’t willing to throw away for something better. Stat boosting food may also be helpful, and it’s the finale of the game, why not?
Anyway when you’re ready to go talk to Casey so that you can set up the final pump regulator.

Now that the pump part is ready for installation head over to the catacombs. You’ll see that the door to the church is closed. Keep going and go up the ramp to the area with the jazz men statues and concrete building where you originally got the key for the area with May’s coffin all the way back in the start of the game.
You’ll notice that there’s a blinking red light inside of the building. We’ll get to that in a second, for now let’s unlock the safe with the code you got from the house with the car crashed into it in Bastion. It’s right beside the truck on the other side of the fence from where you enter the area, across from the jazz men statues.

Open it and inside is the exploding arrows recipe.

With a new recipe in hand head back to the concrete building with the flashing light inside. You can now open the door with the “Waterfall Key” you got from May. Inside is the final pump! Stick the part in like before and the light will shine green. Congratulations, all of the Reserve pumps are now fixed! You can head back to the bus now.

Once you’re back, make sure you’re really super ready to start this, it’s your last chance to equip yourself before the action starts. Talk to Casey on the radio. He will be understandably overjoyed. Though when he actually starts the pumps you’ll see something new in the distance. Serious ending spoilers ahead.

The Church is lit up… and this also reveals that The Reserve has been in the church this whole time! The Reclaimed and The Tower will descend upon it in no time flat. Also Casey still can’t get out of the bunker. You’ll have to go over there yourself and get inside. When you’re done talking to Casey go back to the catacombs and take the right to head to the churchyard.
A quick sidenote: If you haven’t played through the final yet then stop reading and play through it once yourself. You owe it to yourself to witness the ending of The Walking Dead: Saints and Sinners - Chapter 1 without knowing what is coming.
Don’t worry if you don’t make all of the right decisions. The game will create a save right here when you emerge from the catacombs to the churchyard. If you play through the ending and want to make different choices you can always reload your save here.
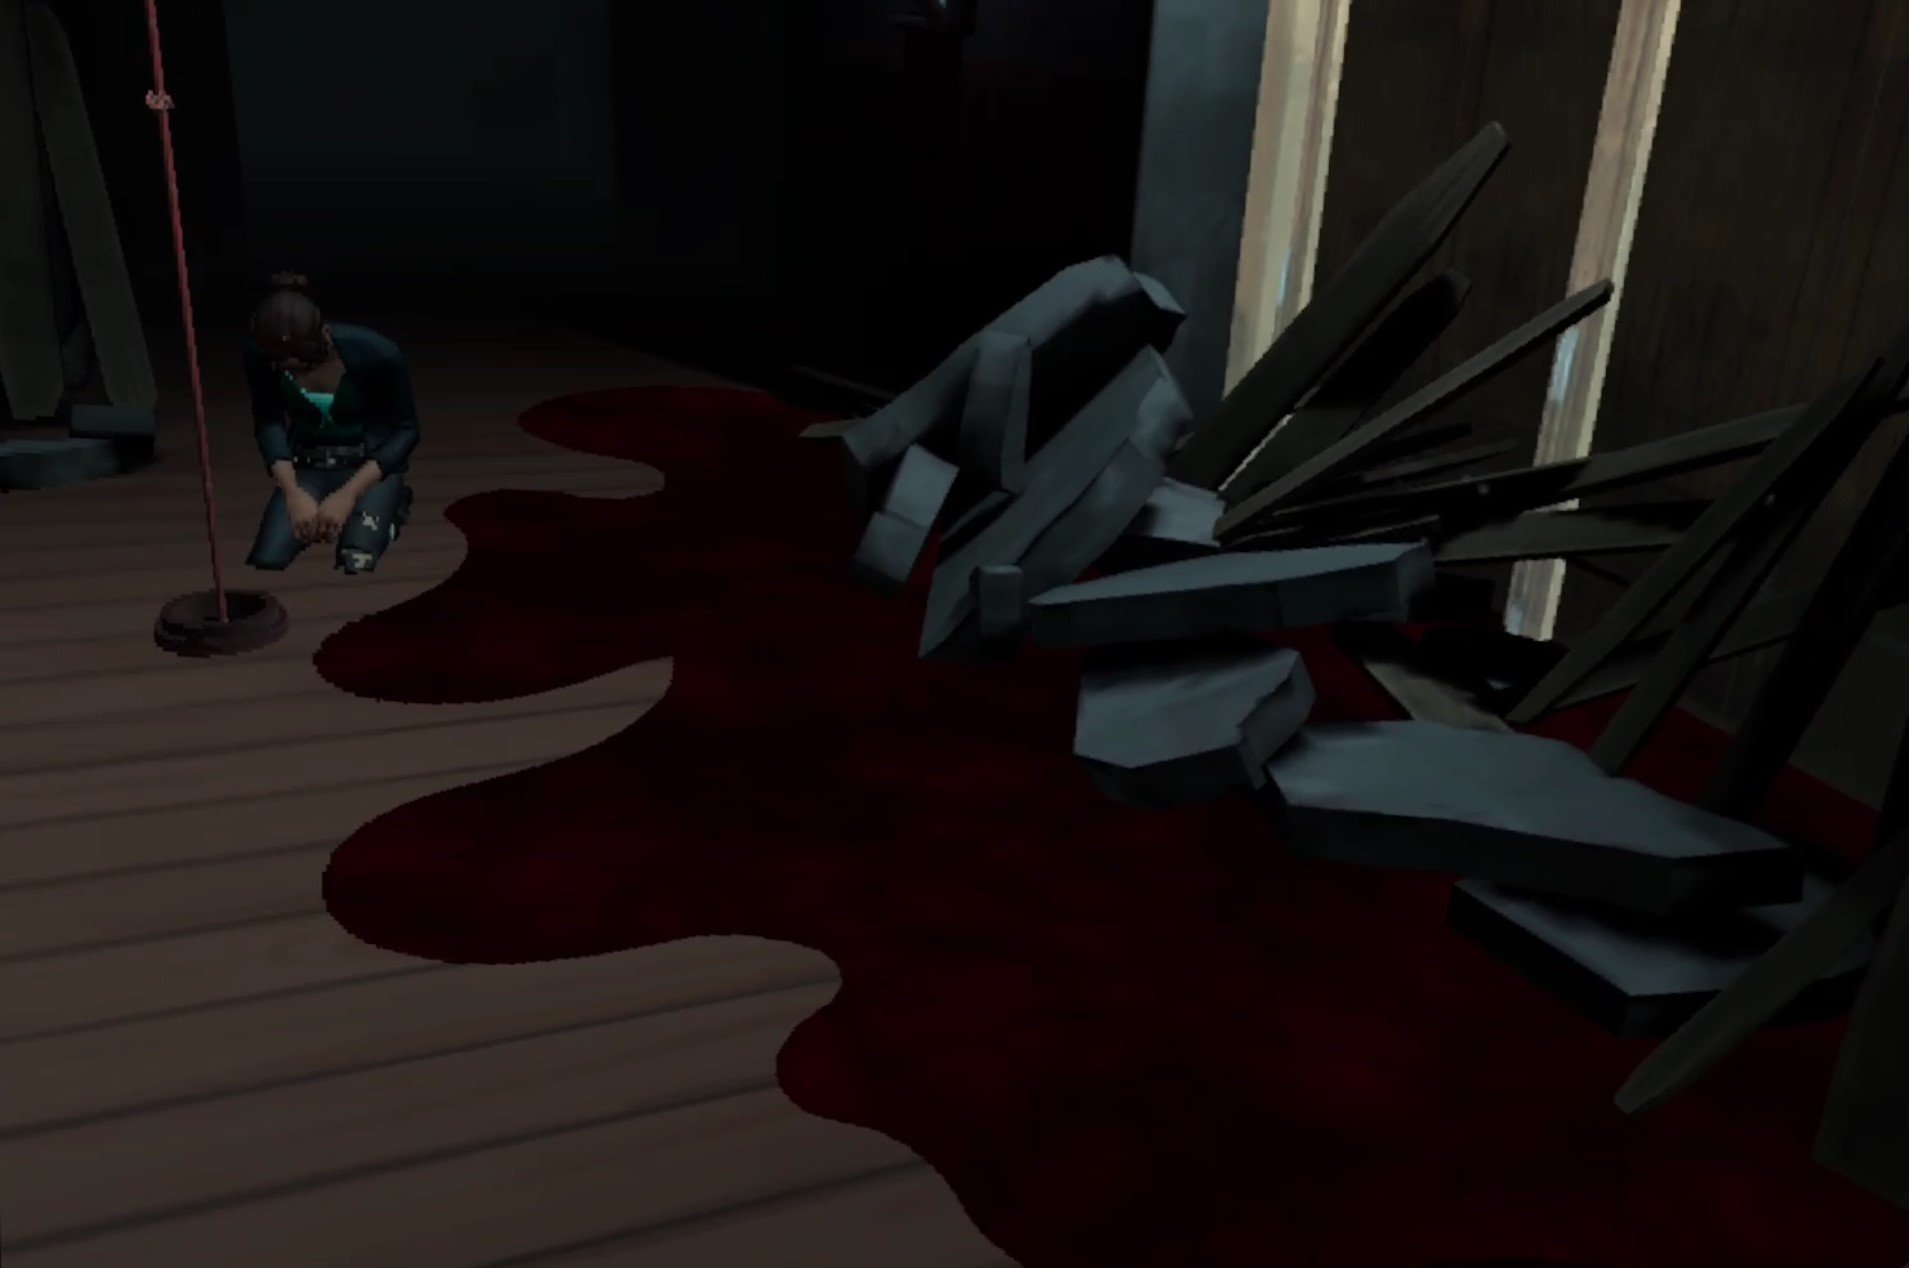
Anyway after you emerge from the catacombs you’ll see a bunch of dead bodies all around you. One in particular has a picture next to her, drawn in a very familiar style.

You’ll hear weeping and sniffling coming from the shed right in front of where you come in from the catacombs. Go inside and you’ll find a woman on the floor. Talk to her and find out what happened here.
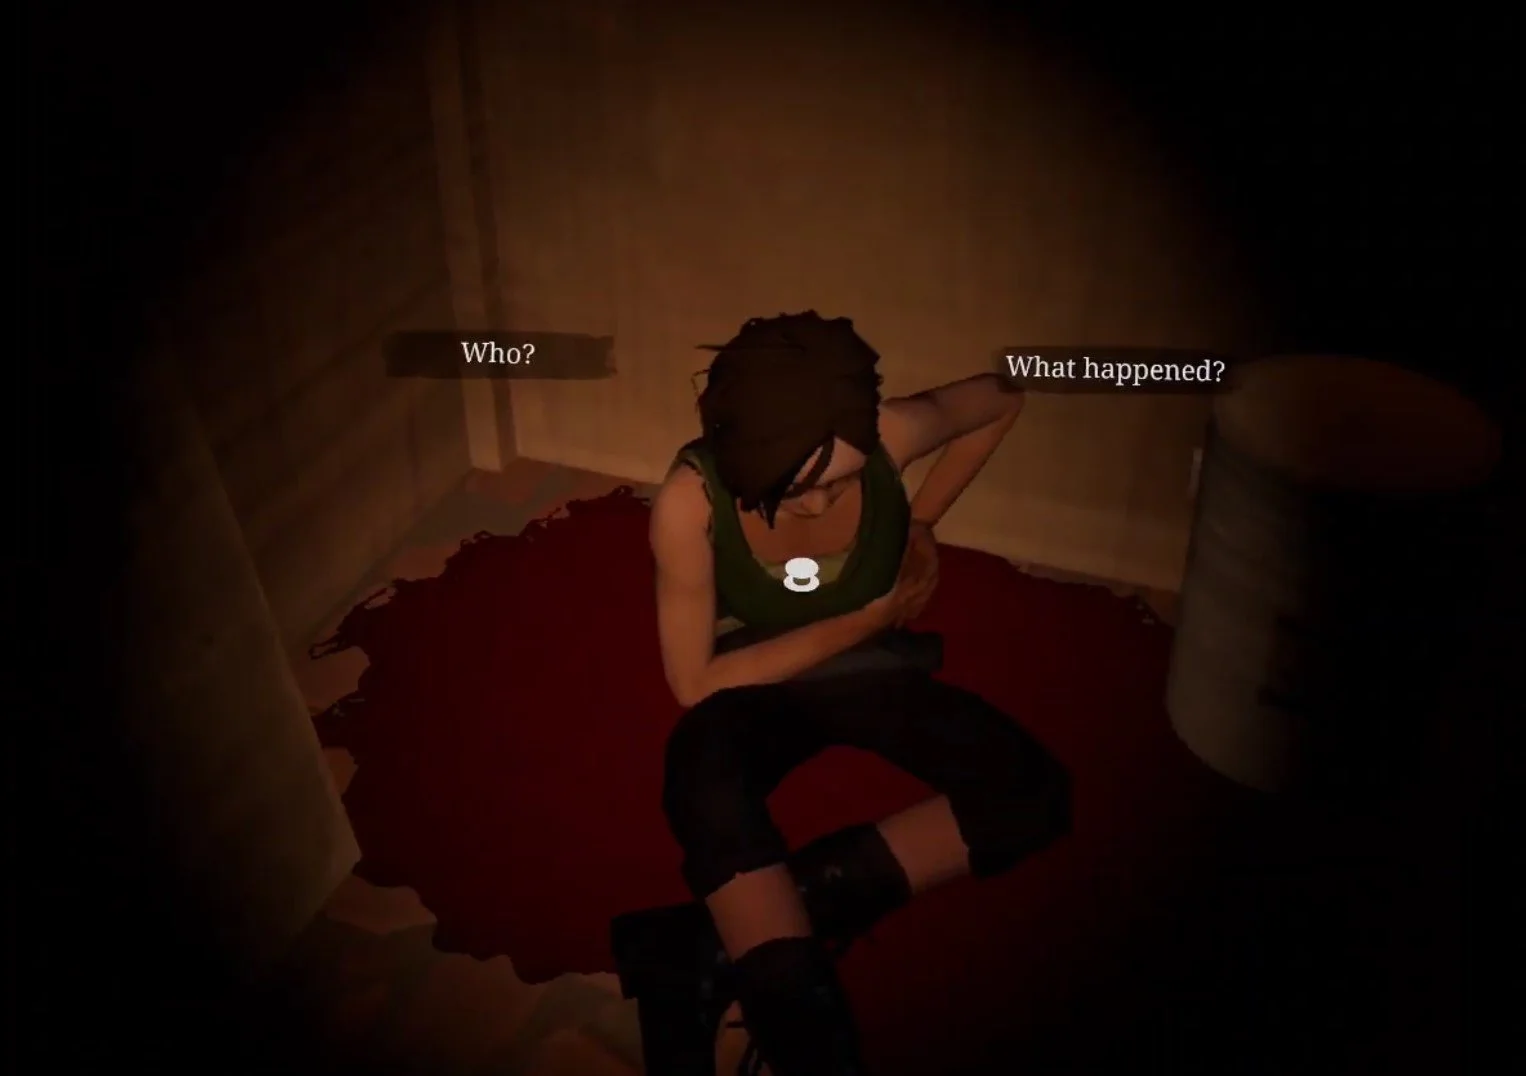
Kill the woman or leave her, either way doesn’t matter. When you leave the shed one of the corpses will now be alive as a walker. Even if you try to run away they’ll follow you and will likely be killed anyway.

That’s because when you walk over to the street, you’ll see Tower grunts running past you towards the church. Now if you sided with The Tower and killed JB at Bastion, this is no problem at all. You can just walk right past them. They’ll do nothing but throw a few snide remarks your way unless you antagonize them.
If you sided with JB and killed Georgia, or killed both of them, then you’ll have to fight your way through a bunch of Tower grunts as you advance up the street towards the church. Hopefully you’ve got something powerful like the Nova 1014. The Tower soldiers will be armed and armored to the teeth.

Once you get to the churchyard you’ll see a burning car, and some explosions will greet your entrance. Tower soldiers will come from your left and right periodically. They’ll advance towards the church and fight the Reclaimed soldiers that are spread out around the front of the building.

If you sided with JB earlier then the Reclaimed soldiers will let you pass inside. If JB never made it out of Bastion alive then you’ll have to fight your way through them. Still, it’s very easy to sprint past most of them while they fight the Tower soldiers and make a beeline for the open gate on the left side of the church. There might be a Reclaimed soldier or two in front of the gate, but if you make short work of them you can run right through. Don’t try clearing the area, enemies will spawn infinitely.
Just like in Bastion, siding with the Tower is the easier and less combat focused option here. If you can just walk past the Tower soldiers you’ll only need to run past or shoot one or two Reclaimed grunts to make it through the gate. Either way the battle looks and sounds very epic. Once you’re through the gate climb up the ladder propped up on the side of the old police van blocking your way.

When you drop down on the other side of the van the sounds of gunfire will subside and you’ll hear shouts of victory. The battle between the Reclaimed and the Tower has ended. Continue on, there’s a couple of bandages and a Nutri Stew on a picnic table in the center of this area. At the end of it you’ll see an open window on the side of the church and a drain pipe leading up to it. You can climb that drain pipe and get into the church.

Once you’re inside the attic of the church, you’ll hear Casey’s voice below you. Keep heading forward by ducking underneath the ceiling beams, and turn right to see a hole in the floor. Jump down the hole.

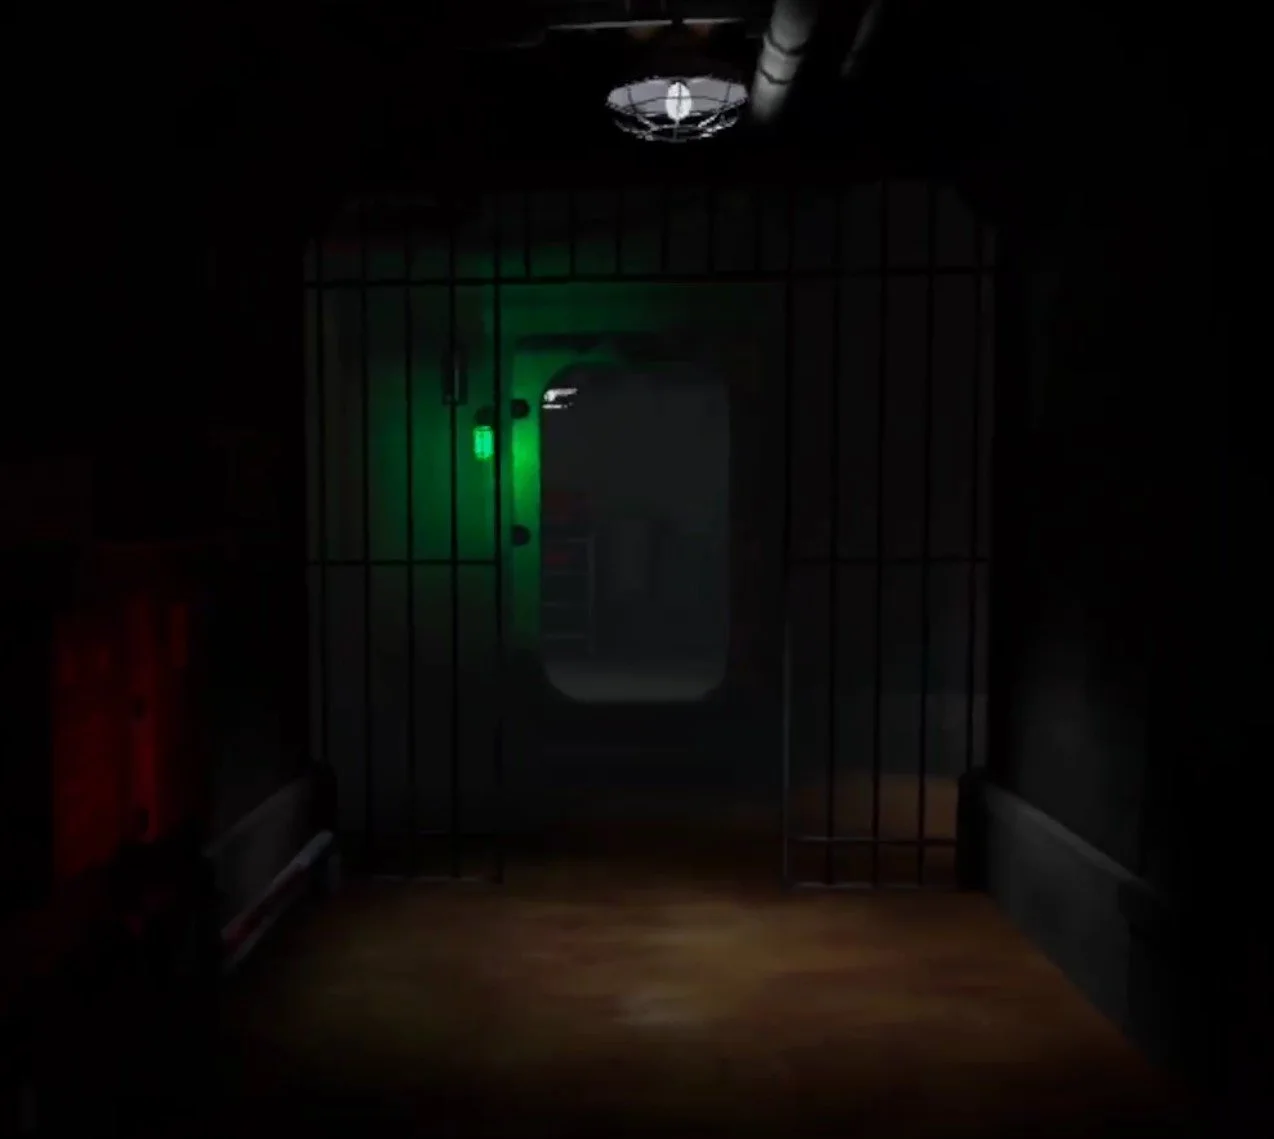
There’ll be a brief load when you hit the ground, so don’t worry if your game seems to stutter. You’ll see a door with a red light next to it. You can’t go there yet, instead go the other way down the hallway towards Casey’s voice. You’ll find that the origin of his voice is another piece of pump machinery, the flood control panel.

You can talk to Casey through the control panel like the radio back in your bus. He’ll tell you that the only way to save him is to redirect the flood flow to the armory. After you talk to Casey you can redirect the flow to either the Comms Room, Armory, or both. To do so get the code that JB gave you in bastion from your journal by going to the Notes tab on the far right, then select the Reserve button on the top left and then selecting Reserve Flood Code from the list.

Once you punch the code into the keypad use the lever on the right to make your choice, and then turn the wheel on your left towards the right.
As for your choices, this is a big one. Casey is right, redirecting the flow towards the Armory will destroy the bounty that you’ve hunted The Reserve to collect, but what he doesn’t tell you is that there is still some stuff in the Comm room. Two Custom Nova 1014 Shotguns, a Custom Hunting Rifle, and two FS92M 9MM Pistols all in perfect condition. There’s also some various odds and ends like a little food and some books and junk that you can scrap.

Flooding the Comms Room will indeed kill Casey, and he will scream at you over the radio if you do so. For doing this though, you’ll have access to the Armory. While you won’t get any of the things in the Comms Room, you won’t need them, because the Armory is packed.
Inside are 3 Custom AR-416 Rifles in perfect condition There are also more FS92M pistols, a ton of materials in the form of Boxes of Loot, and even Dragon Bars on the shelves. Even if you brought nothing you won’t have the backpack space to fit it all. Most importantly there is also the recipe for the AR-416 Rifle, and the recipe for the 5.56mm ammunition that it uses.

Before you make your decision, keep in mind that both of the AR-416 recipes can be found later in the Aftershocks DLC or Chapter 2: Retribution. You can find them on the bodies of enemy soldiers. They drop randomly, but you’ll get them eventually when playing through either follow up experience.
You can also flood both of these places as Jean Baptiste suggested, and get nothing. If you really want stuff, you’ll still be getting a lot of it in the Aftershocks DLC, though the massive amount of equipment in the Armory is definitely helpful, most of all the recipes inside.
Once you make your decision the door with the red light beside it back where you fell through the ceiling is now open, head on through. You’ll find yourself in a kitchen littered with corpses. Across the table in front of you is a door blocked with boards. If you don’t have a weapon on you can use the axe propped up on the wall to smash the boards down.

While you’re doing this the bell on the top of the church will ring once. You’ll hear the people outside chattering about it. Once you’re past the boards go down the hallway, and emerge in the heart of the church. At the other end of the room is the rope that, if pulled, rings the church bell, and either one or two figures will be standing near it.

Walk across the church towards them. May will yell something about not taking a step closer, but you can stand as close to her as you like and she won’t react differently. She’s got her hands on a rope, and if she pulls that rope the massive bell above you will ring and attract a horde of walkers. If you didn’t flood the Comm Room and spared Casey then he will also be there.
Here is your second choice. Most likely either Casey Or May will end up dead. There is no talking May out of her grief. She will ring the bell no matter what you say. The only way to prevent her from doing this is by shooting her to death. If Casey is alive, then he won’t allow May to commit an atrocity. If you don’t shoot May then he will. Strangely enough, if Casey does shoot May he seems to find it cathartic.

Of course if Casey never made it out of the Reserve then he won’t be there to intervene, and even if he did you can always shoot him before he shoots May, though in that case you might as well have flooded the Comm Room.
If you are alone with May then she will say the same things, and still ring the bell unless you kill her. If this happens she will collapse on the floor and you’ll hear the people outside being slaughtered by the hordes of the undead. Blood will seep through the front door.
You can also ring the bell yourself, even after shooting May. Ringing the bell more than once won’t do anything.
Thanks to commenter Kevin on this article we now also know that there is a somewhat secret ending here where both May and Casey survive. To do this immediately run up to May as you enter the church and get really close to her so she freaks out and starts ringing the bells, or ring the bell yourself while standing between her and Casey.
Both her and Casey will silently drop to the floor, defeated, as the walkers descend on the people outside of the church. Neither will say anything, so this isn’t the most satisfying ending, but neither of them will perish either.

When May and Casey’s fates are decided you can now enter the bunker and take whatever you want from the room that you chose not to flood, or just walk straight through the bunker if you flooded both of them.
At the end of the straight hallway is this open door, to your right and left will be some walkers on the other side of some bars, they can’t get through and attack you, so don’t worry. Climb up the ladder in the room at the end of the hall and then head through the final door to find yourself back outside. There’s a boat at a little pier in front of you, step on it and sail away.

After you sail away the credits will play. You can hit A to skip them, but please do take a moment to at least think of all the people who worked on this game and all of the effort they put into it. The Walking Dead: Saints and Sinners was an early example of the great potential of Virtual Reality gaming, and we as VR gamers owe these people some gratitude.
When the credits are over, the time will skip to one week in the future. Now that you’ve finally found The Reserve, it’s time for the Aftershocks DLC, which you can find a walkthrough for on this site as well.
For now, congratulations on finishing The Walking Dead: Saints and Sinners - Chapter 1!

The Walking Dead Saints and Sinners Walkthrough and Guide - Part 10 - Bastion and The Reserve Key
Stuck in The Walking Dead Saints and Sinners? Wondering where to go next? Maybe you just like to see what is in store for you before you get there, or want to look back and see if you missed anything in The Walking Dead: Saints & Sinners. Well don’t worry we’ve got you covered with this complete walkthrough. This is the tenth part, where you finally get the Reserve Key and go to Bastion to get the final pump part.
Stuck in The Walking Dead Saints and Sinners? Wondering where to go next? Maybe you just like to see what is in store for you before you get there, or want to look back and see if you missed anything in The Walking Dead: Saints & Sinners. Well don’t worry we’ve got you covered with this complete walkthrough. This is the tenth part, where you finally get the Reserve Key and go to Bastion to get the final pump part.
This article will detail how to progress through the main story missions as quickly as possible, with a couple of guiding tips thrown in here and there to make your adventure smoother. Only those recipes that are convenient to get when doing a task for the first time are included. For a full list of all recipes in The Walking Dead: Saints & Sinners, check out our recipe guide article. Spoilers will be as light as possible, but there will be story spoilers by necessity in this walkthrough, but there won’t be any explanation of what is going on in the story beyond what is necessary to make the walkthrough make sense.
All Walkthrough Parts:
The Walking Dead Saints and Sinners Walkthrough and Guide - Part 1 - The Graveyard
The Walking Dead Saints and Sinners Walkthrough and Guide - Part 2 - The Shallows
The Walking Dead Saints and Sinners Walkthrough and Guide - Part 3 - Via Corolla
The Walking Dead Saints and Sinners Walkthrough and Guide - Part 7 - Old Town and Another Stash
The Walking Dead Saints and Sinners Walkthrough and Guide - Part 8 - Rampart
The Walking Dead Saints and Sinners Walkthrough and Guide - Part 9 - The Shallows Again
The Walking Dead Saints and Sinners Walkthrough and Guide - Part 10 - Bastion and The Reserve Key
The Walking Dead Saints and Sinners Walkthrough and Guide - Part 11 - The Reserve and the Ending
The Resting Place/The Church
Welcome back to New Orleans in The Walking Dead: Saints and Sinner. Wake up and grab a melee weapon. When you walk outside of the bus you’ll see that May’s lantern is lit once again.

As always go over to the coffin, and inside is a note. Read it and you’ll find that May is waiting for you near the church in the same place she was before.

Walk over to the entrance to the old catacombs, deal with the zombie or two that spawn down there, and take the first right to go over to the church yard. After you exit the catacombs and take a right, you’ll see May across the street.

Talk to her and you’ll find out that she will give you the Reserve Key, and that it will show up the next time the lantern is lit. Congratulations! No more intelligence gathering for you. You can also kill May here if you’re angry at her for how many gunfights she put you through for a key, and still get that key off of her body. This isn’t recommended as it will cut out another interesting element of the story later.
Anyway head back to the bus the way you came, and talk to Casey on the radio. He’s heard where you can get the final pump controller. At a fortified apartment building called the Bastion.

Make sure you bring guns. The biggest guns you have, and probably a bandage just in case. Explosives are also great, like the nail bombs that you can craft at the survival bench. If you haven’t used the sticky bombs from the first stash then those will also do just fine. Depending on your choices there is a perfect chance to use those explosives to take out multiple enemies.
You won’t have to worry much about zombies for this mission. If you ever wanted the perfect time to run a pistol on each hip, this is it. Hopefully you’ve unlocked the powerful Nova 1014 shotgun. Or if you have a Worn AR-416 that you got off of a dead tower grunt, that will work too. Just make sure you have some ammunition for whatever you bring. No matter what you can’t go wrong with a double barrel or hunting rifle, whatever you prefer. Just make sure you’re ready to fight other people with guns.
Once you’re ready for a fight head over to Bastion.
Bastion
When you arrive in Bastion you’ll notice that it’s… quiet. Too quiet. There are no gunshots, no walker moans. Just silence. If you check your watch you’ll see that the usual circular timer that ticks down until the bells ring is no longer there. It’s just full green. That’s because there are no bells this time around. You can take as much time as you like.

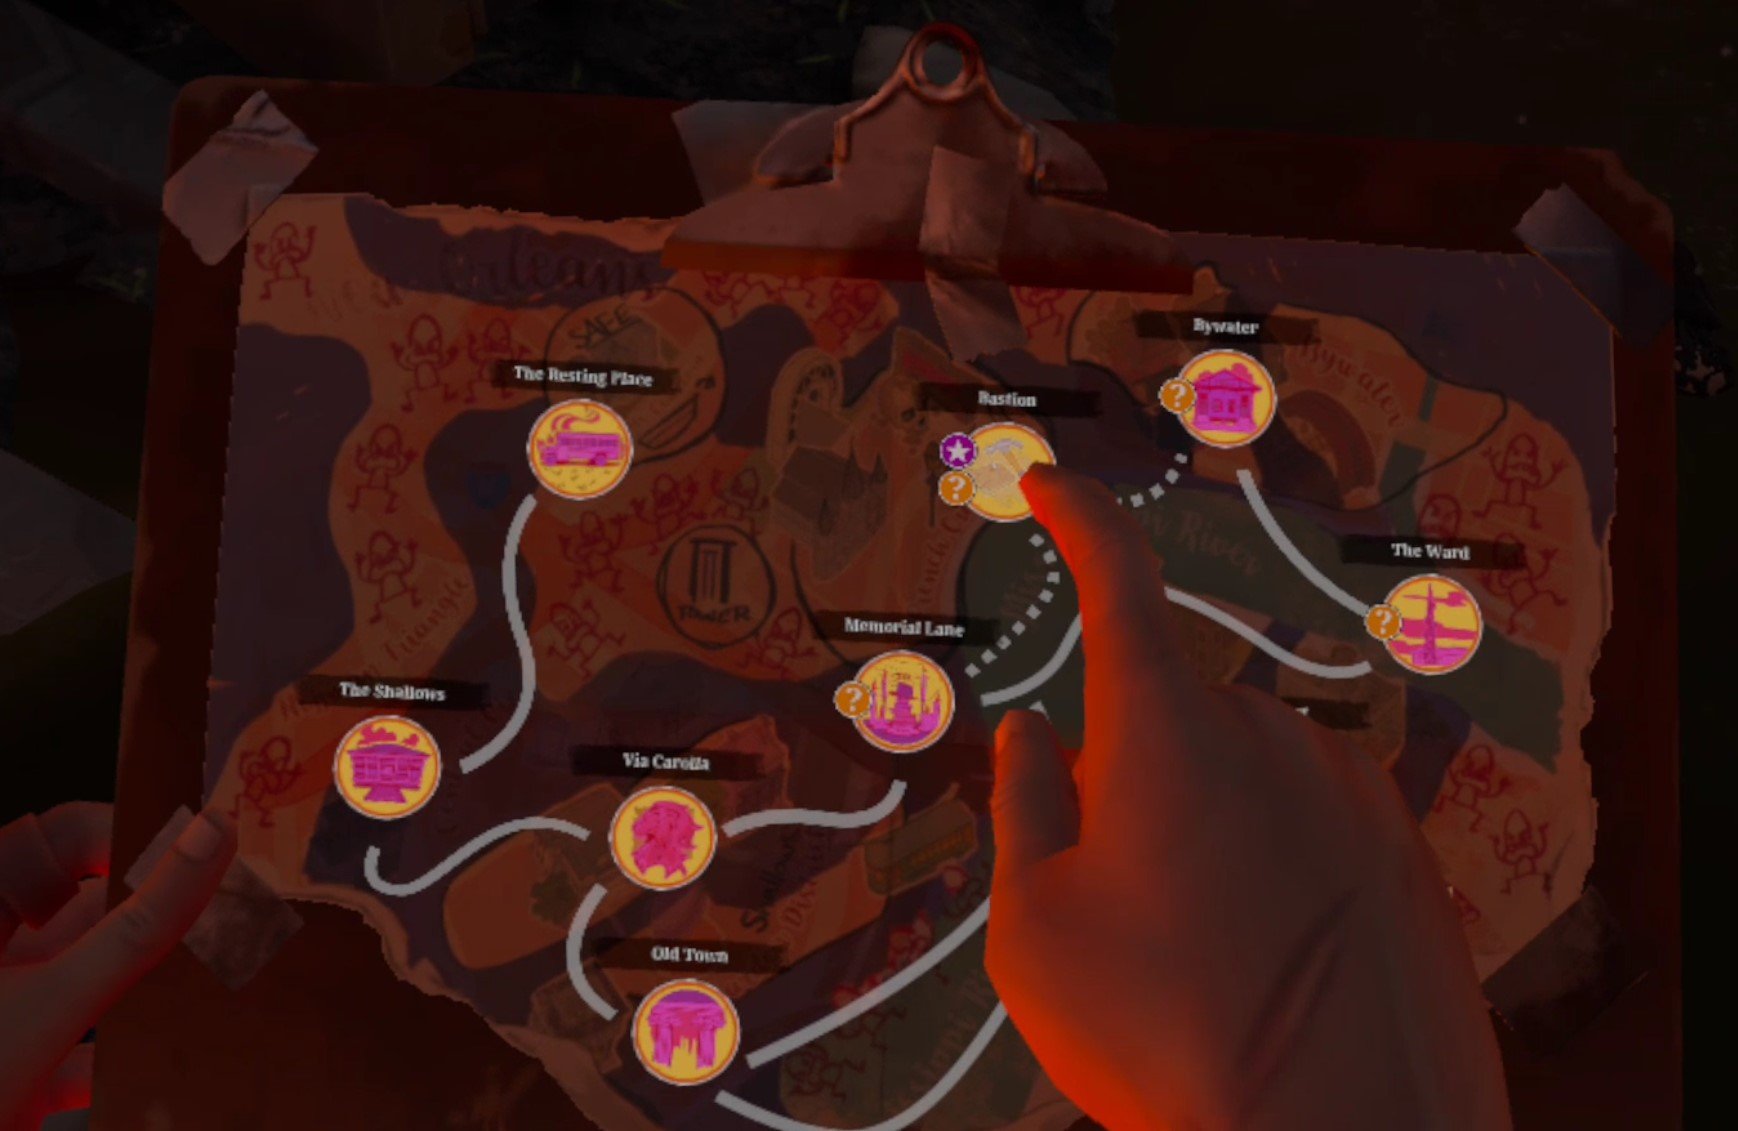
As always take a peek at your map. You’ll see two enterable buildings marked with colors. A blue building and a yellow building.

The yellow building is the fortified apartment complex that is your target, and has the pump regulator inside. If you want to go straight there go ahead, and skip a little further in this walkthrough. Since there are no enemies and all the time in the world though, you might as well take a right out of your spawn and stroll down Walnut street until you see a building with a car crashed into it.

This is the building marked blue on your map. Go up the crashed car and take a right, you’ll see a path that leads around the back of the building, and a hole in the wall blocked by some boards. Use a heavy melee weapon like a cleaver, or a two handed firearm, to bash the boards down and head inside. After you walk out of the first room there will be a little side table on your left, and on it a piece of paper with a safe code.

Take it, you’ll be able to use it in the next walkthrough. Meanwhile feel free to loot the house, loot the streets, and do anything you like until you’re ready to get the pump. When you are, walk over to the yellow building on your map.
It’s large and lit up by a bunch of work lights left in the road. Still, nobody appears to be home. There will also be some good loot inside. Make sure to also check the garages on either side of the building as well. If you want to go straight for the pump then enter one of the doors that are on the lower side of the building relative to the map and walk up the stairs.

Either way if you go upstairs and wander around for a bit you’ll inevitably find an open door, and a figure sitting inside.

Make sure you’ve looted the area as much as you like before talking to him. After your chat with the leader of the Reclaimed, Jean Baptiste aka “JB”, you’ll have more important things on your mind than what junk you’re carrying.
Your chat with JB will be illuminating, and he will give you the codes that will active the Reserve’s flood control system, as well as the final pump controller and the dial for it. You can also, as always, just shoot him and take all of those things off of his body.

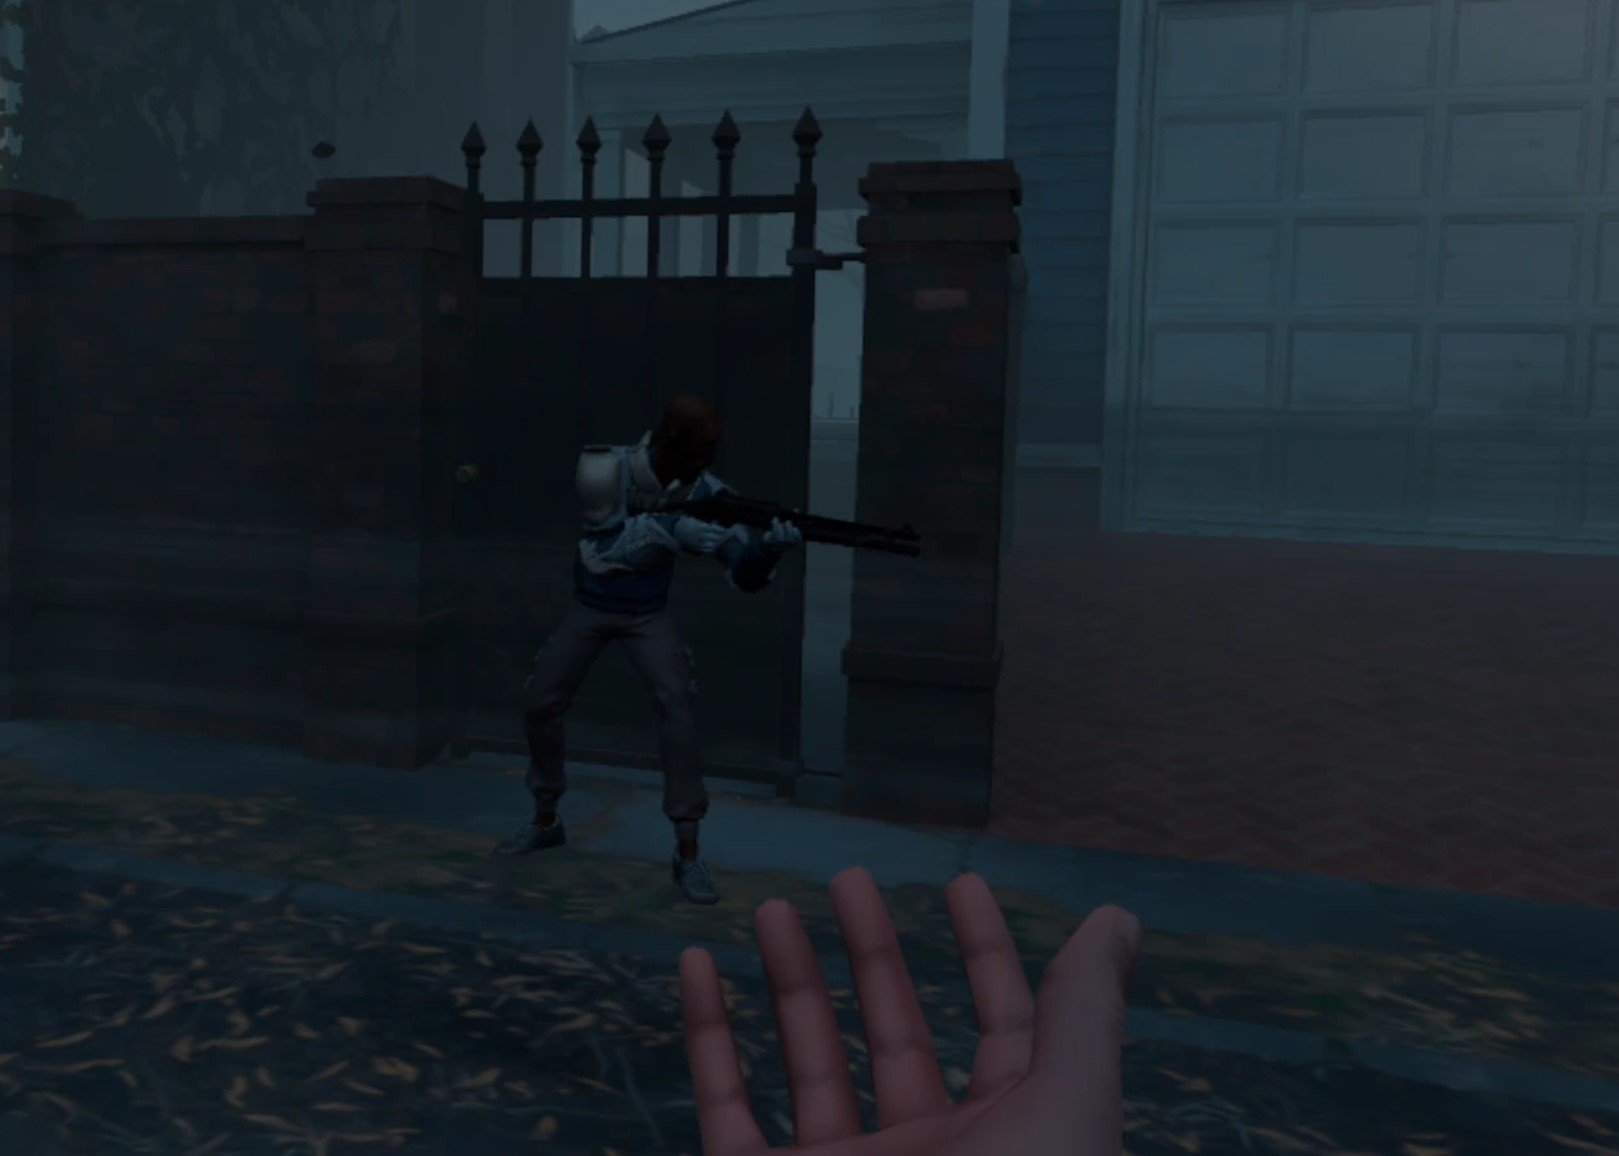
Whenever you’re done with JB, walk back down the stairs and you’ll see that the door across the room leading outside is open. Walk over and you’ll run into another of New Orleans’ notorious leaders, and a bunch of her soldiers.

Georgia offers you a deal. Go back inside and kill JB and she’ll forget all of her grunts you killed and stashes you stole. If you refuse this deal you can’t walk away peacefully. It’s either agree to kill JB, or fight Georgia and her soldiers right there.
Here are where the options really open up. If you agree to kill JB you can go back in and tell him you’ll kill him. He will accept this and just wait around for a bullet. He won’t even fire on you first. If you do this then Georgia will promise that her troops will not fight you during the upcoming battle for The Reserve. Then you can just walk past Georgia and her goons and go back to The Resting Place.

You can also warn JB, but instead of running he will charge out to fight Georgia and the Tower soldiers alongside her. Without help JB will certainly lose. If he does survive though he will thank you, and promises that Reclaimed troops will not fight you over The Reserve.
You can also kill both leaders, and neither side will avoid fighting you over The Reserve.
As far as getting that done, shooting JB is the easy way out of the situation. He won’t even fire first on you. Fighting Georgia is harder, especially if you’re trying to keep JB alive. If you warn JB and he starts to run outside, make sure you jump down the stairwell and make it out before he does, or he will quickly perish.
You can always fight her before warning JB, or while she is talking to you. You’ll notice that she has two soldiers standing very close by her. So the optimal way to start the fight is before you say something that causes them to attack. Use the explosives you hopefully brought, and throw it right beside Georgia. That should take out her and at least one of her soldiers.

Use that big gun you brought for the rest. If you take a lot of hits you can always duck back into the building to avoid death, though JB might still foolishly run outside and get killed while you’re bandaging.
A benefit of fighting Georgia is that her soldiers might drop guns, like Worn AR-416es, and the recipe for Sticky Bombs, or any other weapon recipes you might have missed so far. If JB lives he will thank you and run off. If he dies then you’ll have to fight the Reclaimed over The Reserve as well.
However the situation plays out, head back to the Resting Place. You’ve got the final pump regulator. The fight for The Reserve is about to begin.

The Resting Place
Home sweet home. Once you arrive you’ll see that the lantern over the coffin is lit once again. Go there and get a final picture and note from May, and most importantly the Waterfall Key, which you need to access The Reserve.

Once you’re done reading May’s note, go ahead and scrap all that loot you got. When you’re ready for the final battle of The Walking Dead: Saints and Sinners, go over to the radio and talk with Casey. It’s time to enter The Reserve.

Need a guide on what comes next? Want to find out what happens during the thrilling conclusion of The Walking Dead: Saints and Sinners? Then head over to Part 11.

The Walking Dead Saints and Sinners Walkthrough and Guide - Part 9 - The Shallows Again
Stuck in The Walking Dead Saints and Sinners? Wondering where to go next? Maybe you just like to see what is in store for you before you get there, or want to look back and see if you missed anything in The Walking Dead: Saints & Sinners. Well don’t worry we’ve got you covered with this complete walkthrough. This is the ninth part, where you go back to the Shallows to get another package for May.
Stuck in The Walking Dead Saints and Sinners? Wondering where to go next? Maybe you just like to see what is in store for you before you get there, or want to look back and see if you missed anything in The Walking Dead: Saints & Sinners. Well don’t worry we’ve got you covered with this complete walkthrough. This is the ninth part, where you go back to the Shallows to get another package for May.
This article will detail how to progress through the main story missions as quickly as possible, with a couple of guiding tips thrown in here and there to make your adventure smoother. Only those recipes that are convenient to get when doing a task for the first time are included. For a full list of all recipes in The Walking Dead: Saints & Sinners, check out our recipe guide article. Spoilers will be as light as possible, but there will be story spoilers by necessity in this walkthrough, but there won’t be any explanation of what is going on in the story beyond what is necessary to make the walkthrough make sense.
All Walkthrough Parts:
The Walking Dead Saints and Sinners Walkthrough and Guide - Part 1 - The Graveyard
The Walking Dead Saints and Sinners Walkthrough and Guide - Part 2 - The Shallows
The Walking Dead Saints and Sinners Walkthrough and Guide - Part 3 - Via Corolla
The Walking Dead Saints and Sinners Walkthrough and Guide - Part 7 - Old Town and Another Stash
The Walking Dead Saints and Sinners Walkthrough and Guide - Part 8 - Rampart
The Walking Dead Saints and Sinners Walkthrough and Guide - Part 9 - The Shallows Again
The Walking Dead Saints and Sinners Walkthrough and Guide - Part 10 - Bastion and The Reserve Key
The Walking Dead Saints and Sinners Walkthrough and Guide - Part 11 - The Reserve and the Ending
The Resting Place
Welcome to another day in New Orleans. After you wake up you’ll notice that the lantern on the pole overtop the tomb is lit up again. So go over there and get your new task from May out of the coffin. There’s a picture of the location as always, and a letter from May that you should read to get a little more background on her.

You might recognize it from the photo, but that is a window in the Blue Mansion located in the Shallows, the very first place you went to in The Walking Dead: Saints and Sinners for the radio microphone!
It’s not going to be quite so easy to get into the Blue Mansion this time though. There will be a lot of Tower soldiers guarding the place inside and outside. Be prepared for heavy combat. Grab the best guns that you have. By now hopefully you’ll at least have access to the FS92M 9MM Pistol, or even the Nova 1014 Shotgun. If you do, bring them, but if not that’s okay.

This mission is totally possible with a Double Barreled Shotgun or Hunting Rifle. Just be aware that you’ll have to do some close quarters fighting inside the building no matter how you approach this. So a good pistol is very helpful. Make sure you’ve got plenty of ammo and durability on those guns too, you’ll need to use them a lot.
You may also want to eat some stat boosting food like Gumbo, which gives you 25% more max health. There will still be zombies though, as always, so make sure you’ve got some melee options on hand as well. Whenever you’re geared for some human on human combat and ready to rock, head over to the boat and sail to The Shallows.

The Shallows (Again)
This time when you arrive in The Shallows you will spawn in on the skiff in the upper right corner of the map. Just down the road in front of you and on the right is the Blue Palace. You might hear some shooting after you spawn in, get ready.

Once you start walking down Bordeaux and make it to the truck right in front of where you spawn in, two Reclaimed soldiers with rifles will come running over from a side street. Don’t shoot, they’re actually on your side here, and can make getting into the Blue Palace much easier.

The first Tower soldiers guarding the Blue Palace are on the other side of the truck, and the two Reclaimed will pause for a few moments, and then walk around the front of the truck and start fighting them.

You’ve got a lot of options here. The Tower soldiers won’t actually attack you until you attack them first or get too close to the building, or go into the backyard behind the Blue Palace. So you can always just run past the fighting between the Tower and Reclaimed forces, bypassing most of the external Tower defenders, and take one of several paths inside (more on that later). Though once you’re inside the Blue Palace you will have to fight.
You can also fight alongside The Reclaimed soldiers. They will fight the first group near the skiff, and then go on to attack the Tower soldiers in front of the front door to the Blue Palace. Unfortunately the front door is heavily barricaded now and you can’t go through it. If the Reclaimed soldiers are still alive, they’ll go around the front of the building to the open garage, and fight the Tower defenders there.
If the Reclaimed soldiers somehow survive all of this, they’ll mill around on the street. Once all the Tower defenders are clear you might as well just walk in through the open garage door.

For the fun of a chaotic shootout and the loot that dead enemies will drop (potentially including Worn AR-416 Assault Rifles) fighting through the Tower forces on the street is definitely recommended. There are few moments that are so action packed in the first The Walking Dead: Saints and Sinners game that you’ll be missing out if you ignore it.
Still, if you prefer stealth gameplay or just want to avoid fighting as much as possible, there are several routes you can take to avoid fighting the Tower soldiers outside. They are mostly the same as those from the first time you came to The Shallows, just with a bunch of Tower guards added in.
As mentioned earlier you can run past them and they won’t be immediately hostile. If you’re quick you can duck in through a hole near the front door that leads to the crawlspace beneath the house, and from there pop up through the broken floorboards into several rooms inside.

You can also just not go down Bordeaux street from the very beginning, and instead walk to the little lot that the Reclaimed grunts run in from at the start. Further down is a big gate with a Tower soldier defending it. If you walk through the gate the soldier will attack, but it’s only one. There’s a small courtyard on the other side with a hole in another wall, crawl through it and you’ll be in the backyard behind the Blue Palace.
There are only a couple of Tower guards in the backyard, so take them out and you can climb up a gutter pipe to the second floor, crawl down into another crawlspace hole, or just walk in through the back door.

You can also just walk down the street, past the open garage and into a small side gate with a single guard in front of it. You can quickly shoot the guard and slip inside, or just run through the gate before he notices, and you’re in the backyard.
As you can see there are a ton of ways to get inside. For the least amount of combat though, you’re best off just using the first option presented here and going through the crawlspace hole at the front of the house.
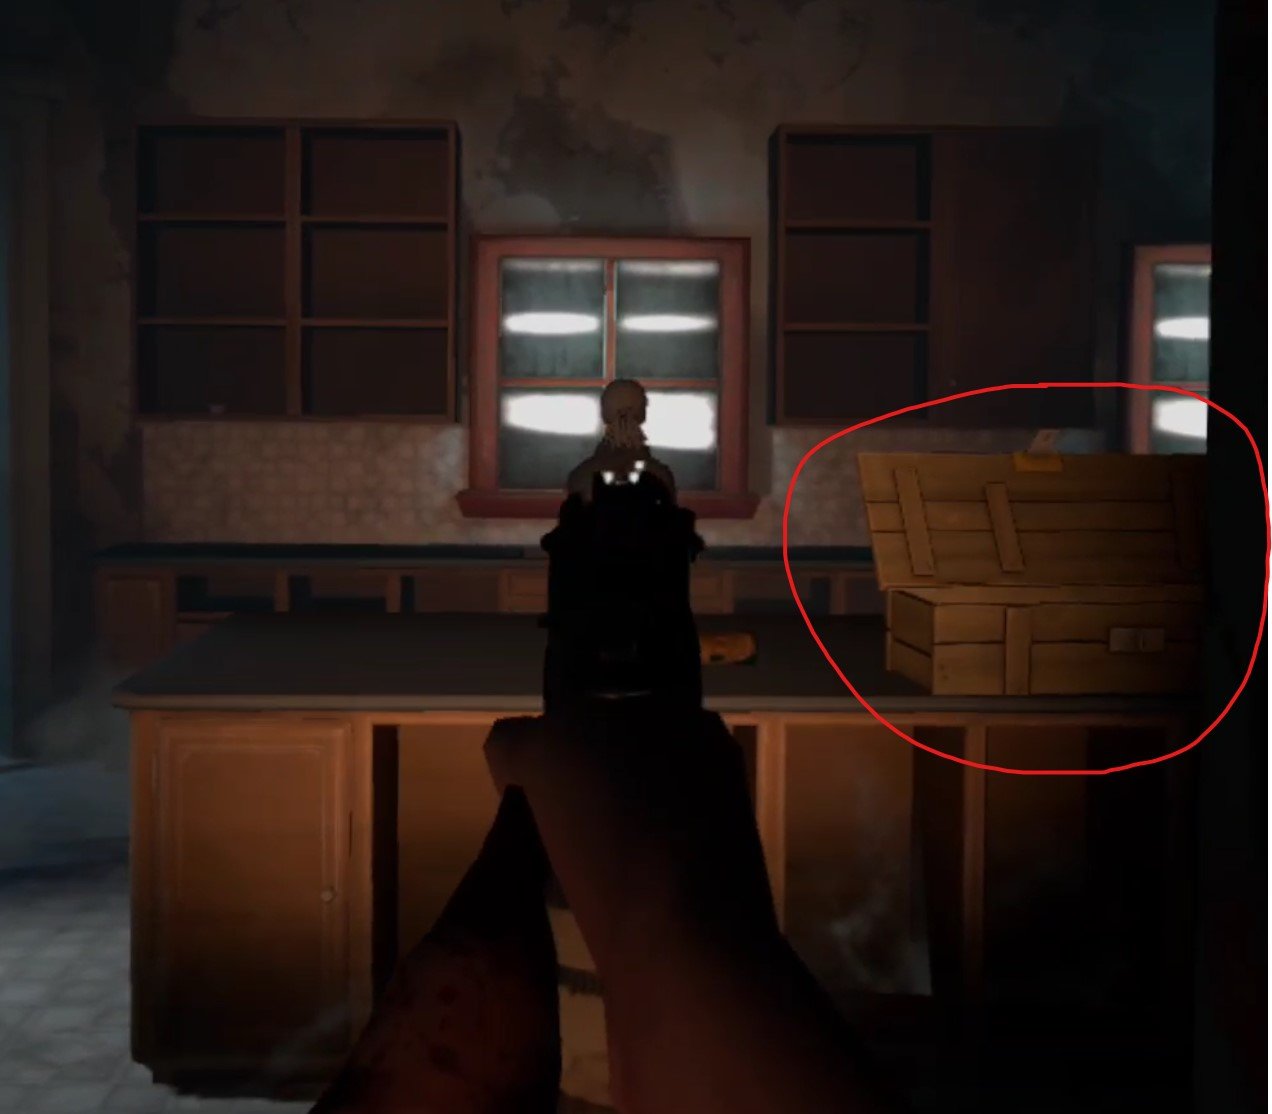
Once you’re inside the layout and loot spawns are mostly the same as the first time you were here. For more information on the loot spawns in the Blue Palace, check out the walkthrough article for the first Shallows mission here. The differences this time are a few crates scattered around, like in the kitchen on the main floor. These open crates contain Boxes of Loot, which are the best loot item in the game.
There are also, of course, Tower soldiers everywhere now. About one for every room, so always have your gun ready when going through a door or rounding a corner. Go through the house and gather loot, or don’t, it’s up to you, there will also be some good stuff by your objective, which is upstairs.
If you wander around the second floor long enough you will inevitably run across it. It’s the small, long room with the pool table in the middle of it. That Pool Table now holds the intel you need, and some goodies. Though there are two Tower soldiers in the intel room, and some in the adjoining room.
If you’re running into those barbed wire traps with cans hanging from them, then you’re going in the right direction. Oh, and in case you’ve forgotten you can easily disarm those by tapping the wire with a gun, melee weapon, or your flashlight.
If you’re having trouble finding the intel room then the fastest way to get there is to climb up the main stairs to the second floor, and go down the long hallway that leads past two doors, one on the left (goes to the attic), and one on the right. At the end of that hallway is another door, and that least directly to the intel room.

Once you’ve got the goods you can just retrace your steps and leave the way you came. As long as any guards that might be remaining outside don’t see you inside the perimeter of the house then they won’t shoot at you.
Oh, and if you never opened the safe to get the .45 Revolver Recipe the first time you came here, the code for that should be on the ground by the carport with the ruined car in it on the road right by the skiff in the top left corner of the map, where the woman was the first time you go to The Shallows.
The Resting Place
Once you’re back do the usual, scrap loot items, store useful items like the timer bombs that you found next to the intel, and put the folder from the stash into the coffin. Congratulations, you’ve survived The Shallows twice! Have a good sleep.

Need a guide on what comes next? Want to find out where the final Pump Part for Casey is? Then head over to Part 10.