


How to Make Metal Weapons and Tools Solo at the Blacksmith in A Township Tale
If you’ve followed our guide on how to Play A Township Tale Solo on the Oculus Quest 2 then you’re definitely at the point where you have unlocked the Blacksmith building and can finally make metal Weapons and Tools. The best and most durable weapons in A Township Tale are made at the Blacksmith, while there are some that you can find out in the wild, you’ll need to know how to make your own to have a consistent source of weapons and tools while exploring A Township Tale Solo.
If you’ve followed our guide on how to Play A Township Tale Solo on the Oculus Quest 2 then you’re definitely at the point where you have unlocked the Blacksmith building and can finally make metal Weapons and Tools. The best and most durable weapons in A Township Tale are made at the Blacksmith, while there are some that you can find out in the wild, you’ll need to know how to make your own to have a consistent source of weapons and tools while exploring A Township Tale Solo.
This guide assumes that the Blacksmith on your server has not been used by other players, and directly follows our previous Solo Guide for A Township Tale.
Settle In
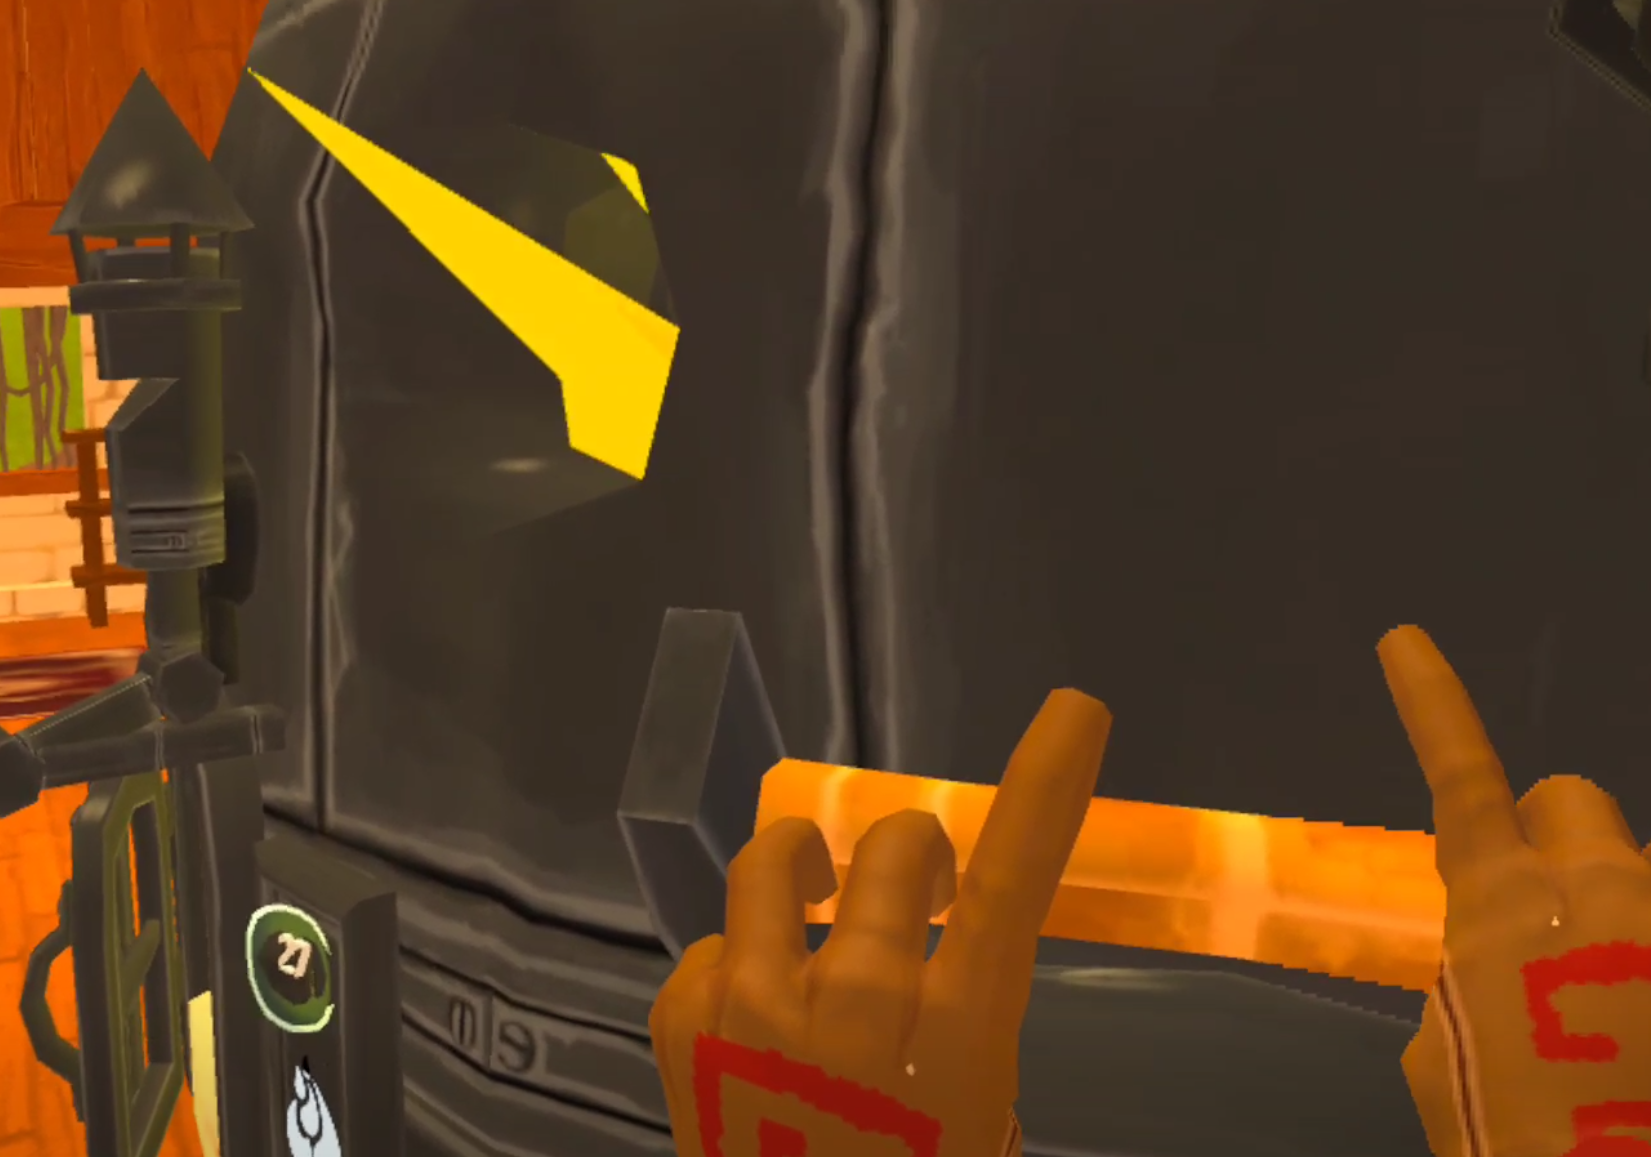
After strutting up your newly constructed staircase you will see the Blacksmith directly in front of you, which you can recognize by the giant forge, training dummy, and anvil shaped sign.

It’s been a long time since anyone was here, so all of the doorways and windows are overgrown with vines so thick you can’t walk through them. Use a tool to smash the vines to pieces. If you don’t have a tool or weapon on you, a rusty hammer is on the anvil in front of the forge.

Now that you can enter the Blacksmith freely you can get down to the real business of making your own weapons and tools. When you take a look around you’ll see various parts and pieces lying around, in addition to some rusty tools. There will also be some other useful pieces on shelves. We won’t be using any of that for our first creation. Instead we’ll create something from scratch using recipes that will be available to anyone when they first unlock the Blacksmith.
Smelting Ingots in the Smelter
First things first, in order to make something out of metal, we will need metal ingots. Gather all of the coal and copper ore you have. Even if you don’t have any there should be enough already in the Blacksmith to create a few copper ingots. Just look on the shelf immediately to your left after you come in through the entrance that is next to the training dummy.

Once you’ve got your copper ores and coal together, it’s time to use the huge black smelter in the center of the building to make some bars of copper (aka, ingots). You’ll notice a hopper right in front of that shelf which has the ores and coal on it. Open it up, and throw all of your copper inside. Once it’s all nestled in there close it completely. That will put your copper ore inside of the smelter.
If you are wondering how many ingots will be made from your ores, every three ores creates a single ingot.

If you mess up and put something in the hopper that you don’t want in the smelter, you can always pull the lever next to it and everything you put inside will appear on the little table to the left of it.
Once your ore is inside of the smelter, you will need some fuel to heat it up and turn it into ingots. To fuel up your smelter go a little to the right of the hopper, and open the grate you will find at floor level. Throw all of your coal inside the grate, and the smelter will instantly start smelting ore into bars.

Smoke will start to billow from the smelter, and you will see flames inside of it, so you know it’s working. Still, each bar takes a few seconds to smelt. To speed up the smelting process you can push down on the bellows next to the Coal Grate. You know the bellows are working when great gouts of flame start appearing in the smelter window in front of you.
When the smelter stops working you are either out of ore or out of coal. If you’re in a pinch and don’t have enough coal, you can also use wood to fuel the smelter. You could also always go back into the mines for more too.
To collect the fruit of your labors go to the output hopper to the right of the bellows.

Turn Ingots Into a Blade
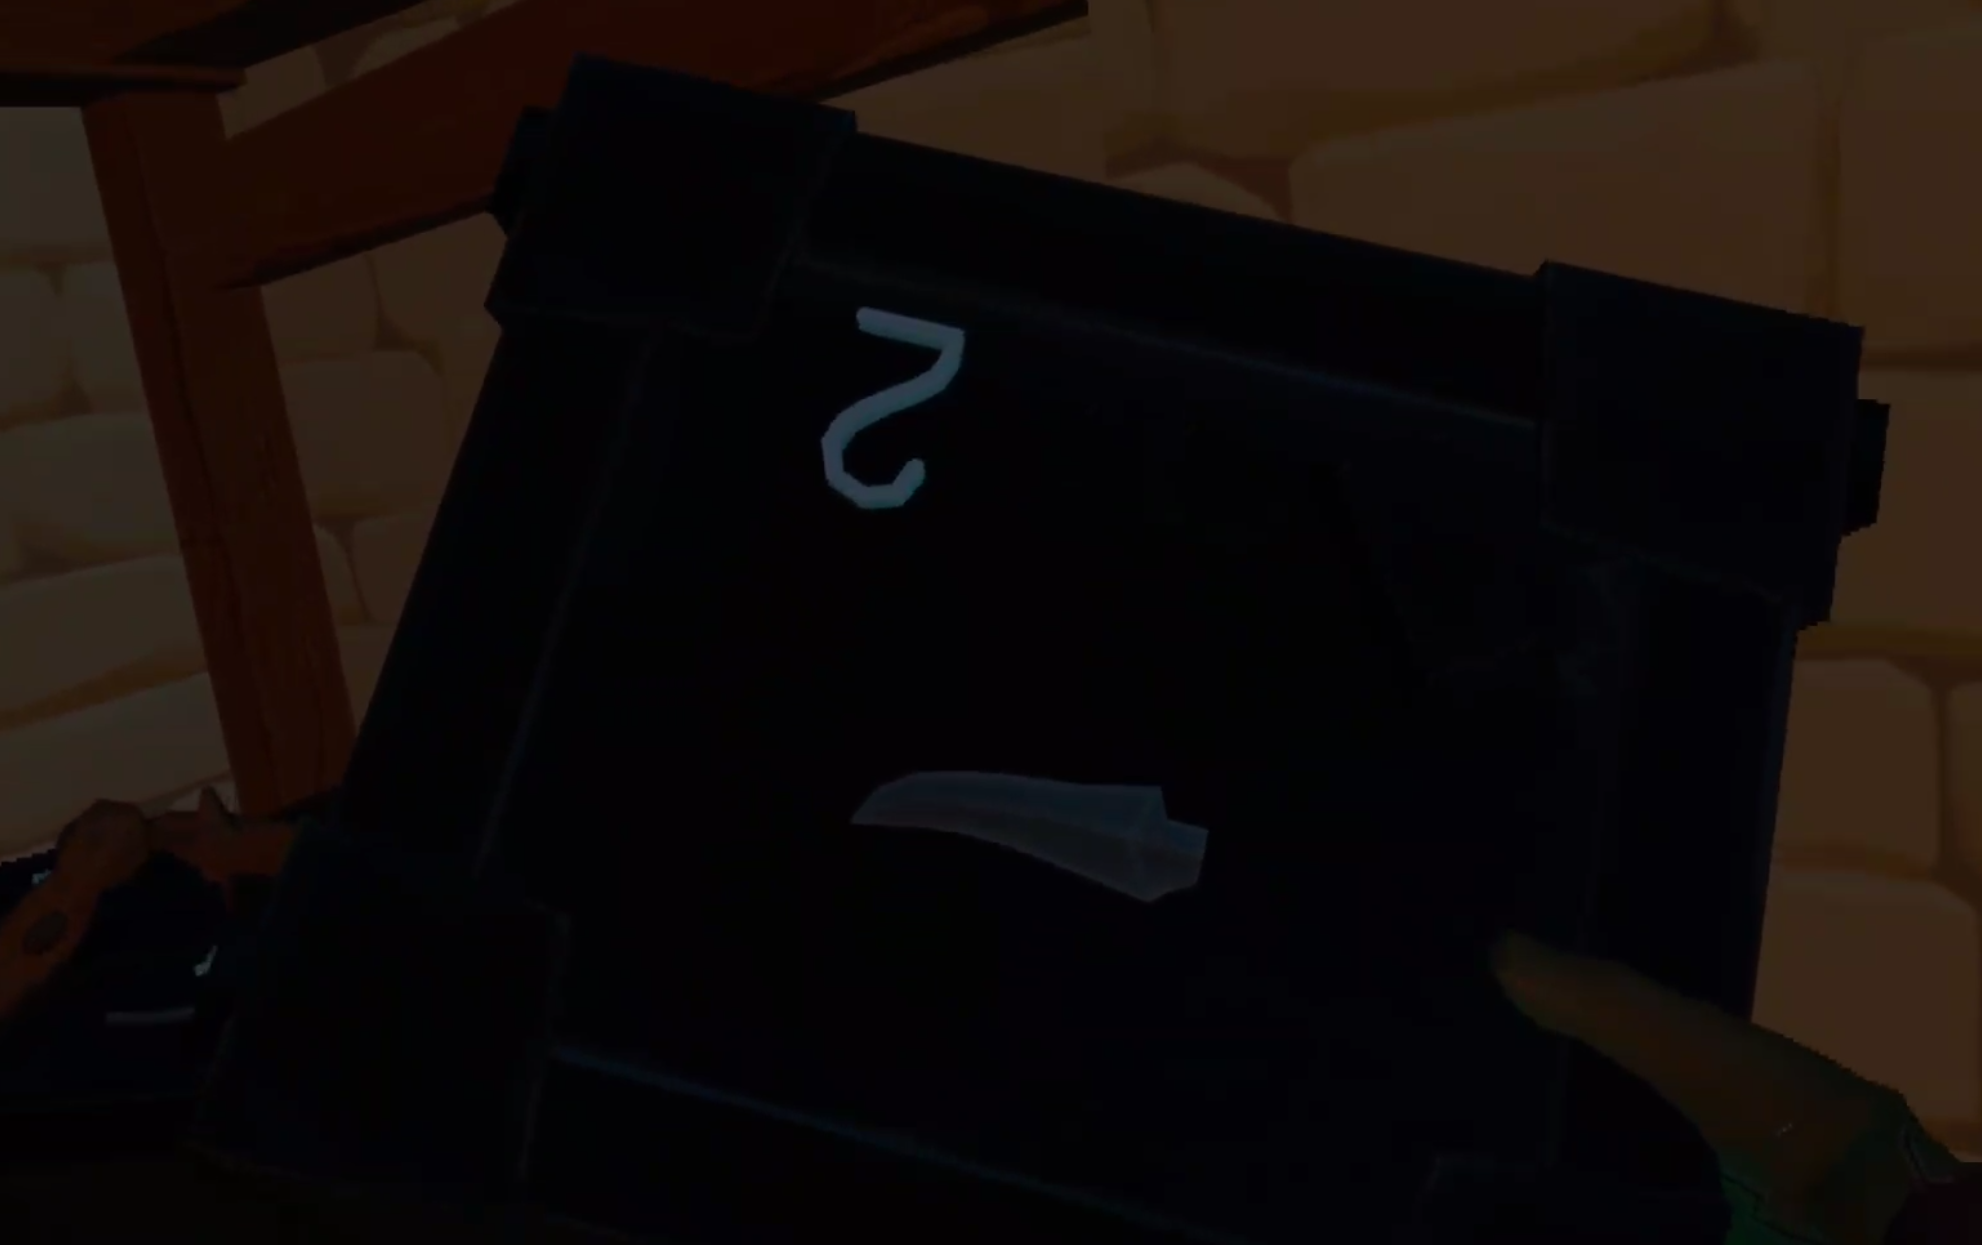
So now that you have some ingots it’s time to make our Dagger blade. By now you’ve probably noticed these black rectangles lying around with silhouettes of tool pieces on them. There’s one with a hammerhead on it right beside the smelter, and a few more on the table right behind the output hopper you just retrieved your ingots from.

These are blacksmithing moulds, and they go in the slot on the side of the furnace right above where the hammer mold spawns. You can find more of these moulds in chests throughout the world and in the mines. Luckily the game gives you a few here to start with, and it gives you an easy way to organize them all.
On the other end of the Smithy you’ll see a tall black metal cage with a rope on the side. This device stores Moulds in each of the brackets inside of it. You can also peruse your collection of moulds by pulling the rope on the side of it. To put a mould inside of this device take the mould in your hand and hold it up to one of the brackets, then let go.
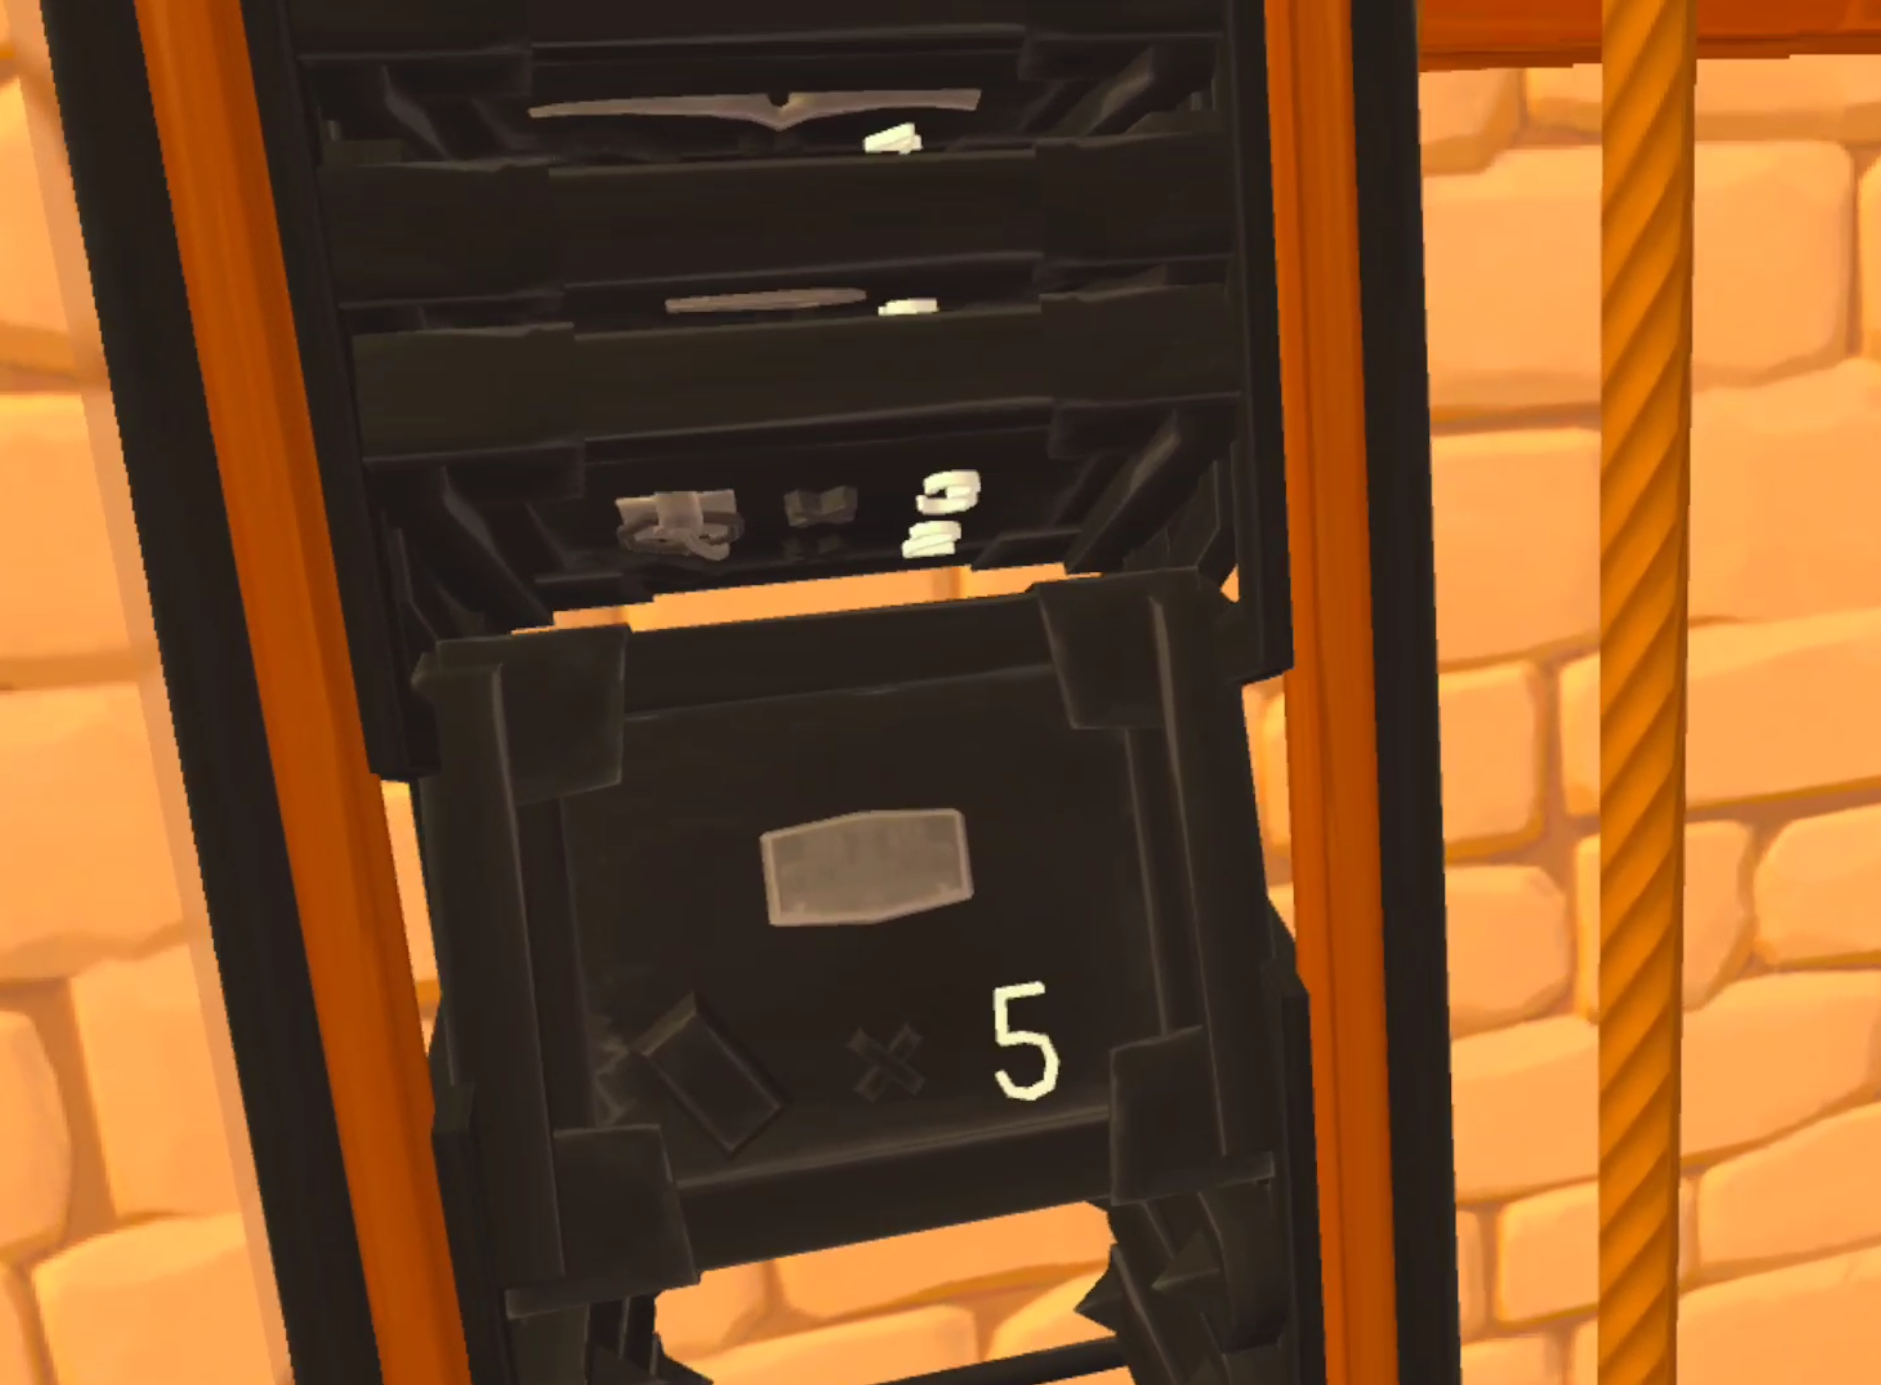
Once you’re done storing your Blacksmith Moulds, locate the mould that looks like a short curved blade. This is the curved dagger mould, and will be our first metal weapon that we make ourselves.
Once you’ve got the mould put it in the slot right above the spot on the side you found the Hammer mould. Once it’s nestled in there any ingots that you put into the smelter will then be turned into whatever mould is in that slot. In this case, a curved dagger blade. The number on the mould also indicates how many metal bars are needed to make that metal item. In this case, two.

Now go back to the input hopper and put in exactly two of your newly minted copper bars. You can put in more if you like, but if you do the smelter will not stop making curved dagger blades until it runs out of bars or fuel. So only put in two bars in order to make a single dagger blade.
Once the bars are in smelting will begin automatically as long as there is fuel in the smelter, just like when smelting the ores into ingots. Once the smelting is done the finished dagger blade will drop into the output hopper.

Firing Your Blade at the Forge
When you pick up your new dagger blade you might notice that it’s a little… bulky. A little dull even. That’s because this blade has yet to be forged, and is just in the rough shape of the end product. It’s not sharp at all. Now it’s time to bring it outside and get to the coolest part of Smithing at the Township Tale Smithy, forging.

Forging is straightforward. Take the thing you need to forge, and put it into the hot fire. In this case that is your dagger blade. There’s a little piece of stone that you can lay it on next to the coals that is very convenient. Don’t stick your hand too far into the forge or you will take damage.
In a few moments the metal piece will become hotter and glow orange. Then little wisps will start to float out of it. When you see those wisps the blade is ready to be smashed into shape.

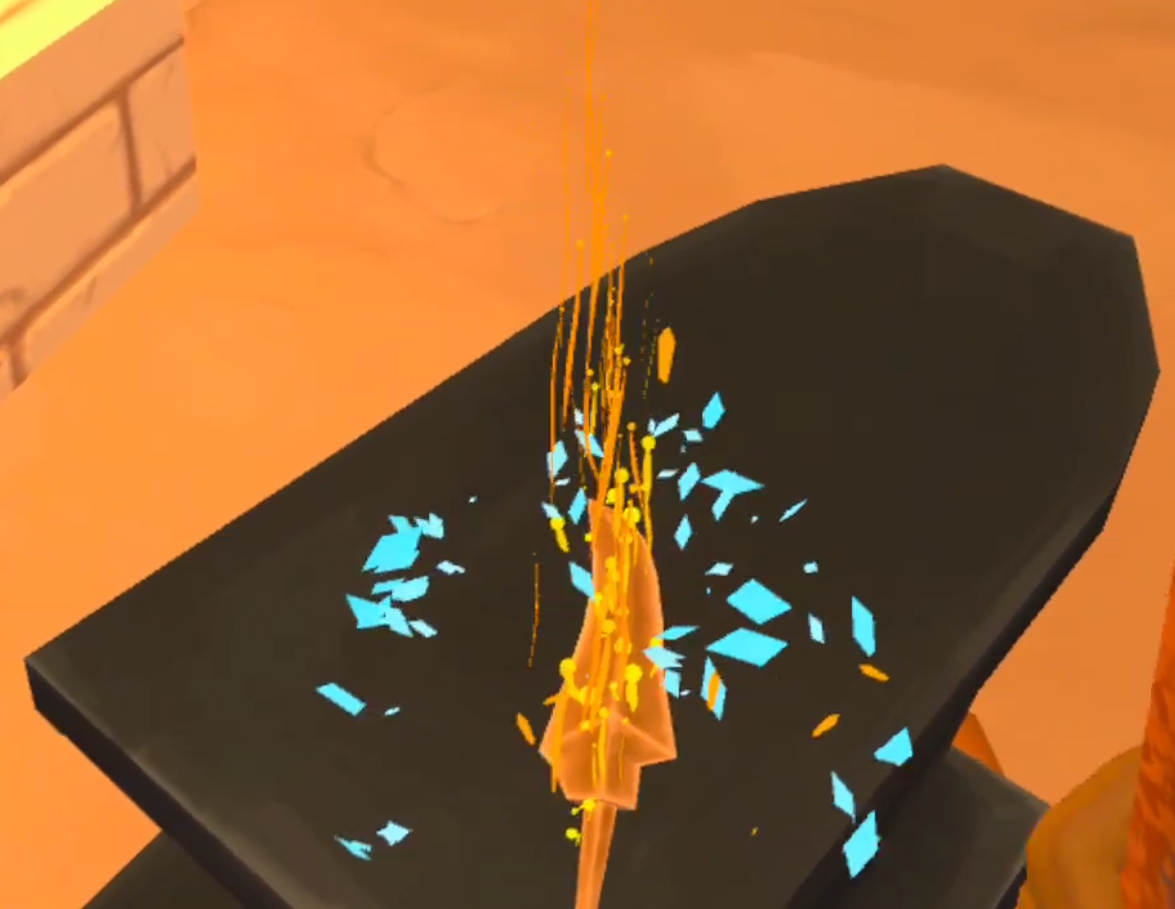
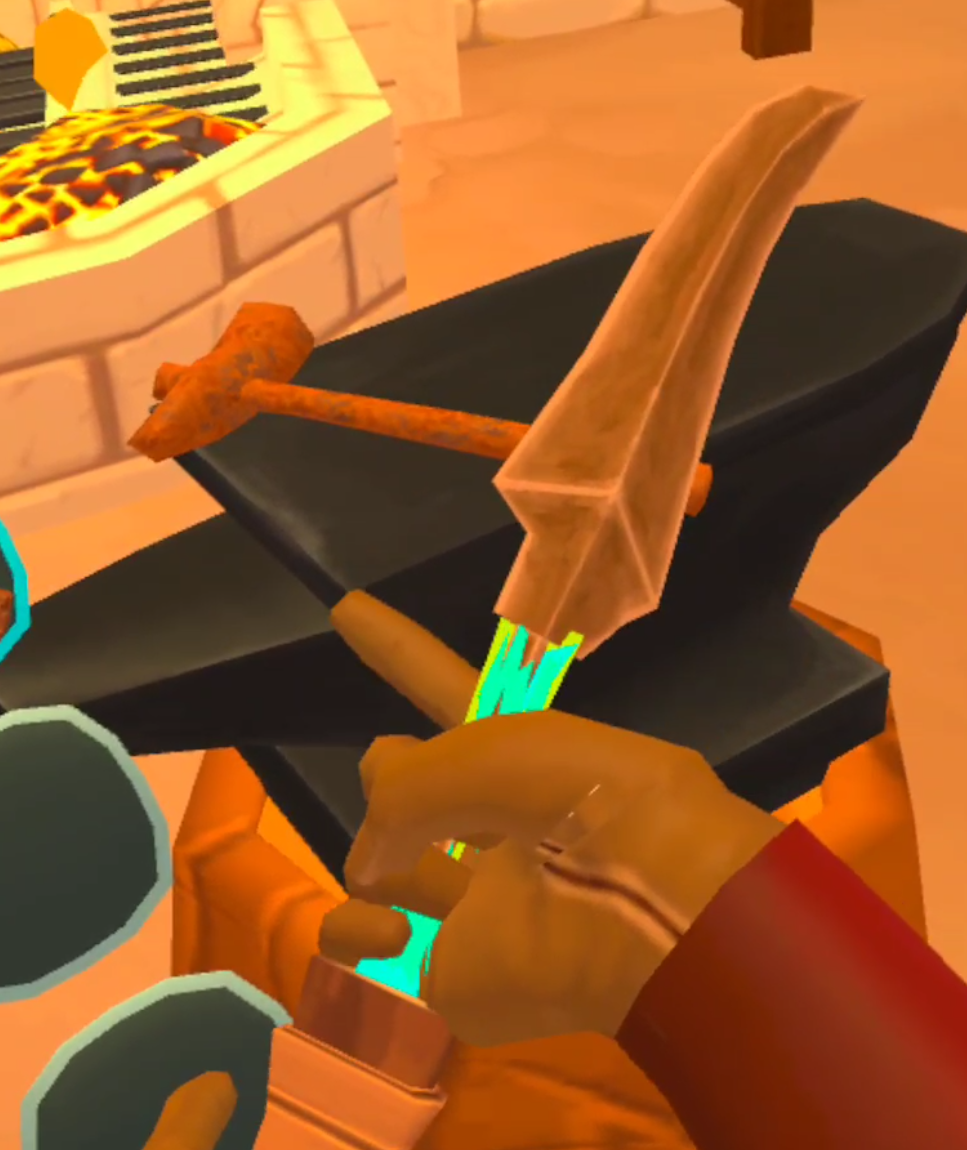
Take the blade out of the furnace and put it on the anvil next to it. Use the rusty hammer that spawns on the anvil to start smashing at the blade. If you’re hitting it dead on there will be a satisfying sound, as well as a small burst of sparks. You will also notice the shape of your blade change as it flattens out and becomes sharper. Keep hammering until the blade loses it’s orange glow.
When the blade is cool put it back in the forge until the orange wisps come out of it again. Keep doing this until a flash of blue sparks and a triumphant noise signal that the blade is finished!
Creating a Handle | Basic Carpentry
Now that the smithing and forging is done up at the Smithy, the final part you will need for your dagger is a handle to attach the blade to. You’ll be able to find handles in chests or in the mines, and there are even a few that spawn in the Smithy, but for this example we will make our own.
So let’s leave the Smithy with our new blade, and go down the stairs to the Carpentry Workshop.

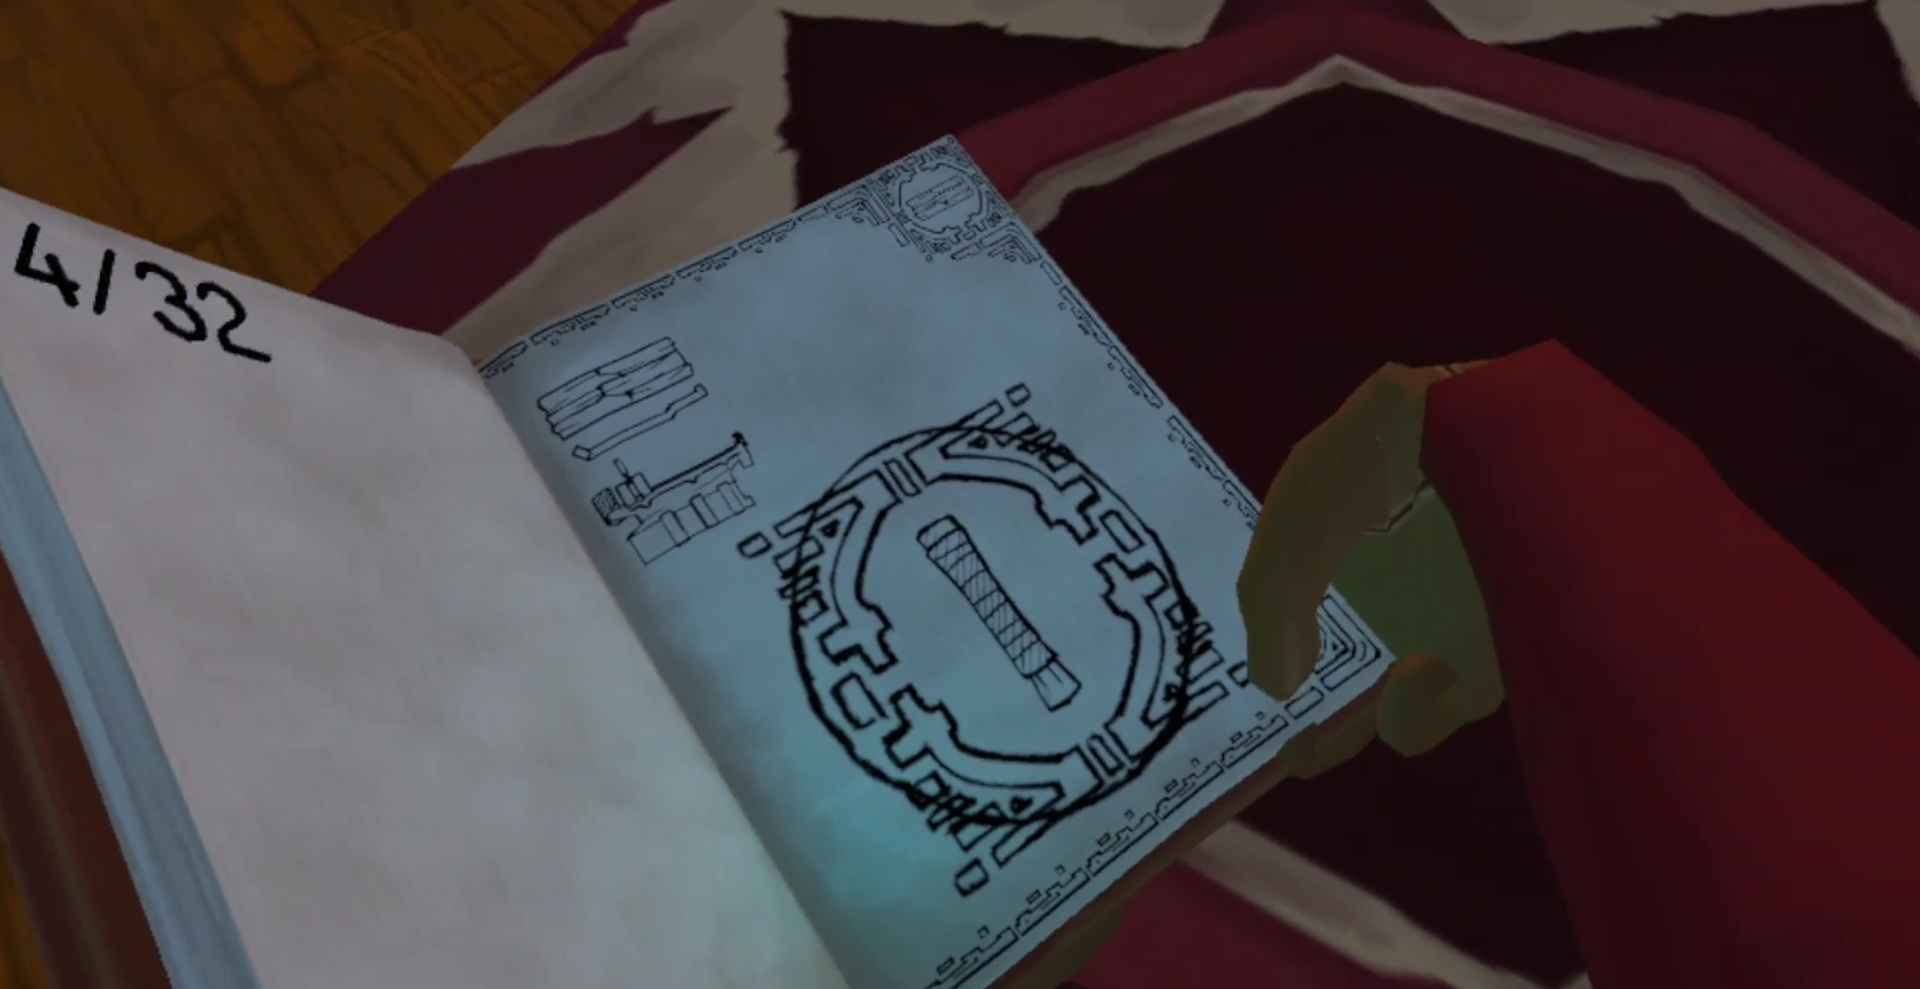
To make the handle you will need six pieces of wood and a hammer. Some extra pieces of wood wouldn’t hurt either, in case you make a mistake. Past the Carpentry Workbench in the center of the room (aka the Wood Turning Table) you will see a book on a pedestal in the back of the building. Pick up that book and leaf through it until you find the short handle recipe page. Rip that page out of the book.
Then take the page you ripped out and put it into the page holder next to the workbench in the center of the room.

Once the page is in the workbench it is time to add your wood. Put the pieces of wood in between the two sections of the workbench and move the sliding section inwards to capture the pieces. You will need to place six in total to make the one solid block of wood needed to make the handle.
Once the pieces have been placed in between the two sections successfully you will see that one part of the wooden block becomes highlighted.

There should be a chisel nearby on a table, take that chisel in one hand and your hammer in the other. This part can be difficult to get the hang of. Place the Chisel at a 45 degree angle to the piece of highlighted wood, and then strike the back of the chisel with the hammer. If you did it right you will see wood chips fly off of the piece of wood, hear a wooden clapping noise, and see the piece of wood you are chiseling move slightly.

Keep doing this until the highlighted section of the wood block flies off, and a new section is highlighted. Make sure to only chisel off the highlighted sections, the order is important. If the piece you need to chisel is on the bottom of the wood block, grab the handle on the top of the moveable section of the table and pull it downwards to flip the block of wood upside down.
When you chip off all of the outer pieces of wood you’ll be left with just the inner section. Once you make it that far order doesn’t matter, just chip away at it however you want to.

Keep chiseling away at the center until your handle is revealed. Now you’ve got every piece needed to create your dagger!

Combining The Pieces
The last part is by far the easiest. Just take your finished short handle in one hand and your finished blade in the other. The places where you can combine the two will be highlighted. Then just smash them together and voila! Your dagger is complete.
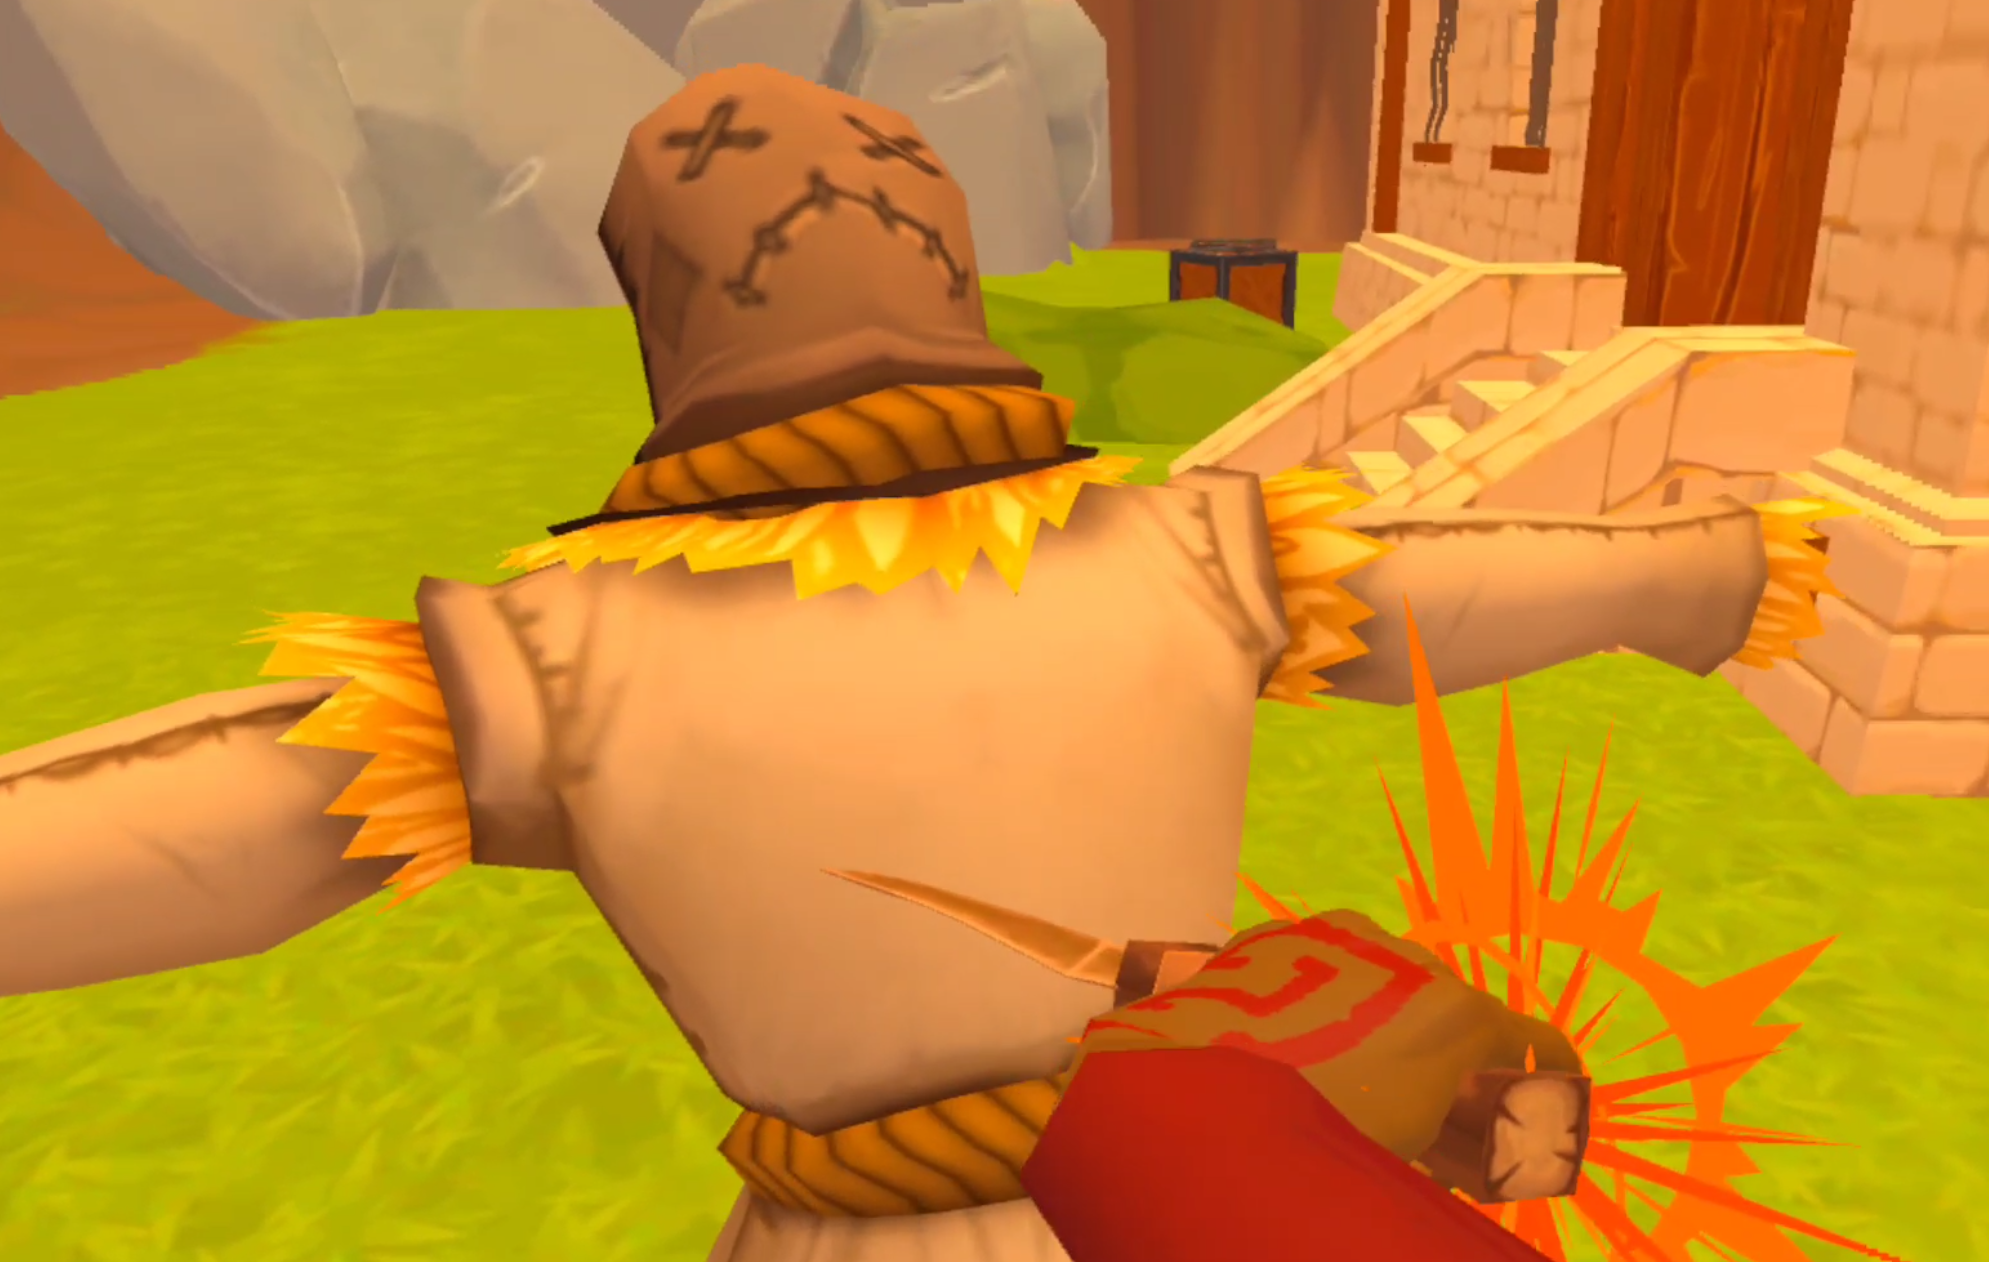
Feel free to test your new weapon out on the dummy right in front of the Blacksmith.
Now that you’ve made one Weapon Solo every the next ones will only get easier. For your next weapon you might find, or have the mould for, a pommel or blade guard to increase the durability or damage of the weapon. There are tons of variations and combinations of pieces that you can combine into various tools and weapons. Some use longer handles, like pickaxes and hammers.
Next you can make a pickaxe or hammer using the moulds you start with and the long handle found on one of the Smithy shelves. The more you explore and the more crafting recipe pages and moulds you find, the more interesting combinations you will be able to make. That’s a big part of the fun of A Township Tale. Now that you know the basics the sky is the limit for crafting Solo.
A Township Tale can be found for free on PCVR via Alta’s Website or for the Oculus Quest via the Oculus store for 9.99$. It’s a ton of fun, even by yourself, and well worth the price if you don’t mind doing a lot of gathering and crafting yourself. Good luck out there and have fun!

The 3 Greatest VR Real Time Strategy (RTS) Games on the Oculus Quest 2 and Meta Quest 3
Real Time Strategy is not the most represented game genre in Virtual Reality or on the Oculus Quest 2. As we’ve covered before here that is partly due to a lack of innovation for VR strategy games, and partially due to the VR format being much better suited to innovation in other areas.
The closeness of Virtual Reality and the ability to turn your arms into controllers is much more suited to Shooting or Fighting games than the Strategy genre. Still, VR Strategy Games on the Oculus Quest 2 offer some head turning visuals, and great use of 3D space that utilizes VR controls. So here’s what we’ve got, the 3 Greatest VR Real Time Strategy Games on the Oculus Quest 2… for now.
You Might Also Enjoy:
Eternal Starlight
As we’ve said in our video on Eternal Starlight, it isn’t the future of the RTS genre, but it is one hell of a take on a Strategy game in Virtual Reality.
In Eternal Starlight you take on the role of a Captain for future humans who have managed to carve out a new home (not Earth) among the stars. Unfortunately a particular faction of aliens has decided that humans must vacate the planet they have settled on or face annihilation.

With nowhere else to go you must stand and fight and defend humanity’s new home. Gather what allies you can and assemble a fleet, because it’s going to get rough. Don’t worry if you fail though, Eternal Starlight is a roguelike, so you can always try again from the start if your flagship goes down in flames.
The roguelike portion of this game is by far it’s weakest, and seems to have been added to make more game out of less. You will end up repeating the exact same missions, all formatted like RTS story campaign missions, over and over again. Though there is some satisfaction in getting slightly further down a mission tree than you did before.

Each mission in Eternal Starlight begins with a brief chat over the comms to give each mission in this VR RTS a little context.
The meat of the gameplay is directing your low poly ships to face towards other low poly ships and exchange volleys of gunfire ranging from canons to lasers.
All, of course, depending on where the weapons are mounted on the ships themselves. Every ship has shields, armor, and hull points. Get those hull points to zero and they explode in a great fireball.
This gameplay takes place over a variety of missions. Protect the space station, destroy the asteroids with explosives, close the stargate that is spawning enemies, and so much more.
Each mission starts with dialog between the quirky alien races that you fight with and against, which is mildly entertaining the first time, but ends up just being something you just skip past the third to tenth times.

Equipping a ship in Eternal Starlight. This Virtual Reality strategy game is all about customizing your small collection of ships.
Throughout these missions you build your fleet up from just your flagship into a force powerful enough to stop the destruction of the human race, or your fleet is too weak to complete a mission and you start over again. Each ship can be customized with different turrets, upgrades, and special abilities.
There is some tactical depth to making a fleet of ships that complement each other, but you will soon figure out which weapons and abilities are just flat out more powerful than others, and use only those.
Eternal Starlight doesn’t captivate as much as a strategy game with more depth would, but it’s easy to get into and easy to enjoy for about as long as you would enjoy most Virtual Reality titles on the Meta Quest 2 (Six to Eight hours).
The controls are occasionally clunky, but make good use of the 3D space in VR. Moving your ships with the Oculus Touch Controllers in 3D space feels natural when it works properly.
Homeworld: Vast Reaches
Luckily it seems that more innovation and effort has been put into the VR RTS space more recently by Virtual Reality Game developers. With none other than Gearbox Software credited as having had some part in the making of Homeworld: Vast Reaches.
Released shortly before the much anticipated, but much maligned, flatscreen game Homeworld 3, Homeworld: Vast Reaches is a fantastic addition to any strategy gamer’s VR collection and is basically a Homeworld game but in Virtual Reality.

Controlling your fleet in Homeworld VR is easy!
Rather than controlling your fleet of ships with a mouse and keyboard as usual, you’ll be using your hands and taking a god’s eye view of the battlefield as the newest controller of the titular Mothership as the Hiigaran people of the Homeworld universe once more defend themselves from great threats.
Homeworld: Vast Reaches is all about deftly organizing and controlling your fleet of ships as it grows bigger and better throughout the story campaign and you face greater and greater threats. Your ships are all organized in clustered formations called Strike Groups. Each of these strike groups is a group of ships that you organize and control as a single entity.

Inspecting a unit in Homeworld: Vast Reaches.
Each type of unit has different strengths and weaknesses in Homeworld VR, and mixing and matching which ships are combined in your strike group, as well as their formations, makes for some very interesting strategic decisions. Not to mention the more tactical nature of controlling your force in three dimensions.
All together Homeworld: Vast Reaches makes for a fantastic translation of the classic Homeworld experience to Virtual Reality, and is a strategy game that anybody who loves Virtual Reality and loves strategy games should definitely try. The only downside is its lack of Multiplayer or even a Skirmish mode. The entire game is limited to the Campaign, but that Campaign is well designed and thrilling from start to finish.
Battlegroup VR
Here we are saving what is, arguably, the best for last. If you want a Virtual Reality Real Time Strategy Game to really sink your teeth into, Battlegroup VR is what you’re looking for. It has a similar control scheme to Eternal Starlight, but with deeper customization and combat options that make it harder to grasp at first, but much more satisfying to master.

Battlegroup VR is a very intense VR RTS.
Once again you’ll be moving 3D ships in a 3D VR space so that their turrets point at the enemy ships and fire on them. Once again in a variety of missions, all with pre mission narration and plot. You will also acquire resources to build, customize, and upgrade a variety of ships throughout the game. There are a number of combat vessels to choose from, as well as support ships for those combat vessels.
There are a ton of fleet compositions to try, and a ton of different ways to equip your ships. If you like the sound of a game like Eternal Starlight, but want deeper mechanics and customization to sink your teeth into, then Battlegroup VR has you covered.

Customizing your commanders and ships is a must do for victory in this Strategy Game.
The missions are just as varied, from base defense, to convoy raiding, to convoy protection, to just going toe to toe with enemy vessels, there are a lot of tactical scenarios to try out. Though a lot tend to just devolve into straight ship on ship battles. Additionally the maps that these battles take place on tend to be a little bland and not offer a ton of terrain to break up the fighting.
Still, the visuals of Battlegroup VR are beautiful, by far the best out of any Oculus Quest 2 Strategy Game. Instead of the smooth low poly visuals of the other games listed here, Battlegroup VR goes for a high sci fi, high realistic and very dark aesthetic. It really pushes the Meta Quest 2’s graphical capabilities far, and still runs smoothly.

You can even see your ships out of the window of your flagship! Very cool.
The game uses these gorgeous visuals well. The bridge of your flagship stares directly into the dark of space, lined with stars. You can even see other ships right through the viewport. It’s very cool and makes you feel like you really are right there in the thick of battle directing things. You can even take direct control of your ship, if the game wasn’t hands on and in depth enough already.
That all being said the main downside of Battlegroup VR is the length of its combat. Sometimes you’ll end up a little bored, waiting for a ship to finish putting salvo after salvo into another vessel. The pacing of the combat is a little too slow at times, but that can be a blessing when the battles become truly massive.
Well there you have it, the 3 Greatest Real Time Strategy games available on the Oculus Quest 2. Hopefully this list will become bigger in time. There are also other games that, while not technically real time strategy, can still scratch that strategic itch, like Cities VR.
You Might Also Enjoy:
How To Turn Pistol Whip Into an Intense Workout | VR Exercise Guide
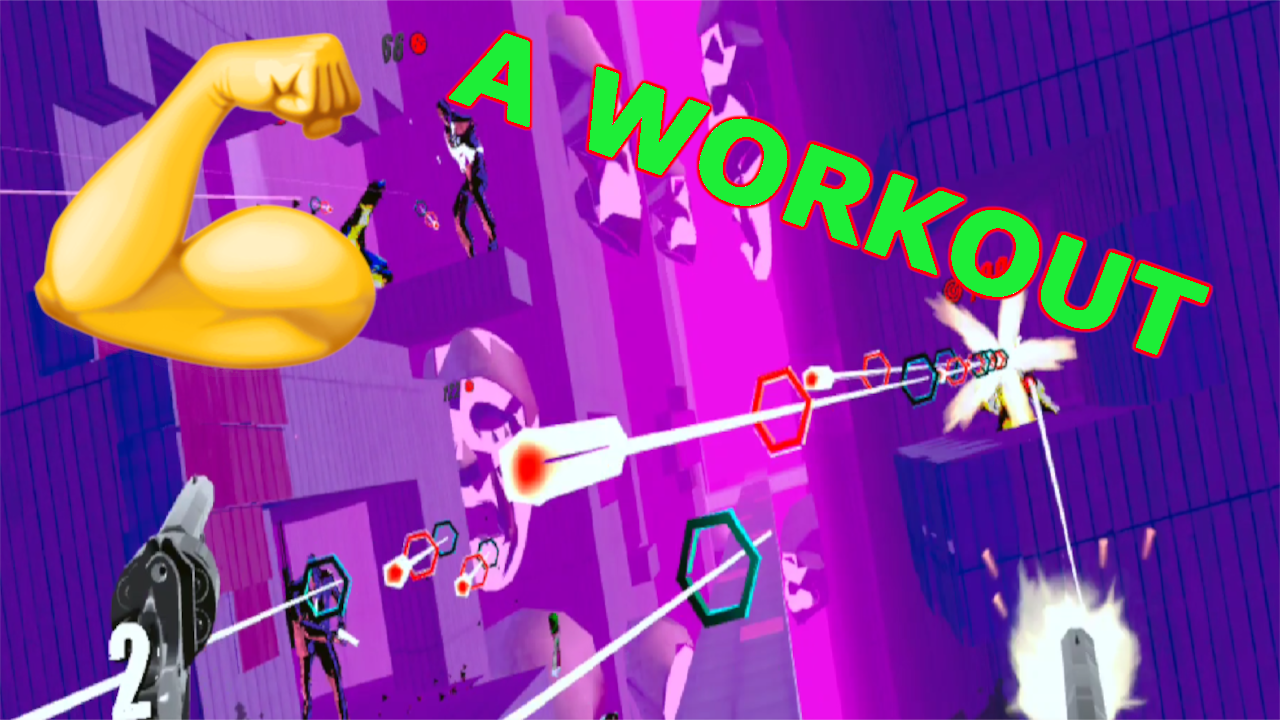
The Oculus Quest 2 has brought the possibilities of Virtual Reality fitness to light and made VR exercise possible with no wires to get in the way of flailing arms or legs. Of course, the headset on its own is nothing without games that make exercise fun and exciting. Pistol Whip by Cloudhead Games is one such game, and among VR fitness titles it is often overlooked and underutilized.
Pistol Whip is, whether you know it or not, a fantastic cardio and leg workout on the Meta Quest 2. You just need to know what settings to use to make the game as intense as possible and you’ll be sweaty and sore in no time. Here we’ll show you how to turn Pistol Whip into a workout.
How Can Pistol Whip Be A Workout?
At the end of the day making a VR game a workout is really not complicated. Just apply the correct settings to arcade mode, and turn a game that can be a standing and pointing simulator into a Quad and Glute stimulating sweatfest. Before we get into what settings to use though, you should know what the goal of these settings are. Basically, you want the game to force you to move as much as possible.

In Pistol Whip the game makes you move your arms to aim and shoot your guns, and also move your head out of the way of incoming bullets. While swinging your arms around to shoot isn’t much exercise, it is fun and will keep you engaged and entertained. Dodging is also fun, and forces you to use your leg muscles to duck, dip, dive, and move out of the way as quickly as you can. Both of these motions together burns a lot of calories and becomes a lot of exercise over the course of a level.
The Right Weapon for Sweatin
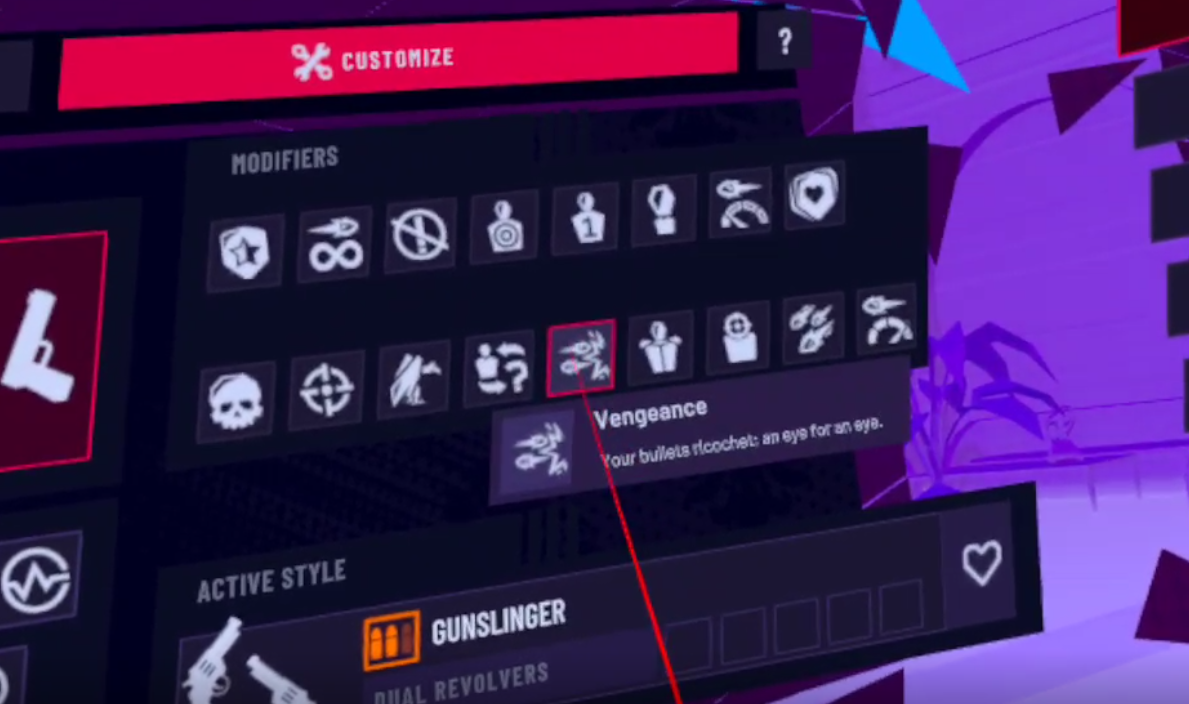
When you open Pistol Whip go straight to Arcade Mode. Contracts vary widely in intensity and some levels of the campaign can be very intense on harder difficulties, but not always. To guarantee good exercise, stick to Arcade mode. Now that you’re there, go to the settings panel on your left and select the “Customize” tab. Here is where the magic happens.

Start with the weapon you will be using, by default it will likely be set to the pistol, but you want to use revolvers. That’s right, plural revolvers, dual wielding one in each hand. Why dual wield six shooters you wonder? Glad you asked. First of all you want to dual wield so that you keep both of your arms lifted up during the course of a song, and keep both of them engaged.
This way you won’t favor one arm over another. Also using the Revolvers means that you will have to reload each gun after six shots, which means you will need to move your arms more, since you will have to reload more often. Most importantly having only 12 total shots at your disposal before reloading means that if you are very good at shooting in Pistol Whip you won’t be able to easily shoot all of your opponents before they have a chance to shoot at you. This means more bullets coming at you, and more reasons to move your body to dodge out of the way.
Important Magic Modifiers
So you’ve got your weapon selected, but surely just using dual revolvers doesn’t turn Pistol Whip into a great VR exercise game? You would, of course, be right, the real magic happens in the modifiers section. Just a couple of modifiers turns Pistol Whip from a boring slog where you spend most of your time standing still, into a Quad Blasting masterpiece.
The first and most important modifier is Vengeance. Turning Vengeance on means that every time you shoot an enemy, a bullet is immediately fired back from that enemy towards you. This means that no matter how good you are at shooting, how quick you are to on the draw, there will always be bullets coming at you.
This is important, because it means you will never just be standing still shooting whatever comes in your way. The constant barrage of bullets that are coming at you, even if you shoot every enemy before they have a chance to shoot you, means that you will be constantly engaging your legs and back by dodging out of the way.
That’s what you want, to be forced to dodge and move as much as possible by the game, but not so often that you just lose super quickly every time. Depending on your level of skill in shooting you may or may not want to also activate the Bullet Hell modifier. This makes it so that every enemy will fire a constant stream of bullets towards you rather than one shot at a time.

If you tend to shoot enemies very quickly, then Bullet Hell makes the whole experience a little more tense, and forces you to dodge a ton when you miss an opponent. If you tend to miss enemies a lot then the amount of bullets that the Bullet Hell modifier brings to you might be overwhelming. Either way it will definitely get you moving.
With these modifiers the game becomes a sort of dance, a constant symphony of ducking and weaving between the punctuation of the violent bursts from your guns. There is an agility and grace to the game, and in that a deep sense of satisfaction in its mastery that many a Virtual Reality commentator has described as “feeling like John Wick.” You will find with these modifiers, and the harder you push yourself in this game, the more satisfying executing a perfect dodge by windmilling your whole upper body around a stream of bullets before returning fire with precision.

There are also a number of other modifiers that you can add if you would like, like Disorder (which mixes up enemy types) or High Velocity (which increases bullet speed forcing you to dodge more quickly) but Vengeance and Bullet Hell are by far the most important to keep you moving constantly during Pistol Whip. With Vengeance alone you are in for a workout for sure, and both together will get your legs burning.
Difficulty and Level Selection
Difficulty is simple, because you’re here to get some exercise. Crank the difficulty up as hard as you can without instantly losing. Hard difficulty is preferrable, if there was an extreme difficulty that would be even more recommendable, but Hard is as far as it goes.

If you’re newer to Pistol Whip going to Hard difficulty instantly might lead to you just dying a lot and not having any fun. In that case stick to Normal or Easy for a while, whatever is a good mix of challenging and engaging for you. Just remember that fitness requires pushing yourself, and so you should up that difficulty as soon as possible. The higher the difficulty the more enemies there will be. The more enemies there are then the more bullets coming at you. The more bullets coming at you the more you have to move to get out of the way and the more calories burned.
Which level you select also factors into difficulty. Some are naturally harder than others. “Black Magic” for instance, is one of the easiest levels by far, and is a great warmup round. While “Religion” is the hardest level in the game, and has an extremely difficult part at the end which will not fail to either quickly defeat or exhaust you. When you’re looking at the level select menu they will generally be harder the further to the right and down you go. Except, weirdly, for “The Fall”, which is actually incredibly easy.

On a related note the game is generally more fun when you vary up the levels that you play, and even when you vary modifiers. Just make sure you keep Vengeance and Dual Revolvers on at a minimum and you will be burning some calories for sure. Other than that feel free to experiment and keep it fresh.
Pistol Whip and Virtual Reality fitness in general is about making exercise more fun by playinga game that will make you want to move, so that you win that game. VR just gives us the games that involve using our whole body and not just our hands. Keep it fun and keep it interesting.
So that’s how you turn Pistol Whip into a super effective cardio and leg workout. Have fun out there and stay fit!
Having trouble sweating through your headset’s face cover? Try out new ones from VR Cover that repel sweat and are easy to swap in.
Pistol Whip by Cloudhead Games can be bought on the Oculus store or Steam for $29.99 and it is worth every penny.
9 Best Fighting Games On the Oculus Quest 2
Want to get into a fight but not get the bruises that come with one? Whether its with your hands, or clubs, or swords, or even magic hands, there are plenty of great choices on the Oculus Quest 2 as far as fighting games are concerned. Here are the 9 best.
Want to get into a fight but not get the bruises that come with one? Whether its with your hands, or clubs, or swords, or even magic hands, there are plenty of great choices on the Oculus Quest 2 as far as fighting games are concerned. Here are the 9 best.
For a video version of this list check out this video on our Youtube Channel.
You Might Also Enjoy:
The 3 Greatest VR Real Time Strategy (RTS) Games on the Oculus Quest 2
11 Best Shooting Games for the Oculus Quest 2 | Shooters for the Quest 2
Dragon Fist: VR Kung Fu - Best Quest 2 Fighting Games
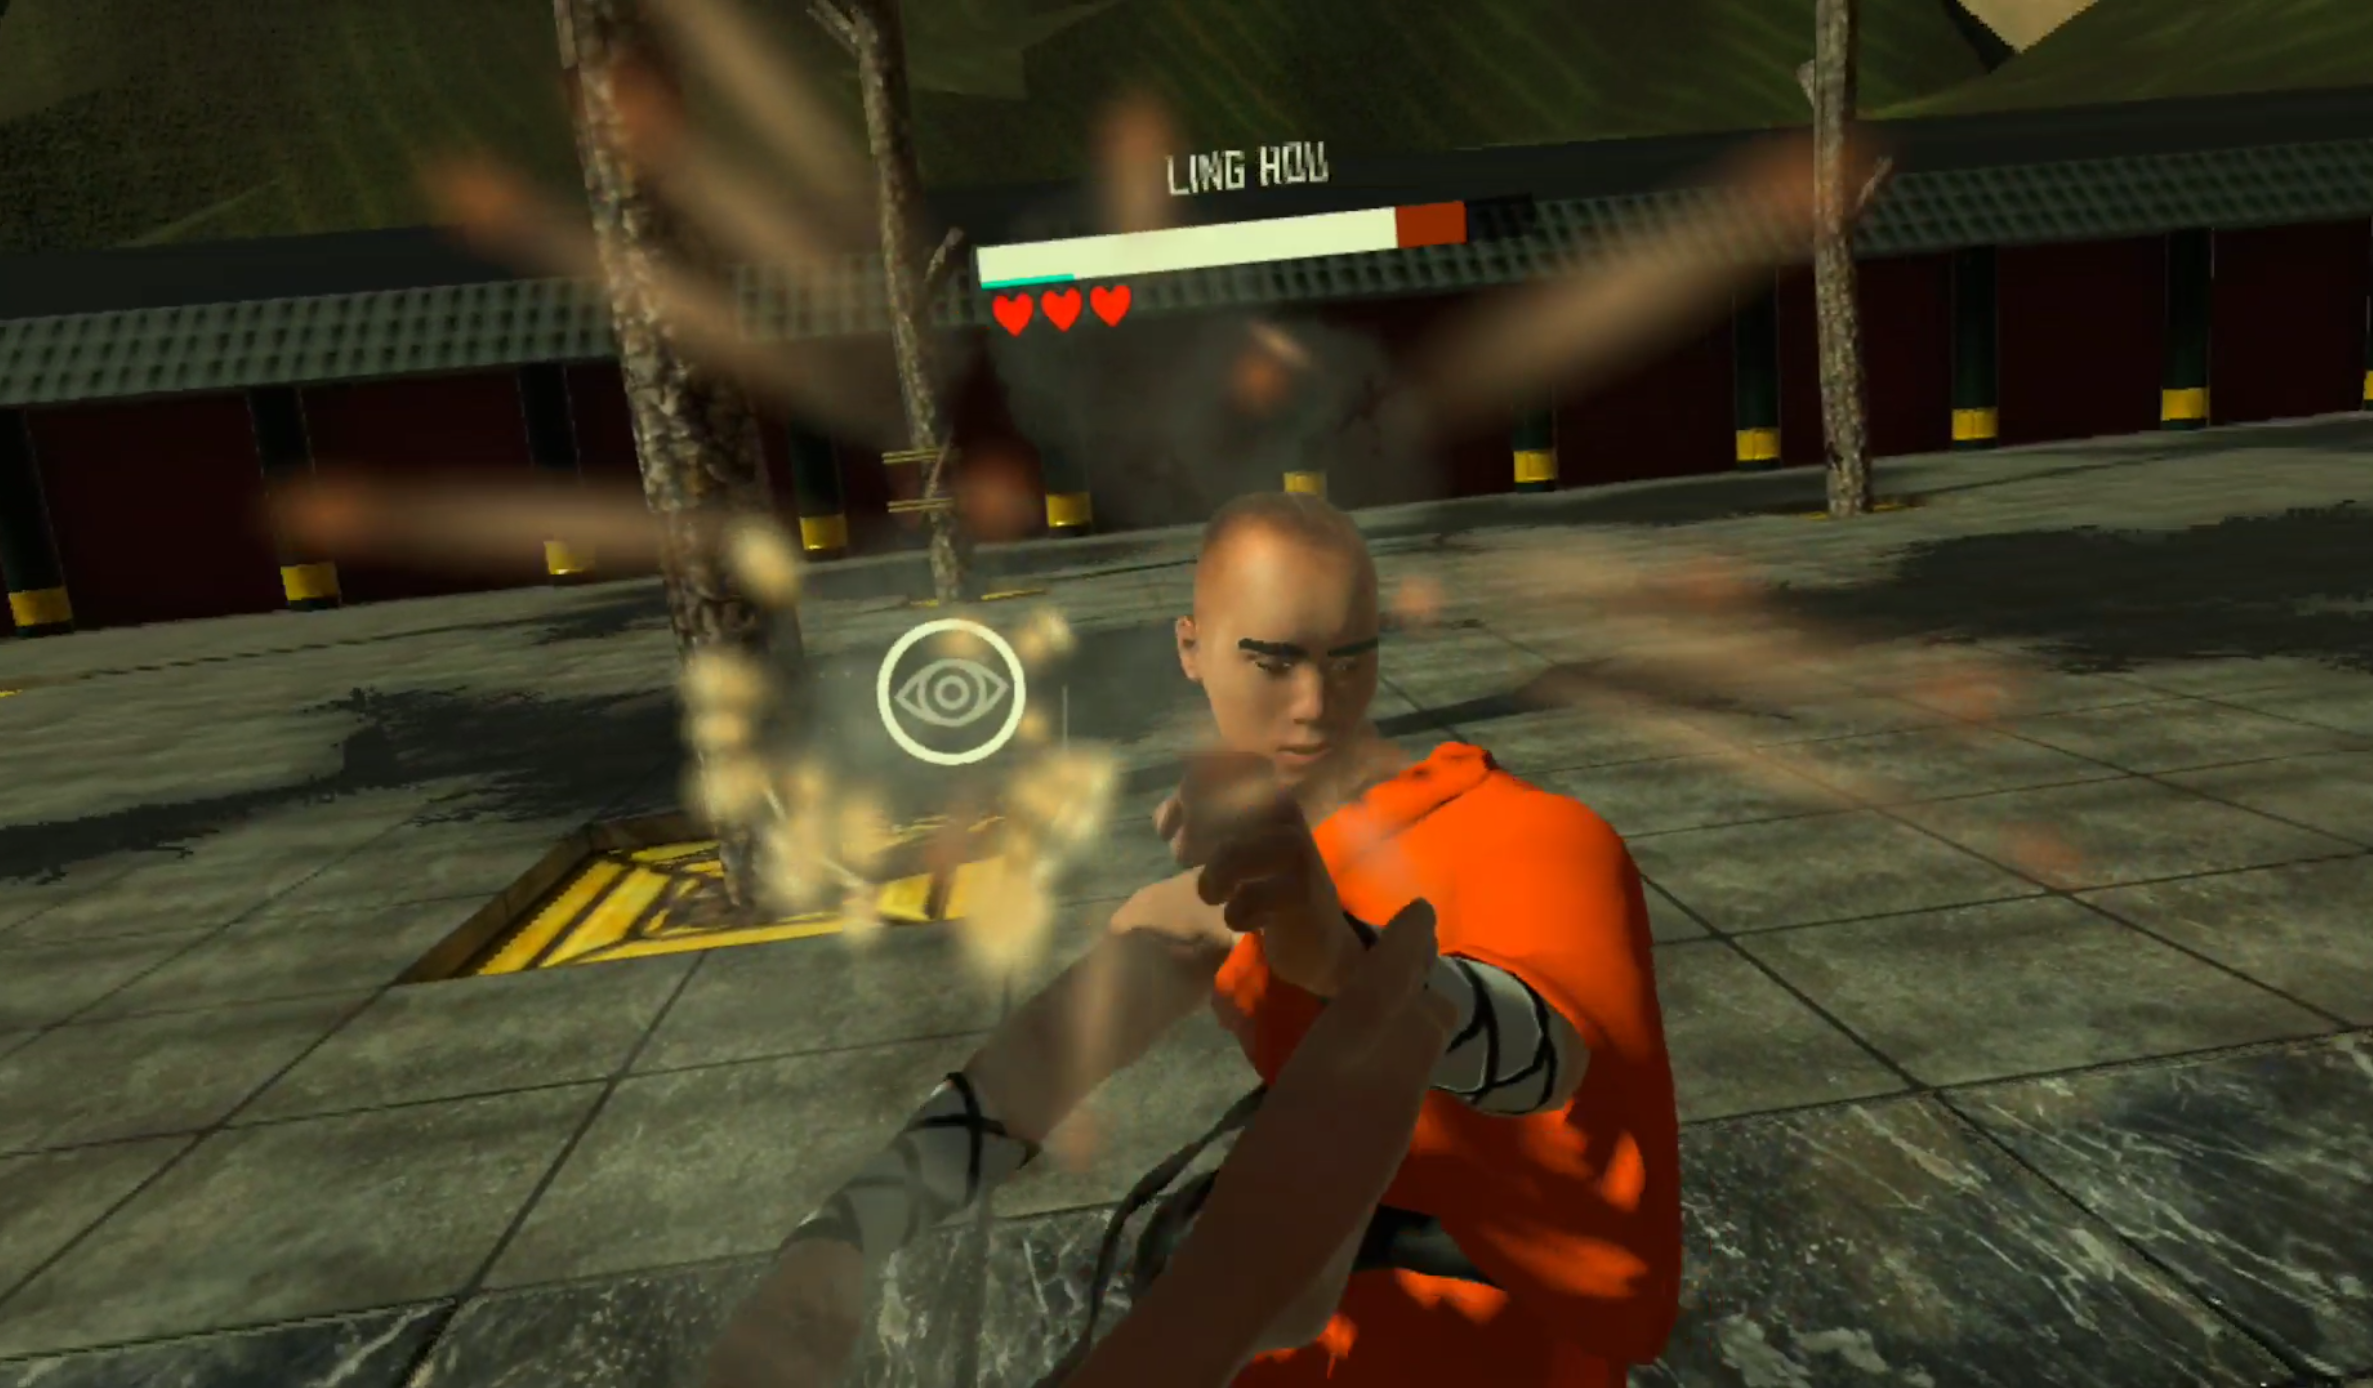
As you might have seen in our youtube video on it. Dragon Fist: VR Kung Fu is one of the hottest and most ambitious quest 2 fighting games out there. In it you get to choose from a wide roster of characters to play as, and to fight against. Each has special abilities, strengths, weaknesses, and a variety of kung fu and non kung fu fighting styles to pair your own up against. If you want to compare it to a VR Mortal Kombat we won’t stop you.

A fight in Dragon Fist: VR Kung Fu - A great VR fighting game
You are free to fight basically however you want. Go in throwing wild haymakers, or carefully palm strike and finger punch the pressure points on your enemy in order to weaken them temporarily. Throw stuff, or throw ninja stars, or throw fireballs, it’s all available and there are a lot of fights to be had in Dragon Fist: VR Kung Fu. A ton of fighting and a lot of ways to experience it, can’t ask for much more.
Thrill Of the Fight - Best Quest 2 Fighting Games
We’ve previously spoken about Thrill Of the Fight as well here… a lot. It is a top tier boxing game that runs on the Oculus Quest 2 as well as PCVR. Out of all existing boxing games, and maybe even all VR fighting games, it is the one that is both the most true to life, without stupid stamina bars and artificial barriers on how quickly you can move or often you can punch, except for your own physical limitations.

Knocking down Ugly Joe in Thrill Of The Fight
If boxing is your chosen form of combat then there is no better VR title to pursue that with than Thrill Of the Fight. It is not only the most intense workout in VR, but also one of the most rewarding action experiences to overcome. The opponents you face in Thrill Of the Fight will challenge you both in terms of strategy and in how far you can push yourself physically. When you get to the point where how hard each fight is is not enough, there’s always a setting you can change or another difficulty level to go through.
If you’ve yet to get into Thrill Of the Fight and it sounds intriguing, check out our beginner’s guide on how to get the most out of this great VR fighting game.
Blade and Sorcery: Nomad - Best Quest 2 Fighting Games
Out of every game on this list, you’ve probably heard of Blade and Sorcery: Nomad. It has all the great tiktoks and youtube videos, second in infamy there only maybe to Boneworks. Why? Because Blade and Sorcery (and by extension it’s Quest 2 counterpart, Blade and and Sorcery: Nomad). Is supremely moddable with everything from Halo guns to Star Wars lightsabers.
Blade and Sorcery is a fun VR fighting game on the Quest 2
It’s also a ton of fun without mods. There is a large variety of medieval weaponry to choose, from bows to massive two handed swords, to glorified hunks of metal on a stick. The opponents you face are very well animated, attack, and respond dynamically.
Oh, and as the name also implies, you get magic. Throw fireballs, or send lighting from your hands, or dangle someone upside down off of a cliff with a gravity spell. There’s a ton of sandbox fun to be had, and promises of an RPG mode somewhere down the line. If you’re looking for some magical fantasy sword fights then this quest 2 fighting game delivers.
Swordsman VR - Best Quest 2 Fighting Games
Like the idea of Blade and Sorcery, but like the “Blade” part more than the “Sorcery” part? Well then Swordsman is probably your go to Meta Quest 2 action game. The goal of Swordsman is to be the best sword fighting game in VR, and they’ve done quite a lot to try to earn that reputation. With an RPG progression system and a ton of enemies to face, Swordsman certainly isn’t strained for content, and these enemies are much tougher than you might be accustomed to from other VR fighting games.

VR fighting games are great
Each is heavily armored, and parries and ripostes your attacks with precise moves and timing, more precise than any of the quest 2 fighting games. If you want an intricate fencing experiences, where every move counts and mistakes are punished immediately, then Swordsman is your game. Master opponents from Vikings to Samurai and everything in between. It’s tough, but it’s so satisfying to land that perfect counter on your enemy’s exposed elbow.
Battle Talent - Best Quest 2 Fighting Games
Battle Talent used to be free, but it’s still well worth the price as we’ve mentioned before. It is also the most High Fantasy, with all sorts of goblins, elves, and skeletons for you to fight with a variety of weapons and spells. There’s a spear that spits lightning and a literal gun. That’s not even counting the tons of weapons that can be modded in. Battle Talent is just as moddable as Blade and Sorcery.

A boss skeleton in Battle Talent
Battle Talent has a leg up on other VR fighting games with it’s exciting maze mode. There aren’t exactly a lot of RPG elements to go with a lot of these fighting games, and so Battle Talent shines because of the many interesting character building choices you make in its mazes. You start the maze with a single weapon and average stats, but over the course of the maze as you defeat enemies and bosses you build and enchant your arsenal to make it more powerful. You also get upgrades to your character like extra health or magical damage. Make a powerful mage, or a burly warrior, or anything in between.
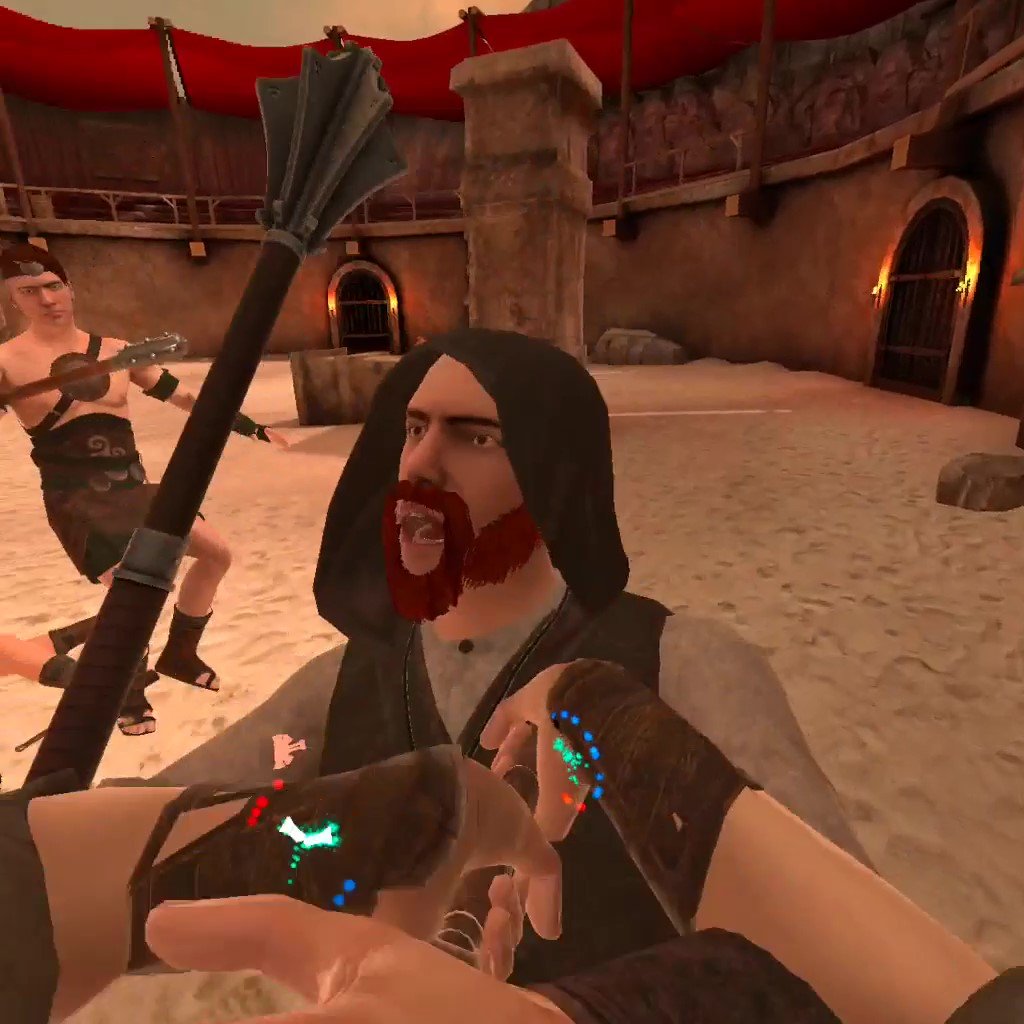
Gorn - Best Quest 2 Fighting Games
Want to shut off your brain and just smash for a while? Play Gorn. This somewhat goofy, but all around fun, colorful gladiator simulator Quest 2 fighting game is a really good time. You and all of your enemies are obscenely buff, with huge arms and hilariously stubby legs that bounce up and down off of the ground. Blood splatters are colorful and downright pretty, and you can do absolutely horrible things to your enemies from ripping off limbs to pulling hearts out.

Gorn is the most hilarious of all Quest 2 fighting games
While Gorn doesn’t have a lot of mechanical depth to it’s fights, really they’re easy to win just by flailing your arms, it is an extremely fun game to just mess around in. It’s not really about winning in this VR fighting game, it’s about destroying the ridiculous musclebound puppets that come at you in as fun a way as possible with a huge variety of weaponry. While Gorn doesn’t have a ton of replayability, for the laughs you get the first time around it is more than worth it, and is a great example of what VR physics can do.
Gladius - Best Quest 2 Fighting Games
Want a more serious gladiator simulator than Gorn? Well then come on down to the Colosseum of Ancient Rome in Gladius, a gladiator simulator where you will definitely die horribly, and avoiding that death for as long as possible is pretty hard. All sorts of beings will try to kill you in Gladius, from Lions to Gauls to Tigers to Amazons, and you need to fight carefully to preserve your limited health while you dispatch them.

A tiger attacking in Gladius
With weapons from Gladii to Longswords, try to please the crowd as you dismember and slice your way through your enemies. Please the crowd and they will throw you gifts, more money for weapons, food to heal you, powerups to give you immense power temporarily. See how long you can make it in the arena, and the longer you do, the more gold you get for upgrades to give you even more VR fighting options.
While Gladius is sometimes a little janky in its animations and executions, it combines the Ancient Roman setting and its RPG elements delightfully.
Until You Fall - Best Quest 2 Fighting Games
Until You Fall is an action fantasy roguelike set in an ancient kingdom overcome by a strange crystalline evil that turned your once proud people into monstrous versions of themselves. You, as the kingdom’s last defender, must fight your way through it to defeat the evil that has infested your home in this VR fighting game.

Until You Fall is a very colorful VR fighting game
Since Until You Fall is a roguelike, you need to fight your way to the end without falling yourself, and pulling that off is the great hook of the game. Hit certain milestones to get more options for your arsenal, and further upgrade your weapons with better stats using points that you get each time you fail. The progression is very solid for a roguelike, and keeps you coming back for another upgrade to your favorite weapon.
Until You Fall’s greatest strength other than it’s progression is its use of both of your hands in its action combat, and it’s way of encouraging you to move. Some even say that Until You Fall is even more of a workout than most VR fighting games. Whether it is or not it is very strategic, and requires good reflexes. Mix and match the weapons you take in either hand. Some are slower, some are faster, and see which special abilities combine for the greatest effect. Until You Fall gives you some opportunities to plan and think about your character build, while also having loads of quick action.
Creed: Rise to Glory - Best Quest 2 Fighting Games
Creed: Rise to Glory is the other good Boxing game on the Oculus Quest 2. While not as realistic or as intense as Thrill Of the Fight, anyone who is still craving more boxing action should give Creed a look.
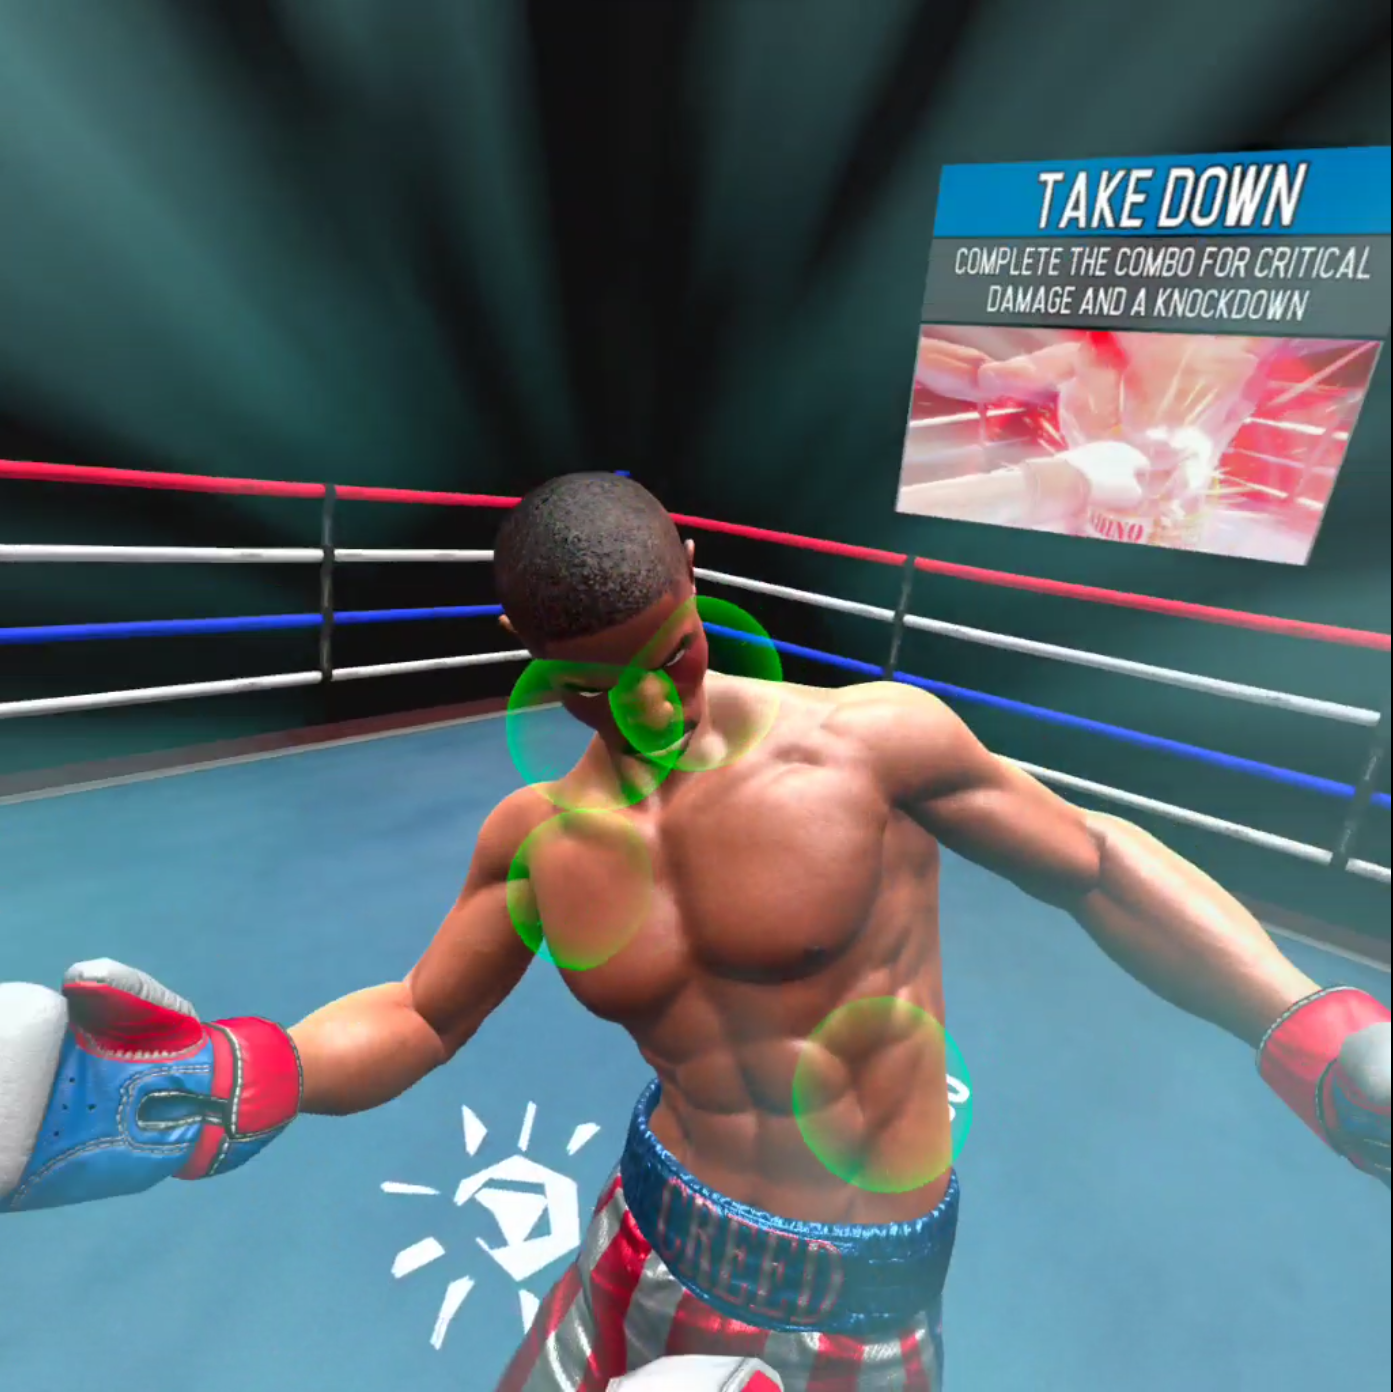
A slow motion attack in Creed: Rise to Glory
In this Quest 2 fighting game you take the role of Adonis Creed, and fight your way to the top of the Rocky franchise one opponent at a time. It is similar to Thrill Of the Fight in fighting style, but falls sort of being the more true to form experience that Thrill Of the Fight is. You don’t need to punch as hard, you don’t need to duck and weave as much. The whole experience is more toned down and artificial feeling.
The opponents you face move in more set patterns. You are encouraged to move in a certain way, and punch certain points as well. The game will interrupt a sweet combo to slow everything down and tell you to punch certain points. Creed: Rise To Glory is a more arcadey VR boxing experience, but it is still fun if you don’t mind being interrupted.
Compared to Thrill Of the Fight, Creed can be a bit of a let down for those who want a very real experience. However Creed: Rise to Glory looks very good, and is a fun romp of its own, especially for those that want to box in VR without sweating through their headset.
You Might Also Enjoy:

Massively Improve your Oculus Quest 2 Video Graphics Quality with this App
The Oculus Quest 2 is an amazing piece of hardware, but the video quality can be kind of a let down. It looks fuzzy and it can be really hard to see things at long distances, and so you might be wondering how you can improve the graphics on your Oculus Quest 2 to make it more enjoyable, or give you a competitive edge.
Well look no further, because an application already exists that will improve the graphics on Meta Quest 2 games and applications automatically and natively on your headset without having to type in any ADB commands or do any programming or configuration yourself.
The Oculus Quest 2 is an amazing piece of hardware, but the video quality can be kind of a let down. It looks fuzzy and it can be really hard to see things at long distances, and so you might be wondering how you can improve the graphics on your Oculus Quest 2 (or Quest 1) to make it more enjoyable, or give you a competitive edge.
Well look no further, because an application already exists that will improve the graphics on Meta Quest 2 games and applications automatically and natively on your headset without having to type in any ADB commands or do any programming or configuration yourself.

On the Left, Onward run with Quest Games Optimizer. On the Right, Onward without
What App?
The App you’re looking for to make your Quest 2 graphics look better is the Quest Games Optimizer app, which you can install on to your headset directly through an .apk and an app like SideQuest and then find in the “Unknown Sources” menu. After you have Quest Games Optimizer installed you can make your games look better at the flick of a switch.
When you open it, Quest Games Optimizer (a.k.a. QGO) will show you every game you have on your Meta Quest 2 that has a profile which can be applied to it to make its graphics look beautiful.

The Quest Games Optimizer Main Menu
There are over 250 profiles right now, and more are being added by the developer and community all of the time! A ton of popular titles like The Walking Dead: Saints and Sinners have profiles that make it look incredibly crisper. (Here’s the complete list Use google translate for the page). The profile can be enabled in the QGO application and then will be applied automatically when you start your game. (A popup will let you know that it is applied successfully when you start the game)
Just look at the difference! While some profiles have greater effects than others, all of them make games look much clearer, and improve the graphics overall very noticeably.

Onward Improved
Also, for you moment capturers and content creators out there, you can easily change the recording resolution of your Quest 2 from the Quest Games Optimizer. Just use the little video icon in the top right corner, and you can change your recording resolution with just a single button press
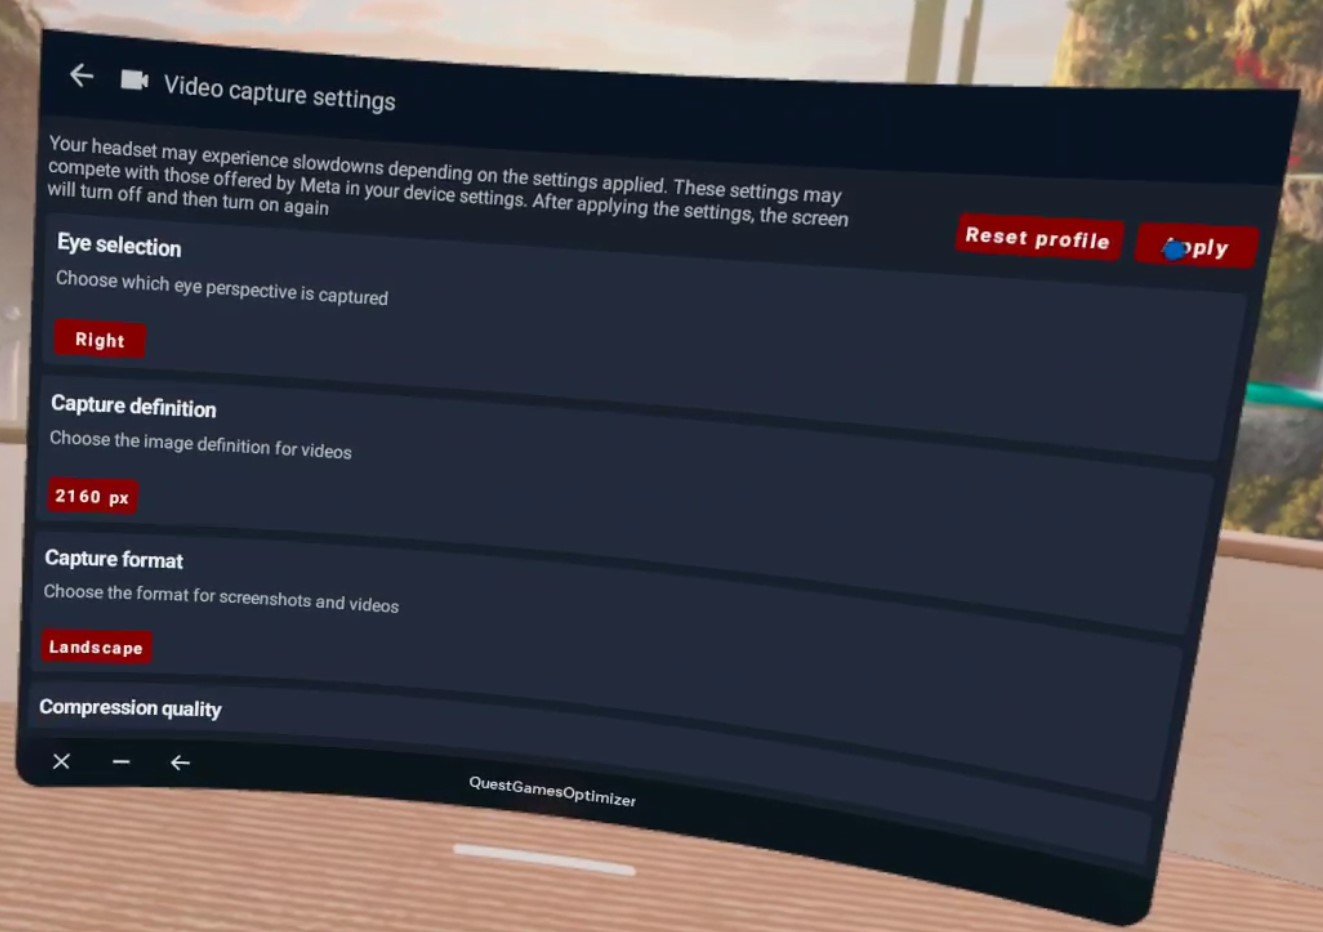
The Quest Games Optimizer Video Capture Settings
Of course, the Oculus Quest 2 is only so powerful, and so can only process so much due to its hardware. Optimizing a game on its own will run very well, but optimizing a game and then recording on top of that can cause noticeable frame lag and stutters. So be careful combining optimization and high resolution recording. Maybe when Project Cambria (aka the Quest 2 Pro) comes out, both can be achievable at the same time.
Setup
Speaking of issues, there is only a single issue with Quest Games Optimizer, and that is the setup. Getting it running in the first place can be a lot if you’re newer to the Quest and haven’t used Airlink or Quest Link before. As you can see in the “Prerequisites” section of the itch store page here. You need to:
Have your headset and Facebook/Meta account in developer mode so that you can use applications in “Unknown Sources.”
Do no disturb needs to be disactivated so that you can get notifications when a profile is applied or your recording settings are changed.
You need to enable an ADB wireless connection for QGO to work at all.
This can be a lot for some people if they’re not a certified VR lover who has already done all of this to install custom applications or connect their Headset to their PC. Luckily there are plenty of guides out there that explain the setup steps.

Thrill Of The Fight improved with Quest Games Optimizer, and not improved
Even if you have already done all of this, you will need to reconnect your Headset to your PC once to enable ADB, which Quest Games Optimizer needs to do anything, though this can be done wirelessly. Luckily after you enable ADB debugging wirelessly you won’t need to do it ever again. One setup and you can change your recording settings and make your games look better whenever you want.
After you enable ADB you can keep using Quest Games Optimizer without having to worry about connecting it to a PC, just stay on the same wireless network. After the initial hookup it’s still very easy. The easiest way around this limitation is to just avoid restarting your headset, and it’s pretty hassle free after you’ve done it once, so it’s really not that big of a problem.

Moss: Book 1 improved and unimproved
For more guidance on how to enable an ADB wireless connection the developer of Quest Games Optimizer has a post on their itch page about it here. When it comes to setup their itch page actually has a lot of great advice, and you can find out even more about Quest Games Optimizer on it.
Quest Games Optimizer is currently 4.99$ on itch io. Whether or not you might mind the setup it is extremely worth it to use this to make your Quest 2 games look much better. It is doubly worth it if you want to easily make your recordings look good too.