


All Into the Radius VR Maps and Locations
Into the Radius VR, whether on the Oculus Quest 2 or PCVR, has 5 dangerous locations that comprise the Pechorsk Radius. Here are the maps for each of those locations and a quick rundown on what to expect and how to be ready to explore each of them.
Into the Radius VR, whether on the Oculus Quest 2 or PCVR, has 5 dangerous locations that comprise the Pechorsk Radius. Here are the maps for each of those locations and a quick rundown on what to expect and how to be ready to explore each of them.
You Might Also Enjoy:
Pervomay Route

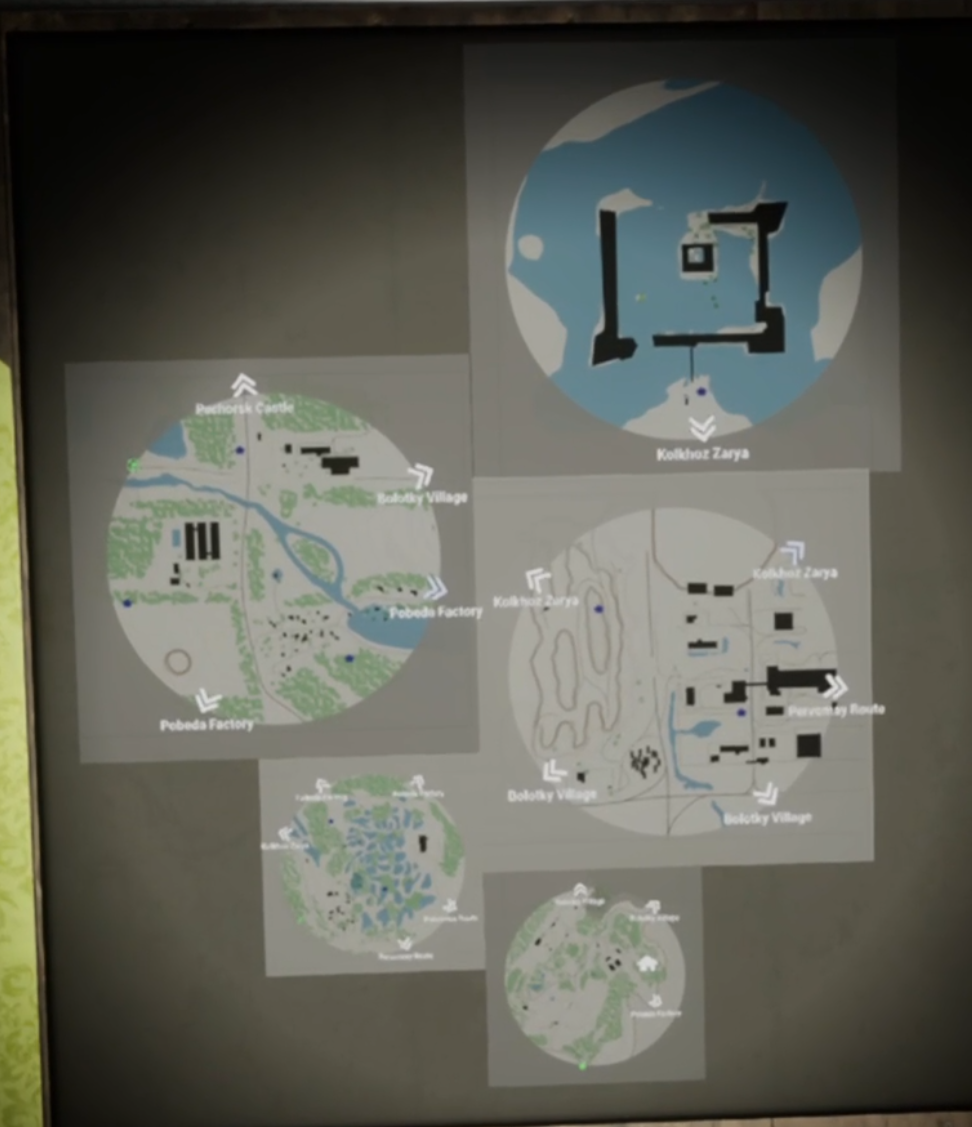
The first map of Into the Radius VR is Pervomay Route. It marks the edge of the Pechorsk Radius and is lightly wooded and hilly with a scattering of buildings. As you would expect, this map is the least risky to explore. You can navigate your way through it with just the Makarov and Shotgun available to you at the beginning of the game. You enter this map from your home base at the bottom, and can exit to Bolotky Village in two places on top of the map, and to Pobeda Factory on the right side of the map.
There are enemies in the Pervomay Route, but they are the weakest in the game, primarily Fragments, with some Phantoms and Spawns thrown in. Mimic Policemen are the first real challenge here, so be especially careful when you start exploring past the large field of craters covered in anomalies. The two story building in the center of the map spawns at least two Mimic Policemen and the train station will have quite a few as well.
The anomalies of this area are mostly distortion and reflector anomalies, which are generally easy to see with the naked eye and can be detected with bolts. Though the interiors of buildings often have the Black Grass anomaly inside, especially in the small walled in base with the semicircular quonset huts. Luckily Black Grass is easy to deal with provided you have a flashlight or two. There is a gas anomaly in the top right section of the map here, which you can tell by the clouds that glow green. Make sure to wear a gas mask when entering them
Despite being the least dangerous area, Pervomay Route remains relevant even when you have explored further into the Radius. Even in the late game there are a number of anomaly fields that will spawn valuable artifacts after every tide, and valuable devices such as Weather Monitors and Camera Traps to be found. Clearing out all of the Pervomay Route map will net a few thousand at least.
Bolotky Village
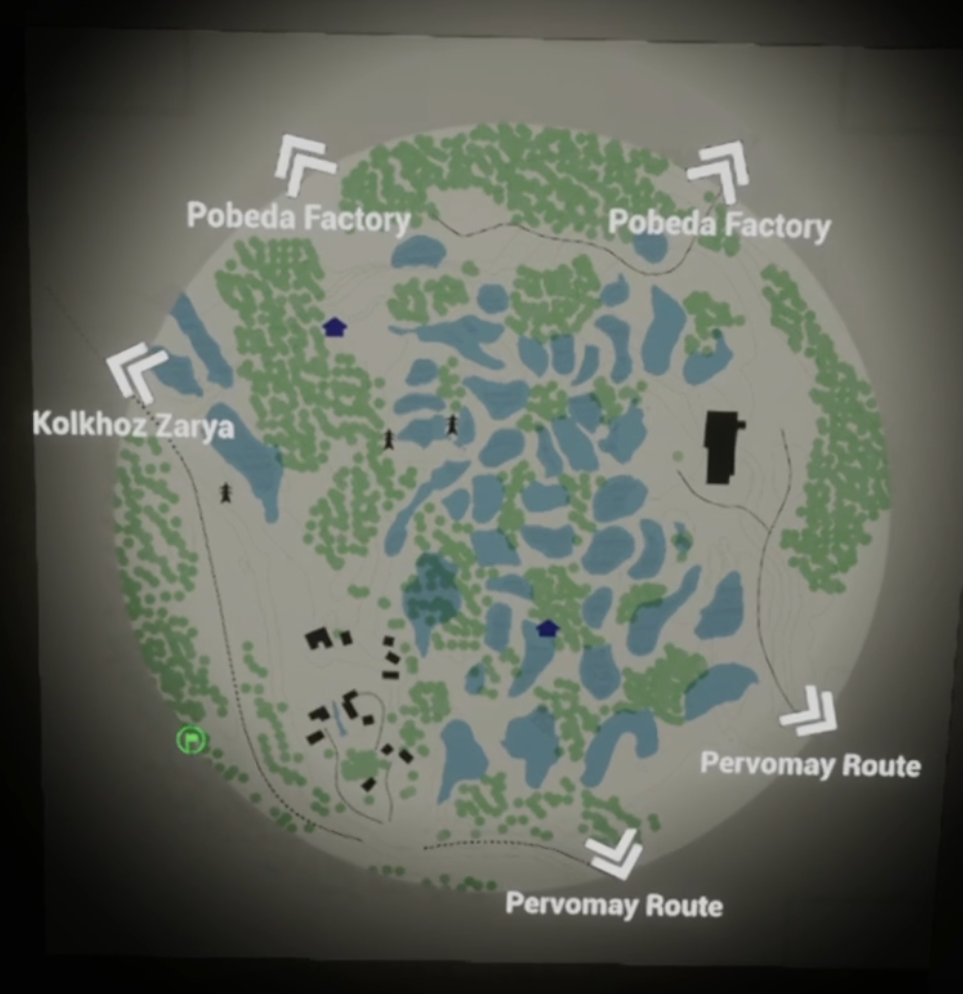
The next Into the Radius VR map is Bolotky Village. It is hilly on the bottom, though it quickly levels out into a large swampy center and a densely wooded northern section. There is a route from your home base in the bottom left corner of the map, as well as entrances from Pervomay Route in the bottom right corner of the map. The top of the map contains exits to Pobeda Factory, and there is also a route to Kolkhoz Zarya in the top left corner of the map.
While you can go to Pobeda Factory first, you should not as Bolotky Village is much more manageable, and the main missions will take you here first anyway. While it is possible to fight your way through Bolotky Village with a Makarov and a Double Barreled Shotgun, it is much easier to defeat the enemies here if you upgrade your weapons to something from security levels two or three.
You may also want to upgrade your ammunition to AP or P+ rounds, though it will be expensive, as Bolotky Village is the first location to contain armored enemies. There aren’t too many, so more expensive ammunition is not really worth it. Enough regular FMJ rounds will still punch through armor sooner or later. In addition both Seekers and Mimic Commandos make an appearance in Bolotky Village. While Seekers are all over the place, Mimic Commandoes are only found in the large construction site with the yellow crane hanging over it in the top right hand corner of the map.
More anomalies are also added to Bolotky Village. In addition to those found in Pervomay Route, Bolotky Village includes the Web Anomaly, which is especially dangerous at night, and cannot be detected or disarmed with bolts. Be careful and try to spot the wispy tendrils of the web, especially in areas with a lot of trees.
The Bolt anomaly can also be found in the flooded basement of the construction site next to the crane, and also in the woods on the north of the map, and beside the nearby entrances to Pobeda Factory. The Bolt anomaly is the quickest killer, so be careful when you hear its snapping and popping.
The village section of the Bolotky Village in the bottom left part of the map, and the construction site with the crane in the top right part are the most dangerous. While the village is more manageable the construction site is by far the most difficult combat challenge so far and will be your first big test of your fighting capabilities. Just like in Pervomay Route there are plenty of anomaly fields scattered about, with enemies that won’t take a ton of resources to overcome between them, so this is a very profitable map even in the late game.
Pobeda Factory

The third map in Into the Radius VR is Pobeda Factory. It is largely flat and covered in roads and other industrial leftovers, with the exception of the deep ravines and canyons in the top left side of the map. The Factory itself dominates half of the map, and consists of a few large warehouses, offices, and production buildings ringed in by a wide fence.
There is no entrance to Pobeda Factory directly from your home base. However it is accessible from both Pervomay Route on the right side, Bolotky Village on the bottom right and bottom left, and Kolkhoz Zarya on the top right and top left. While you can go to Kolkhoz Zarya First, it’s much easier to tackle Pobeda Factory before Kolkhoz Zarya, and the main missions will lead you to Pobeda Factory first anyway.
Pobeda Factory is the first area where wearing armor becomes very necessary, as there are a ton of Mimic Commandoes here, accompanied by Mimic Policemen and every other creature you have fought so far. The amount of armored enemies also increases dramatically in Pobeda Factory, so be ready. A rifle of some kind is highly recommended here. There are even Mimic Snipers, both in the tower above the ravines in the top left hand corner of the map, and at the blockhouses guarding the entrance to Kolkhoz Zarya there.
More new anomalies make their appearance in the Pobeda Factory. There is the Stomper Anomaly, which looks as though a giant invisible monster is stomping along the ground. The stomps of force will continue in a straight path, so simply keep your distance and you can avoid this anomaly easily. Getting caught in it will crush you and detonate any explosives stored on your body.
The Scythe anomaly can be found in the Factory Complex itself, and is most recognizable for the long translucent circle that expands when you are near it, as well as the loud noise it creates. This noise will attract enemies in a fairly wide radius, so once you hear it prepare for a fight, unless you’ve already cleared the area.
Pobeda Factory has some great stashes if you know where to look, and some storehouses and other places where you might find some technological loot and supplies. There are also a few anomaly fields that can yield artifacts. Overall Pobeda Factory is a less dangerous if you avoid the large factory buildings, walled in office building in the southwest, and the blockhouses at the end of the ravine. There are large concentrations of enemies there and outside of the main missions, little reward for fighting them.
Kolkhoz Zarya

The fourth map of Into the Radius VR is Kolkhoz Zarya. This map is a mixture of flat plains and tree laden hills, with a large village, greenhouses, and a train station to explore. An entrance from your home base can be found in the top left corner of the map, right next to a path to the final area, Pechorsk Castle, on the top. A path to Bolotky village is in the top right, while the bottom right and bottom left hold avenues towards Pobeda Factory. Kolkhoz Zarya is where the end game begins. Only come here if you are well equipped and prepared for a lot of fighting.
That is because the enemies in Kolkhoz Zarya are denser and more numerous than ever before, not to mention more dangerous. Mimic Commandoes are joined by Mimic Hunters, which are basically Mimic Commandoes but better armed and more accurate.
Sliders also join the fray, which means a deadly combination of close quarters and ranged enemies for you to deal with. Even if you clear out the whole map of enemies, you will never be completely safe in Kolkhoz Zarya due to the BTR wandering around. Be alert for its searchlight, and run if it spots you. There is no viable way to destroy the BTR.
Sniper Rifles can be very useful in Kolkhoz Zarya due to its numerous ranged enemies and long distances, but some fighting in close quarters is also inevitable in locations such as the greenhouses. By now you have seen every anomaly the game has to throw at you, so you will have nothing new to contend with there. Be careful in the wide open spaces of Kolkhoz Zarya. It is very easy to get pinned down by the BTR or the excess of Mimic Hunters while Sliders or other melee enemies close in on you.
If you never seriously considered stealth before in Into the Radius VR, then Kolkhoz Zarya might be a good place to use a silencer and travel at night. Otherwise bring a lot of ammunition and don’t get caught in the open. Even the spaces in between large concentrations of enemies are very dangerous.
Pechorsk Castle

Pechorsk Castle is the final map of Into the Radius VR. It has a single entrance from Kolkhoz Zarya, and can be quickly accessed due to it being so close to the Kolkhoz Zarya route to your home base. Pechorsk Castle is the most dangerous area in the Zone, and sits right below the large floating orb that dominates the area. Out of all locations this is the one to be the most prepared to tackle. It is recommended to fully equip yourself with the best gear before entering the gates of Pechorsk Castle.
The outskirts of the castle consist of a couple of dilapidated buildings, one of which you can sleep in, and a few Phantoms milling around. Past the buildings is the bridge leading across the moat and a little section underneath the wall that can be walked. The outskirts and moat have a few crates to loot and some other odds and ends to pick up. The real danger and the real reward lies inside of the castle, but its gates will remain closed until you pick up the final main mission.
Once you are on the final main mission of the game the front gate will swing open and you can walk inside. Inside is a maze of tight corridors ending in several wide open spaces on the walls and inner plaza. You will need to fight both in close quarters and at medium to long ranges. Mostly you will need a lot of ammunition and healing items to shoot your way through. Be careful of being picked off when rounding a corner.
Quickly peaking out and back in can minimize your deaths. If multiple ranged Mimics keep a bead on you while you are standing still you can easily get picked off. Some areas have only one entrance. There are also multiple anomaly fields to navigate through. Once you are in Pechorsk Castle your goal is the keep at the center. Good Luck.
There you are, all of the maps in Into the Radius VR and some information on them. Into the Radius is a fantastic game for both PCVR and the Quest 2. Pick it up on the Oculus store for 29.99$ or on Steam for 29.99$.
You Might Also Enjoy:
The 3 Best WW2 Games on the Oculus Quest 2
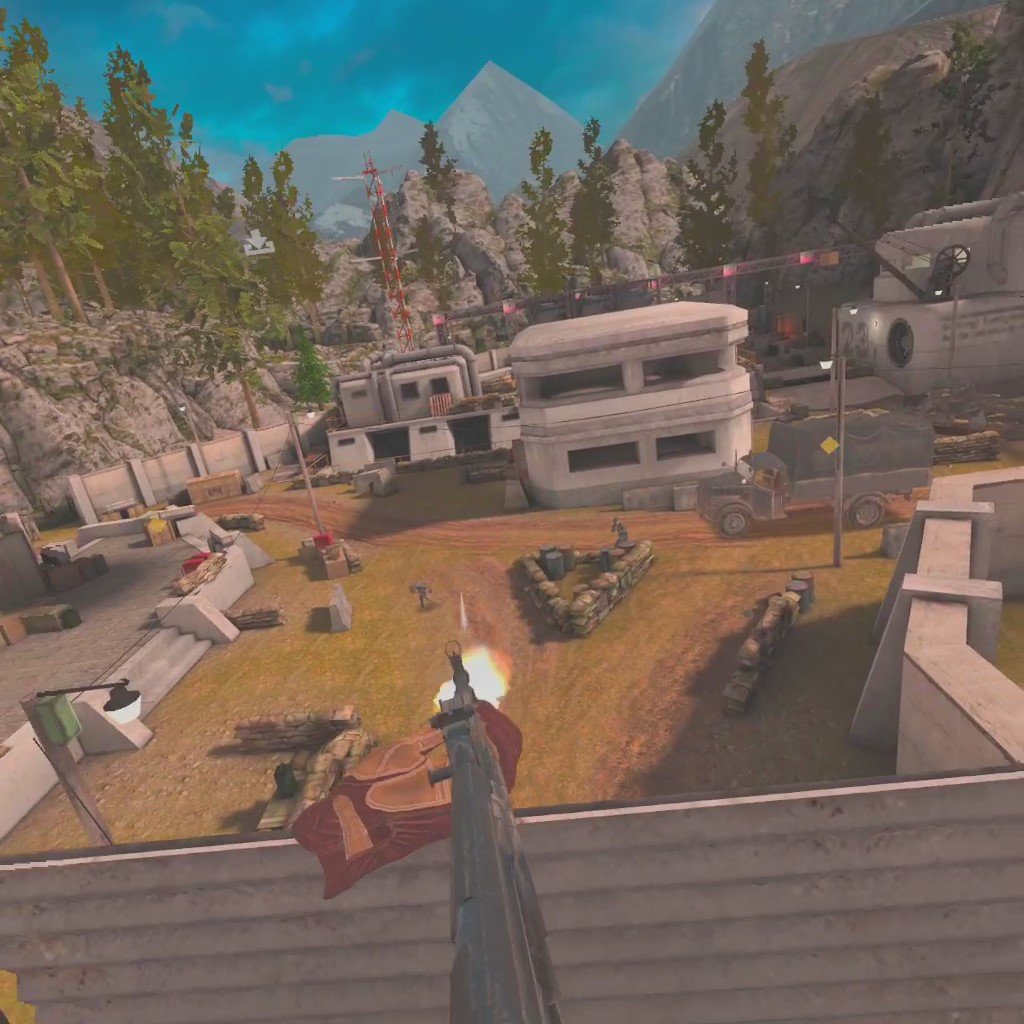
Who doesn’t like a good WW2 game? From the FPS to RTS genres World War 2 has been a backdrop for some of gaming’s biggest hits. Though strangely enough the most global conflict in human history has not been very prevalent in Virtual Reality… yet, here’s the 3 best WW2 games for the Quest 2.
Who doesn’t like a good WW2 game? From the FPS to RTS genres World War 2 has been a backdrop for some of gaming’s biggest hits. Though strangely enough the most global conflict in human history has not been very prevalent in Virtual Reality… yet, here’s the 3 best WW2 games for the Quest 2.
You Might Also Enjoy:
The 3 Greatest VR Real Time Strategy (RTS) Games on the Oculus Quest 2
11 Best Shooting Games for the Oculus Quest 2 | Shooters for the Quest 2
Sniper Elite VR
As covered in our review of the game, Sniper Elite VR heavily skews its gameplay in a way not conducive to how everyone plays shooters. As the name implies the game is heavily focused on sniping, though there are some opportunities to get up close and personal with shotguns and SMGs.
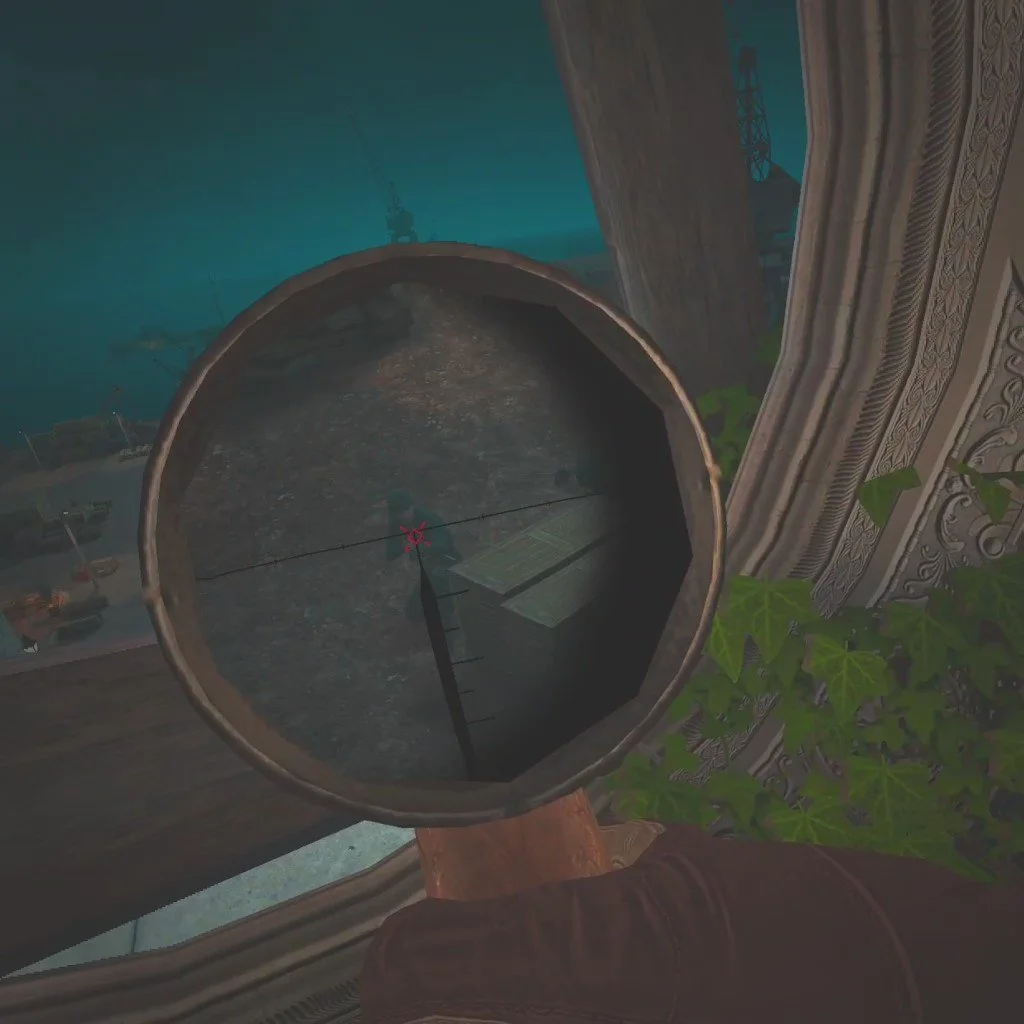
That being said, the premise is very cool. You are an Italian partisan, desperately holding out and doing your best to thwart the Nazi regime to prepare for the Allied Invasion to come. There are a couple of cool character moments in the game, though the story is not what you should play this for.
The gameplay, which is part combat with a variety of WW2 weaponry and part sneaking and assassinating Nazi patrols, is overall very solid. Missions are varied in location and theme. You get a lot of choice on how you want to approach situations and what weapons you bring with you. While sniping is often mandatory, there are also plenty of areas where going in guns blazing while throwing grenades and firing your SMG is just as viable.

Sniper Elite VR combines the more novel gameplay concepts of the Sniper Elite franchise (such as firing your rifle when a plane flies over to cover the sound of the shot) with an interesting setting during World War 2. These create a Virtual Reality game that, while not the most well rounded of VR shooters, is still interesting for VR aficionados, snipers, and World War 2 fans.

Warplanes: Battles over Pacific
Rather than a Virtual Reality shooter, Warplanes: Battles over Pacific is a VR flight simulator that is heavily geared towards flying combat in the Pacific Theater of World War 2. You can use both American and Japanese planes of the era to fly through combat missions and win by destroying enemy air and ground targets. These targets consist of a variety of things from fighter aircraft, to barrage balloons, to convoy trucks, to AA flak guns, to storage buildings.
The controls are a huge draw for this game. While you can do what you need with just your controller buttons, you can also do a lot of actions, like throttling and changing the direction of the plane, by using your virtual hands to grip the controls through physical representations in your cockpit. Want to throttle up? Then grab the throttle and push it forward.
This is much more immersive that just hitting some buttons, you can actually use the real plane controls like you are in the cockpit yourself. Warplanes: Battles over Pacific makes full use of being a Virtual Reality game in this way.

Though once you get the hang of it the gameplay can be a little repetitive. The missions follow the same formula. Destroy some primary target, usually they are one type of enemy on the map, like all enemy fighters, all ships, or all barrage balloons, while destroying or avoiding other enemies on the map. You get bonus points for destroying all enemies before eliminating your primary target.
This is cool but the missions ultimately all end up having the same rhythm to them, though the maps are varied and so are the combinations of enemies. Still, you would be hard pressed to find a better combat flight simulator on the Quest 2. The developers clearly took a lot of lessons from their first, World War 1 themed game Warplanes: WW1 Fighters to make a very polished WW2 flying game.
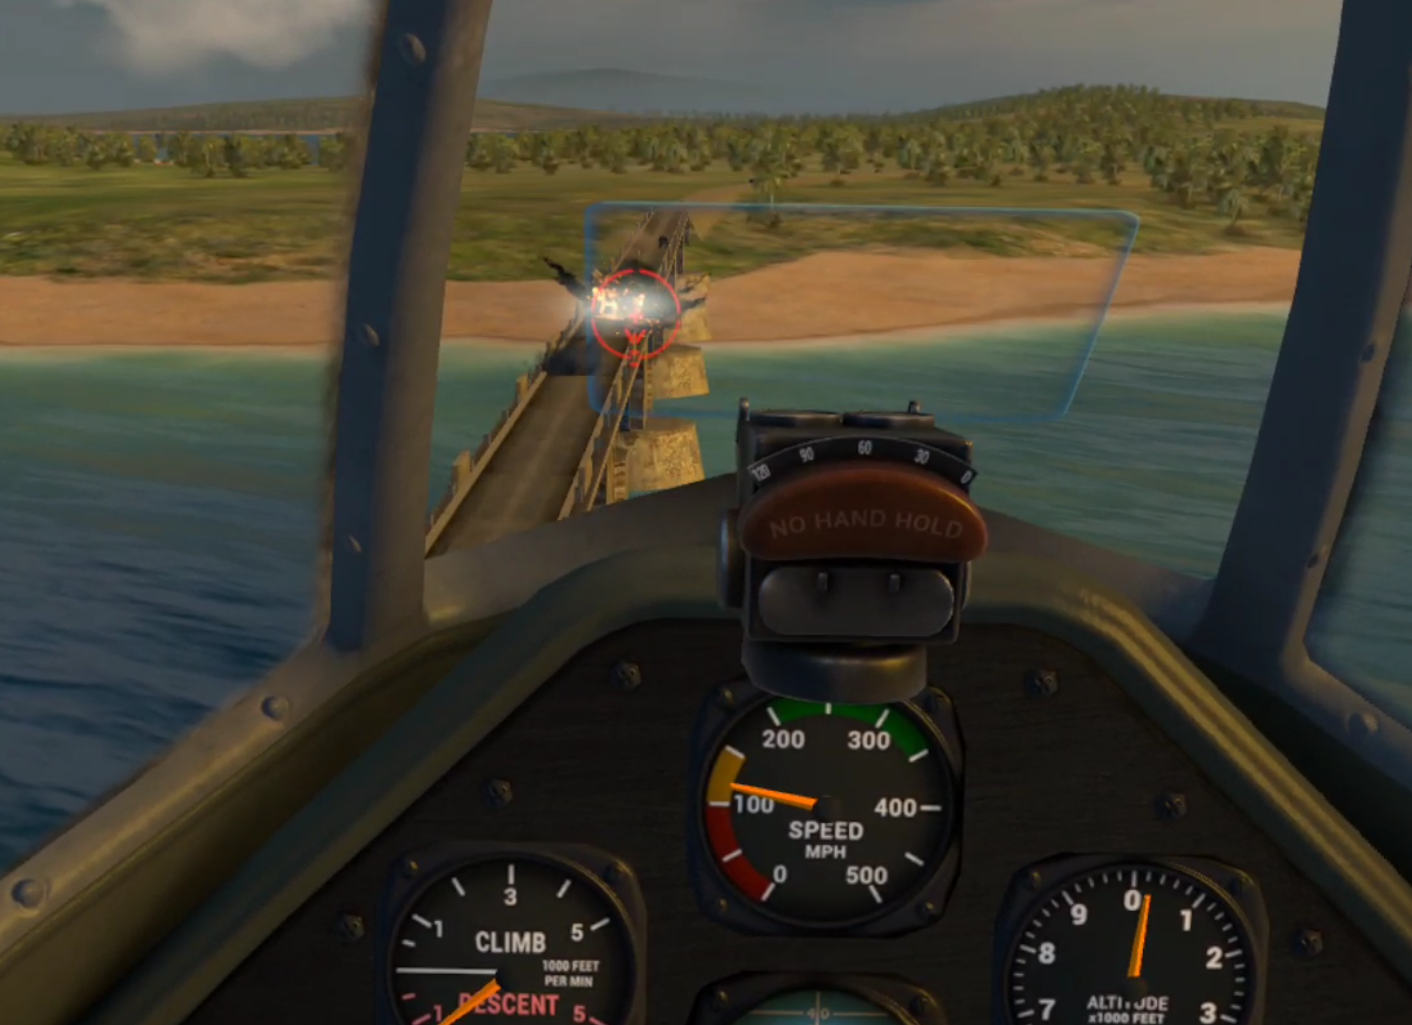
The Multiplayer is also fantastic. You can do Co-op missions with others as well as dogfight against them in Deathmatch. This gives you a chance to use your WW2 flying skills competitively, and is really where the replayability of this game is. Like the Singleplayer there is little variety in the game modes here, but the variety comes from the other players in the game. That being said it can be a little difficult to find a full lobby, depending on the time of day.
Overall if you want to fly combat missions in VR on your Quest 2, Warplanes: Battles over Pacific cannot be beaten.

Medal of Honor: Above and Beyond
Medal of Honor: Above and Beyond was widely speculated to be the premier WW2 game for Virtual Reality. The unfortunate truth is that while Medal of Honor: Above and Beyond has some solid moments in its Single Player, and seems to hit all of the bases of a World War 2 Shooter. It’s lackluster Multiplayer and overly frenetic pacing means it fell so short of everyone’s expectations that it remains relevant only because of the absence of better choices for VR WW2 shooting.

Unlike Sniper Elite: VR this game does not depend on Sniping so heavily, though there are some sniper sections in it. Medal of Honor: Above and Beyond does the exact opposite of depending on any particular mode of play, instead it throws an absolute ton of them at you. You’ll be shooting from a farmhouse in one mission and then dropping bombs in a plane in the next. Meanwhile a bevy of cutscenes interrupt each experience.
In the earlier missions there is far more time spent in cutscenes than in combat. If you manage to make it through the by-the-numbers World War 2 story that is neither believable nor interesting with characters that are one dimensional and that get very annoying over time, then you will be blessed with a few minutes of actual gameplay. This does even out in the later chapters of the game, and there are, later on, some cool moments shooting bazookas at tanks and assaulting a railway gun solo.
Though as you finally get more shooter gameplay than gimmicks, the appeal of the game starts to shine through. You finally get a chance to immerse yourself into the combat and have fun going from classic World War 2 setpiece to classic World War 2 setpiece as you do your part in breaking down the Nazi regime. Overall the campaign varies between boring you with too many cutscenes and being genuinely entertaining when it gives you time to really get into the World War 2 combat.

The shooting is decent for VR, though it brings no real innovations. When you get more combat to chew on, then the occasional gimmick, like a metal detector you use to tip toe through a field of land mines, is more welcome as it serves as a break from the combat, rather than an infuriating obstacle.
Medal of Honor: Above and Beyond also has multiplayer. The modes consist of “Spawn, wander around, and shoot the first opponent you see.” The shooting itself is not well implemented either, a few weapons are clearly far better than all others, making the diversity of weapons non existent. After you get the hang of it you will just use two or three weapons, or get slaughtered by those who know better. There is nothing special that will hold your attention.
Overall Medal of Honor: Above and Beyond is not worth its high price for the small amount of decent gameplay there is to be found inside. I only recommend it if you are completely out of better VR shooters to play, or have such a love for the WW2 setting that you absolutely must get more of it in Virtual Reality. This game would have been a huge hit in the 2000s, but now feels outdated and boring.
Well there you have it, the 3 Best WW2 games on the Oculus Quest 2.
You Might Also Enjoy:

Iron Guard's One Choice that puts the VR in VR Tower Defense
So how does Iron Guard use Virtual Reality perspective and hand controls in a Tower Defense game? If you're familiar with previous critiques on this channel, you'll know that here at Reality Remake we believe that Virtual Reality games should use VR perspective and controls to their fullest, otherwise they might as well be on a flat screen. Well Iron Guard has a good example of doing just that.
So how does Iron Guard, a VR Tower Defense game, use Virtual Reality perspective and hand controls well in a Tower Defense game? If you're familiar with previous critiques on this site, you'll know that here at Reality Remake we believe that Virtual Reality games should use VR perspective and controls to their fullest, otherwise they might as well be on a flat screen. Well Iron Guard has a good example of doing just that.
The Role of the Player
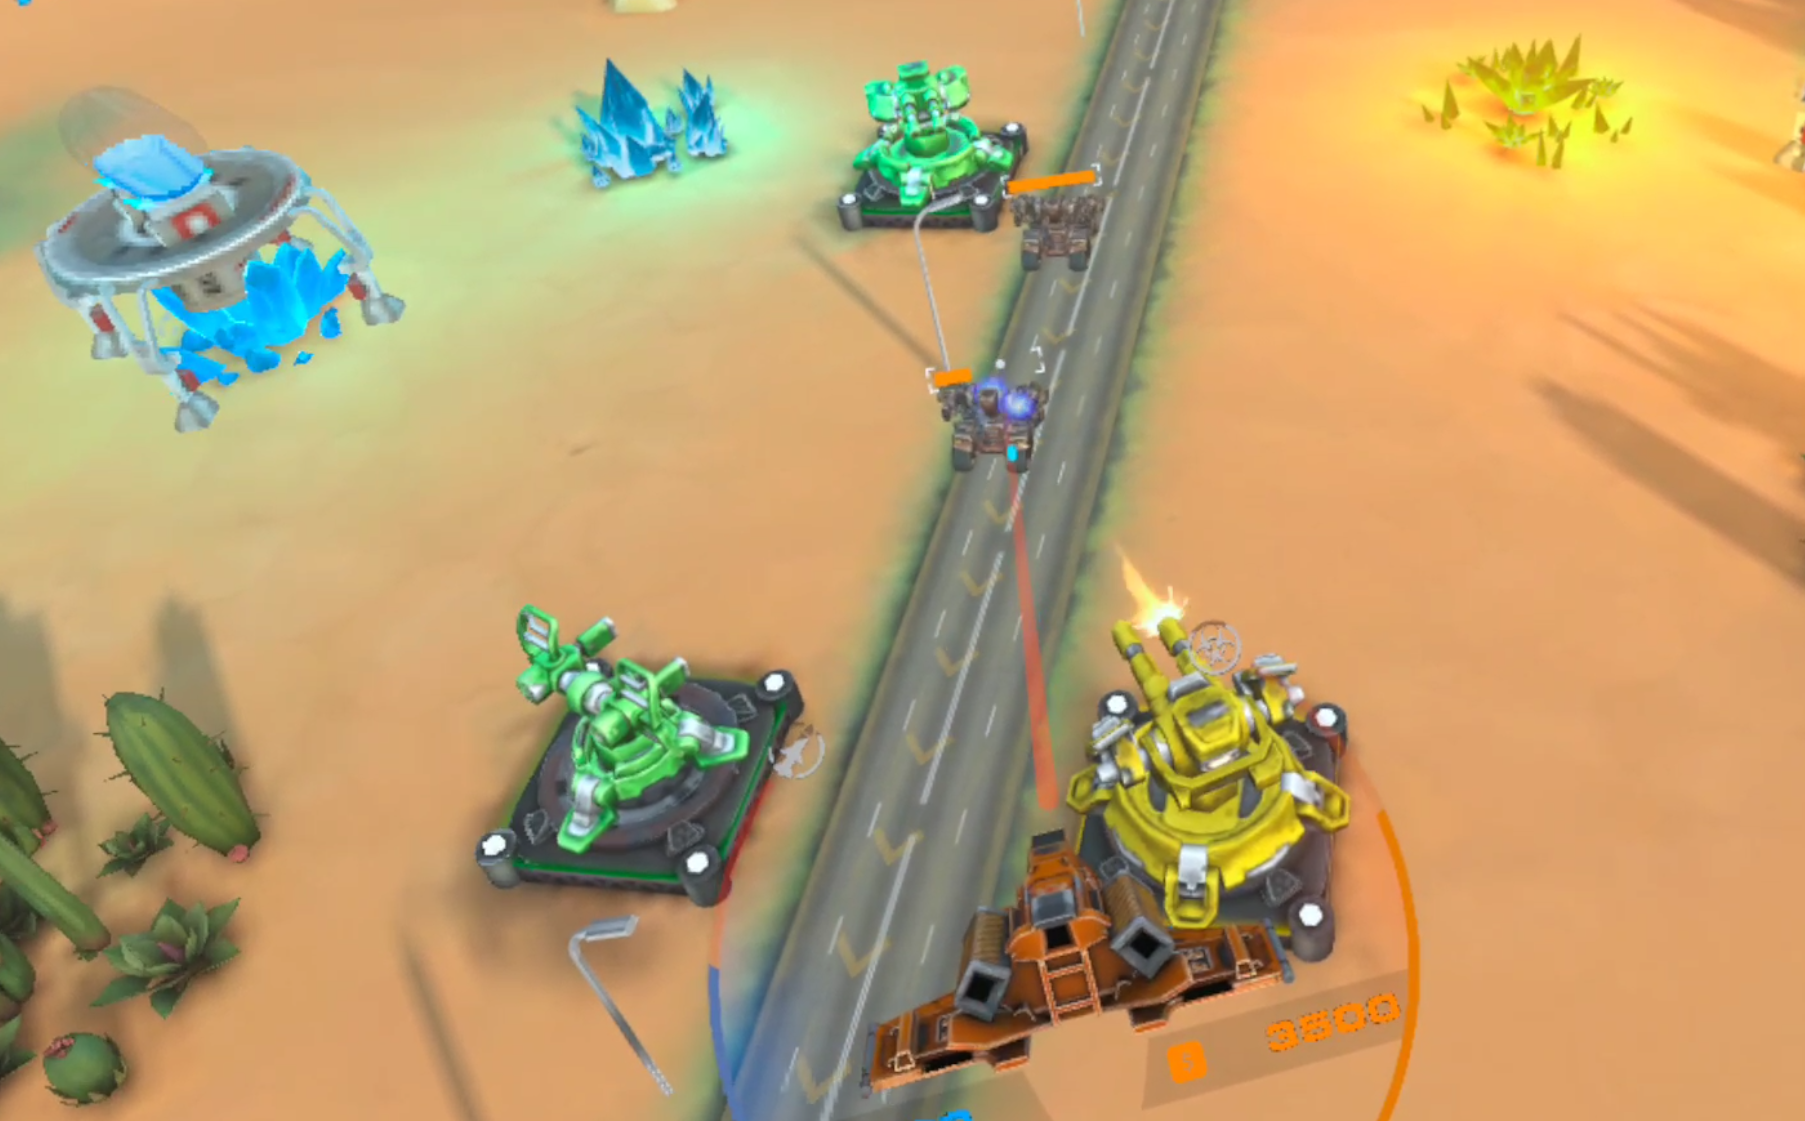
In Iron Guard you're not some omniscient and undefined commander looking down at the entire battlefield through a 2D or isometric view. Instead your right hand is an "Engineer" or rather a little flying drone that you take control of. You still effectively take an omniscient view, and you look around the arena with your head and eyes like in any other VR game.

The little plane that your right hand becomes effectively functions just as your left hand does, as a controller with specific functions in the game. In this case those functions are to shoot lasers and launch missiles, while your left hand is used for building the Towers, Barricades, and Resource Miners you will use to defend your objective.
Feeling Like a Part of the World
If this were only adding a little flavor so that using your hands to control the battlefield makes a little more sense in the universe of the game, then that would not be a lot unto itself. What makes the little ship that your right hand becomes take on actual weight in the game as something more than a setting and aesthetic choice is a single enemy type in Iron Guard, the enemy robot flyers.

These are not constrained to a lane like their land bound brethren, and don’t attack the objective you are defending, but rather fly around the arena and attack you, well not you, they attack your right hand. While you use your eyes to see and your left and right hands together, only your right hand is actually represented in the game. So that is what the flying robots pay attention to, and what they shoot at with their lasers.
If one of those lasers hits your little drone then you cannot fire for a while, and all of your abilities begin their cooldowns again. It is very unfortunate to get hit, and with the exception of rocket turrets only you can take down the flying robots. You will have to dodge the enemy flyers, and you will have to shoot them down. Suddenly your plane hand that was little more than a pointer takes on real meaning, suddenly you treat it like a plane.
You duck and weave and fire volleys back. It's not just your hand anymore, it feels like a part of the world rather than just a glorified mouse pointer on a very fancy pair of screens. A switch flips in the mind at this change, and it becomes more natural to see your hand as what it is visually represented as, the ship which controls your defense efforts.

You become closer with your virtual counterpart in the world of Iron Guard, and therefore feel like an actual part of the world, and not some omniscient controller who commands with aloof detachment.
This is the sort of immersion that only Virtual Reality games can pull off, and in this case it is even more abstract than your human body being a virtual human avatar's body. Now your hand becomes a plane that controls your defense of a distant and deeply damaged space colony. It becomes a part of the world.
It would have been better if more had been done with this concept in Iron Guard, but the fact that it exists at all is a step in the right direction for Virtual Reality Tower Defense games, and VR games in general.
You can find Iron Guard on Steam for 7.99$ (a free demo is available as well) and on the Oculus store for 14.99$.

9 Clever Tips and Tricks for The Walking Dead Saints and Sinners
The Walking Dead Saints and Sinners is one of the greatest Virtual Reality games out there, but if you’re having a tough time maybe you’re not enjoying it as much as you could. Well if you’re struggling or just want to dominate the flooded streets of The Walking Dead’s New Orleans even harder, here are some premium Tips and Tricks for The Walking Dead Saints & Sinners.
The Walking Dead Saints and Sinners is one of the greatest Virtual Reality games out there, but if you’re having a tough time maybe you’re not enjoying it as much as you could. Well if you’re struggling or just want to dominate the flooded streets of The Walking Dead’s New Orleans even harder, here are some premium Tips and Tricks for The Walking Dead Saints & Sinners.
A video version of this article can be found here on our Youtube Channel.
You Can Outrun Walkers
This tip is the most important for people new to The Walking Dead: Saints and Sinners. At first when playing the game you’ll probably be pretty afraid of the Walkers you come across, and hesitant to fight them, though there won’t be many of them for your first few trips into New Orleans.

That’s perfectly natural until you get the hang of braining the undead, and realize that as long as you stay calm and take them one or two at a time, they’re not very dangerous. Just keep in mind that it’s not the end of the world if you get noticed by a few walkers at the same time.
If you do attract a crowd of walkers you can outrun them and break their line of sight to you by getting some obstacles like ruined cars or a building between you and them. If they don’t see you for a while most walkers will get bored and wander in a different direction.
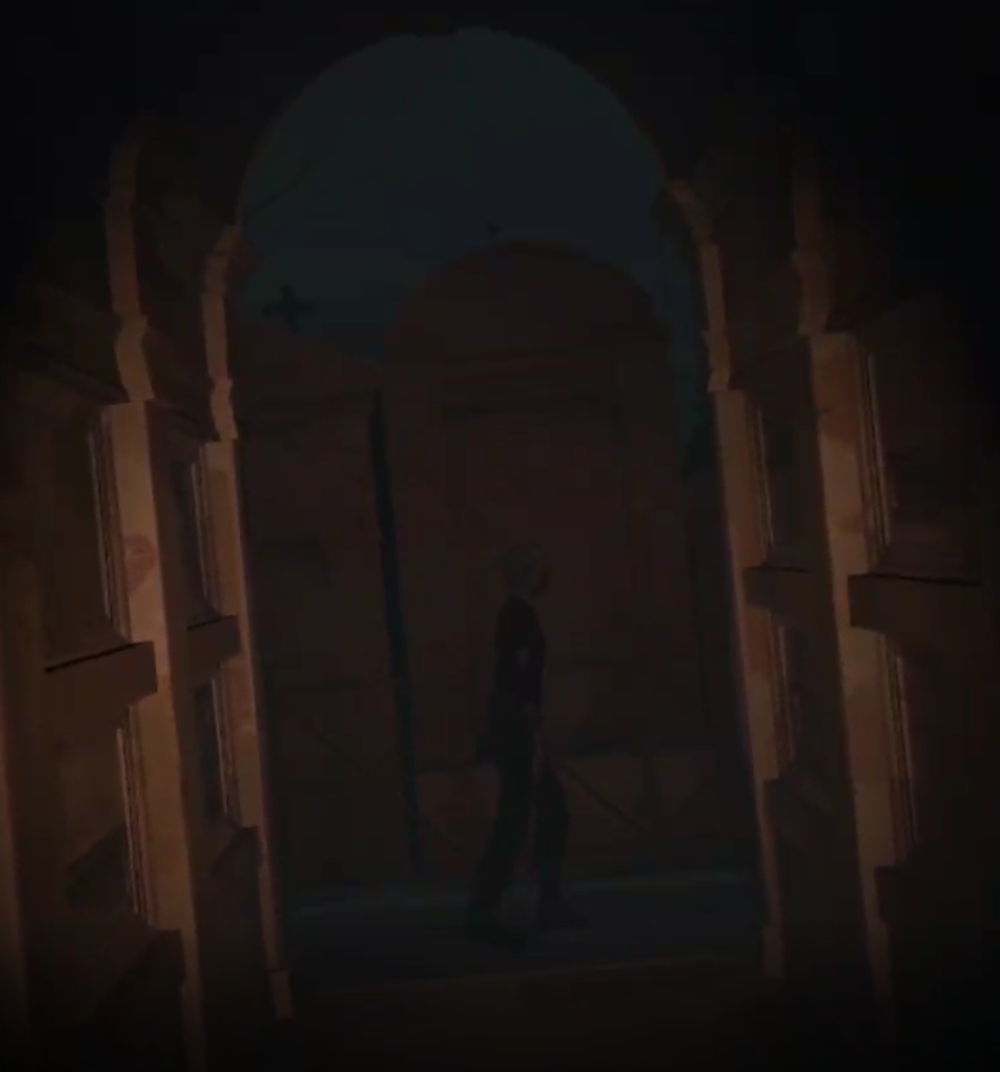
Every once in a while you’ll get a particularly fast walker that chases you very persistently, those you will have to take on, though they are easy to get 1 on 1 as they’ll outpace their slower cousins. Just be careful not to run until your stamina hits zero, you can keep walking and regenerate stamina, just make sure to run in bursts. Running out of stamina will make a bad situation worse.
Also be careful not to run into more walkers while you escape. While running away shouldn’t be your default strategy, but it is the best idea when you are severely outnumbered and inexperienced.
2. Only Eat Food You Make
In The Walking Dead: Saints and Sinners, food restores your maximum stamina. You lose maximum stamina when you run and swing melee weapons, basically whenever your stamina bar goes down. So you will have to eat food, but don’t eat any old funky can of beans you found on a street corner where walkers have been dragging their rotting feet all over it.

Eating food that you scavenge will reduce your maximum health, just like diseased walkers do, which means you will then have to use rare and precious medicine to restore your maximum health. Why waste your medicine when you can just make food yourself that restores your maximum stamina and doesn’t decrease your maximum health?
All food that you craft at the Survival Workshop does not reduce your maximum health, and restores quite a bit of stamina. Some food recipes that you find also give you bonuses for the day, such as…
3. Jambalaya is the Most Resource Efficient Food
As we pointed out in our article that shows you how to unlock all of the hidden recipes in The Walking Dead: Saints and Sinners, Jambalaya is the best food to eat on a daily basis as it reduces the amount your weapons deteriorate as you use them. So if you eat Jambalaya every day, you won’t have to use as many resources to craft weapons, because they will break more slowly.

You can get the Jambalaya recipe in Via Corolla, the second map the game lets you access, by going to the huge blue house with the “TOWER” banner on the outside and picking it up off of the kitchen stove. Keep in mind that the effect goes away when you sleep, and only takes effect when you eat it, so it’s best to start your day with a heaping serving of Jambalaya.
4. Weapons You Craft Yourself Work the Best
Tired of having to pull the slide back on that Worn FS92M when it jams every other shot? Sick of your scavenged weapons falling apart in your hands after only a few uses even if you ate your Jambalaya in the morning?
Well that’s because this is a game with a crafting system, and so you’re encouraged to use it. Don’t use those scavenged weapons, just like you shouldn’t eat scavenged food. Break it all down in your trash can and craft some brand new weapons instead!

Weapons you craft last a lot longer, jam less, and start off at full durability. When you’ve got four tower grunts doing their best to fill you full of holes, you’ll be happy to have a gun you can rely on. Speaking of guns…
5. Always Carry a Gun
It shouldn’t surprise anyone that a firearm is a good thing to have on you in an apocalypse, but it can be awfully tempting to take as few weapons and equipment as possible when going on a scavenging run in The Walking Dead Saints and Sinners.
You will, of course, need a melee weapon to get rid of walkers quietly, but if you only expect to run into walkers you might wonder, what do I need a gun for? They’re noisy and will just attract more walkers if I use it, might as well just rely on melee weapons. Might as well not bring a gun and save that slot for a piece of loot to turn into parts.

Well dying and losing all of your loot is a hell of a lot worse than having one less slot to keep loot in, so keep a gun on you. Even if you run into nothing but walkers, you might run out of stamina and have to shoot your way out. There are also diseased walkers, who will take a sizeable portion of your maximum health if they bite you or die near you, so killing them at a distance with a gun is the best way to get rid of them.
Guns are always worth it. Even if you’re a bad shot, you’ve still got options, like…
6. Shotguns are the Easiest Guns
Aiming a weapon in Virtual Reality is as close a simulated experience to aiming a real weapon as we’ve got, and The Walking Dead Saints and Sinners has a pretty good simulation of handling guns. They’ve got weight to them, and fire pretty straight out of the barrel, so if you’re not a good shot you might have trouble landing headshots with single shot firearms like pistols or the Hunting Rifle.
Well don’t worry because there are two weapons of choice for the aiming impaired here, the Double Barrel and Nova 1014 Pump Action shotguns. Unlike all other guns in this game, you only need to aim in the general direction of an enemy’s head and let it rip. The spread on the buckshot shells is much more forgiving than the bullets of other weapons.

While the Double Barreled Shotgun only holds two shells, it does have a much wider spread to each shot than the Nova, making it easier to land headshots, but also less effective at range. The Nova is arguably the all around best gun in the game for the amount of destructive power it can put out, and ease of use.

7. Get the Backpack Upgrade First
As we’ve mentioned in our Loot Tier List and Upgrade Guide article, there is one upgrade that stands above all others in The Walking Dead: Saints and Sinners. That is the “Deep Pockets” Backpack upgrade at the Gear Workbench.

This upgrade adds 9 slots to your backpack, and a large slot that can hold two handed weapons. The more loot you can carry and then break down at your base, the more upgrades, healing items, and weapons you can craft. The earlier you get this upgrade, the faster you can get other upgrades, it’s really a no brainer.
8. You Can Find Medical Items In the Wild
If you’re out of meds and hurting while out scavenging, you won’t necessarily have to go all the way back to base to heal up. Inside buildings you will often find Dirty or even Clean Bandages in Bathrooms, Kitchens, and Laundry Rooms. You may even get lucky and find one in the street.
So be careful if you are wounded, but check for medical items before going back to base, they might save your life.
9. Turn Off Health and Stamina Bars
This tip is a bit of personal preference. If you prefer to have as few obvious UI elements in your face while playing VR, then go to the Settings Menu and turn off Health and Stamina Bars by deselecting the “Enable HUD” option. Otherwise you will constantly see both of them at the bottom of your screen, and they might get in the way from time to time.
You can still check your health and stamina by looking at your watch. I’d suggest at least trying the game with the Health and Stamina bars off. If you don’t like it you can always switch them back on, and it is even more immersive without those big bars sitting in your view.

There you have it, 9 Tips and Tricks for The Walking Dead: Saints & Sinners. This is a fantastic game set in the universe of The Walking Dead, and is overall a shining example of Virtual Reality game development done right. If you haven’t picked it up already there is no VR game on the Oculus Quest 2 (or Meta Quest 2 if you prefer) that I could recommend more highly.
You can find The Walking Dead: Saints & Sinners on Steam for 39.99$ and on the Oculus/Meta store for 39.99$.

How to Make Metal Weapons and Tools Solo at the Blacksmith in A Township Tale
If you’ve followed our guide on how to Play A Township Tale Solo on the Oculus Quest 2 then you’re definitely at the point where you have unlocked the Blacksmith building and can finally make metal Weapons and Tools. The best and most durable weapons in A Township Tale are made at the Blacksmith, while there are some that you can find out in the wild, you’ll need to know how to make your own to have a consistent source of weapons and tools while exploring A Township Tale Solo.
If you’ve followed our guide on how to Play A Township Tale Solo on the Oculus Quest 2 then you’re definitely at the point where you have unlocked the Blacksmith building and can finally make metal Weapons and Tools. The best and most durable weapons in A Township Tale are made at the Blacksmith, while there are some that you can find out in the wild, you’ll need to know how to make your own to have a consistent source of weapons and tools while exploring A Township Tale Solo.
This guide assumes that the Blacksmith on your server has not been used by other players, and directly follows our previous Solo Guide for A Township Tale.
Settle In
After strutting up your newly constructed staircase you will see the Blacksmith directly in front of you, which you can recognize by the giant forge, training dummy, and anvil shaped sign.

It’s been a long time since anyone was here, so all of the doorways and windows are overgrown with vines so thick you can’t walk through them. Use a tool to smash the vines to pieces. If you don’t have a tool or weapon on you, a rusty hammer is on the anvil in front of the forge.

Now that you can enter the Blacksmith freely you can get down to the real business of making your own weapons and tools. When you take a look around you’ll see various parts and pieces lying around, in addition to some rusty tools. There will also be some other useful pieces on shelves. We won’t be using any of that for our first creation. Instead we’ll create something from scratch using recipes that will be available to anyone when they first unlock the Blacksmith.
Smelting Ingots in the Smelter
First things first, in order to make something out of metal, we will need metal ingots. Gather all of the coal and copper ore you have. Even if you don’t have any there should be enough already in the Blacksmith to create a few copper ingots. Just look on the shelf immediately to your left after you come in through the entrance that is next to the training dummy.

Once you’ve got your copper ores and coal together, it’s time to use the huge black smelter in the center of the building to make some bars of copper (aka, ingots). You’ll notice a hopper right in front of that shelf which has the ores and coal on it. Open it up, and throw all of your copper inside. Once it’s all nestled in there close it completely. That will put your copper ore inside of the smelter.
If you are wondering how many ingots will be made from your ores, every three ores creates a single ingot.

If you mess up and put something in the hopper that you don’t want in the smelter, you can always pull the lever next to it and everything you put inside will appear on the little table to the left of it.
Once your ore is inside of the smelter, you will need some fuel to heat it up and turn it into ingots. To fuel up your smelter go a little to the right of the hopper, and open the grate you will find at floor level. Throw all of your coal inside the grate, and the smelter will instantly start smelting ore into bars.

Smoke will start to billow from the smelter, and you will see flames inside of it, so you know it’s working. Still, each bar takes a few seconds to smelt. To speed up the smelting process you can push down on the bellows next to the Coal Grate. You know the bellows are working when great gouts of flame start appearing in the smelter window in front of you.
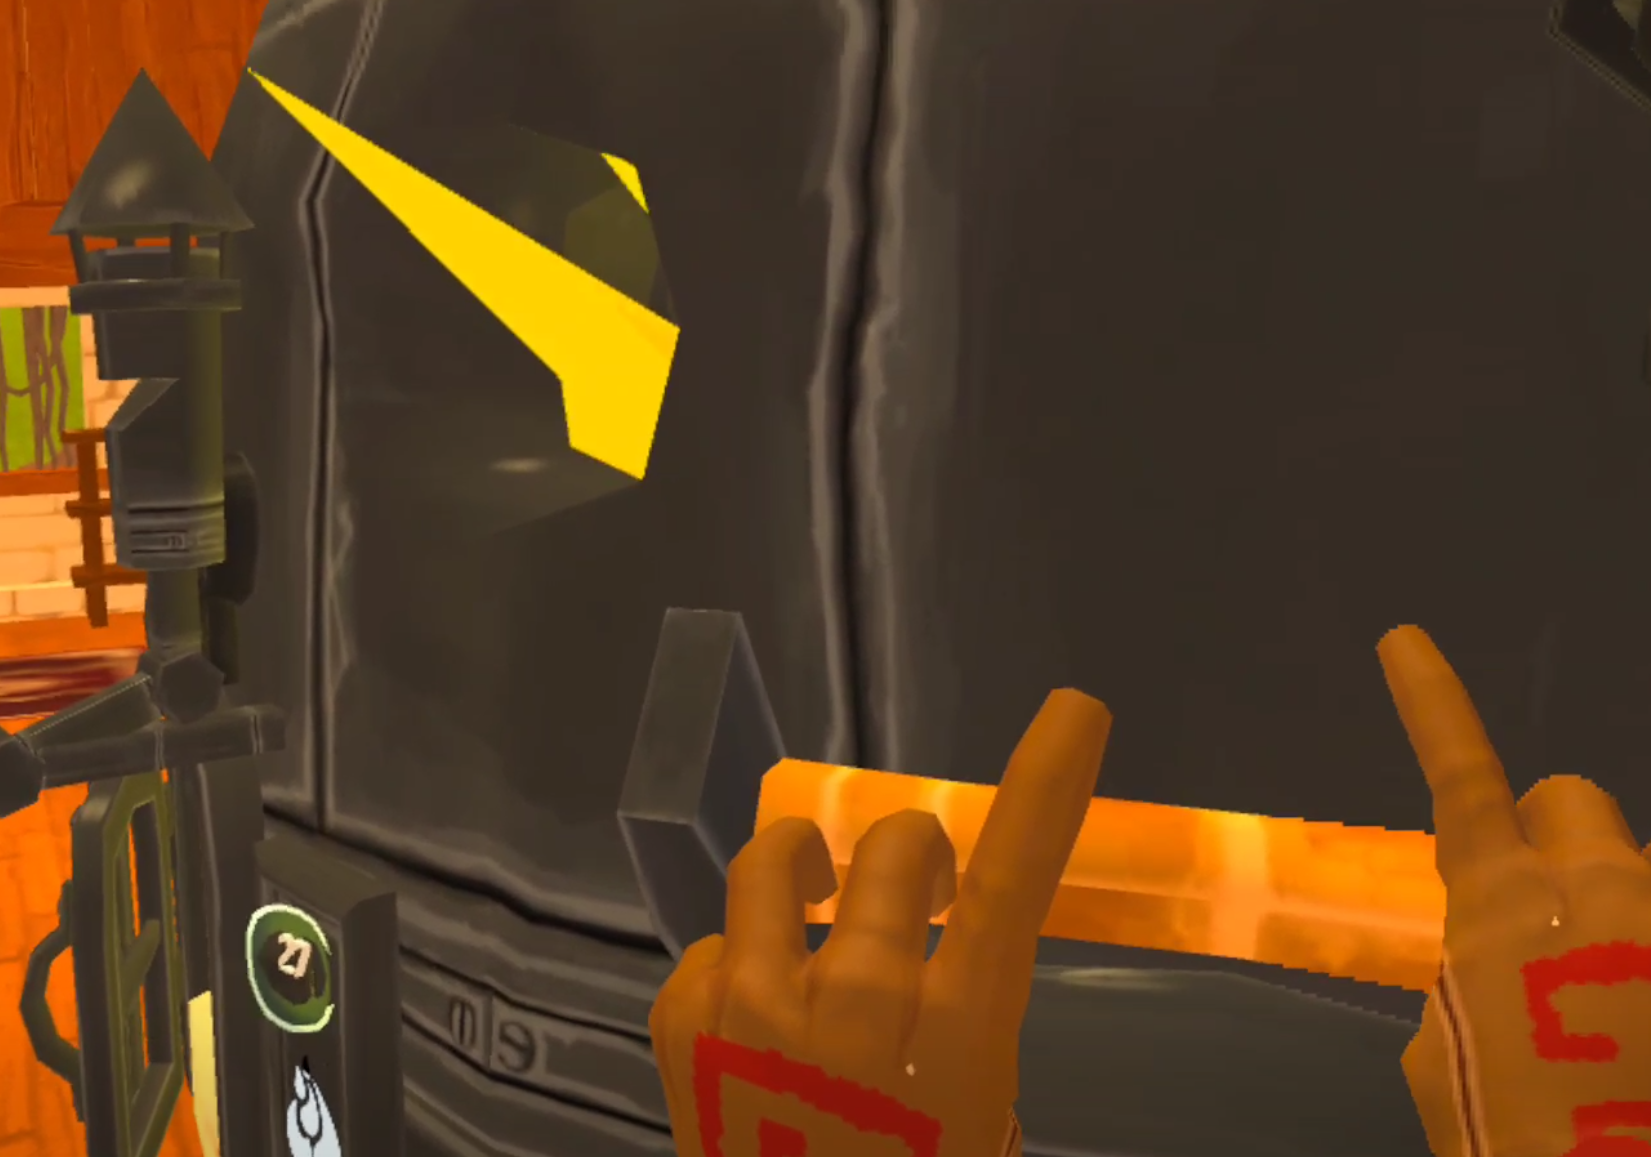
When the smelter stops working you are either out of ore or out of coal. If you’re in a pinch and don’t have enough coal, you can also use wood to fuel the smelter. You could also always go back into the mines for more too.
To collect the fruit of your labors go to the output hopper to the right of the bellows.

Turn Ingots Into a Blade
So now that you have some ingots it’s time to make our Dagger blade. By now you’ve probably noticed these black rectangles lying around with silhouettes of tool pieces on them. There’s one with a hammerhead on it right beside the smelter, and a few more on the table right behind the output hopper you just retrieved your ingots from.

These are blacksmithing moulds, and they go in the slot on the side of the furnace right above where the hammer mold spawns. You can find more of these moulds in chests throughout the world and in the mines. Luckily the game gives you a few here to start with, and it gives you an easy way to organize them all.
On the other end of the Smithy you’ll see a tall black metal cage with a rope on the side. This device stores Moulds in each of the brackets inside of it. You can also peruse your collection of moulds by pulling the rope on the side of it. To put a mould inside of this device take the mould in your hand and hold it up to one of the brackets, then let go.
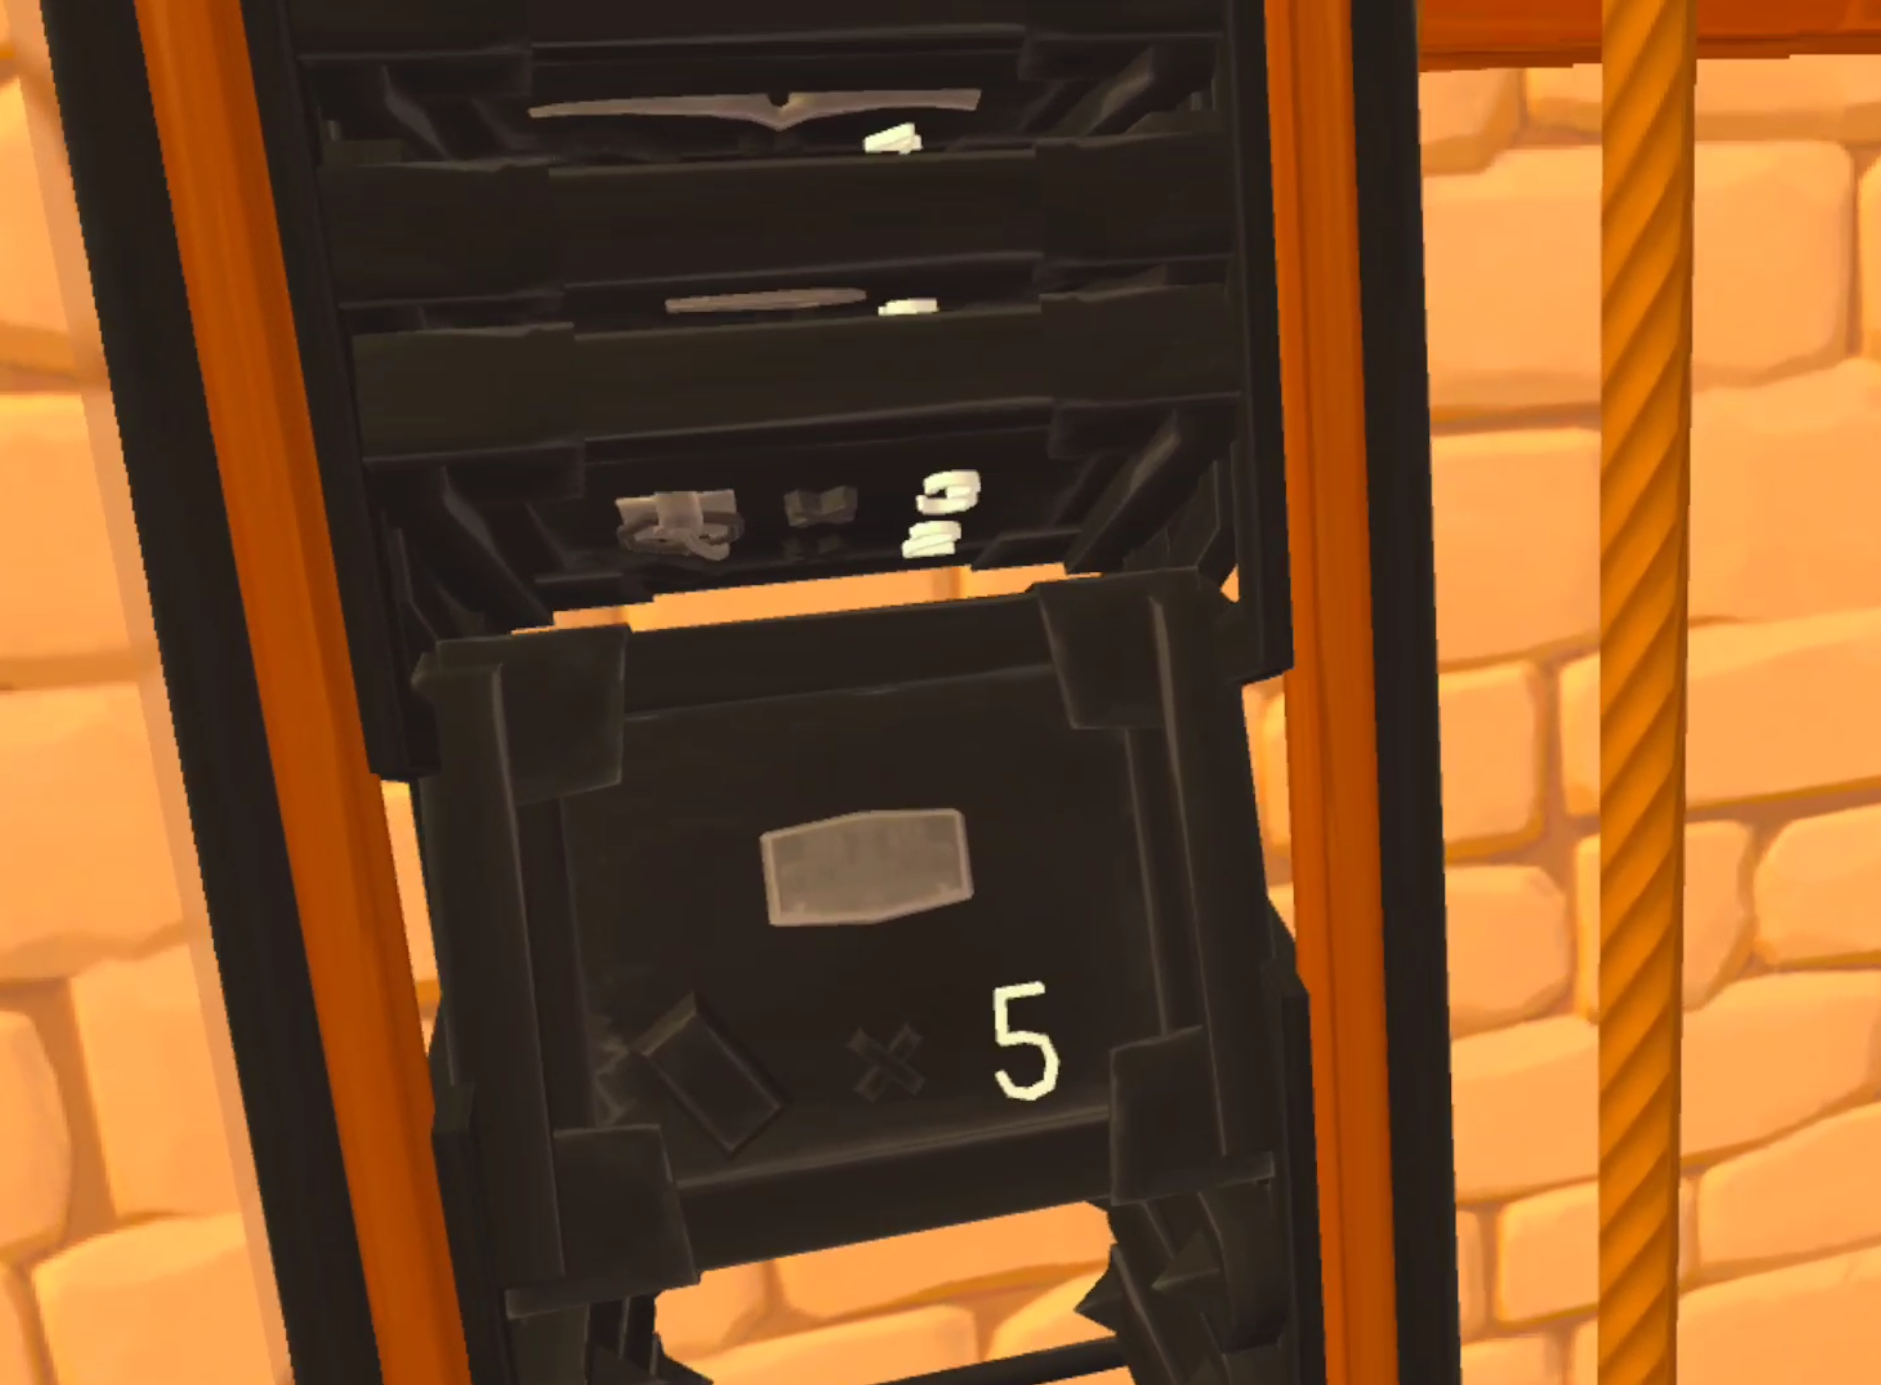
Once you’re done storing your Blacksmith Moulds, locate the mould that looks like a short curved blade. This is the curved dagger mould, and will be our first metal weapon that we make ourselves.
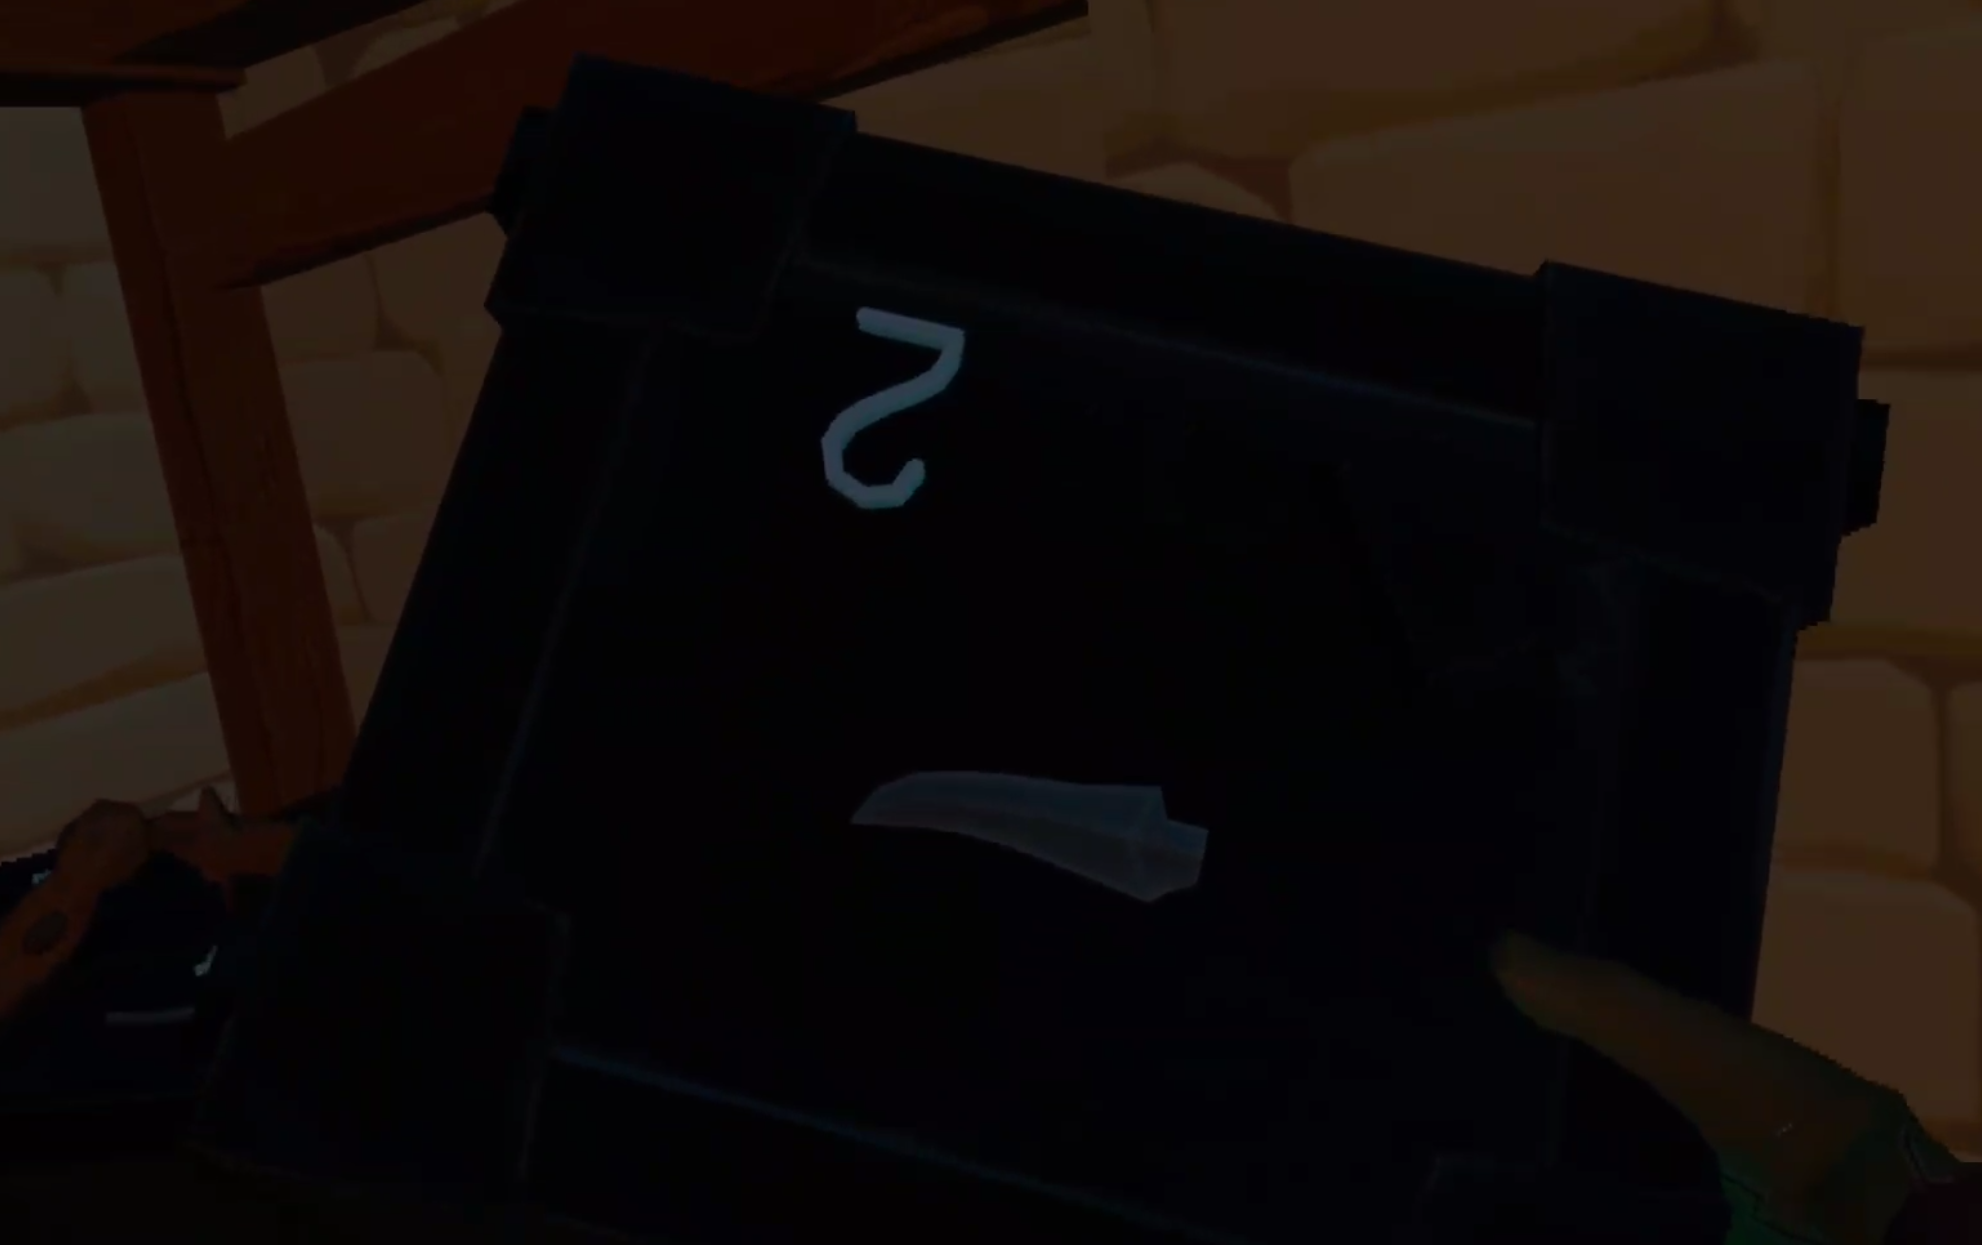
Once you’ve got the mould put it in the slot right above the spot on the side you found the Hammer mould. Once it’s nestled in there any ingots that you put into the smelter will then be turned into whatever mould is in that slot. In this case, a curved dagger blade. The number on the mould also indicates how many metal bars are needed to make that metal item. In this case, two.

Now go back to the input hopper and put in exactly two of your newly minted copper bars. You can put in more if you like, but if you do the smelter will not stop making curved dagger blades until it runs out of bars or fuel. So only put in two bars in order to make a single dagger blade.
Once the bars are in smelting will begin automatically as long as there is fuel in the smelter, just like when smelting the ores into ingots. Once the smelting is done the finished dagger blade will drop into the output hopper.

Firing Your Blade at the Forge
When you pick up your new dagger blade you might notice that it’s a little… bulky. A little dull even. That’s because this blade has yet to be forged, and is just in the rough shape of the end product. It’s not sharp at all. Now it’s time to bring it outside and get to the coolest part of Smithing at the Township Tale Smithy, forging.

Forging is straightforward. Take the thing you need to forge, and put it into the hot fire. In this case that is your dagger blade. There’s a little piece of stone that you can lay it on next to the coals that is very convenient. Don’t stick your hand too far into the forge or you will take damage.
In a few moments the metal piece will become hotter and glow orange. Then little wisps will start to float out of it. When you see those wisps the blade is ready to be smashed into shape.

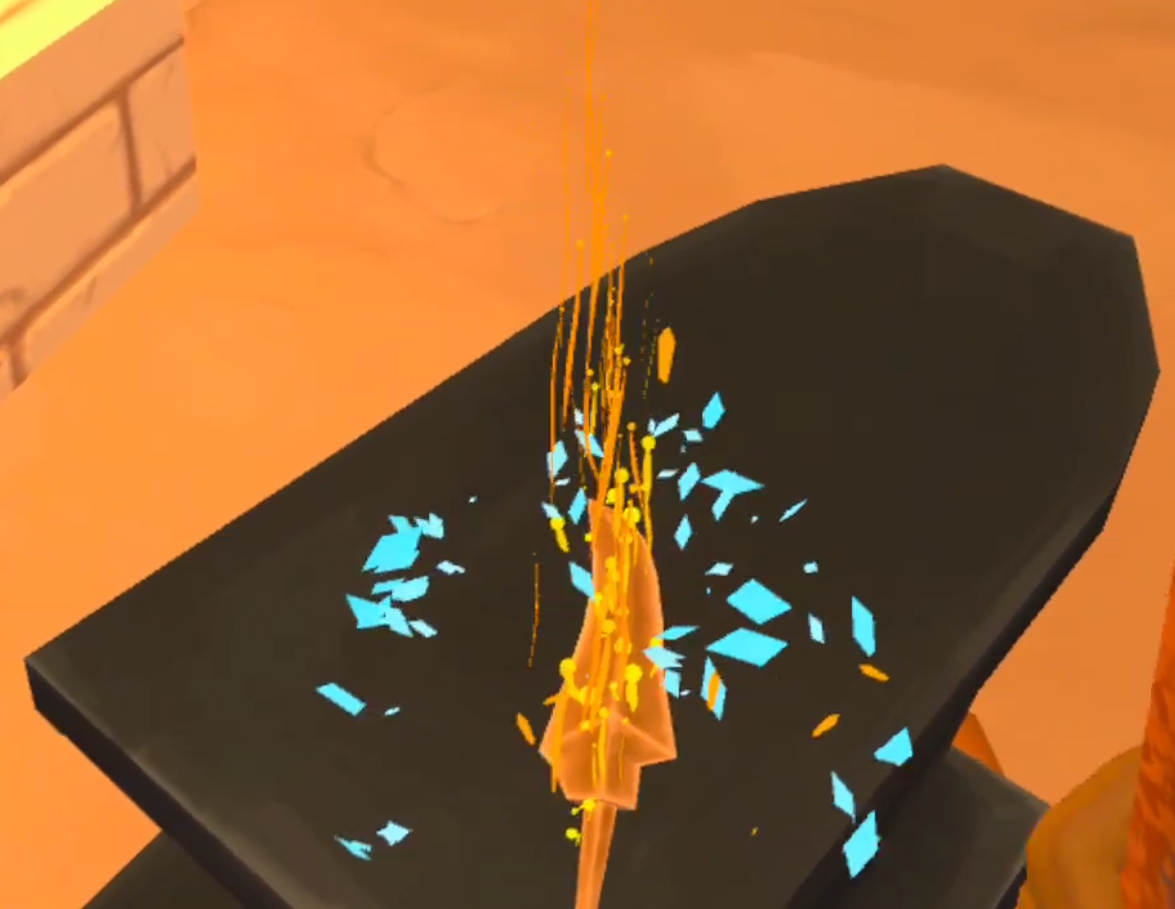
Take the blade out of the furnace and put it on the anvil next to it. Use the rusty hammer that spawns on the anvil to start smashing at the blade. If you’re hitting it dead on there will be a satisfying sound, as well as a small burst of sparks. You will also notice the shape of your blade change as it flattens out and becomes sharper. Keep hammering until the blade loses it’s orange glow.
When the blade is cool put it back in the forge until the orange wisps come out of it again. Keep doing this until a flash of blue sparks and a triumphant noise signal that the blade is finished!
Creating a Handle | Basic Carpentry
Now that the smithing and forging is done up at the Smithy, the final part you will need for your dagger is a handle to attach the blade to. You’ll be able to find handles in chests or in the mines, and there are even a few that spawn in the Smithy, but for this example we will make our own.
So let’s leave the Smithy with our new blade, and go down the stairs to the Carpentry Workshop.

To make the handle you will need six pieces of wood and a hammer. Some extra pieces of wood wouldn’t hurt either, in case you make a mistake. Past the Carpentry Workbench in the center of the room (aka the Wood Turning Table) you will see a book on a pedestal in the back of the building. Pick up that book and leaf through it until you find the short handle recipe page. Rip that page out of the book.
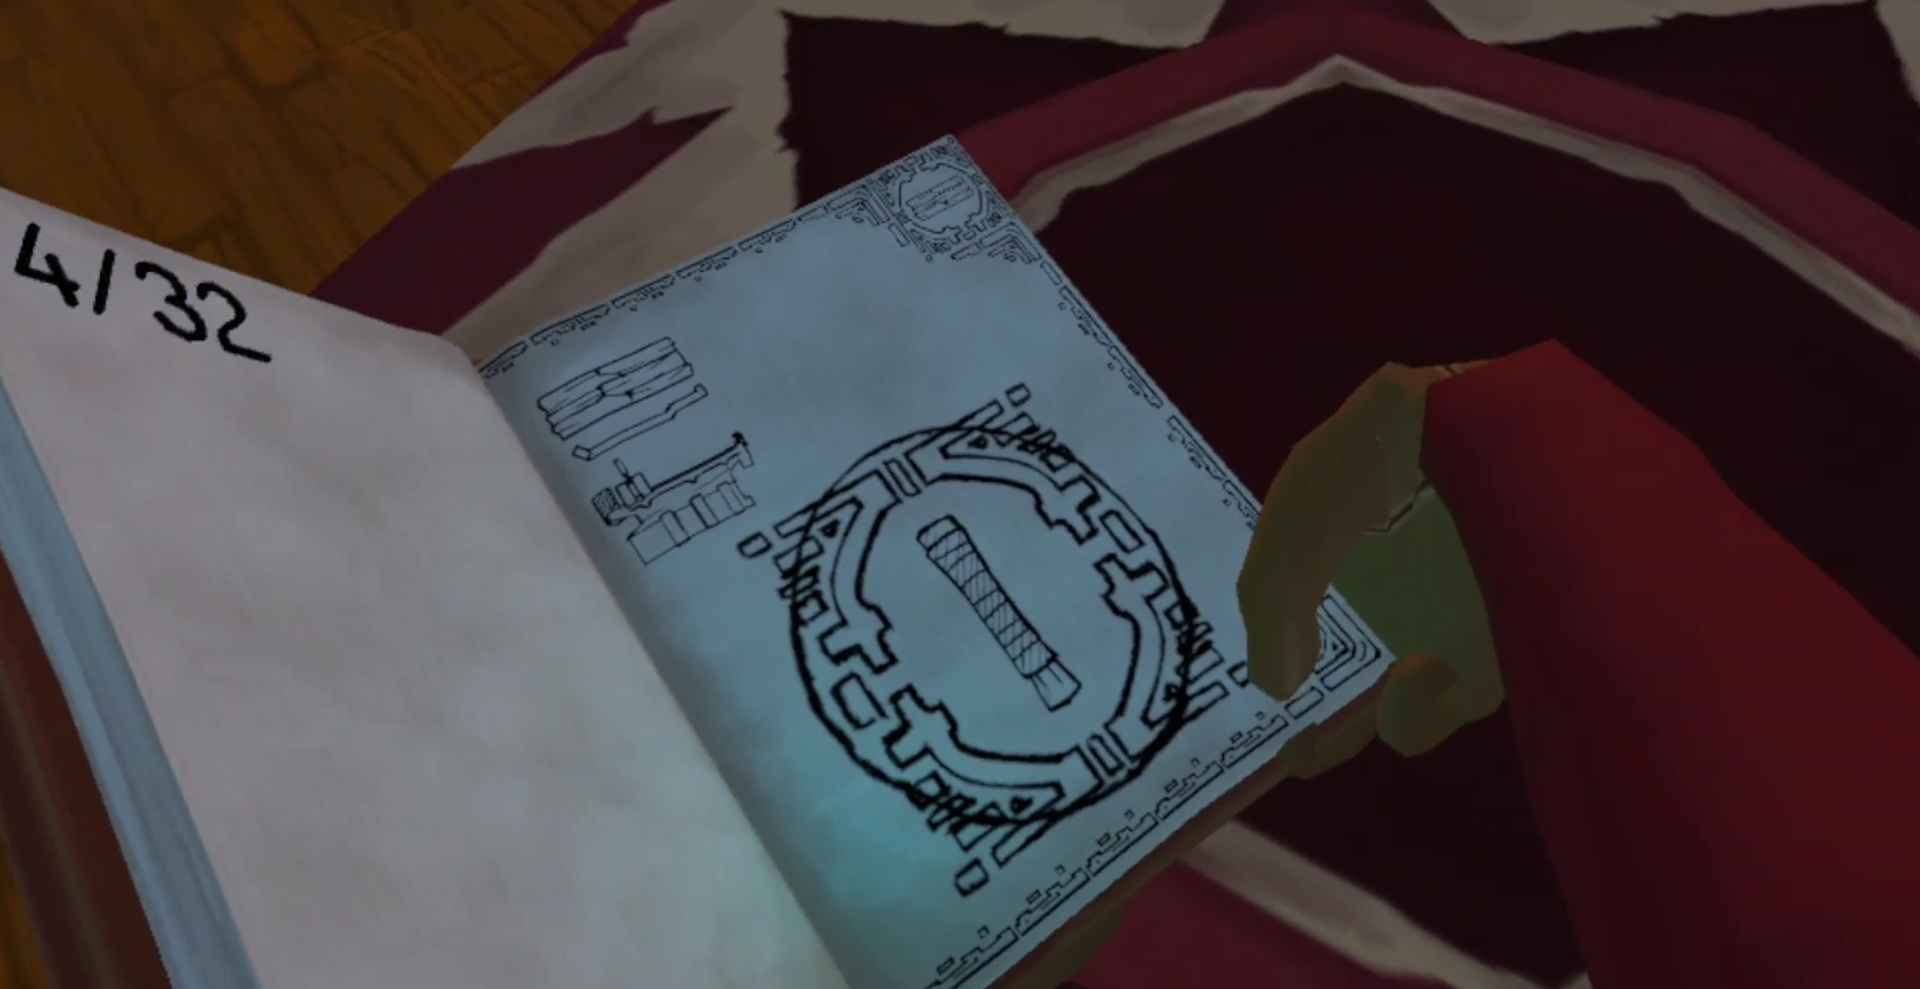
Then take the page you ripped out and put it into the page holder next to the workbench in the center of the room.

Once the page is in the workbench it is time to add your wood. Put the pieces of wood in between the two sections of the workbench and move the sliding section inwards to capture the pieces. You will need to place six in total to make the one solid block of wood needed to make the handle.
Once the pieces have been placed in between the two sections successfully you will see that one part of the wooden block becomes highlighted.

There should be a chisel nearby on a table, take that chisel in one hand and your hammer in the other. This part can be difficult to get the hang of. Place the Chisel at a 45 degree angle to the piece of highlighted wood, and then strike the back of the chisel with the hammer. If you did it right you will see wood chips fly off of the piece of wood, hear a wooden clapping noise, and see the piece of wood you are chiseling move slightly.

Keep doing this until the highlighted section of the wood block flies off, and a new section is highlighted. Make sure to only chisel off the highlighted sections, the order is important. If the piece you need to chisel is on the bottom of the wood block, grab the handle on the top of the moveable section of the table and pull it downwards to flip the block of wood upside down.
When you chip off all of the outer pieces of wood you’ll be left with just the inner section. Once you make it that far order doesn’t matter, just chip away at it however you want to.

Keep chiseling away at the center until your handle is revealed. Now you’ve got every piece needed to create your dagger!

Combining The Pieces
The last part is by far the easiest. Just take your finished short handle in one hand and your finished blade in the other. The places where you can combine the two will be highlighted. Then just smash them together and voila! Your dagger is complete.
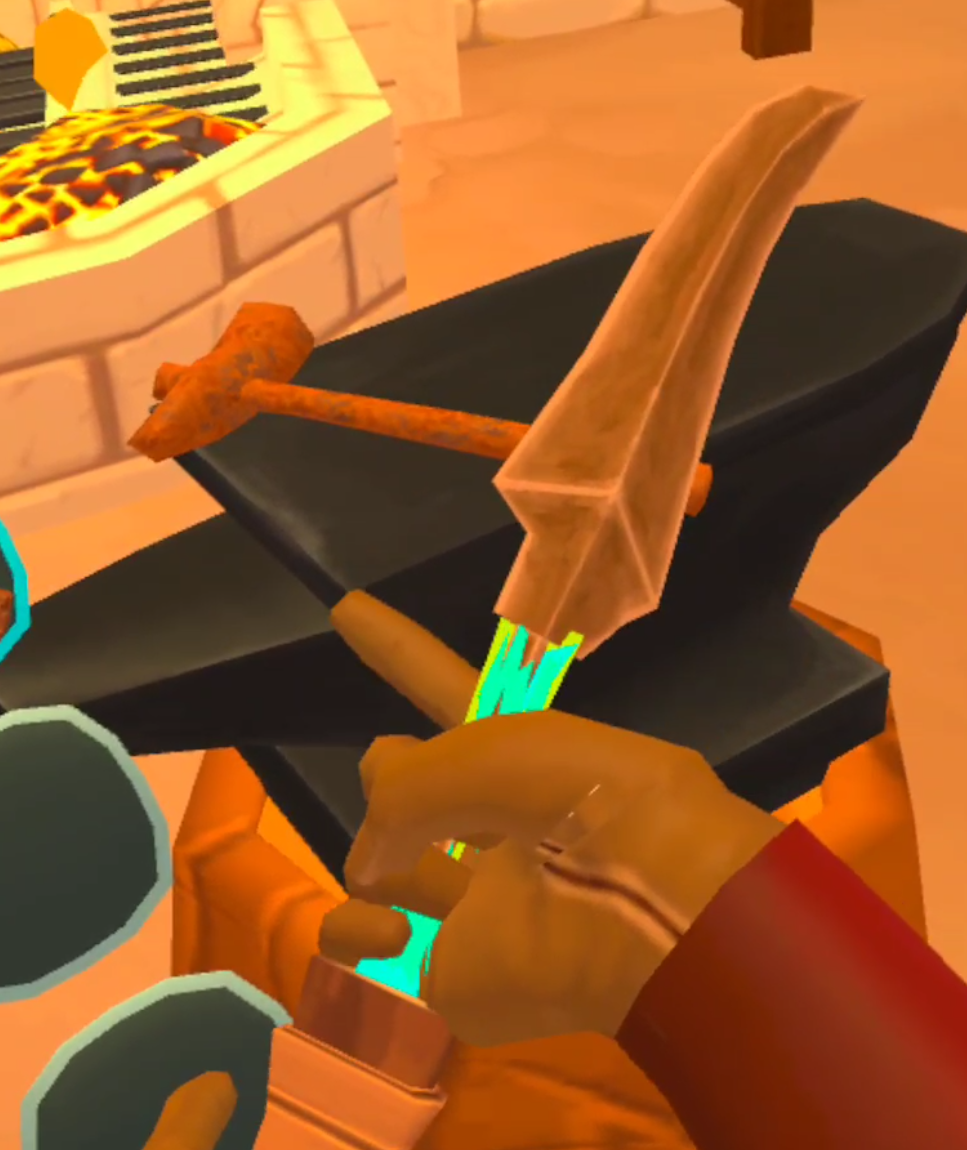
Feel free to test your new weapon out on the dummy right in front of the Blacksmith.
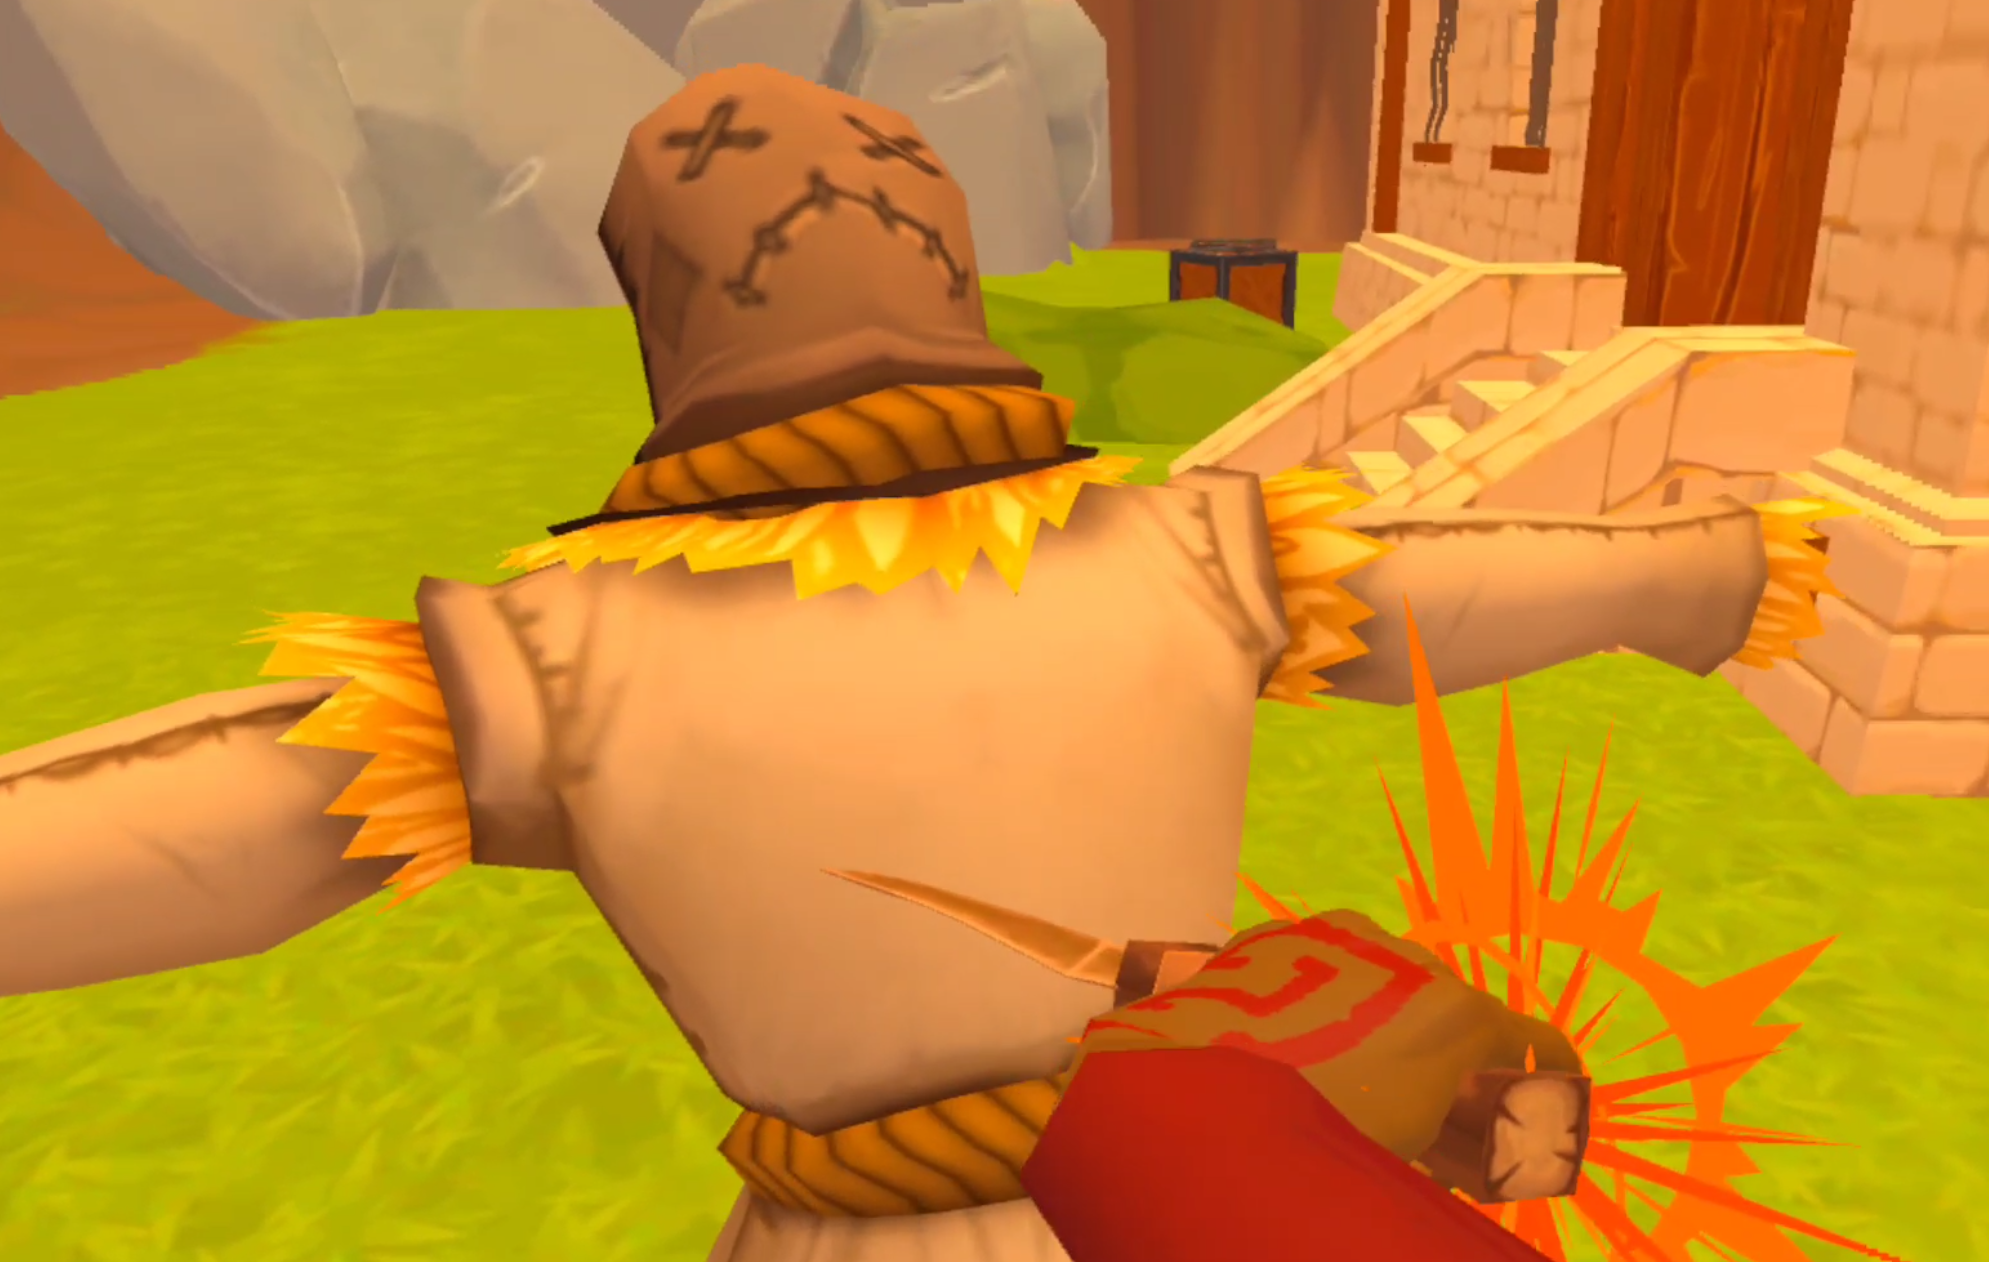
Now that you’ve made one Weapon Solo every the next ones will only get easier. For your next weapon you might find, or have the mould for, a pommel or blade guard to increase the durability or damage of the weapon. There are tons of variations and combinations of pieces that you can combine into various tools and weapons. Some use longer handles, like pickaxes and hammers.
Next you can make a pickaxe or hammer using the moulds you start with and the long handle found on one of the Smithy shelves. The more you explore and the more crafting recipe pages and moulds you find, the more interesting combinations you will be able to make. That’s a big part of the fun of A Township Tale. Now that you know the basics the sky is the limit for crafting Solo.
A Township Tale can be found for free on PCVR via Alta’s Website or for the Oculus Quest via the Oculus store for 9.99$. It’s a ton of fun, even by yourself, and well worth the price if you don’t mind doing a lot of gathering and crafting yourself. Good luck out there and have fun!