


ARC Raiders Loadout Guide for Beginners (Best Builds to Loot, Survive, and Win)
Discover the best ARC Raiders loadouts for beginners. Learn budget, PvP, and hybrid builds to maximize loot, survive raids, and win more fights.
Starting out in ARC Raiders can feel brutal. One bad raid and suddenly your stash is empty, your confidence drops, and you’re questioning every decision you made. Most beginners assume the problem is aim or reaction time—but in reality, it’s usually something much simpler: your loadout strategy.
The players who succeed consistently aren’t always the best shooters. They’re the ones who understand what to bring, when to bring it, and why it matters. After analyzing real gameplay strategies and experienced player insights, one thing becomes clear—success in ARC Raiders is built on using the right loadout for the right situation and keeping what equipment you have in mind in the raid.
In this guide you’ll learn how to think about loadouts the right way, and how to use three core builds to steadily improve your survival rate, profits, and combat effectiveness.
What Is a Loadout in ARC Raiders?
A loadout in ARC Raiders isn’t just your weapon—it’s your entire approach to a raid. Every item you bring in, from your shield to your healing supplies, shapes how you play and how likely you are to make it out alive.
For beginners, this matters more than mechanical skill. A well-balanced loadout gives you room to make mistakes, recover from bad situations, and still extract with something valuable. On the other hand, a poorly planned kit can leave you underpowered, overexposed, or worse—too scared to take any risks at all.
At its core, every loadout should strike a balance between three things: cost, survivability, and combat power.
Most beginners in ARC Raiders don’t fail because of aim—they fail because they bring the wrong gear into the wrong raid.
You either:
Bring too little → can’t defend yourself
Bring too much → lose everything and go broke
The solution is simple: run the right loadout for the right goal.
Below are three exact loadouts you can copy, each designed for a specific purpose:
Making money safely
Winning PvP fights
Handling most raids consistently
These are based on real player-tested strategies and builds.
Keep in mind that there are many different weapons in ARC Raiders to suit different playstyles and you may want to bring something different depending on how your playstyle develops, try new things as you find them. The weapons used here are just good examples to start with.
Loadout #1 — Budget Looting Build (Safe Profit Runs)
This is the loadout you should run when:
You’re low on money
You want guaranteed profit
You don’t want to risk gear
Exact Loadout Setup
Weapons
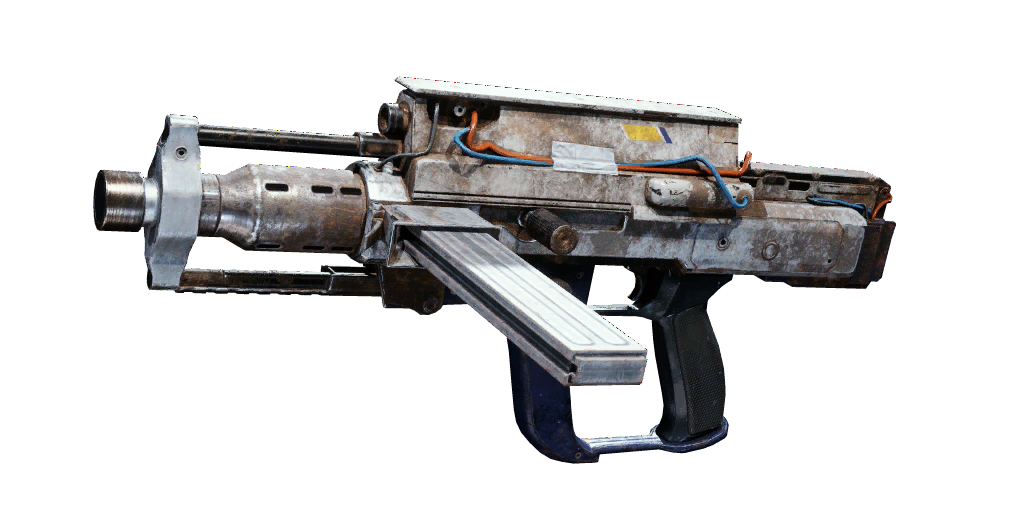
Primary: Ferro (Level 2+ recommended)
Secondary: Stitcher (base or upgraded)
Shield
Light Shield
Augment
Looting MK2 (priority for inventory space)
Consumables
3–5 Bandages
2–3 Basic Shield Rechargers
1 Adrenaline Shot
2 Smoke Grenades
Utility
1 Raider Hatch Key (day raids only)
How to Play This Loadout
You are not here to fight—you are here to loot and leave.
Run straight to:
Medium-value buildings
Low-traffic areas
Hatch exits if you find good loot early
If you get into a fight:
Use Stitcher at close range
Use smokes to escape
Do NOT chase kills
What This Loadout Does Best
Builds your economy
Removes gear fear
Teaches movement and map awareness
👉 If you’re struggling in ARC Raiders, run this for 5–10 raids straight. Then you’ll have some gear to use for more risky raids.
Loadout #2 — PvP Combat Build (Fight & Dominate)
This is your high-risk, high-reward loadout.
Run this when:
You want kills
You’re confident in fights
You can afford to lose gear
Exact Loadout Setup
Weapons
Primary: Venator 4 (or Bobcat if available)
Secondary: Optional (Stitcher or none)
Shield
Medium Shield
Augment
Mk2 Combat Augment that lets you use a medium shield
(If you can afford it) Tactical MK3 Defensive (or Looting MK3 Survivor)
Consumables
6–8 Bandages
4–6 Shield Rechargers
1 Defib
2 Smoke Grenades
2 Jolt Mines
Ammo
2–3 full stacks of medium ammo if running the Venator. Light ammo for the bobcat, but bring four stacks at least.
How to Play This Loadout
You are actively looking for fights.
Your priorities:
Control positioning
Use cover and angles
Reset between fights with heals
If things go wrong:
Smoke → reposition → heal
Never stay exposed
Key Advantage
This loadout allows you to:
Take multiple fights in one raid
Kill geared players
Extract with high-value loot
⚠️ But remember:
You are now a high-value target that is making a lot of noise and attracting attention. Win a fight, loot quick, and reposition.
Loadout #3 — Hybrid Build (Best Everyday Loadout)
This is the loadout most players should use most of the time.
It balances:
Looting
PvP
Survivability
Exact Loadout Setup
Weapons
Primary: Stitcher (close range)
Secondary: Renegade (mid-range)
Shield
Light or Medium Shield
Augment
Looting MK2 or MK3
Consumables
5–6 Bandages
3–4 Shield Rechargers
2 Smoke Grenades
1 Adrenaline Shot
Ammo
2 stacks (light + medium depending on weapons)
How to Play This Loadout
This is your adaptive playstyle.
Fight when you have advantage
Avoid fights when you don’t
Loot consistently
Use:
Renegade → mid-range pressure
Stitcher → close-range fights
Why This Loadout Works
Handles almost every situation
Not too expensive
Still competitive in PvP
👉 This is your default kit for ~80% of raids
The Simple System to Improve Fast
If you want real progress, follow this loop:
Run Budget Loadout → build money
Run Hybrid Loadout → gain experience
Run PvP Loadout → practice combat
Repeat.
That’s it.
Essential Loadout Strategies for Beginners
Improving in ARC Raiders isn’t about playing faster—it’s about playing smarter.
Many new players fall into the trap of over-investing too early, bringing expensive gear into situations they’re not ready for. This often leads to hesitation, poor decision-making, and ultimately, lost raids. Instead, focusing on consistent, low-risk runs allows you to build confidence and resources over time.
Another major factor is knowing when to leave. Greed is one of the biggest killers in the game. Extracting early with guaranteed profit is almost always better than risking everything for “just one more building.”
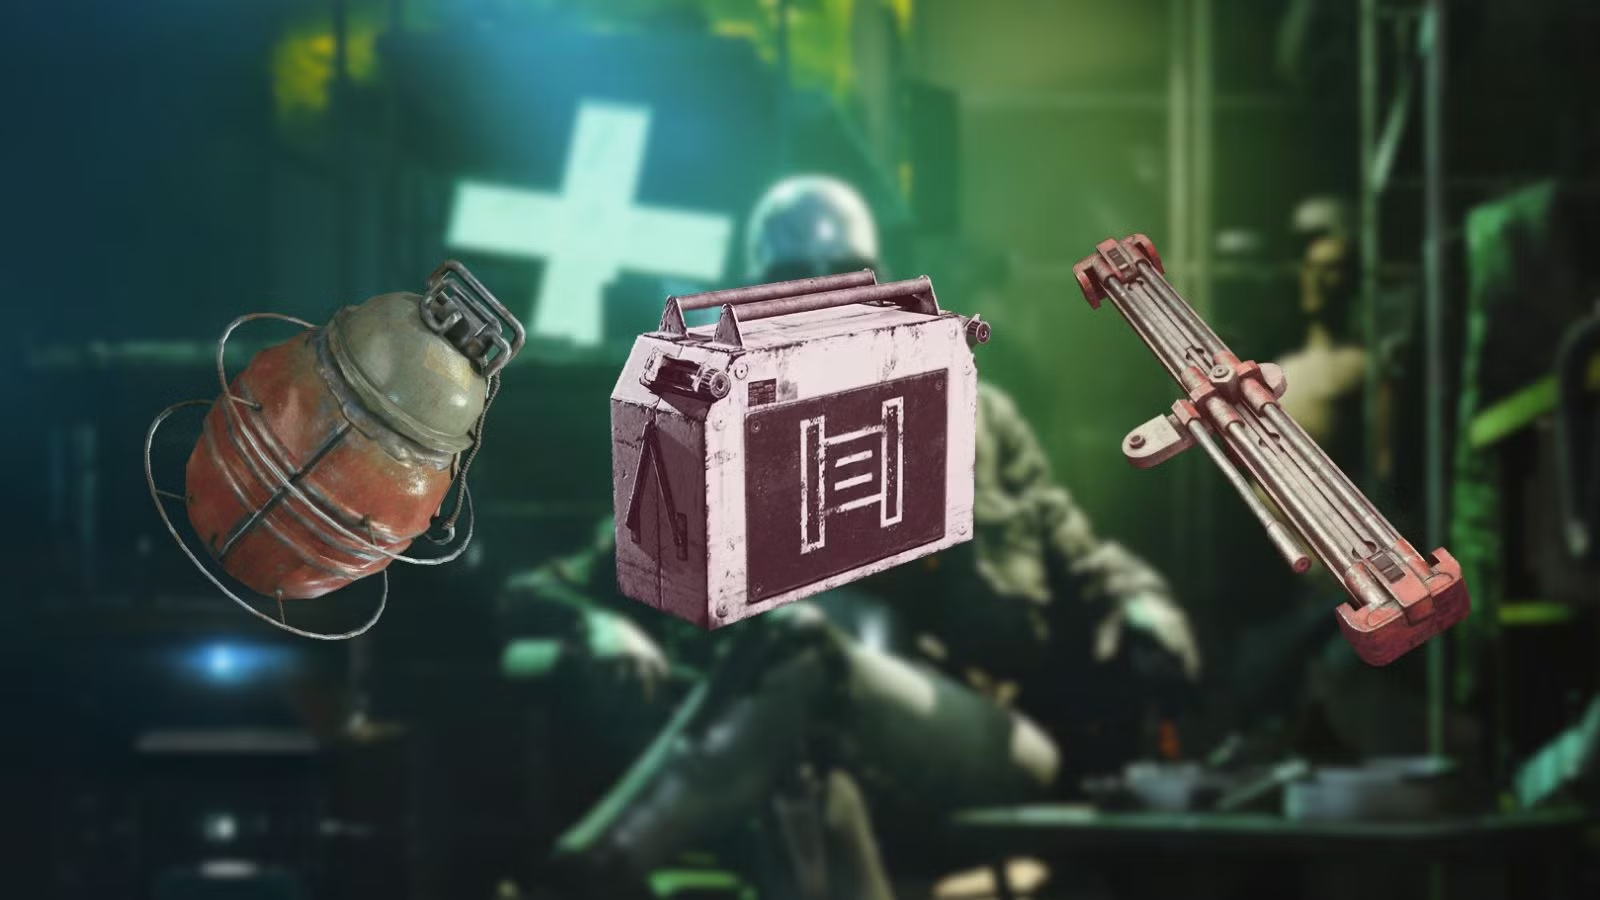
Mobility and escape tools also play a critical role. Items like smoke grenades or adrenaline boosts aren’t just optional—they’re often the difference between surviving and losing everything .
Common Mistakes That Hold Beginners Back
A lot of early frustration comes from avoidable mistakes. Bringing in gear that’s too expensive, neglecting healing items, or taking fights that don’t need to happen are all patterns that quickly drain your resources.
Another common issue is misunderstanding your goal. Not every raid is about fighting. Sometimes the smartest move is avoiding conflict entirely and focusing on efficient looting routes, especially in high-traffic areas where other players are likely to converge .
Conclusion
Mastering ARC Raiders doesn’t happen overnight, but it becomes much easier once you understand how to approach your loadouts.
By rotating between a budget build for profit, a PvP kit for combat, and a hybrid setup for consistency, you create a system that supports steady progress instead of constant setbacks.
Over time, you’ll notice a shift—not just in your results, but in your confidence. You’ll stop worrying about losing gear and start focusing on making smarter decisions.
And in ARC Raiders, that’s what truly separates beginners from experienced players.
The Ultimate Guide to Arc Raiders Weapons: Best Guns Ranked for PvP & PvE
Whether you’re dropping into a raid or fighting against rival players, your choice of Arc Raiders weapons has a huge impact on how each encounter plays out. In a game where every bullet counts — and every mistake can cost you your loot — knowing which Arc Raiders guns dominate in various scenarios is essential.
Whether you’re dropping into a raid or fighting against rival players, your choice of Arc Raiders weapons has a huge impact on how each encounter plays out. In a game where every bullet counts — and every mistake can cost you your loot — knowing which Arc Raiders guns dominate in various scenarios is essential.
This guide is based on real gameplay data, including PvP duels, PvE arc pressure, weapon handling, ammo efficiency, range performance, and real player success rates. No theory crafting or spreadsheets — just what works when it matters most.
Ranking Methodology: How We Judge the Best Arc Raiders Guns
To make sense of all the gun options in Arc Raiders, we measured them using several practical criteria:
PvP Efficacy
The most important metric — guns were evaluated on their ability to win fights against other players. High aim assists, quick kill potential, and ease of use under pressure all influence performance.
PvE Performance
How well weapons handle arc threats — from weak drones to heavily armored units — affects survivability and loot completion.
Ammo Efficiency
Carrying too much ammo restricts loot space. Guns that deal more with less ammo are more valuable.
Versatility
A gun that works across ranges and situations scores higher than one that only shines in niche spots.
Now let’s break down every major weapon you’ll encounter in Arc Raiders.
🔻 D Tier — Weapons to Avoid
These are guns that feel fun or unique, but simply don’t hold up when real stakes are on the line.
Hairpin
While some players enjoy how quirky the Hairpin feels, its performance stats tell a harsh story. It does roughly 20 damage per shot — a laughably low figure compared to other guns in its class — and its effective range barely stretches past ~38 meters. The weapon’s recoil and bloom make consistent hits difficult, especially in the heat of PvP. Because it fires light ammo and struggles to output meaningful damage, you’ll almost always want to drop this weapon as soon as you find anything better. Its only redeeming trait is comedic value — but that doesn’t win you fights.
Arpeggio (Burst AR)
The Arpeggio is a medium weapon that fires in three‑round bursts. In theory, this makes it accurate, but in practice it suffers from two major issues: slow follow‑up shots and constantly having to reacquire your target. While each burst can deal respectable damage, you’ll often find that other medium weapons — especially autos or semi‑autos — outpace the Arpeggio’s damage output due to smoother handling and easier control. In PvP, this burst nature becomes a liability at any range against weapons that don’t stop firing or fire a single very damaging shot. There are simply better guns to run.
Bettina (Slow AR)
The Bettina is an epic assault rifle that uses heavy ammo, giving it strong damage against both players and arc armor. Controlled bursts can deal serious damage, especially in PvE situations. However, recoil makes full‑auto fire unreliable, and the weapon demands careful shot pacing to be effective. While powerful, the Bettina is best suited for players willing to manage its costs and limitations rather than those seeking an efficient all‑rounder. It simply doesn’t perform in PvP at any range compared to much cheaper options, and isn’t so good at PvE that it shines in that respect either. It is underwhelming at everything and extremely expensive.
🔸 C Tier — Usable, but Underwhelming
These weapons aren’t terrible, but they don’t compare well to higher‑tier choices once the game progresses.
Burletta (Classic Sidearm)
The Burletta feels like what you’d expect from a classic pistol — lightweight, quick to draw, and easy to handle. It uses light ammo and has a 12‑round magazine, which makes it a useful secondary in a pinch. However, its damage output is underwhelming against both armored arcs and well‑shielded players. It can win fights against less experienced opponents, but against better players or tougher enemies, it will struggle. The Burletta excels in early game or as a supplementary weapon, but as your arsenal improves, it quickly feels like a backup rather than a contender. Though it is still on par or even better than a Kettle if fully upgraded and using an expanded magazine mod.
Torrente (LMG)
The Torrente is an interesting LMG choice — it boasts high damage per second (DPS) at close range and a huge (60-90 round depending on level) magazine that can shred players and arcs alike. However, its handling is unwieldy unless you are crouched, with a bullet spread and recoil pattern that demand constant adjustment. The Torrente also burns ammo quickly, forcing you to carry extra stacks that eat up valuable inventory space. In mid‑game fights, many players find themselves needing to reposition or reload at bad moments. While it’s not useless, it’s better suited for specific playstyles — largely stationary, close‑range suppression — rather than versatile combat. Still, a Torrente in the right place at the right time can destroy entire squads… as long as you don’t have to move much and they run into you.
Rattler (Automatic AR)
The Rattler turns its weaknesses into strengths. At base level, its 10‑round magazine and slow reload are noticeable drawbacks — but once upgraded, it becomes one of the most ammo‑efficient assault rifles in the game. Its accurate firing and deliberate shot pacing make it excellent for players who don’t spray‑and‑pray but rather control bursts carefully. Because medium ammo packs solid penetration and damage output, the Rattler becomes a solid gun for mid‑range skirmishes and sustained fights. Its relatively low upgrading cost means you can invest in it early and keep it viable throughout your loadout progression. Its main drawback is how slowly it reloads, instead of the entire magazine at once, just two bullets at a time.
Jupiter (ARC Fighting AR)
The Jupiter is a legendary energy weapon built almost entirely for PvE dominance. Each shot deals massive damage to arc armor, allowing it to one‑shot lighter enemies and rapidly strip armor from heavy targets like leapers and bastions. Despite energy ammo stacking very low, the weapon is surprisingly ammo‑efficient. Its downsides are clear in PvP. The Jupiter has a noticeable wind‑up before firing, making it predictable, and energy ammo performs poorly against players. With no mods or upgrades available, it lacks flexibility. The Jupiter is only good against ARC and is slightly better in PvP than other energy weapons, but not good enough at either to be top of its class.
🟡 B Tier — Solid Choices With Limitations
These guns are competent and can shine in the right hands or specific roles but aren’t top contenders overall.
Stitcher (SMG — Close Range Slayer)
The Stitcher earns its spot by excelling in close quarters. It uses light ammo and has an aggressive fire rate that, when aiming down sight with precision, can shred enemies quickly. However, without upgrades, the Stitcher feels underpowered due to low per‑bullet damage and a rapid ammo burn rate that leaves you reloading often. A well‑modded Stitcher — with foregrip, barrel, magazine, and stock — becomes much more stable, giving you surprising lethality in tight spaces. It’s not great at range, but in corridors and point‑blank fights, this SMG brings ferocity that many higher‑tier guns can’t match. If you want a great close range SMG that is cheap then a fully loaded Stitcher can easily compete with higher tier weapons.
Vulcano (Semi‑Auto Shotgun)
The Vulcano is essentially an upgrade over the base Il-Toro shotgun, with a six‑round semi‑automatic design that helps mitigate the slowdown most shotguns suffer. Up close, it can absolutely decimate shields, smaller ARC, and players, especially. The challenge comes when enemies create distance: Shotgun damage fall‑off in Arc Raiders is extreme, so at even mid‑range the Volcano isn’t very useful. Using the Volcano effectively means mastering movement, positioning, and close‑range aggression, or bringing another weapon along with it. It rewards those who push fights but punishes passive players who get caught out. This is ranked lower than the Il-Toro simply because of how expensive it is in comparison for relatively little improvement, though it is an improvement.
Ferro (Medium/Long Range Cheap Powerhouse)
The Ferro is one of the most balanced high‑damage rifles in Arc Raiders. Using heavy ammo, it can crack heavy shields in one or two shots and punch through thicker arc armor that other weapons merely scratch. Its slower fire rate means you need to make each shot count, but that’s where the Ferro shines — it rewards precision and patience. Mod slots for barrel, foregrip, and stock allow you to tune it for either long‑range duels or slightly closer engagements. In skilled hands, this rifle controls mid‑to‑long‑range fights and forces opponents to rethink how they approach you. As long as you don’t let your opponent get close the Ferro is very capable, but hard to master due to its slow aiming speed and need to reload after every shot. It would be a lower tier due to its short range limitations, but it is also extremely cheap, making it a great budget option.
Osprey (Sniper Rifle)
The Osprey sits in a niche many players overlook: a mid‑to‑long‑range rifle with moderate weight, decent ammo efficiency, and surprisingly strong handling. Not to mention, this weapon has a fantastic Scope. The Osprey’s moderate recoil and built‑in optic make it easier for players to consistently land hits at distance. While it doesn’t punch as hard on ARC as dedicated heavy weapons, its ammo use is efficient and it can deal steady damage to both players and arcs when aimed. In coordinated teams or when played by sharpshooters, the Osprey can control sightlines and support teammates effectively, even if it’s not top‑tier solo. Just be careful to make sure you unscope and chamber another round after each shot.
Tempest (Reliable Mid-Range Dominator)
The Tempest is one of the most consistent assault rifles in Arc Raiders. Using medium ammo, it delivers strong damage with a recoil pattern that’s easy to control in both tap‑fire and full‑auto situations. If you engage first, the Tempest will win most medium‑range PvP fights. It performs well against ARCs when weak spots are targeted. Its weight and high crafting cost are the main downsides, but for players who can afford it, the Tempest remains a decent choice for reliable PvP and PvE performance.
🔥 A Tier — Win More Fights, More Often
These guns are strong choices that outperform most others in the right context.
Renegade (Medium Range Hybrid)
If the Ferro is precision, the Renegade is efficiency. With medium ammo and a lever‑action design, this rifle trades a bit of raw power for a faster follow‑up shot rate and easier handling in dynamically changing fights. It feels right in the sweet spot between a sniper and an assault rifle — you can hold angles at 50–150 meters, then transition into closer engagements without feeling undergunned. The Renegade’s ammunition is abundant enough to sustain extended fights, and its suppressor capability lets you pick targets without immediately revealing your position. If you can reliably hit your shots, especially on the head, this weapon is effective at all ranges.
Aphelion (Burst Fire AR)
The Aphelion brings burst fire into the dance, giving medium‑range players an option that’s neither fully automatic nor purely single shot. Its bursts deliver solid chunk damage, and in good hands this creates a rhythm that’s tough for enemies to counter. It’s not mechanically overwhelming to use, which makes it approachable for players scaling up from beginner to intermediate skill levels. Though it doesn’t dominate like some S‑tier picks, it earns its place due to reliable damage spread and being energy based, making it great against ARC enemies.
Anvil (Heavy Revolver)
The Anvil is a superb example of how a “sidearm” can outperform expectations. This heavy ammo revolver packs a massive punch, capable of chunking player shields or tearing into arc armor in surprisingly few shots. Its slower handling and reload force you to be deliberate, but once you master its timing, it becomes a lethal secondary weapon or even a primary in medium engagements. It also has a unique tech mod slot that can alter its firing pattern dramatically — swapping straight bullets for four‑projectile shots that mimic a tight shotgun spread. It takes some skill to use, especially against players, but it is a fantastically affordable all around option that does great against ARC and players as long as you land your hits. When mastered the Anvil is a weapon you can use in any situation, though it still struggles at very long ranges.
🏅 S Tier — Guns That Define the Meta
These weapons consistently win fights, outperform competitors, and give you a tactical edge in most scenarios.
Kettle (Versatile Assault Rifle)
The Kettle is one of the most effective and well‑rounded weapons in the game. It uses light ammo for faster shots, a solid firing rate, and a smooth recoil pattern that rewards tap‑firing into medium ranges. The Kettle performs well in PvP — capable of melting shields and outgunning many opponents — while still maintaining enough control to handle smaller PvE ARCs. Its four mod slots (barrel, foregrip, magazine, stock) give you access to suppressors and stability upgrades, making it flexible for both stealth runs and open combat. Because it’s relatively easy to upgrade and maintain, it’s become a favorite among players who want consistency without compromise.
Il-Toro (Heavy Hitter Shotgun)
The Il-Toro is the quintessential close‑range terror: a slow‑firing, pump‑action shotgun that deals massive damage. Landing just one or two shots on an enemy can instantly turn the tide of a fight — whether it’s cracking shields or scoring a kill. Due to its slower firing speed and significant fall‑off at range, the Toro demands aggressive play and smart positioning; you have to close distances and take fights on your terms. When mastered, it feels like a reward system — someone caught at point‑blank range often doesn’t walk away. This is the ultimate point blank weapon.
Venator (Elite Pistol Champion)
Though technically a sidearm, the Venator pushes past average pistols to hold its own against rifles and SMGs. Its two‑shot burst mechanic — firing a pair of medium ammo rounds with each trigger pull — means headshots or quick follow‑ups can decimate enemy shields before they know what hit them. It can run through its magazine quickly, but is still easy to handle and deals fantastic damage. It demands deliberate aiming, but this precision playstyle makes it significantly more rewarding than many auto weapons. Its only drawback is a lack of barrel mods (and thus no suppressor), which means you’ll give away position more often — but with how effective it is, that’s a trade many players are happy to make.
Bobcat (Close-Range PvP Monster SMG)
The Bobcat is one of the most dangerous Arc Raiders guns in close‑quarters combat. Its extremely high fire rate allows it to shred player shields and health in seconds, making it ideal for aggressive pushes and tight interiors. Using light ammo, it fires fast but burns through magazines quickly, so fights are often decided almost instantly. With four mod slots, including a barrel for suppressors, the Bobcat becomes even deadlier when properly kitted. Its weaknesses are range and ammo efficiency — it struggles against armored arcs and performs poorly at medium distance. In skilled hands, though, it is the strongest PvP SMG in the game.
🧨 Specialized Arc Raiders Weapons — ARC Destroyers
Some guns don’t fit traditional PvP roles, but remain powerful niche tools.
Hullcracker (Arc Armor Specialist)
The Hullcracker is a dedicated anti‑arc device — its explosive shells obliterate arc armor with huge penetration. This makes it invaluable in PvE raids when your mission priority is disabling or eliminating heavily armored arc units, such as when fighting the Queen. Its slow firing, unique projectile curve, and deliberate pacing make it challenging in PvP, but in a team composition built around arc removal, it shines. Because reloads and handling cost precious time, it is best paired with a more standard weapon for personal defense.
Equalizer (Experimental Beam Weapon)
As one of the rare energy ammo weapons, the Equalizer stands apart with a beam that melts armor at extreme range. It’s not a PvP fav — energy ammo doesn’t deal good damage to players — but in long‑range ARC destruction, it has few rivals. The beam’s high accuracy and sustained fire make it efficient at sniping down the armor on large ARC enemies such as the matriarch. It is heavy and unwieldy, but can be indispensable in coordinated raids where ARC are the target.
Final Verdict: Best Arc Raiders Guns for PvP & PvE
These guns cover every playstyle: up‑close brushing corpses with shotgun blasts, controlling sightlines with rifles, and executing surgical hits from medium range. A balanced loadout often includes one primary weapon for your engagement style and a secondary to handle specific fights. Though that is kind of expensive, so bringing one more versatile weapon is often the better choice. It’s up to you to decide.
Choosing the right Arc Raiders weapons isn’t just about raw firepower — it’s about understanding how they feel, how they perform under pressure, and how they synergize with your playstyle. Whether you’re a stealth sniper, a rush‑down aggressor, or a tactical mid‑range controller, this guide breaks down what you need to know to win more fights and complete more raids.
Now it’s your turn — gear up, choose wisely, and bring the fight to the enemy. Raiders, let’s go!
10 Top PvP Tips in ARC Raiders: Dominate Every Fight (Even as a Casual)
PvP in ARC Raiders can feel intimidating for casual players. Between third‑person shooting, extraction pressure, and unpredictable encounters, learning how to survive (and extract and win!) takes more than good aim. Whether you’re a dad with limited time or a newer Raider just trying to improve your win rate, this guide breaks down key PvP tips that’ll help you come out on top more often.
PvP in ARC Raiders can feel intimidating for casual players. Between third‑person shooting, extraction pressure, and unpredictable encounters, learning how to survive (and extract and win!) takes more than good aim. Whether you’re a dad with limited time or a newer Raider just trying to improve your win rate, this guide breaks down key PvP tips that’ll help you come out on top more often.
You may also be interested in:
ARC Raiders Guide: Where to Find Apricots & Lemons for Scrappy Upgrades
Arc Raiders Blueprint Guide – Quest Rewards, Best Loot Containers & Pro Tips
Arc Raiders Ultimate Skill Tree Guide 2026: Best Perks And Skills
ARC Raiders Expedition Guide — Earn Skill Points & Maximize Your Loot
1. Master Healing Fast — Combo for Instant Returns
Healing is one of the most underrated skills in PvP. Knowing how to heal faster than your opponents can flip an entire fight.
✅ Combo Heal
Use a Herbal or Vita Shot first — this begins healing your health over time. You are also free to do other things, like use a different item or a weapon. Healing items that heal more at once are better.
Immediately follow with a Surge Shield Charger to stack the shield and finish healing fast.
This puts you from nearly dead to full in seconds — crucial in sticky fights.
⚠️ Quick Tip: Always heal health first, then shields. Shields reduce damage but don’t stop all incoming damage on their own. Having high shields and no health means you are still easy to take down.
2. Control Recoil — Go Horizontal
Weapon recoil matters. Vertical recoil moves up — easy to counter by pulling straight down. Horizontal recoil swings left/right — much harder to control.
💡 Pro Tip:
Use angled grips instead of vertical grips
This helps keep shots accurate and gives you a steadier spray in mid‑fight
Just make sure to not let the recoil pull your aim up and you will be much more accurate
3. Use Sound & Cues to Your Advantage
In ARC Raiders, audio cues are powerful.
🎧 Notes to Listen For:
Footsteps on different terrain
Arc alert sounds (indicate incoming players or danger)
Shield hit sparks vs health hit sounds. Shields make noise when hit or when broken, even when you can’t see what you are hitting (for instance when a grenade you threw into a room break’s someone’s shields.
🧯 Visual Cues:
Enemy weapon and shield visuals tell you their engagement range and rarity
Flare colors and bursts help find player locations — but be cautious, some gadgets mimic flares
Knowing what’s happening around you can preemptively save your life. So make sure you are listening carefully for the sounds of ARCs and other raiders. Turning on certain settings, like night mode, can help with that.
4. Utility Items Are PvP Gold
Utility items aren’t just fun — they’re game‑breaking when used well.
Must Bring:
🔹 Smoke Grenades – Block sightlines for resurrecting your teammates or escaping
🔹 Barricades – Create instant cover or create instant chokepoints.
🔹 Trigger & Heavy Fuse Grenades – Excellent for displacing or punishing enemies that are camping a corner or room.
🔹 Zipline / Snap Hook – For fast movement and the ability to quickly flank or change positions
🔹 Defibrillator – Rapidly pick up teammates
💡 Strategy: Set traps around doors or stairways to alert you when enemies go there. An amazing combo is a Jolt Mine and Blaze Grenade Trap.
5. Movement Tech and Positioning
Movement isn’t just running — it’s positioning.
📌 Fall Trick: On ziplines, jump and press E at the last moment to avoid fall damage.
📌 Ladders: Dismount fast to avoid predictable drops.
📌 Rolling Off Edges: Certain rolls avoid fall damage if executed close to ledges.
👆 High Ground = Advantage
Staying above your enemies gives visibility and cover advantage.
📏 Crouch Walk & Silent Steps
Slow movement decreases sound, useful when you're trying to ambush or reposition.
6. Know Your Weapons & Engagement Ranges
Weapons fit certain distances. A stitcher or Venonator excels close up, but won’t win long‑range duels.
📌 Rule of Thumb:
SMGs/Shotguns — Close range
Rifles/Snipers — Medium to long range
🎯 Match your engagement style to your weapon — don’t force a fight on your enemy’s terms. Also keep in mind some maps (like Blue Gate) have wide open sight lines that can favor longer range weapons. Though there are interior areas that favor shorter ranged weapons. It depends on the map and where you are going on that map.
7. Settings & Audio for Competitive Awareness
Good settings help you fight better:
🔊 Audio:
Night mode on
Effects volume loud enough to hear footsteps
🖱️ Controls:
Shoulder swap on an easy button — quick cover peeks save lives
High FOV for vision advantage
Frame cap matched to your monitor for smoother gameplay
8. Teamwork & Communication
In squads, planning ahead matters.
📌 Mark enemy positions using pings
📌 Coordinate pushes
📌 Cover angles teammates aren’t watching
👉 Even solo players get benefits from careful movement and callouts (if available).
9. Mistakes to Avoid
❌ Rushing for a Downed Player Kill Too Soon
They attract enemies and expose your position. Downed players can still talk to their team and ping your location.
❌ Open Ground Fights
You become an easy target if you have no hard cover to hide behind. Smoke grenades can help get you out of the open where you are vulnerable as well. Otherwise you just better hope you shoot faster.
❌ Overusing VOIP Chat
Everyone hears you — including enemies nearby.
Always prioritize surviving over getting kills — especially in extraction shooters where losing gear hurts more than a missed kill. Sometimes just running while you can is better than sticking around.
10. Stay Adaptive — Respect your Opponents
PvP in ARC Raiders isn’t just shooting — it’s reacting well to unpredictable factors:
Incoming AI (Arc enemies can change fight outcomes)
Third‑party teams that might swoop in while you are vulnerable
Running out of resources (ammo, heals, utility) mid‑fight
Terrain and positioning
Smart decisions win more than raw aggression.
PvP is Learned, Not Luck
Getting better at PvP in ARC Raiders isn’t about having perfect aim — it’s about reading the fight, using every tool your loadout grants you, and making smart, informed decisions.
Next time you drop in, think healing combos, utility placement, movement, and positioning — and victory will follow.
You may also be interested in:
ARC Raiders Expedition Guide — Earn Skill Points & Maximize Your Loot
Welcome to the ultimate beginner‑friendly ARC Raiders Expedition Guide! If you’re an ARC Raiders player who’s heard about the expedition but isn’t 100% sure what it is or why it matters, you’re in the right place. This guide breaks down everything you need to know — what the expedition is, what you keep vs. lose, why you should do it, and how to prepare for your first one.
Welcome to the ultimate beginner‑friendly ARC Raiders Expedition Guide! If you’re an ARC Raiders player who’s heard about the expedition but isn’t 100% sure what it is or why it matters, you’re in the right place. This guide breaks down everything you need to know — what the expedition is, what you keep vs. lose, why you should do it, and how to prepare for your first one.
Whether you’re close to the expedition window or just curious about long‑term progression, you’ll walk away confident and ready to make the most of your ARC Raiders journey.
You may also be interested in:
ARC Raiders Guide: Where to Find Apricots & Lemons for Scrappy Upgrades
Arc Raiders Blueprint Guide – Quest Rewards, Best Loot Containers & Pro Tips
Arc Raiders Ultimate Skill Tree Guide 2026: Best Perks And Skills
What Is the ARC Raiders Expedition?
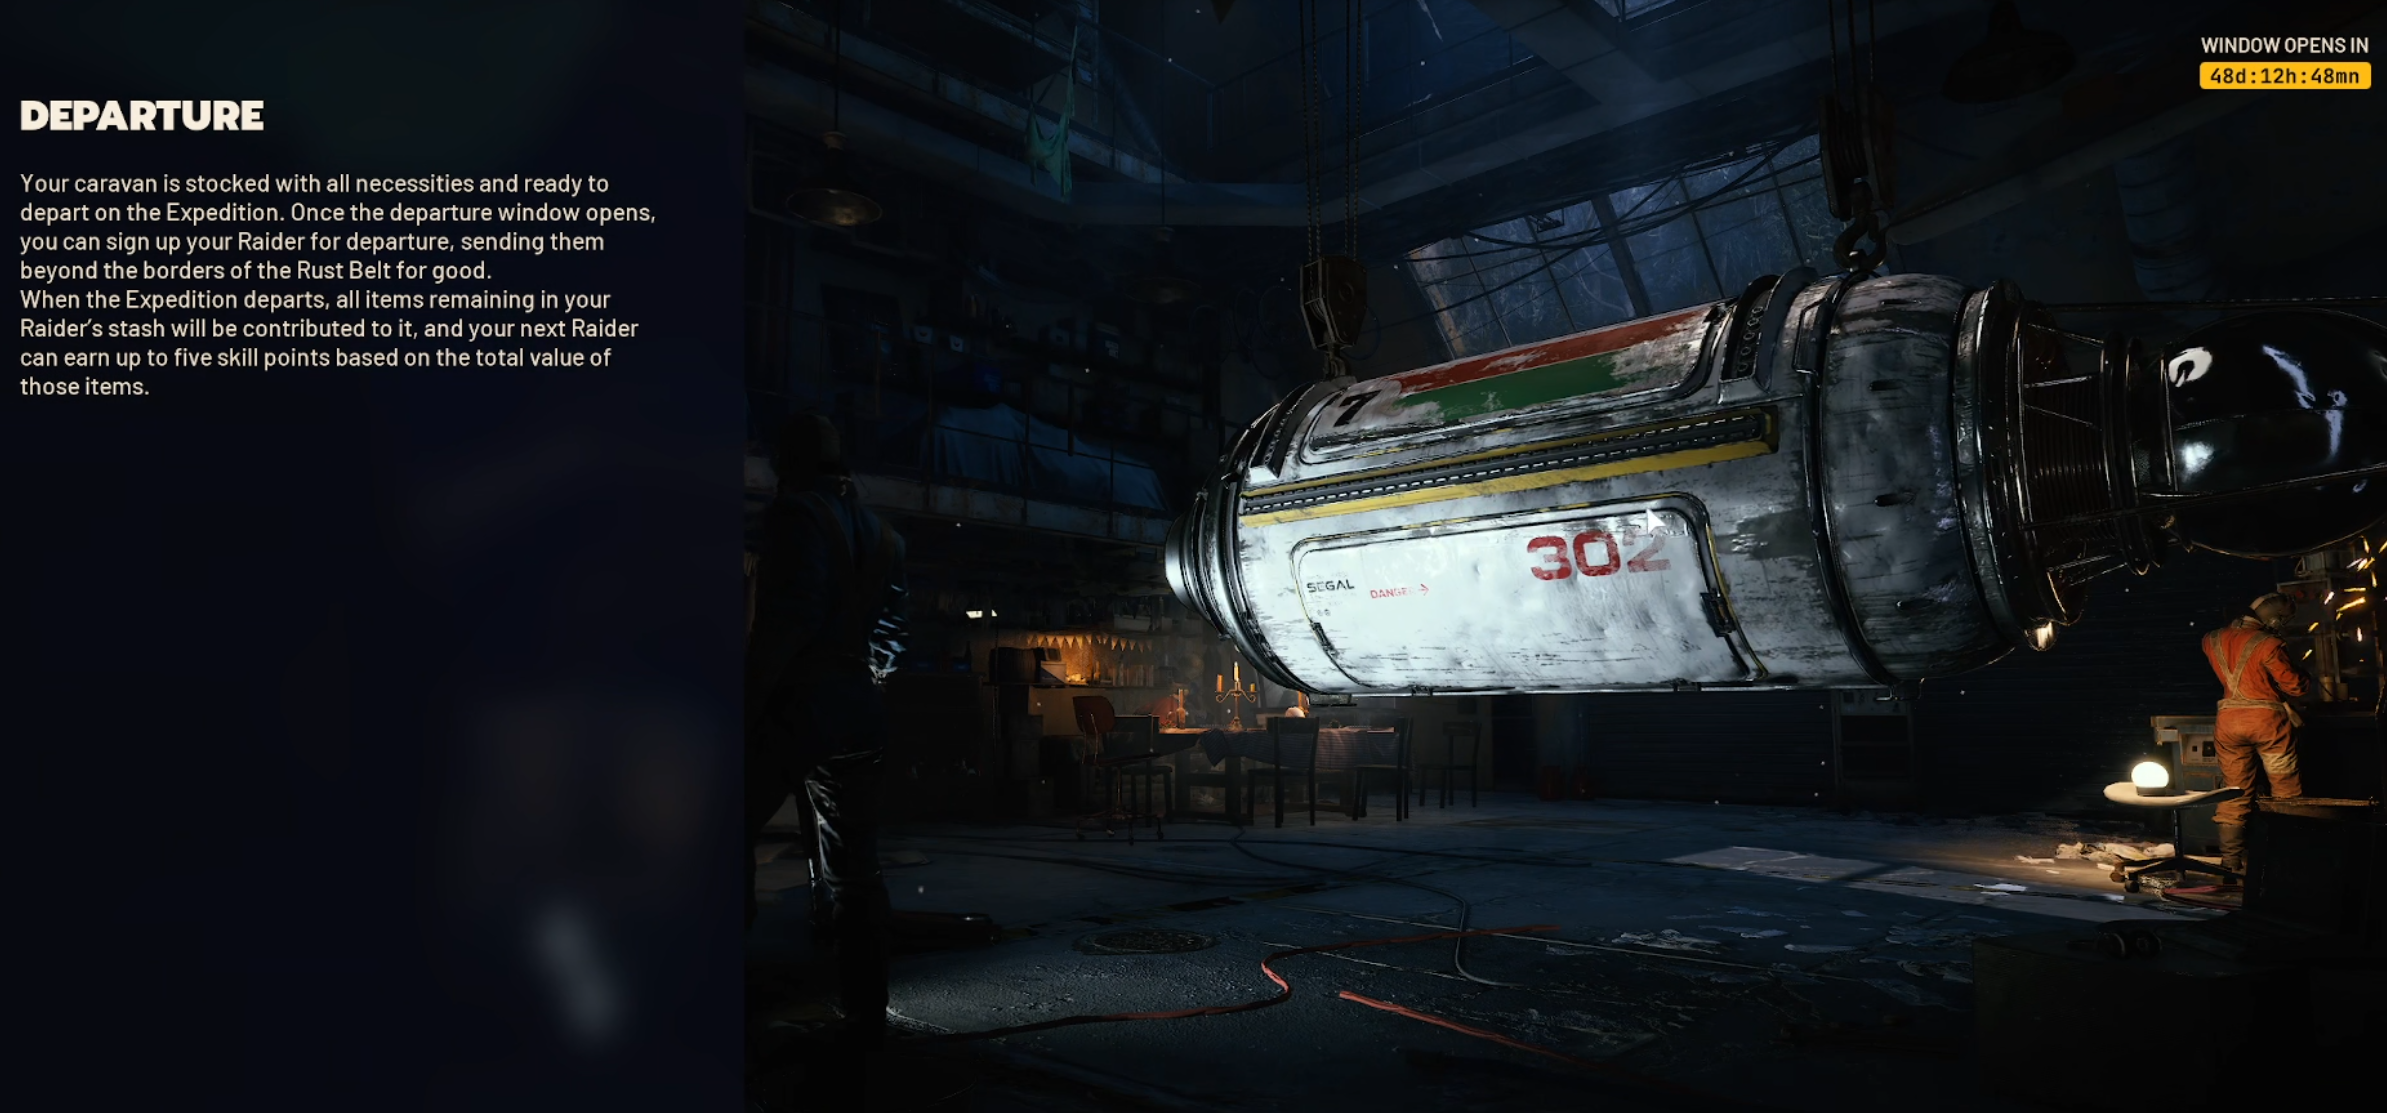
In ARC Raiders, an expedition is a special in‑game project that becomes available once your raider reaches a certain level. Think of it as your character’s big sendoff: you build a caravan, gather resources, and ultimately choose to wipe your character in exchange for powerful long‑term advantages.
Expedition Explained Simply
An expedition is essentially a planned reset — your current raider finishes their time in Sparanza, hands off the hideout and progress to a new raider, and begins again from scratch. But this isn’t just a reset for fun — it’s tied to lasting bonuses that help future characters grow smarter, faster, and stronger.
How the Expedition Fits Into ARC Raiders
Instead of treating every wipe as starting over, ARC Raiders rewards you for doing it on purpose through the expedition system. The goal? Build your caravan, contribute the required items, and secure those permanent benefits before the departure window closes. It is a wipe of your character, but a voluntary one.
What You Keep vs What You Lose
When you trigger an expedition wipe, some parts of your progress carry forward — and others don’t. Understanding this is key to deciding whether you’re ready to take the leap.
What You KEEP After a Wipe
Below are the things that stay with you when you wipe for an expedition:
Unlocked maps — You don’t have to re‑unlock them.
Unlocked workshop stations — They return at level 1 but are available.
Codex entries
Raider tokens & Cred
Raider Deck progress
Leaderboards & Trials
Cosmetics
Bonus skill points earned through expeditions
Bonus stash slots earned through expeditions
These permanent bonuses are the heart of why the expedition is worth doing — they carry forward into future playthroughs and cannot be lost.
What You LOSE When You Wipe
While some things stay, others reset completely:
Player level
Base skill points
Items in stash & inventory
Blueprints
Coins/Cred
Raid progress & quests
Workshop levels beyond level 1
Losing blueprints and stash items may sound scary at first — but we’ll talk soon about why the expedition rewards outweigh these losses for long‑term players.
How ARC Raiders Expeditions Work
Expeditions aren’t automatic — they involve multiple stages and a calendar window for contributions and departure.
Expedition Phases
ARC Raiders expeditions are structured into stages:
Build Stages – Donate resources to build the caravan’s foundation.
Load Stages – Fill the caravan with items from your stash and inventory to reach required contribution totals.
Departure Window – A limited period where you confirm your expedition wipe and lock in rewards.
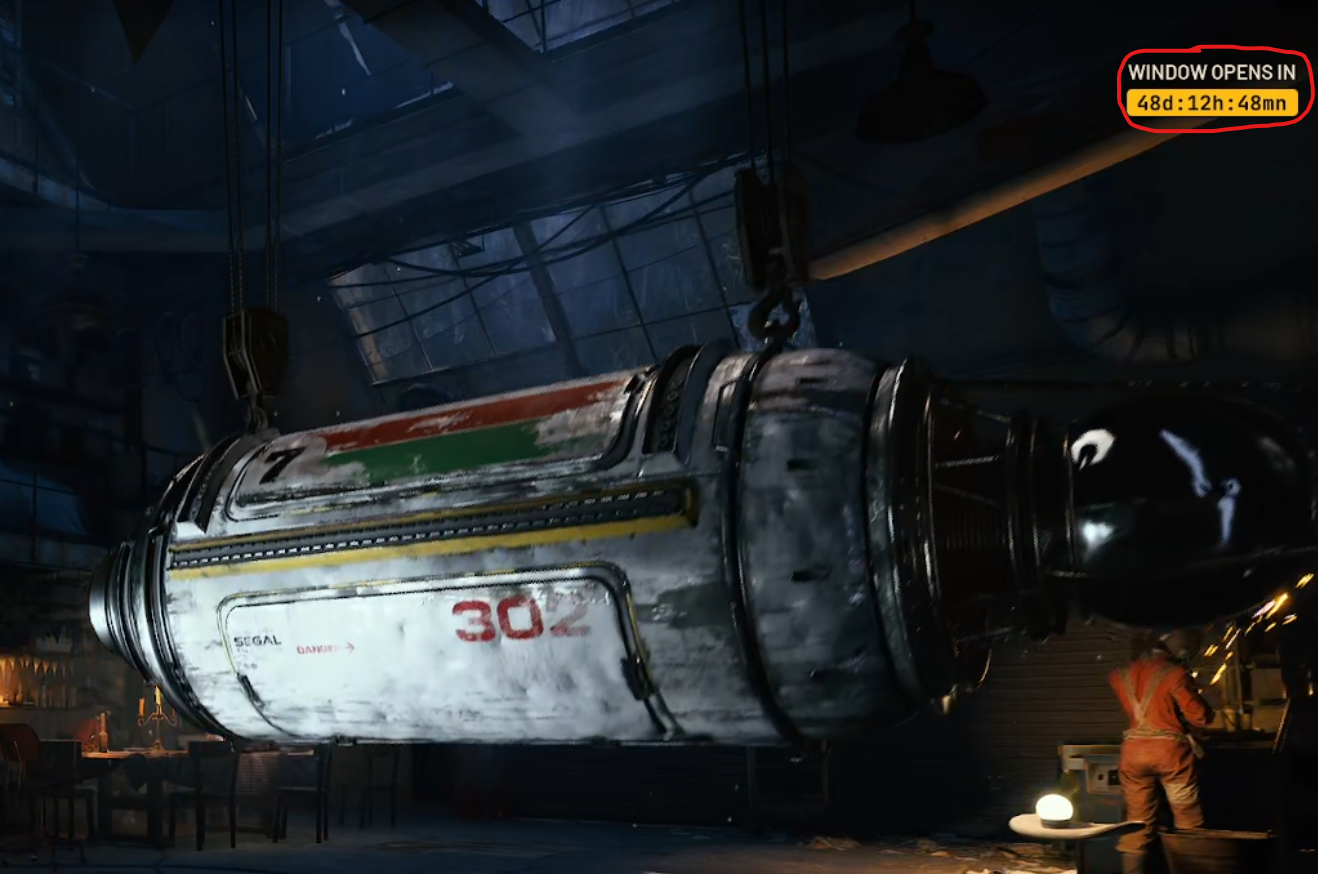
The Expedition Timeline
Each expedition has a schedule. Players have about 60 days to contribute resources and complete stages. At the end of that period, a 7‑day window opens where you can select Yes to depart — meaning your character will wipe and transition into the next.
For example, in one cycle players could contribute up until a certain date (e.g., Dec 21), then choose to depart between launch and final date (e.g., Dec 17–22), with the actual wipe happening at the end of the window.
What Happens If You Miss the Window
If you invest in an expedition but don’t confirm departure during the 7‑day window, you may lose progress toward that expedition’s buffs. Still, your expedition will remain and can be used for following departure windows. If you don’t leave during the window though, you will have to wait for the next one. You can always see when the next departure window is in the Expedition menu. Planning is critical!
Why You Should Do an Expedition
So you’ve heard what gets wiped — but why should you do it? Let’s break down the real value.
Permanent Skill Points
One of the biggest draws of the expedition is bonus skill points. You can earn up to five permanent skill points by contributing a high‑value stash. These stack with future expeditions and help build deeper, more powerful skill trees on new characters. For every million in stash value you get another skill point.
Permanent Stash Slots
Every expedition gives you extra stash slots. These aren’t temporary — they stay with your account forever. More stash space means more room for valuable loot, currency, consumables, and resources.
Temporary Buffs
On top of the permanent rewards, expeditions also grant temporary buffs — for example:
Increased XP gain
Better resource yield
Repair cost reduction
These stack up to three expedition cycles as long as you continue participating.
How to Prepare for Your First Expedition
Before you commit to wiping your character, you want to maximize the value you contribute — especially for skill points.
Many players aim for a target stash value (like 5 million in Cred) to earn the maximum bonus skill points. It’s not mandatory to hit an exact number, but the higher your stash value used for contribution, the better your rewards. Skills are a very big deal in this game, sou you’ll want as many points as you can get.
The ARC Raiders Expedition system may seem intimidating at first — a wipe always comes with questions and uncertainty. But once you understand how it works, it’s clear that expeditions are one of the best ways to boost your long‑term progression in ARC Raiders.
By earning permanent skill points, extra stash space, and temporary buffs that stack across expeditions, you set yourself up for future playthroughs that are stronger, smarter, and more efficient.
Whether you’re a new player leveling up or a long‑time raider preparing for your next wipe, mastering the expedition is a key part of your ARC Raiders journey.
You may also be interested in:

The Best Extraction Shooters You Should Try in 2026
If you’ve ever heard about extraction shooters and wondered what all the hype is about, you’re in the right place. Extraction shooters blend intense combat, high‑stakes scavenging, and the thrill of getting out alive with your loot. Whether you’re new to the genre or a seasoned player, here’s a friendly guide to the best extraction shooters worth checking out right now.
If you’ve ever heard about extraction shooters and wondered what all the hype is about, you’re in the right place. Extraction shooters blend intense combat, high‑stakes scavenging, and the thrill of getting out alive with your loot. Whether you’re new to the genre or a seasoned player, here’s a friendly guide to the best extraction shooters worth checking out right now.
You may also be interested in:
What Is an Extraction Shooter?
Extraction shooters are a sub‑genre of action shooters where your goal isn’t just to eliminate enemies — it’s to enter a dangerous area, scavenge valuable gear and loot, and make it back alive. If you die, you usually lose everything you brought in or found during the run. This high‑risk, high‑reward loop makes every raid feel intense and memorable.
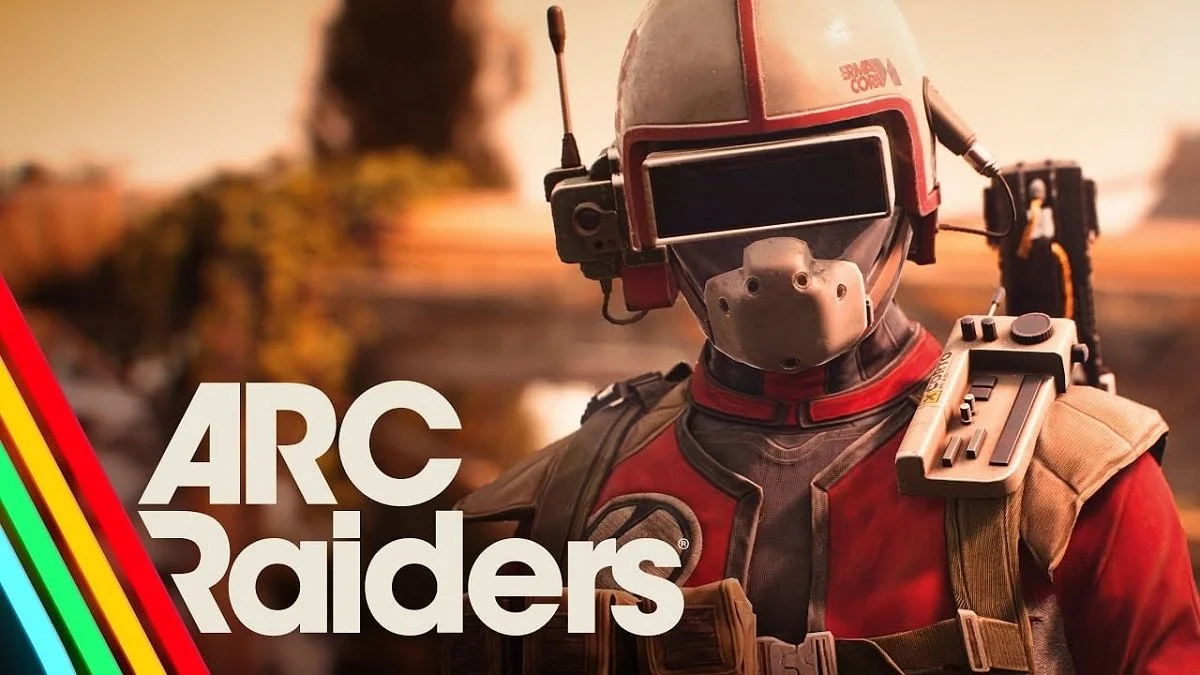
1. ARC Raiders – Most Recommended in 2026
Why it's #1:
ARC Raiders blends intense PvPvE gameplay with high visual fidelity, storytelling, and team dynamics, making it the best all-around extraction shooter of the year. Whether you're facing mech threats or rival players, it constantly challenges your survival instincts. There are a ton of items to use, and the gameplay feels dynamic and fun throughout. IF you are new to the extraction shooter genre there is no game that comes more highly recommended. It may even be the best extraction shooter of 2026.
Key Highlights
PvPvE with dynamic enemy AI and player encounters
Stunning graphics and immersive environments
Proximity voice chat for negotiating or ambushing
Co-op or solo options for flexible playstyle
Crafting, base-building, and trading post-raid
Why You’ll Love It:
This game is shaping up to be the definitive next-gen extraction shooter. You’ll need to make tough calls in high-stress raids, with a compelling loop that keeps you coming back for more.
2. Incursion Red River – Best PvE‑Focused Shooter
For those who prefer teamwork over solo PvP chaos, Incursion Red River delivers a tactical PvE extraction experience. You’ll spend time exploring detailed maps with quests and objectives, and there’s no time limit on missions — making it ideal for methodical players. Though the overreliance on fighting bot enemies may make it dull for some who crave PvP action and the variety that comes with it.
What You’ll Love
Cooperative play with squads
No clutch timer — take your time
Faction missions and reputation progression
Realistic weapon feel and customization
Just remember: dying still means losing your gear, so play smart!
3. HOLE – Best Indie & Unique Single‑Player Extraction Shooter
Looking for something a bit different? HOLE is an indie single‑player extraction shooter that stands out with its quirky concept and focused gameplay loop. You enter levels from a floating device and collect currency to upgrade your sewer base.
Highlights
Unique progression system via base upgrades
Simple but thoughtful mechanics
Subtle horror vibes amid extraction gameplay
A great bite‑sized alternative to larger extraction games
This one’s a gem if you want extraction thrills without the complexity of massive MMO‑style games.
4. Hunt: Showdown – Best for PvP + PvE Hybrid Thrills
For players who thrive on tension and atmosphere, Hunt: Showdown is a standout choice. Set in monster‑infested environments, you’ll track bounties, fight both AI foes and other players, and risk losing everything at every turn. Its early 20th century setting is also very unique with interesting weapons like revolvers and repeaters. Even bows and melee weapons are quite viable in this game, and there are a lot of scary zombie like enemies and demonic monsters to fight.
What Makes It Special
Gritty, atmospheric western setting
Audio cues matter — every sound counts
Permanent death for hunters adds weight to decisions
Unique and strategic loadout and tools system, your hunter levels up until they are killed, giving each life more weight
5. Escape From Tarkov – The Hardcore King
No extraction shooter list is complete without Escape From Tarkov. Widely regarded as the definitive extraction shooter, it pushes realism and complexity to the max with deep weapon customization, survival systems, and unpredictable raids.
Why It’s Legendary
Massive variety of weapons and mods
Complex survival mechanics and inventory management
No tutorials — you learn by doing
Highly rewarding progress loops
Be warned: this one has a steep curve, but if you enjoy a challenge — no game does it quite like Tarkov.
6. ZERO Sievert – Best Top‑Down Extraction Twist
Not all extraction shooters have to be first‑person! ZERO Sievert brings the genre into a top‑down perspective with pixel art charm. It’s tough and strategic, incorporating hunger, sleep, and day/night cycles to influence how raids go down. It’s got anomalies and mutants and an amazing STALKER kind of setting and feel, definitely unique.
Standout Features
Six maps with unique challenges
Survival systems like eating, drinking, and sleeping
Radiated areas and bandit threats
A fresh, challenging take
New enemies like mutants
It’s a great option if you want something different from the usual FPS format.
7. Arena Breakout Infinite – Best for Beginners
Why It’s Good for New Players:
Arena Breakout Infinite offers a seamless learning curve, traditional FPS gameplay, and a strong player base. It’s sort of a carbon copy of Escape From Tarkov, though it is different in the specifics. The maps are unique and so are other elements of the game, though it does feel a lot like Tarkov and also has a modern setting. Still, if you want more of Tarkov in a different package give Arena Breakout Infinite a try.
Features That Help Beginners
Fantastic tutorial mission
Beginner-only map access early on
Fast-paced gunplay and movement
Quick kits to gear up easily
Free-to-play and low barrier to entry
Which One Should YOU Play?
Here’s a quick guide to match your style:
🎮 New to extraction shooters? ARC Raiders
🤝 Prefer PvE teamwork? Incursion Red River
🌟 Want something unique? HOLE
🔫 Love high tension and PvP? Hunt: Showdown
🧠 Ready for a challenge? Escape From Tarkov
🎨 Like different gameplay formats and a STALKER atmosphere? ZERO Sievert
🚀 Excited for the latest? ARC Raiders
Whether you want something casual to jump into or a deep, unforgiving challenge, the extraction shooter genre has something for everyone. Grab your load‑out, head into the raid, and don’t forget — the real victory is extraction.
You may also be interested in: