

How to Beat All ARC Enemies - Arc Raiders Guide
ARC Raiders throws you into an unforgiving sci-fi battlefield filled with relentless robotic enemies known as the Arc. From the sky-patrolling Wasp to the devastating Rocketeer and the massive Queen, every Arc enemy comes with its own unique behaviors, weaknesses, and high-stakes loot.
Whether you're a new raider or a seasoned squad leader, knowing how to counter each Arc efficiently is the key to survival. In this guide, we break down every ARC enemy, their attack patterns, weak points, and best strategies to defeat them—so you can stay one step ahead and maximize your rewards.
You may also be interested in:
ARC Raiders Guide: Where to Find Apricots & Lemons for Scrappy Upgrades
Arc Raiders Blueprint Guide – Quest Rewards, Best Loot Containers & Pro Tips
Arc Raiders Ultimate Skill Tree Guide 2026: Best Perks And Skills
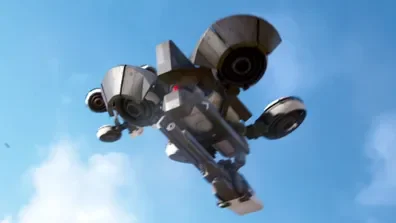
The Wasp

The Arc Raiders Wasp
Small size doesn’t mean harmless — the Wasp floats around the skies and can turn your raid into a scramble if you underestimate it. It patrols in the air, often with other flying Arcs, scanning for sound and movement. When its search beam changes from blue to yellow, it’s preparing. Once it hits red, you’re in attack mode: it will charge in and unload a volley of light ammo attacks.
Weak points & strategy: Two good shots to either of the blade thrusters destabilises it. Even with one wing gone it keeps attacking, so your realistic goal is to destroy two thrusters. When you do, it crashes and explodes on impact.
Loot drops: Arc power cells (shield recharge material), light ammo, arc alloy, and a “wasp driver” item that sells well and is also used for a workbench upgrade.
2. The Hornet
The Arc Raiders Hornet
Flying alongside Wasps, the Hornet is a medium aerial threat with one nasty twist: it fires slow‑traveling electric darts. If one hits you, you’ll be stunned and take heavy damage.
Weak points & strategy:
Focus on the two back thrusters. Shooting both brings it down to the ground.
While it tries to face you, you can crouch or sprint in a circular pattern (especially sideways) to get shots at its sides.
When a dart is launched, you don’t need to dive — sprint left or right or use cover. Diving drains stamina.
Prioritize the Wasps first (if they’re present) while using cover to dodge the Hornet.
Loot drops: Arc alloy, arc power cells, medium ammo, and a “hornet driver” component that sells well and is also used for a workbench upgrade.
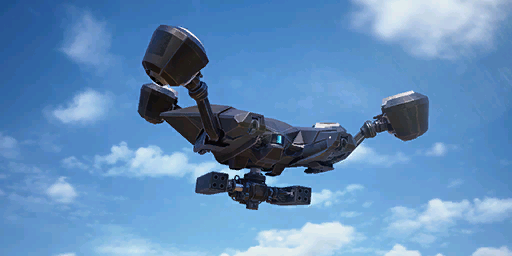
3. The Snitch

The Arc Raiders Snitch
The Snitch is not out to kill you — at least not directly. Instead, it scans large areas and calls in backup (typically Wasps + Hornet) the moment it spots you.
Weak points & strategy:
Its outer rotor‑wiper blades: shoot all three quickly and you’ll take it out before the reinforcements arrive.
Sometimes you might let it spot you intentionally if you’re hunting loot/XP and can handle the backup spawn.
Loot drops: Arc alloy, arc power cells, and a “snitch scanner” — a grenade‑type tool that can spawn Arc enemies when thrown (very handy).
4. The Leaper
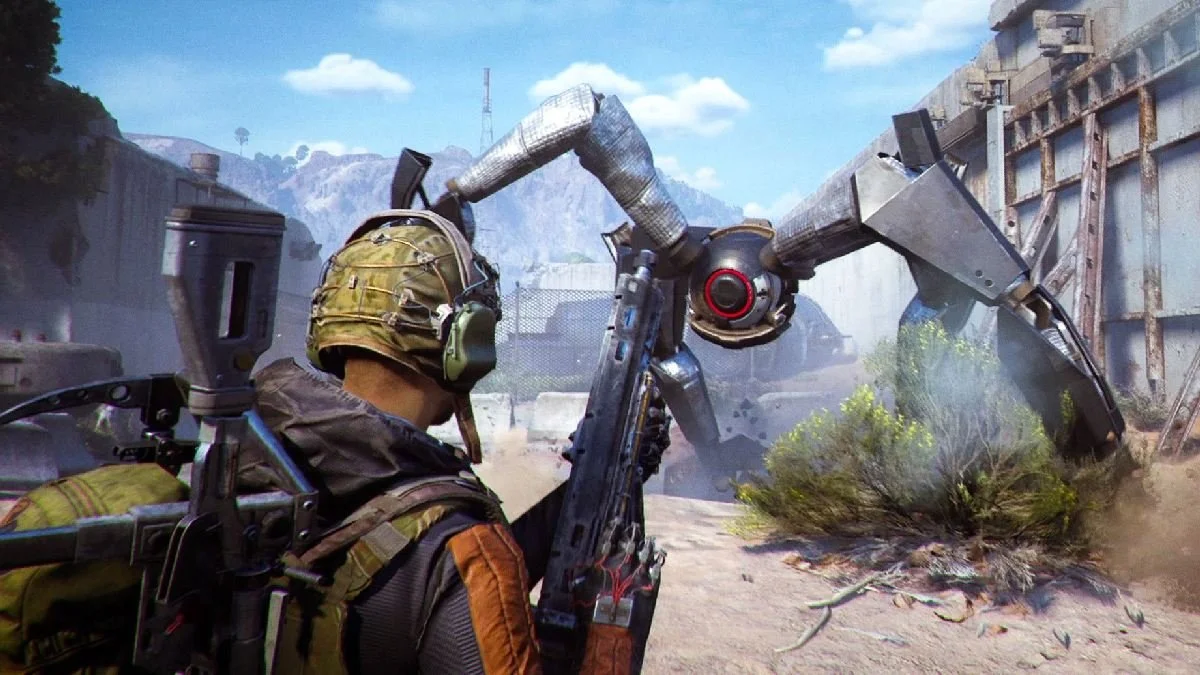
The Arc Raiders Leaper
This one is pure chaos if you catch it in the open. The Leaper is a large, spider‑like machine that will literally leap long distances and chase you into tight spots. It stomps, it launches shock waves in an area around it, and it will end your raid if you get caught unprepared.
Weak points & strategy:
Bring lots of ammo — this fight takes time.
Find a small building or structure where the Leaper can’t fit inside. Get it to leap onto the building.
Focus on its legs. Wear down the leg armour (better with high arc‑penetration weapons/gadgets) until inner metal shows, then break the leg segments. Repeat until it falls.
If you’re out in the open, you’ll die — hide in cover or inside structure.
Loot drops: Mid‑tier weapon parts, crafting materials. The Leaper breaks into pieces when destroyed.
5. The Bastion

The Arc Raiders Bastion
Slow‑moving but deadly. The Bastion trades mobility for raw firepower — its high‑RPM minigun chews through armour and shields in seconds.
Weak points & strategy:
Its yellow‑marked kneecaps or the yellow cylinder on the back are the weak zones. Shooting these deals damage through armour.
Once those weaken, inner metal is exposed — you can then target its core.
Use a solid piece of cover. Also: Wasps and Hornets often back it up, so clear air threats first before focusing the Bastion.
Loot drops: High‑value crafting items; Bastion also breaks into many pieces when destroyed.
6. The Bombardier

The Arc Raiders Bombardier
This one brings indirect fire to you: large missiles that arc into the sky then land near your position like punishment from above. It’s usually accompanied by a Spotter drone that designates targets.
Weak points & strategy:
Same weak points as the Bastion: focus the yellow kneecaps or back cylinder on the Bombardier.
Engage from a roof or building so you limit its ability to arc its missiles at you.
Watch out: if a Rocketeer is nearby too, the combination can be brutal.
Loot drops: Big haul — rocket ammo (used for the Hullcracker launcher), bombardier cells (key for a workbench upgrade), and premium materials.
7. The Rocketeer
The Arc Raiders Rocketeer
One of the toughest foes — the Rocketeer fires huge missile barrages with massive AoE damage. Even well‑equipped squads can struggle if they misplay this one.
Weak points & strategy:
Aggro it into a strong building with minimal windows and a roof. Missiles will still go through doors/windows somewhat, so you want strong cover.
Listen for the missile lock audio cues. After each barrage you get a small window to poke at its thrusters.
Use high‑penetration weapons — wear down armour, target thrusters when safe.
Expect a lengthy engagement and attract attention (other raiders may show up).
Loot drops: Rocketeer drivers ( item for explosives bench), heavy gun parts.
Tip: Unless you really need the loot or you’re confident, you might want to avoid this one for now.
8. The Tick

The Arc Raiders Tick
Tiny but annoying — the Tick hides inside buildings (walls, ceilings, dimly‑lit rooms) and leaps at your face. It’s not the biggest threat but it’s easy to get caught off guard.
Weak points & strategy:
No real exposed weak point — just shoot it when it jumps.
If it latches on you, you’ll get a “hug zone”: you’ll have to rapidly tap a prompt to throw it off, then still kill it.
Loot drops: Tick pods — early‑game quest material and equipment bench upgrade resource.
9. The Pop

The Arc Raiders Pop
The Pop is the classic “run‑at‑you and explode” enemy. Easy to kill, but if you’re not paying attention it can end your shield and health in seconds.
Weak points & strategy:
Just take a quick shot at it when it rolls toward you; one shot often does the job.
If you’re trying to evade, sprint away — its explosion has radius.
Loot drops: Basic crafting items, arc power cells, light ammo.
10. The Fireball

The Arc Raiders Fireball
A fire‑specialist arc that shows up inside buildings. If it gets near you, expect flamethrower damage and persistent fire zones on the floor.
Weak points & strategy:
Wait for its shell to open (signalling attack), then strike with a high‑penetration weapon.
Avoid standing in its flame zones — they burn you over time.
Loot drops: Fireball burners (used for quests/upgrades) and other crafting materials.
11. The Turret & The Sentinel
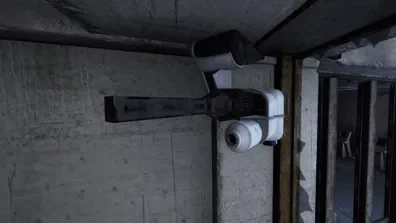
The Arc Raiders Turret
Turret
Wall‑ or ceiling‑mounted machine gun unit found indoors. It tracks you, fires heavily, and can be frustrating in close quarters.
Strategy: Use cover, wait for its reload pause, then peek and shoot.
Loot drops: Arc alloy, light ammo, simple gun parts.
Sentinel
A sniper‑turret version, found overlooking large areas. Its laser sight gives away its firing moment — use the cue to find cover, then counter‑shoot when it reloads.
Loot drops: Similar to Turret, with a little more value.
12. The Surveyor
The Arc Raiders Surveyor
Not hostile in the direct sense: the Surveyor rolls around, pauses to scan via a radar array. When the radar opens, it’s vulnerable. Hitting the array directly deals critical damage, but the surveyor will flee instead of fight back, making it a tough enemy to catch up to. It goes REALLY quickly. Using stunning equipment like the Showstopper can help keep it close.
Weak points & strategy: Wait for the scanning radar to open, shoot the exposed section, then follow it when it rolls away. Trying to force it while it’s moving is a waste of time.
Loot drops: Crafting items, arc power cells, recyclable materials.
13. The Shredder

The Shredder in Arc Raiders
A new menace on Stella Montis — the Shredder skims just above the ground and unloads a brutal close-range shotgun blast that can drop even seasoned Raiders in a couple hits. Heavily armored and far more dangerous up close than Ticks, Pops, or Fireballs, the Shredder punishes anyone who gets careless.
Weak points & strategy:
Pull it into open space if you can. Stella Montis’ tight alleys make Shredders far more lethal, so fight them where you have room to dodge that wide blast.
Snap Blast Grenades are the cleanest counter. They stick to surfaces, are cheap to craft or buy, and two well-placed grenades will delete a Shredder outright — just get clear before they pop.
If you’re forced to shoot, aim for the bottom thrusters. Hitting them can stun the Shredder or cause its blast to whiff entirely. Heavy-penetration weapons like the Ferro or Anvil can break through its armor plating quickly.
Solo players should treat Shredders with respect — or avoid them altogether. But as soon as a squad focuses fire, they fall fast. They don’t dart around like Wasps or Hornets, so lining up follow-up shots is trivial once you stagger them. Listen for their audio cues; hearing a Shredder before it hears you gives you the advantage.
Loot drops: Standard ARC scrap and components
Tip: Unless you’re confident or hunting for Trials, avoid getting surprised in tight corridors. Shredders thrive at close range — deny them that, and they’re just another busted ARC chassis on the ground.
14. The Queen & The Harvester

The Arc Raiders Queen, which protects the Harvester
Queen
A massive behemoth enemy (think apartment‑building size) seen during special events. It’s heavily armed (artillery pods, beam attacks) and designed for serious squads.
Strategy: You’ll need high‑tier gear, team coordination, and time. Not recommended solo. A very in depth strategy is required to defeat the Queen.
Harvester
The structure the Queen guards. Looting the Harvester vaults can give big rewards, but you’ll likely face the Queen or serious resistance.
Loot drops: Highest‑tier crafting materials, rare quest drivers, special event items. Another article specifically about the Harvester is coming.
15. The Matriarch

The Matriarch in Arc Raiders
A towering ARC monstrosity — the Matriarch is a colossal walker that dwarfs even the Queen. With long-range artillery pods, sweeping beam weapons, and thick armor plating, the Matriarch is a true endgame threat meant to overwhelm unprepared Raiders. It can even spawn more ARC to defend itself. You also migh tnotice the Rocketeers following it in the picture above.
Just like the Queen it is difficult to defeat the Matriarch so an in depth strategy is required.
You may also be interested in:
ARC Raiders Guide: Where to Find Apricots & Lemons for Scrappy Upgrades
Unlock Scrappy’s Upgrade: Hunt Mushrooms, Olives & Prickly Pears in ARC Raiders
How to Defeat the The Queen in ARC Raiders Guide - Easiest Way Revealed
Final Tip
No matter which Arc you face, keep these core rules in mind:
Choose weapons with high arc‑armour penetration when you expect big enemies (typically those that use heavy ammo).
Use cover and terrain smartly.
Prioritise weak points (thrusters, kneecaps, yellow markers) over spraying bullets.
Be aware of support units (Wasps, Hornets, Spotters) — don’t tunnel‑vision on the big one while smaller ones pick you off.
Know your loot — many Arcs drop drivers or materials that unlock workbench upgrades or are quest items.