

How to Defeat the The Queen in ARC Raiders Guide - Easiest Way Revealed
Taking on The Queen in ARC Raiders is absolutely one of the most thrilling—and rewarding—challenges the game offers. With the right plan, load‑out and positioning you can pull off the kill in surprisingly little time. This guide breaks down exactly how to do it: the bare minimum gear, the ideal load‑out, the best map location and fight strategy, and how to handle looting and escape safely. Whether you’re solo or teaming up, you’ll come away ready.
You may also be interested in:
ARC Raiders Guide: Where to Find Apricots & Lemons for Scrappy Upgrades
Arc Raiders Blueprint Guide – Quest Rewards, Best Loot Containers & Pro Tips
Arc Raiders Ultimate Skill Tree Guide 2026: Best Perks And Skills
1. Why you should team up (and why solo is tougher)
Doing it in a trio is much quicker and safer. You’ll kill the Queen in around 5‑10 minutes if your team’s geared and coordinated.
Solo? Expect about 12-15 minutes, and every mistake costs more—it’s riskier.
Her laser attack is deadly; if you go down solo, there’s no friendly revive.
Crossing open terrain alone raises your exposure to other players.
The Queen drops 10‑15 Queen Reactors — and you might not even fit all of them if you manage the kill solo.
Bottom line: If you can run with friends or a group, you’ll spend fewer resources, have lower risk and enjoy the fight more. But if you’ve got the gear and want the solo challenge, we’ll walk you through it.
2. Load‑out Options
A. Bare Minimum Load‑out
Here’s what you’ll need at the very least to make it happen:
A Tier 1 Hullcracker (launcher weapon) with ~200 rounds of ammo. In one run it took about 176 shots (with some misses) to drop her.
A couple stacks of bandages + shield recharges, since you’ll likely get hit by fire or the laser.
A decent shield (blue or better) just to survive the laser.
A Hatch Key (so you can extract with loot).
A PvP weapon + ammo (just in case other players interfere).
Optional: a few door blockers if you’re going to fight inside a closed space (more on that later).
Note: Everything else beyond the launcher ammo is flexible. The only “must‑have” is the launcher with enough ammo.
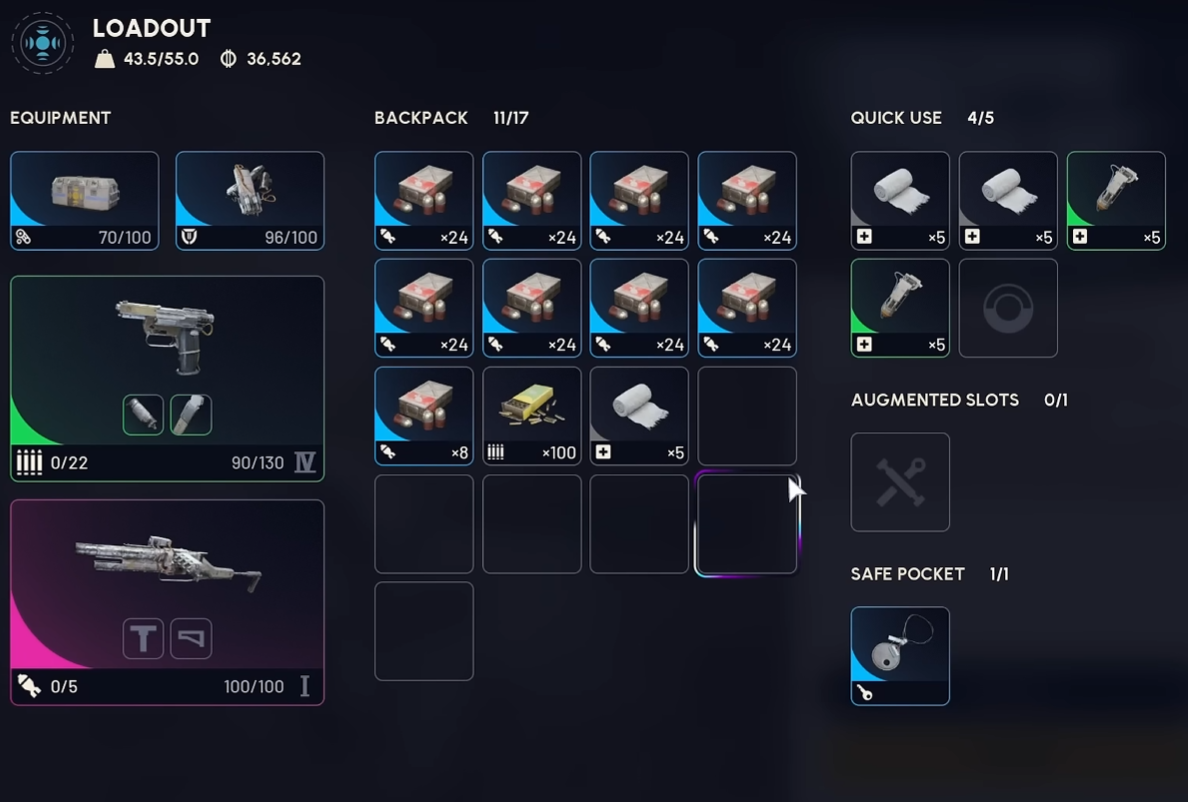
A bare minimum load out to fight the ARC Raiders Queen.
B. Ideal Load‑out
If you want to make the fight smoother and faster, this is what you’d bring (and what worked for a clean ~12‑minute solo run):
Tier 4 Hullcracker (50% increased fire rate) so you shred her much faster.
A Tier 4 Anvil (or equivalent heavy weapon) for both PvP defence and to deal with smaller enemies that pop up.
Double Wolfpacks (high damage grenades) for rocketeers or adds so you don’t get derailed.
Hatch Key + door blockers so you can fortify your spot and extract safely.
Lots of healing gear + shield recharge items.
Over 200 launcher rounds for the Hullcracker.
In essence: you scale up from “bare minimum” to “real comfort zone” by improving those key weapons, ammo count, defensive gear, fortification tools and extraction tools.
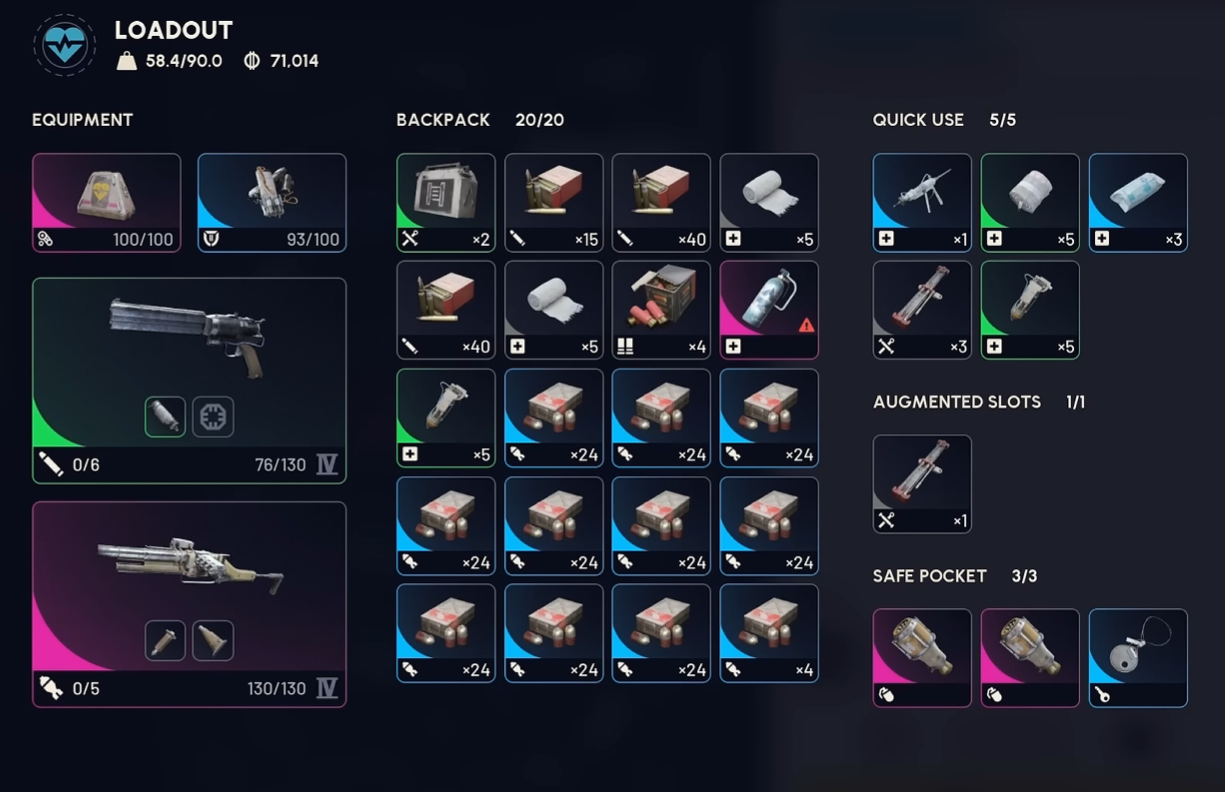
A fully decked out loadout to fight the ARC Raiders Queen
3. Finding the Best Location & Setting Up the Fight
The right fight location can reduce chaos and increase success rate dramatically.
Preferably spawn in a fresh match, not mid‑game. If you spawn with just 20 minutes left or all the players are active, you’re at a disadvantage.
If you spawn on the opposite side of the map, it might be smarter to abort (use Hatch Key) and queue again. Time and risk multiply when you’re far away.
Once you’ve got a good spawn, head toward the designated building area—one example is on the Dam Battlegrounds map (north side, near the broken bridge).
Go inside a building with one or two door entrances you can control. Place door blockers or barricades (deployable cover) on both entrances. This gives you a safe zone, reduces player interference and gives you vantage points.
In that building you’ll have a handful of window ledges you can jump on to shoot from. These window positions become key in the fight.
Strategy:
Use one window as your primary firing angle, jump onto the ledge and fire.
When The Queen engages heavy attacks (rocket barrage or laser), pivot to the far back right window to reload/repulse and reposition.
Alternate between these windows as needed—doing so keeps you covered and maximises DPS.
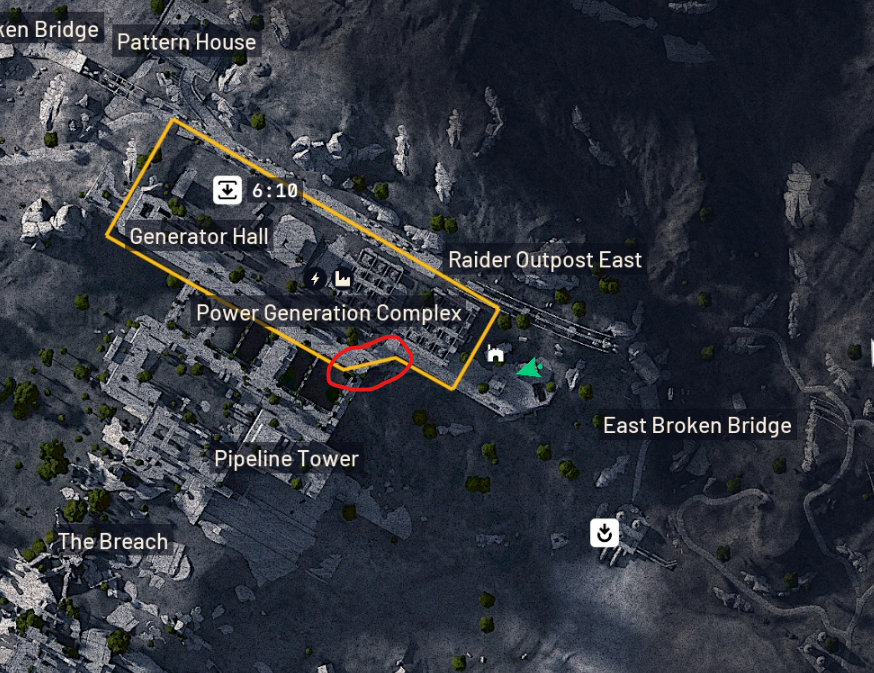
The windows in the long hallway on the circled portion of the Dam Battlegrounds map here is a good spot to fight the Queen from.
4. Fighting The Queen: Tactics & Attack Patterns
Understanding her attacks and behaviour streamlines the fight.
Attack Patterns
Rocket Barrage (Mortar fire): She fires 2–5 mortars that land and explode after a delay into flaming area. You’ll see/hear cues. Dodge or reposition quickly.
Laser Beam: Deadly if you stay in line‑of‑sight. It can feel like a one‑shot kill. The moment you see it charging, get out of the window line‑of‑sight. Don’t risk extra shots.
Weak Points & Where to Shoot
Her face/head core is a solid target (especially for a straightforward approach).
The joints/legs are also weak spots and may yield faster kills if you target them—but are harder to hit.
If you’re using a high‑rate launcher like the Tier 4 Hullcracker, simply mag‑dumping at her face while staying safe is totally viable.
Step‑by‑Step Fight Routine
Fortify your windowed building with door blockers.
Get ready at the first window ledge.
Take shots at The Queen’s face (or leg joint if you prefer, if you hit your shots you could take her down more quickly).
When she fires the rocket barrage, dodge/move.
When she starts the laser, immediately move into cover and reload.
Return to the primary angle and resume shooting.
Continue until ~150–200 launcher rounds are gone (for solo runs). Then she goes down.
Watch for other players: if you heard “don’t shoot” emotes, be ready.
5. The Loot Phase & Extraction
This part can be the trickiest if you’re not prepared.
The Queen drops Queen Reactors (and other high‑tier loot) — you can get 10–15 of them.
Looting in the open is dangerous: other players may try to ambush you.
Use barricade kits to shield yourself while you grab loot.
Even after the kill, stay alert. Players may pretend friendly, then shoot you.
Then extract using the Hatch Key you brought. Don’t hang around in the extraction zone longer than needed.
6. Solo Tips vs. Team Tips
If Solo:
Make sure you’re confident with the building/angles and your ammo/gear.
Accept that you’ll carry extra resources (ammo, heals) because you have no support.
Be extra cautious of other players.
If in a Team (trio):
Assign roles: one stays at window A, one at window B, one covers extraction/looting or provides PvP defense.
Each bring less ammo/heals—they share the workload.
You’ll clear The Queen faster (5‑10 minutes) and extract with less risk.
Conclusion
Taking down The Queen in ARC Raiders isn’t an impossible task—it just demands preparation, positioning, and discipline. Whether you approach solo for the challenge or with a team for the speed and safety, following this guide gives you the best shot at success. Grab your load‑out, choose your stronghold, know when to shoot and when to duck, secure the loot, and extract. Get out there and claim those Queen Reactors—you’ve got this.
You may also be interested in: