

Elite Dangerous VR Review and Setup Guide
Elite Dangerous: Odyssey is a space exploration and combat game that has been around for a long time. Still, defining it so simply seems to do it injustice. You can explore space in a variety of ships, and explore planets in vehicles or on foot. There are many wars and skirmishes popping up over inhabited space all of the time in Elite Dangerous. There is even a mysterious and hostile alien race to encounter. The universe of Elite Dangerous is true to scale, and hardly any of it has even been explored in the many years since the game’s release.
Elite Dangerous: Odyssey is a space exploration and combat game that has been around for a long time. Still, defining it so simply seems to do it injustice. You can explore space in a variety of ships, and explore planets in vehicles or on foot. There are many wars and skirmishes popping up over inhabited space all of the time in Elite Dangerous. There is even a mysterious and hostile alien race to encounter. The universe of Elite Dangerous is true to scale, and hardly any of it has even been explored in the many years since the game’s release.
Even better, Elite Dangerous and its expansion Odyssey, have VR support! Just as we did in our article on War Thunder VR here you’ll get an Elite Dangerous VR review on how it stands as a PCVR game. If you’re still interested after reading the review, there is also a setup guide at the end to help you avoid some potential pitfalls getting Elite Dangerous VR running on your computer.
This review and setup is based on running Elite Dangerous VR on a Meta Quest Pro or Meta Quest 2 using Airlink, though the same result can easily be achieved through Meta Link using a cable. Any VR Headset or HMD that can run a Virtual Reality game through Steam should be able to run Elite Dangerous in Virtual Reality mode.
Table of Contents:
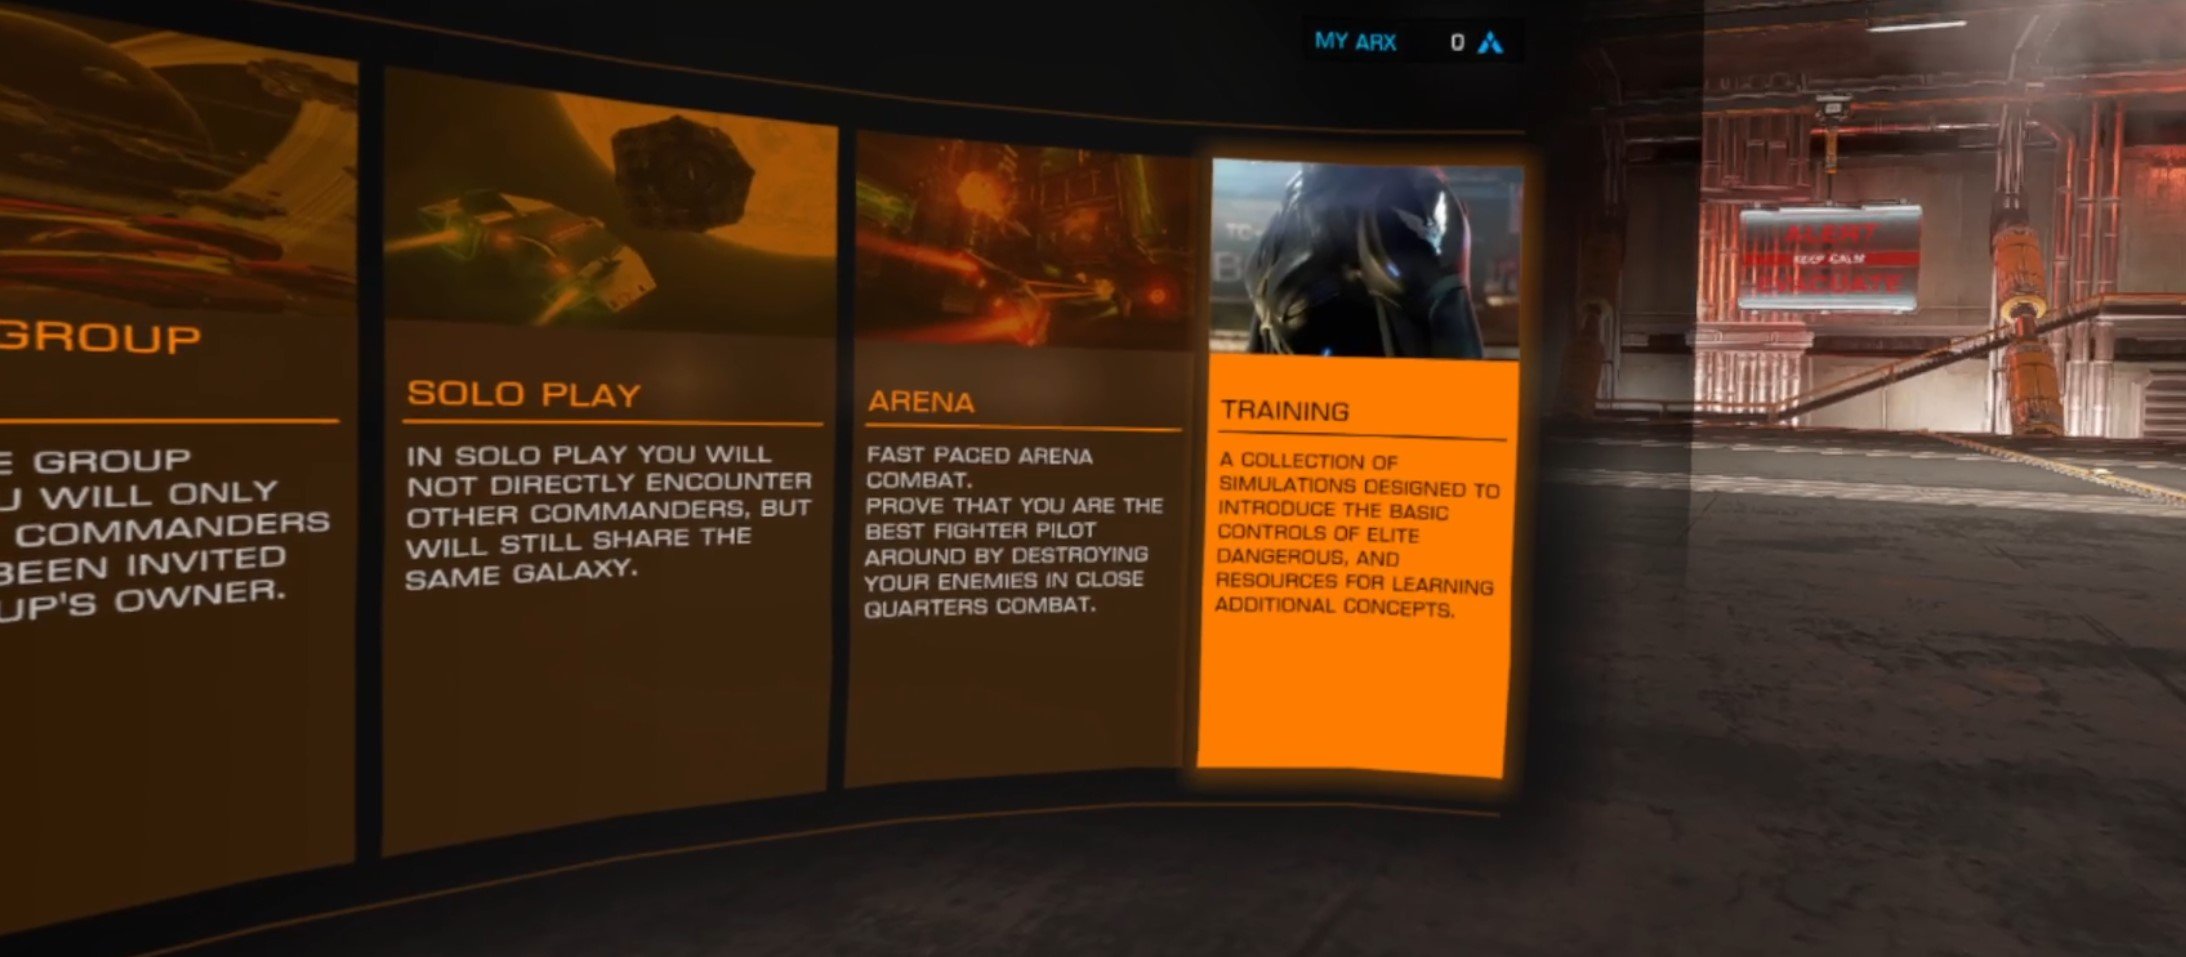
Elite Dangerous VR Space Exploration
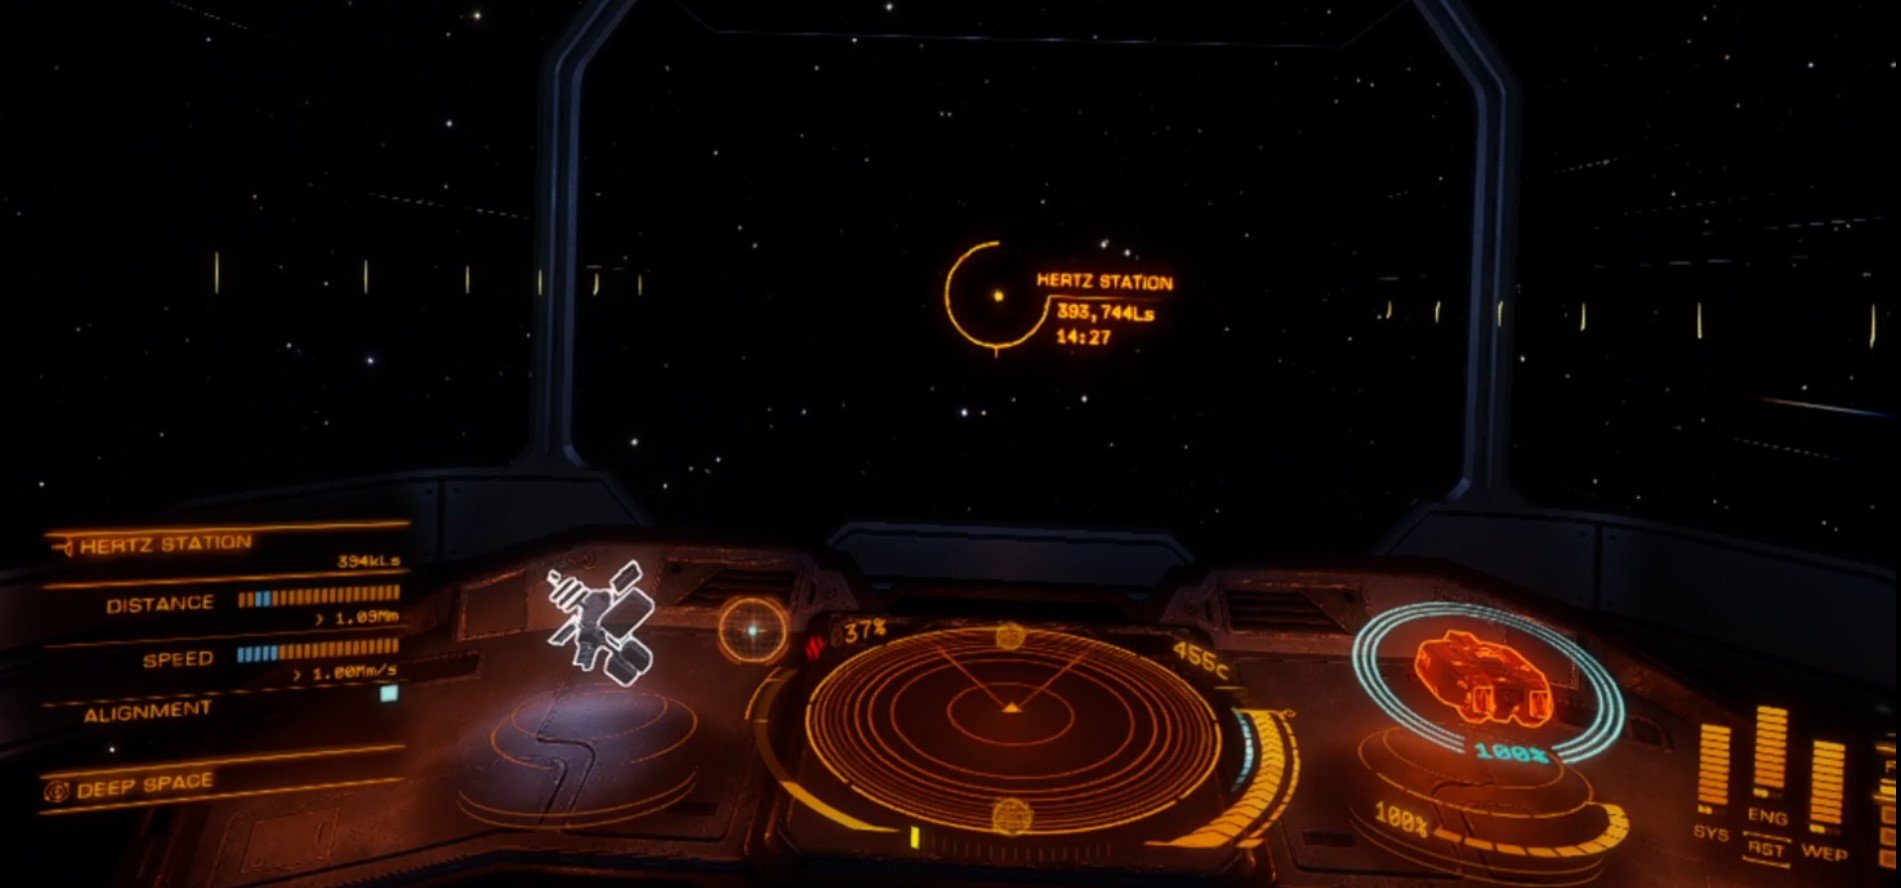
The real meat of Elite Dangerous VR Odyssey is the space exploration. Cruising through the cosmos in your spaceship was originally the only way to explore the game, and still remains the primary way in which Elite Dangerous VR is played.
Before we get there though, we start at the main menu and… well it looks really nice. The background is entirely 3D and isn’t just a flat picture behind a menu. It looks good in Virtual Reality. It’s also immediately clear that Elite Dangerous detects where your VR headset is pointed (at least on a Meta Quest Pro and Meta Quest 2). Just looking directly at menu options will select them.
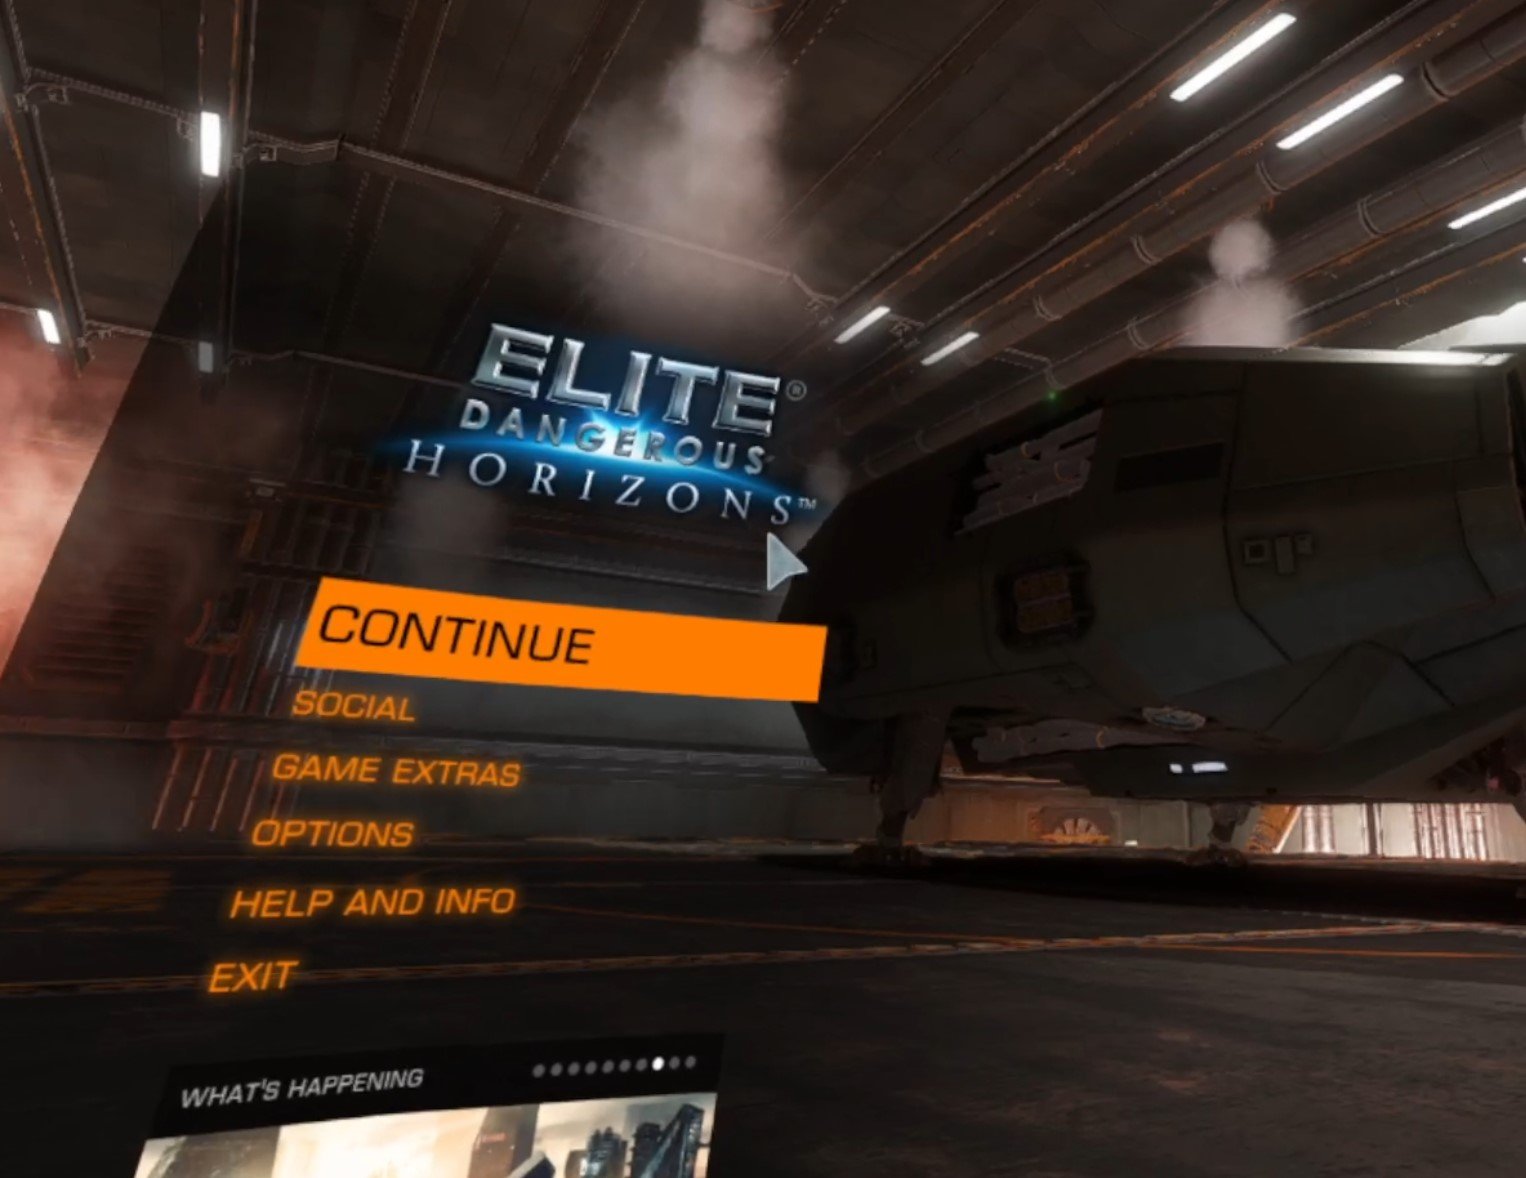
The menu can be navigated with VR touch controllers using the right joystick and “A” button. It’s well put together and has a unified sci-fi space aesthetic. Later we’ll fuss with the settings a little, but for now there’s nothing to do but start the game.
It is immediately obvious that Virtual Reality is well integrated in Elite Dangerous: Odyssey. Your field of view is excellent, and you can immediately look down at your own virtual body that manipulates the controls in front of you as you do actions in the ship. You can even use the Oculus touch controls by changing the control scheme in the options menu. Though using a mouse and keyboard gives you a much wider array of buttons to work with, and is overall an easier way to play Elite Dangerous in Virtual Reality.
Though even if you do use the Oculus touch controls, the only input registered is from the joysticks and buttons. You can’t actually move your arms by using them. If you wanted to physically manipulate the controls with your actual hands then you won’t find that level of VR immersion in Elite Dangerous VR. Still, the controls are smooth and good overall.
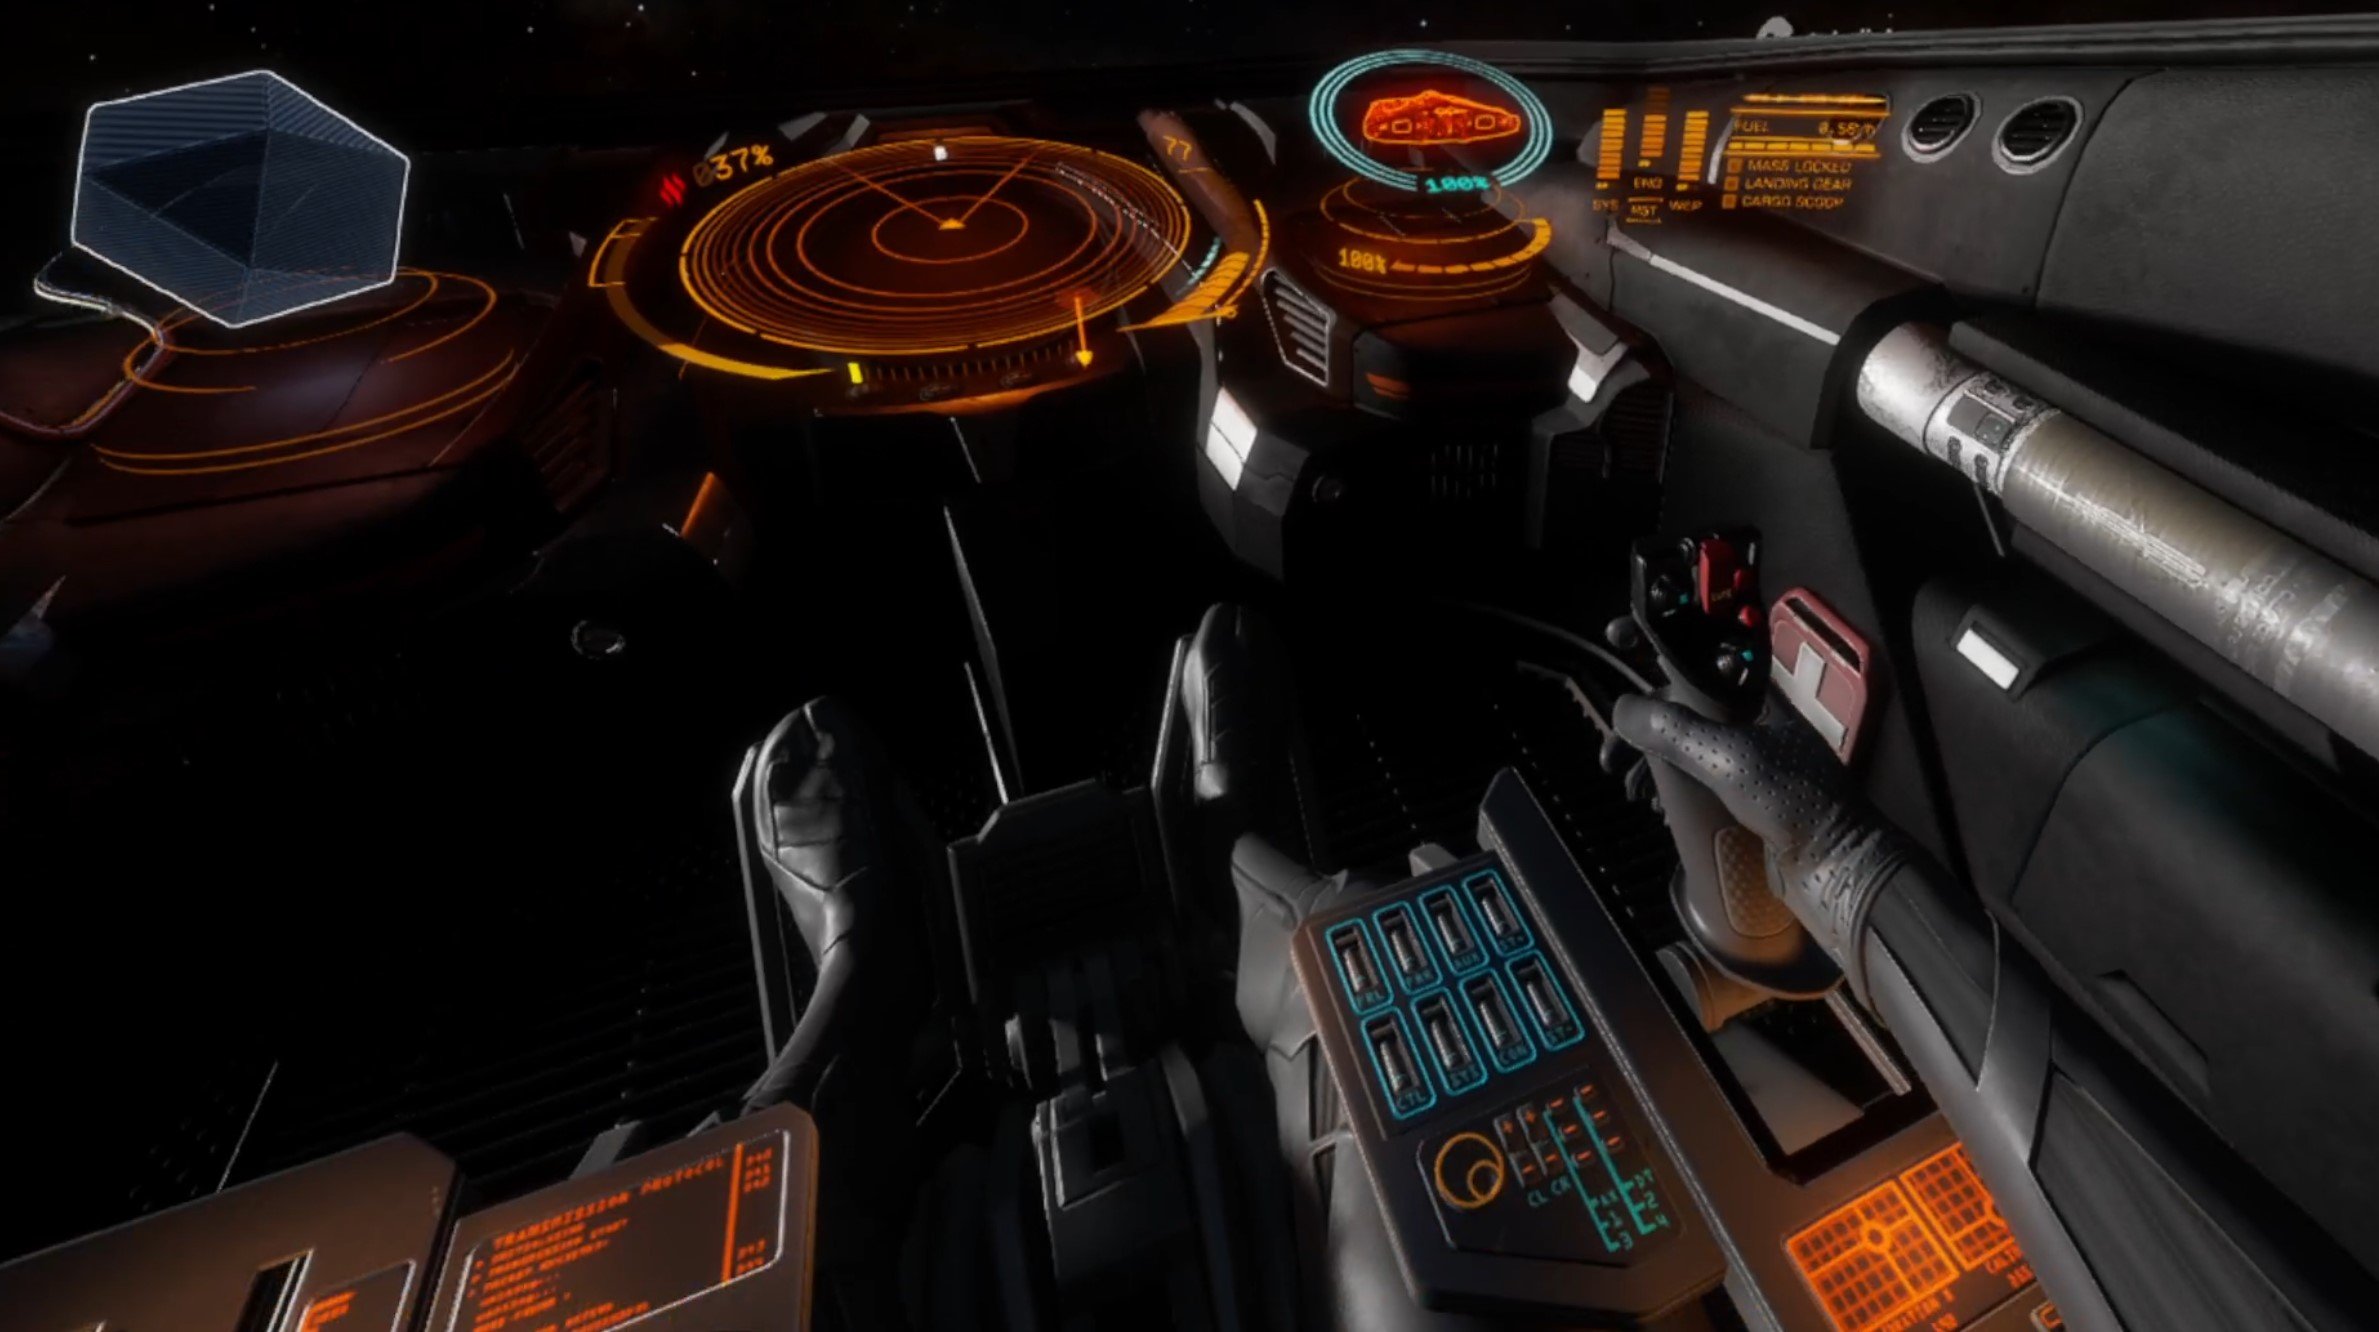
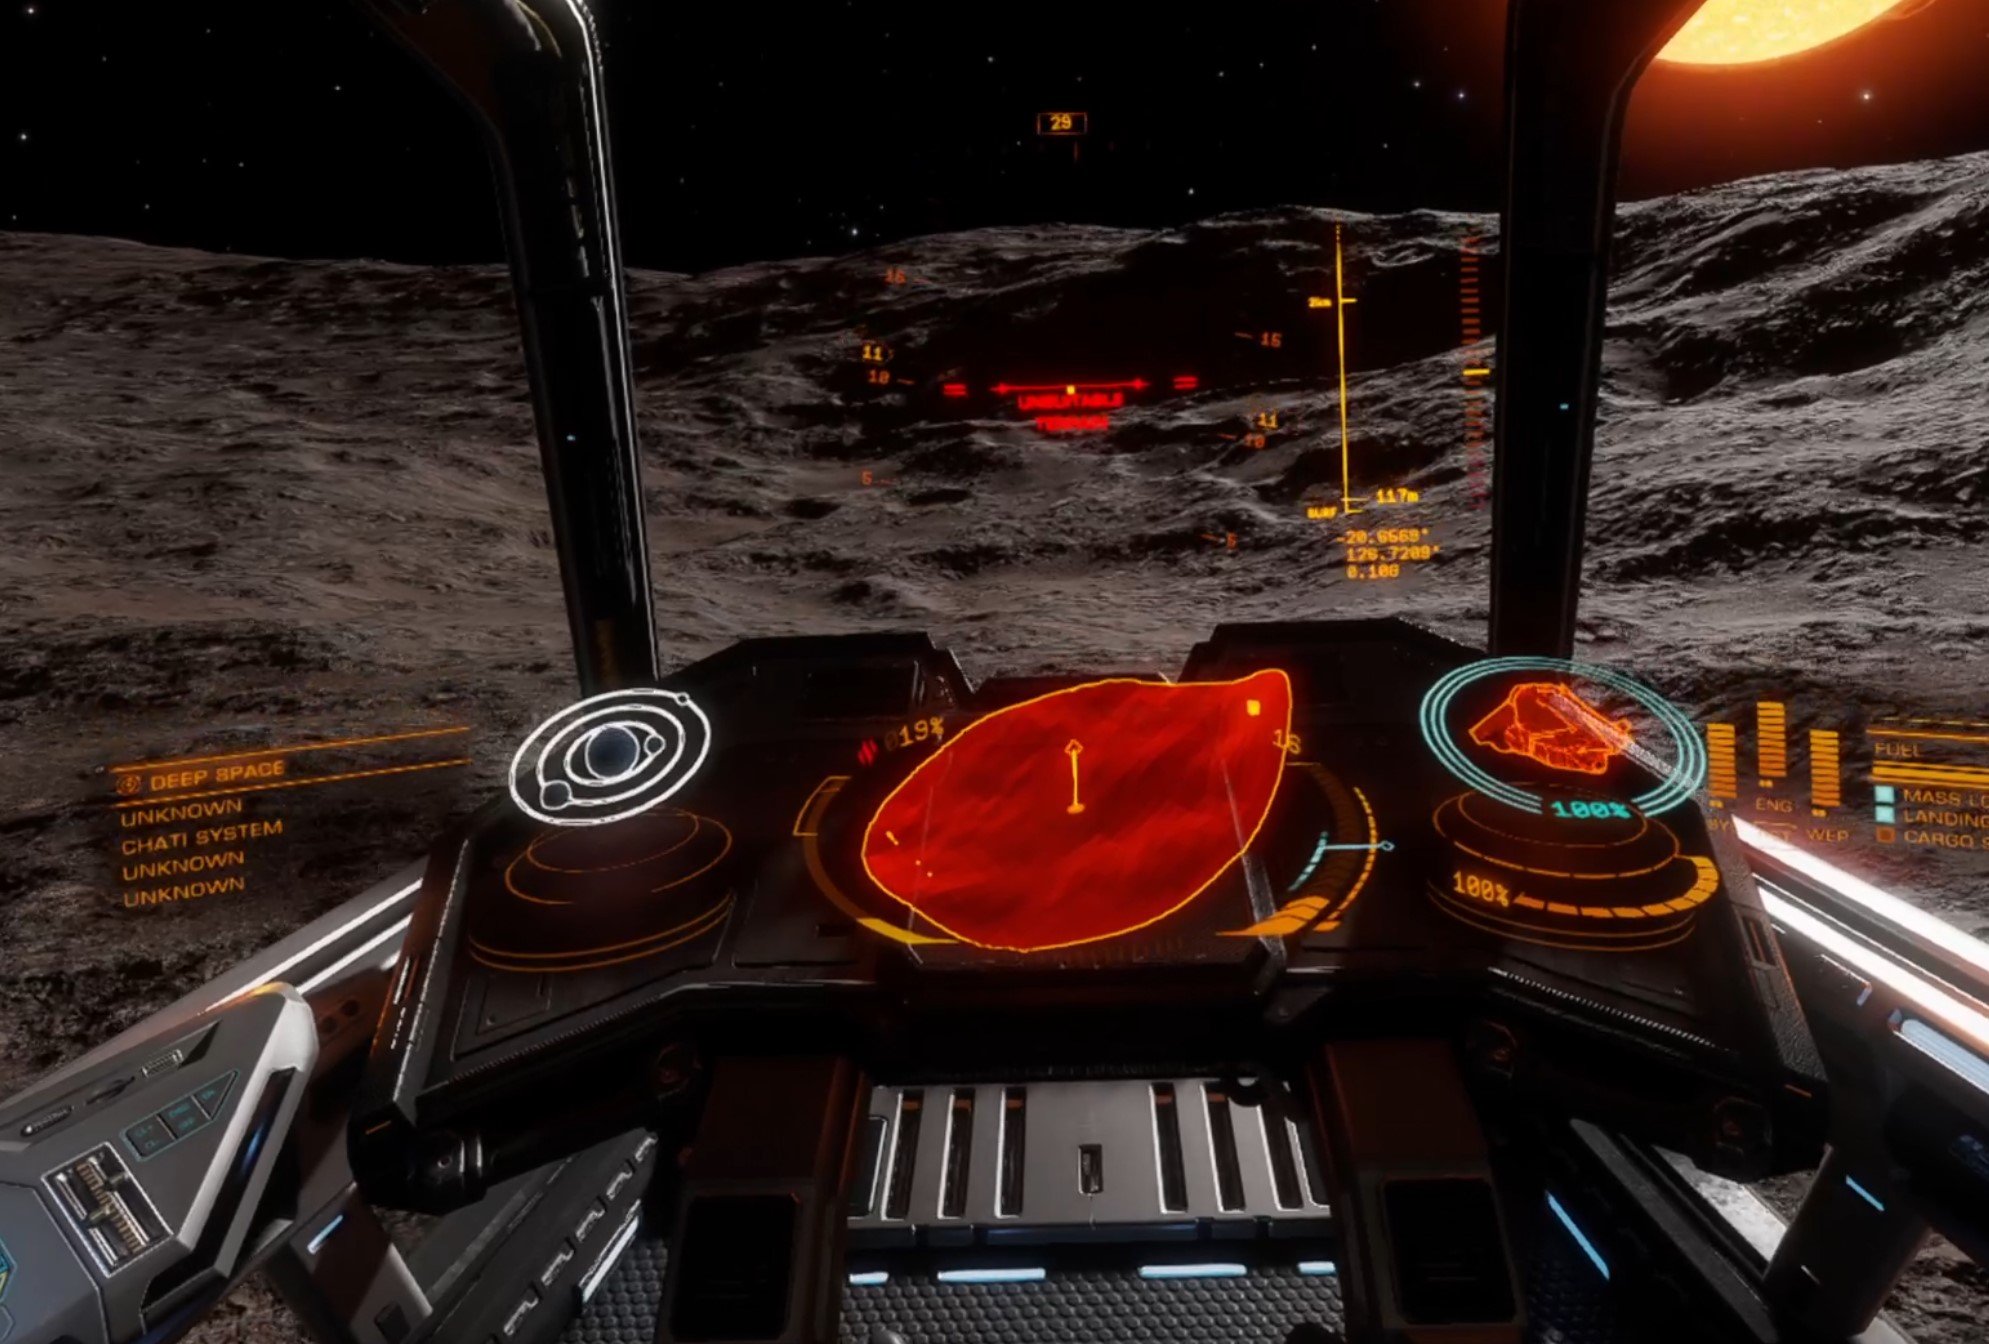
The cockpit of even your little starter ship looks fantastic, and menus appear and become interactable around your cockpit as you look at them. A further reminder that Elite Dangerous VR is tracking what direction you are looking in. You probably wouldn’t notice that at first though, because the first time you launch your ship everything looks absolutely magnificent.
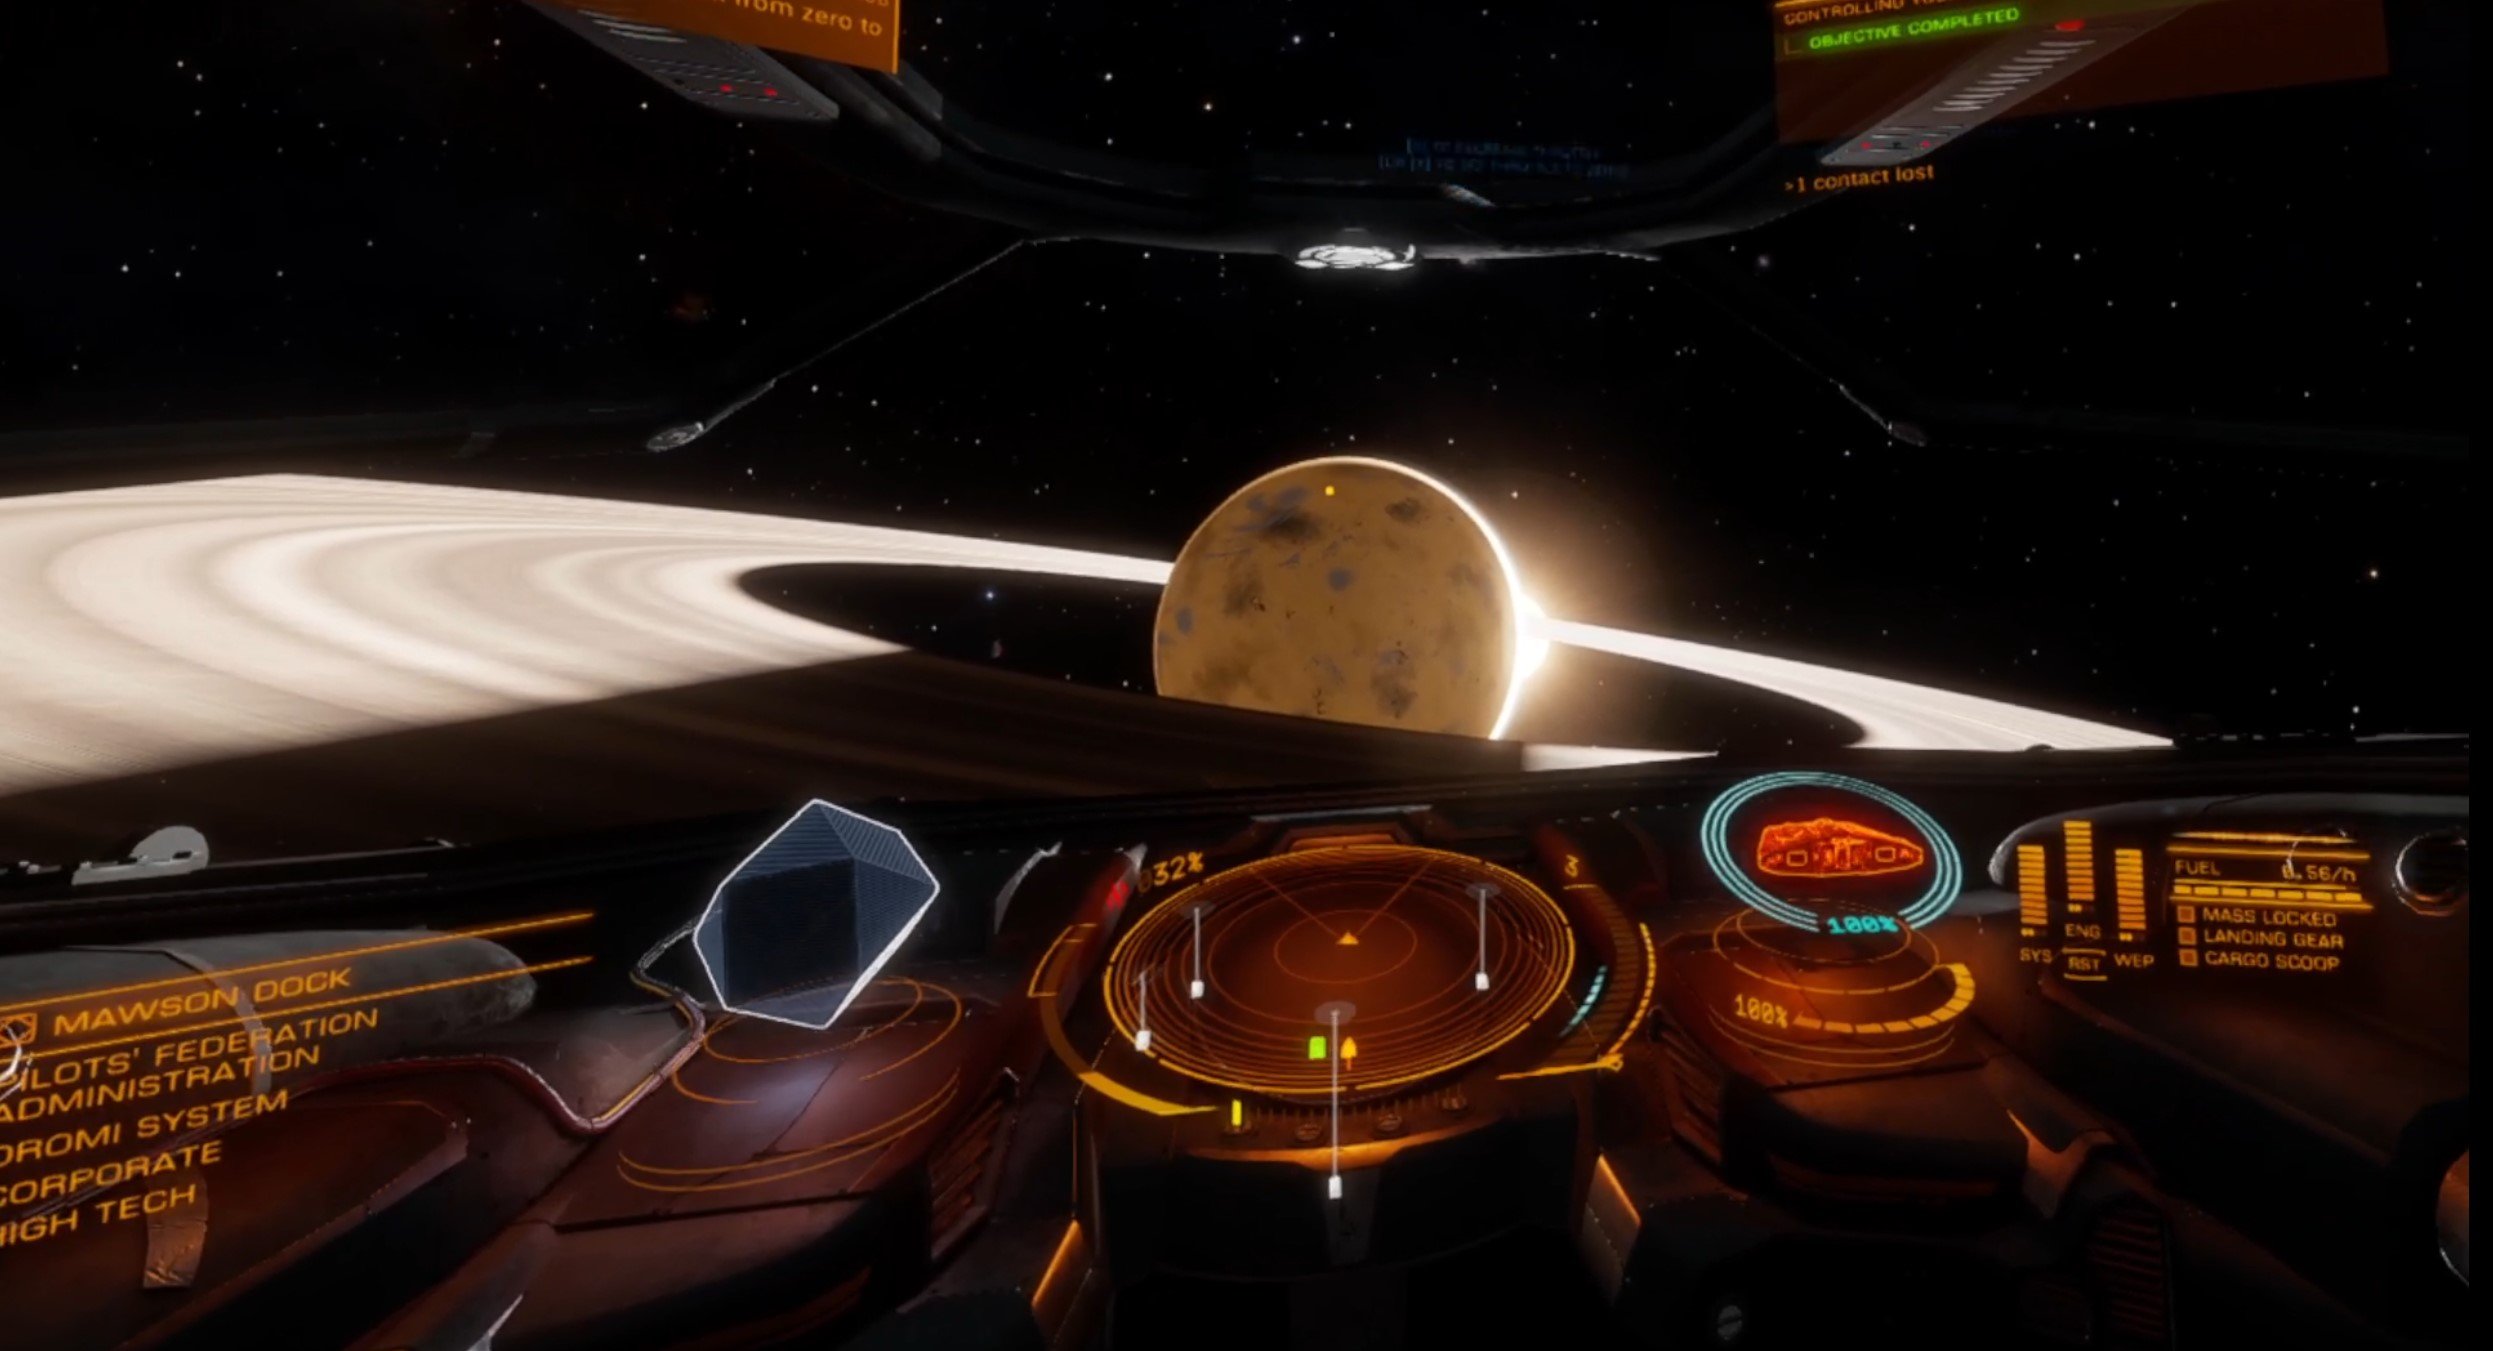
The inside of the space station you launch from looks amazing and extremely detailed. The other ships, the little tugs and trams moving along the walls. All of it looks absolutely fantastic and Virtual Reality makes it all feel so immediate. It’s as though you’re actually looking out of the window of an actual spaceship and witnessing these technological marvels. It only gets better once you go outside.
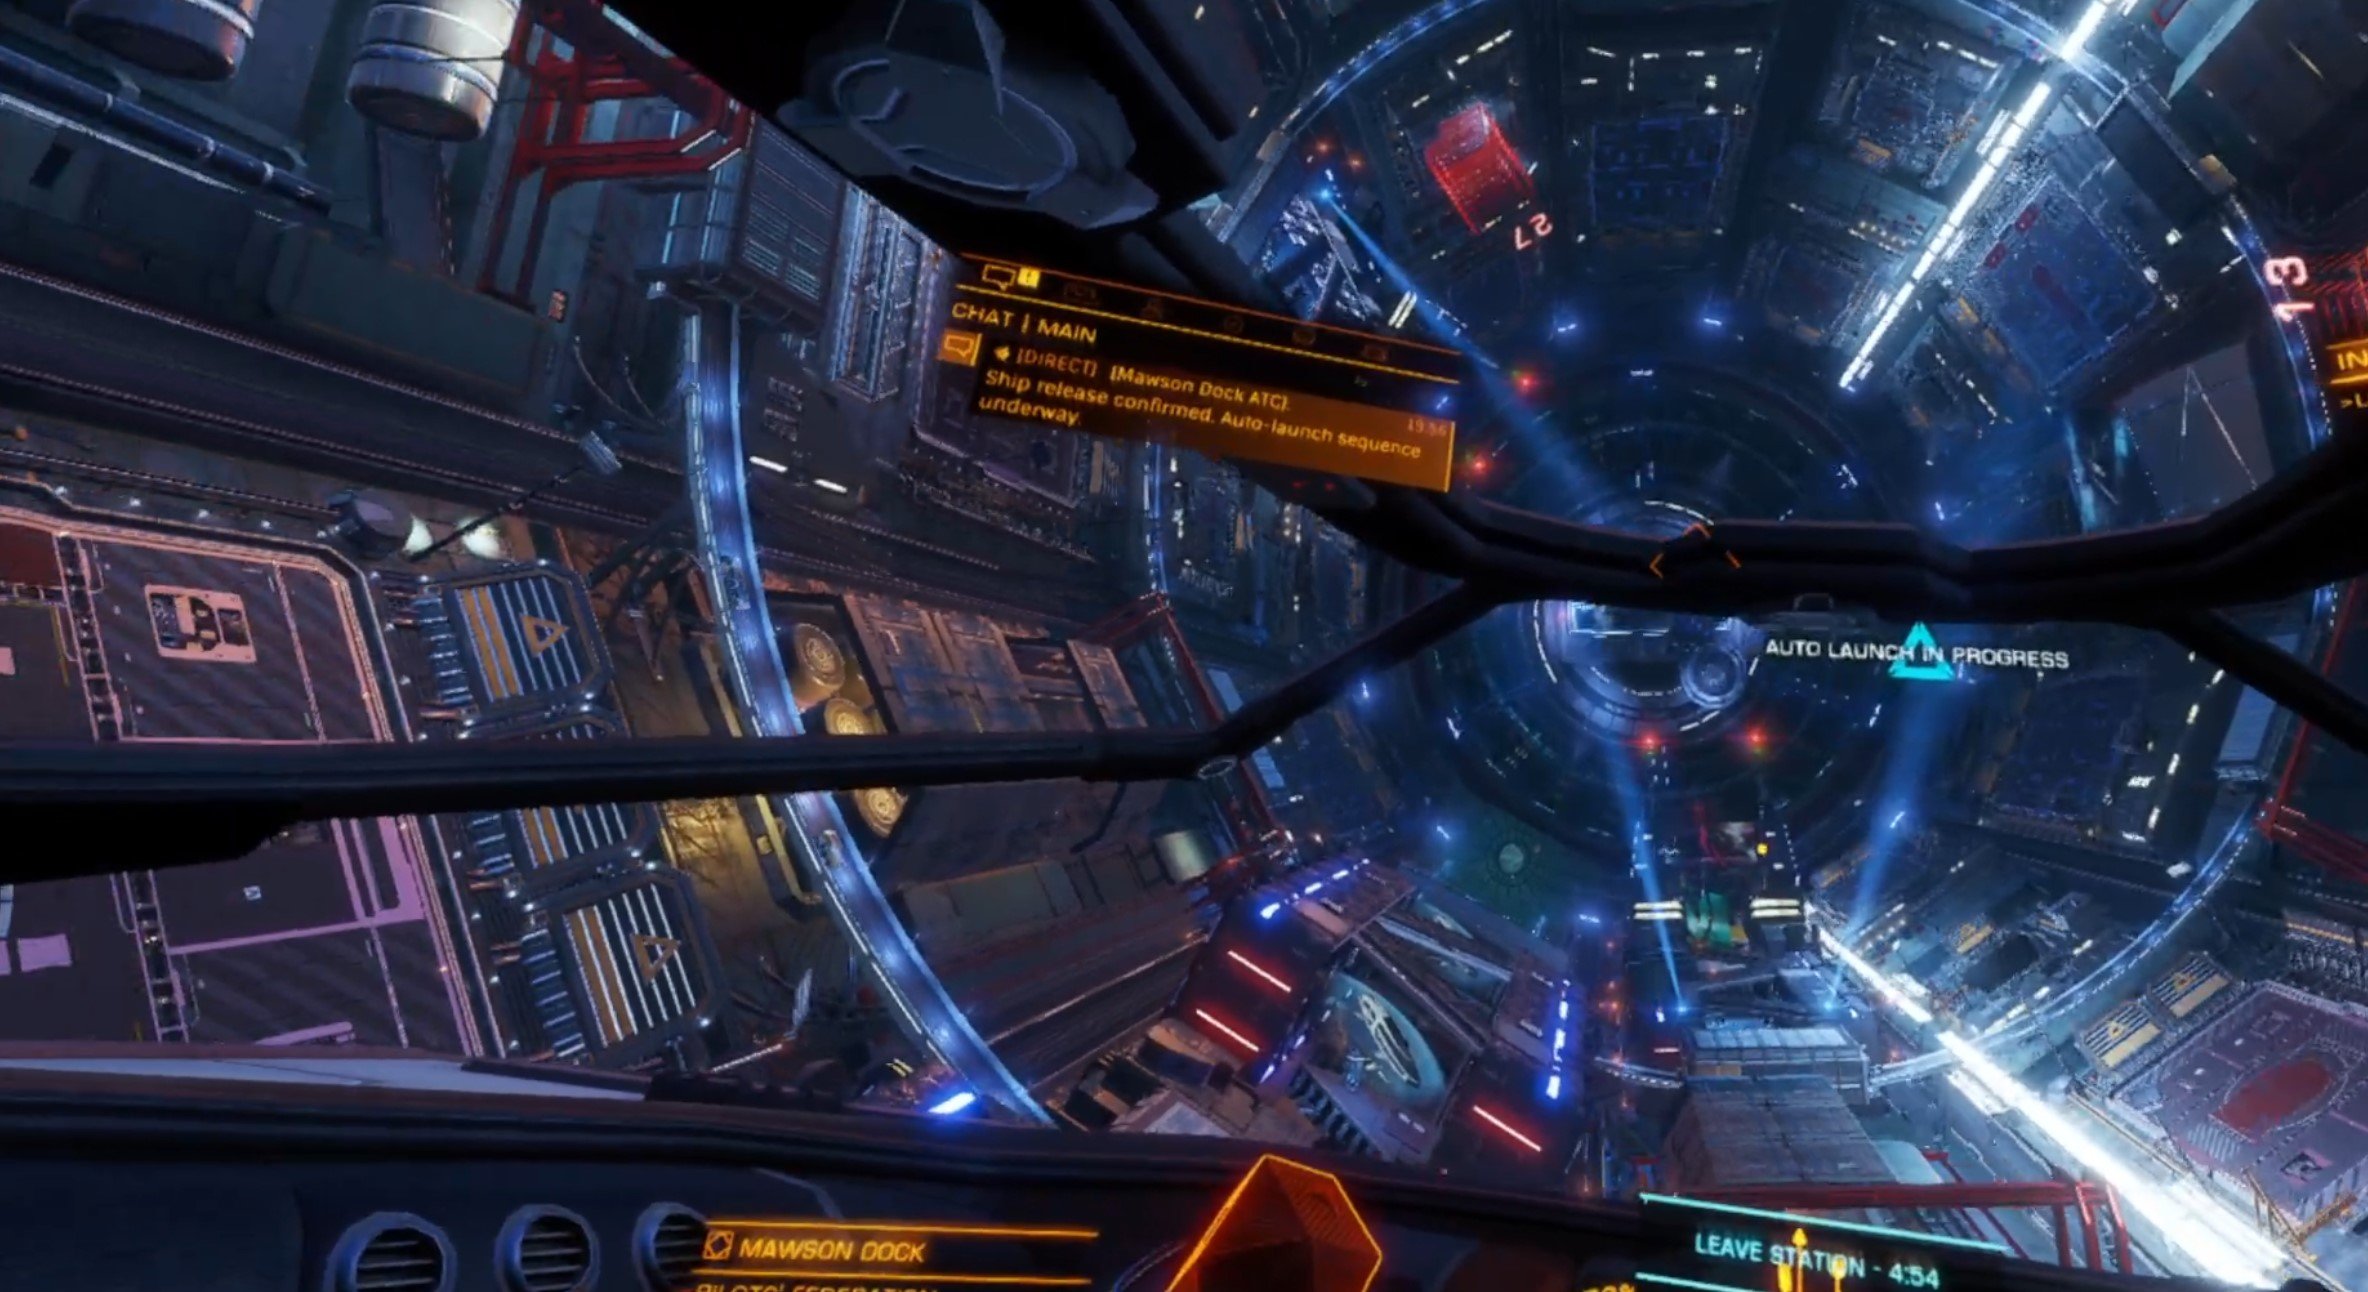
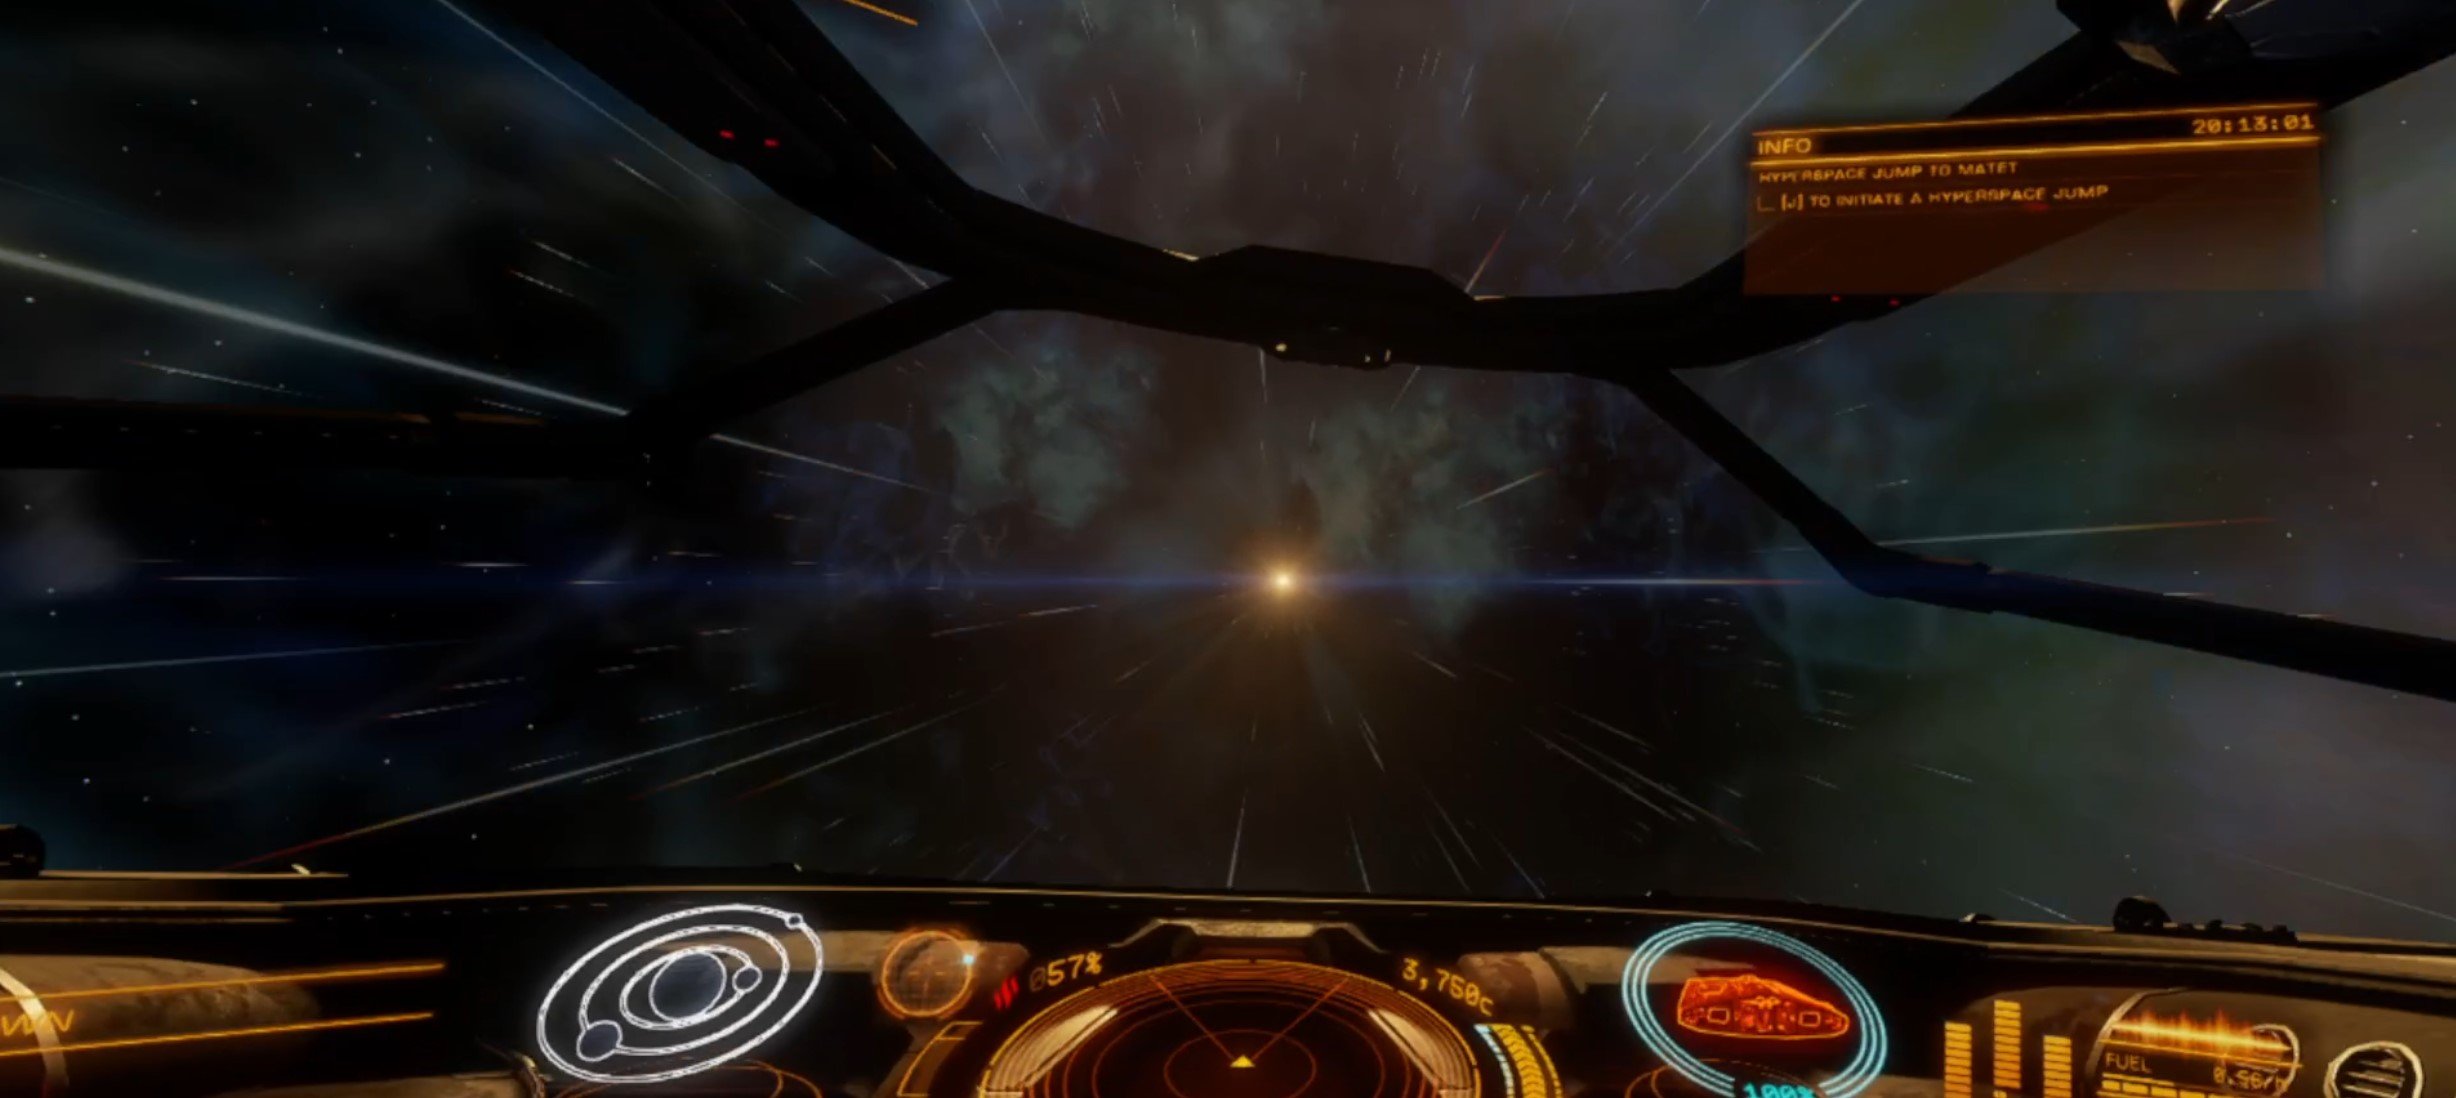
There were some graphical glitches here. Playing around with the graphical settings didn’t prevent them, but the visuals were still fantastic overall. Viewing space around you from the cockpit of your ship in Elite Dangerous: Odyssey VR is absolutely astounding. You’ll also be spending a lot of time jumping from star system to star system, and even something as mundane as travelling from place to place looks and sounds incredible.
Elite Dangerous VR benefits from being in Virtual Reality rather than the flat screen even when doing mundane things like moving cargo around. Though occasionally you will have to sit around and wait as your ship takes a long time to travel to a part of the solar system you are in that’s a long way out. Sitting around looking at your cockpit for over ten minutes in VR is a little boring, but generally that’s rare.
As you might expect, the most thrilling aspect of Elite Dangerous VR in space, the combat, is absolutely fantastic. You actually have an advantage over someone using a flat screen, because you can easily look up and around your cockpit freely by just moving your head physically.

As always, the combat also just looks more impressive by being in VR. Just like the inside of a space station, or seeing an unknown planet from afar, the extra depth and immediacy of your surroundings that VR brings makes the whole experience more intense. Virtual Reality in Elite Dangerous also throws away the distractions. You can’t see your desk or whatever room you might be playing in. All that surrounds you is your cockpit and the space that surrounds it. Elite Dangerous VR is easy to get lost in because of that, and that is certainly a good thing.
The one downside to Elite Dangerous VR is that is can be nauseating. There are a lot of options to help control motion sickness in Elite Dangerous VR in the settings menu, which is covered here in the “Elite Dangerous Settings” section below. For some general ways to avoid getting motion sickness in VR, check out this article here.
Elite Dangerous VR SRV Ground Exploration
While not the main draw of Elite Dangerous: Odyssey, there are still a lot of interesting things to see when exploring the surface of a planet in your Surface Recon Vehicle, or SRV. The ability to explore the surface of a planet makes each one more than just a blip on your map. Each planet is now a whole new arena for play.
Just like in space there’s plenty to do on planets in your SRV. Bases to explore and destroy. Missions to complete. Cargo to deliver. The SRV mode is sort of a game within a game. All you have to do to enter it is park your ship on the planet’s surface and launch your rover (assuming your ship has a bay holding one.)
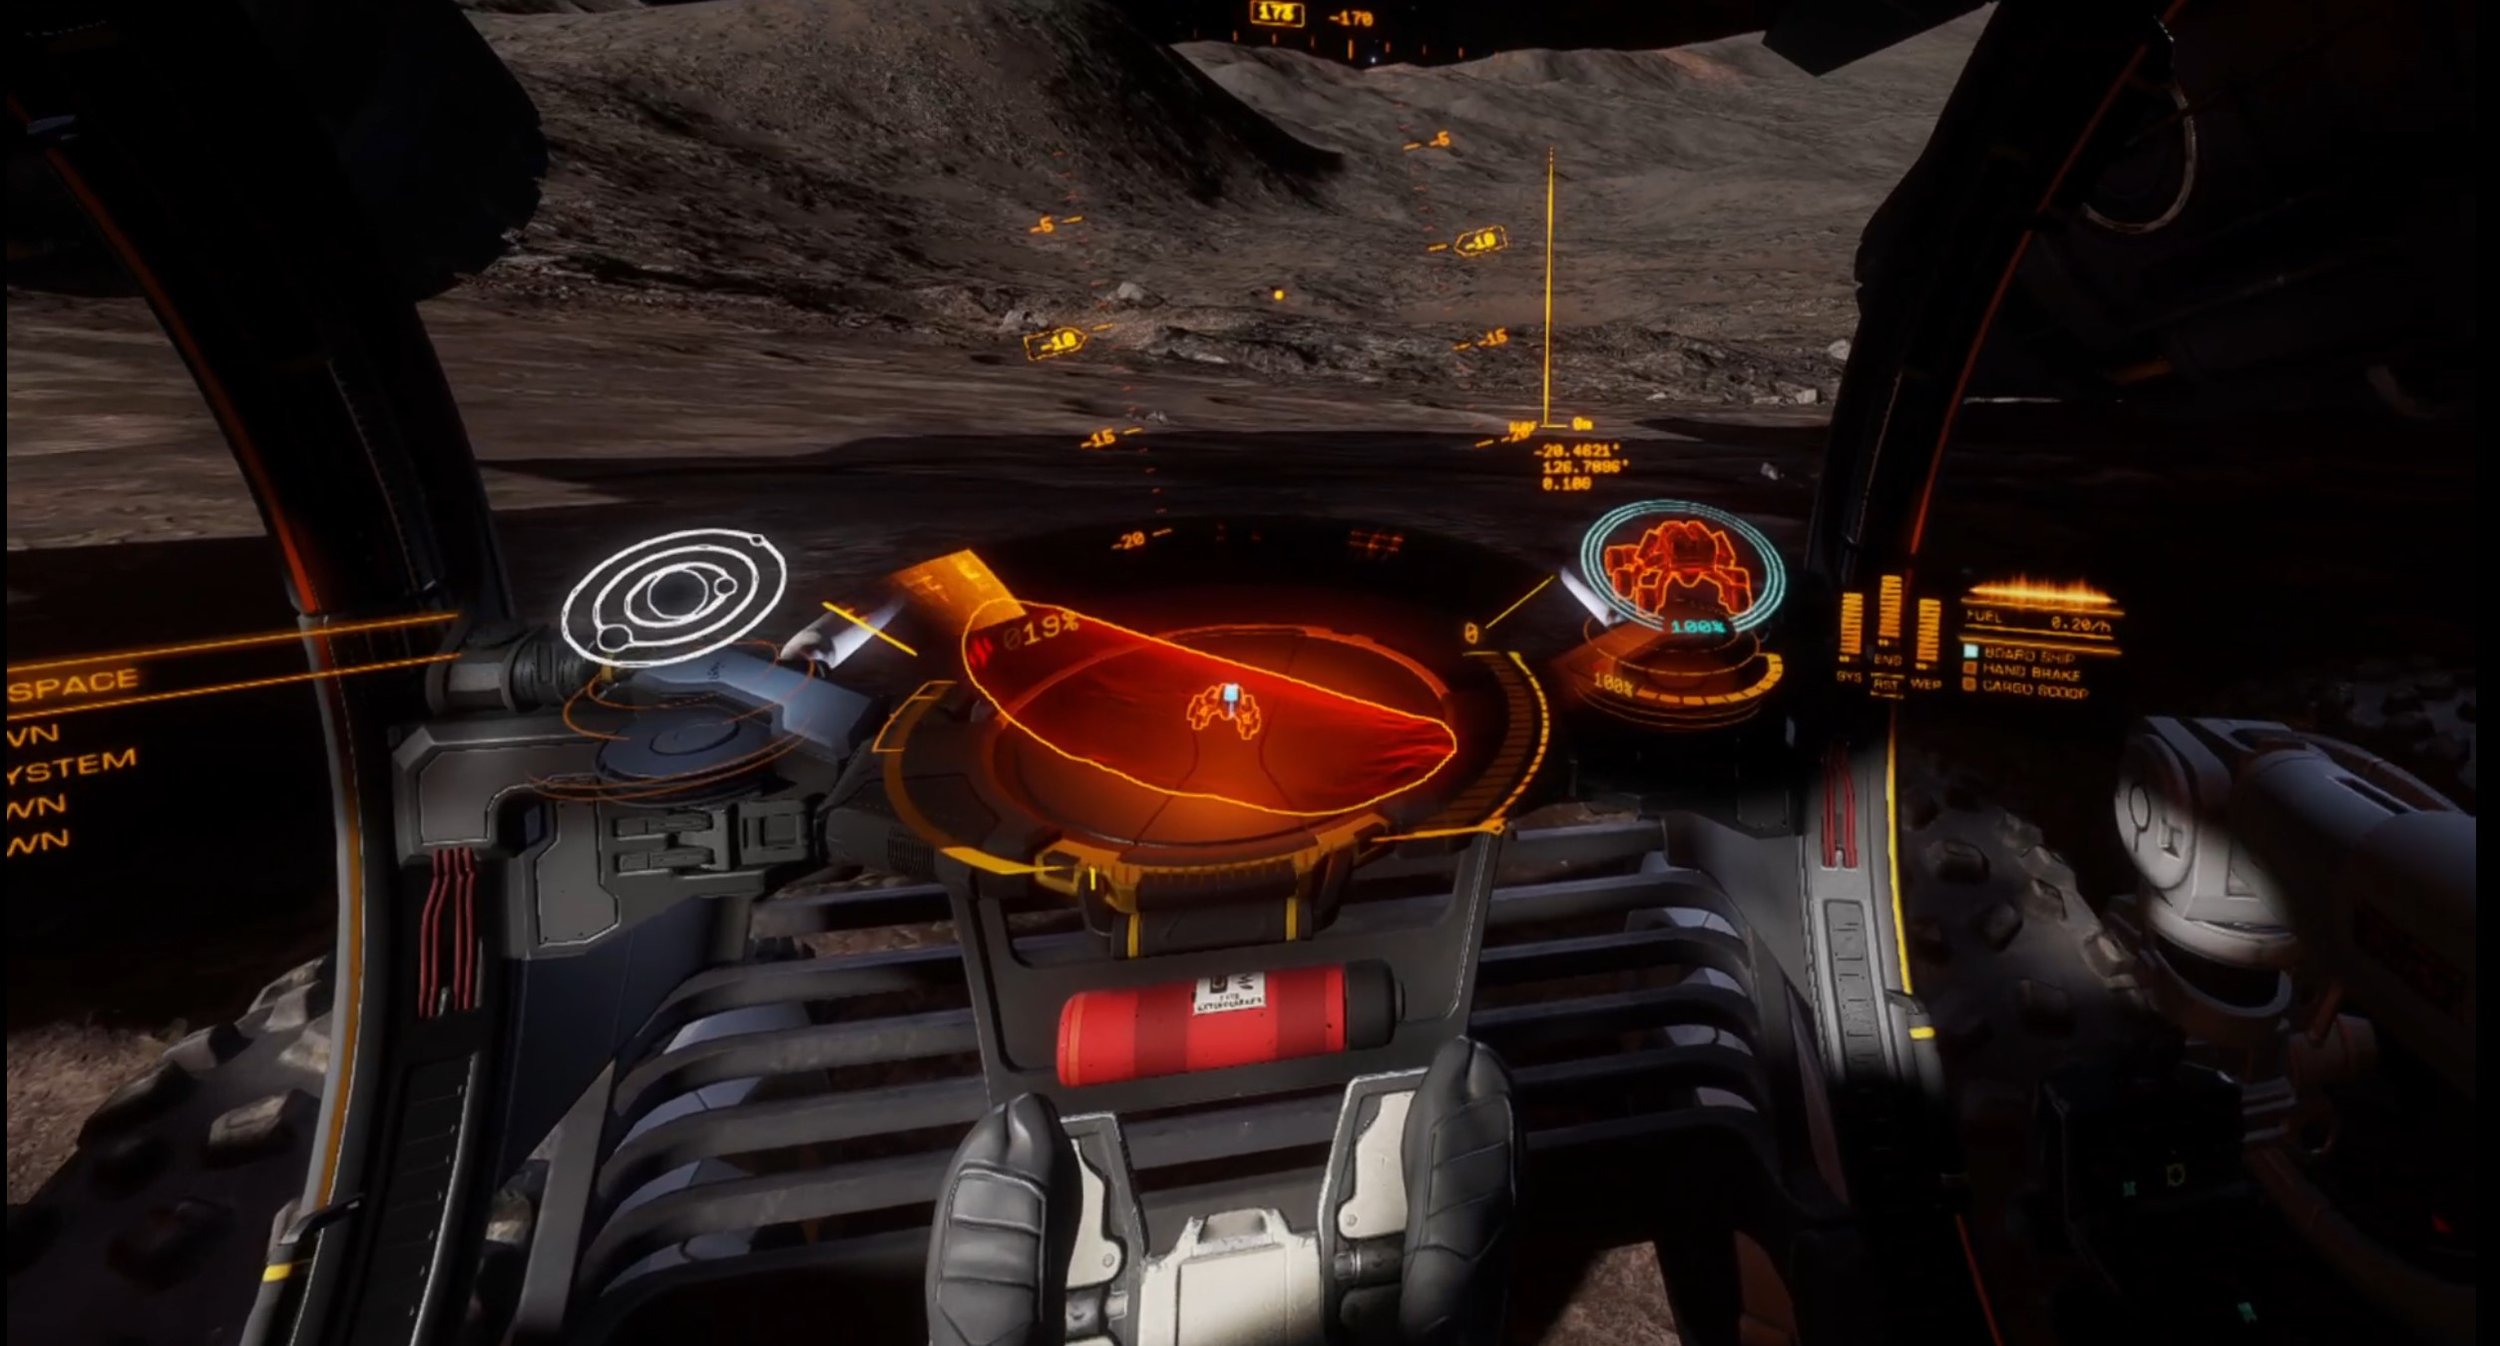
As far as the SRV in Elite Dangerous: Odyssey VR, it’s a lot like the space gameplay. The cabin of your vehicle is very well detailed and you have full freedom to look around it. Menus appear when you point your headset at them. It’s all very well made and an overall fantastic VR port. Just like in space there is also the option to use your Touch Controllers, but it is much easier to keep relying on the mouse and keyboard for the excess of buttons.
The SRV mode is just as strongly supported in VR as the space gameplay overall. Though the downside of it potentially giving you motion sickness is even stronger. It can be easy to flip your SRV without realizing you are doing it, and flipping without being ready for it coming is a shock if you’re prone to motion sickness. There are a lot of options to help control motion sickness in Elite Dangerous VR in the settings menu, which is covered here in the “Elite Dangerous Settings” section below. For some general ways to avoid getting motion sickness in VR, check out this article here.
Elite Dangerous VR On Foot
The single most disappointing part of Elite Dangerous: Odyssey VR is that there is no official support for “On Foot” gameplay in VR. “On Foot” gameplay means playing the game outside of a vehicle. Including walking through space stations, or traversing planets outside of a vehicle.
There is absolutely no official VR support for this gameplay in Elite Dangerous, and there are no current plans announced to implement VR support for on foot gameplay. This is a real shame, and denies a whole part of Elite Dangerous: Odyssey to Virtual Reality lovers.
Though while there is no official support for on foot VR gameplay in Elite Dangerous VR, there are some unofficial ways to play on foot in Virtual Reality. Keep in mind that these methods are not officially supported by the developer, and can potentially break your game. Use at your own risk.
Here is a Reddit thread showing and describing how to play on foot in Elite Dangerous: Odyssey VR. Here is also a Youtube video describing how.
Elite Dangerous VR Settings
Motion Sickness can be a problem in almost all VR Games, and Elite Dangerous: Odyssey VR is no exception. In fact the constant rolling of your spacecraft or SRV can result in very bad motion sickness. Luckily the Virtual Reality support in Elite Dangerous VR is so good that there are settings to help you counteract this. Here’s a quick rundown of what you have to help reduce motion sickness.
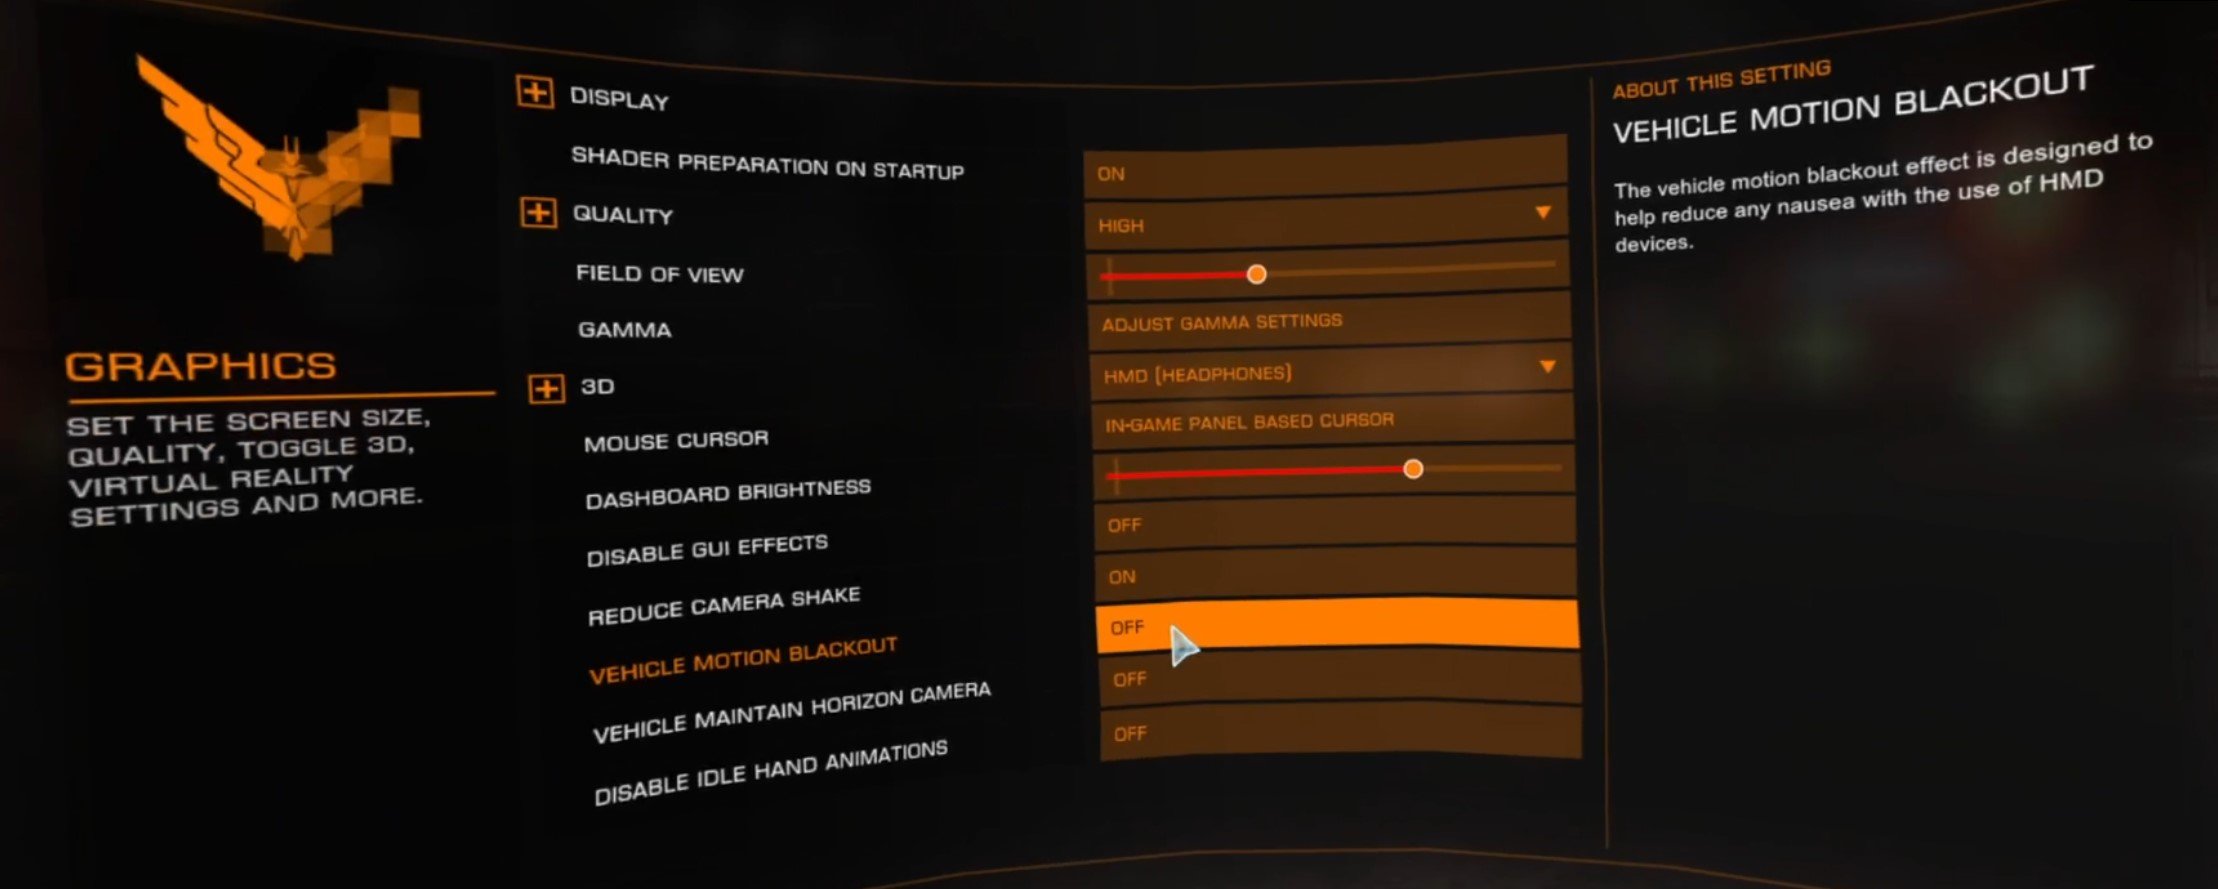
When you go to the Graphics options in the main menu, these are present at the bottom. Disabling GUI effects can make your view a little less busy and chaotic, and that can help. One of the best options to help reduce motion sickness is by turning the “Reduce Camera Shake” option on. Even if you don’t get motion sickness having a less shaky view can help to increase your situational awareness.
“Vehicle Motion Blackout” essentially functions as a vignette. Whenever your vehicle moves a black border will appear on the edges of your view. This blocks your peripheral vision, and is a feature in a lot of VR games because it reduces nausea and motion sickness.
The “Vehicle Maintain Horizon Camera” option keeps your view more steady and horizontal when piloting a vehicle. This can help prevent motion sickness as a result of tumbles and quick turns in your vehicle, meaning you can maneuver quickly without feeling nauseous. Finally the “Disable Idle Hand Animations” option simply stops the idle hand animations of your player character inside of your vehicle. It can be a little weird when your pilot’s hands move around when you’re not actually moving your hands.
Elite Dangerous VR Setup
Setup was more difficult than you’d think. Mostly due to a bug in the Steam version of the game. I’d bought Elite Dangerous a long time ago, and apparently that came with some problems. When launching the Steam version of the game I made a new Frontier account and linked my Steam account to it using the instructions found at this link.
Unfortunately after logging in and launching through steam I could get nowhere, and just got this popup telling me that I needed to update the game. There was nothing else I could do here, hitting the X in the window closed the whole launcher.
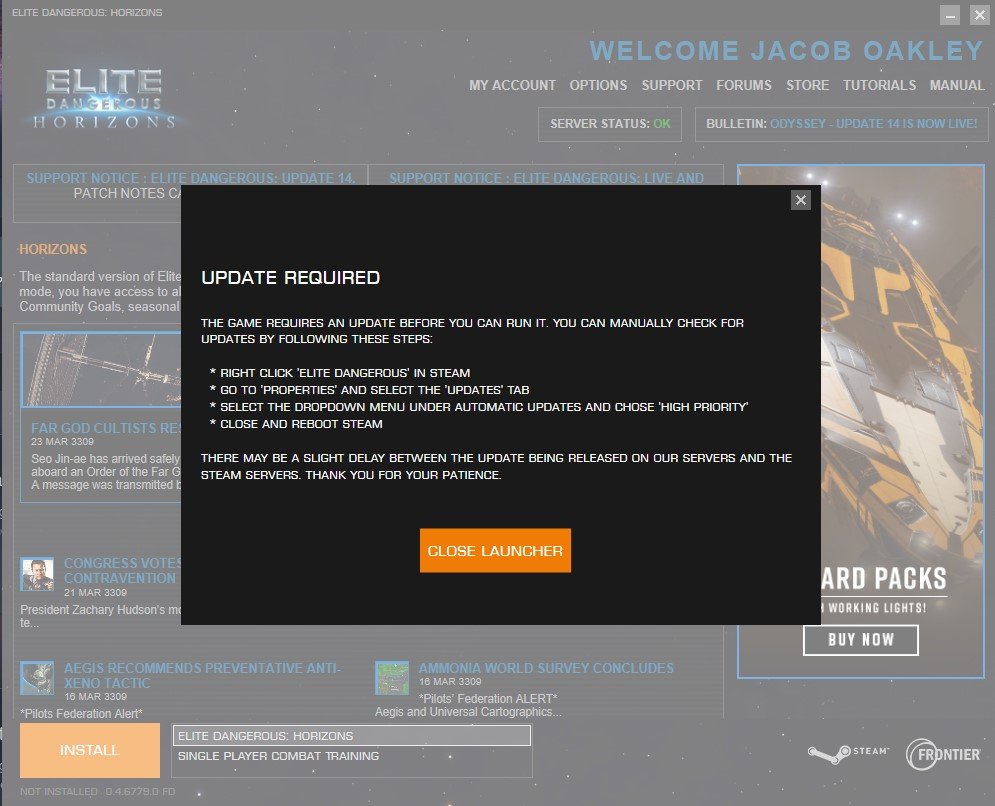
I couldn’t even log in and try linking a different account or anything. After some googling I found a number of possible fixes, including downloading a sketchy seeming alternate launcher and using that. The most straightforward fix I found was manually launching the EDLaunch.exe file as an administrator from the Elite Dangerous directory itself in steam (\Steam\steamapps\common\Elite Dangerous).
This forced me to log back in, but when I did the game stated that I didn’t have access to the game. After another hour or so of googling, reading ancient forum threads, and trying different solutions brought me to remember that I had used a different email for my previous account when I’d last played the game. After guessing the right email in the Frontier website’s “Forgot My Password” function, I finally could log in by manually running the launcher and updated the game. After that running it directly through Steam worked fine. This was all even before purchasing the Elite Dangerous: Odyssey DLC, though luckily purchasing that DLC through Steam created no further problems.
From what I read a lot of people have had this problem for years, and honestly it doesn’t look good for Elite Dangerous or Frontier. Not only was the account linking process annoying, but having to link an account and it still not working could be the last time a lot of people touch Elite Dangerous: Odyssey.
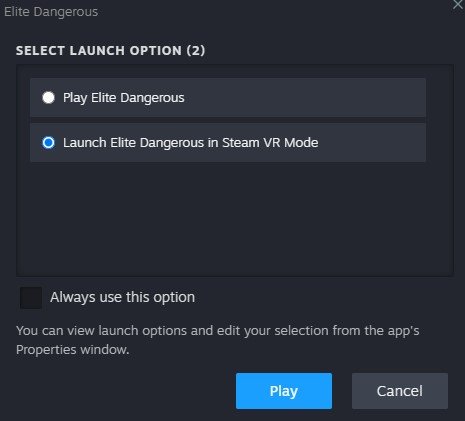
Luckily when all that was over launching the game was as simple as connecting the headset to the computer with Meta Airlink, running the game through steam, and selecting “Launch Elite Dangerous in Steam VR Mode.”
That was the whole setup! Enjoy Elite Dangerous Odyssey VR.

New Planes for FREE In VTOL VR By Easily Installing VTOL VR Mods
Welcome to this step by step guide on how to install VTOL VR Mods! VTOL VR is an extremely fun VR combat flight simulator game, and it’s even better with mods. So keep reading to find out how to install VTOL VR mods as easily as possible to make your game even better. In this example we will be installing a brand new modded plane! The Mirage 2000CX. Keep reading to find out how to get a free new plane in VTOL VR!
Welcome to this step by step guide on how to install VTOL VR Mods! VTOL VR is an extremely fun VR combat flight simulator game, and it’s even better with mods. So keep reading to find out how to install VTOL VR mods as easily as possible to make your game even better. In this example we will be installing a brand new modded plane! The Mirage 2000CX. Keep reading to find out how to get a free new plane in VTOL VR!
Mod Loader for Installing VTOL VR Mods
The first step in installing PCVR VTOL VR mods is downloading and installing the VTOL VR Mod Loader. This is a useful program that you can use on your PC to install and manage VTOL VR mods. Go to the vtolvr-mods.com homepage and download the latest version of the VTOL VR Mod Loader by clicking the “Download Mod Loader” button.

After the VTOL VR Mod Loader is downloaded, run it as an administrator. You can choose not to, but not all features may be available if you do not. You may see a popup like this one.

If you do and want to keep following this guide, then press Yes. Do note that the VTOL VR Mod Loader is third party software and not supported or created directly by the VTOL VR developers.
Anyway, once the Mod Loader is run with the correct permissions you will see the “First Time” Setup menu.

Press the “Auto Detect” button on the right side of the screen. If, for some reason, the VTOL VR Path field does not fill after you press this button, then press “Browse” and navigate to your computer’s VTOL VR folder. If your VTOL VR installation is through Steam then this folder should be located at:
C:\Program Files\Steam\steamapps\common\VTOL VR\
If you installed Steam somewhere other than the default location, then go to your “Steam” folder wherever you installed it before following the rest of the filepath above.
Once the VTOL VR Path field is filled correctly, press the “Install” button.

You may see a popup like the one above, asking you to update files. If you see this press Yes. Afterwards you may have to wait shortly for the updates to download and install. You can see the progress of this at the bottom of the VTOL VR Mod Loader application. When everything is set up the Mod Loader should look like this.

Downloading VTOL VR Mods
From the main menu of the VTOL VR Mod Loader you can press the “Open https://vtolvr-mods.com” button to go to the website where you can download mods, or just go to vtolvr-mods.com. Once you’re there press the “Mods” or “Skins” icons in the top left corner of the page, depending on what you want to download and install. Here we will be downloading the Mirage 2000CX aircraft to use in our modded VTOL VR game. So let’s go to “Mods.”

On the left hand side of the “Mods” page you can filter for the type of mod you are looking for, or do a string search if you have a type of mod in mind. Luckily for the Mirage 2000CX mod, it’s right here on the first page. When you find the mod you want, click on the name or picture of the mod to open its page.
Once you’re on the Mod page make sure to read the description for any potentially required mods to run it, how the mod works, and any potential bugs that the mod may cause.
When you’re ready to download the mod, just click the “Download” button in the top right. The mod will download to your Downloads folder, or wherever you have configured your PC to send downloaded files.

Installing VTOL VR Mods
Head back over to the VTOL VR Mod Loader, and on the bottom left side of the application hit the “Open Folder” button.

This will open the “VTOLVR_ModLoader” folder within your VTOL VR installation folder that you selected when setting up the VTOL VR Mod Loader. Enter the “mods” folder within this new File Explorer window. Take the mod file you downloaded, unzip it, and move the unzipped folder into this “mods” folder.
Back in the VTOL VR Mod Loader, select the “Mods” button in the top left corner of the screen. Your freshly added mod should be visible in the Mod Loader. Selecting the “Auto Update” checkbox can also help to keep mods up to date, but if you notice a difference in the “Current Version” and “Website Version” numbers you may need to manually update the mod by deleting it from the “mods” folder and repeating this by redownloading it from the vtolvr-mods.com website.

Running VTOL VR With Mods
Now that your VTOL VR mods are installed it’s time to try them out! Press the “Play” button in the bottom right hand corner of the Mod Loader. You should always launch your modded VTOL VR game using this button. Otherwise your mods may not work and problems may occur even when using unmodded content. If you want to play VTOL VR unmodded again, you can just press the red “Disable” button in the top right corner of the VTOL VR Mod Loader.

Once the game is launched and you’ve hit the “Start Game” button in the initial menu. When you’re in the pilot selection menu, don’t select your pilot just yet, instead go to the “Mods” menu here.

Once you’re in the Mods menu in VTOL VR select the mod you just installed and press the “Load” button at the bottom. There will be a brief delay, and then the button will say “Loaded!"
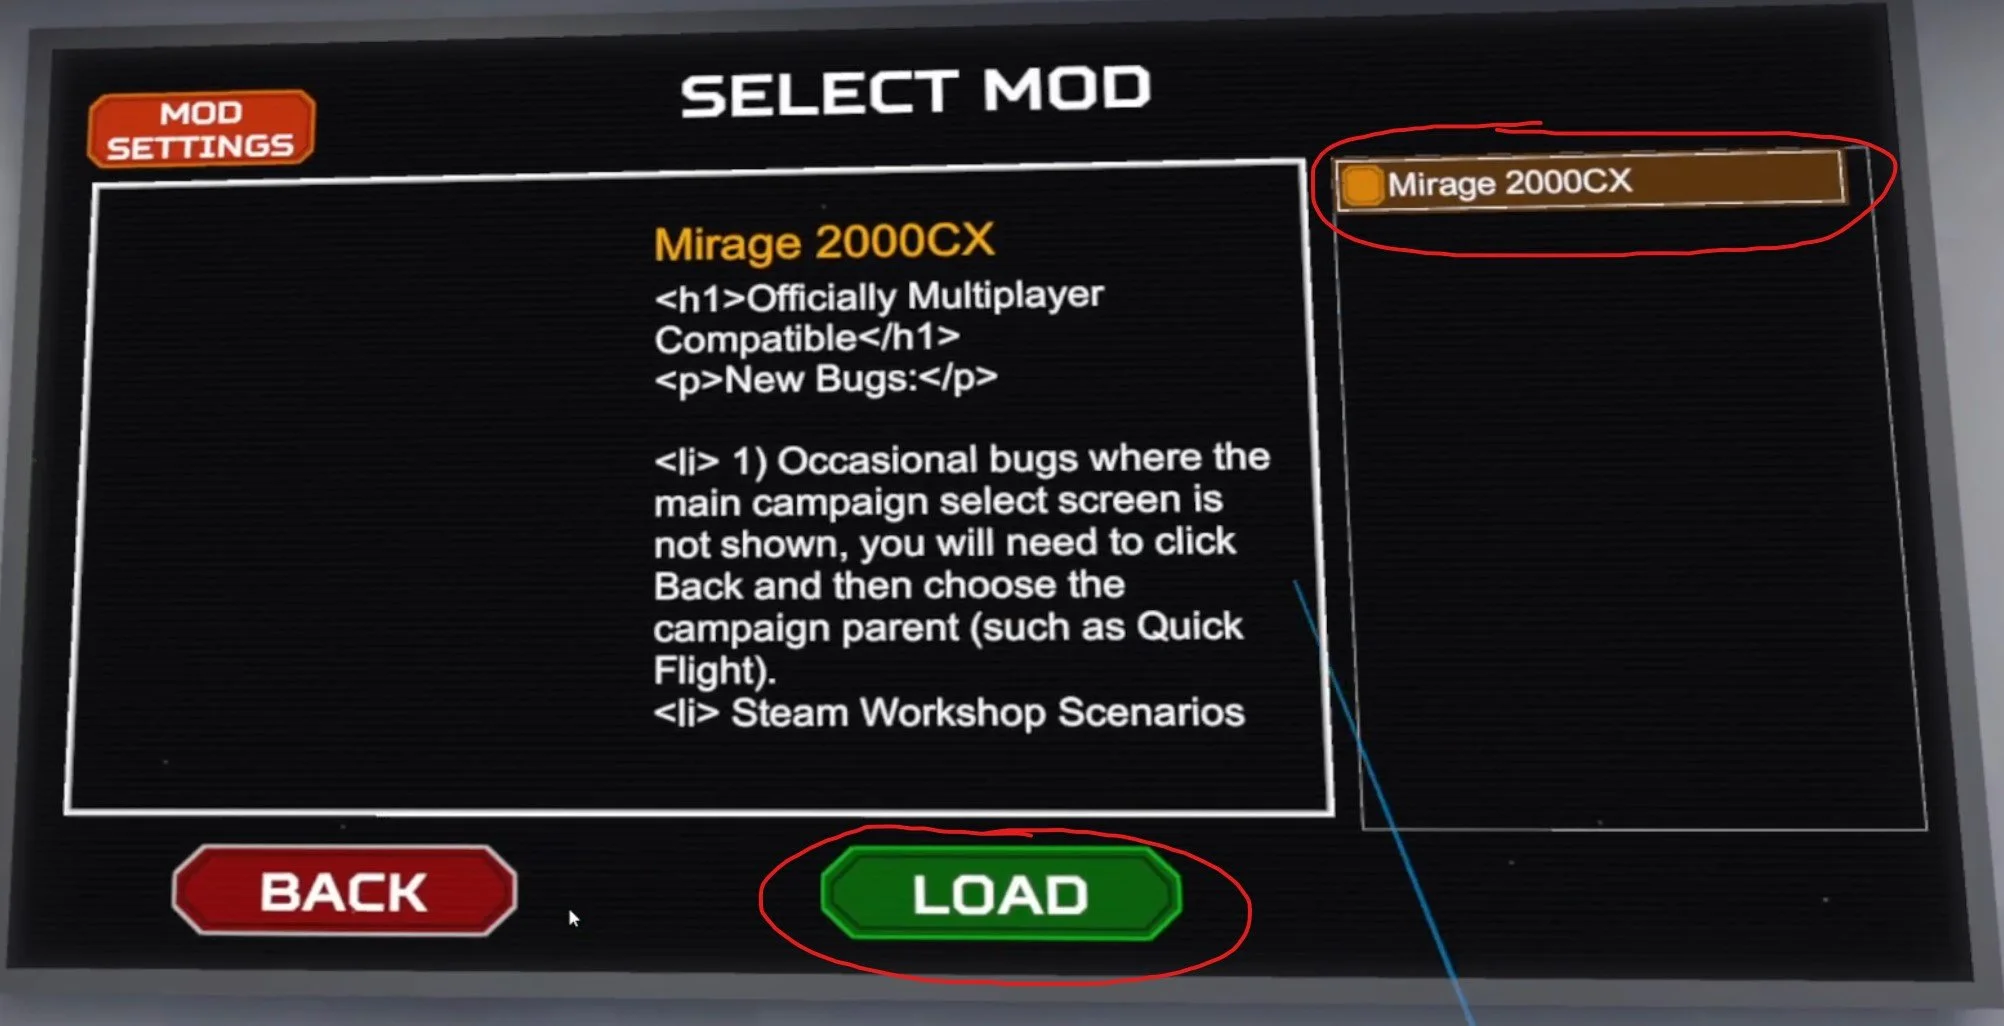
Once the mod is loaded go back and select your pilot as usual. Since this example added a new modded plane to VTOL VR, the Mirage 2000CX is now available to be selected as an aircraft. Other mods may be visible elsewhere, for instance skins should be available when customizing the aircraft that the skin is meant for.

Keep in mind that the mod might not show up immediately after pressing the “Load” button in the mod menu. If you don’t see the mod ingame at first try starting a Quick Flight as another aircraft, or exit and restart the game from the Mod Loader.

Congratulations, you now know how to easily install VTOL VR mods! More mods are coming out all of the time to make VTOL VR even more fun. Thanks to all of the VTOL VR modders out there for their contributions to making this game even better. Enjoy!
3 Epic John Wick VR Games That Make You Feel Like John Wick Himself
Want to feel like John Wick having epic gunfights against a ton of opponents and beat the odds will skill and precision? Well then this list of the 3 Best John Wick VR Games will give you that feeling in the most immersive gaming medium out there, Virtual Reality. You’ll never feel more like John Wick than when you’re playing these games.
Want to feel like John Wick having epic gunfights against a ton of opponents and beat the odds will skill and precision? Well then this list of the 3 Best John Wick VR Games will give you that feeling in the most immersive gaming medium out there, Virtual Reality. You’ll never feel more like John Wick than when you’re playing these games.
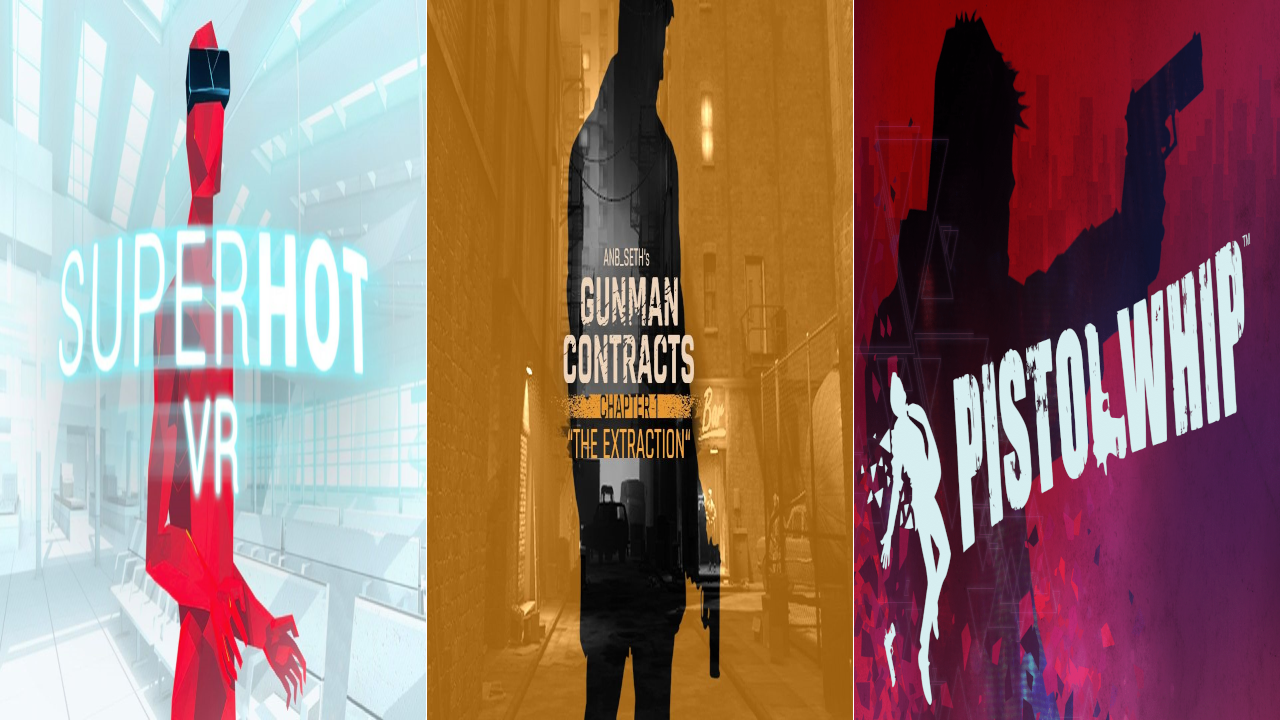
Half Life: Alyx - Gunman Contracts
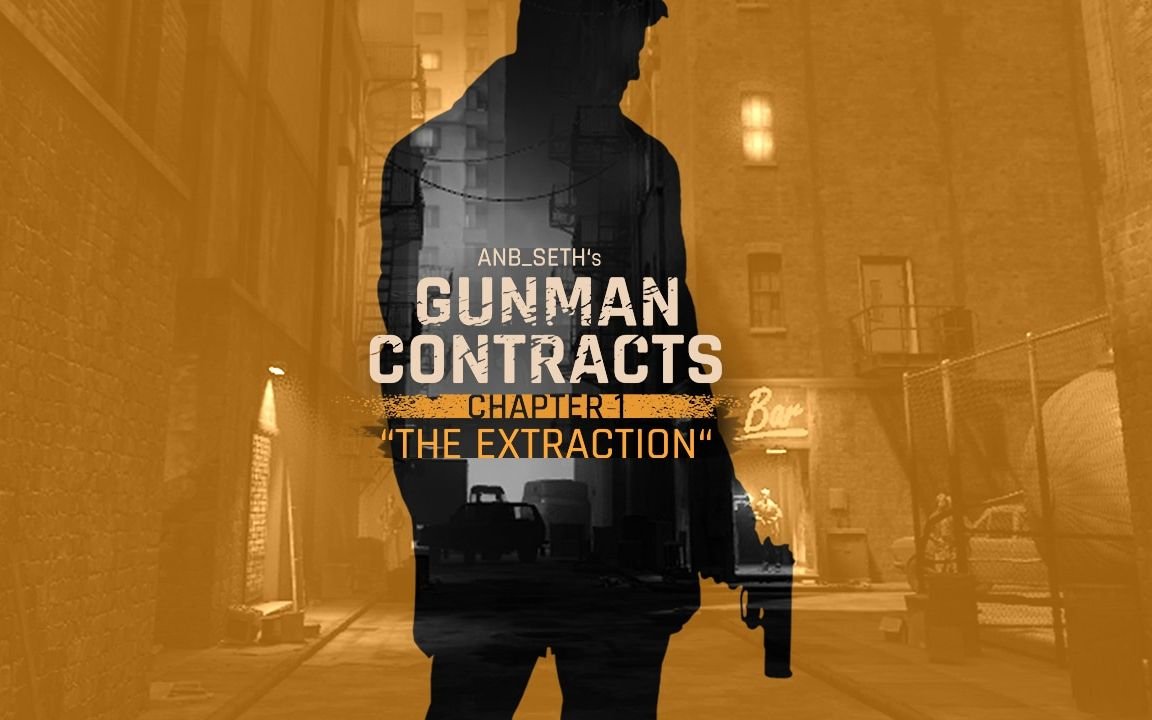
Half-Life: Alyx is considered to be one of the best PCVR shooters out there. It combines a great story, fantastic atmosphere, and great gunplay in an experience that is easy to learn. Half-Life: Alyx also has great modding tools, and a modder called ANB_Seth made a fantastic mod for the game that is the ultimate John Wick VR experience.
It’s called Gunman Contracts, and can be easily installed through the Steam Workshop if you own Half-Life: Alyx. In Gunman Contracts you’re a mercenary with a trusty pistol and a goal that takes you through hordes of goons armed with submachine guns.
Your ammunition is infinite, and all that you have to focus on is fighting your way through these hordes of enemies to your goal. The gunplay is tight and thrilling in Gunman Contracts, and each scenario of the mod takes place in a very John Wick sort of setting. A dingy backstreet bar with dark secrets in the basement, or an art gallery in a hotel run by a criminal.
The sci-fi enemies of Half-Life: Alyx are replaced with goons who react quickly to your presence and are a ton of fun to have a gunfight with. This mod rewards quick thinking, speed, and precision. You’ll feel like John Wick when playing this VR game as you go from room to room firing your pistol.
Pistol Whip
Pistol Whip is a fantastic rhythm based VR game. In it you have a pistol (or two if you want) and are guided forward through a highly stylized environment as enemies appear and try to shoot you down. Music plays the whole time, and the tracks are great too. It feels like you’re John Wick in a movie and the soundtrack is playing during your action scene.
What really makes Pistol Whip a John Wick VR game is the epic dance that you do when advancing through its levels. As the enemies shoot at you, you shoot them back. You constantly need to dodge the projectiles that are coming your way while trying to fire back accurately with your own pistol and reload.
When you begin to master Pistol Whip you feel like John Wick, or like you’re doing some gun-fu. The constant dodging and firing makes you feel like some sort of gun fighting ninja in Virtual Reality. The music helps with this a lot, and every level plays out like an action scene from a John Wick movie. Each level requires precise timing, movement of your body, and precision. That is, if the difficulty setting requires it.
The one downside to Pistol Whip is that the opening difficulty of the game doesn’t quite give you this feeling of being a John Wick assassin. You will probably want to get into Arcade mode and turn the difficulty up with modifiers so that the experience involves a lot of dodging and shooting rather than standing in place and lazily lifting your arm to fire a shot every few seconds. Check out this guide to find out more.
Superhot VR
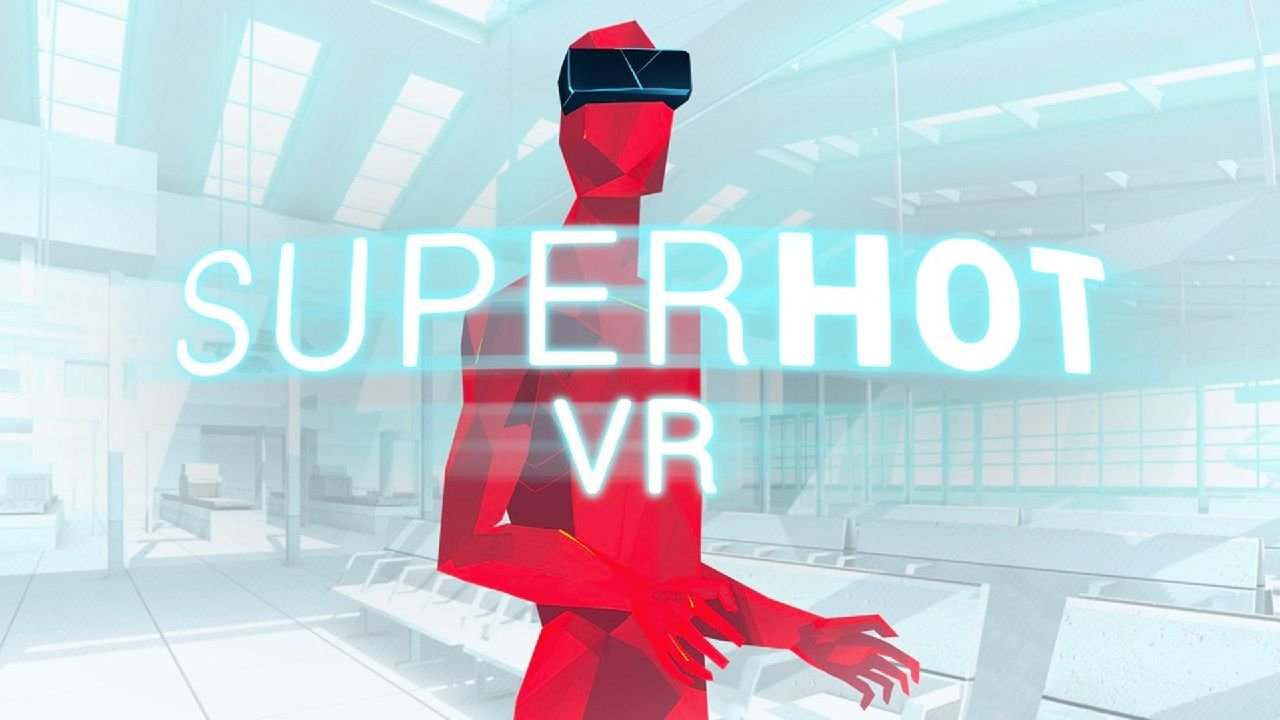
Superhot VR is another fantastic action based VR game that will make you feel like John Wick in Virtual Reality. Unlike Pistol Whip, Superhot VR gives you intense action and forces you to do incredible feats of shooting and fighting right out of the gate. You don’t even need to be particularly fast yourself to pull them off.
This is because Superhot VR pauses time as long as you don’t move. Time only moves as fast as your head and hands do. So if you stand still nothing will happen, but whenever you move, bullets, objects, and enemies move as well. This means you have plenty of time to decide your next move before you do it, or you can just move slowly. So the whole fight plays out like a slow motion action scene with you deciding the pace.
This John Wick VR game is a ton of fun and will definitely make you feel like an elite assassin like John Wick himself. Each encounter plays out like an action movie sequence. No more bullets in your pistol? Throw it at an enemy and grab another. No gun at all? Throw a nearby shuriken at your enemies. Enemy coming at you with a knife? Time your punch precisely before they cut you.
Everything in Superhot VR becomes an intricate dance that you navigate your way through while expertly taking down opponent after opponent. It’s a ton of fun and is a precise and action packed experience. Another great John Wick Virtual Reality game.
There you have it, 3 Epic John Wick VR games. Each of these comes highly recommended from many sources, not just here, and you’re sure to have a good time and feel like a cool action movie hero just like John Wick.
Awesome Gorilla Tag Color Codes and How To Use Them
Want some great looking Gorilla Tag color codes? Maybe you’re wondering how to change your Gorilla Tag color code and make your Monke whatever color you want it to be? Well time for you to enjoy customizing your Monke with Gorilla Tag color codes. Here’s some color codes you can use, and below them in “How To Change Your Gorilla Tag Color Code” you can find out how to use them if you don’t know how.
Want some great looking Gorilla Tag color codes? Maybe you’re wondering how to change your Gorilla Tag color code and make your Monke whatever color you want it to be? Well time for you to enjoy customizing your Monke with Gorilla Tag color codes. Here’s some color codes you can use, and below them in “How To Change Your Gorilla Tag Color Code” you can find out how to use them if you don’t know how.
Some Great Gorilla Tag Color Codes You Can Use
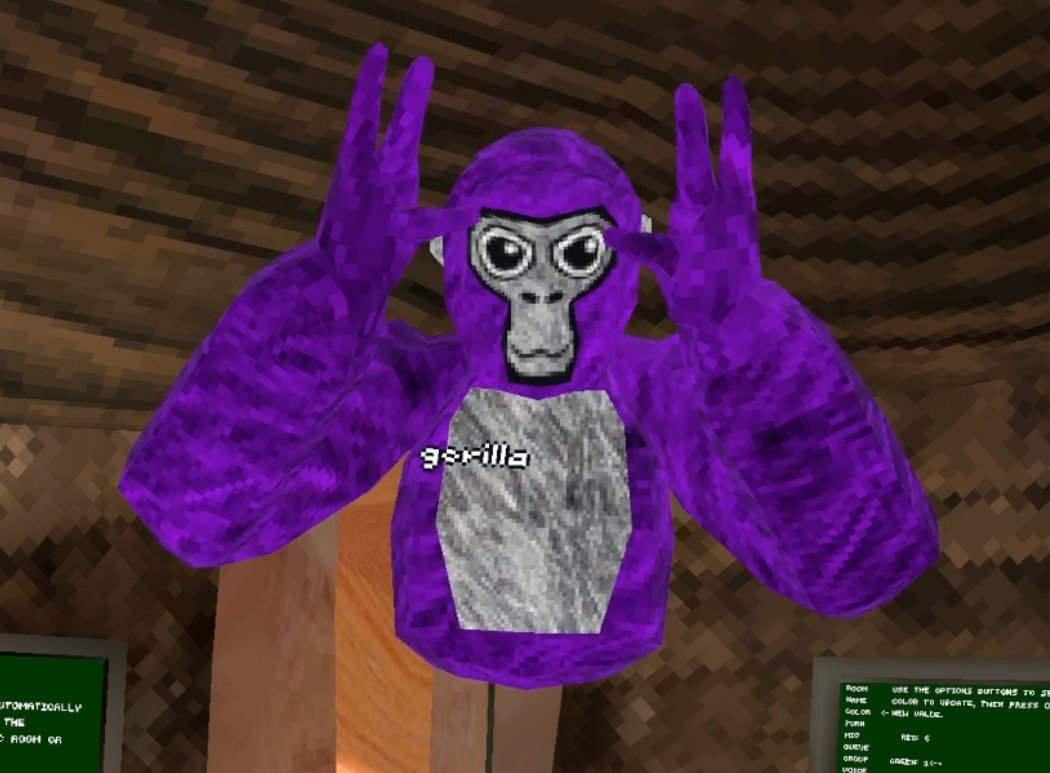
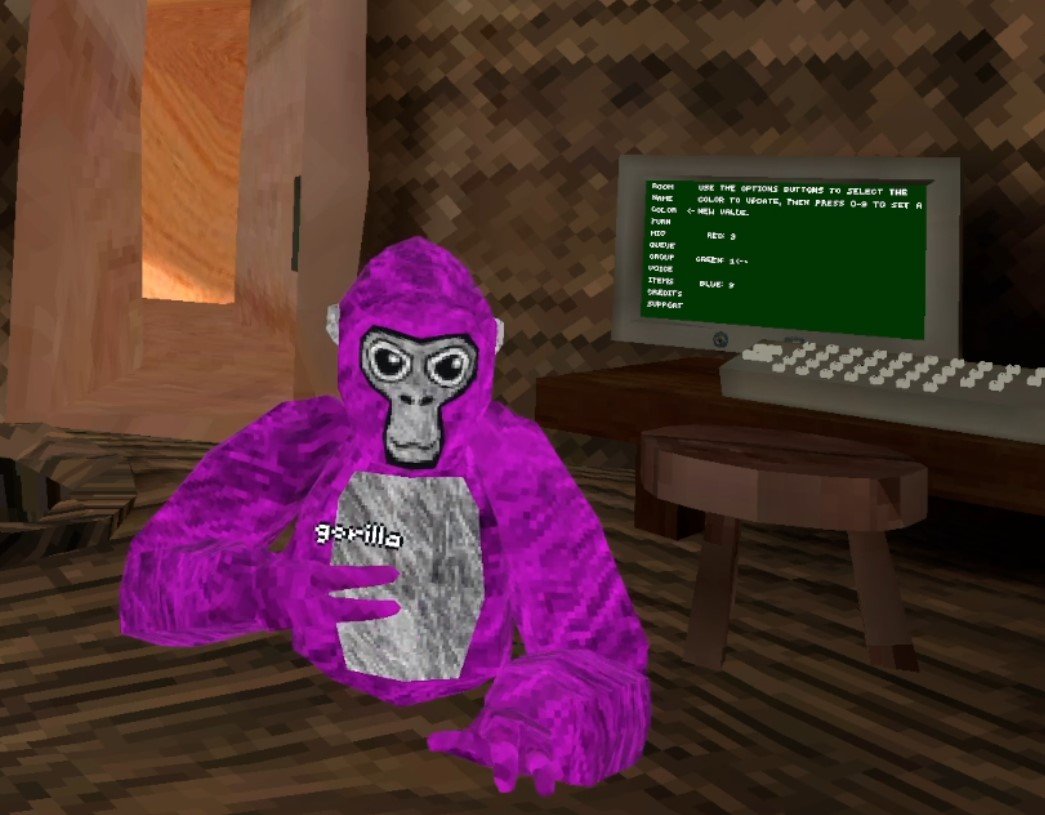
Purple - 4 0 9
Purple is such a classic color. It really stands out and oozes luxury. Purple used to be the color of Emperors and Kings back since Roman times. So if you want to feel like royalty 4 0 9 might be the color code for you.
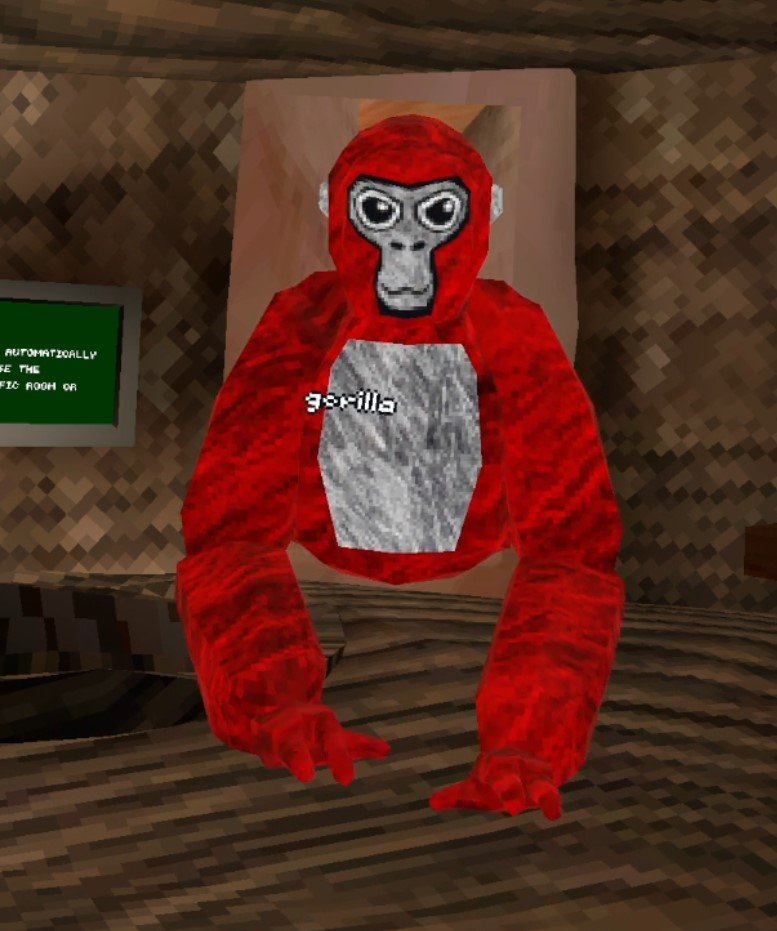
Red - 9 0 0
Alright so this might not be the most complicated color code, but red monke just looks great. Just looking so red must make you go faster, right? Red is a really aggressive color, and is kind of intimidating. Also if a tagged player just glances at you and doesn’t look closely, you look a bit like a tagged lava monke and they might think you’ve already been infected in the infected game mode.
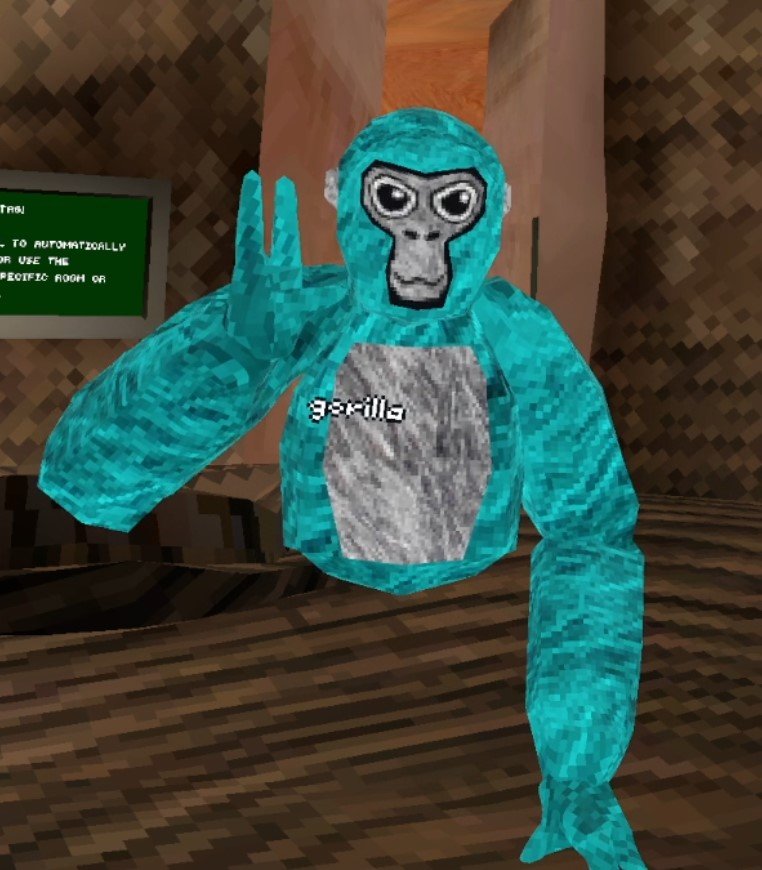
Teal - 1 9 9
This color code is a nice light teal, almost blue even. If you’re a really chill monke this is a nice calming color. Maybe if you’re just enjoying some mini games and don’t want to go really hard and just have a relaxing time, then this could be the relaxing color code for your monke.
Black - 0 0 0
Black is what you get when all colors are gone, so setting all color codes to 0 makes black. Black is the fur color of a lot of actual gorillas, and so if you want to really be like a lot of real gorillas out there go simple and go with black. Black has always looked good.

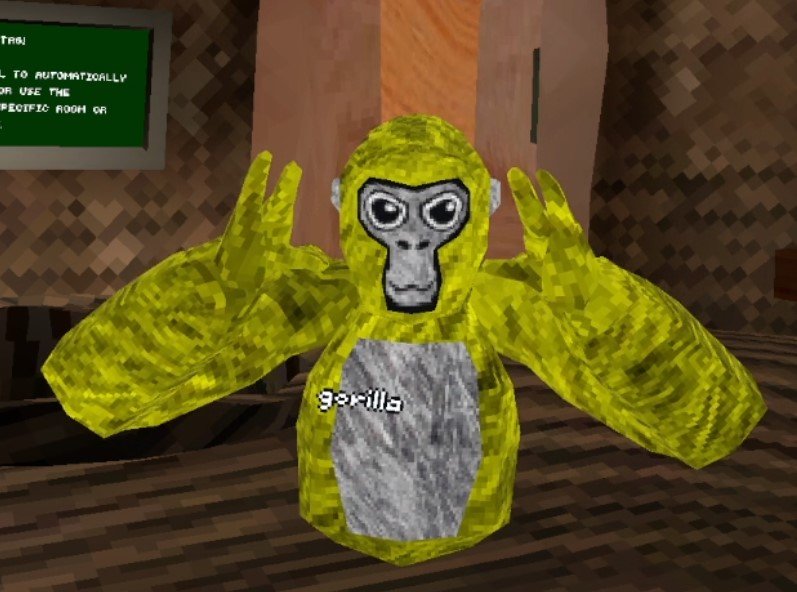
Yellow - 9 9 0
Red and Green make yellow, so full red and full green makes a really bright yellow color. Yellow is a color that reminds of vibrant nature. You’re going to stand out with yellow as your color, and that’s alright.
Pink - 9 1 9
It’s Pink, who doesn’t like a nice pink? Pink is the color of harmony and friendship, so if you want to make some friends in Gorilla Tag, don’t be afraid to be pink.
White - 9 9 9
White monke, aka old monke, is another classic. White is actually just all colors combined together and so if you set all the colors to 9 then you get white. You can crack jokes about “back in my day” or try to sound like an old geezer with this color code on. Otherwise it looks pretty great on it’s own, and blends in with the fur your monke always has on their chest and face.
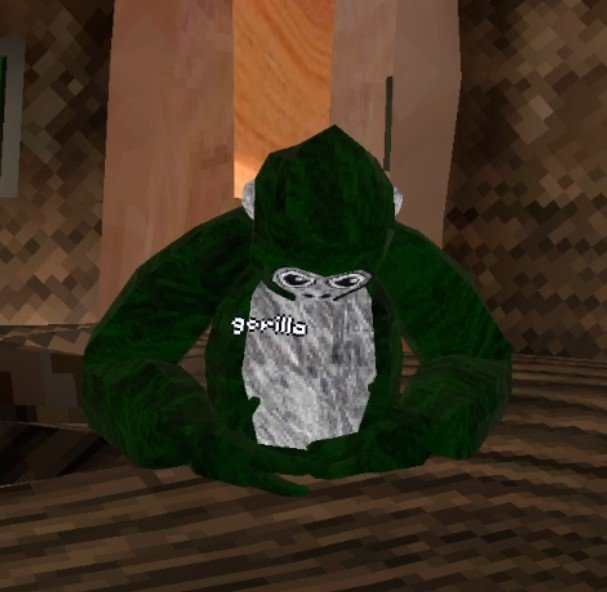
Dark Green - 0 2 0
Ah, the camouflage color. If you set your color code to 0 2 0 you’ll basically blend in with the scoreboard. Kind of a meme, but then again maybe blending in with the environment can give you a split second of an advantage when someone is trying to tag you.
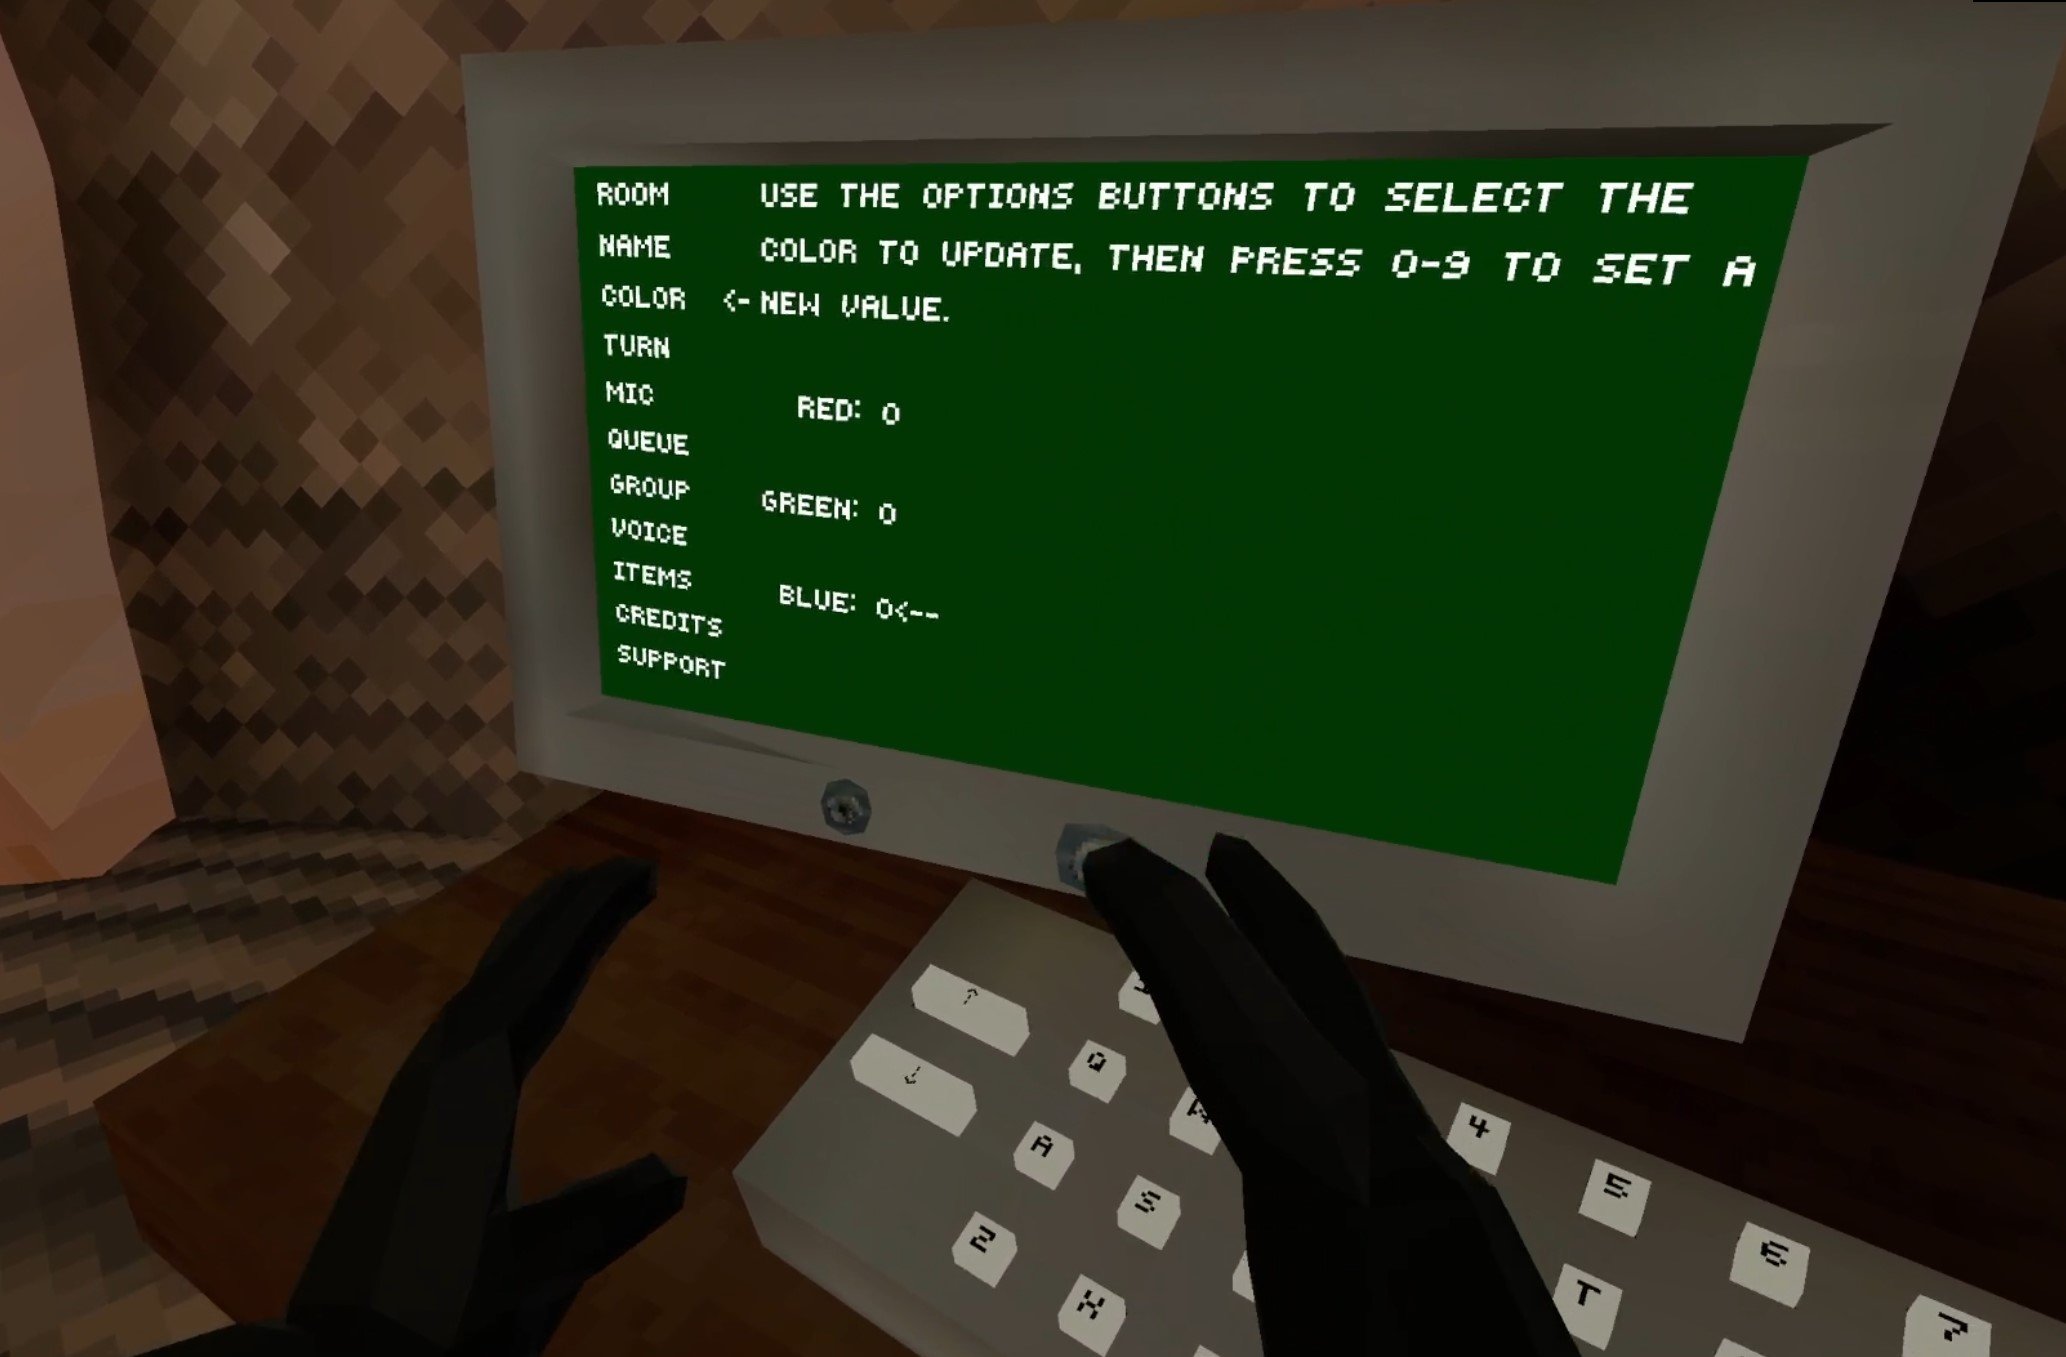
How To Change Your Gorilla Tag Color Code
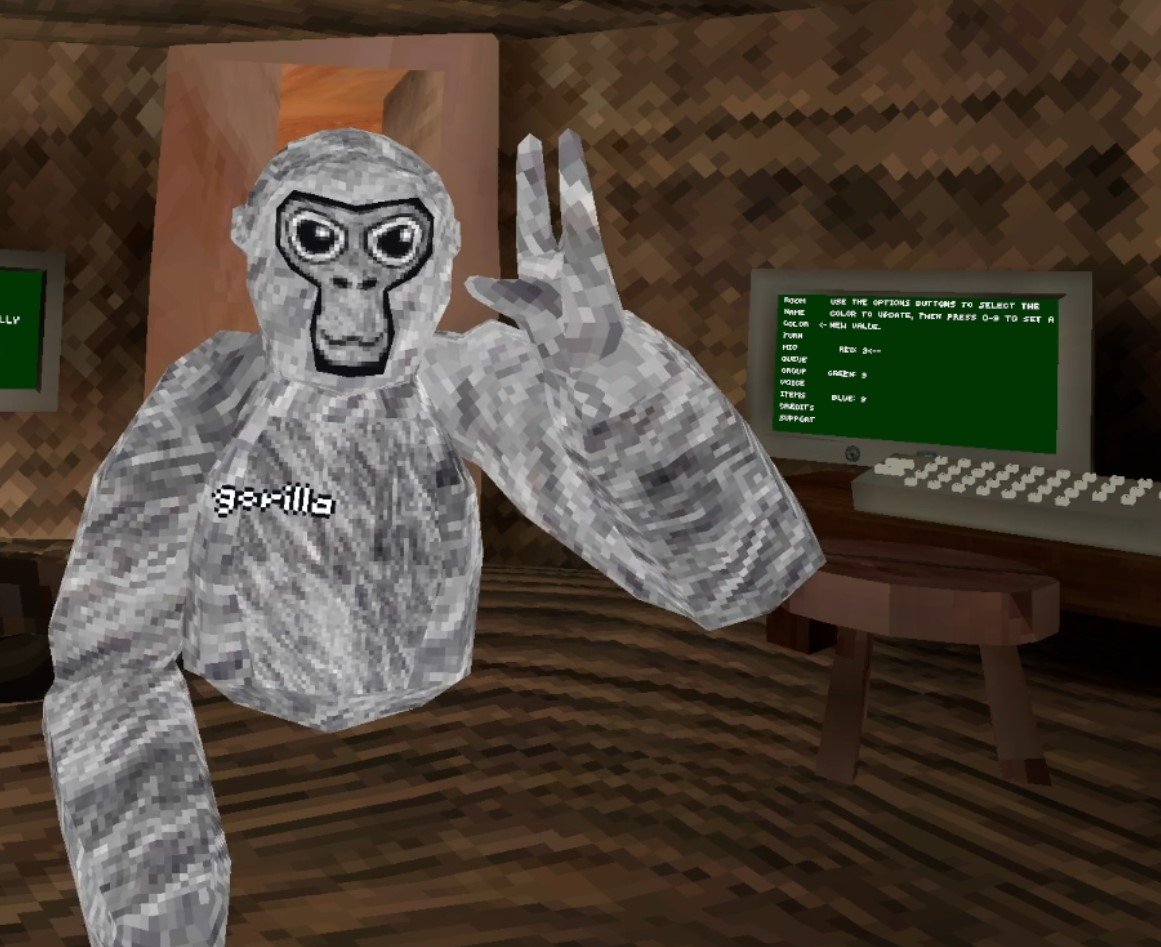
Changing your Gorilla Tag color code is easy! Just start the game. You’ll be in your treehouse as always. Then go across the room to the PC.
When you’re there use the arrows on the left side to scroll down to “Color” and you’ll see the three color Code settings. They are Red, Green, and Blue. Press Option 1 to select Red, and then hit a number to change your red number. The same goes for Green and Blue, except Green is Option 2, and Blue is Option 3.

There you go, some awesome Gorilla Tag color codes and how to change them so that your Monke can look however you like. Enjoy!
A Relaxing Farming Simulator VR Game - Across The Valley
A lot of VR experiences are really intense, and that’s okay. Though sometimes you might want something a little more relaxing, something that, while virtual, still reminds you of where we came from, of the earth and the animals and plants. Well if you want to live the fantasy of a serene farmer in VR then here’s a great relaxing farming simulator VR game.
It’s called Across the Valley and it has everything you’d expect from a farming simulator VR game while also being easy to learn, very pleasing to look at, and really makes you feel like a farmer with a daily routine to take care of the plants and animals. Across the Valley is available on Steam VR for PCVR and PSVR2.
Farming Simulator VR Beginnings
You start Across The Valley with a huge farm. Literally too huge, a ton of animals, a large amount of land with plants in all different phases of growth. It’s definitely not the beginning that you would expect from a VR farming simulator. It’s all a bit overwhelming to be honest, and you’ll spend the day trying to figure out how things work as you try to tend to the massive amount of crops that beg for your attention.

What you’ll likely notice first is the main quirk of Across The Valley, there is no slide movement. There isn’t even free teleporting movement. You can only teleport to set points outside or in any building. In a landscape of modern VR games that have come to encourage greater and greater freedom of movement, this makes Across The Valley an outlier.

Trying to think like the creators of this game over at FusionPlay, I can’t help but think that the programmers and designers were happy to hear this decision. There’s no need to circle the farm in with invisible walls or mountains. No need to implement and test collision on every square inch of the farm. With all player interaction constrained to small areas there is no need to worry about anything outside of these areas. This probably saved the developers quite a few headaches and a lot of work.
Luckily the player doesn’t suffer from this nearly as much as you might think. Even when you’re used to freely sliding and teleporting around the environment as you please, Across The Valley doesn’t make you miss these things once you realize how the movement works. You activate the teleport by holding a button or joystick, and then point your controller at the thing you want to teleport to and let go. Every seasoned VR gamer is familiar with this, and it’s easy to do.
You still have plenty of opportunities to look at the beautiful farm, and everything you would want to teleport to is highlighted once you hit the teleport input, so it’s not confusing, and you never have to guess where you can and cannot teleport.

Prompts will appear to tell you about the various tools, plants, and animals you come into contact with on your farm. They’re helpful, and not too much fumbling with the controls is needed. Though in a few cases you might wonder how to do basic things like plant seeds, you won’t easily get stuck and confused as to how to do something after a little bit of playing around. We all know basically how plants work, and that basic knowledge is all Across the Valley really requires. Even if you do get stuck there are even more in depth tutorials to come.
You’ll notice as you mess around on the huge farm that the sky starts getting darker. It becomes harder to see what you’re doing as you’re getting used to the controls. Luckily this doesn’t last for long, and all of a sudden you find yourself inside your house next to your bed.

A bird appears and tells you that you were dreaming! Your farm is just beginning, and you’ve only got a single piece of farmable land, but one day you might have that huge farm that you dreamed of.
This is a very fascinating way to frame the beginning of Across The Valley. Having a small taste of what a thriving farm feels like lets you know early on what is possible, and what your goals are. It’s also a little bit of a relief. Having so much VR Farm to deal with so early on was a bit overwhelming. Luckily now you have plenty of time to come to grips with the basics.
Starting Your VR Farm (For Real This Time)
The bird will tell you to go to the Task Board, and what you’ll quickly find is that the Task Board dictates what you do in this game. Your first task is simply to clear your only plot of land and plant some wheat.

The tutorials kick in full swing here, and it is pretty easy to understand, especially with your prior dreaming experience, how to actually perform the tasks that the board gives you. The tutorials in Across The Valley are great, and the whole game functions as a sort of tutorial. Whenever you unlock something new the task that you get to interact with that new thing will always outline exactly how to care for it be they a wheat patch or a cow.

Doing tasks unlocks more things that you can buy for your farm like more plots of land for planting and more animals. Speaking of animals, you get your first one after planting your first crop of wheat, a chicken.

You receive another task to water and feed your new chick, and also give them a little love with some petting. All animals aren’t bought full grown. You’ll need to invest some more time and resources into caring for them before they grow up and start producing products for you to sell. After caring for your chick, your last task for your first day is to go to sleep.
Time passes in each day, and each time you go to sleep animals grow larger, animal feed and water is depleted, and plants grow and require additional care.

The Rhythms of this VR Farming Simulator
The downside of these tutorials being done through tasks is that you are fairly railroaded in what you can do, which at first is no problem. You’ve hardly got many options after all. Still, this will persist, and you cannot ignore tasks. You have to do them in order to unlock more plots of farmable land and animals. The only way to progress is to do tasks.

So you can plant whatever you like and spend as many days as you like nurturing what animals you have and that’s fine. There’s no penalty for taking your time, which is good, but you will eventually have to do the Tasks to uncover all of what Across The Valley has to offer. In a way this is good. For a relaxing VR Farming Simulator, you might want to have the decision making be as minimal as possible. The task system achieves this by telling you exactly what to grow and what to do.
On the other hand if you were excited to make decisions as a VR Farmer in Across The Valley, the only real decision you make is what crops to plant. Crops have a variety of uses as animal feed, and take different times to grow and grow at different rates. So there is some minor decision making there. Generally though, you couldn’t mess up so badly that you fail the game. Across The Valley is a relaxing game, and that means there really is no way to fail it.

When playing it I slept for about 5 days in a row, and while my crops were all gone and needed to be replanted, all of the animals were completely fine without care. They even grew in the meantime. So you can’t mess up so badly that you lose everything you’ve gained. Whether that is a good thing or not is up to you. This reveals that Across The Valley, as you might have guessed from the look of the game, isn’t a serious VR Farming Simulator. It’s a fantasy of idyllic life in the country, and as far as fantasies go this is one that can drag you in.
You’ll settle into the rhythm of the game. Get up, check your task, and care for the plants by weeding or watering or whatever they need done to them. Maybe you’ll have a harvest and then have to reseed the earth. Then you care for your animals. Water them, pet them, feed them, and maybe shovel some manure. Chickens produce an egg a day, and sometimes you’ll shear the sheep or milk the cow.

Then eventually you go to bed and do it again. Across The Valley builds rhythms on top of rhythms. You grow a checklist in your mind of what needs doing every day, and you go and do it. Over time you complete tasks and your checklist grows.
That’s what Across The Valley really is. It’s not a complicated game. It’s not a true simulator of VR Farming or a VR Farm. It is compelling though, and if you’re looking to turn your mind off and immerse yourself in the basic routines of an idyllic farm in immersive Virtual Reality, then Across The Valley delivers.