


3 Epic John Wick VR Games That Make You Feel Like John Wick Himself
Want to feel like John Wick having epic gunfights against a ton of opponents and beat the odds will skill and precision? Well then this list of the 3 Best John Wick VR Games will give you that feeling in the most immersive gaming medium out there, Virtual Reality. You’ll never feel more like John Wick than when you’re playing these games.
Want to feel like John Wick having epic gunfights against a ton of opponents and beat the odds will skill and precision? Well then this list of the 3 Best John Wick VR Games will give you that feeling in the most immersive gaming medium out there, Virtual Reality. You’ll never feel more like John Wick than when you’re playing these games.
Half Life: Alyx - Gunman Contracts

Half-Life: Alyx is considered to be one of the best PCVR shooters out there. It combines a great story, fantastic atmosphere, and great gunplay in an experience that is easy to learn. Half-Life: Alyx also has great modding tools, and a modder called ANB_Seth made a fantastic mod for the game that is the ultimate John Wick VR experience.
It’s called Gunman Contracts, and can be easily installed through the Steam Workshop if you own Half-Life: Alyx. In Gunman Contracts you’re a mercenary with a trusty pistol and a goal that takes you through hordes of goons armed with submachine guns.
Your ammunition is infinite, and all that you have to focus on is fighting your way through these hordes of enemies to your goal. The gunplay is tight and thrilling in Gunman Contracts, and each scenario of the mod takes place in a very John Wick sort of setting. A dingy backstreet bar with dark secrets in the basement, or an art gallery in a hotel run by a criminal.
The sci-fi enemies of Half-Life: Alyx are replaced with goons who react quickly to your presence and are a ton of fun to have a gunfight with. This mod rewards quick thinking, speed, and precision. You’ll feel like John Wick when playing this VR game as you go from room to room firing your pistol.
Pistol Whip
Pistol Whip is a fantastic rhythm based VR game. In it you have a pistol (or two if you want) and are guided forward through a highly stylized environment as enemies appear and try to shoot you down. Music plays the whole time, and the tracks are great too. It feels like you’re John Wick in a movie and the soundtrack is playing during your action scene.
What really makes Pistol Whip a John Wick VR game is the epic dance that you do when advancing through its levels. As the enemies shoot at you, you shoot them back. You constantly need to dodge the projectiles that are coming your way while trying to fire back accurately with your own pistol and reload.
When you begin to master Pistol Whip you feel like John Wick, or like you’re doing some gun-fu. The constant dodging and firing makes you feel like some sort of gun fighting ninja in Virtual Reality. The music helps with this a lot, and every level plays out like an action scene from a John Wick movie. Each level requires precise timing, movement of your body, and precision. That is, if the difficulty setting requires it.
The one downside to Pistol Whip is that the opening difficulty of the game doesn’t quite give you this feeling of being a John Wick assassin. You will probably want to get into Arcade mode and turn the difficulty up with modifiers so that the experience involves a lot of dodging and shooting rather than standing in place and lazily lifting your arm to fire a shot every few seconds. Check out this guide to find out more.
Superhot VR

Superhot VR is another fantastic action based VR game that will make you feel like John Wick in Virtual Reality. Unlike Pistol Whip, Superhot VR gives you intense action and forces you to do incredible feats of shooting and fighting right out of the gate. You don’t even need to be particularly fast yourself to pull them off.
This is because Superhot VR pauses time as long as you don’t move. Time only moves as fast as your head and hands do. So if you stand still nothing will happen, but whenever you move, bullets, objects, and enemies move as well. This means you have plenty of time to decide your next move before you do it, or you can just move slowly. So the whole fight plays out like a slow motion action scene with you deciding the pace.
This John Wick VR game is a ton of fun and will definitely make you feel like an elite assassin like John Wick himself. Each encounter plays out like an action movie sequence. No more bullets in your pistol? Throw it at an enemy and grab another. No gun at all? Throw a nearby shuriken at your enemies. Enemy coming at you with a knife? Time your punch precisely before they cut you.
Everything in Superhot VR becomes an intricate dance that you navigate your way through while expertly taking down opponent after opponent. It’s a ton of fun and is a precise and action packed experience. Another great John Wick Virtual Reality game.
There you have it, 3 Epic John Wick VR games. Each of these comes highly recommended from many sources, not just here, and you’re sure to have a good time and feel like a cool action movie hero just like John Wick.
Awesome Gorilla Tag Color Codes and How To Use Them
Want some great looking Gorilla Tag color codes? Maybe you’re wondering how to change your Gorilla Tag color code and make your Monke whatever color you want it to be? Well time for you to enjoy customizing your Monke with Gorilla Tag color codes. Here’s some color codes you can use, and below them in “How To Change Your Gorilla Tag Color Code” you can find out how to use them if you don’t know how.
Want some great looking Gorilla Tag color codes? Maybe you’re wondering how to change your Gorilla Tag color code and make your Monke whatever color you want it to be? Well time for you to enjoy customizing your Monke with Gorilla Tag color codes. Here’s some color codes you can use, and below them in “How To Change Your Gorilla Tag Color Code” you can find out how to use them if you don’t know how.
Some Great Gorilla Tag Color Codes You Can Use
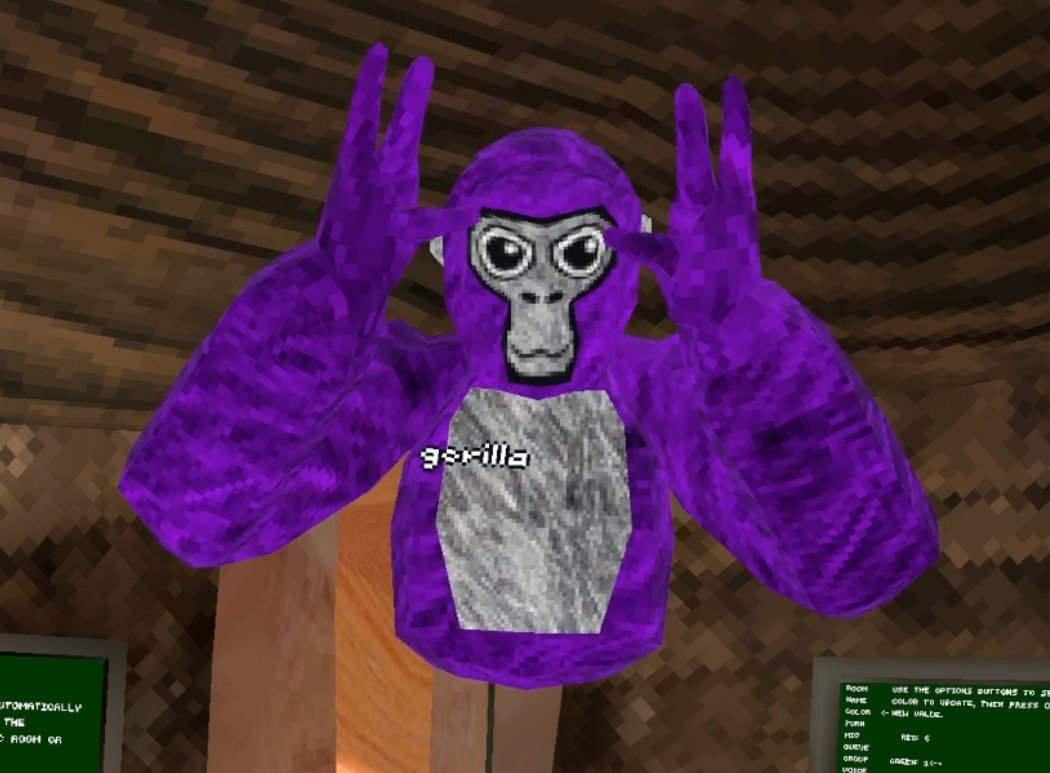
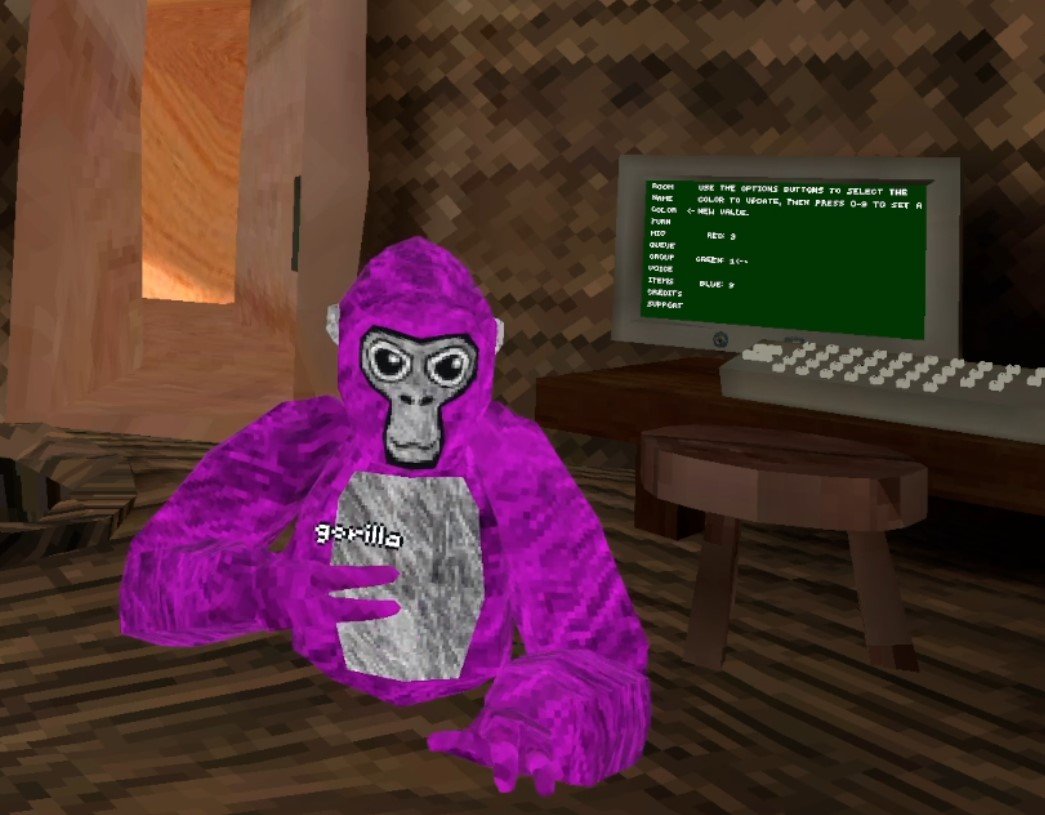
Purple - 4 0 9
Purple is such a classic color. It really stands out and oozes luxury. Purple used to be the color of Emperors and Kings back since Roman times. So if you want to feel like royalty 4 0 9 might be the color code for you.
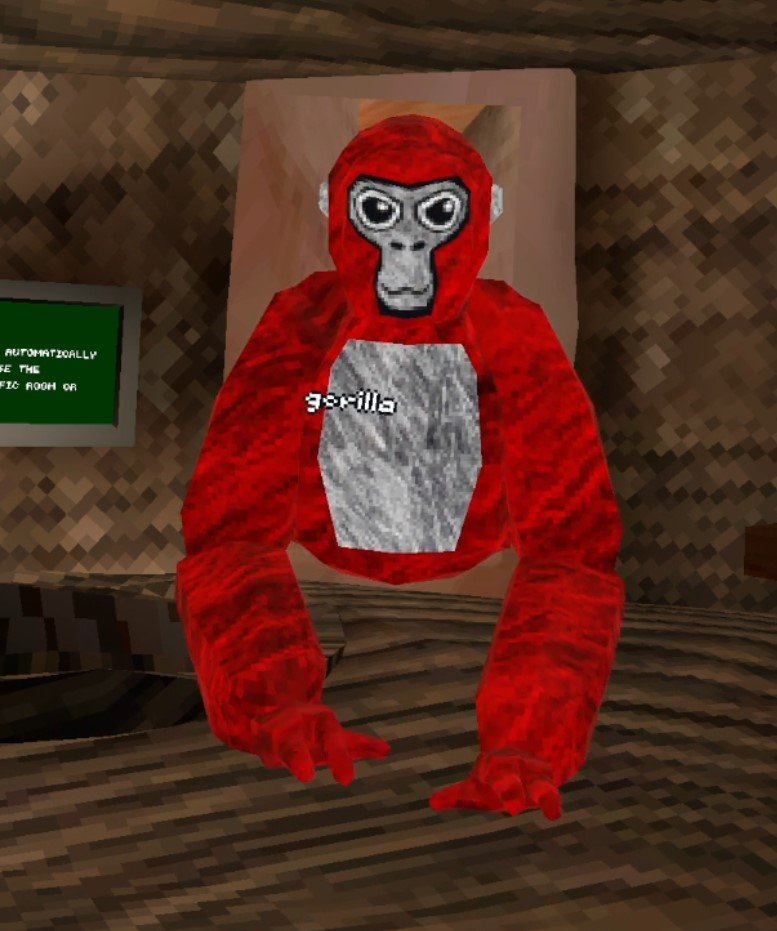
Red - 9 0 0
Alright so this might not be the most complicated color code, but red monke just looks great. Just looking so red must make you go faster, right? Red is a really aggressive color, and is kind of intimidating. Also if a tagged player just glances at you and doesn’t look closely, you look a bit like a tagged lava monke and they might think you’ve already been infected in the infected game mode.
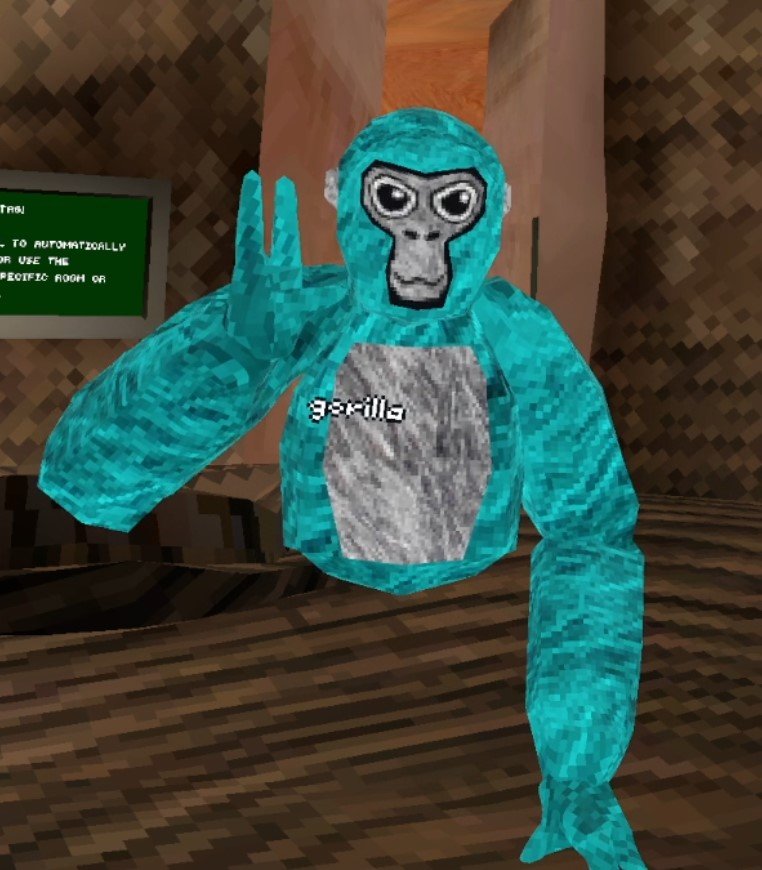
Teal - 1 9 9
This color code is a nice light teal, almost blue even. If you’re a really chill monke this is a nice calming color. Maybe if you’re just enjoying some mini games and don’t want to go really hard and just have a relaxing time, then this could be the relaxing color code for your monke.
Black - 0 0 0
Black is what you get when all colors are gone, so setting all color codes to 0 makes black. Black is the fur color of a lot of actual gorillas, and so if you want to really be like a lot of real gorillas out there go simple and go with black. Black has always looked good.

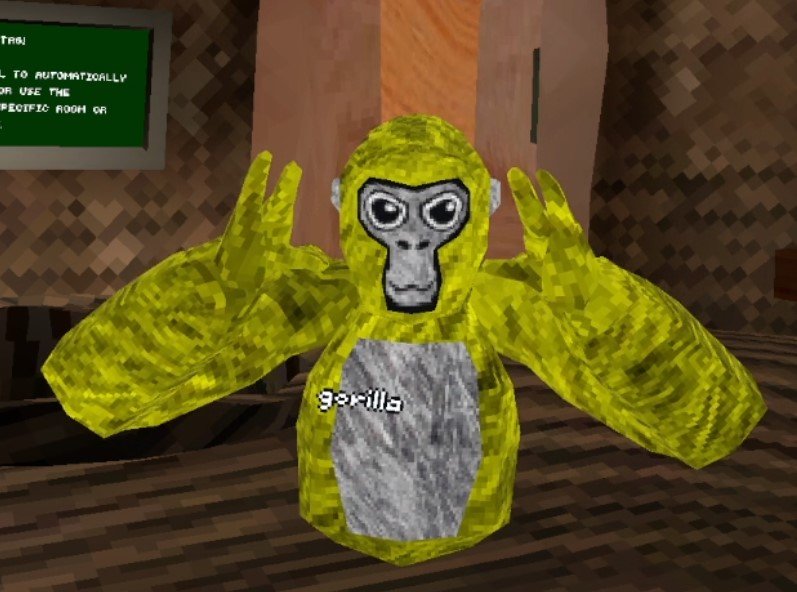
Yellow - 9 9 0
Red and Green make yellow, so full red and full green makes a really bright yellow color. Yellow is a color that reminds of vibrant nature. You’re going to stand out with yellow as your color, and that’s alright.
Pink - 9 1 9
It’s Pink, who doesn’t like a nice pink? Pink is the color of harmony and friendship, so if you want to make some friends in Gorilla Tag, don’t be afraid to be pink.
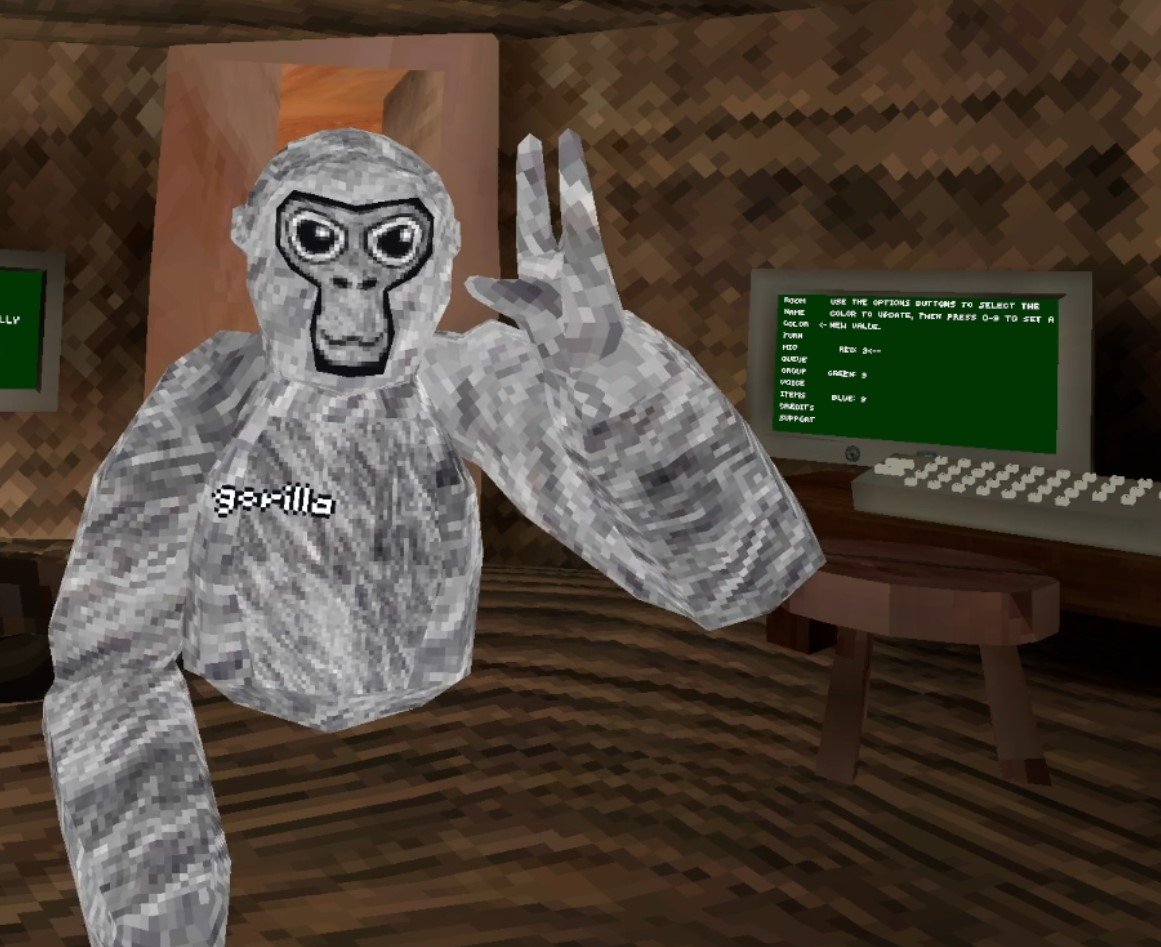
White - 9 9 9
White monke, aka old monke, is another classic. White is actually just all colors combined together and so if you set all the colors to 9 then you get white. You can crack jokes about “back in my day” or try to sound like an old geezer with this color code on. Otherwise it looks pretty great on it’s own, and blends in with the fur your monke always has on their chest and face.
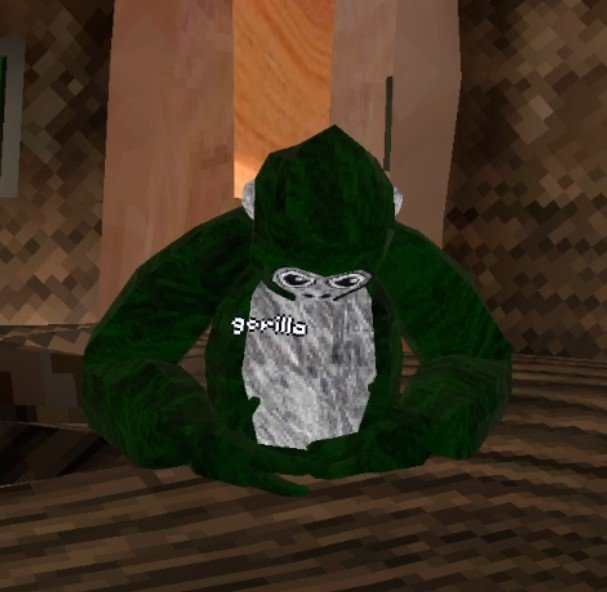
Dark Green - 0 2 0
Ah, the camouflage color. If you set your color code to 0 2 0 you’ll basically blend in with the scoreboard. Kind of a meme, but then again maybe blending in with the environment can give you a split second of an advantage when someone is trying to tag you.
How To Change Your Gorilla Tag Color Code
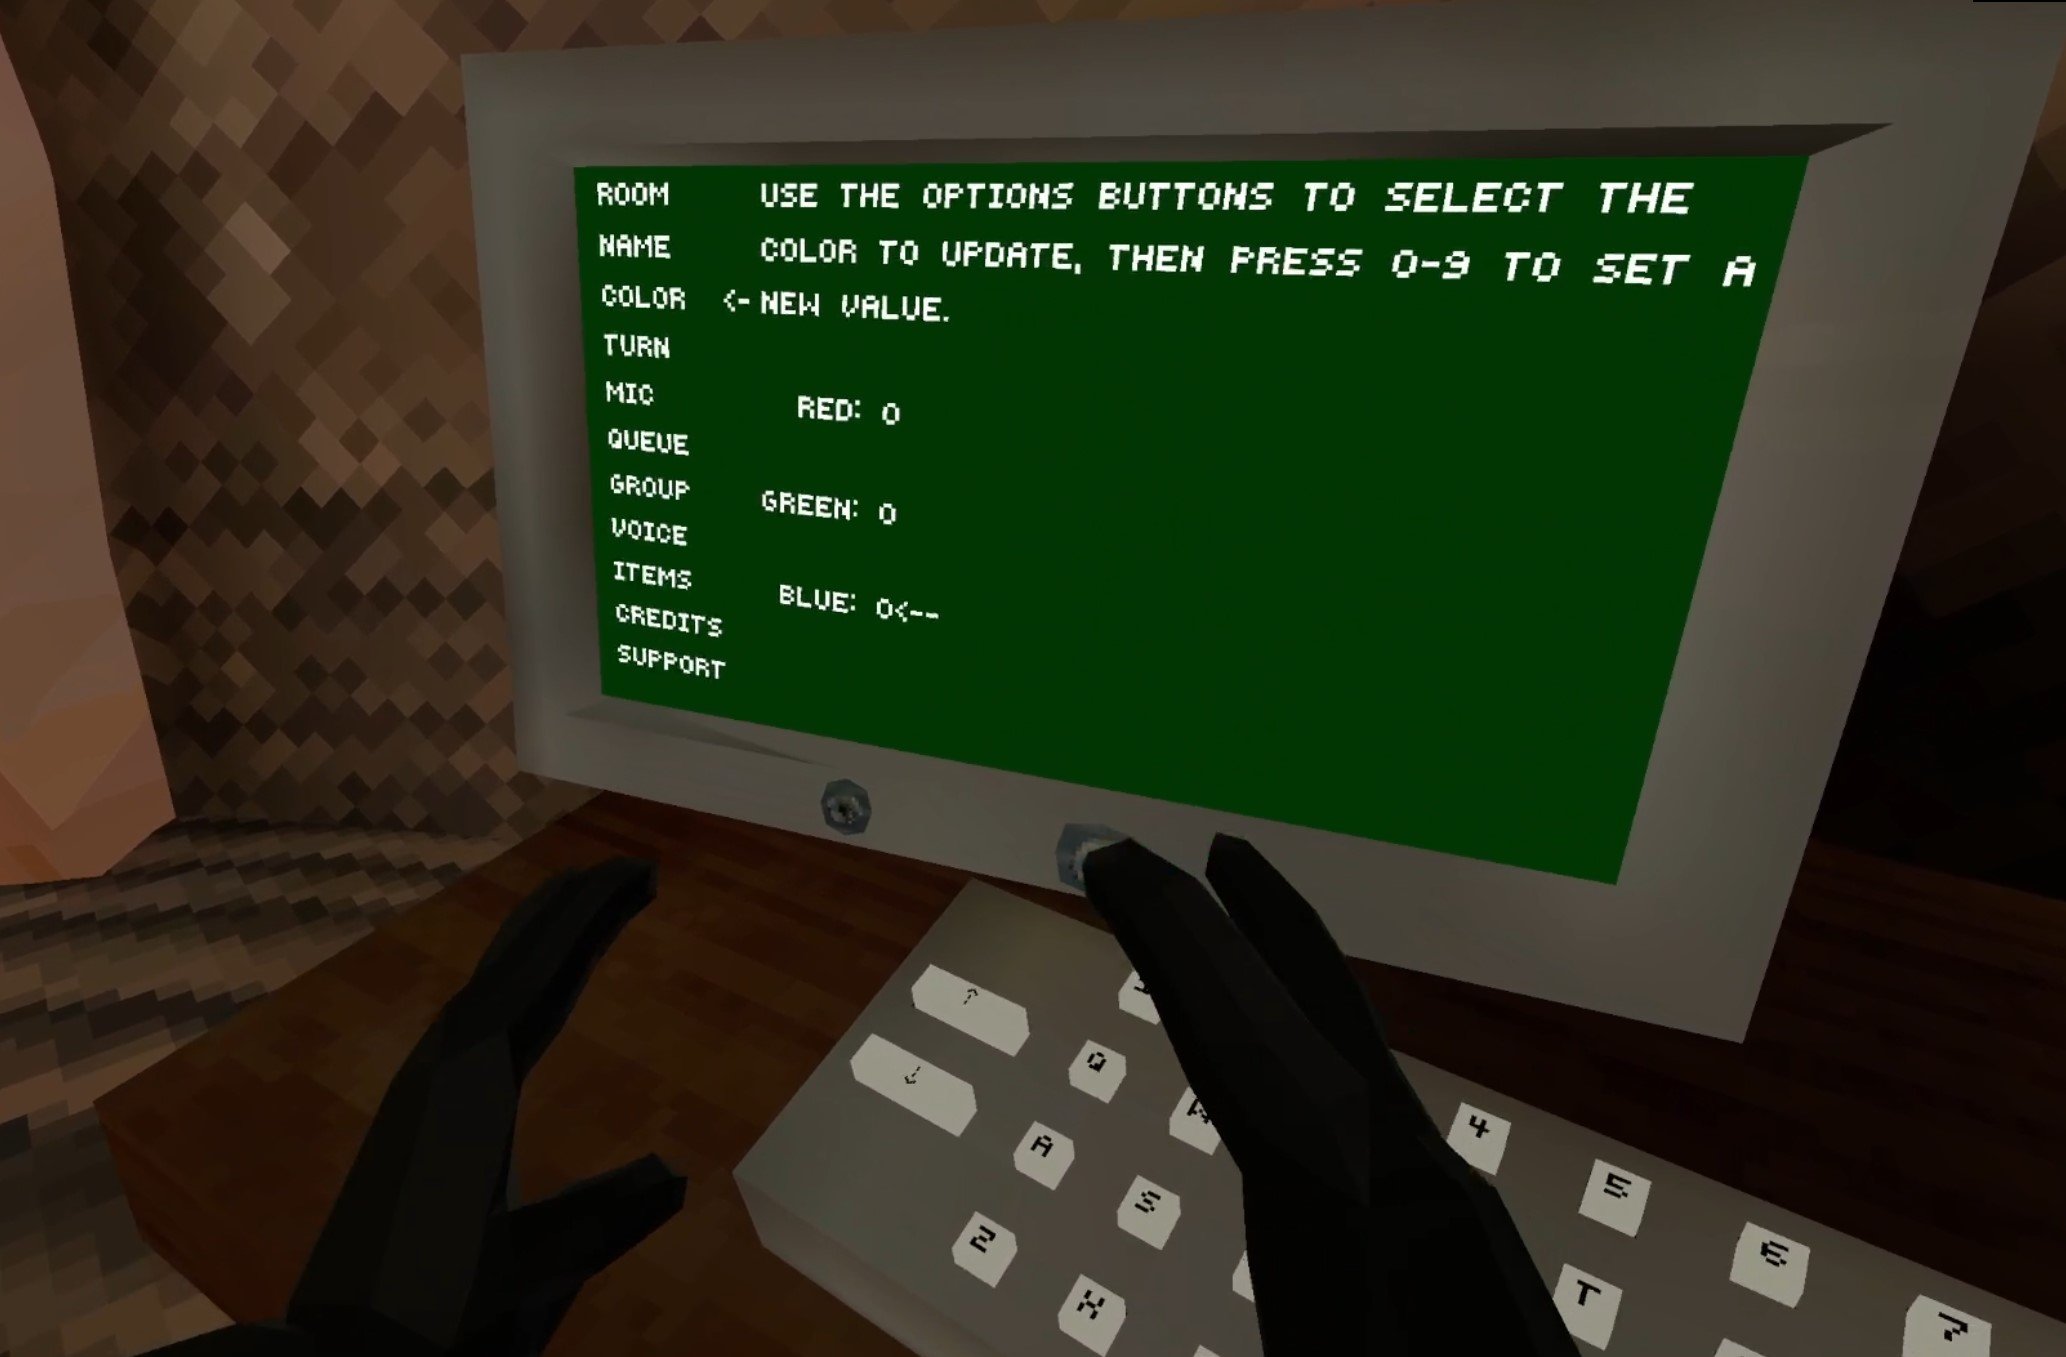
Changing your Gorilla Tag color code is easy! Just start the game. You’ll be in your treehouse as always. Then go across the room to the PC.
When you’re there use the arrows on the left side to scroll down to “Color” and you’ll see the three color Code settings. They are Red, Green, and Blue. Press Option 1 to select Red, and then hit a number to change your red number. The same goes for Green and Blue, except Green is Option 2, and Blue is Option 3.

There you go, some awesome Gorilla Tag color codes and how to change them so that your Monke can look however you like. Enjoy!
A Relaxing Farming Simulator VR Game - Across The Valley
A lot of VR experiences are really intense, and that’s okay. Though sometimes you might want something a little more relaxing, something that, while virtual, still reminds you of where we came from, of the earth and the animals and plants. Well if you want to live the fantasy of a serene farmer in VR then here’s a great relaxing farming simulator VR game.
It’s called Across the Valley and it has everything you’d expect from a farming simulator VR game while also being easy to learn, very pleasing to look at, and really makes you feel like a farmer with a daily routine to take care of the plants and animals. Across the Valley is available on Steam VR for PCVR and PSVR2.
Farming Simulator VR Beginnings
You start Across The Valley with a huge farm. Literally too huge, a ton of animals, a large amount of land with plants in all different phases of growth. It’s definitely not the beginning that you would expect from a VR farming simulator. It’s all a bit overwhelming to be honest, and you’ll spend the day trying to figure out how things work as you try to tend to the massive amount of crops that beg for your attention.

What you’ll likely notice first is the main quirk of Across The Valley, there is no slide movement. There isn’t even free teleporting movement. You can only teleport to set points outside or in any building. In a landscape of modern VR games that have come to encourage greater and greater freedom of movement, this makes Across The Valley an outlier.

Trying to think like the creators of this game over at FusionPlay, I can’t help but think that the programmers and designers were happy to hear this decision. There’s no need to circle the farm in with invisible walls or mountains. No need to implement and test collision on every square inch of the farm. With all player interaction constrained to small areas there is no need to worry about anything outside of these areas. This probably saved the developers quite a few headaches and a lot of work.
Luckily the player doesn’t suffer from this nearly as much as you might think. Even when you’re used to freely sliding and teleporting around the environment as you please, Across The Valley doesn’t make you miss these things once you realize how the movement works. You activate the teleport by holding a button or joystick, and then point your controller at the thing you want to teleport to and let go. Every seasoned VR gamer is familiar with this, and it’s easy to do.
You still have plenty of opportunities to look at the beautiful farm, and everything you would want to teleport to is highlighted once you hit the teleport input, so it’s not confusing, and you never have to guess where you can and cannot teleport.

Prompts will appear to tell you about the various tools, plants, and animals you come into contact with on your farm. They’re helpful, and not too much fumbling with the controls is needed. Though in a few cases you might wonder how to do basic things like plant seeds, you won’t easily get stuck and confused as to how to do something after a little bit of playing around. We all know basically how plants work, and that basic knowledge is all Across the Valley really requires. Even if you do get stuck there are even more in depth tutorials to come.
You’ll notice as you mess around on the huge farm that the sky starts getting darker. It becomes harder to see what you’re doing as you’re getting used to the controls. Luckily this doesn’t last for long, and all of a sudden you find yourself inside your house next to your bed.

A bird appears and tells you that you were dreaming! Your farm is just beginning, and you’ve only got a single piece of farmable land, but one day you might have that huge farm that you dreamed of.
This is a very fascinating way to frame the beginning of Across The Valley. Having a small taste of what a thriving farm feels like lets you know early on what is possible, and what your goals are. It’s also a little bit of a relief. Having so much VR Farm to deal with so early on was a bit overwhelming. Luckily now you have plenty of time to come to grips with the basics.
Starting Your VR Farm (For Real This Time)
The bird will tell you to go to the Task Board, and what you’ll quickly find is that the Task Board dictates what you do in this game. Your first task is simply to clear your only plot of land and plant some wheat.

The tutorials kick in full swing here, and it is pretty easy to understand, especially with your prior dreaming experience, how to actually perform the tasks that the board gives you. The tutorials in Across The Valley are great, and the whole game functions as a sort of tutorial. Whenever you unlock something new the task that you get to interact with that new thing will always outline exactly how to care for it be they a wheat patch or a cow.

Doing tasks unlocks more things that you can buy for your farm like more plots of land for planting and more animals. Speaking of animals, you get your first one after planting your first crop of wheat, a chicken.

You receive another task to water and feed your new chick, and also give them a little love with some petting. All animals aren’t bought full grown. You’ll need to invest some more time and resources into caring for them before they grow up and start producing products for you to sell. After caring for your chick, your last task for your first day is to go to sleep.
Time passes in each day, and each time you go to sleep animals grow larger, animal feed and water is depleted, and plants grow and require additional care.

The Rhythms of this VR Farming Simulator
The downside of these tutorials being done through tasks is that you are fairly railroaded in what you can do, which at first is no problem. You’ve hardly got many options after all. Still, this will persist, and you cannot ignore tasks. You have to do them in order to unlock more plots of farmable land and animals. The only way to progress is to do tasks.

So you can plant whatever you like and spend as many days as you like nurturing what animals you have and that’s fine. There’s no penalty for taking your time, which is good, but you will eventually have to do the Tasks to uncover all of what Across The Valley has to offer. In a way this is good. For a relaxing VR Farming Simulator, you might want to have the decision making be as minimal as possible. The task system achieves this by telling you exactly what to grow and what to do.
On the other hand if you were excited to make decisions as a VR Farmer in Across The Valley, the only real decision you make is what crops to plant. Crops have a variety of uses as animal feed, and take different times to grow and grow at different rates. So there is some minor decision making there. Generally though, you couldn’t mess up so badly that you fail the game. Across The Valley is a relaxing game, and that means there really is no way to fail it.

When playing it I slept for about 5 days in a row, and while my crops were all gone and needed to be replanted, all of the animals were completely fine without care. They even grew in the meantime. So you can’t mess up so badly that you lose everything you’ve gained. Whether that is a good thing or not is up to you. This reveals that Across The Valley, as you might have guessed from the look of the game, isn’t a serious VR Farming Simulator. It’s a fantasy of idyllic life in the country, and as far as fantasies go this is one that can drag you in.
You’ll settle into the rhythm of the game. Get up, check your task, and care for the plants by weeding or watering or whatever they need done to them. Maybe you’ll have a harvest and then have to reseed the earth. Then you care for your animals. Water them, pet them, feed them, and maybe shovel some manure. Chickens produce an egg a day, and sometimes you’ll shear the sheep or milk the cow.

Then eventually you go to bed and do it again. Across The Valley builds rhythms on top of rhythms. You grow a checklist in your mind of what needs doing every day, and you go and do it. Over time you complete tasks and your checklist grows.
That’s what Across The Valley really is. It’s not a complicated game. It’s not a true simulator of VR Farming or a VR Farm. It is compelling though, and if you’re looking to turn your mind off and immerse yourself in the basic routines of an idyllic farm in immersive Virtual Reality, then Across The Valley delivers.

How To Install An Awesome Gorilla Tag Mod Menu
Welcome to this step by step guide on how to install a Gorilla Tag Mod Menu and use it! Gorilla Tag is an extremely fun VR game, and it’s even better with mods. A Gorilla Tag mod menu is great because it lets you easily active and deactivate mods without having to go back to the Gorilla Tag in game PC in your tree house. So keep reading to find out how to install a Gorilla Tag mod menu as easily as possible.
Welcome to this step by step guide on how to install a Gorilla Tag Mod Menu and use it! Gorilla Tag is an extremely fun VR game, and it’s even better with mods. A Gorilla Tag mod menu is great because it lets you easily active and deactivate mods without having to go back to the Gorilla Tag in game PC in your tree house. So keep reading to find out how to install a Gorilla Tag mod menu as easily as possible.
Installing the Gorilla Tag Mod Menu on the Oculus Quest 2
A quick note for all Oculus Quest 2 lovers that are wondering how to get mods directly on your Quest 2. Unfortunately Gorilla Tag mods and Gorilla Tag mod menus can no longer be installed on the Quest 2. There are also currently no plans to bring Quest 2 modding back to Gorilla Tag. Sorry, but if you want to install a Gorilla Tag mod menu then you’ll have to do it on PCVR. Look at this screenshot from the Gorilla Tag modding discord.

You can’t install a Gorilla Tag Mod Menu on an Oculus Quest 2 or 3
If you see a guide that says you can install mods, probably using the QuestPatcher tool, then they won’t tell you that you won’t be able to play Gorilla Tag on your Meta Quest 2 after using QuestPatcher. It just won’t work, and will constantly tell you that you have an outdated version of the game that has to be restored to the newest version.
If you have a Quest 2 and want to play Gorilla Tag on PCVR then you could set up and use Oculus Airlink. The thing about Airlink is that it can drop a ton of frames and be very choppy and look horrible if your internet setup to your PC isn’t very good. If you want to use Oculus Airlink, then make sure your PC is connected to your Router or Modem with an ethernet cable.
If you can’t or don’t want to use Airlink then you’ll need to be able to connect your headset to your PC directly. This is possible with an Oculus Quest 2 using an Oculus Link Cable or comparable USB 3 cable. If you don’t have one there are plenty online that are not as expensive as the official Link Cable, but are possibly not as good.
Monke Mod Manager for PCVR Gorilla Tag Mod Menu
The first step in installing PCVR Gorilla Tag mods is downloading and installing the Monke Mod Manager. It’s a sweet program that you can use on your PC to install Gorilla tag mods. Go to the Monke Mod Manager github page that you can find at this link. Click on the MonkeModManager.exe link under “Assets” to download the installer.

Downloading the Monke Mod Manager to install Gorilla Tag mods
After Monke Mod Manager is downloaded, launch it to start the installer. You might get a prompt like the one you see here if the installer can’t find where your Gorilla Tag launcher is, especially if you’re running it through Oculus.

If you see this error don’t worry
That’s alright. If you run Gorilla Tag through Steam click OK and then find and select GorillaTag.exe at C:\Program Files (x86)\Steam\steamapps\common\Gorilla Tag. If you run Gorilla Tag through the Oculus app then you can find and select GorillaTag.exe at C:\Program Files (x86)\Oculus\Software\Software\another-axiom-gorilla-tag (your filepath might be a little different depending on where you have Steam or Oculus installed, just find the “Steam” or “Oculus” folder and follow the rest of the path from there).
Whether Monke Mod Manager found the path automatically or you had to find it yourself, it will start up and you’ll see a menu with a bunch of check boxes. The box that we’re looking for is the mod menu we’re installing that comes with the Monke Mod Manager, the Haunted Mod Menu. This Gorilla Tag mod menu is great and easy to use. For more information on it you can also check out the Haunted Mod Menu github page.

Installing a Gorilla Tag Mod Menu using the Monke Mod Manager
Scroll up and down the mods available and check whichever other mods you want to install. This Gorilla Tag mod menu is only useful if you have some mods to turn on and off. Then hit “Install/Update” in the bottom right corner, and in a couple of seconds the mods will be installed.

Now installing a ton of Gorilla Tag mods to use with the mod menu
Using Your New Gorilla Tag Mod Menu
So you’ve got some mods installed for Gorilla Tag and the Haunted Mod Menu to activate or deactivate them with. Time to run Gorilla Tag and check them out. Once you start the game you’ll see that the Gorilla Tag mod menu can’t be accessed at first, and if you enter a lobby you’ll find that all of your activated mods won’t be working!
Don’t panic, that’s just because Gorilla Tag will turn off any installed mods by default when entering a standard lobby. If you are joining a normal lobby then you won’t be able to run mods, because if you have a mod like Power Arms then nobody will be able to catch you, and it will basically be like you’re cheating.
Flying with Gorilla Tag mods
To actually use your new mods you’ll either have to find a custom room that somebody else made, and join it by entering the room ID in the “Room” menu on the Monke Computer in your treehouse, or go over to the “Game Modes” menu in your tree house. When you’re there hit the arrow button on the right and you’ll see that you can select a ton of Modded game modes to find public lobbies that are modded. Select one and then enter a lobby by exiting your treehouse as usual.

Stick to the modded game modes when using Gorilla Tag mods
When you enter the Modded lobby you’ll notice that there’s a yellow button on the inside of your left Monke paw. Press it with your other hand.

Press this button on your palm to open the Gorilla Tag mod menu
Now your Gorilla Tag Mod Menu will appear out of the back of your left hand! All of the mods you installed will be on the mod menu. You can scroll through all of your mods with the arrows on the bottom. To activate a mod press the mod name in the mod menu with your right hand and the button will turn red. That means that the mod is activated.
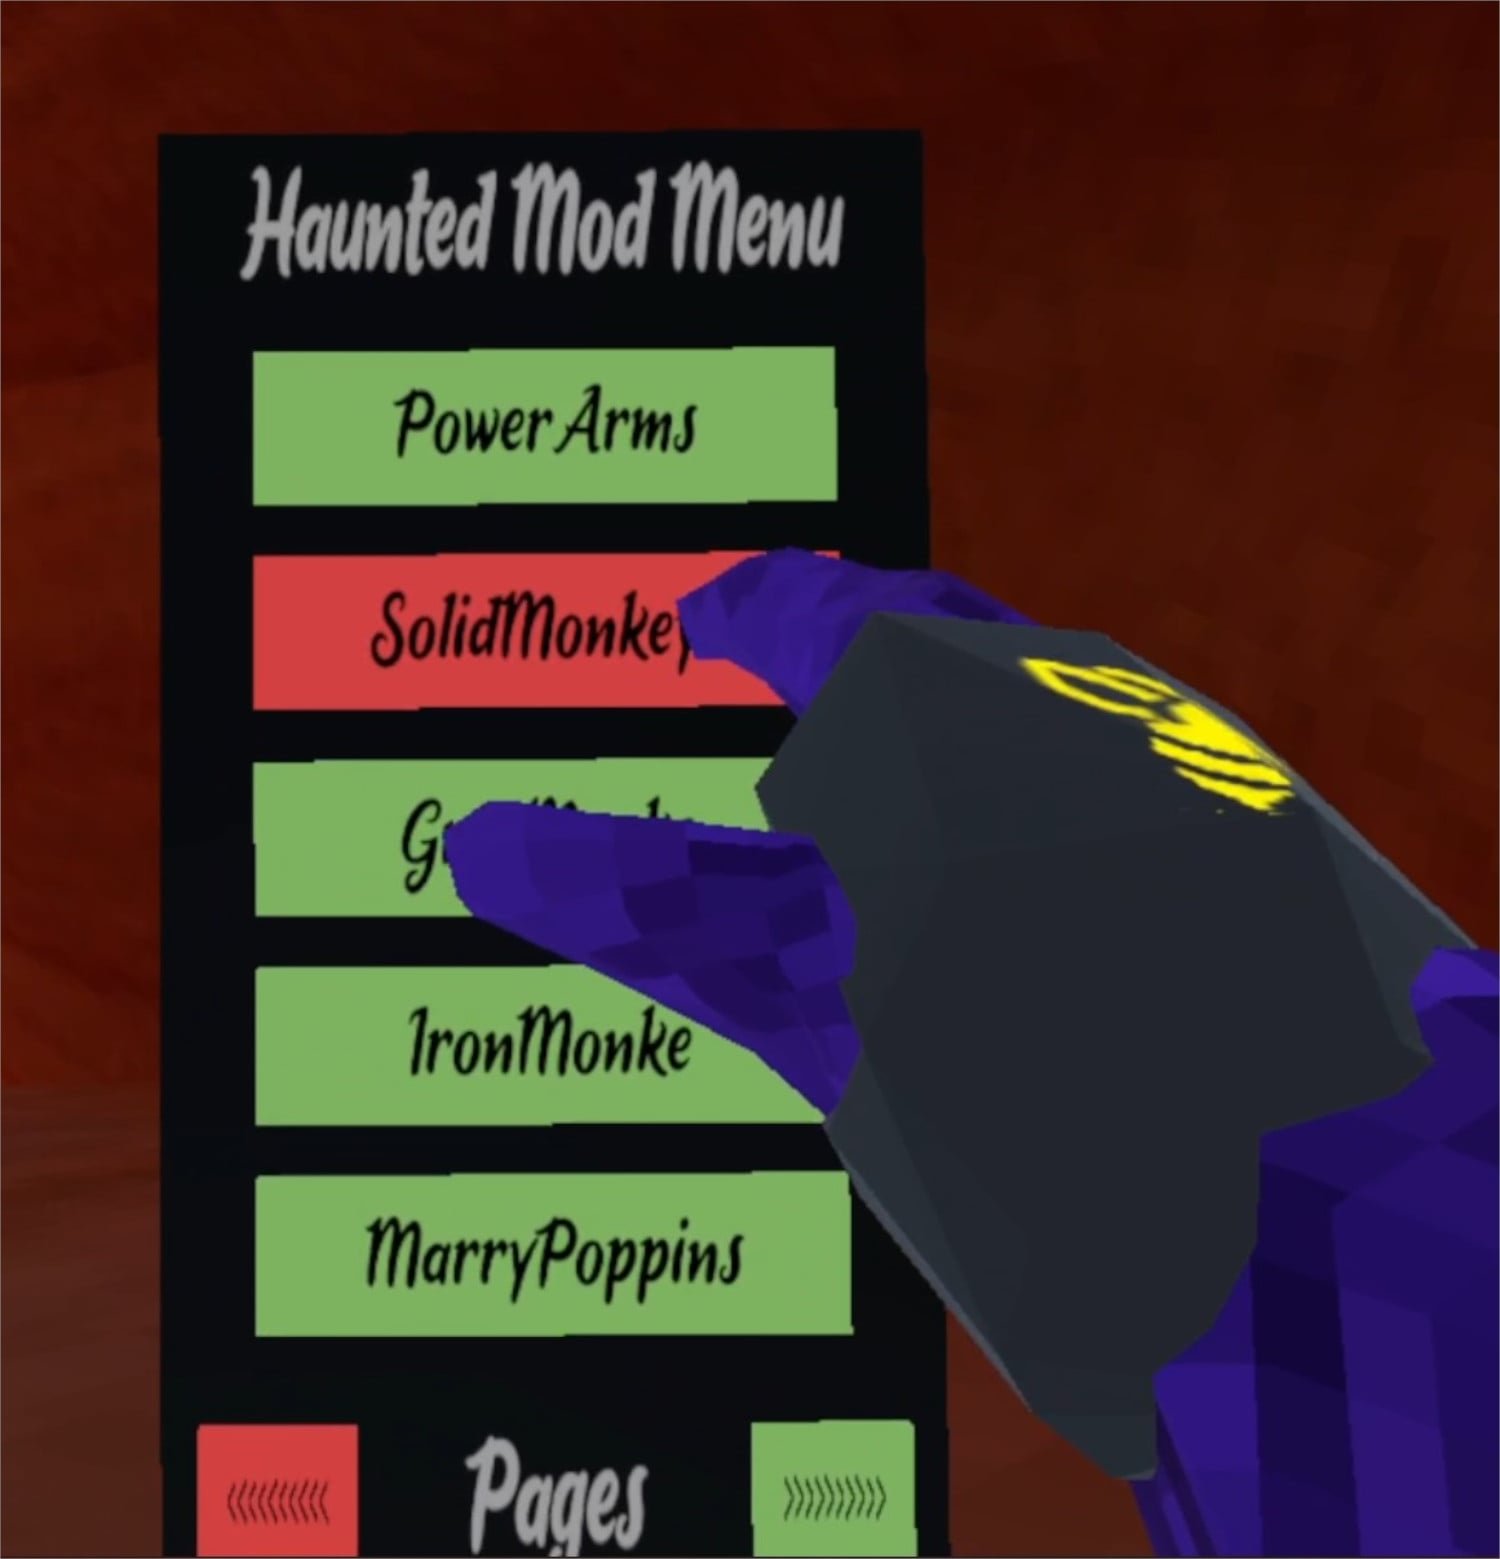
Activating a mod using the mod menu
Now you can easily enjoy all of your Gorilla Tag mods with your new Gorilla Tag mod menu! Activate and Deactivate your mods at will. Enjoy!

All Armor in Blade and Sorcery: Nomad and How to Equip It
If you’ve seen the Blade and Sorcery armor in the spawning book, but are confused as to how to actually use the armor then you’ve come to the right place. If you’re also curious about the different types of Blade and Sorcery: Nomad armor that is available then you’ll find that here too. This is All the Armor in Blade & Sorcery and Blade & Sorcery: Nomad and how to use it.
If you’ve seen the Blade and Sorcery armor in the spawning book, but are confused as to how to actually use the armor then you’ve come to the right place. If you’re also curious about the different types of Blade and Sorcery: Nomad armor that is available then you’ll find that here too. This is All the Armor in Blade & Sorcery and Blade & Sorcery: Nomad and how to use it.
Equipping Armor
The easiest way to equip armor is to go to the spawning book, scroll down to the Armor section, select the armor piece that you want, and hit Equip. If you already have a piece of armor or clothing in the slot that the new piece goes into, the old armor piece will appear in one of your hands.

Of course this isn’t the most immersive way to change your character’s armor, and of course you want to see how cool the Blade and Sorcery armor looks on your character. Well don’t worry, because in your house is a mirror on the other side of the room from the spawning book, behind the wooden wall and beside your bed.

Normally you can’t take off or add on armor pieces to your body by hand, but if you stand in front of the mirror and pull the lever next to it downwards. You can now take off and put on pieces of armor as much as you like until you pull the lever up again. When you are adding or removing a piece just hover your hand over the appropriate bodypart and let go when it glows white and then press the grab button to remove armor, or release it to equip a piece of armor that is in that hand.

You can mix and match armors as much as you like. There’s even mods that add new armor sets, though we won’t go into any specifics on mods here and they can be very finicky. If you want to install some mods later, check out our Blade and Sorcery modding guide.
Some armor pieces are also capable of overlapping. You can, for instance, fit a leather helmet over a gladiator’s headband. Anyway, now that you know how to equip and unequip armor, let’s see all the Blade and Sorcery: Nomad armor sets and how they look.
All Blade and Sorcery Armor Sets
Here are all of the Blade and Sorcery armors. Each comes in a set, but you can mix and match as you please to make some unique combinations.
Civilian Armor
The civilian armor set gives you some respectable looking regular medieval clothing and a pair of boots. Nothing fancy, nothing really armored, but it looks pretty good. Not much in the way of actual armor or protection though.

Ragged Armor
The Ragged armor set basically looks like you just got out of a shipwreck, or are begging on a street corner somewhere. Some very simple garments with a pair of sandals. Try this armor on if you want to look like a first level MMO character. Basically the least armored armor in Blade and Sorcery.

Bandit Armor
Bandit armor is worn by the bandit enemies you can fight in Blade and Sorcery: Nomad. It’s some pretty well rounded leather armor that can turn aside an imprecise sword thrust or a feeble swing.

Gladiator Armor
The same armor worn by Gladiator enemies in Blade and Sorcery: Nomad. It’s very simple stuff that doesn’t offer much protection at all, but really gives off that desperate warrior vibe. The Gladiator Blade and Sorcery armor is very apt for what it is named.

Mercenary Armor
Some formidable, and stylish, armor. The Mercenary set has some metal pieces that can protect very well, and has a great patchwork armor look to it. This is definitely capable of saving you from a powerful blow, if that blow lands on the armor that is.

Soldier Armor
The heaviest armor, but the most well rounded in terms of actual protection. The Soldier Armor covers you head to toe in metal, though metal might not be the best thing to be covered with when fighting lightning magic. Still, it can turn aside swords and heavy blows easily, though your face and arms are still a little exposed. If you want to be a true tank then this is the armor for you. This is the same armor worn by the soldier enemies.

Battlemage Set
The same armor worn by Battlemage enemies. Comes with a cool hood, though it’s light on actual armor. Still, looks pretty cool and definitely gives a flexible arcane feeling. Look at all those belts!

Well there you have it, all the Blade and Sorcery armor there is. Good luck and have fun with your armored character in Blade and Sorcery.