

Is Escape From Tarkov PvE Worth It? A Deep Dive for New Players
What if there was a way to learn the game, master the maps, and experiment with weapons without dying to someone camping in a bush? That’s where Escape From Tarkov’s PvE mode comes in.
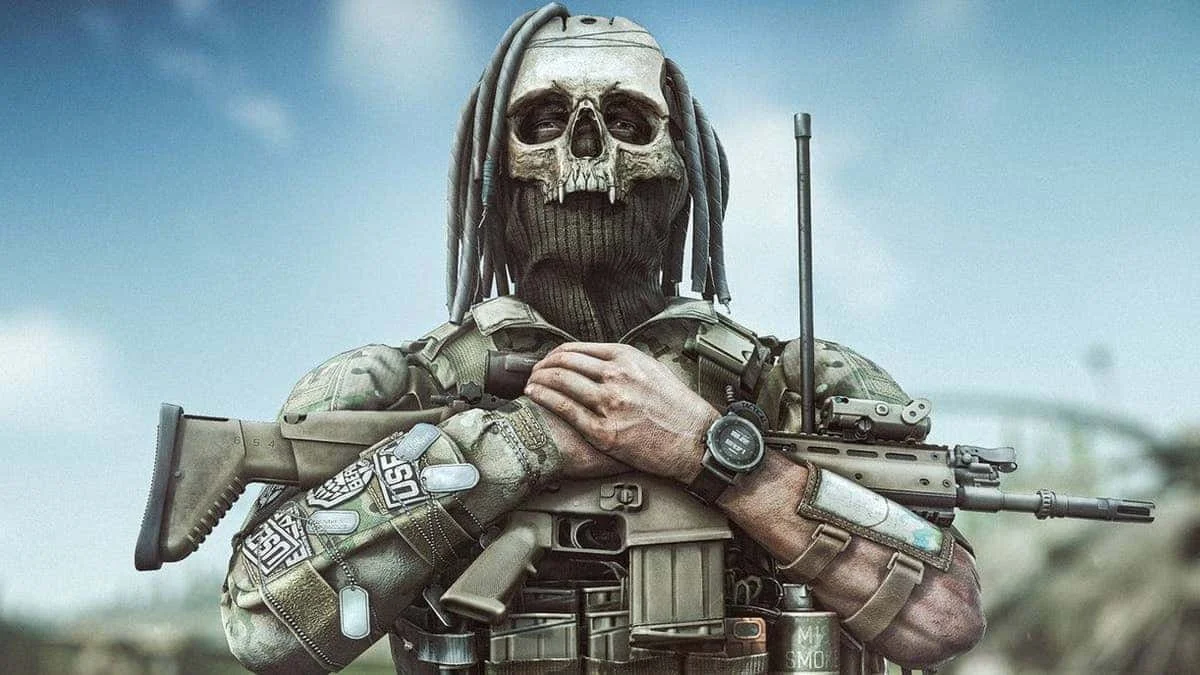
Escape From Tarkov is famous for its brutal PvP combat, punishing learning curve, and loot‑filled raids. You gear up, hit the battlefield… and then a player you never saw puts a round in your head. It’s part of the Tarkov experience, but it’s also a huge barrier for new players.
What if there was a way to learn the game, master the maps, and experiment with weapons without dying to someone camping in a bush? That’s where Escape From Tarkov’s PvE mode comes in.
Let’s break down what PvE actually is, how it’s different from PvP, and whether it’s worth your time.
You may also be interested in:
Best Settings for Escape From Tarkov 1.0 – Max Visibility + FPS
Mastering Scav Runs: The Ultimate Guide to Scavving in Escape from Tarkov 1.0
Beginner’s Guide to Escape from Tarkov 1.0 — What New Players Need to Know
Top 7 Best Budget Weapons in Escape From Tarkov (2026 Guide)
What Is PvE in Escape From Tarkov?
PvE stands for Player vs Environment. Unlike the traditional Tarkov experience, where you face other players, PvE removes human opponents entirely.
✔️ You face AI enemies — scavs, bosses, and AI PMC characters
✔️ You keep your progress and gear (unlike offline)
✔️ You can join co‑op with friends
✔️ Traders, quests, hideout progression — all still work
In short, PvE lets you play Tarkov without the stress of human combat, giving you space to learn and grow. Though that doesn’t mean it is a completely challengeless game.
How PvE Differs From PvP
Here’s the biggest change:
👉 No other human players.
That means no unpredictable ambushes, no cheaters, and no “face‑shot out of nowhere.”
But PvE isn’t just easy mode — the AI can be very challenging, especially if you peek the same corner twice. They flank you, respond to sound, and will still punish mistakes. Though let’s be honest, they’re much easier to deal with than human players, but still offer enough of a challenge to give you some interesting encounters while you learn the game.
Here are the main differences:
PvE
No human enemies
Persistent progress (keeps loot & XP)
Great for learning
AI still challenging for a beginner
Less stressful
PvP
Human opponents (unpredictable)
High risk, high tension
Core Tarkov experience
Faster adrenaline
Harder for beginners
Why PvE Is Perfect for New Players
1. Lose the “Gear Fear”
One of the biggest hurdles in Tarkov is fear of loss. You finally find a sick weapon build — and then boom, an unseen player ends your raid.
In PvE, you can take your favorite gear into raids without that crippling anxiety. Try new weapons, armor, and attachments. Learn what works for your playstyle.
2. Learn Maps Like a Pro
Maps in Tarkov are HUGE and complex. In PvP, exploring them confidently without being gunned down is almost impossible for newbies.
PvE lets you:
Walk around without constant danger
Memorize landmarks & extract points
Discover high‑tier loot spots
Practice map routes at your pace
This alone can dramatically improve your success in PvP later. Though in the PvP mode you can also learn the maps through the “Offline” game mode where progression is neither gained nor lost, so using PvE isn’t strictly necessary to learn the maps.
3. Master Quests & Progression
Some quests in Tarkov feel like cryptic nightmares — especially with players hunting you while you try to plant items or find hidden spots.
In PvE:
✔️ Quests are manageable
✔️ You can focus on objectives
✔️ Traders and hideouts progress
✔️ No fear of losing quest items
This builds confidence and ensures you don’t get stuck on quests early on.
4. Practice Advanced Combat Skills
The AI in PvE isn’t just standing around — they will:
Investigate sound
Flank you
Shoot with accuracy
You WILL die — but each death teaches you something real.
PvE is a less punishing training ground that still feels like Tarkov combat.
PvE Technical Stuff You Should Know
When starting PvE:
Server Types
Local Mode: Hosted on your computer — quick raids, depends on hardware
BSG Servers: Hosted by Battlestate — more advanced AI and smoother experience
For the best AI experience, choose BSG servers when you start a raid.
Purchasing & Access
PvE isn’t part of the base Tarkov game for every edition — you must own it:
🎫 Edge of Darkness / Unheard Edition: PvE included
🎫 Standard Edition: PvE available as a separate paid add‑on
Once owned, a toggle appears in the main menu to switch between PvP and PvE characters.
Each character has separate progress, so you can enjoy both modes independently.
Is PvE Worth Buying?
Yes — especially for new players.
If you’re brand new or returning after a long break, PvE gives you:
✅ A safer environment to learn
✅ Real progression that matters
✅ Less stress & more enjoyment
✅ A stepping stone to PvP success
That said, PvE isn’t the classic Tarkov experience. Some players feel removing PvP dilutes the thrill. But if the goal is learning, fun, and comfort, it’s absolutely worth it.
Final Verdict
Escape From Tarkov PvE is more than “easy mode.”
It’s a training ground — a place to learn, experiment, and build confidence before stepping back into the unforgiving world of PvP.
If you:
🎯 Want to learn maps and mechanics
🎯 Aren’t ready for ruthless PvP yet
🎯 Prefer a less stressful Tarkov experience
Then PvE is absolutely worth trying.
When you’re ready to face human players again, PvP will feel less terrifying and a lot more rewarding.
You may also be interested in:
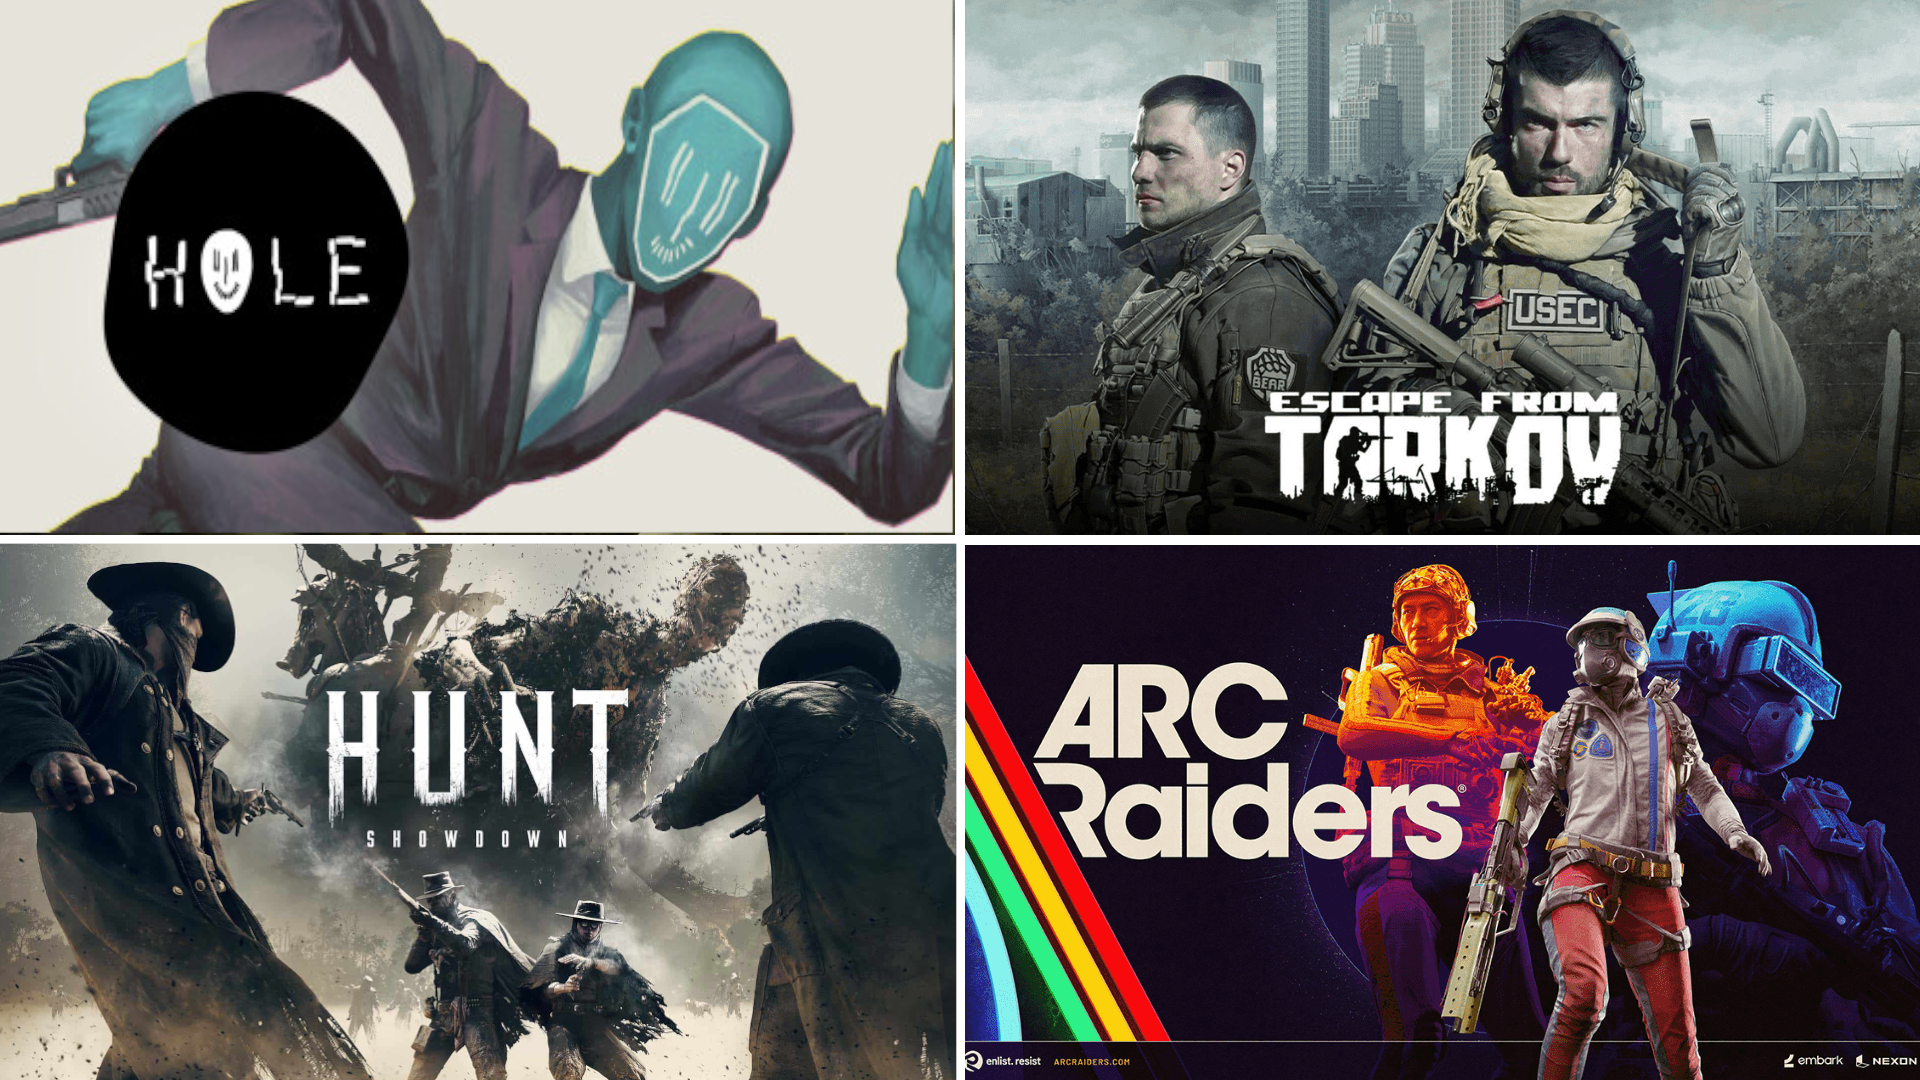
The Best Extraction Shooters You Should Try in 2026
If you’ve ever heard about extraction shooters and wondered what all the hype is about, you’re in the right place. Extraction shooters blend intense combat, high‑stakes scavenging, and the thrill of getting out alive with your loot. Whether you’re new to the genre or a seasoned player, here’s a friendly guide to the best extraction shooters worth checking out right now.
If you’ve ever heard about extraction shooters and wondered what all the hype is about, you’re in the right place. Extraction shooters blend intense combat, high‑stakes scavenging, and the thrill of getting out alive with your loot. Whether you’re new to the genre or a seasoned player, here’s a friendly guide to the best extraction shooters worth checking out right now.
You may also be interested in:
What Is an Extraction Shooter?
Extraction shooters are a sub‑genre of action shooters where your goal isn’t just to eliminate enemies — it’s to enter a dangerous area, scavenge valuable gear and loot, and make it back alive. If you die, you usually lose everything you brought in or found during the run. This high‑risk, high‑reward loop makes every raid feel intense and memorable.
1. ARC Raiders – Most Recommended in 2026
Why it's #1:
ARC Raiders blends intense PvPvE gameplay with high visual fidelity, storytelling, and team dynamics, making it the best all-around extraction shooter of the year. Whether you're facing mech threats or rival players, it constantly challenges your survival instincts. There are a ton of items to use, and the gameplay feels dynamic and fun throughout. IF you are new to the extraction shooter genre there is no game that comes more highly recommended. It may even be the best extraction shooter of 2026.
Key Highlights
PvPvE with dynamic enemy AI and player encounters
Stunning graphics and immersive environments
Proximity voice chat for negotiating or ambushing
Co-op or solo options for flexible playstyle
Crafting, base-building, and trading post-raid
Why You’ll Love It:
This game is shaping up to be the definitive next-gen extraction shooter. You’ll need to make tough calls in high-stress raids, with a compelling loop that keeps you coming back for more.
2. Incursion Red River – Best PvE‑Focused Shooter
For those who prefer teamwork over solo PvP chaos, Incursion Red River delivers a tactical PvE extraction experience. You’ll spend time exploring detailed maps with quests and objectives, and there’s no time limit on missions — making it ideal for methodical players. Though the overreliance on fighting bot enemies may make it dull for some who crave PvP action and the variety that comes with it.
What You’ll Love
Cooperative play with squads
No clutch timer — take your time
Faction missions and reputation progression
Realistic weapon feel and customization
Just remember: dying still means losing your gear, so play smart!
3. HOLE – Best Indie & Unique Single‑Player Extraction Shooter
Looking for something a bit different? HOLE is an indie single‑player extraction shooter that stands out with its quirky concept and focused gameplay loop. You enter levels from a floating device and collect currency to upgrade your sewer base.
Highlights
Unique progression system via base upgrades
Simple but thoughtful mechanics
Subtle horror vibes amid extraction gameplay
A great bite‑sized alternative to larger extraction games
This one’s a gem if you want extraction thrills without the complexity of massive MMO‑style games.
4. Hunt: Showdown – Best for PvP + PvE Hybrid Thrills
For players who thrive on tension and atmosphere, Hunt: Showdown is a standout choice. Set in monster‑infested environments, you’ll track bounties, fight both AI foes and other players, and risk losing everything at every turn. Its early 20th century setting is also very unique with interesting weapons like revolvers and repeaters. Even bows and melee weapons are quite viable in this game, and there are a lot of scary zombie like enemies and demonic monsters to fight.
What Makes It Special
Gritty, atmospheric western setting
Audio cues matter — every sound counts
Permanent death for hunters adds weight to decisions
Unique and strategic loadout and tools system, your hunter levels up until they are killed, giving each life more weight
5. Escape From Tarkov – The Hardcore King
No extraction shooter list is complete without Escape From Tarkov. Widely regarded as the definitive extraction shooter, it pushes realism and complexity to the max with deep weapon customization, survival systems, and unpredictable raids.
Why It’s Legendary
Massive variety of weapons and mods
Complex survival mechanics and inventory management
No tutorials — you learn by doing
Highly rewarding progress loops
Be warned: this one has a steep curve, but if you enjoy a challenge — no game does it quite like Tarkov.
6. ZERO Sievert – Best Top‑Down Extraction Twist
Not all extraction shooters have to be first‑person! ZERO Sievert brings the genre into a top‑down perspective with pixel art charm. It’s tough and strategic, incorporating hunger, sleep, and day/night cycles to influence how raids go down. It’s got anomalies and mutants and an amazing STALKER kind of setting and feel, definitely unique.
Standout Features
Six maps with unique challenges
Survival systems like eating, drinking, and sleeping
Radiated areas and bandit threats
A fresh, challenging take
New enemies like mutants
It’s a great option if you want something different from the usual FPS format.
7. Arena Breakout Infinite – Best for Beginners
Why It’s Good for New Players:
Arena Breakout Infinite offers a seamless learning curve, traditional FPS gameplay, and a strong player base. It’s sort of a carbon copy of Escape From Tarkov, though it is different in the specifics. The maps are unique and so are other elements of the game, though it does feel a lot like Tarkov and also has a modern setting. Still, if you want more of Tarkov in a different package give Arena Breakout Infinite a try.
Features That Help Beginners
Fantastic tutorial mission
Beginner-only map access early on
Fast-paced gunplay and movement
Quick kits to gear up easily
Free-to-play and low barrier to entry
Which One Should YOU Play?
Here’s a quick guide to match your style:
🎮 New to extraction shooters? ARC Raiders
🤝 Prefer PvE teamwork? Incursion Red River
🌟 Want something unique? HOLE
🔫 Love high tension and PvP? Hunt: Showdown
🧠 Ready for a challenge? Escape From Tarkov
🎨 Like different gameplay formats and a STALKER atmosphere? ZERO Sievert
🚀 Excited for the latest? ARC Raiders
Whether you want something casual to jump into or a deep, unforgiving challenge, the extraction shooter genre has something for everyone. Grab your load‑out, head into the raid, and don’t forget — the real victory is extraction.
You may also be interested in:

Top 7 Best Budget Weapons in Escape From Tarkov (2026 Guide)
Whether you’re a fresh PMC still grinding early levels and tasks or just trying to save rubles between raids, going cheap doesn’t mean going weak in Escape From Tarkov. The right budget weapons can still win fights, secure loot, and help you improve your gameplay without draining your stash. This 2026 guide breaks down the 7 best budget‑friendly guns that punch above their price.
Whether you’re a fresh PMC still grinding early levels and tasks or just trying to save rubles between raids, going cheap doesn’t mean going weak in Escape From Tarkov. The right budget weapons can still win fights, secure loot, and help you improve your gameplay without draining your stash. This 2026 guide breaks down the 7 best budget‑friendly guns that punch above their price.
You may also be interested in:
Best Settings for Escape From Tarkov 1.0 – Max Visibility + FPS
Mastering Scav Runs: The Ultimate Guide to Scavving in Escape from Tarkov 1.0
Beginner’s Guide to Escape from Tarkov 1.0 — What New Players Need to Know
Why Budget Weapons Matter
Tarkov’s economy is brutal — you lose your gear when you die. Running expensive guns early and often means losing more when things go south. Budget weapons keep risk low and fun high while you learn recoil patterns, positioning, and map flow. These are also weapons you might commonly get your hands on as a Scav and so being familiar with them means you will always have something you know how to use.
Top 7 Best Budget Weapons (2026)
1. SKS (Simonov Semi‑Auto Carbine)

The SKS is one of Tarkov’s most iconic budget rifles. Chambered in 7.62×39mm, it deals solid damage and retains good penetration for its cost, making it versatile for mid‑range engagements and beginner PvP. It’s semi‑automatic, easy to handle, and doesn’t demand pricey mods or ammo. You can even get a magazine that is twice the size of the default one for a low price. Hit your shots with this and you can do some great damage.
Why It’s Great
Solid damage and decent pen for the price
Works well on maps like Woods and Customs
No magazine reload (top‑loading) saves space and cost. No need to buy several magazines
2. MP‑153 / MP‑155 Shotguns

Shotguns like the MP‑153 and MP‑155 are brutal in close quarters. Cheap to buy and run, they shred unarmored targets and make Factory or close‑quarters fights manageable without fancy gear. Opt for buckshot (at least 7mm is ideal) or flechette ammo for maximum stopping power and cheap per‑round cost. There are also some cheap slugs out there that do great damage and can hit at medium ranges.
Why It’s Great
Devastating at close range
Ammo is inexpensive and easy to find
No need for heavy mods to perform well
3. PPSh‑41 (7.62×25mm High ROF SMG)

The PPSh‑41 is a classic World War II SMG that still holds up in Tarkov’s budget scene. It fires the affordable 7.62×25mm round with a very high rate of fire, making it lethal in tight indoor fights and factory runs. Aim for the legs or head and you can absolutely shred someone with this.
Why It’s Great
Extremely high rate of fire
Cheap ammo and parts
Great for tight corridors and surprise engagements
4. Mosin Nagant Infantry (7.62×54R)

If you want cheap long‑range power, the Mosin Nagant Infantry is hard to beat. Its bolt‑action nature means slower fire, but that single 7.62×54R shot often feels devastatingly powerful — especially against unarmored foes. It’s a classic choice for budget sniping and picking off targets at range. Even the iron sights can be deadly, and it’s easy to insure and then drop under a rock for another raid once you find something better. Just like with the SKS you don’t need to bring a rig or a ton of mags to use this either.
Why It’s Great
Massive damage and penetration
Cheap rifle with classic stopping power
Good for long‑range maps like Woods
5. VPO-136 Vepr-KM (AKM Style)
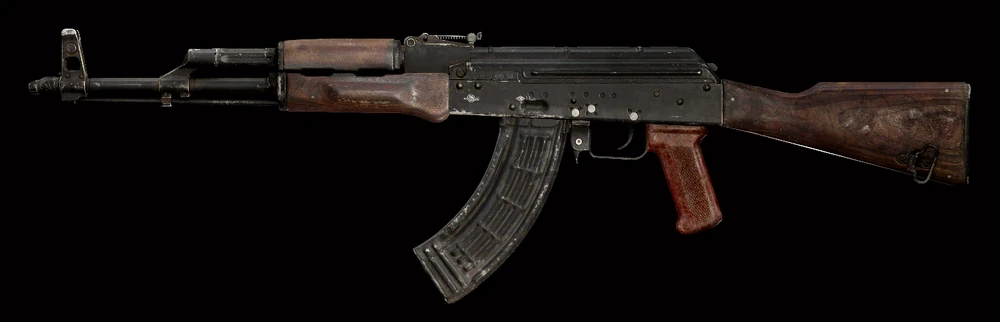
The VEPR KM and its variants (e.g., VPO‑136) are semi‑automatic rifles built on the 7.62×39mm platform. They hit hard, are very forgiving to use, and often share ammo and parts with other budget 7.62 rifles like the SKS. It’s basically a budget AKM that doesn’t shoot automatically, but is still quite solid.
Why It’s Great
Hard‑hitting semi‑auto rifle
Excellent ammo compatibility
Easy to control recoil compared to full auto guns
6. Saiga‑9 / PP‑19‑01 Vityaz (9×19mm SMGs)

For players who like fast, flexible close‑to‑mid range options, Saiga‑9 and PP‑19‑01 Vityaz SMGs are fantastic budget picks. They use affordable 9×19mm rounds, keep recoil manageable, and are great on Factory, Interchange, or Dorms. They’re like pistols on steroids.
Why It’s Great
Low recoil and burst potential
Ammo is cheap and plentiful
Good handling for new players
7. AKS‑74U (Short Barrel 5.45×39mm)

The compact AKS‑74U offers excellent mobility and firepower for its price. Chambered in 5.45×39mm, this little carbine is a staple budget pick that still performs well when modded lightly. It’s especially effective in tight fights and urban maps. Honestly if you’re willing to bring a basic budget kit that includes mags and spare rounds, you can’t go wrong with the AKS-74U. Like a lot of these budget weapons it is available at loyalty level 1 Prapor, but this one is really easy to go full auto with and perform really well against a variety of targets, even at longer ranges.
Out of all of the best budget weapons in Escape From Tarkov the AKS-74U is the king of all of them. It’s small, light, slaps hard, goes automatic, and is available for cheap from prapor loyalty level 1. Get that bank robber rig from Ragman, a couple spare mags, and some US ammo, and you can do a lot of damage with this little thing even right after you unlock Prapor (which you should do as quickly as possible by doing the “Tour” missions).
Why It’s Great
Excellent handling and mobility
Affordable ammo and parts
Works well in both close and mid‑range fights
Upgrade opportunities
Fully Automatic
Slaps
How to Build a Full Budget Loadout
A cheap weapon is just one piece of the puzzle. Pair your gun with:
Basic rigs and bags (bank robber and T-bag from ragman) for some storage space.
Low‑cost meds (AI-2 cheese kits, tourniquets, bandages, and pain killers)
This way you stay light, cheap, and when you’re getting better at the game you’ll have a lot of chances to fail and still get back up. Though doing some good scavving also helps a lot.
Tips for Budget Play Success
Play smart: Avoid wide open spaces without a solid plan
Use terrain and cover: Outsmart better‑geared foes
Practice recoil and burst control: Makes budget guns feel more lethal
You don’t need top‑tier gear to be effective in Escape From Tarkov. With the right choices — like the SKS, PPSh‑41, and Saiga‑9 — you can dominate raids, learn the game, and keep your stash intact. Enjoy surviving Tarkov on a budget and come out smarter and richer each time.
Frequently Asked Questions (FAQs)
Q1: Can budget weapons kill geared players?
Yes — with smart ammo choices and positioning, even cheap guns can outperform expensive loadouts.
Q2: Which budget rifle is best for mid‑range fights?
The SKS and VEPR KM are excellent mid‑range budget options.
Q3: What shotgun is best for close quarters on a budget?
MP‑153 and MP‑155 are powerful and cheap for close‑range fights.
Q4: Is the AKS‑74U worth using on a budget?
Yes — it offers mobility, decent ammo, and solid performance for its cost.
Q5: Should I focus on weapon mods or ammo?
Ammo quality usually has more impact on performance than mods, especially on budget guns.
You may also be interested in:

Arc Raiders vs Escape from Tarkov 1.0 — Which Extraction Shooter Wins in 2025?
If you’re into extraction shooters — you know, those tense looting runs where you’re praying you make it out alive — chances are you’ve been caught in the debate:
Arc Raiders… or Escape from Tarkov?
Both games are extraction shooters, but they feel very different once you’re in the raid. One might pull you in for long, sweaty sessions, and the other might be what gets your buddies to try to extract for the first time.
Let’s break it down in real gamer terms.
The Basic Differences — Arcade vs. Hardcore
Arc Raiders
Arc Raiders is the more mainstream, accessible extraction shooter. It blends action and quick decisions with the thrill of ransom runs — but with smoother movement and tighter loot loops.
People say it feels like the extraction genre but fun, not punishing — the kind of game you pick up after work with friends, run a few maps, laugh at wild moments, then log off.
If a game like this ever goes “mainstream,” Arc Raiders is the one — it’s cross‑platform, it runs on consoles, and it doesn’t require a high‑end PC just to load in. That’s a big deal.
Most players who’ve dipped their toes into both describe it like:
Arc Raiders is its own style of extraction shooter
It won’t replace Tarkov, but it will pull players away
It’s way more casual friendly
People who aren’t hardcore will play it more often
In short: Arc Raiders is the extraction shooter that feels like it could be a regular game people hop into, not just the elite handful of players who grind Tarkov and can head,eyes someone else instantly from 100 meters. Arc Raiders gives you a chance to react to being attacked and use movement and items to have more options in what you do in a fight. It’s also much simpler to get started in.
Escape from Tarkov
Tarkov is the original hardcore extraction shooter. It’s gritty, intense, unforgiving.
In Tarkov:
Every gunfight feels meaningful
Death means losing gear — maybe your best loot
Raids are long, tense, and every sound matters
You’ll hear people talk about RPD hitboxes, scavs sneaking from bushes, and trying to hit a guy mid‑air with a .50 cal
Tarkov IS extraction shooter culture. It pioneered the intense all or nothing raid that goes from casual to making your heart pump and adrenaline spike because you found that one item you need so badly and are so far away from the extraction point. Your end can be lurking around every corner and it can come in an instant.
But it’s also:
Complicated
Harder to run on average hardware (but still manageable)
Not very welcoming to casual players
Feels kinda niche
A lot of players ask, “Can Tarkov ever really appeal to casuals?” The answer — for now — feels like no. You need patience, and time to learn the systems. That alone shuts out a huge chunk of players. Though once you learn the game well enough to feel the rush of excitement every time you try to extract… well then you are hooked and no other game is quite the same.
Head‑to‑Head PvPvE — What Feels Better?
🎮 Combat & Movement
Arc Raiders
Action‑oriented
Fast paced
Third‑person mobility
More forgiving fights
Feels more like a shooter with extraction elements — not just a straight tactical sim.
Tarkov
Slow, methodical, hardcore
Every shot counts
First‑person tension
You’ll hear footsteps and lose sleep
It’s the classic “hard core” extraction experience. You may be loaded down with loot, low on ammo, injured, and trying to limp to the extraction while praying there isn’t another PMC around the next corner.
Which is better?
For straight combat fun? Many prefer Arc Raiders.
For tactical tension that lingers? Tarkov wins.
Accessibility & New Players
Arc Raiders shines here. It feels casual‑friendly — you don’t have to memorize ammo types, and people who’ve never played an extraction shooter can jump in and still have a good time pretty quickly.
A lot of folks think Arc Raiders might be the game that introduces extraction shooters to the masses. Imagine playing with your console friends after work, just running a map, laughing at weird AI robot fights, and having fun without feeling like you’re being punished for every mistake.
Tarkov? That’s still the veteran, hardcore playground. The systems are deep — weapon mods, ballistics, health, hideout, traders — and people love that depth, but it’s not casual‑friendly.
🏁 Final Verdict — Which Should You Play?
Here’s the takeaway based on how you like to play:
🔥 Play Arc Raiders if:
You want fun, fast‑paced action
You’re not looking for hardcore simulation
You want something you can play with console and PC friends
You want a game that doesn’t punish you for learning
💀 Play Escape from Tarkov if:
You crave tactical depth
You love tension, realism, and high stakes
You enjoy the hardcore grind and complex systems
You’re ready for a challenge that’s unlike most shooters
The Bottom Line
Arc Raiders and Escape From Tarkov are both extraction shooters — but they feel totally different once you’re in the raid.
Either way — you’re getting two very different but awesome experiences. Both are fantastic games, but in different ways.

Beginner’s Guide to Escape from Tarkov 1.0 — What New Players Need to Know
Escape From Tarkov 1.0 is a hardcore, realistic extraction shooter that’s unlike any other game you’ve played before. In every raid you enter, you’ll face both AI and real players. Your goal is simple — survive, complete quests, collect loot, and escape alive. But don’t be fooled by how simple that sounds. Tarkov has one of the steepest learning curves in modern shooters, and it can feel overwhelming at first.
Escape From Tarkov 1.0 is a hardcore, realistic extraction shooter that’s unlike any other game you’ve played before. In every raid you enter, you’ll face both AI and real players. Your goal is simple — survive, complete quests, collect loot, and escape alive. But don’t be fooled by how simple that sounds. Tarkov has one of the steepest learning curves in modern shooters, and it can feel overwhelming at first.
This guide breaks down the core mechanics, economy, movement, combat, gear, survival systems, and progression — all in friendly, conversational terms. You won’t need to panic. Read on, take notes, and most importantly: be patient with yourself. Everyone starts as a beginner.
You may also be interested in:
Best Settings for Escape From Tarkov 1.0 – Max Visibility + FPS
Mastering Scav Runs: The Ultimate Guide to Scavving in Escape from Tarkov 1.0
Top 7 Best Budget Weapons in Escape From Tarkov (2026 Guide)
Is Escape From Tarkov PvE Worth It? A Deep Dive for New Players
💸 Getting Started: Purchasing the Game
Before you jump into Tarkov, you actually have to own the game. There are several editions available on the official Escape From Tarkov website. The most beginner‑friendly choice is the Standard Edition. It’s the digital base game, with a small starting stash and a basic secure container.
Starting with a higher edition can give you larger stash space, extra gear, or early access to features like PvE — but if you’re unsure whether you’ll enjoy Tarkov, start with the Standard Edition. You can always upgrade later. Buying a bigger edition right away can feel like a waste if the game isn’t for you.
Also, when creating your account, use a Gmail address if possible. Some players have reported issues with other email providers during registration in the past, though this may have been fixed.
🧍♂️ Choosing Your Faction: BEAR or USEC
Once you launch the game, you’ll choose between two factions: BEAR and USEC.
BEAR: Russian PMC with Russian voice lines and AK‑style weapon options.
USEC: NATO/Western PMC with English voice lines and Western weapon options. Many beginners choose USEC for comfort and familiarity with the language. You also get a slight bonus on some maps featuring ex-USEC “rogue” AI enemies.
This choice affects your early gameplay and faction quests, and it doesn’t drastically change core mechanics. Pick whichever feels right for you — there’s no “wrong” choice.
🎒 Your First Look: Starting Inventory & Stash
At the beginning, your inventory — called your stash — is small. On a Standard Edition account, you’ll see basic items like:
Weapon with magazines
Armor, rig, and headset
Food and water
Medical supplies
Spare ammo and melee item
Your stash is where you store items between raids. Anything you don’t extract with is lost unless it’s in your secure container — a personal safety net for your most valuable loot. Early on, your secure container is tiny, so be smart about what you protect.
Inside the game menus you’ll also see statistics like level, kills, distance, and survival rate — and the health panel, which shows the status of your character’s body parts. We’ll talk more about that soon.
🧭 Maps, Offline Raids & Practice
Learning the maps is one of the most important early steps to survival. Tarkov maps are big, complex, and full of danger. Offline raids are your best friend when you’re new. They let you:
Explore maps without fear of losing gear
Learn extraction points
Fight AI at your own pace
Understand loot spawns and terrain
To start an offline raid:
Select a map
Check the box for Practice Mode
Adjust AI and settings to your preference (it is recommended to keep them on for practice)
Even if you keep AI on for a “live” feel, offline raids are excellent for learning the layout before facing real players.
🧑🔧 Settings That Help You Survive
Certain settings can make Tarkov easier to play — especially early on.
Quick slots (for meds and grenades)
Stance and health condition displays
FOV and head bobbing
Stamina and fatigue settings
Malfunction handling
For example, binding inspect weapon and check malfunction to easy keys lets you quickly fix jams in the middle of combat. These settings are personal preference, but they help make the action more fluid and less stressful.
📦 Gear & Economy: Fear of Losing Stuff
In Tarkov, you lose what you bring in unless it’s insured or in your secure container. Early on, you’ll die a lot — it’s just part of the game. That’s why many seasoned players encourage budget gear runs instead of bringing high‑end weapons and ammo right away.
Start with:
A modest weapon and ammo
Light armor
Just enough gear to complete quests
Nothing you’ll be devastated to lose
Gearing up too much too early can lead to quick losses and frustration. Instead, think smart: survive, complete tasks, and upgrade when you understand the risks better.
🧠 Scav Runs: Low Risk, High Reward
You’ll unlock Scav runs after playing a bit. In a Scav run, you enter as a different character with random gear — and you don’t lose your main stash if you die. This makes it a valuable source of loot and experience.
Tips for Scav runs:
Use them often early on
Learn map geography
Collect valuable items for your main stash
Increase your Scav reputation for better spawns
This is one of the most risk‑free ways to get valuable items and make progress.
💉 Health, Injuries & Status Effects
Tarkov’s health system is far more detailed than most shooters. Every limb has its own HP, and different injuries affect you differently:
Head and thorax damage can quickly kill you
Limbs and stomach damage slow you down or drain stamina
Bleeds, fractures, and concussions require specific items to heal
Painkillers, splints, and CMS kits are essential for surviving injuries and getting out of raids alive.
🔫 Ammo Matters More Than Guns
One of the first big lessons in Tarkov is that ammo type matters more than weapon choice. Different ammo rounds have varying damage, penetration, velocity, and effectiveness against armor.
The best way to learn ammo:
Inspect the ammo in game
Optionally use ammo charts (online tools are huge here)
Understanding ammo will significantly improve your survivability in fights.
🛠 Hideout & Modding Weapons
As you play, you’ll unlock and build your hideout — a personal space that grants bonuses and allows for weapon modifications. A workbench lets you add parts to guns that change recoil, accuracy, handling, and more.
Modding can seem overwhelming, but start simple:
Focus on essentials like stocks and grips
Experiment to see how each part affects your weapon
Don’t worry about meta builds until later
Remember — good ammo with a basic gun often outperforms fancy parts with poor ammo. First focus on making sure your gun works, maybe by testing it in an offline raid against some Scavs.
🤝 Traders & Progression
Traders are NPCs who:
Give quests
Buy and sell items
Unlock new gear through loyalty levels
As you complete tasks and level up traders, you gain access to better weapons, armor, ammo, and crucially — the Flea Market. The Flea Market lets you buy and sell with other players, which transforms your progression.
Aim to reach the level needed for Flea Market access early — it’s a game‑changer, and you’ll get there sooner or later (level 15).
🚫 Common Beginner Mistakes to Avoid
Here are some traps new players frequently fall into:
Ignoring the map and getting lost (google the map for wherever you are going and have it up on a second monitor or your phone)
Being greedy after a kill and looting a body that is out in the open
Thinking PvP is the main priority at the start
In Tarkov, survival and learning are more important early on than fighting. Focus on finishing raids, completing quests, and gearing up slowly and sustainably.
🎯 Final Thoughts — It Gets Better
Escape From Tarkov is tough — that’s part of its appeal. Expect early deaths, confusion, and mistakes. But with patience and persistence, the game becomes incredibly rewarding. Every survival feels earned. Every quest completed feels triumphant.
So, take your time. Learn the maps. Respect the mechanics. Play smart. And most of all — enjoy the journey.
Good luck out there, and we’ll see you in Tarkov.
You may also be interested in: