


This Massive VR MMORPG Is Dead - Zenith: The Last City
Sad news today for the Virtual Reality community and VR lovers in general.
The Co-Founders of Ramen VR, Andy Tsen and Lauren Frazier, recently announced that they will no longer be developing and deploying new Patches for the Virtual Reality MMORPG Zenith: The Last City.
Despite massive success upon launching the game on both the Meta Quest and Steam stores, Zenith has become increasingly more barren and lifeless throughout the years since its launch.
This hasn’t been due to a lack of effort on the part of the developers. New features such as instanced dungeons, an entirely reworked tutorial and questing experience, a new class, and new tools for exploration and resource gathering did not breathe new life into the game and keep players coming back to it.
That was the core problem with Zenith: The Last City, no matter what the developers over at Ramen VR tried to do, players just didn’t stick around for more than a month.
This lead to an effect where when you logged in to play the game it felt pretty barren, and any MMORPG is only as good as the players that fill it. So it was easier to simply not log back in, since it seemed that not many others were interested in the game.
Even an overhaul and free to play addition in the form of Zenith: Infinite Realms and rebranding the game Zenith: Nexus didn’t reverse this trend, and the game became too expensive to continue developing.
After the final patch in August, Ramen VR will be ceasing active development on Zenith and switching their focus and resources to new projects.
Though the Zenith: Nexus and Zenith: The Last City servers will remain up and running for the time being, and those who bought ingame currency will be receiving rewards in future games released by Ramen VR… whenever that is.
For more check out the FAQ that Ramen VR has posted on their website or the video they posted explaining their story.

Blade And Sorcery Golem Boss Fight Guide And Tips
Having trouble with Blade and Sorcery’s Golem Boss Fight? Well you wouldn’t be the only one.
The golem boss, lovingly named Hector by the community, is an opponent you will have to defeat quite a few times in Blade & Sorcery.
Luckily I’ve got a guide and some tips here on fighting the Blade & Sorcery boss golem so that you can upgrade your crystals and progress further in the game.
Having trouble with Blade and Sorcery’s Golem Boss Fight? Well you wouldn’t be the only one.
The golem boss, lovingly named Hector by the community, is an opponent you will have to defeat quite a few times in Blade & Sorcery.
Why? Because you will need to defeat this Blade and Sorcery boss every time you want to get a new crystal to upgrade your magic. You might as well get good at fighting the golem boss, because you’ll be doing it a lot.
Luckily I’ve got a guide and some tips here on fighting the Blade & Sorcery boss golem so that you can upgrade your crystals and progress further in the game.
How To Defeat The Blade And Sorcery Golem Boss
You need to destroy each of the pink crystals found on the golem’s body to destroy it. They shine pretty brightly, so when you see them you’ll know it.

The Blade & Sorcery Golem Boss. Also known as Hector.
These crystals can be located all over the golem. Some are on his upper legs, while others can be on his torso, upper arms, and even his back.
These crystals can be smashed with anything, even your bare fists if you hit them enough times, but a single hit with a blunt object will do just as fine.
While you can destroy some of the crystals by just jumping up and swinging a weapon overhead, like those on the golem’s legs, you’d have to actually climb up the golem’s arms and back to reach others.
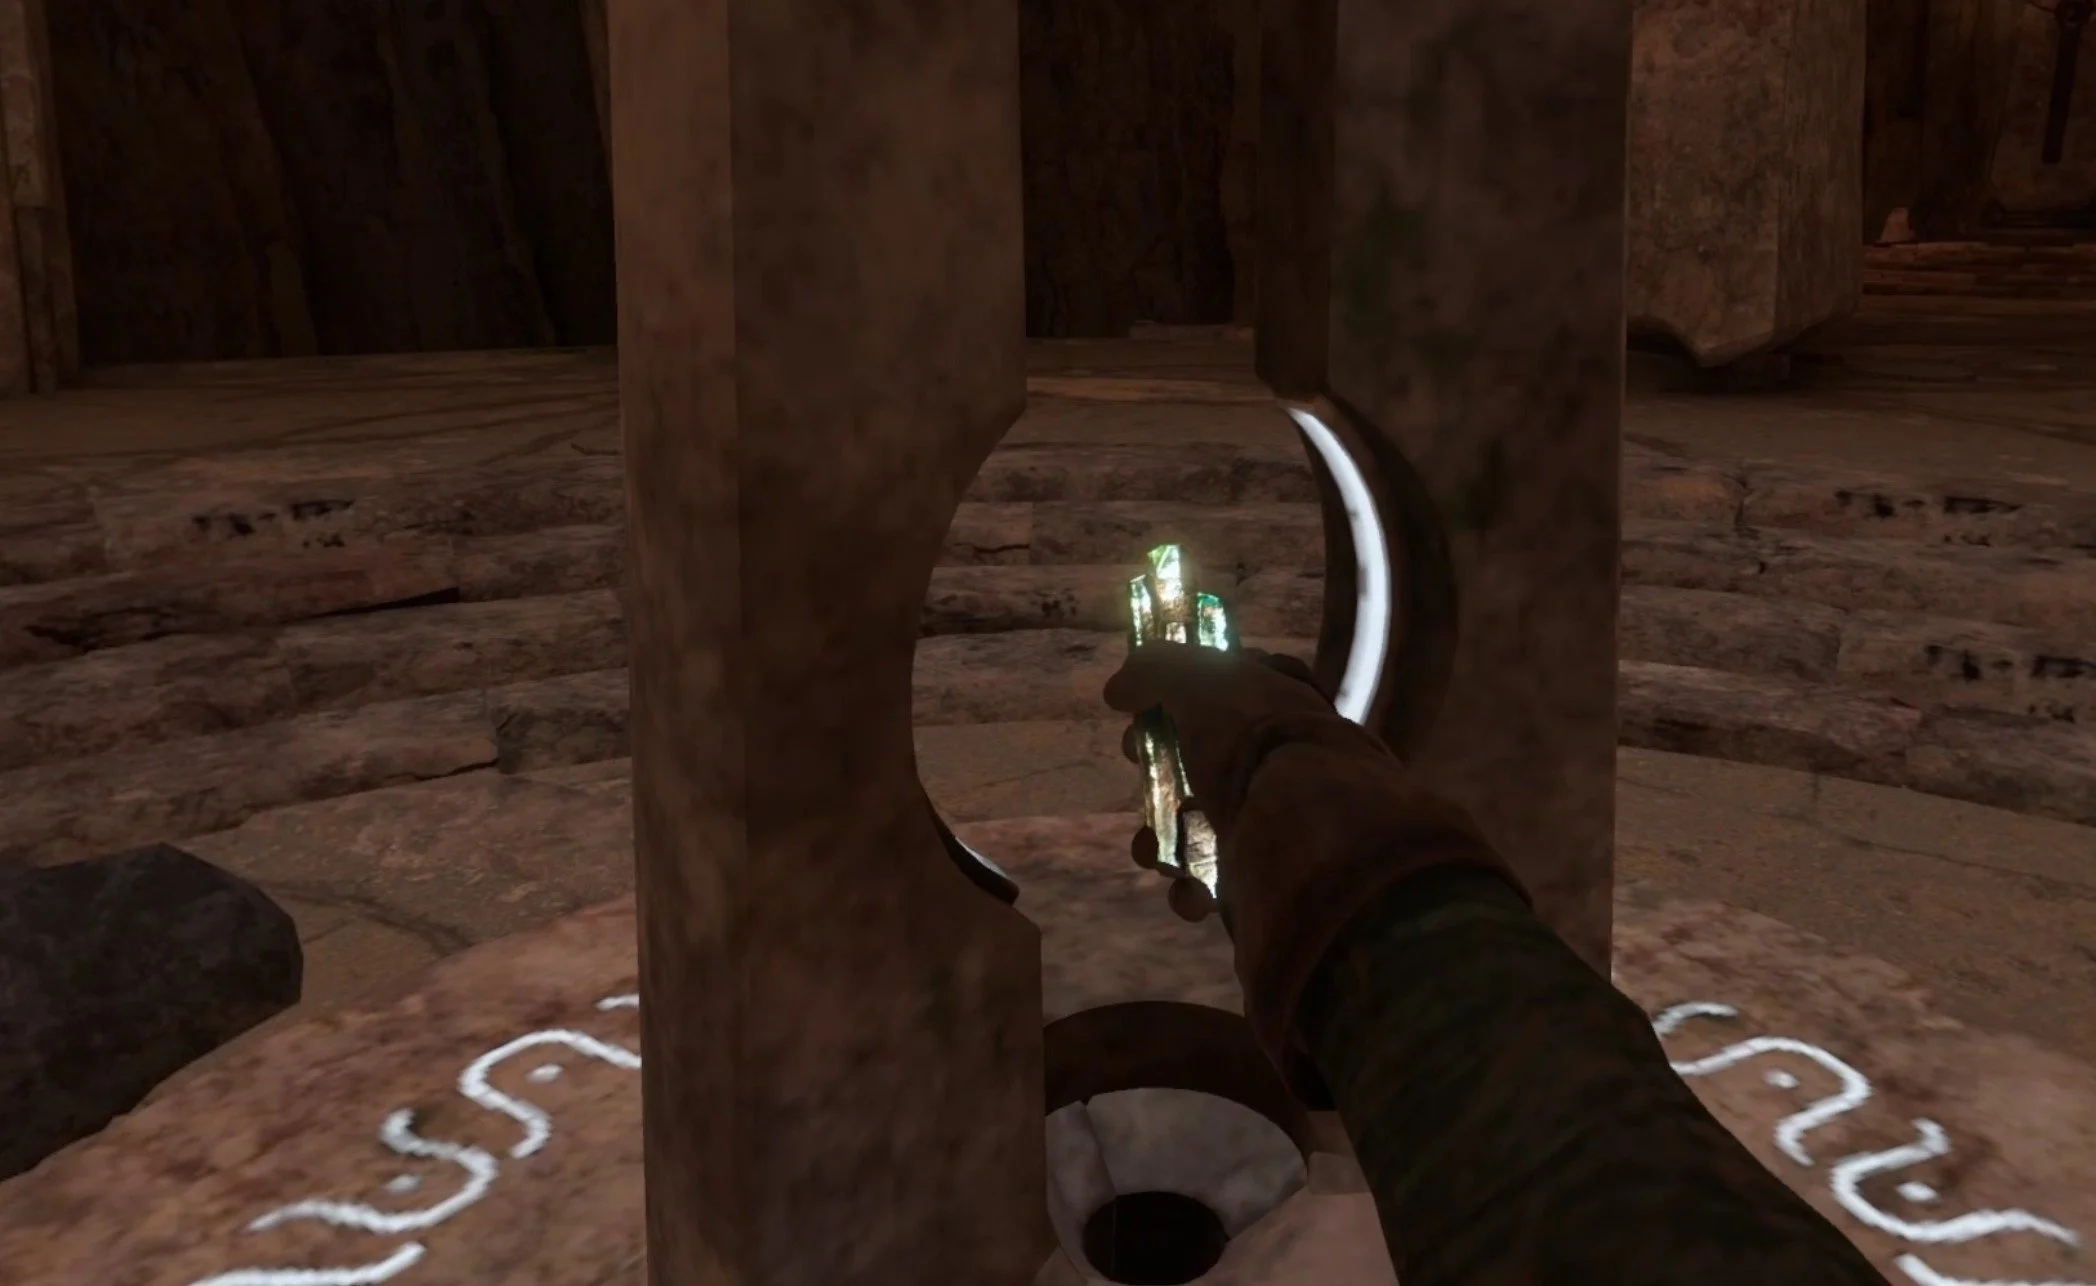
It doesn’t end there though. You’ll notice that some of the crystals are also covered in a strange energy barrier. These barriers can’t be smashed. After you’ve destroyed a few of the crystals on the golem’s body you’ll need to look around the arena and find a big glowing blue crystal.

One of the blue crystals you will have to break to remove the shields from some of the golem’s crystals.
There are several of these throughout the arena, but only one will be revealed at a time. The others will be covered with a magical barrier. Once you find the crystal then smash it.
Some are easy to get to and can be smashed with a fist or melee weapon, while others may force you to climb to get close to them. You can always break those from afar with ranged attacks. If you don’t want to, or can’t, do that, there will always be something climbable that can get you close enough to smash it.
Once the blue crystal is smashed one of the golem’s pink crystals will lose the barrier protecting it, and the golem will also crouch down and be temporarily stunned. Run over to the golem quickly and take this opportunity to smash one of the crystals in a hard to reach area, like on its back.

After you break a blue crystal the boss will be stunned for a few seconds.
Once all of the pink crystals are smashed the golem will kneel down and not get back up. Hit its face to reveal the crystal beneath and pull the crystal out of its head to defeat it.
A once closed door will open in the chamber that you fight the golem in, go through that door and you can place the crystal on a pedestal and choose what kind of crystal you want. Then step on the glowing circle nearby to teleport back home.
Once you defeat the Blade and Sorcery boss you can get a crystal of any kind you like.
Equipment Tips For The Blade And Sorcery Boss Golem Fight
As with any boss fight in any game it’s important to show up prepared not only with knowledge (which is why you’re reading this article) but also with the right ingame equipment to tilt the chances of success in your favor.
Even if you showed up the golem boss fight with no weapons at all you will be relieved to know that there are a few pieces of equipment to be found within the arena itself. Just to the right of the gravity lift that you fall into the arena on you’ll find a spear and shield lying on the ground.

This shield and spear are great free weapons in the boss arena.
The shield isn’t particularly useful the first few times you fight the golem, but the golem does get more dangerous the more times you defeat him.
Later on they will develop a long ranged lighting beam attack that you can reflect with the shield. You can use the reflected beam to destroy the golem’s crystals as well. The shield can also be helpful in deflecting the golem’s other attacks.

You can reflect the golem’s lightning beam with a shield.
The spear isn’t ideal, but it is also useful as a means to smash the boss’s crystals by just hitting them with the shaft of the spear like it’s just a long club.
You’ll also notice that on either side of the arena there are these bowls inlaid into the walls that are full of lightning. Next to each of them is a bow and a quiver of arrows.

There are two free bows and quivers of arrows in the Blade and Sorcery golem boss arena.
Dip the arrow into the lightning to charge it. Then fire it with the bow. The arrow will become a homing arrow that will home in on the nearest crystal. It’s not very smart though, so if another piece of the golem is in the way the homing arrow will just bounce off.
Also keep in mind that the lightning won’t stick to the arrowhead for long, so you have to fire it quickly before it wears off. You can use these arrows to hit the golem’s pink crystals from afar, or destroy the big blue crystals that are in hard to reach places without having to climb to them.
The biggest drawback to relying on using ranged weapons is how limited your ammunition is, with just about forty arrows total being present in the arena. Each crystal also won’t break with just a single hit from an arrow, you will have to hit the crystal multiple times.

These lightning arrows can be very useful to take out the Blade and Sorcery golem boss’s pink crystals from far away.
There is also a big ancient hammer to the found next to the central pillar in the arena. While it isn’t ideal it can also be used to smash crystals. The same goes for the sword found on top of the ridge just to the left of the entrance to the arena (you’ll have to climb up or take the ramp on the other side of it to get up there).
So, naturally, it’s better for you to bring in some more ideal weapons for yourself. I’ve found that the easiest weapons to use to quickly smash crystals are short blunt weapons like the club, trench mace, or flanged mace. A small axe can also be a great choice to quickly smash those crystals.
These can be easily wielded with one hand so that you can grab it from a weapon slot while you’re hanging on to the golem with your other hand. They will also smash a crystal in a single hit.

Smashing the crystals on the golem boss’s lower leg is easy and should be done first.
You could bring additional quiver of arrows if you like to use your bow to fight the golem. Bringing your own shield is unnecessary, but you should also consider your choice of magical crystals when fighting the golem.
For instance, once you have obtained two gravity crystals and combined them you can use gravity magic to launch yourself into the air, which is very useful for quickly getting to high places in the boss arena, or jumping on to the golem’s back.
You can also use gravity magic to deflect the boulders the golem throws at you. So if you want more help against this Blade and Sorcery boss then make sure to get gravity crystals whenever you can. It’s the most helpful magic for fighting the golem.

Using gravity magic to jump on to the Blade and Sorcery golem’s back.
If you can get some armor to prevent you taking as much damage that is also helpful, but not nearly as much as bringing healing items.
Bring as many healing items as you can. The more you bring then the longer you can stay in the fight, just make sure to use them when your health gets low and you see red. If you can’t afford armor or healing items you can always keep doing outposts and arena battles on the map until you can afford as many as you like.
Bringing the right items can make the Blade & Sorcery golem boss fight a lot easier.
Some Golem Boss Fight Tips
So we’ve gone through how to defeat Blade & Sorcery’s Golem Boss Fight (destroy their pink crystals, then destroy the blue crystals to remove the shield from the rest of the pink crystals).
We’ve also gone through what sort of equipment you should bring (a short club, tons of healing items, armor if possible, arrows if you prefer ranged attacks, gravity magic if possible).
Now for some more general tips that will help you stay alive in the boss fight arena and defeat the boss.
First of all, mobility is key in this boss fight. You don’t want to let the golem hit you by swinging his big arms or throwing a rock at you. The key to avoiding these attacks is mobility. Stay moving as much as possible. Remember to swing your arms to run. As long as you don’t stand still and keep your distance you will have an easy time avoiding most of the boss’s attacks.
This also applies when you’re climbing the body of the golem itself. The golem has a lot of handholds for you climb up him, but you can only grab on to him for a very short time before they throw you off. So make sure to climb as quickly as you can with both hands, before grabbing a weapon with just one of your hands to smash a crystal.
Right after you smash a crystal make sure to jump off of the golem and run away, because the golem will throw you off of him with damaging magic, like a blast of gravity or electricity. Though if you’re quick enough you can destroy two crystals at once before jumping off. It’s risky, but if you’re quick you can pull it off.

The golem using a gravity blast after one of its crystals is destroyed.
When you’re far away from the golem make sure to keep moving to avoid their ranged attacks, and when you’re close make sure to carefully pick your opportunity to jump on top of them and get at those crystals.
You can just jump up to hit the crystals on his lower back and legs, but you’ll need to use ranged attacks or climb to reach the upper crystals. If you get hit make sure to heal up at a safe distance before taking another shot.
You can even run to the other side of the big pillar in the center of the arena to buy yourself some time where you won’t have to dodge the golem’s ranged attacks. This can be especially useful when smashing the crystal near the ceiling there, since the boss will take a while to walk around and start attacking you again.
That’s about it! You won’t need to use all of these tactics to defeat the Blade and Sorcery boss fight, so take and use whatever fits your playstyle. Enjoy!

How To Get Contractors Showdown And Play On the Meta Quest 3 and 2
So you’ve heard about the amazing VR Battle Royale game Contractors Showdown and want to get in on the fun.
That’s awesome, and welcome to the best new VR Battle Royale Shooter there is. You’ve probably heard about how great this game is, and I can say from all of the fun I’ve had that there isn’t a Battle Royale quite like this one out there.
The movement is quick, and the shooting has a very good feel to it. Not to mention the map is huge, there are a ton of players, and there are so many different types of guns and equipment to try.
How To Play Contractors Showdown
Anyway, if you want to know how to get Contractors Showdown on your Meta Quest 3 then you’ve come to the right place. The same things said here apply to any Meta Quest device like a Meat Quest 2 or Pro as well.
Purchasing and installing Contractors Showdown on the Meta Quest is really easy. Here’s how to do so entirely in your Quest device, though you can also purchase the game through the Meta website or App on your phone before putting on your headset to install it. First put the headset on.
When you’re in your home screen you can open the store by hitting the orange button at the bottom with the shopping bag on it (when you point your controller pointer at it a bubble will show up saying “Meta Quest Store”).
Oh, and your headset will need to be connected to a WiFi network for this to work, so if you aren’t already then click on the WiFi icon on the left side of the menu bar to open your settings and connect to a WiFi network.

This orange button opens the Meta Quest store. You’ll need to go there to get Contractors Showdown.
At the top left of the store screen click on the magnifying glass search icon.
A little keyboard will show up below. Start typing “Contractors Showdown” into the search bar and hit the blue arrow to search for it.
Then click on the Contractors Showdown icon under “Apps.”

Searching for Contractors Showdown in the Meta Quest store.
Now you’ll be on the Contractors Showdown store page. There will be some more information about Contractors Showdown on it, and you could also hit the “View In Store” button to see a video about the game and some screenshots if you like.
If you’re reading this then you probably already know that you want Contractors Showdown. So hit the blue button that shows you the amount the game costs.

When you buy this game for the first time there won’t be “Gift” next to the price.
Unfortunately Contractors Showdown isn’t free. So you’re going to have to pay for it using a credit card. If you haven’t already linked a card to your account then you will be prompted to enter valid card information that can be charged for the purchase.
Once you’re done with that and you’ve purchased the game click the button on the right side of the menu bar that looks like a grid of 9 squares. This will take you to your app library.
You should now see an icon for Contractors Showdown in your library. If you don’t you can always search for it by clicking the magnifying glass icon in the top right and typing “Contractors Showdown” into the search bar.
If the icon is greyed out then point and click on it with your trigger to start installing, and then wait for the installation to complete.

Installing Contractors Showdown on a Meta Quest headset.
Once the game is installed just click on it again and you’ll find yourself in Contractors Showdown!
Now that you’re in the game there is an excellent tutorial that will show you the basics of how to play. That was how to get Contractors Showdown and how to play Contractors Showdown. Enjoy!

Into The Radius 2 Early Access Release Date Announced As July 24th
Here is a long anticipated release announcement for any fan of VR Survival Games or VR Shooters. Into the Radius 2 will finally be hitting Early Access on Steam on July 24th.
Sorry standalone purists, but there has been no additional announcement concerning a Quest version of the game, so for now Into the Radius 2 will be PCVR only. However, I’m sure that won’t be the case for too long.
If you haven’t tried the predecessor to this title, Into the Radius is one of the best VR Survival Shooters ever created, up there with other greats such as The Walking Dead: Saints and Sinners. It’s combination of decrepit eastern bloc and surreal alien settings makes its atmosphere unmatched, and the freedom afforded in its gameplay hardly seen elsewhere in the Virtual Reality gaming scene.
Into the Radius 2 promises to be a continuation of that fine legacy.
Through the many articlesfound here about the first Into the Radius game, you might guess that the first title is a favorite for this publication. While a tense, surreal, survival shooting experience in Virtual Reality might not be for everyone, if you like any of those descriptors then it is likely a game for you.
Understandably, it is extremely exciting to hear about a sequel.
Here is an excerpt of the press release provided by the developers over at CM Games concerning Into the Radius 2:
“Into the Radius 2 is an immersive VR survival shooter, set in a realm of surreal landscapes and deadly anomalies known as Pechorsk Security Zone. Arm yourself with realistic weapons and team up with friends as you venture deeper into the mysteries that lie within the zone.
The sequel retains the beloved features from the original, including meticulously crafted weapons and attachments, a sophisticated loot-management system, and the freedom to explore the secrets of the dangerous locations teeming with anomalies and haunting enemies. Building on this foundation, Into the Radius 2 will introduce riveting expansions, starting with the option for two-player co-op (currently in beta, expanding to four players with updates).”
Additionally CM Games also stated the following, which reveals the absolutely massive amount of content that is already planned for the early access release, and is sure to balloon further as development continues on the game.
“Like the original game, this is just a first stop on a long journey to full release, and this is our first public version of Into the Radius 2.
Here’s what you can expect from the initial Early Access launch of the game:
-2 locations + new UNPSC Explorer facility
-7 top priority missions and a number of secondary missions
-13 weapons, some of which have more than 1 variant
-Several backpack options and 6 types of chest rigs to choose from
-A variety of new anomalies and entities
-Single player and 2 player co-op (currently in beta, expanding to four players with updates”
As CM Games have shown in their various Devlogs, Into the Radius 2 is shaping up to be not only a continuation, but an expansion of it’s predecessor, and I for one am very excited to try it.
Into the Radius 2 will be 39.99$ on July 24th and beyond. Admittedly a little pricey for a VR title. Though the developers over at CM Games have stated that they will not ever permanently change the price.

The Walking Dead Saints and Sinners Aftershocks Walkthrough and Guide - Part 2 - Rampart
Stuck in The Walking Dead Saints and Sinners: Aftershocks? Wondering where to go next? Maybe you just like to see what is in store for you before you get there, or want to look back and see if you missed anything in The Walking Dead: Saints & Sinners: Aftershocks.
Don’t worry, I’ve got you covered with this complete walkthrough. These articles will detail how to progress through the main story missions as quickly as possible, with a couple of guiding tips thrown in here and there to make your adventure smoother.
Today we’ll be recovering the second national guard cache, which has been found by the Tower in the abandoned Rampart High School.
Stuck in The Walking Dead Saints and Sinners: Aftershocks? Wondering where to go next? Maybe you just like to see what is in store for you before you get there, or want to look back and see if you missed anything in The Walking Dead: Saints & Sinners: Aftershocks.
Don’t worry, I’ve got you covered with this complete walkthrough. These articles will detail how to progress through the main story missions as quickly as possible, with a couple of guiding tips thrown in here and there to make your adventure smoother.
Previously we went to Bywater to retrieve a National Guard Cache. Today we’ll be recovering the second national guard cache, which has been found by the Tower in the abandoned Rampart High School.
This guide assumes that you are starting Aftershocks with the "Aftershocks Quickstart” option in the main menu. If you’re playing Aftershocks after completing the main campaign then some details might be slightly different, but the challenges you face in the missions will be the same.
If you are missing some of the recipes then you can still pick them up while doing the missions in this walkthrough, though they won’t be explicitly pointed out here. For a full list of all recipes in The Walking Dead: Saints & Sinners, check out our recipe guide article.
Spoilers will be as light as possible, but there will be story spoilers by necessity in this walkthrough. There won’t be any explanation of what is going on in the story beyond what is necessary to make the walkthrough make sense.
The Resting Place
As with any mission in this The Walking Dead: Saints and Sinners Aftershocks walkthrough, let’s talk about getting ready for the struggle ahead.
If your radio isn’t tuned to station 47 then tune it. You’ll be able to hear not only a Tower broadcast about the national guard cache at Rampart, but also the random changes to different locations for the day (i.e. caches, patrols, etc).

Keep your radio tuned to channel 47.
Oh, and make sure to check the steps leading into the bus. You’ll find that somebody has left you a note.

Someone left you a note on the steps leading up to the bus. Very ominous.
Anyway, on to preparing for the mission. Just like previously when we went to Bywater, there are a ton of human enemies guarding the Rampart High School and the cache within.
While stealth is an option if you prefer it, this mission can be completed by avoiding human opponents instead of fighting them, it’s better to make sure you’re prepared by bringing some firepower that is effective against armored human soldiers armed with guns.
Bring at least one larger firearm and at least one pistol. A bow can be useful if you want to rely on stealth, but if you bring one it’s wise to bring another large firearm for backup. Using a few of your backpack slots to carry a bandage and a couple of explosives as well won’t hurt.
There will be a ton of loot to be had during this mission, and regardless you should be pretty well off in the resources department already, so don’t worry too much about leaving room for scavenged items. It’s time to have fun with all of the recipes and items you found during the original campaign.
Finally, make sure you’ve got a couple of melee weapons for walkers, and it might be wise to bring some food if you plan to try and get some of the crafting recipes found in Rampart after you complete your main objective of finding the cache.
There are no bells in this mission, so you will have unlimited time to search the area for any recipes you might have missed. The only time constraint is your stamina bar getting smaller due to hunger.
The Rampart National Guard Cache
Once you’re armed to the teeth and ready to go, head over to the boat and leave for Rampart.
Luckily the route to your objective is pretty straightforward. Once you arrive in Rampart take a look at your map

A direct route to the national guard cache. Watch out for the tower patrols on the way.
See the route outlined above? That’s the most direct route to the cache, and sort of your only route. You can also go around the top of the gym, but if you go that way you will definitely run into trouble.
Normally in Rampart there are more ways into and out of the school open to you, but here in Aftershocks they’re mostly blocked off. To get to the cache and the entrance to the east wing of the school beside it, you’ll have to go through the courtyard.
The courtyard is the most dangerous place to be in Rampart right now. It’s full of Tower patrols. After you go through the gate which is right in front of where you will spawn in, you’ll see or hear them.

The Tower soldiers aren’t very observant and can be avoided if you are careful.
There will also be some stationary tower grunts guarding the side entrances to the courtyard, like that on the other side of the basketball court, and the other one from behind the east wing of the school.
I recommend following the path highlighted on the map above and just going straight through the courtyard. There are a few Tower patrols that you can sneak past if necessary, or fight.
Fighting them isn’t tough because you can easily get the jump on them, or use explosives like nail bombs or sticky bombs to perform an effective ambush. With all of the tools at your disposal they should be no problem.
Whether you sneak through or fight your way through you’ll find the national guard cache near the open entrance to the east wing, on the bottom right of the courtyard on your map. It’s under an awning and next to a big yellow schoolbus.
The cache is on that table next to the school bus, already opened.
Unfortunately the cache is mostly empty, but there is a note inside, a bandage, and most importantly a strange key. Make sure to take the key.
The note will give you some story and tell you to go to the library. Conveniently there is an entrance to the school that is very near the library and right next to the cache. If you’re facing the empty cache box, just turn around.

The entrance to the school next to the cache.
Head inside and get your melee weapons ready for some walkers.
There aren’t any human enemies inside of Rampart, they’re confined to the courtyard, but inside there will be plenty of walkers and plenty of wire traps.
Luckily these traps aren’t the explosive sort we saw last time, they’ll only hurt you a little if you touch them. It’s easy to disarm them by just touching them with an object, like your flashlight or a melee weapon. So they’re mostly harmless.

These wire traps are easy to disarm by touching them with an object.
Anyway, once you’re inside, immediately take a right and go down the hallway that ends in the door blocked by that computer cart, like you can see in the screenshot above.
Once you reach the end of the hallway turn left and go up the big staircase. Once you are at the top of the stairs go down the hallway leading out of the stairwell until you see some double doors on your left next to a blockage in the hallway where the roof caved in.
Those double doors lead into the library, and once you enter the library keep to the left and you’ll find the contents of the national guard cache just behind the big desk there.

That’s a lot of loot!
There you are, the contents of the national guard cache. Fill your backpack up to your heart’s content. You’ll never want for medicine or bandages again with this haul.
I do recommend you prioritize the “box of loot” items though, since you’ll probably not be able to take everything.
Leaving Rampart
Oh, and on the desk next to the cache is a note with some more story, and the news that the Reclaimed will be there soon. Specifically, it says that they’ll be attacking the courtyard with all of the Tower soldiers inside of it.
This isn’t great news for you, since you’ll be leaving through the courtyard. The exits other than the way you came in are all blocked.
Head back out of the high school the way you came. Head back out through the library’s double doors and take a right. After heading down the stairs just keep going straight down the hallway until you see the exit on your left.

Exiting back to the courtyard, be ready.
Get ready, because there is going to be some fighting out in the courtyard. As soon as you exit the school a couple of large squads of Reclaimed troops will spawn in and sweep the courtyard for enemies, which includes you.
Unless you managed to make it through stealthily and without destroying a single Tower soldier out there. I’m unsure if this is a bug, but I found that if I didn’t get rid of any of the Tower soldiers patrolling then the Reclaimed will just not spawn in.
Though the moment you do shoot a Tower soldier they will spawn in regardless. This seems odd, so I can’t be sure if the same will happen for you, but if you prefer the stealthy approach then you might have an easier time leaving Rampart if you stick to being sneaky.
In the likely event that the Reclaimed do show up they will quickly overwhelm the Tower guards that remain, though the more Tower soldiers you left behind the more there will be to resist the Reclaimed.

The Reclaimed patrols are very tough.
The Reclaimed will be harder to take on than the Tower were though, their groups are bigger and more heavily armed. You’ll have a tougher time blasting your way through.
That being said, once the Tower soldiers are gone the Reclaimed will patrol the courtyard, giving you opportunities to slip around them by stealth or ambush them. You can head back to the boat you came in on via the main gate, or head there by taking the path leading around the Gym, which will be free of human enemies once you make it out of the courtyard.
Regardless, you are strong, and there will certainly be tougher battles ahead. So don’t worry, you’ve got this whether you need to blast or sneak your way out. Head back to the boat that you arrived on, in the top left corner of the map.
Once you’re back at the boat you came in on travel back to The Resting Place, organize your loot, and go to sleep.

Going back to sleep in The Walking Dead: Saints and Sinners - Aftershocks DLC.
Need a guide on what comes next? Well next time you’ll be heading to The Ward to get another national guard cache. To find out how check out part 3 of this The Walking Dead: Saints and Sinners - Aftershocks walkthrough.