


The Walking Dead Saints and Sinners Aftershocks Walkthrough and Guide - Part 1 - Bywater
Stuck in The Walking Dead Saints and Sinners: Aftershocks? Wondering where to go next? Maybe you just like to see what is in store for you before you get there, or want to look back and see if you missed anything in The Walking Dead: Saints & Sinners: Aftershocks.
Don’t worry, I’ve got you covered with this complete walkthrough. These articles will detail how to progress through the main story missions as quickly as possible, with a couple of guiding tips thrown in here and there to make your adventure smoother.
This guide assumes that you are starting Aftershocks with the "Aftershocks Quickstart” option in the main menu. If you’re playing Aftershocks after completing the main campaign then some details might be slightly different, but the challenges you face in the missions will be the same.
If you are missing some of the recipes then you can still pick them up while doing the missions in this walkthrough, though they won’t be explicitly pointed out here. For a full list of all recipes in The Walking Dead: Saints & Sinners, check out our recipe guide article.
Spoilers will be as light as possible, but there will be story spoilers by necessity in this walkthrough. There won’t be any explanation of what is going on in the story beyond what is necessary to make the walkthrough make sense.
The Resting Place
The Walking Dead: Saints and Sinners - Aftershocks, and this walkthrough, begins with you waking up in the Resting Place. Your radio will be on and tuned to channel 61, and you’ll hear a stranger talking about a cache in an auto shop.
Once the message plays, make sure to change the station to 47 to get the usual Tower messages about caches and whatnot. The information from channel 47 is still useful, even when you go to a location for a mission. For instance, if there is a weapons cache in Bywater during this mission it will be there when you go there for this mission.

Home sweet home. If you used the “Aftershocks Quickstart” option your bus will be packed with materials and weapons to use.
So, as with any trip in The Walking Dead: Saints and Sinners, it is time to prepare.
As always, make sure you’ve got a melee weapon or two with you for walkers, and if you’ve got the Jambalaya recipe, or any other recipe for food that gives you a beneficial buff that you want, make sure to make and eat some.
In the Aftershocks DLC you will be facing a lot more human enemies than in the main game, and so for your first foray back out into Bywater make sure you bring some firepower.
You’ll already have an absolute ton of weapons on the wall in the school bus, but whatever you pick be sure to be ready to fight a lot of heavily armed and armored human opponents if need be. I personally recommend the Nova 1014 pump action shotgun.
Bows can also be very effective and can help if you prefer a stealthy playstyle. Regardless, you should definitely bring enough weaponry in case you fail at stealth and end up in a big fight. It is possible to get the cache in Bywater without fighting, but it’s better to be prepared.
I also recommend you bring a pistol in addition to at least one larger weapon. The FS92M 9mm semi automatic pistol is overall a fantastic and versatile choice. The .45 Revolver is also a solid choice for human opponents.
As always bringing a bandage or two is also a good idea in case you get hurt. Bringing other utility items like bombs is also a good idea.
You’ll notice that you start Aftershocks with a lot of resources, and the caches themselves will all contain fantastic loot. Aftershocks is less about carefully building up your resources, and more about using all of the cool items you got over the course of the main game. So enjoy yourself and use all of your toys.
Maybe even bring some food if you want to take your time, because you can. In this mission and all other Aftershocks missions there are no bells and no time limit. The closest thing to a time limit is your stamina bar depleting whenever you swing a weapon or run.
Bywater
Once you’re armed and ready head to the boat and off to Bywater.

Travelling to Bywater.
Once you arrive and get off of the boat, the first thing that you will notice is a peculiar wire leading from the back of a truck right in front of you to a propane tank.
Just hang back for a second, and a walker will come around the side of the truck and walk into the wire, which will cause the propane tank to blow up.

A walker a moment before it walks into one of the explosive traps.
This is the newest danger added in the Aftershocks DLC, explosive traps. Get used to them, because there are a lot sprinkled throughout Bywater. Always stay on the lookout for wires and the tanks they are connected to. Keep in mind you can always shoot the propane tank or trigger the wire by throwing something at it from far away to safely detonate the trap.
Head straight down the street and soon you’ll run across an absolute ton of Tower soldiers standing in front of the main entrance to the auto body shop. Since the reserve was flooded they really beefed up on security.
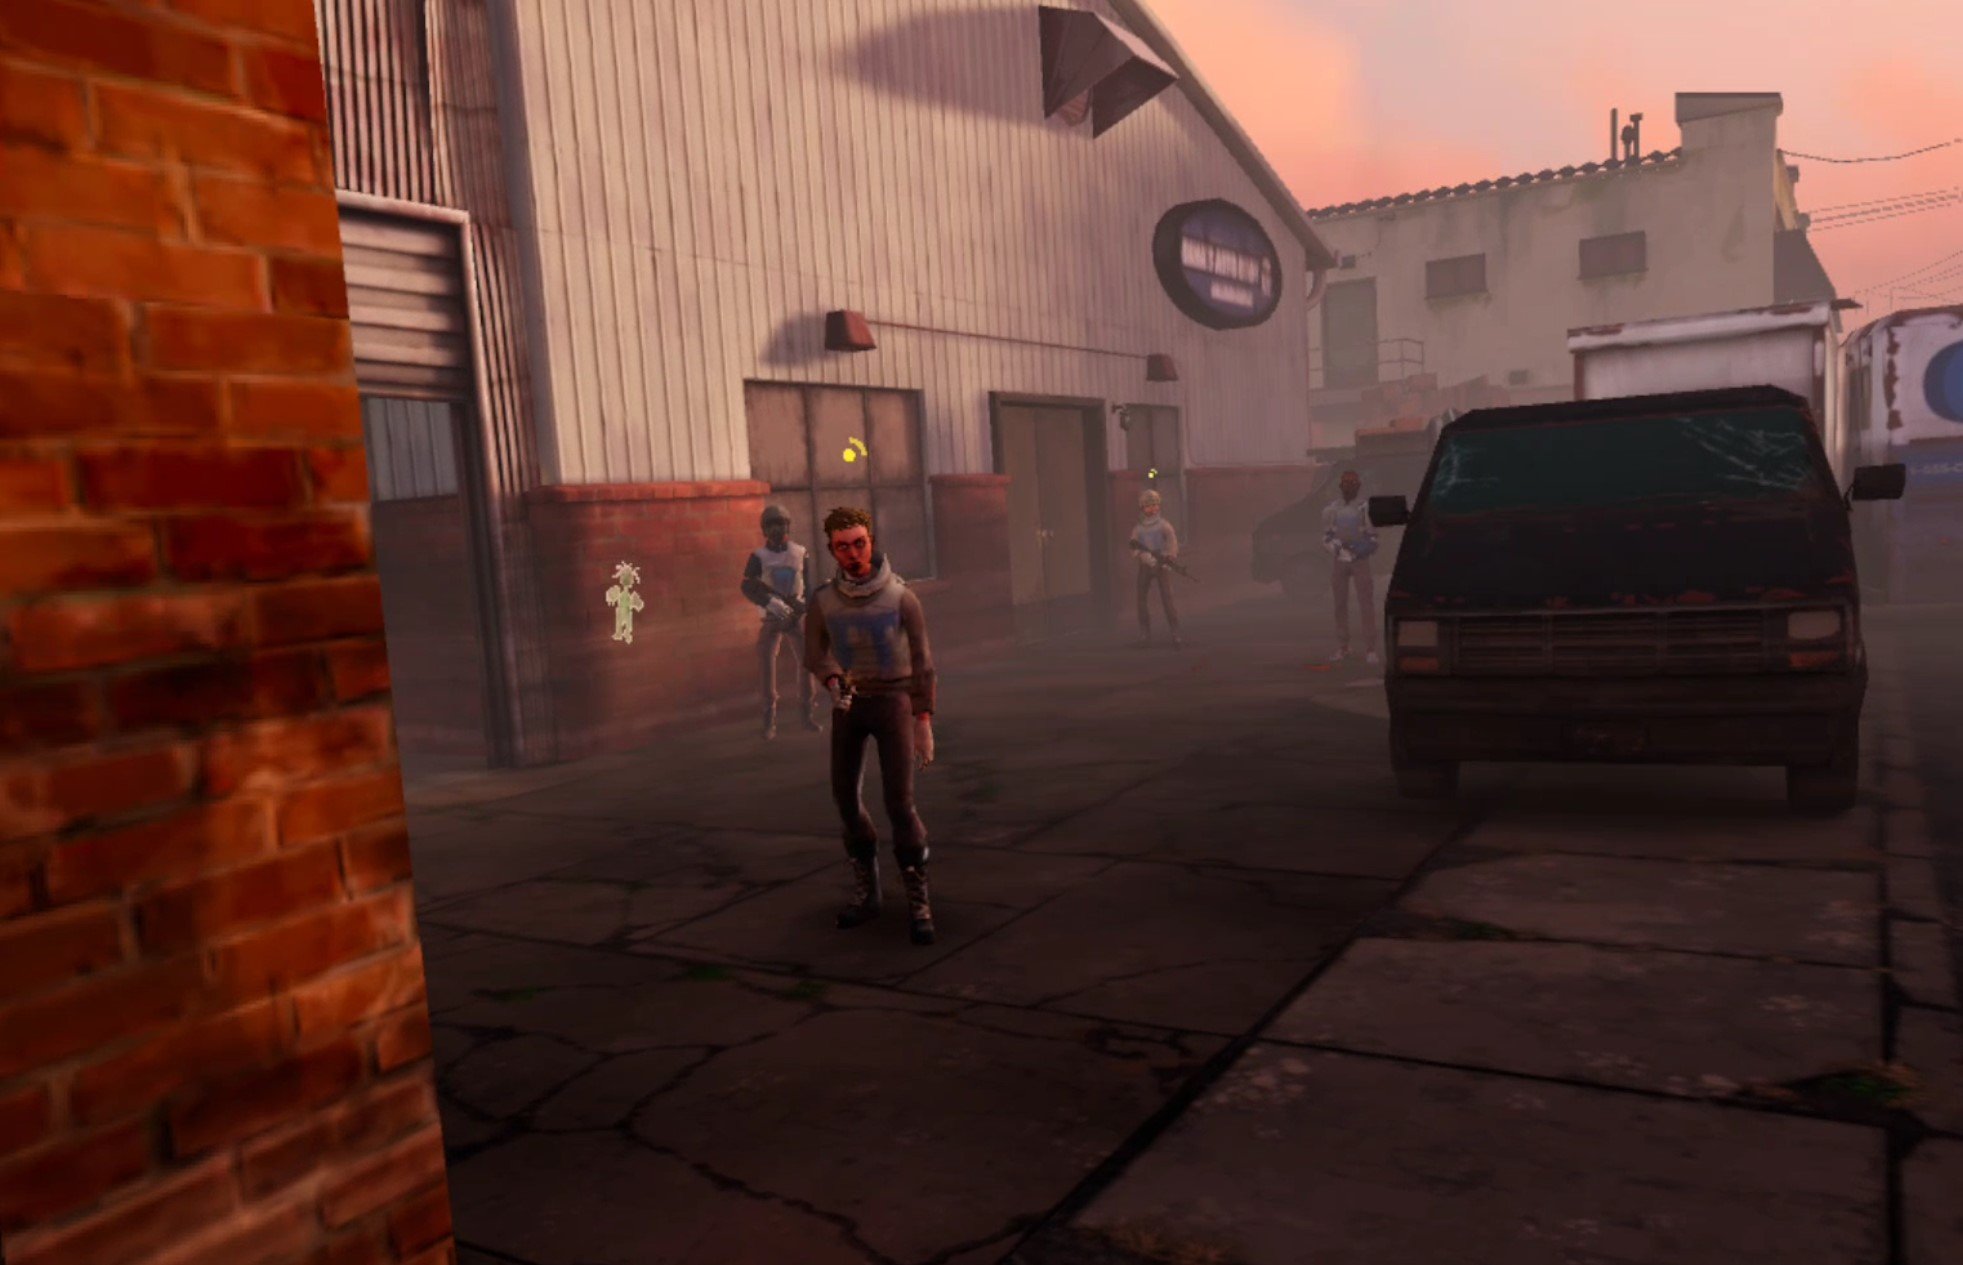
There are a lot of tower soldiers guarding the front entrance to the auto body shop.
Bywater - Getting The Key
You don’t have to deal with them yet, because you won’t have to go for the cache in the back office of the auto body shop immediately.
There’s no point right now, because the cache is locked, and the key is actually located inside of the old cannery. It’s the building marked by the fish on your map.
Oh, and don’t worry too much about picking up loot or anything like that, when you reach the end of this mission you’ll have a ton of loot to bring back with you. Though, as always, if you see any boxes of loot items, make sure to take those.

The in game map of Bywater.
The problem is that the cannery is absolutely packed with explosive traps. So many that if you set one off all of the others will explode.
If you like you can head to the lumberyard marked on your map as the pinkish building with pieces of wood as its icon and retrieve a map from the trash bin in the main office. This map shows you a route through the traps inside of the cannery.
You don’t have to get the map and can just go straight to the cannery if you like, so just skip ahead in this walkthrough if you just want to use the screenshot of the map I’ve included below, or find your way through the cannery traps yourself.
To get the map keep heading down Barthalemy street, and then take a right once you hit Madrid street. Head down Madrid until you see an opening in the fence surrounding the lumber yard with a truck sitting in the middle of it. This is the ideal way in, but be careful, there are traps on either side of that truck.
Luckily those traps are not bulletproof. Just shoot the propane tank or throw something at the wire from far away to make the trap explode.

Shooting an explosive trap to get into the lumberyard.
If you keep to the right of the truck you should only have to shoot a couple of traps before you can safely enter the courtyard and head to the trailer which contains the map.

The lumberyard office containing the map.
Inside the office search through the trash can next to the desk and you’ll find the map, as well as a pistol and some other junk.

The map in the lumberyard that shows you how to get through the traps in the cannery.
Now that you’ve got the map head back to Madrid street and head up the street (towards the top of your map) until you see this hole in the wall on the side of the street. It’s right on the top right corner of the cannery on your map.

A convenient and sneaky side entrance to the courtyard connecting the cannery and auto body shop.
Watch out for the traps near the hole, and after you destroy them you can also knock down the boards over the hole in the fence. There are other ways to get to the cannery garage entrance, but this route will have the fewest Tower soldiers between you and the garage.
You will see that just past this hole you can enter the cannery through the garage entrance on the left. Be careful though, as there are Tower soldiers patrolling the area. Slipping past them towards the cannery entrance should be pretty easy, and you can always take down the patrollers silently with a bow or melee weapon if you’re careful.
If you’re spotted, or you just don’t want to bother with stealth, then just use some of the vast arsenal at your disposal to blast your way through. At this point in The Walking Dead: Saints and Sinners you are very well armed and experienced.
However you get into the garage, be very careful once you enter. Just to be safe always stay ducked and don’t stand up fully until you’re out of the trapped area. It’s very dark so always keep your flashlight on, take your time, and go slowly. Don’t shoot or set off any of the traps, as this will cause the entire building to explode.
Walk past the forklift on its right side and climb up the box with the white paint on the side to your left.

The box you must climb over to enter the cannery proper.
Once you’ve dropped down on the other side of the box reference the map from the lumberyard, if you didn’t get it then just scroll up a bit in this article for a screenshot. You don’t strictly need the map though, if you just slowly crouch walk around you will eventually find the route yourself, though it might be a little frustrating if you get lost.
Remember to stay low and go slowly. If you get turned around don’t panic. You’ve got plenty of time, so take your time, and you can totally do this. Once you climb up the stairs that lead to the second floor of the cannery you’ve made it past the traps.
When you’re on the second floor head through the door leading to the main office. Propped up next to one of the desks you’ll see a guy with no legs sitting next to a radio with the key to the cache in one hand.

The guy you heard on the radio with the cache key.
Bywater - Unlocking The Cache
Now that you’ve got the key the next part is much more straightforward. The cache itself is in the back office of the auto shop. Yes, the same auto shop that is heavily guarded by Tower soldiers. It is possible to sneak past them, and also to fight your way through them. Fighting does also have the advantage of the potential for the tower soldiers to drop crafting recipes or boxes of loot.
The quickest way out of the cannery’s second floor is to go out on to the balcony and jump down, but it’s also an easy way to get spotted by the tower troops standing around in the area below it. If you want to just fight your way to the cache going out by the balcony does offer you a great vantage point to shoot down at them or throw bombs at them.

The balcony exit from the cannery. The entrance to the auto body shop garage is to the right and not visible in this picture.
If you prefer the stealthy approach then quickly jump off of the balcony before you’re seen, or head back into the cannery and jump down to the first floor and weave your way back through the traps so that you can head back out through the garage entrance the way you came.
There will only be a few tower troops patrolling the courtyard full of boxes behind the cannery. You will also notice that there is an open garage door leading into the auto body shop itself.

The side entrance to the auto body shop. The easiest way to fight or sneak in.
Going in through this way will bypass most of the tower defenders between you and the cache, which is in the back office right beside the garage. The back office is located on the side of the building closer to the top of your map, slightly to your right when you enter through the open garage door.
There is only one Tower soldier in the garage itself, so you can easily sneak past them or take them down quietly. Once you are in the office there’s a note with some story about the cache, and more importantly the cache itself! Open it up with your key and loot the treasure trove inside to your heart’s content.

At long last, the cache.
There are a ton of food items inside of this cache, make sure to prioritize taking the boxes of loot and then the dragon bars before anything else.
Once you’ve looted the cache all you’ve got to do is leave through the boat you came in or the one at the end of Eloise street. I recommend the one at the end of Eloise.
All you’ve got to do is exit the office through the door next to the cache and head to the right. There will be a guard or two between you and Eloise street, but at least one will have their backs turned to you and be easy prey.
Once you’re on the street take a right or a left to go to whichever boat you please, though going to the right is the more direct route.
Back At The Resting Place
Once you’re back home head to the bus as usual and scrap all of the fantastic loot you got before going to sleep. Keep your radio tuned to channel 47, there will be another cache tomorrow.

Sleeping before another day of The Walking Dead: Saints and Sinners - Aftershocks.
Need a guide on what comes next? Want to find out how to get the next cache in Rampart? Then head over to Part 2 (coming soon).
7 Amazing UNDERDOGS VR Tips And Tricks
UNDERDOGS is pretty hard VR fighting game to complete all the way to the end. Of course it is! It’s a roguelike. So here are 5 UNDERDOGS VR Tips and Tricks will help you get further along in the game before getting destroyed, and will help you win the whole game, become a champion mech fighter, and save your little brother.
Well if you feel that way, or just want to get better at UNDERDOGS in general then try these fantastic UNDERDOGS tips and tricks that are sure to give you a fighting chance out in the arena and increase your chances of making it up to New Brakka and winning the game.
UNDERDOGS is pretty hard VR fighting game to complete all the way to the end. Of course it is! It’s a roguelike. So here are 5 UNDERDOGS VR Tips and Tricks will help you get further along in the game before getting destroyed, and will help you win the whole game, become a champion mech fighter, and save your little brother.
As an intense VR Fighting Game and a roguelike, UNDERDOGS is pretty difficult to actually complete all the way through. That is, of course, because if you get smashed and lose the game you have to start all over again from the beginning.
So every playthrough has the potential to end with early failure, or take you all the way to the end. Though each attempt can also end at around the same place the last one did, leaving you frustrated and feeling like there’s a point in the game that you just can’t progress past.
Well if you feel that way, or just want to get better at UNDERDOGS in general then try these fantastic UNDERDOGS tips and tricks that are sure to give you a fighting chance out in the arena and increase your chances of making it up to New Brakka and winning the game.
1: Stay Mobile
The number one most important tip in UNDERDOGS that will improve not only your offensive, but also your defensive potential, is to not stay still and stay on the move.

Staying on the move in UNDERDOGS will cause enemies to attack where you used to be instead of where you are.
You will be outnumbered almost all of the time when fighting in UNDERDOGS, and the hordes of bots you will fight will do their best to surround you, corner you, and attack you from the sides and back where you are vulnerable.
Don’t let your enemies do this. Always stay moving and only stop for as long as it takes to strike. Don’t keep attacking a single enemy for too long, and try not to leave your back vulnerable for too long. King will also often shout a warning when an enemy robot attacks you from the side or rear.
While being outnumbered may make it seem like the odds are stacked against you, UNDERDOG’s unique movement system makes staying on the move somewhat easy. You just having to grab the ground and drag yourself in whatever direction you want to move.
You can generate momentum in any direction from a complete standstill, and moving only requires a quick arm motion. Despite the size of your Gorilla mech, speed and mobility is one of its greatest strengths.
Of course awareness is also an important component in your mobility, so also make sure to not get tunnel vision on a single opponent and be aware of other bots preparing to jump you. Constant movement and constantly looking around at your surroundings will help with this.
2: Hit and Run Against Bosses
Staying mobile also applies when you are fighting any of the bosses in UNDERDOGS.
Each of the bosses are bigger, faster, and hit harder than the normal enemies you will meet. Don’t think that just because they’re around the same size as you that means you should be standing face to face with them and duking it out blow for blow.

When a boss winds up an attack in UNDERDOGS it is time to move.
The bosses deal lots of damage and have huge health pools. They can withstand a lot more punishment than you. They can also deal out punishment much faster than you.
So when fighting any of UNDERDOG’s bosses keep in mind that mobility is still key. Get in when you can, deliver a blow or two, and then get out before the boss hits back. Stay on the move and stay alive.
3: Hit Weak Points
Bosses, and a lot of enemies, also have weak points that you can strike for extra damage, and these weak points also sometimes coincide with other mechanics in the game, like overcharge and overheating.
Starting with the bosses, each of them have weak points that you should always aim for to strike for maximum damage. For instance, the champions of each arena are in mechs that are a lot like yours, and just like yours the weak spot is the bubble that protects the driver.

Striking your enemies in weak spots will drastically increase your damage in UNDERDOGS.
Hit this bubble to deal the most damage when you strike at these bosses, and keep in mind that this applies to robot enemies as well, especially the larger ones.
The very common dog robots are all weak to strikes in the head, and their heads won’t have armor on them, so you should always aim there.
The big gorilla robots are also vulnerable to strikes to the head, though their heads are much smaller, and the rhino robots reveal a massive engine inside their backs after they charge, so strike those as quickly as possible to deal massive damage.
Rhino robots, conversely, are actually very hard to hit in the head due to the spikes surrounding their noggins, and so body shots are actually preferable on them.
Oh, and just like with the rhino it’s always better to attack a bot when it is overheated and vulnerable, like the more common Alphas which will always bite and latch on when overcharged, but are harmless during their brief periods of overheat.
4: Use The Environment
You’ll notice pretty quickly that the arenas of UNDERDOGS are full of traps and objects that will affect the fight between you and your many opponents.
Well this UNDERDOGS Tip is here to remind you to take full advantage of the arena that you are fighting in. Seriously, if you make use of the many traps and deadly pieces of scenery spread throughout the arena you will significantly improve your ability to deal damage and therefore survive and win.

Impaling a pit dog on a spike in UNDERDOGS. An important tip is to always use the environment to your advantage.
Take the Killbox, the very first arena in the game, for example. King will announce when the grinder opens, and you’ll definitely notice the massive pinkish glowing swirling blades.
It is super easy to knock robots into those blades with the wrecking balls you start the game with. All you need to do is punch the robots in the direction of the blades and they’ll fall right in.
The same goes for the other rotating spike traps that you will find in the arenas, or the spikes on the walls. Knocking an enemy bot into a wall full of spikes will deal a ton of damage, and stick them there for a while to buy you some more time to deal with their buddies.
Even the car wrecks and explosive barrels can be useful, especially if you have a grabber arm to throw them with. So don’t forget to utilize your environment to deal extra damage.
5: Knock Bomb Robots Into Enemies
Bomb bots are a unique enemy in UNDERDOGS in that they can be just as much of a danger to your opponents as they can be to you.
As long as you are mobile and aware of your surroundings the bomb bots should have a very hard time sneaking up on you and exploding themselves. Even if they do get close they will make a very loud noise when activating themselves.

Another UNDERDOGS tip, bomb bots deal a ton of damage to your enemies.
It’s easy to get rid of them by knocking them over to the other side of the arena and letting them blow up harmlessly and far away.
Though a better alternative is to knock them into an enemy. The bomb bot will stick to them and then blow up shortly after. This can be especially effective against a large group of enemies, and deals a ton of damage while also getting rid of the bomb bot.
Make sure to utilize the bots just as you would utilize your environment to deal damage to your enemies. Oh, but keep in mind that doing too much damage to a bomb bot will cause it to instantly explode, so be careful when handling them.
6: Save Some Money
This UNDERDOGS tip is especially relevant once you start surviving far into your runs and reach the late game.
While buying new equipment and weapons is a great way to increase your combat potential, it is also important to try and avoid breaking the bank so badly that you don’t have the money to afford repairs you might need before next fight.

Always make sure you have the cash to repair your mech in UNDERDOGS.
In UNDERDOGS you have to take what brief opportunities you can get to upgrade the Gorilla, because they don’t come as often as you might like, but at the same time make sure that you have enough cash on hand for any repairs you might need. It’s a delicate balance, but your first priority is always to not be destroyed, and so prioritize cash for repairs first.
When you are about to defeat the second mech boss in the game and are nearing the start of your Backdoor Run to complete the game, don’t think that you should spend all of your cash before the run begins.
You will actually have a couple of opportunities to spend your money on repairs during the Backdoor Run. Trust me, you’re going to want to have the money to afford those repairs.
7: Choose Your Gear Wisely
Before each non boss fight in the arena you’ll be given a choice of patron, each of which changes something about the fight, but that’s not what is important about which one you pick.
What’s important is what kind of gear the patron gives, and what kind of gear you already have for your mech during your current run.

Choosing a patron in UNDERDOGS is more about what rewards they give then the challenges they add.
Your most consistent source of equipment to upgrade your mech will be as rewards for completing a fight, though you can definitely supplement this with random finds and purchases in between battles. Still, read what sort of gear each patron gives you, and see if those rewards are helpful for your current situation. For instance, if you’re spending a lot on repairs, consider going for a patron that offers Tanking gear.
What’s more important though, is getting gear that synergizes well with your current loadout. Now this isn’t something you will be able to master in a run or two, it takes time, but winning UNDERDOGS is more than likely going to take you quite a few runs. That’s the nature of the game as a roguelike.
Still, during each run make sure to read the descriptions of items and really think about what they might go well with. If you’ve got an arm that shocks an enemy each time you hit it, then pick a patron that offers shock damage gear and upgrades.
Buy some items that give bonuses when enemies are shocked, and you might find that you create a combo that does incredible damage. Basically focus on getting add-ons, quirks, and upgrades that give bonuses to the equipment you already have.
With a little luck and some forethought you can get fists powerful enough to destroy enemies in one or two hits.

This UNDERDOGS tip might seem obvious, but make sure you choose your gear carefully.
You can also try out combinations of items in skirmish mode to increase your familiarity with them, and try out new combos to see what works and what doesn’t.
At the end of the day luck is a big component in what equipment you get, and you can always win with lacking equipment if you use your patience, skill, and stamina. Mastering the numbers and equipment of UNDERDOGS just makes the fights a lot easier if you do it right.
Anyway those are all of the UNDERDOGS Tips and Tricks that I’ve got for you. Enjoy yourself out there in the arena and good luck making it to New Brakka. See you there.

The Most Realistic VR Motorcycle Game On The Meta Quest - VRider SBK Review
Looking for an exciting, challenging, and realistic VR motorcycle game on your Meta Quest 3 or Meta Quest 2? Well then look no further, because an extremely realistic VR bike racing experience is here in the form of VRider SBK.
This is more than just a VR Motorcycle Game on the Meta Quest, it’s really more of a VR Motorcycle Simulator.
I have only ridden a real motorcycle once or twice, but even with this limited experience I can definitely appreciate and feel the efforts that the developers of VRider SBK put in to make this a very real feeling Virtual Reality Motorcycle Racing experience.
Let’s find out how in this quick VRider SBK Review.
A Realistic VR Motorcycle Racing Game
In VRider SBK you’re a motorcycle racer on top of a fancy superbike that most normal people could have no hope of actually owning or driving in real life. It goes really fast, really quickly.

This is the most realistic Motorcycle experience you can have in Virtual Reality.
What’s even better is that VRider SBK isn’t like some flatscreen game where you control your motorcycle with a thumbstick and a trigger on a controller, which is entirely unlike the actual controls of a motorcyle.
Nope, in this Virtual Reality game you control the throttle by physically twisting your hands while holding the controllers sideways. You know, kind of like how a throttle on a motorcycle actually works.
It gets even better. As you might guess you will need to do a lot of turning during a superbike race. Well, in VRider SBK you turn by actually moving your controllers in the direction you want to lean in the game, and your motorcycle will lean with you.

Racing on a VR Motorcycle is so much fun in VRider SBK. Though it is really hard.
It is absolutely amazing and intuitive, because this is a pretty close simulation of how you would actually control a real life motorcycle!
That, combined with the very first person VR view of your motorcycle and the track in front of you equates to an extremely immersive and realistic VR motorcycle game that puts any flatscreen attempt at simulating the experience of racing a superbike to shame.
You even have to duck your head down behind your windshield when you go really quickly, otherwise you will shake and slow down because of the wind. You know, like if you really were sitting up on a bike going a couple hundred miles per hour.

Following the arrow on easier difficulties is a good way to learn how to hug the track in a VR Bike Game.
VRider SBK Is Hard
Though there is one downside to this level of realism, and that’s that riding an actual motorcycle in racetrack conditions is hard to learn and hard to master. Due to the amount of realism in the racing simulation and the controls, VRider SBK is also a really difficult game.
Maybe it would be a little easier to someone who has actual experience riding real motorcycles, but to a casual VR gamer VRider SBK is incredibly difficult to be good at. I have finished many races and still have trouble not going off of the track during simple turns.
Though this isn’t due to ignorance, just a lack of experience and skill. The tutorial was in depth and fantastic, giving you a little bit of knowledge at a time and then reinforcing it with a small racing challenge. As far as VR racing game tutorials go, VRider SBK’s might have a lot to learn in it, but it is fantastic.

VRider SBK has a fantastic tutorial, better than any other VR Racing Game I’ve seen.
You can mitigate some of this difficulty with this motorcycle VR game’s many difficulty options. There are a lot, and a few presets going from Rookie to Pro.
I mostly played on Pro for maximum realism, and honestly even with the assistance given to you in the Rookie difficulty this is still a VR racing game that is difficult due to its emphasis on realism. There are also some other options though, like changing the throttle control from twisting the controller to pulling the trigger.

There are a lot of difficulty settings and presets to try in this VR Motorcycle Game.
My back and arms would even start to ache by leaning forward into my chair and holding myself in the motorcycle racing posture with my arms up and tilted to the side and my head tucked safely behind the windshield. With no motorcycle to rest on my body became tired from holding itself up.
I still can outpace bots on the Very Easy difficulty, and found that trying to beat my previous best time on tracks was a very fun way to slowly improve my skills.
So if you want to get into VRider SBK keep in mind that realistic VR bike racing is hard, but still very rewarding when you pull it off right. There are also 12 total tracks, which is a healthy number, and a few different racers you could be as well.
VR Bike Racing Multiplayer
The number one biggest downside to VRider SBK, however, is that despite checking several times I couldn’t find a single live Multiplayer match.
Racing against the bots is fun and all, but they’re bots, and they’re not super intelligent. It seems that they mostly just follow a mostly set path at a set speed without deviating at all based on what you, the player, do to try and pass them. Racing against them feels more like racing against a moving obstacles than against other people.
So I was really hoping for some Multiplayer matches to add a factor of competitive spirit to motorcycle racing in Virtual Reality.
I couldn’t find a single Multiplayer match in VRider SBK.
If you want to race against others it seems that, at the time of writing at least, you’ll have to organize races outside of the game itself. There is an official VRider SBK facebook group and an official VRider SBK Discord where you can find opponents.
There is also a mode where you can try to beat other players’ track times, but that doesn’t really feel like much of a competition either, at least to me.
Regardless, VRider SBK is a fantastic example of using VR hand controls and a VR first person immersive view of the world to bring an expensive and dangerous real world experience, in this case superbike racing, and make it cheap, safe, and fun to enjoy in the comfort of your home on a Meta Quest device.
For that this is a fantastic VR racing simulation, and one that I would recommend if you want to feel what it’s like to race on a motorcycle in Virtual Reality.

Battle Talent VR Multiplayer And Mixed Reality Added In Latest Update
If you’ve always wondered how awesome it would be for Battle Talent VR to have Multiplayer then you’ll be excited to hear that suddenly, out of seemingly nowhere, Battle Talent’s latest update has added Multiplayer to the game.
Now it is incredibly easy to hop into a Multiplayer game of Battle Talent with a friend by using the new Multiplayer option in the main menu.
This new Battle Talent Multiplayer is also cross play and so you can play Battle Talent with anybody whether they are running the game on a Quest or on PCVR.

Joining a Battle Talent Multiplayer server. Image courtesy of developer CyDream.
Now you can duel with your friends, or just get into some shenanigans in the new Homology Arena before you head into some arena battles, dungeon runs, or just mess around with the cheat console to do whatever you and your friends want to do.
So if you’ve wanted a multiplayer physics based VR fighting game that gives you a ton of weapons, magic, and powers to fight hordes of enemies with then now is a fantastic time to try Battle Talent.
This VR fighting game is extremely fun alone not only because of the feel of the physics based combat, but also the insane amount of combinations you can pull off with the vast array of magic and powers the game gives you. Now imagine how crazy the battles of Battle Talent can get with the addition of Multiplayer in Battle Talent.

Two players teaming up for an epic combo in Battle Talent VR Multiplayer. Image courtesy of developer CyDream.
Battle Talent has also added a Mixed Reality (MR) mode as well!
Now you can fight the fantasy enemies of Battle Talent wherever you’d like in the real world as well as the virtual one. All of the real life walls and objects in your vicinity also have collision, which is fantastic.
Your weapons and spells colliding with real life walls and doors makes the experience so much more real. The best part is that multiplayer is available in Mixed Reality as well.
Multiplayer is also supported in Battle Talent mixed reality. Image courtesy of developer CyDream.
Some new items and spells were also added in this update, and if you want more details head over to the patch notes on Steam.
This game has certainly come a very long way in the years since it was a free VR fighting game on the Quest 2, and is definitely still worth every penny.

Exploding Kittens VR Announced For Fall 2024
Here’s an interesting new release announcement among a slew of recent release announcements for games coming to the Meta Quest 2 and Meta Quest 3.
Exploding Kittens VR will be a Virtual Reality spinoff of the real life social card game Exploding Kittens. As we’ve seen with other VR games like Cards and Tankards there is a lot of potential for VR card games on standalone and PCVR devices.
Not only that, but Exploding Kittens is more of a party game, and so is also part of the more casual VR games genre that is also seeing significant growth on the Meta Quest. It’s easier to sit down and play a light and fun game like Exploding Kittens for a bit then work up a sweat with a VR shooting game or VR fighting game.
This Virtual Reality social card game also seems like it will add quite a bit to the original, physical card game.
It’s good to see a game porting itself to Virtual Reality and making full use of VR to add new puzzles, avatar customization, and gameplay elements to the game that make the addition of Virtual Reality more than a gimmick or a convenience. Rather the addition of VR is a way to enhance the experience of gameplay.
Here is an excerpt of the press release provided by the developers over at Saber Interactive:
“FORT LAUDERDALE, Fla. – June 25, 2024 – Saber Interactive has announced Exploding Kittens VR, a new experience based on the wildly popular social-strategy card game. Developed under license from Asmodee Entertainment and published by Saber, Exploding Kittens VR is coming this fall to Meta Quest 3 and Meta Quest 2 and is available to pre-order now with a 10% bonus discount!
Exploding Kittens VR combines the hilarious strategy and chaos of the original card game with the full immersive feel of VR for a totally unique experience. Play with up to five players online or play on your own against bots and force your opponents to draw the dreaded Exploding Kitten. Be the last person standing to win! Customize your own in-game avatar, explore the social hub, and dive into a variety of entertaining mini-games.
Key Features:
- Experience Your Favorite Card Game Like Never Before: Socialize with friends and make new enemies in this laugh-out-loud VR strategy experience based on the hit card game.
- Master a Variety of Tools to Win: Use a slew of tools to strategically outsmart your opponents and come out on top. Look into the future, steal items from other players and deny their moves, defuse an Exploding Kitten at a crucial moment, and more!
- Three Unique Game Modes: Battle it out in either classic or blitz mode with up to five players, or against your biggest rival in duel mode.
- Engage with Immersive Social Hub: Discover an array of activities in the social hub, including mini-games, character customization and more!
- First released in 2015, the original Exploding Kittens card game was a breakout success, going on to spawn multiple adaptations across multimedia, including video game consoles, mobile devices, and even an animated television streaming series planned for this summer.”
Exploding Kittens VR is planned for release this fall and is available for Pre-Order on the Meta Quest store for 10% off.