

Kingdom Come Deliverance 2 Best Horses And Horse Gear Guide
Discover the best horses in Kingdom Come Deliverance 2 and how to equip them with top-tier gear like Cracowian saddles and racing horseshoes to maximize speed, capacity, and combat performance.
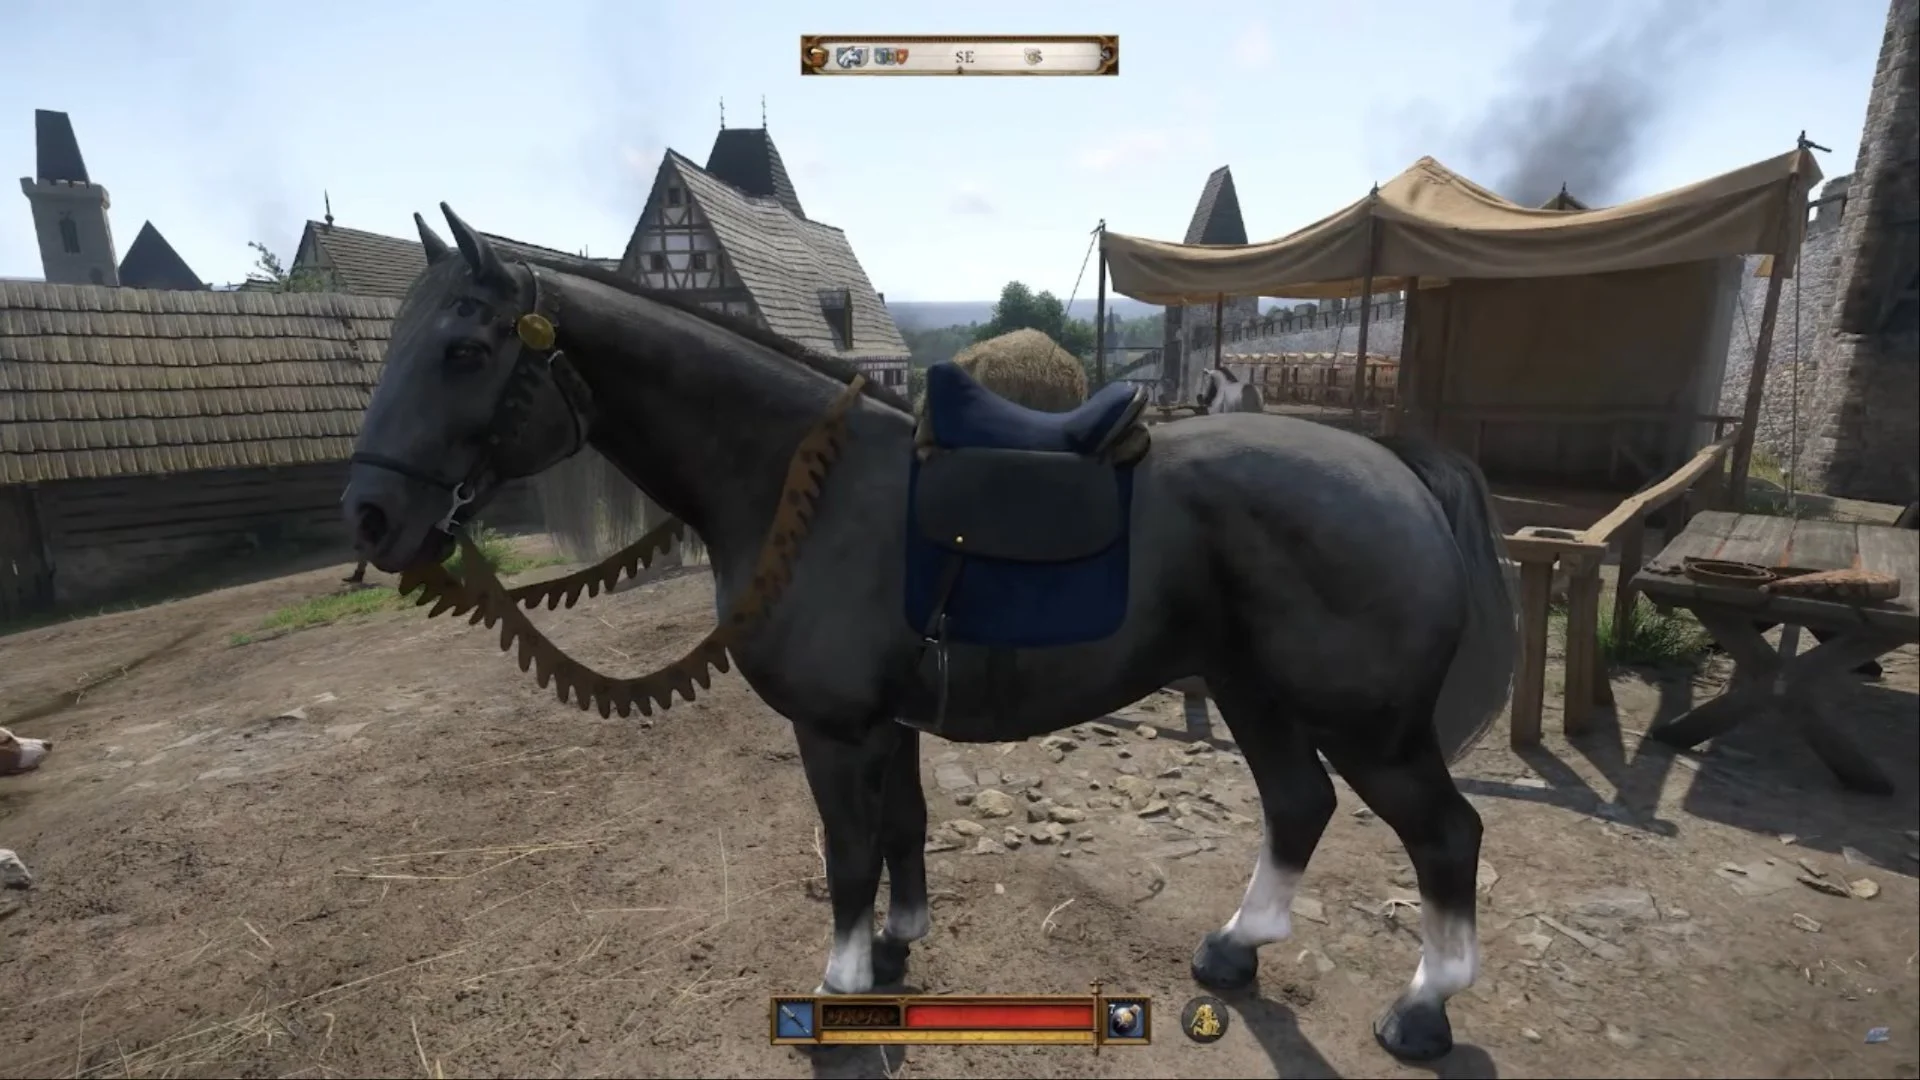
Horses aren’t just a luxury in Kingdom Come Deliverance 2 — they’re essential. A good steed affects how fast you travel, how much loot you carry, and how well you fare in mounted combat. But not all horses are created equal, and pairing them with the right gear can dramatically improve their performance. In this guide, we’ll break down the best horses for every role and how to get the top gear to maximize your mount’s potential.
Best Horses for Every Role
When choosing a horse, you’re balancing four stats: Speed, Stamina, Courage, and Carry Capacity. Some horses excel at one role while others are truly versatile.
Erdel – Best for Pure Storage
If your only goal is haul weight and battle capability with minimal fuss, Erdel shines. Found in the south near Malov’s region, it has the highest carry capacity in the game and very high courage, meaning it handles combat pressure without panicking. The downside? It’s noticeably slower than most mounts. Still, if bulk looting and battlefield durability without speed concerns is your playstyle, Erdel earns its keep. Erdel is available for sale at the Maleshov stable.
Kasztanka – Best Mounted Combat Horse
For players who prioritize speed and combat first, Kasztanka is exceptional. This horse boasts an outstanding blend of high speed and courage, two stats that are fantastic for charging into or away from combat. Kasztanka also makes a fantastic race horse. However, that comes at the expense of capacity — Castana carries very little loot compared to other horses of similar quality. But if your focus is mounted fighting or racing without baggage, she’s your steed of choice. Kasztanka is available for sale at the Maleshov stable.
Meadow – Balanced For Speed and Stamina
Travel just south of the Bellain area near a caravan campsite to find Meadow. This mount hits a sweet spot: faster and with more stamina than many alternatives while only giving up a bit of capacity and courage. Gear can help offset its minor weaknesses, making this a great all‑purpose option.
Pisek Lad – Best All‑Around Horse
Finally, Pisek Lad — available from the horse trader in Kuttenberg (just west of the city on the road) — is widely considered the most balanced mount overall. It has solid stats in speed, stamina, and carry capacity, plus a strong courage level that keeps you mounted in tough fights. Unlike nostalgia favorites like Pebbles or Herring, Pisek Lad starts strong without needing time‑consuming perks to reach its potential.
Pebbles/Herring - Cheap Options
Want a good horse but don’t want to pay for them? Get Pebbles in one of the early main quests and just ride on it for about 35 kilometers and Pebbles gets a free and massive upgrade. While it won’t be as good as the other horses here it’s hard to beat free… and you can always sell the upgraded Pebbles for a huge mark up in price. The same goes for Herring, though you get it later on in the game.
The biggest downside to both Pebbles and Herring are their abysmally low Courage scores, so don’t expect either to make fantastic war horses.
Horse Gear: Get the Most Out of Your Mount
Outfitting a horse isn’t just cosmetic — every piece affects key stats. There are four core gear types: saddles, bridles, horseshoes, and caparisons/chanfrons.
Horseshoes – Extra Speed
One of the most impactful upgrades is racing horseshoes. If you find the set in a north of Suchdol by following the river through the woods to the watering hole, they give a flat +5 speed bonus — enough to counteract even heavy saddle penalties. You can also craft your own after finding a sketch near the horse trader’s table.
Saddles – Carry Capacity
There are two main high‑capacity saddles:
Cracowian Saddle – +200 carry capacity
Dragon Saddle – identical stats with a more stylish look
Both give a decent capacity boost with only moderate speed penalty, making them ideal for looters or merchants‑at‑heart.
Bridles and Chanfrons – Stamina, Speed and Courage
Tournament Bridle: Great all‑around speed and stamina bonus — excellent for travel and general use.
Holy Roman Empire Bridle: Excellent stamina boost with a small speed bonus.
Dragon Chanfron: Best courage and protection for combat, though it slightly reduces speed.
Choosing between bridles and head armor depends on whether you want a fearless warhorse or a speedy courier.
Caparisons – Courage and Style
Caparisons enhance courage and sometimes capacity but usually at some cost to speed or stamina. Mixing and matching gear to fit your chosen role — racing, battle, or cargo — is key. As for getting Caparisons, check the horse traders for gear they are selling.
Horse Gear Setup Tips
🔹 For maximum speed, go light: minimal saddle, racing horseshoes, minimal Caparison, and a high‑speed bridle.
🔹 For combat readiness, favor courage and protection with a heavy chanfron plus bridles.
🔹 For carrying capacity, choose the biggest saddle you can handle and offset weight with racing shoes.
Quick Recap
Whether you want a brave battle mount, a reliable travel companion, or a load‑bearing workhorse, Kingdom Come Deliverance 2 has horses and gear to suit your playstyle. Track down horses like Erdel, Kasztanka, Meadow, and Pisek Lad to match your needs, then fine‑tune them with racing shoes, saddles, bridles, and chanfrons to unlock their full potential.
Ultimate Guide to the Dice Game in Kingdom Come: Deliverance 2 (Farkle)
Use this guide to learn how to find games, understand rules, use badges & dice, and consistently win.
The dice game in Kingdom Come: Deliverance 2 is a tavern mini‑game where you and an NPC take turns rolling up to six dice in pursuit of scoring combinations, aiming to reach a target point total (commonly 5,000 points) before your opponent. It’s essentially a variation on the classic game Farkle, full of risk‑vs‑reward decisions — you must decide when to bank your points or push your luck.
You can also bet Groschen (currency) on matches, and higher stakes offer higher rewards — but risk losing dice or badges if you lose. More on that below.
📍 Where to Find Dice Players
Dice matches are typically found inside taverns or similar social hubs in the game world. Some known examples (as players have reported) include:
Tavern in Troskawitz
Various inns and bars scattered across towns
Different NPCs have different levels of skill and betting limits, so part of the fun is seeking out higher‑stakes players once you understand the game.
Dice, Badges & Bets — What They Mean
Before you start playing, it’s essential to understand the components you can bring into the game:
Badges
Badges determine how high you’re allowed to bet in a match:
No badge — basic betting limits
Silver badge — mid‑tier betting range
Gold badge — high stakes
Important:
You must own a badge of the appropriate tier to play at that bet level. For example, if a match requires a silver badge, you cannot participate without one.
Where do badges come from?
Looting bodies
Robbing bandits
Finding them in stores or on the road
Badges are valuable — if you lose a high‑stake match while wagering your badge, you lose the badge and the Groschen bet too. So decide whether to risk them!
Dice Types
Besides badges, you can also equip special dice that carry unique effects. At the start of a match, you choose:
Which badge (if any) you’re betting
Up to six dice to play with
Different dice may alter probabilities or scoring — but most players begin with standard dice until they collect more and understand the effects.
📜 Dice Game Rules — How to Play
Here’s how a typical turn works:
Goal
Reach the target score (e.g., 5,000) before your opponent.
Rolling the Dice
Roll all available dice (up to six).
Set aside dice that form scoring combinations.
You then choose to either:
Bank (Score & Pass) — secure your points and end your turn.
Score & Continue — keep the points in play and roll the remaining dice.
❗If you roll and no scoring combinations appear, you bust — you lose all points earned this turn and your opponent goes next.
That’s where strategy shines — knowing when to cash in vs risk another roll.
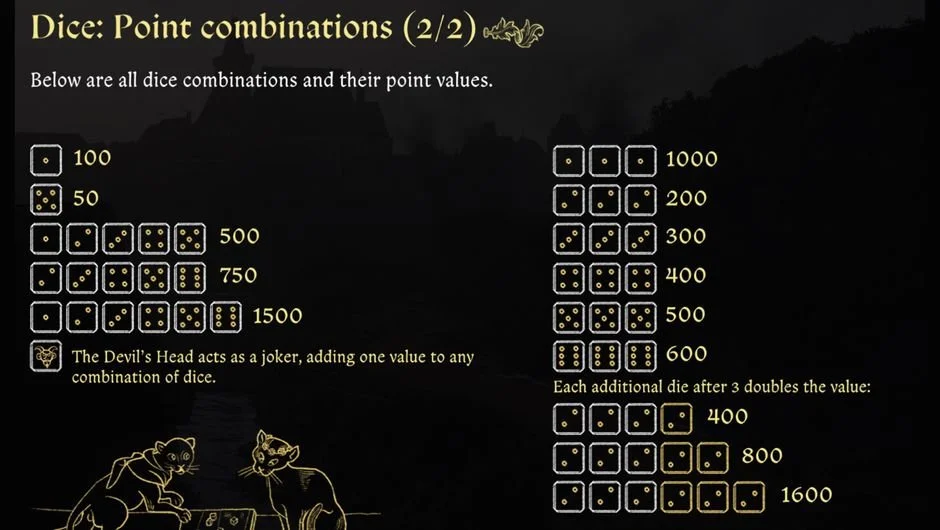
Scoring
Here’s how scoring works in this typical dice game, though rules can vary slightly based on dice type:
Common Scoring Examples
Single 1 → 100 points
Single 5 → 50 points
Three of a kind → higher score (value depends on number)
Straight 1‑6 → 1500 points
Full combinations give big bonuses
📊 Strategic Tips for Winning
Playing dice isn’t just luck — it’s about smart decisions.
Know When to Bank
✔ Good idea to pass when:
You have few dice left and no easy combos left
Your current stash is significant compared to total points required
The risk of busting outweighs potential gain
❌ Risky to continue when:
Only one or two dice remain (low chance to score)
Your current points are already good
Example:
If you’ve scored with three dice and only have two left, you should probably score & pass — rolling two dice without guaranteed scoring is risky.
🧠 Sample Gameplay Scenarios
Here’s how a typical match can flow:
Early Roll
You roll six dice.
Say you get three 6s (a scoring combo).
You keep those and choose to roll the remaining three.
Mid Game Risk
You roll remaining three and get just a single 5.
You can either:
Bank the accumulated points
Continue the risk for a better combo
Most players bank here — only three dice remaining, and risk of busting is high.
Clearing the Board
If you use all your dice in scoring combos (clearing them), you get to reroll all six and continue stacking points. This is the big scoring opportunity players hope for!
Observations From Real Matches
From actual gameplay experienced:
Sometimes you’ll roll nothing and your turn gets skipped.
Other times NPCs take big risks with few dice left — and bust.
You’ll see combinations like:
Pairs and lone fives — not worth saving all of them
Triple combos or straights — great opportunities
Example choice:
Even if you have two fives, sometimes you keep just one five so you have more dice left to roll for bigger combos.
🎉 Special Wins & Combos
Full Straight
Rolling 1,2,3,4,5,6 in one go → 1500 points
If you then clear the board by using all dice, you continue rolling fresh — huge scoring day!
Clearing the Board
Rolling combos that use all dice allows you to reroll all six and keep accumulating points in the same turn — this is the most explosive scoring strategy.
⚠️ Risks with Badges
If you play with a badge and lose, you lose:
The badge itself
The groschen wager
So before betting your only silver or gold badge, consider whether the reward is worth the risk.
Tip: Some players save the game first before high‑stake matches — so they can reload if they lose a badge.
Final Tips for Beginners
✔ Start with low stakes until you understand scoring flow.
✔ Practice deciding when to bank points vs roll — that’s where winning comes from.
✔ Collect better dice and badges as you explore — they influence odds and potential rewards.
✔ Look for high‑level NPCs for bigger bets once confident.
The dice game in Kingdom Come: Deliverance 2 is a fun blend of risk, strategy, and luck — perfect for spending time between quests and tavern conversations. Knowing when to hold your points, when to press your luck, and how your badges and dice affect gameplay makes all the difference.